Software development life cycle
Software development life cycle (SDLC) is a process for planning, creating, testing, and deploying an information system. The instruction focuses on a recommended SDLC approach for the Work.AI automation solution implementation.
In a simplified way, this looks like as follows.
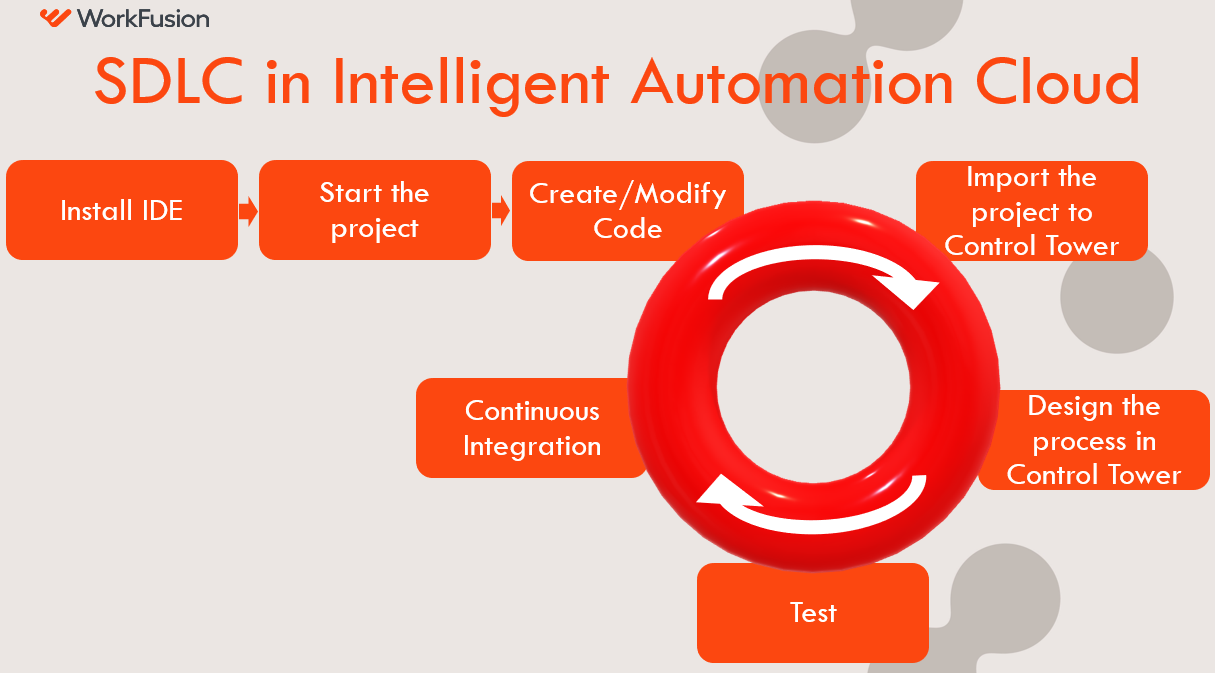
Now let's dive deep into each step of this workflow.
Install Work.AI Developer
Work.AI Developer (Developer) is a part of the Work.AI platform. It is recommended to use Developer as a local (single desktop or laptop) development environment. Also, there is a possibility to install it on Virtual desktop infrastructure or VDI if that is required by policy or for internal systems access. Additionally, developers may install and use IDEA IDE if they prefer it over Eclipse IDE (available in Developer).
The installation process is quite simple and takes several minutes. For more details, refer to Install Work.AI Developer.
After the Developer installation, the end-user gets a simplified copy of the Work.AI platform on a single desktop with access to such local components as Eclipse IDE, Control Tower, Workspace, Secrets Vault, File Storage (Minio), Java, and RPA task execution workers, OCR, and others. All the components work almost the same (except for the ability to scale) as in Work.AI on a server. Find detailed information about components in the Components overview section.
Use of Developer is a WorkFusion-recommended approach to building Use Cases of any complexity.
Start project
In the AI Agent development phase, you should create a Maven project. WorkFusion provides prepared Maven Archetypes for that. The Archetype is a Maven project blueprint with pre-packaged several modules, files, and directory structure to solve defined typical AI Agent scenarios. The Archetype comes with all wiring necessary to build the final project artifact (Bundle), pack external dependencies, all dependencies to the specific version of the platform and ODF, Bot Task, and Business Process auto-testing dependencies. Using WorkFusion Archetypes allows starting development rapidly.
See Create project for the detailed guide on how to create a project. In the guide, there is a quick review of the steps to perform.
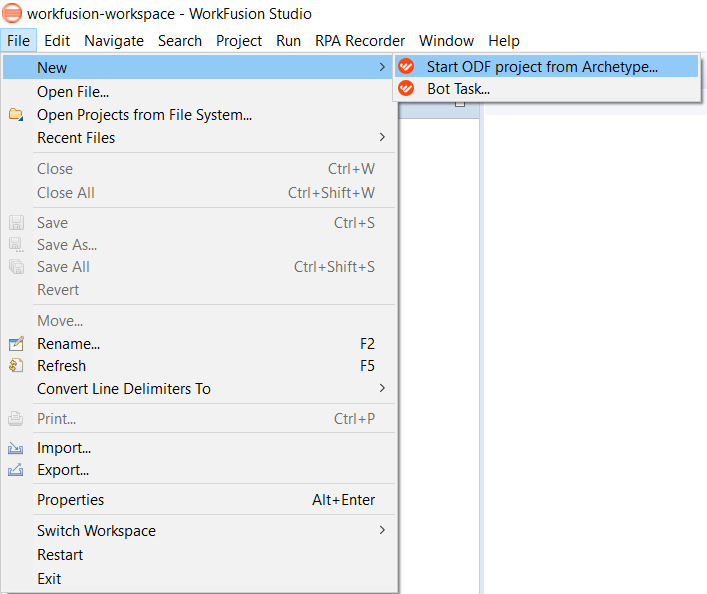
In Eclipse IDE, choose File > New > Start ODF project from Archetype.
Select one of four Archetype types.
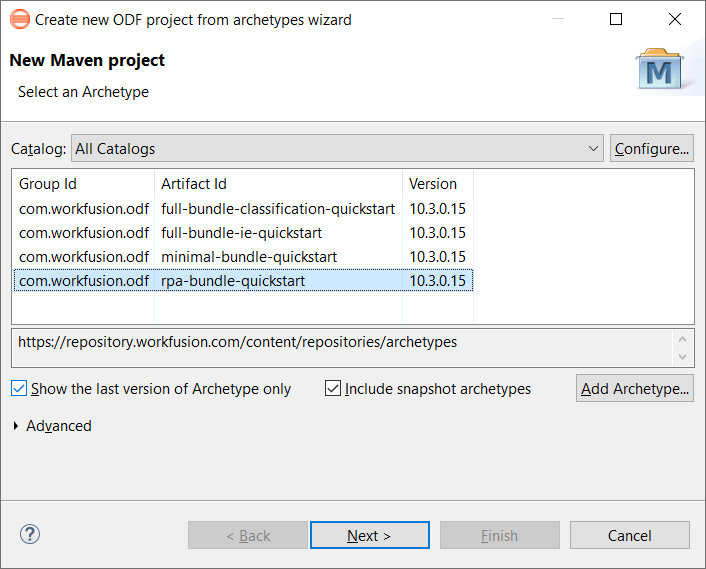
If you want to see all Archetype versions, uncheck Show the last version of Archetype only.
You should choose not only the Archetype type but also its version. Let's assume you need rpa-bundle (without any ML components). Later, you move this project from the local environment to a server environment with the platform v10.2.0. You have to find out what Archetype version you have to choose from the compatibility matrix.
In your case, select rpa-bundle-quickstart of the 10.2.0.27 version. The general rule is to choose an Archetype based on the three digits of the platform release (that is 10.2.0) and find a version with the highest last digit or the latest version (that is 27).
Create and modify code
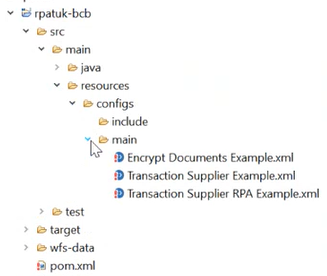
When a project is created, it can look as follows:
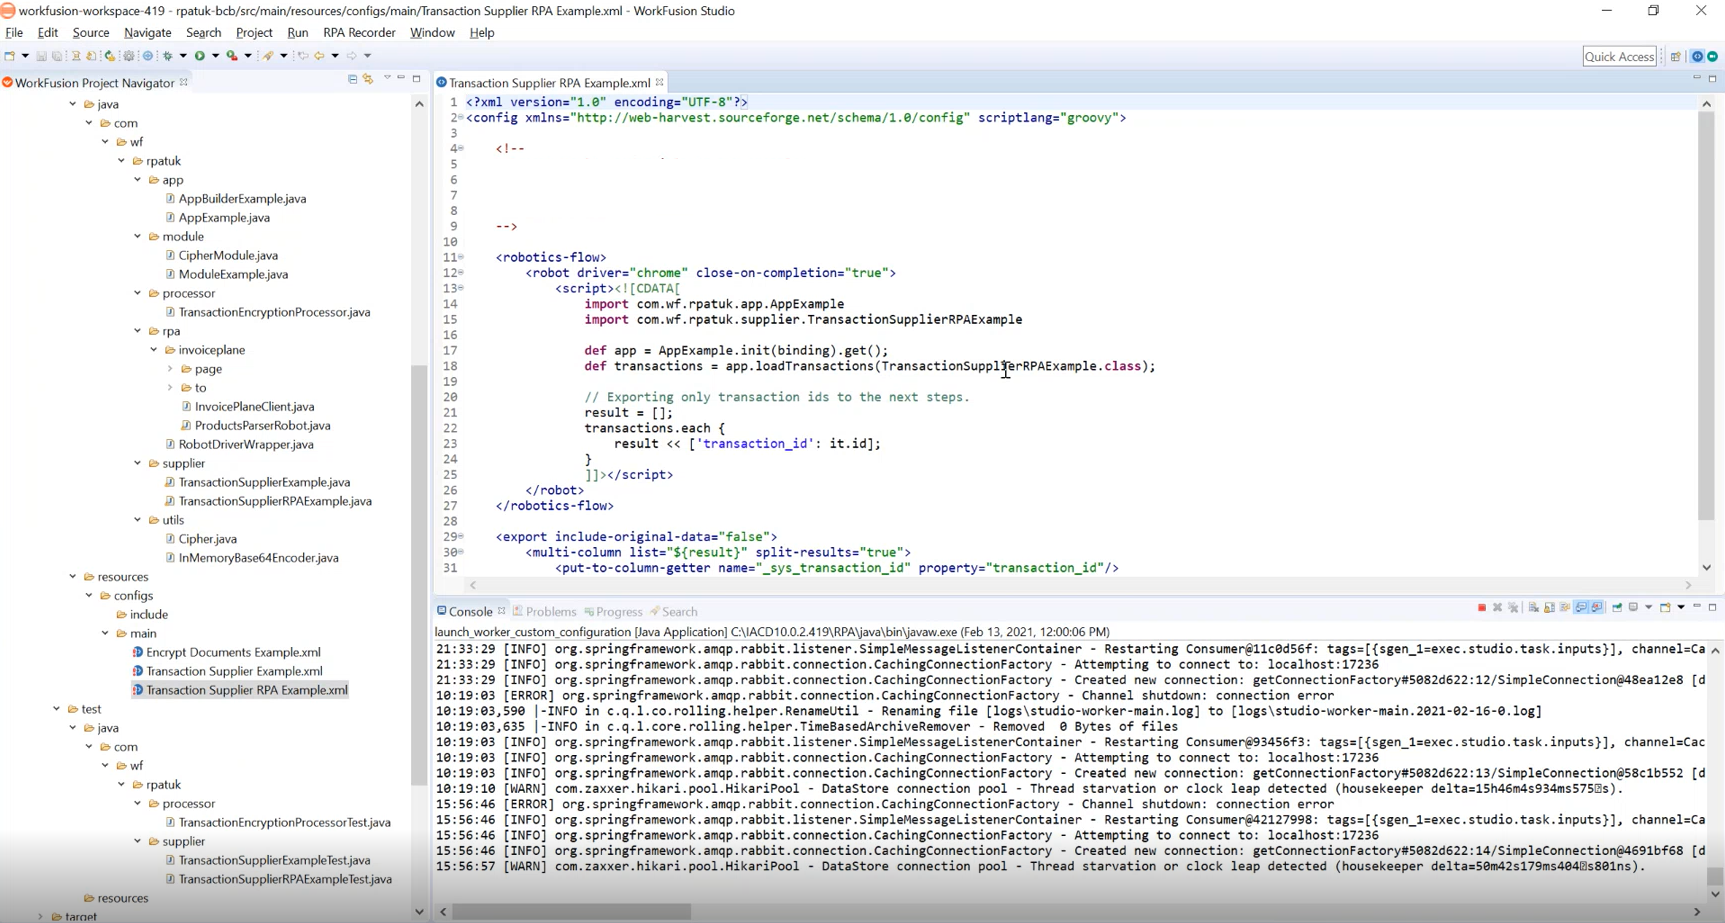
Inside the
resourcesfolder, find theconfigs/mainfolders and put the Bot Task's main code there.noteRight after you launch Eclipse IDE, it automatically starts the Worker process in the console. In this way, IDE can run your Bot Tasks (including RPA) right away without the need to start additional Developer components.
Right-click any Bot Task XML > Run As > Bot Task. After the successful code run, you can upload the project to Control Tower.
Import project to Control Tower
The Import API service enables project deployment to Control Tower. The integration with the service is achieved through the package modules that are part of any WorkFusion Archetype out-of-the-box. Inside a package module, the descriptor defines the resources to be packaged dynamically inside the final Bundle zip file. For example, package.xml can look as in the screenshot below:
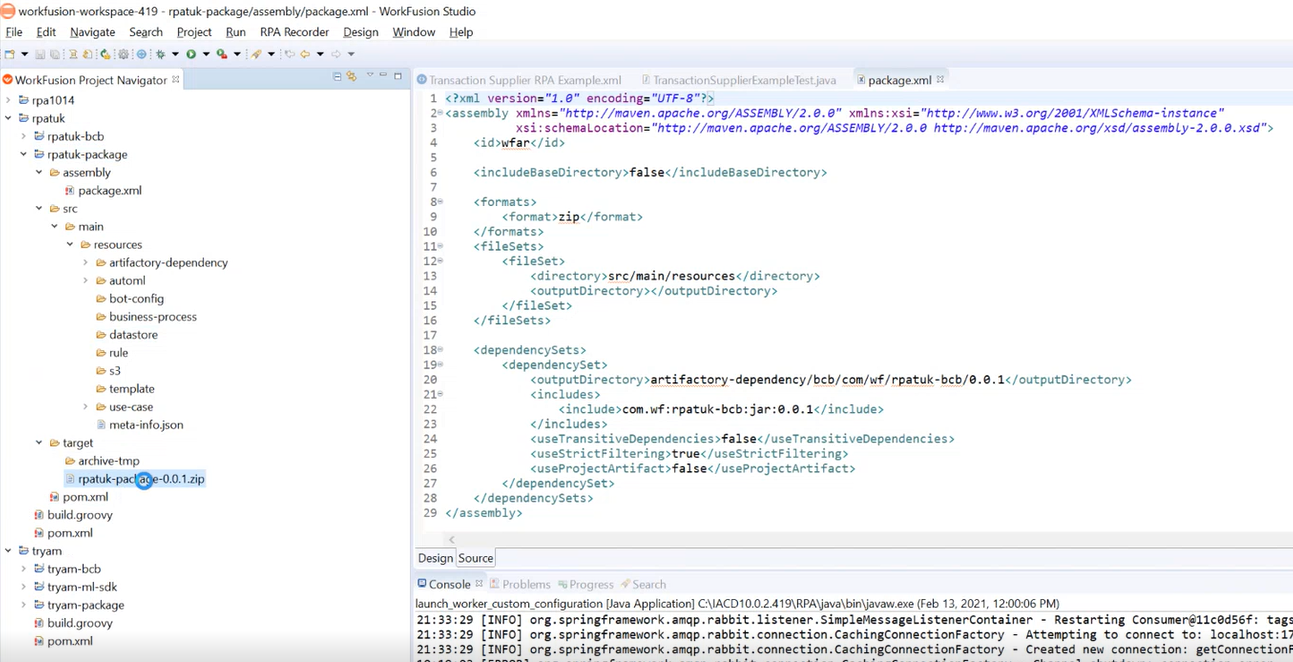
The rpatuk-package-0.0.1.zip file has the same structure as in the resources folder. Additionally, a compiled BCB JAR artifact is added to the proper folder within zip during the build time. Thus, you can avoid such manual action when a project is built. The Bundle is built by CI tools the same way.
Keep in mind that if you create a project with an ML module and generate a Bundle, the automl folder is empty as nothing was done inside the module. You get results only after the model training. Subsequently, the results are copied to the zip file dynamically during the build time, saving the trouble of doing this manually.
The Import API service automatically adds all needed resources to the correct structure without any manual input.
To physically deploy a project from Eclipse to Control Tower, perform the following steps:
Select the appropriate POM file and Run As > Maven build.
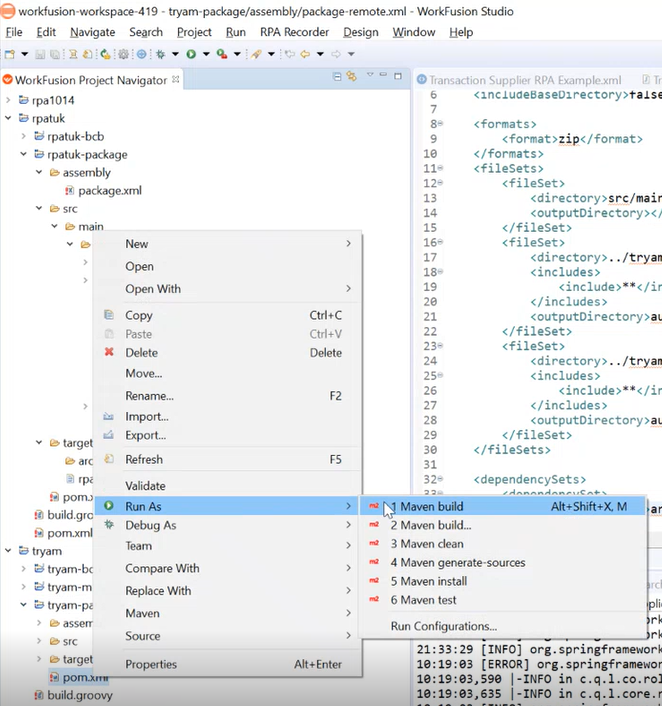
In the appropriate menu, run the following command:
bundle:import.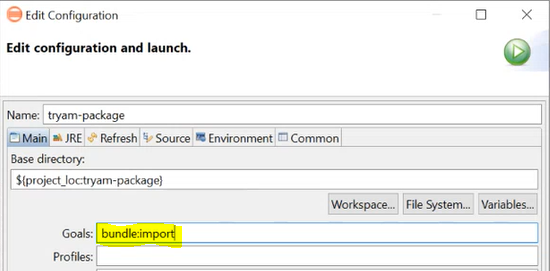
The needed zip file is taken by the Import API service and sent to the appropriate Control Tower using REST. In this case, you have your project deployed to the local Control Tower.
To deploy the project to the remote Control Tower, use a different command:
bundle:import -Premote.Configure the URL of local and remote Control Tower in the project's root POM file.
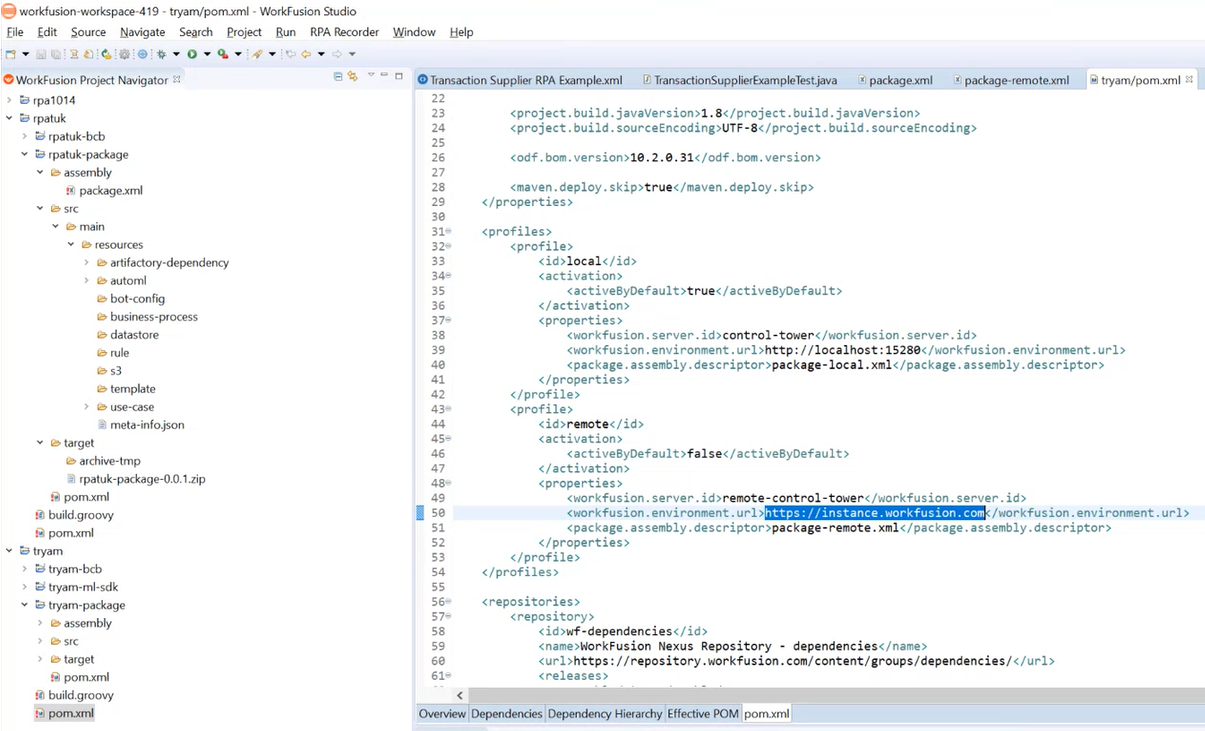
If you have several remote environments, add them accordingly with the appropriate ID.
The credentials are specified in the settings.xml file in the C:\Users\[USER_NAME]\.m2 folder. During installation, Developer puts the pregenerated settings.xml to the WorkFusion public Nexus repository: https://repository.workfusion.com.
If you already have the Maven configuration file, the installer merges its contents and backs up your original settings.xml.
Design Business Process in Control Tower
Inside the BCB module, define Bot Tasks as XML config files. For example, the RPA Archetype comes with three examples of Bot Tasks based on ODF.
Deploy the project to the local Control Tower.
tipMind that after generating the project, you don't have an artifact that defines the Business Process structure inside. You have several not connected Bot Tasks. For the first time, deploy the project to the local Control Tower.
On the local Control Tower, connect the Bot Tasks inside the Business Process and create a needed design.
Make a package of this BP in the form of the zip file and put this zip file in the appropriate folder inside your project package module's
business-processfolder.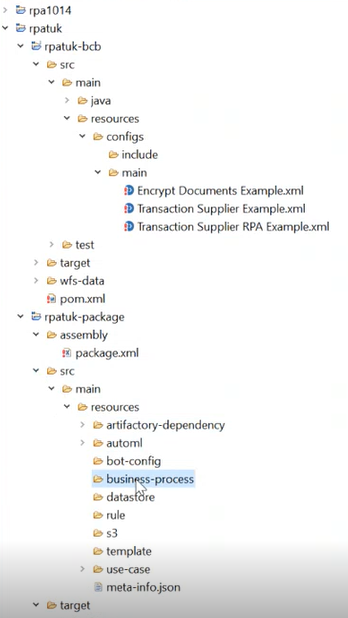
You cannot create a BP package automatically. After making some BP adjustments in any Control Tower (local or server), you have to manually upload the zip file of BP into the project.
Testing
ODF provides three levels of testing:
- Standard Java JUnit tests: a unit testing framework for the Java programming language
- Bot Task unit tests: you can launch a Bot Task as a whole, and if anything is modified while performing this Bot Task, for example, a Data Store, you can assert and check all the results
- Spoke tests: an integral test of the Business Process; you can send this BP to the local or server Control Tower, and a Spoke test gets the result of the executed BP. For example, to assert the results, you can validate the values of output variables.
Continuous integration
The main continuous integration advantage is that on each commit a new Bundle is automatically packaged by Jenkins. This new Bundle is deployed on Control Tower.
You can create a Spoke test that runs the Bundle to test the whole project. If something is broken, you receive a corresponding message. Thus, it isn't a simple Maven build but an integration check on Control Tower.