Create and manage templates
Templates are intended to simplify document ingestion by enabling automated information extraction from structured forms (for instance, ACORD). When a template is created, blank forms are annotated with labels. Based on these labels, data is then extracted from input documents.
To create and manage templates, go to AutoML > Templates.
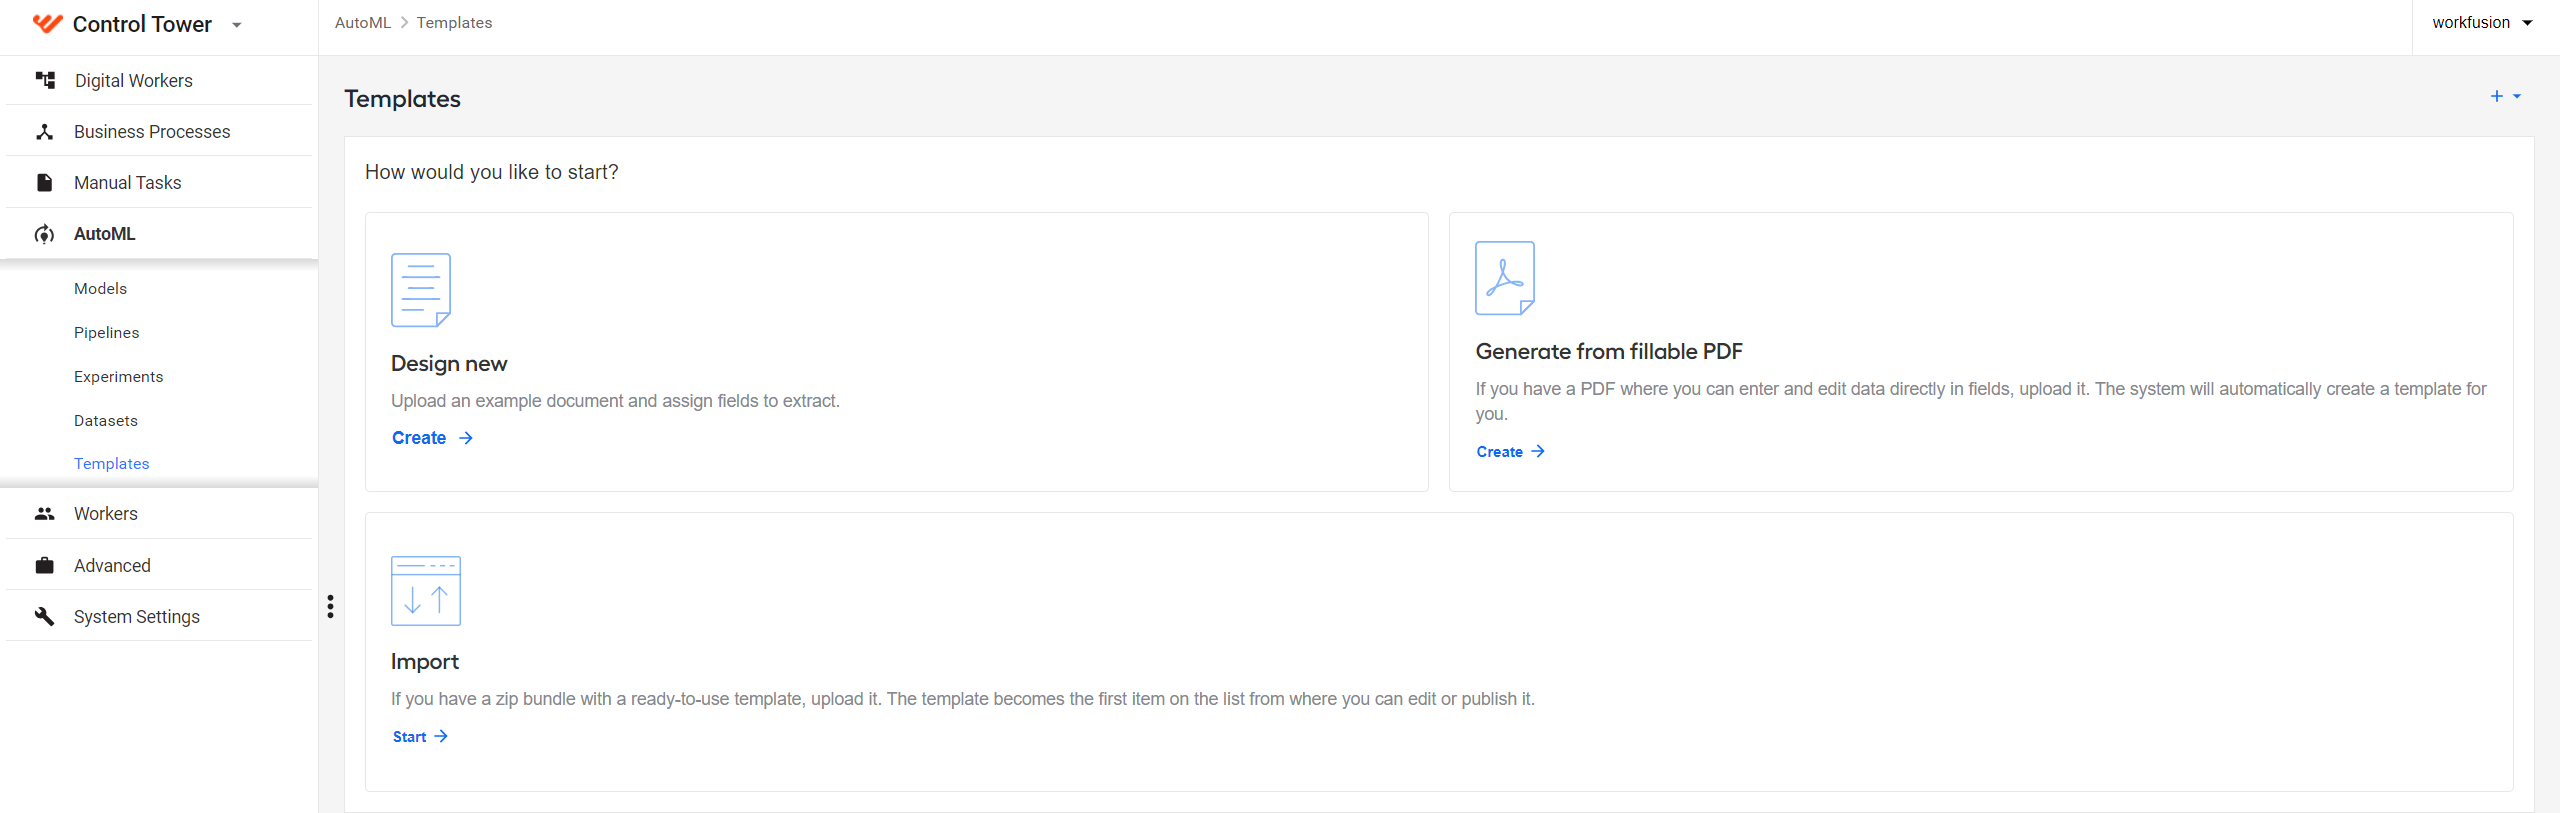
If no templates are available yet, you see the empty-state screen:
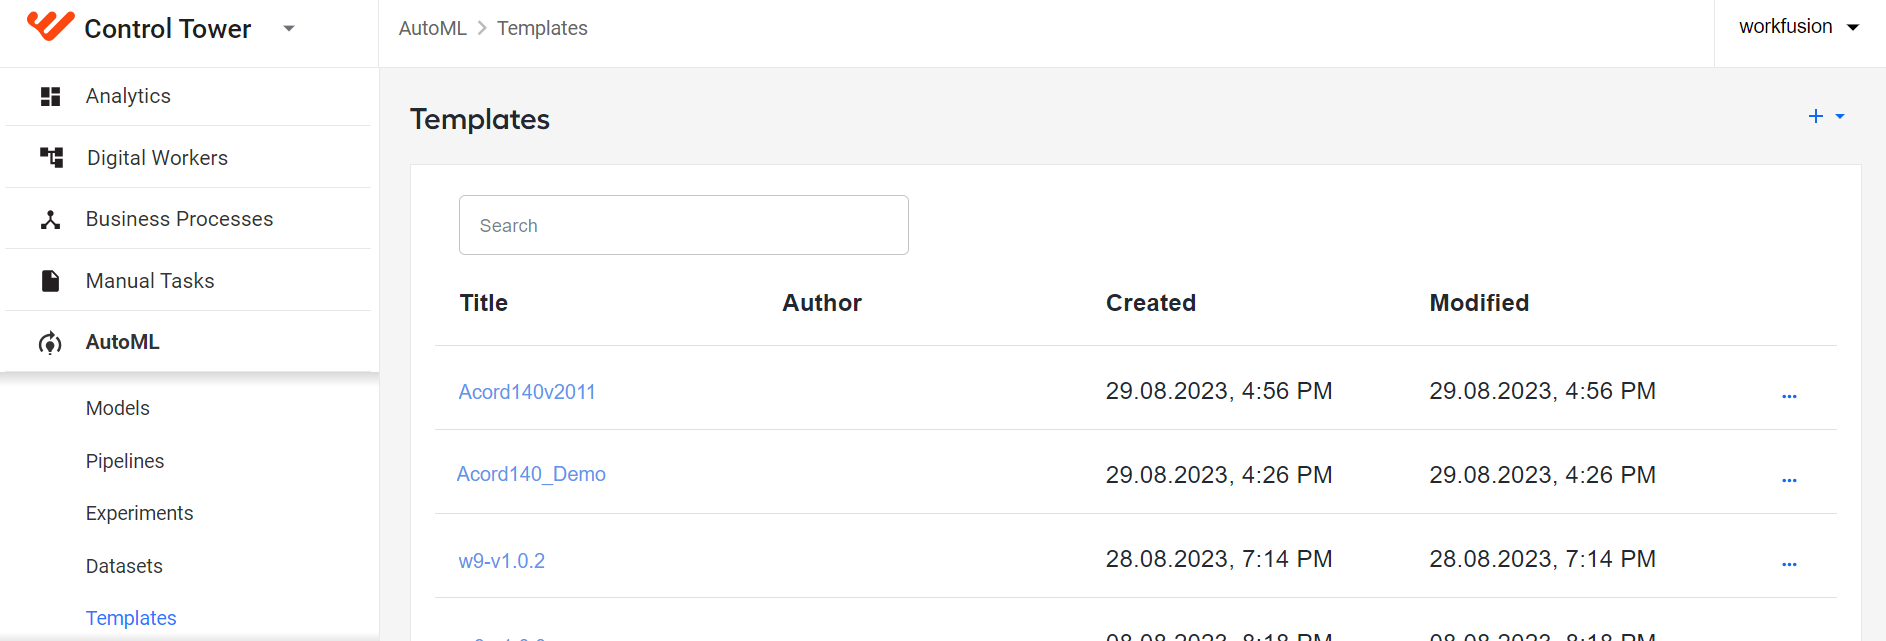
If some templates are already available, you see them listed:
Create template
You have two options to create a template:
Design from scratch
To create a template from scratch, follow the steps below:
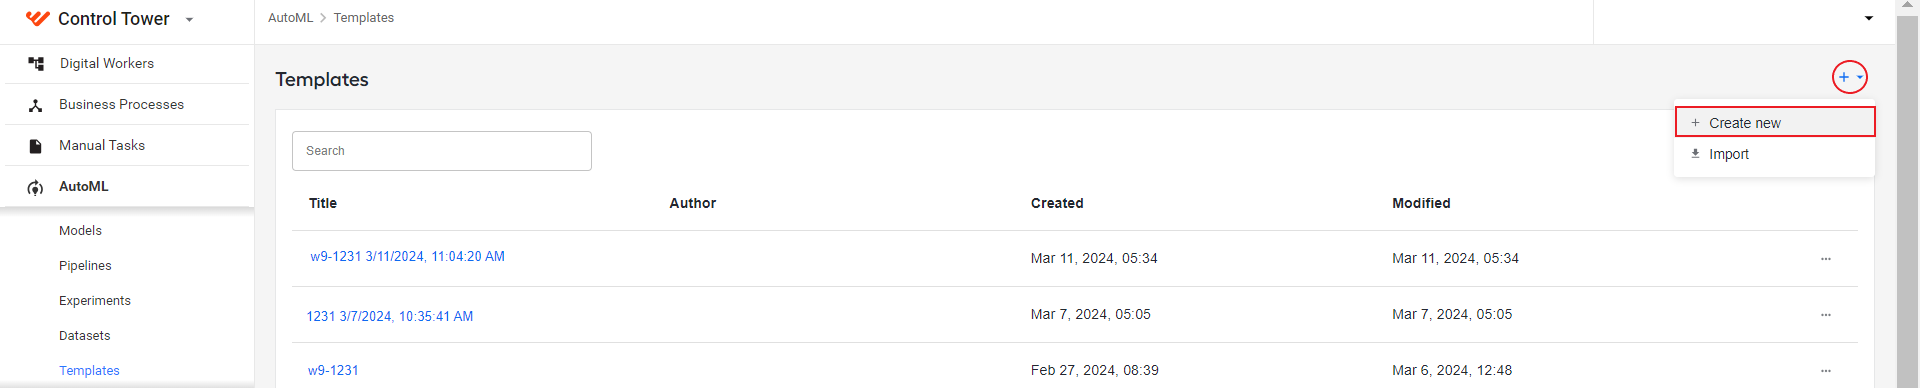
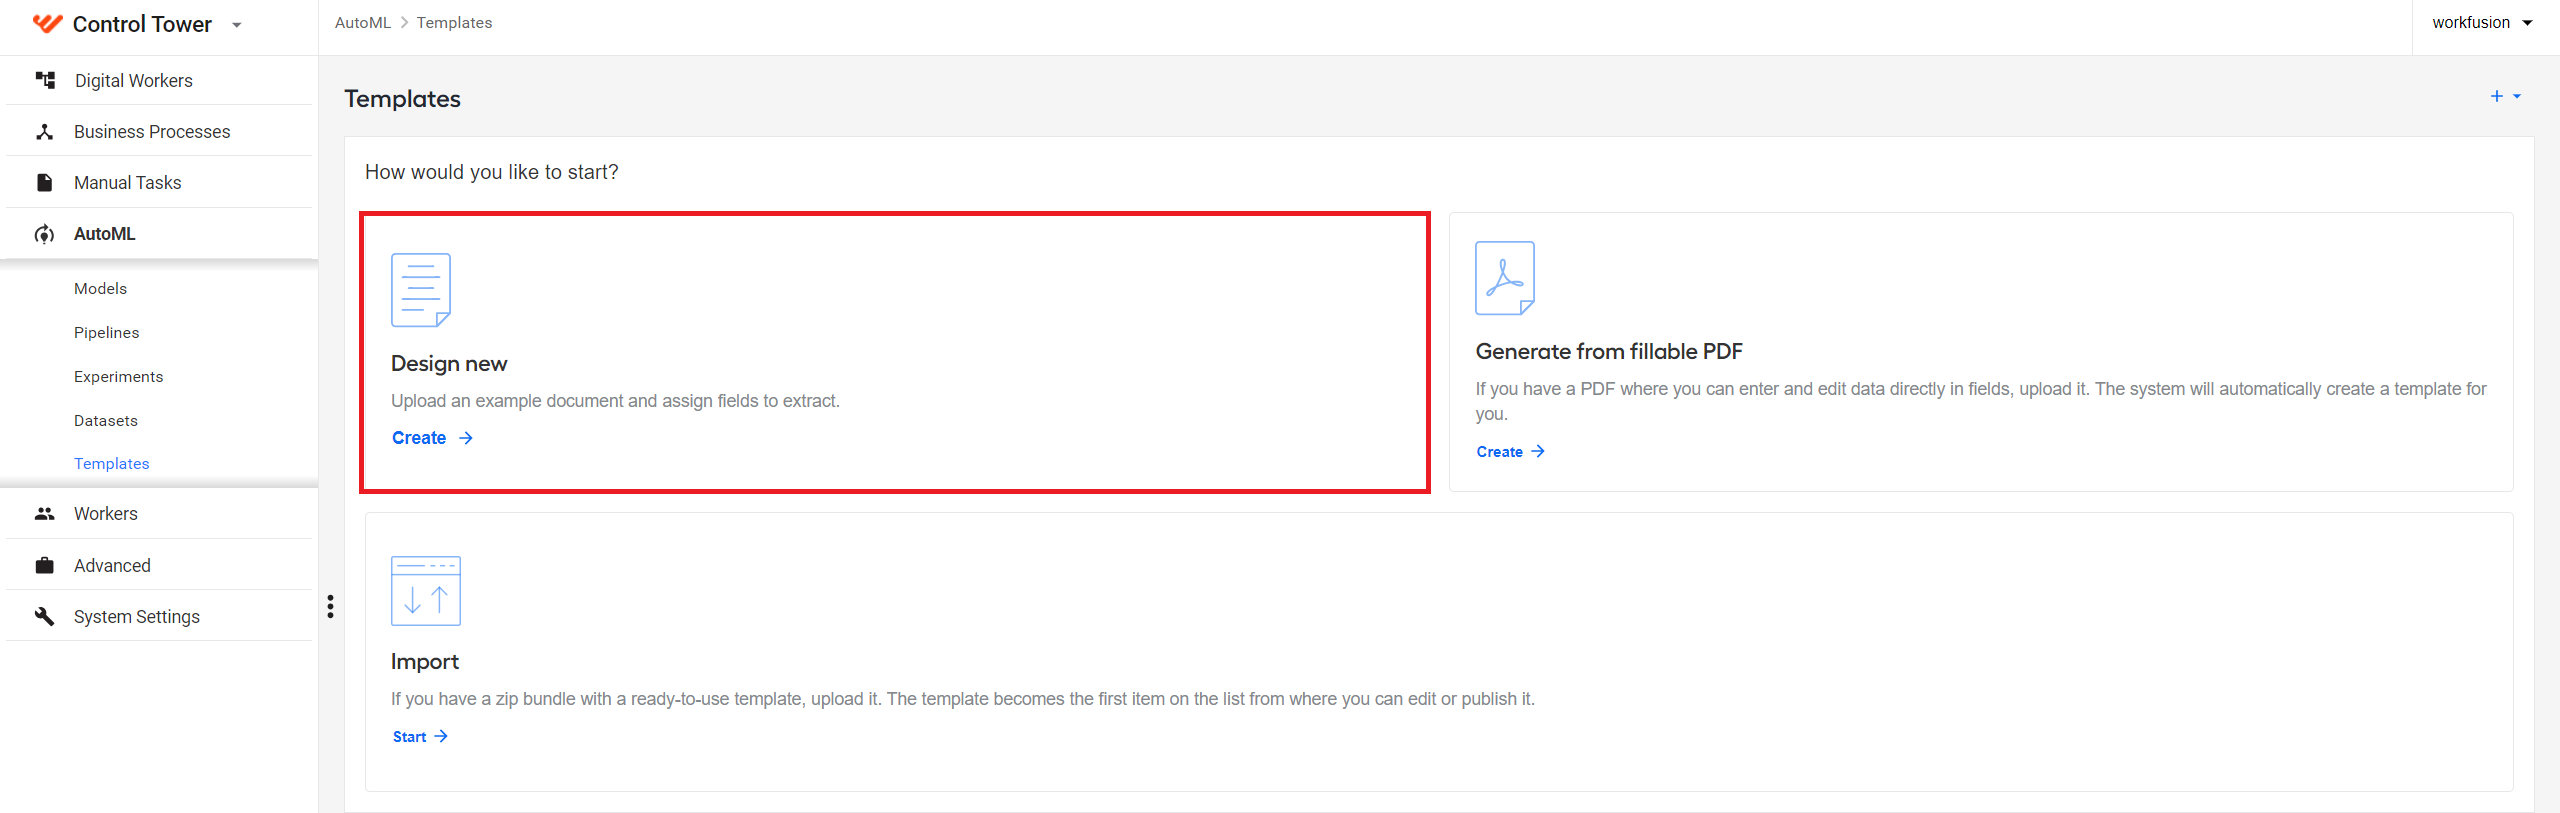
Click + and select Create new.
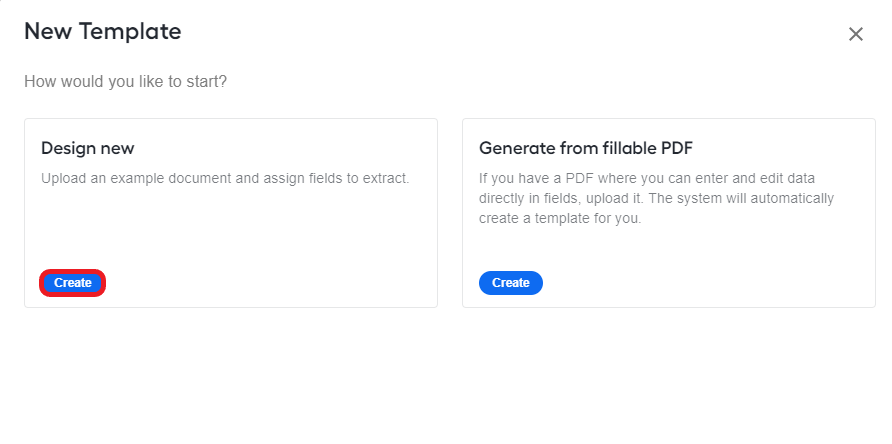
In the New Template window, click the Create button for the Design new option.
On the empty screen, you can also click the Create button for the Design new option to start the same flow.
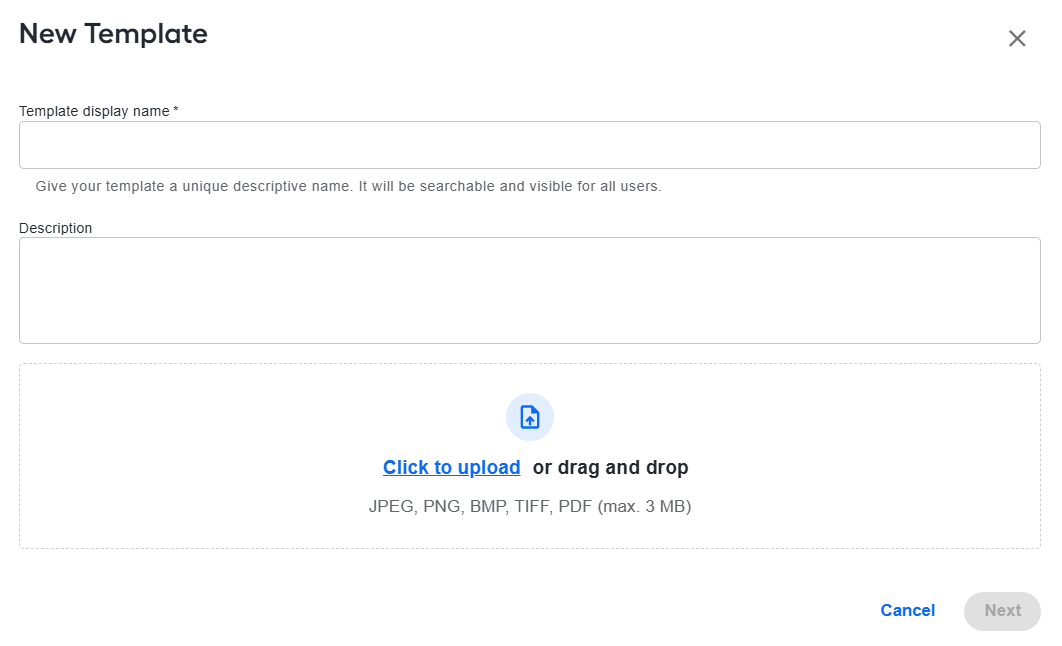
Specify a name and description for the template, upload a document, and click Next. Admissible formats are JPEG, PNG, BMP, TIFF, PDF, and the maximum file size is 3 MB.
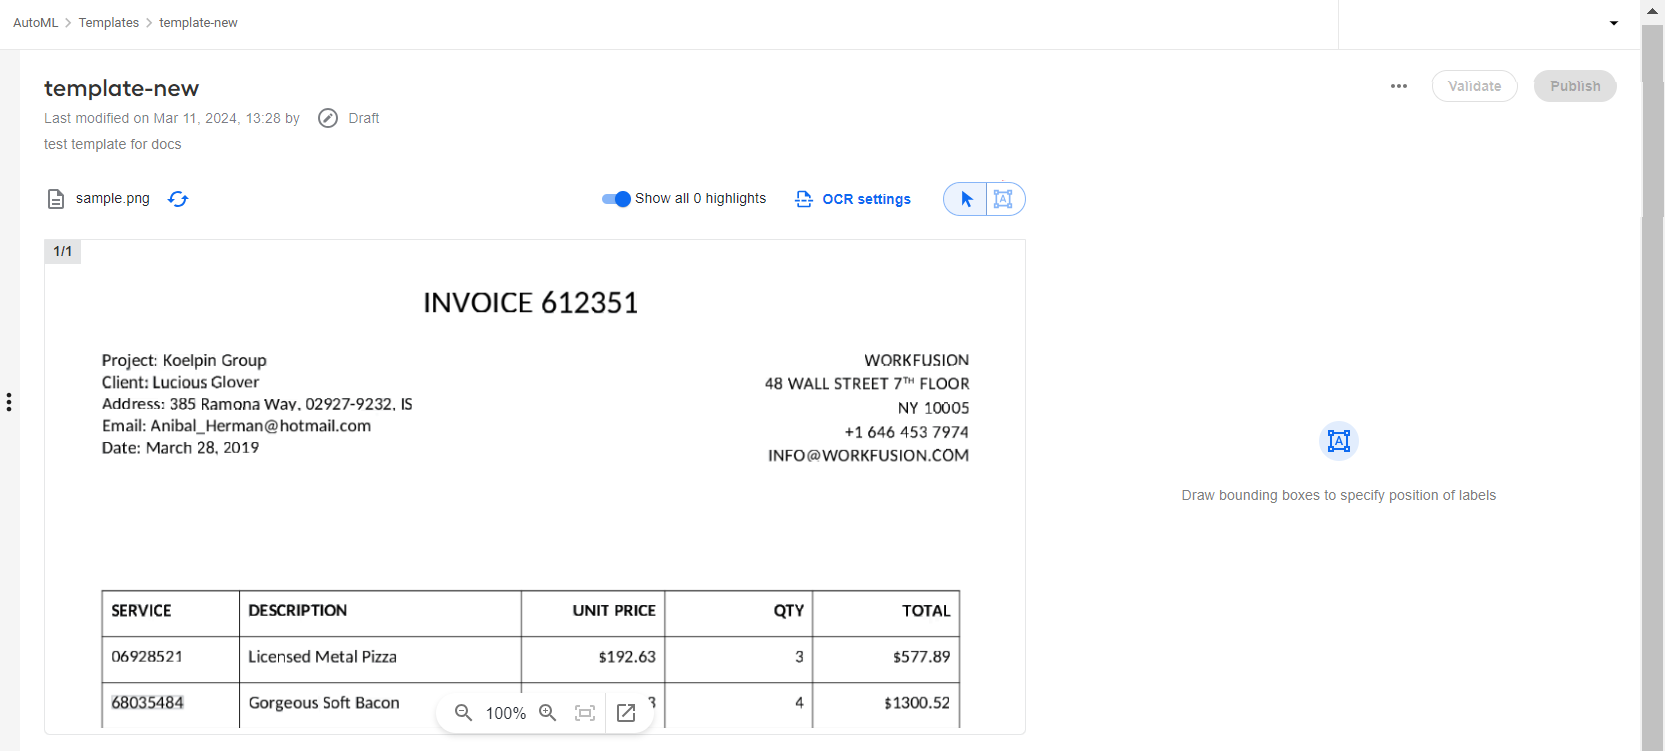
A template is created and added to the list with the Draft status. You are automatically redirected to the page:
On the left, you see the uploaded document. You can replace the uploaded document.
On the right, there's space for adding labels.
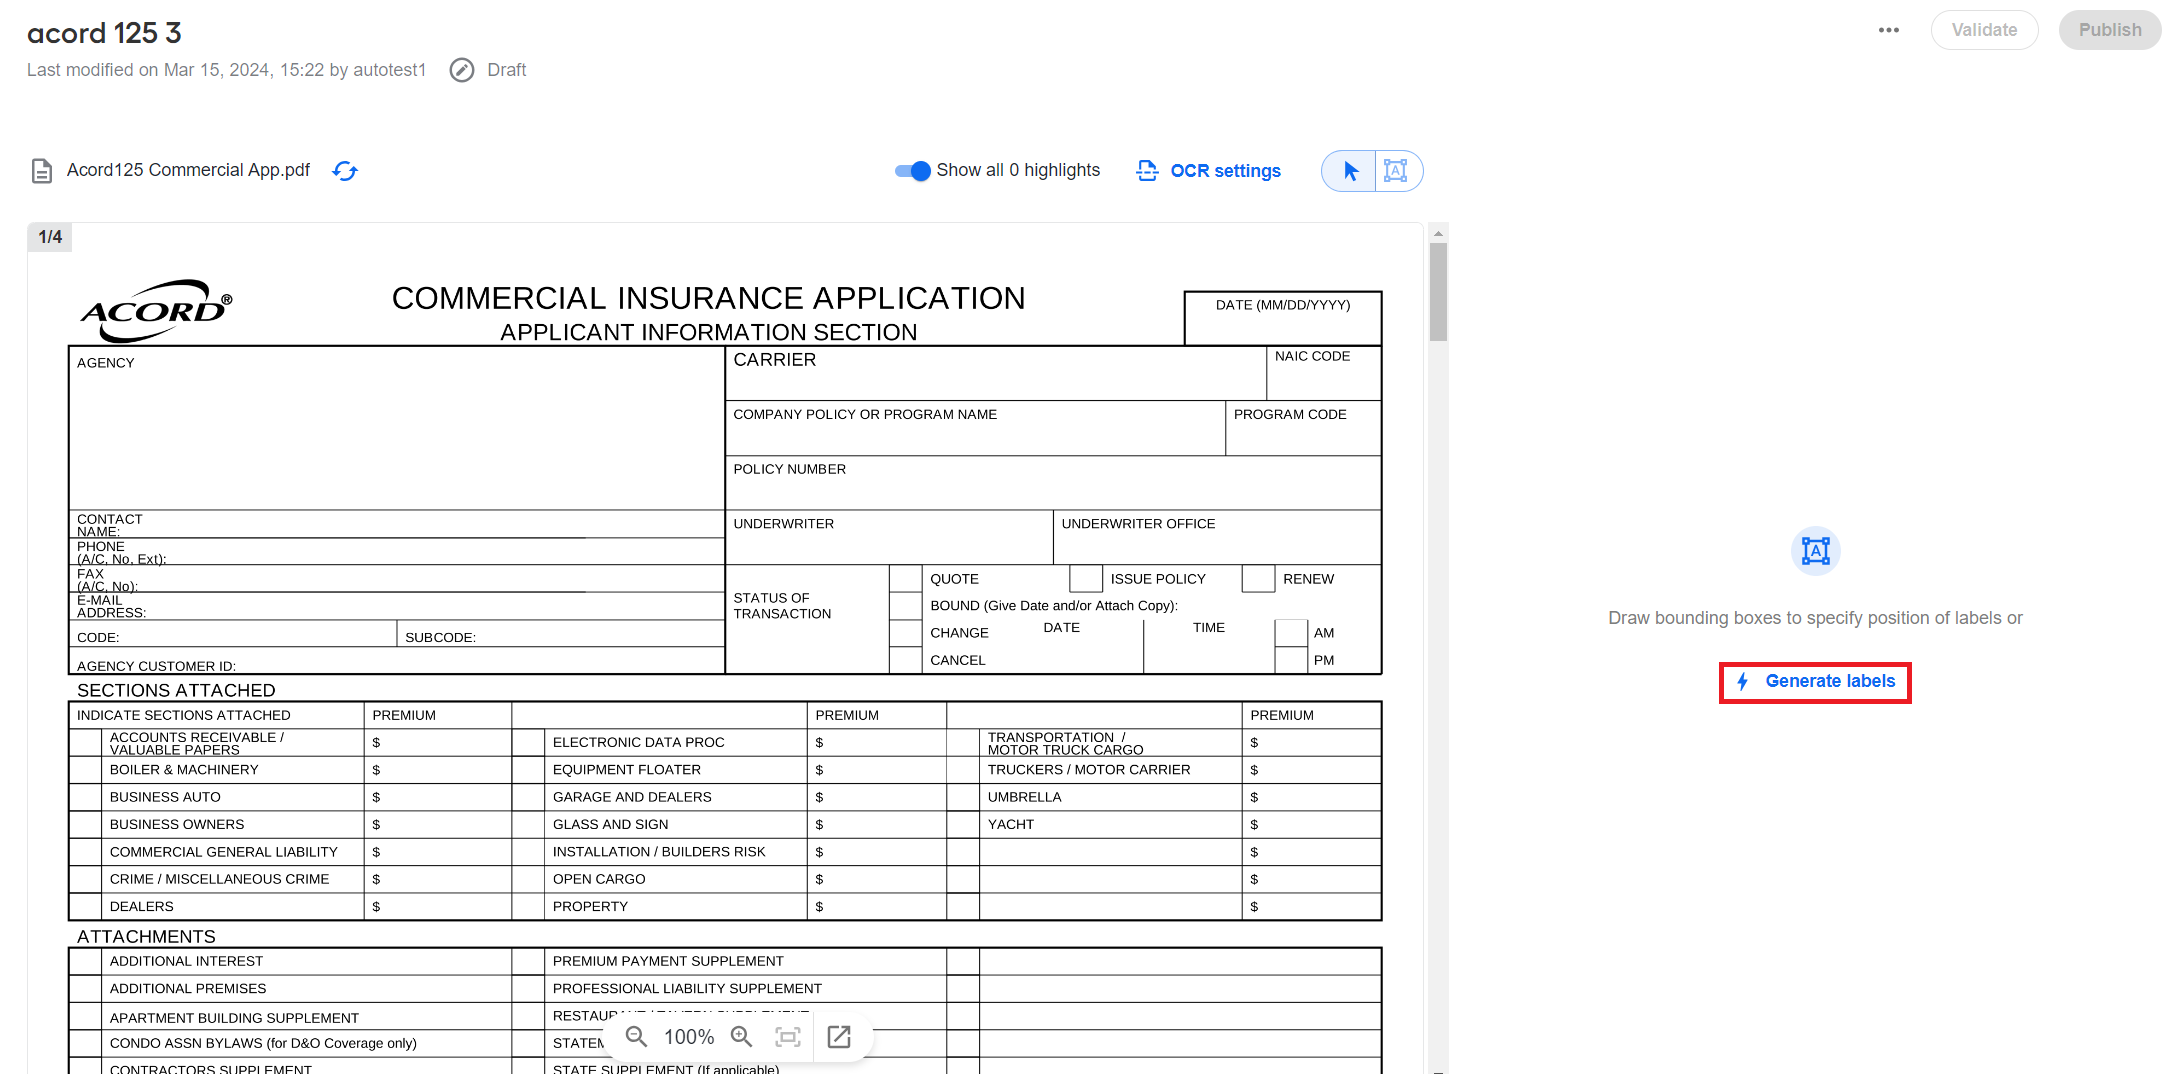
If you upload a fillable PDF via the Design new option, you can also auto generate labels by clicking the Generate labels button:
Create as many labels as you need based on the instruction by drawing and setting bounding boxes.
Click the OCR settings button and edit the defaults if needed to fine-tune the OCR parameters.

Proceed in one of the following ways:
As soon as you launch the validation or publishing, a new template version is created. The published or validated version becomes read only.
Generate from fillable PDF
To create a template from fillable PDF, follow the steps below:
Click + and select Create new.
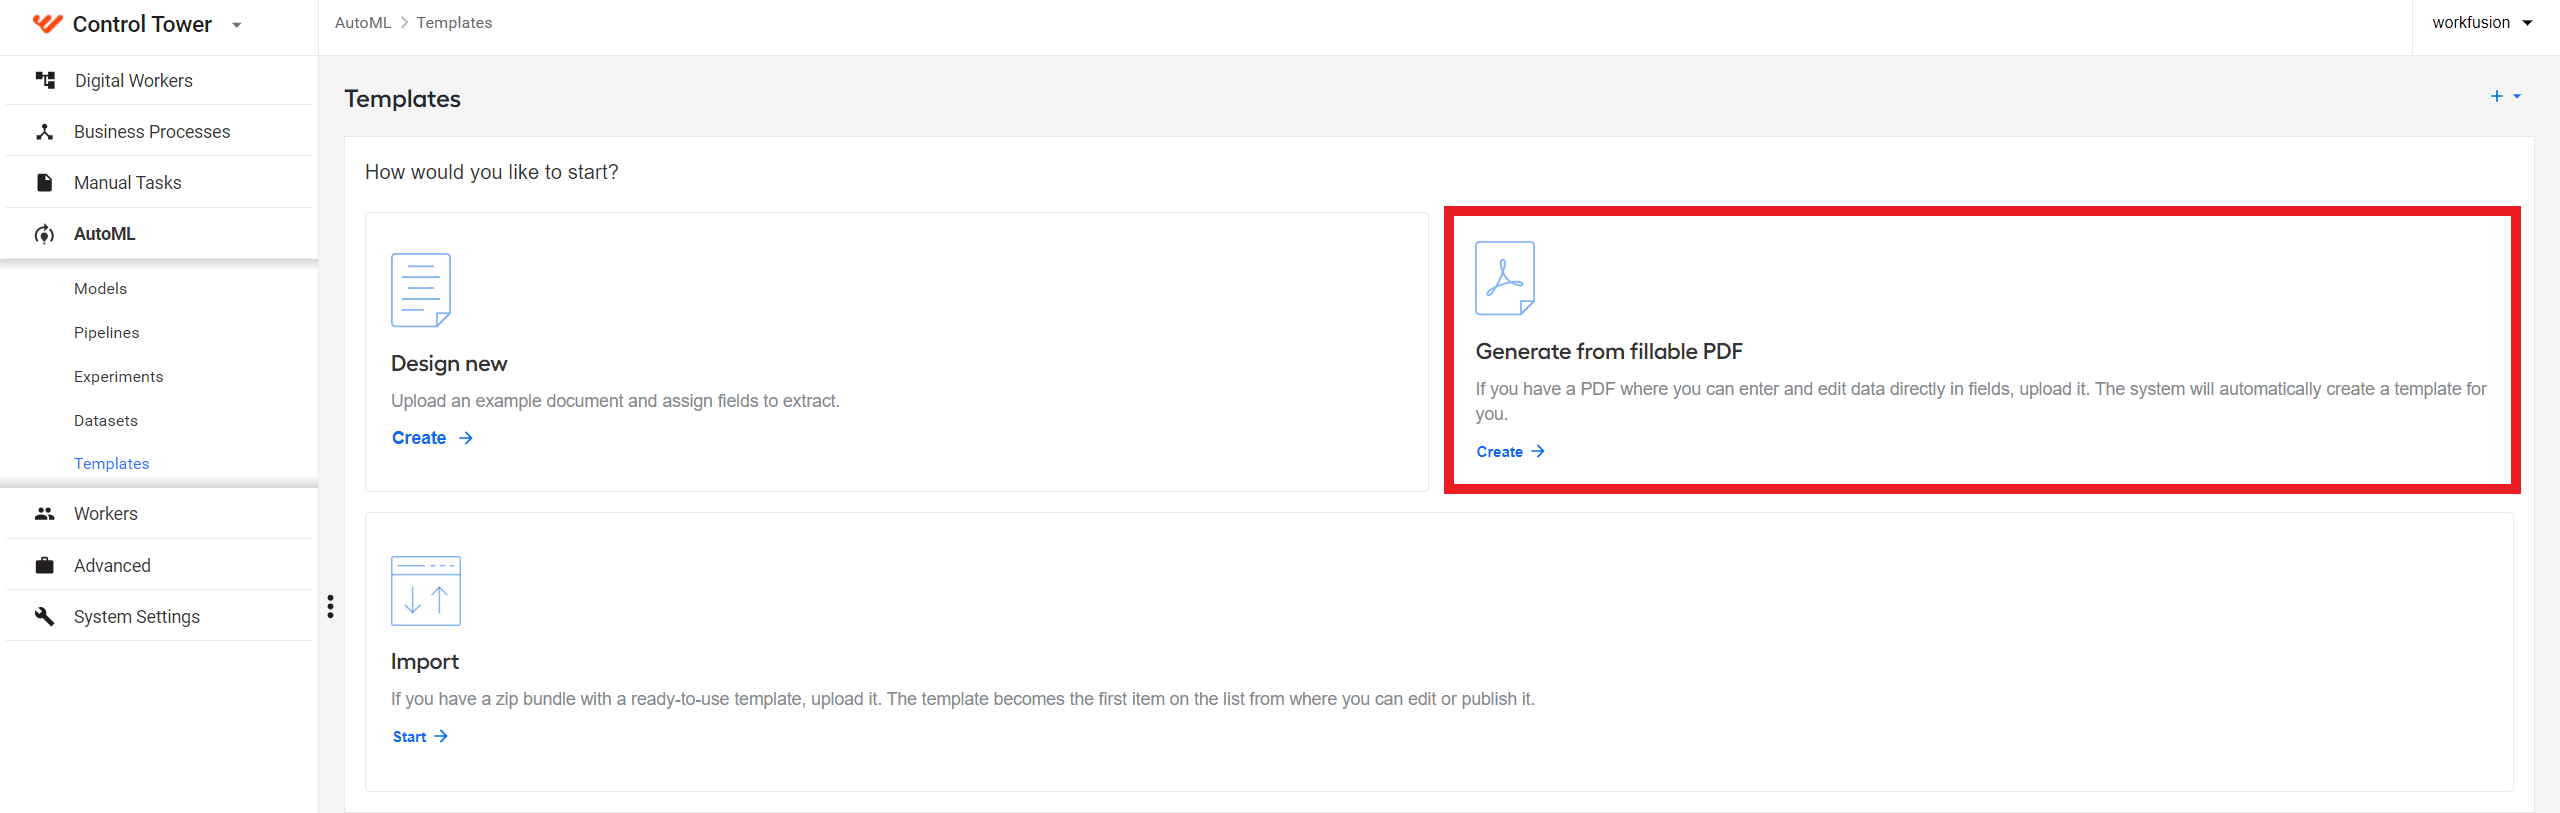
In the New Template window, click the Create button for the Generate from fillable PDF option.
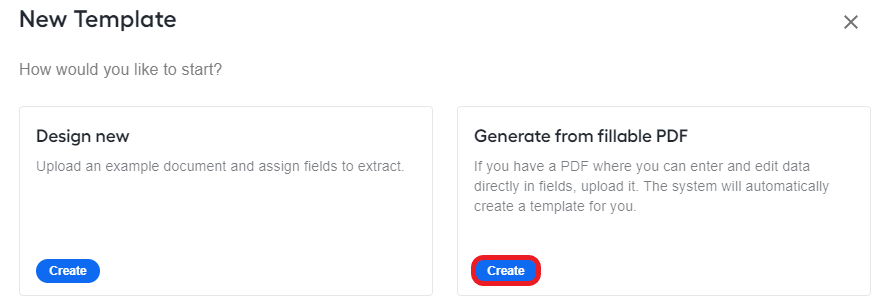
On the empty screen, you can also click the Create button for the Generate from fillable PDF option to start the same flow.
On the New Template page, specify the template name and add a description (optional).
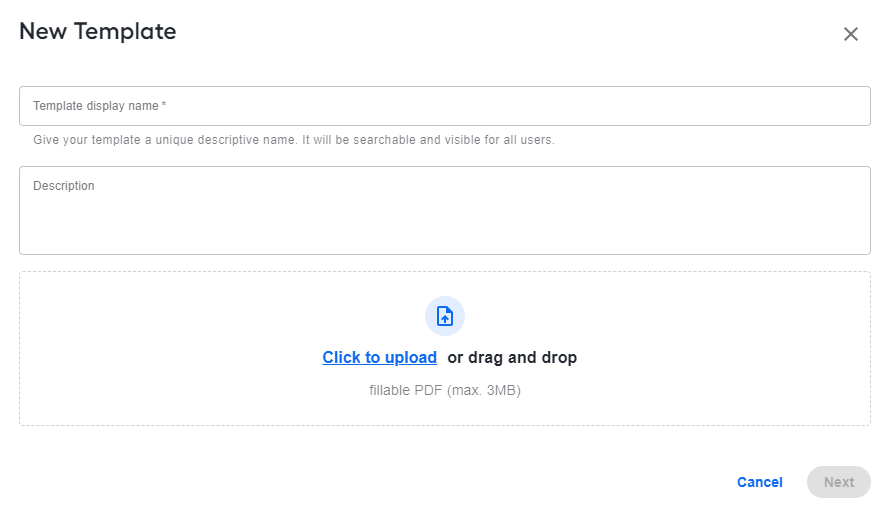
Upload a fillable PDF based on which you want to create the template and click Next.
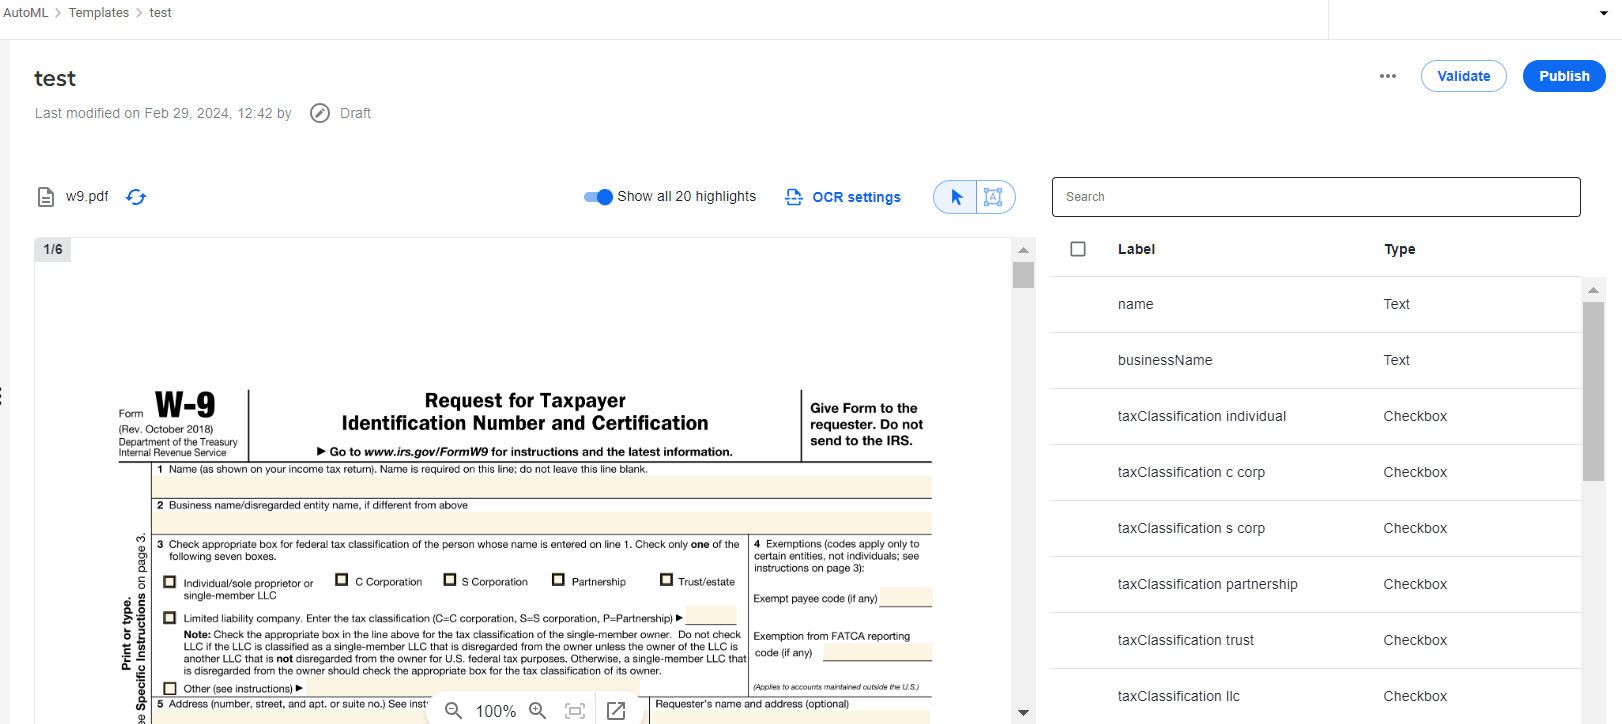
The generated template appears in the Templates list in the Draft status, and you are automatically redirected to the following page:
On the left, there's the uploaded fillable PDF with bounding boxes. You can replace the uploaded document.
On the right, the panel displays extracted fields (labels) corresponding to the bounding boxes on the left and their type (text, number, and so on).
Edit the template using one or both of the following actions:
Click the OCR settings button and edit the defaults if needed to fine-tune the OCR parameters.

Proceed in one of the following ways:
As soon as you launch the validation or publishing, a new template version is created. The published or validated version becomes read only.
Manage templates
On a created or auto-generated template, you can do the following operations:
Rename template
You can only change the template's name and description in the Draft mode.
To change the template's name, do as follows:
Open a template from the list, hover over its name, and click the pencil button.

In the displayed window, specify another name and save the changes.
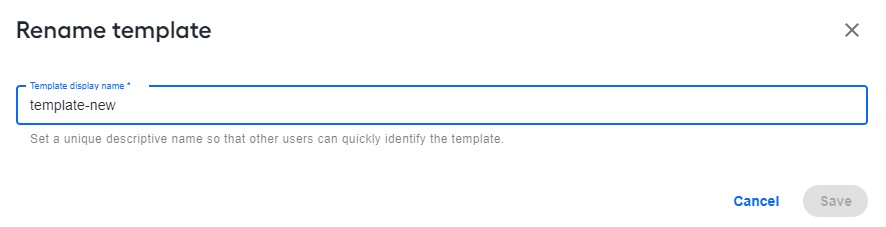
This way, you can also change the template's description: hover over the description (or where it is supposed to be located), click the pencil button, and add a new description in the popup.
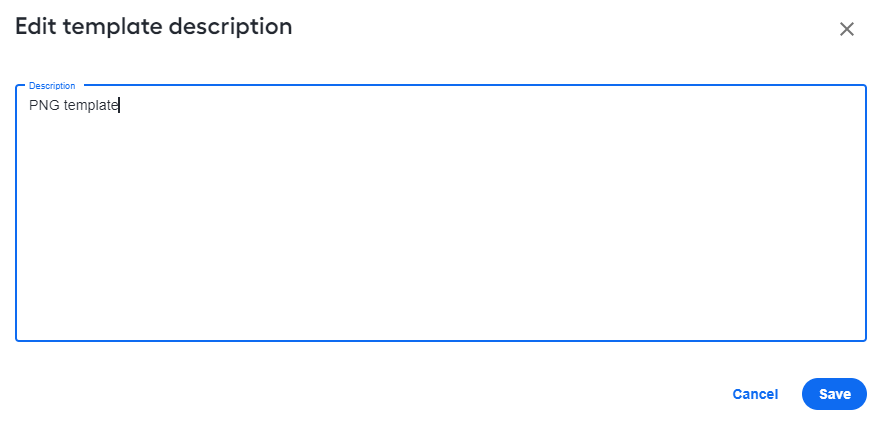
Create labels
To start creating labels, follow the steps below:
Switch to the drawing mode by clicking the Bounding box button:
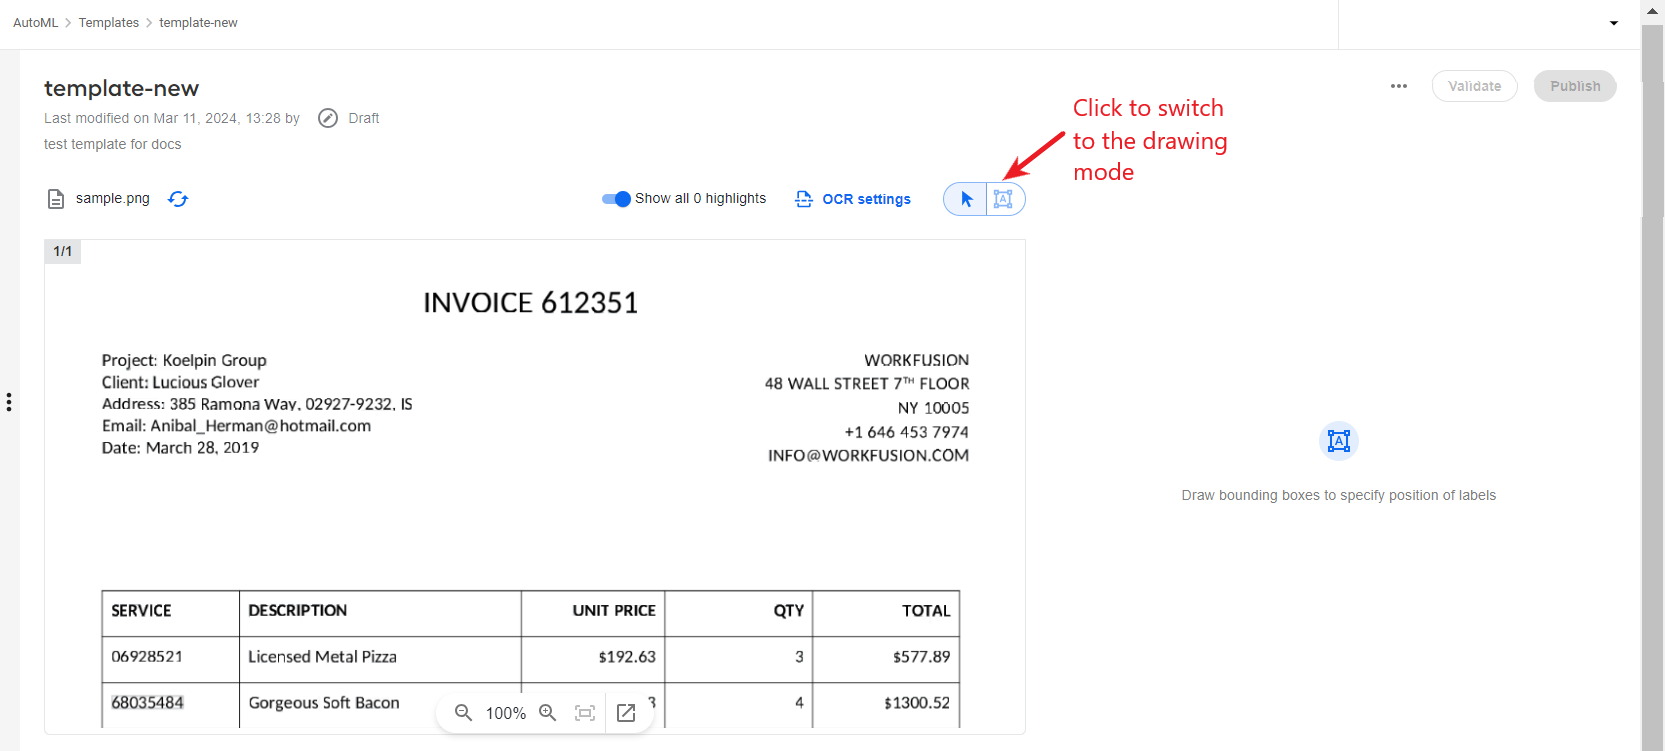
To draw a bounding box, click anywhere near the data element you want to set as a label and, holding the mouse button, drag the mouse pointer to draw a selection area over the chosen element.
In the displayed popup, set the name and type for the label you are creating and click Save. By default, the label is saved in the enabled state.

The created label appears on the right panel. On the left, you can see the corresponding bounding box you drew.
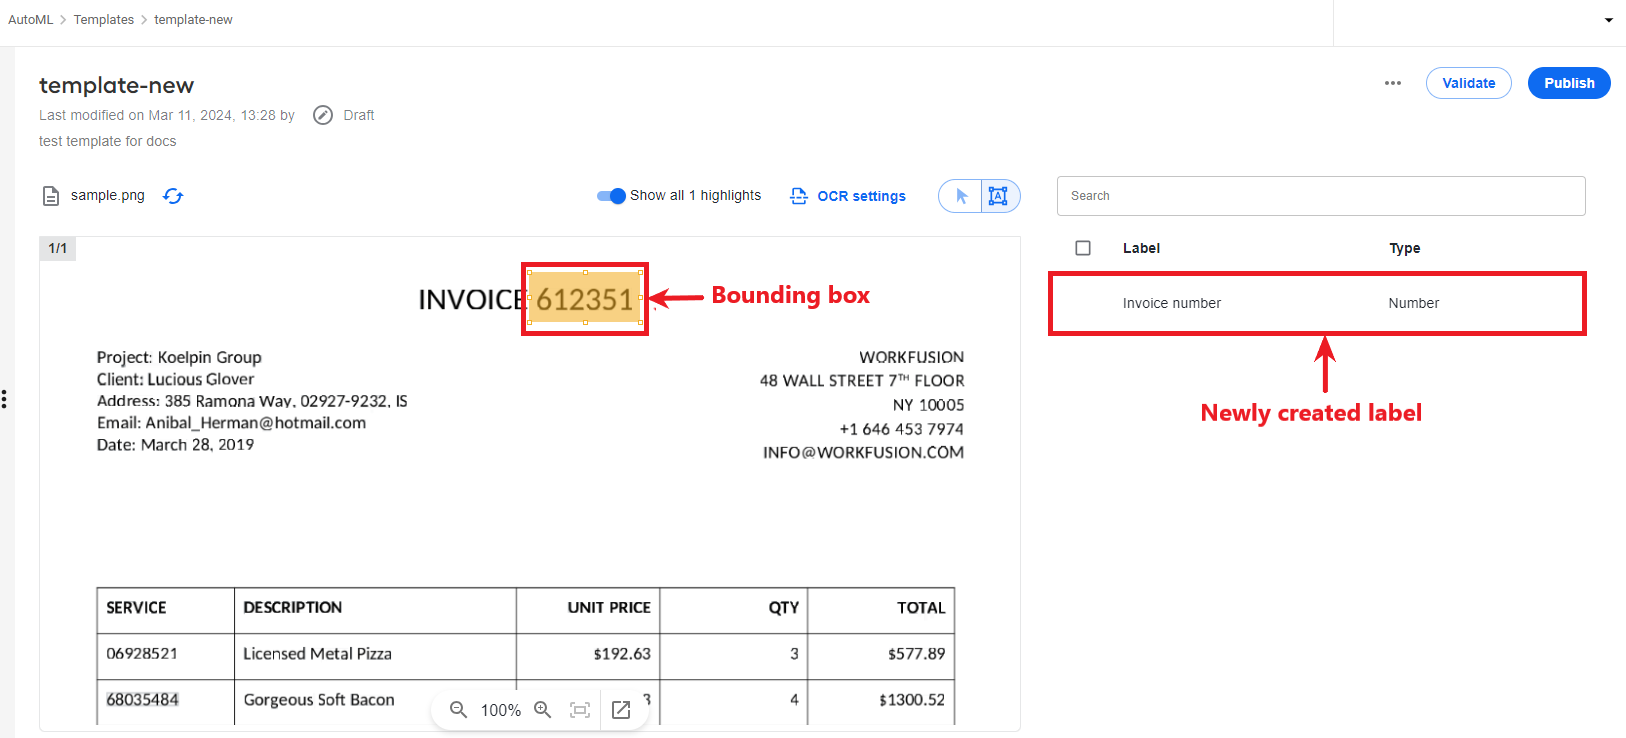
You can change the size of the bounding box by dragging its borders and move it around the document area on the left. Also, you can re-order created labels in the list on the right by dragging them.
Edit labels
To edit a single label, follow the steps below:
In the panel on the right, hover over a label, open the Actions menu, and select Edit.
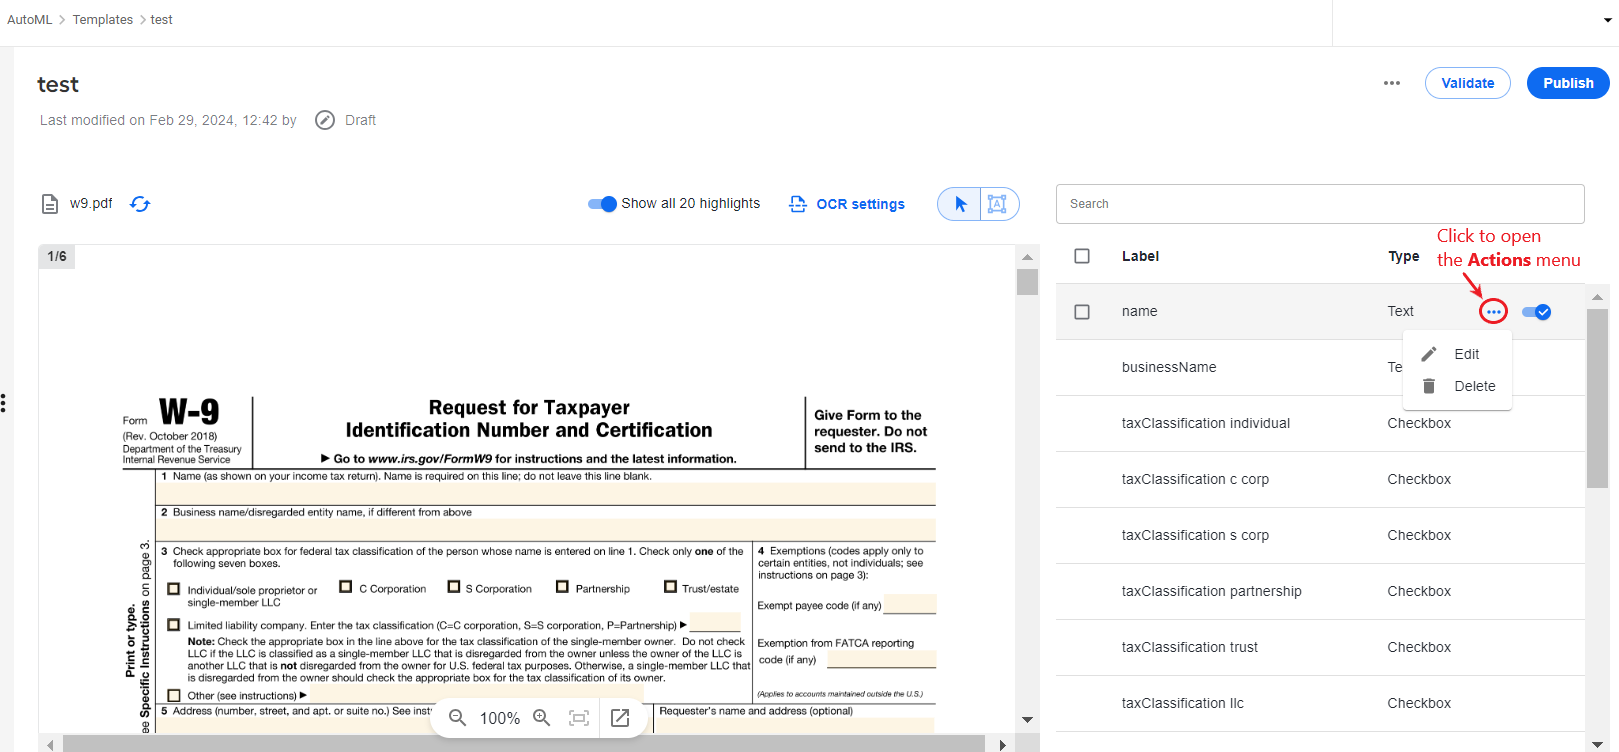
In the displayed window, make neccessary changes:
Update the label name.
Choose another data type: Text, Number, Date, Checkbox, and Signature.
Switch the toggle on or off to enable or disable the label.

Mind that you can also enable or disable labels directly from the labels list.
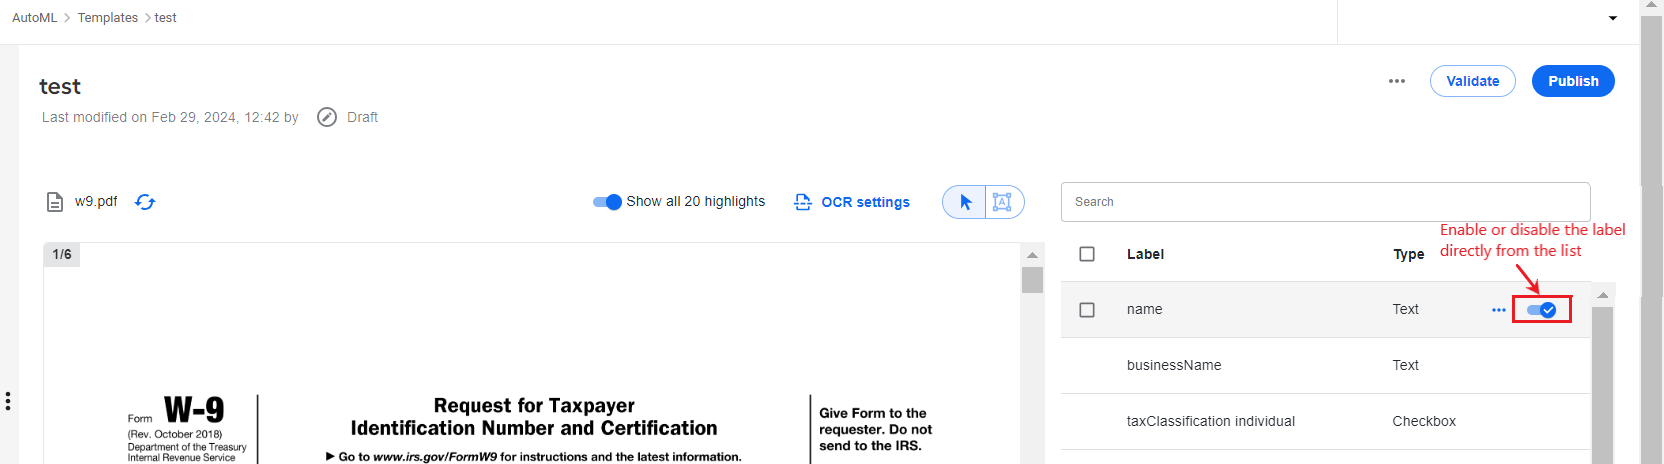
Click the Save button to save the changes in the Edit Label popup.
For bulk label editing, see the Apply bulk actions section.
Remove labels
To remove a single label, hover over a label in the panel on the right, open the Actions menu, and select Delete.
The label is removed permanently from the template.
Replace document
To replace the uploaded document, follow the steps below:
In the top left corner, next to the uploaded document name, click the Replace button.

Choose whether you want to keep the existing labels (if any) or create a new set of labels.
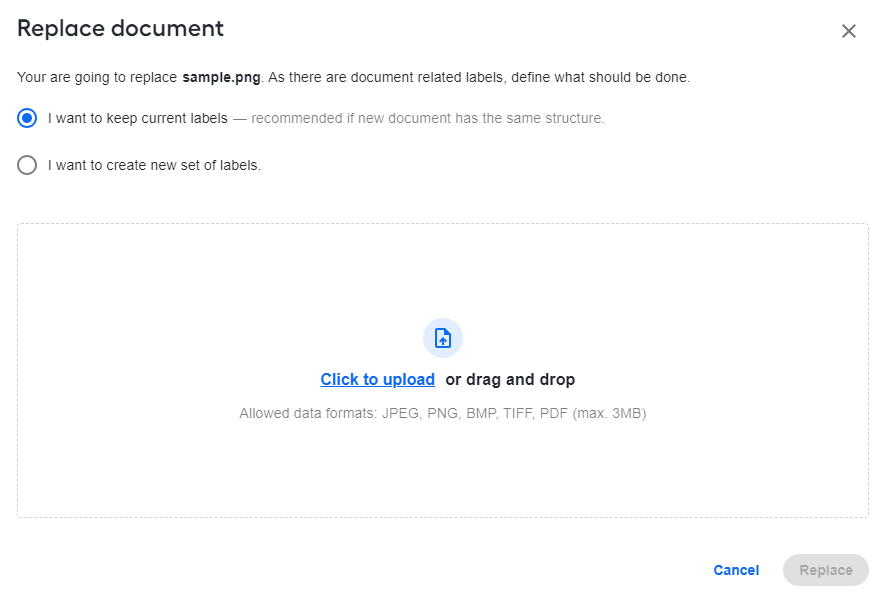
Upload a document and click the Replace button. The new document replaces the one that was displayed in the area on the left.
Apply bulk actions
To initiate bulk actions with labels, you need to have at least one of them selected. To do that, hover over the labels and click the displayed checkboxes.
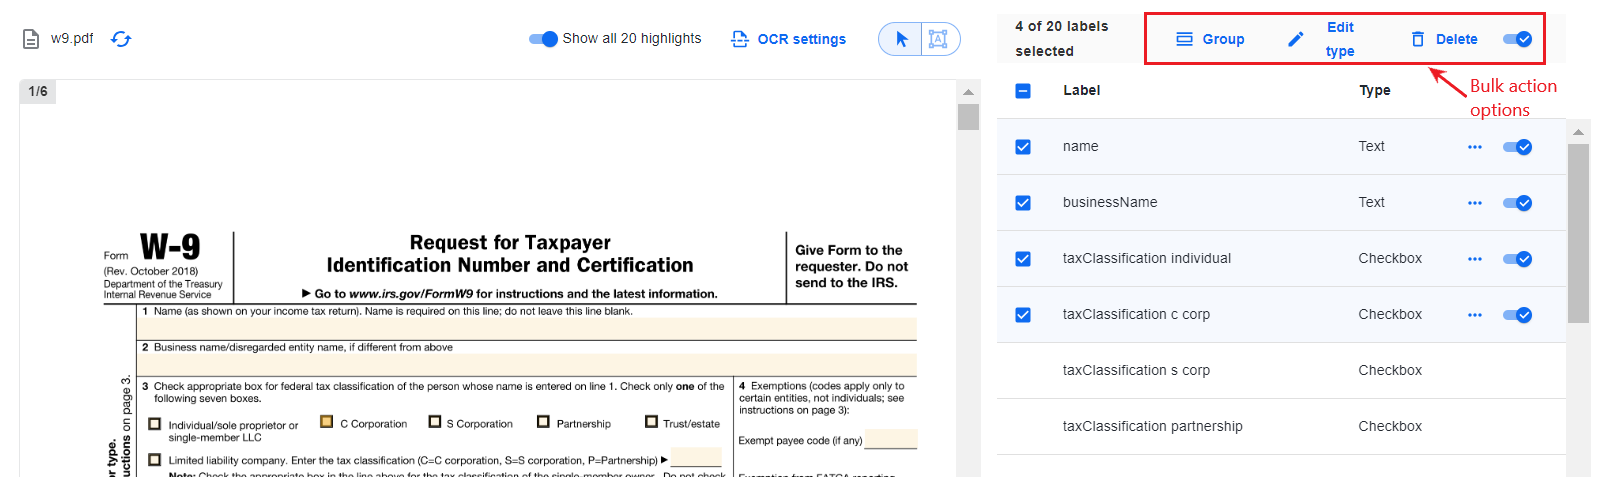
Clicking the checkbox next to the Label header selects all labels on the right panel.
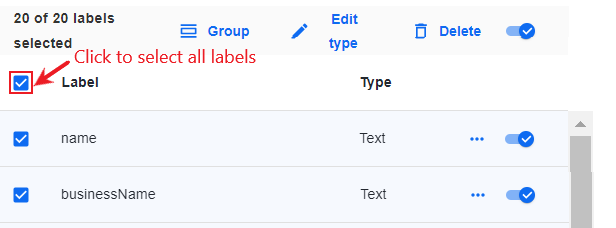
Available bulk action options become visible at the top of the right panel:
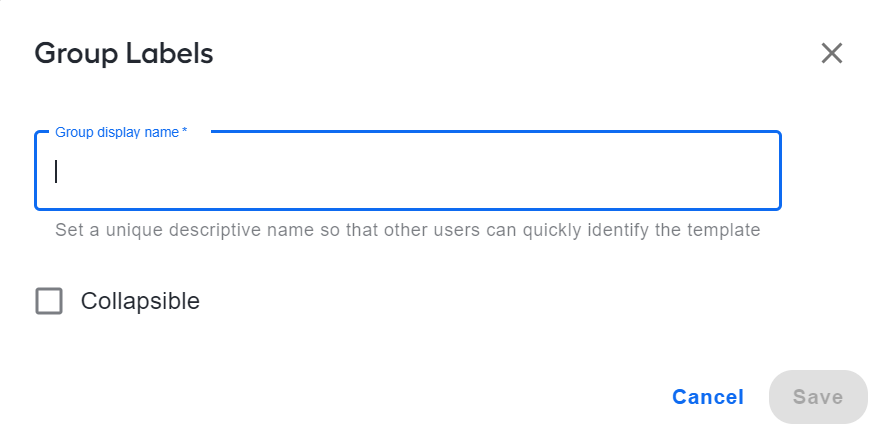
Click Group to unite all the selected labels into a single group in the label panel. To make the group appear as a collapsible section, select the Collapsible checkbox.
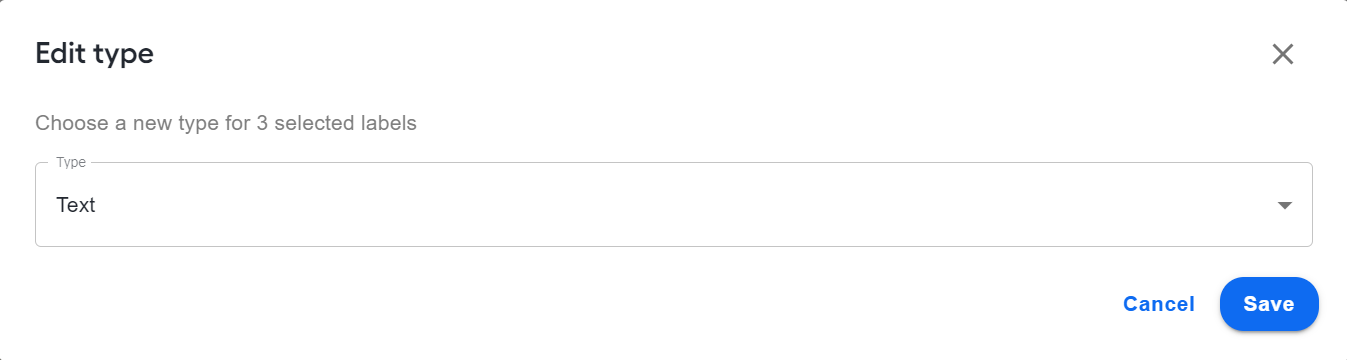
Click Edit type to change the type for all the selected labels. In the displayed popup, update the type and click Save.
Click Delete to remove all selected labels.
Switch the toggle on or off to enable or disable all the selected labels.
Configure OCR
The OCR settings for templates are pre-configured by default. You can leave them without changes or fine-tune to better match your needs.
As you click the OCR settings button, the following popup appears:
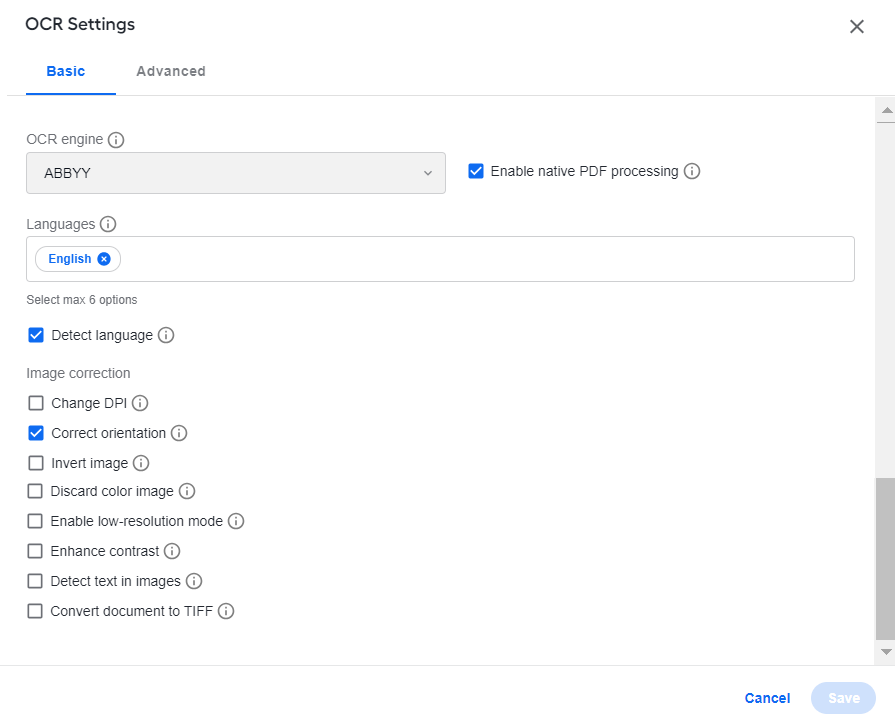
In the popup, you can fine-tune OCR settings, including change the OCR provider. Available options are ABBYY, Azure, Google, Paddle.
The settings are available in the two modes:
Basic, requiring no code usage (see the figure above)
Advanced, where the same OCR parameters as in the Basic mode are represented as editable JSON code
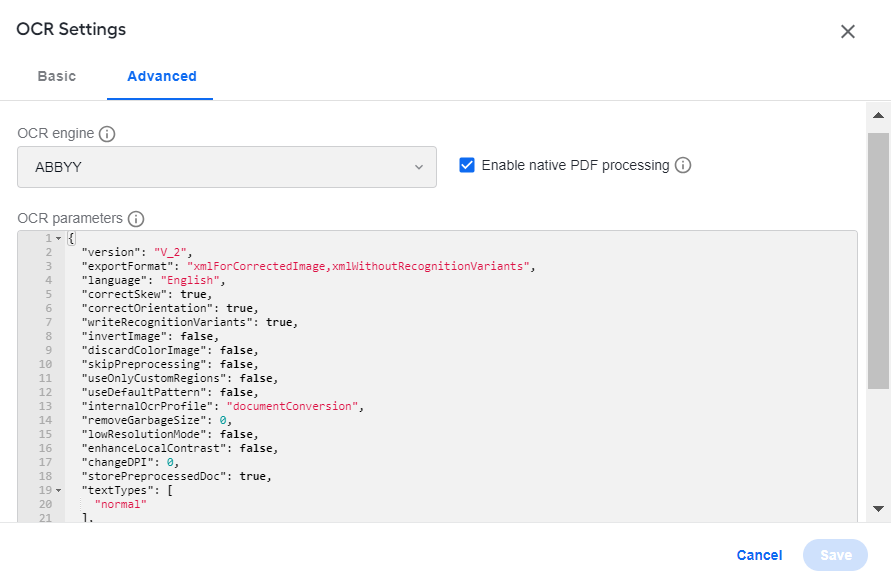
Exact settings available for fine-tuning depend on the chosen OCR provider.
Create template versions
You can see all available template versions in the drop-down list below the template's name. If a template has only one version, no such drop-down list is available.
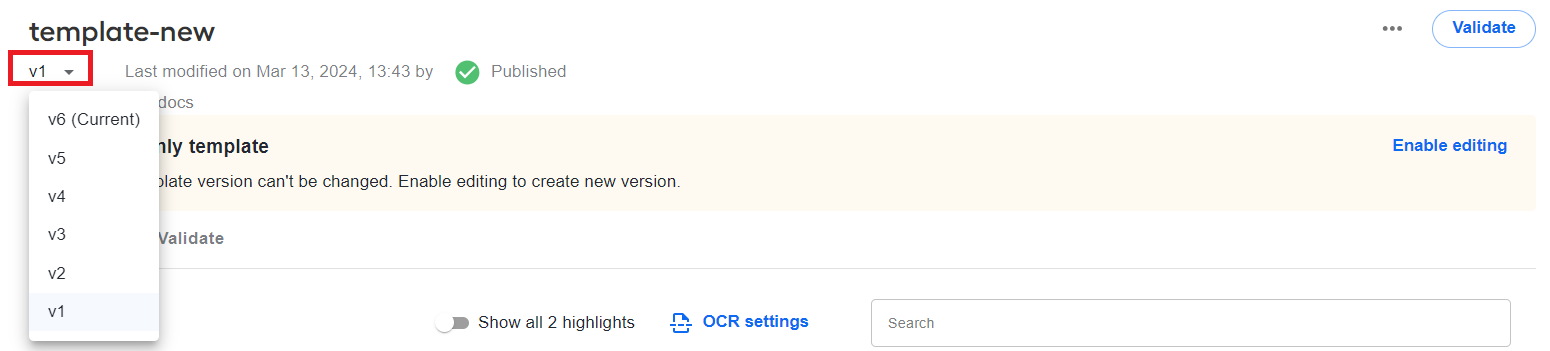
A new template version is created every time you start one of the following flows from an editable template version:
Each new version is added to the drop-down list, while the initial template remains available as the highest version on the list with the current indication.
If you start validation from a published or previously validated version, the validation will not create a new version.
Validate template
To validate a template version means to check the extraction of values using a pre-filled structured form identical to the one used to create the template. You can run several validations in parallel for different template versions using the same or different documents for validation.
To start the validation flow, follow the steps below:
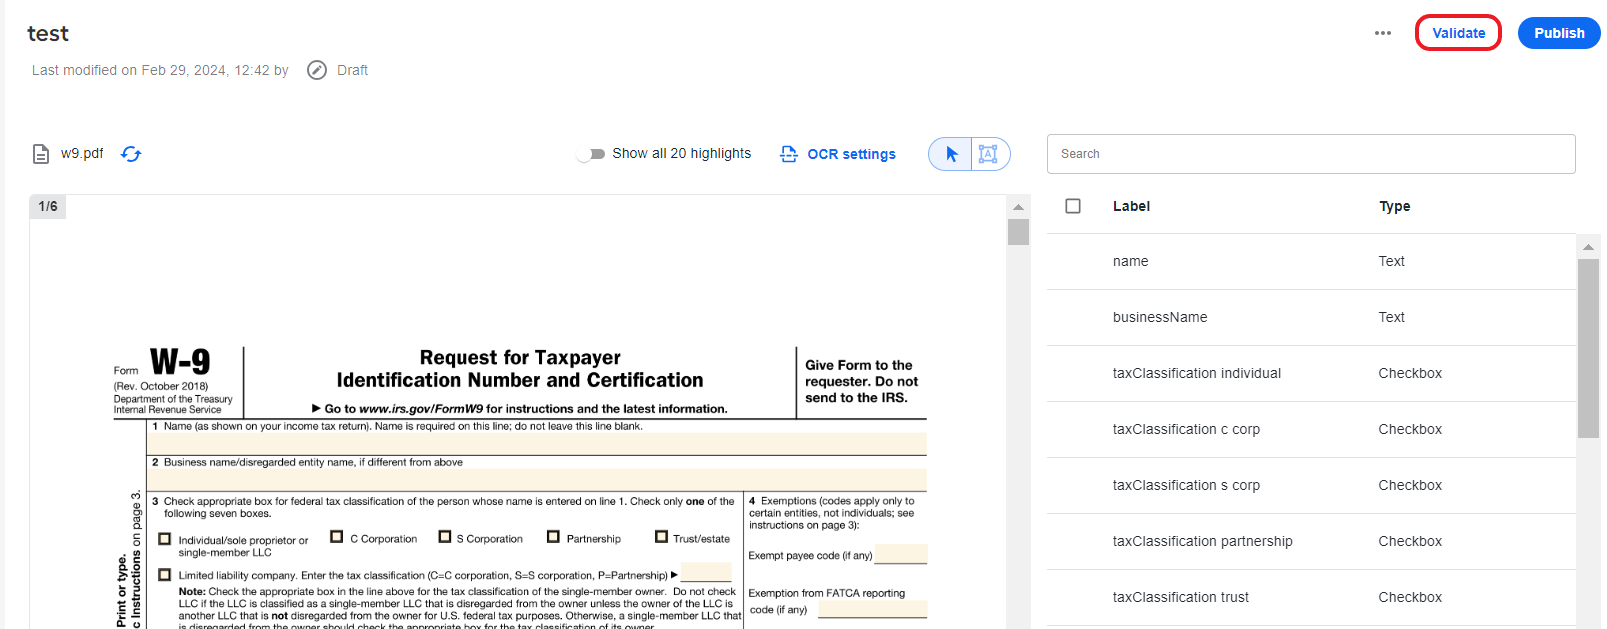
Open the template you want to validate and click the Validate button.
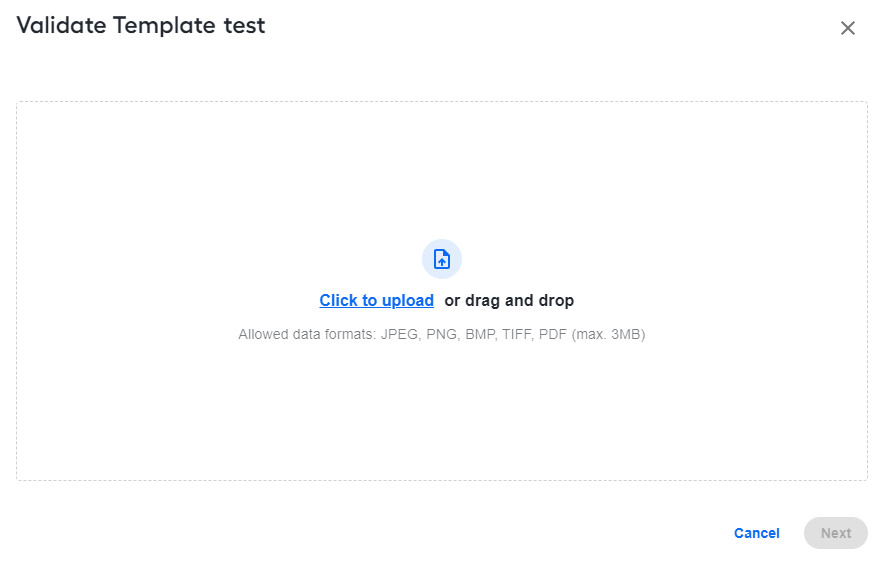
Upload the document based on which the extraction results are to be validated and click Next.
If you are validating a template where a previous version already has a document uploaded, you can choose to validate with the same document or upload a new one.
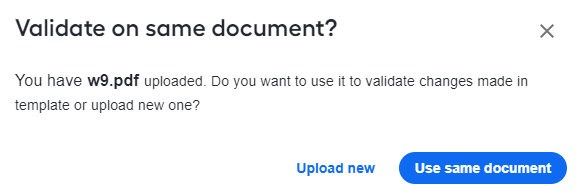
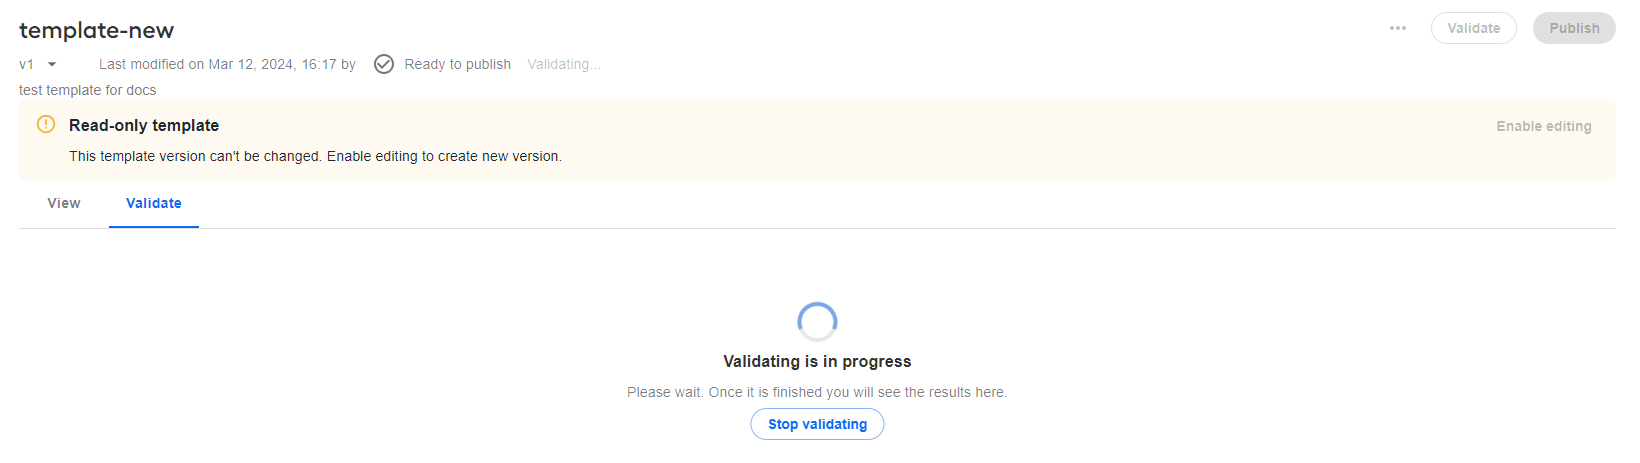
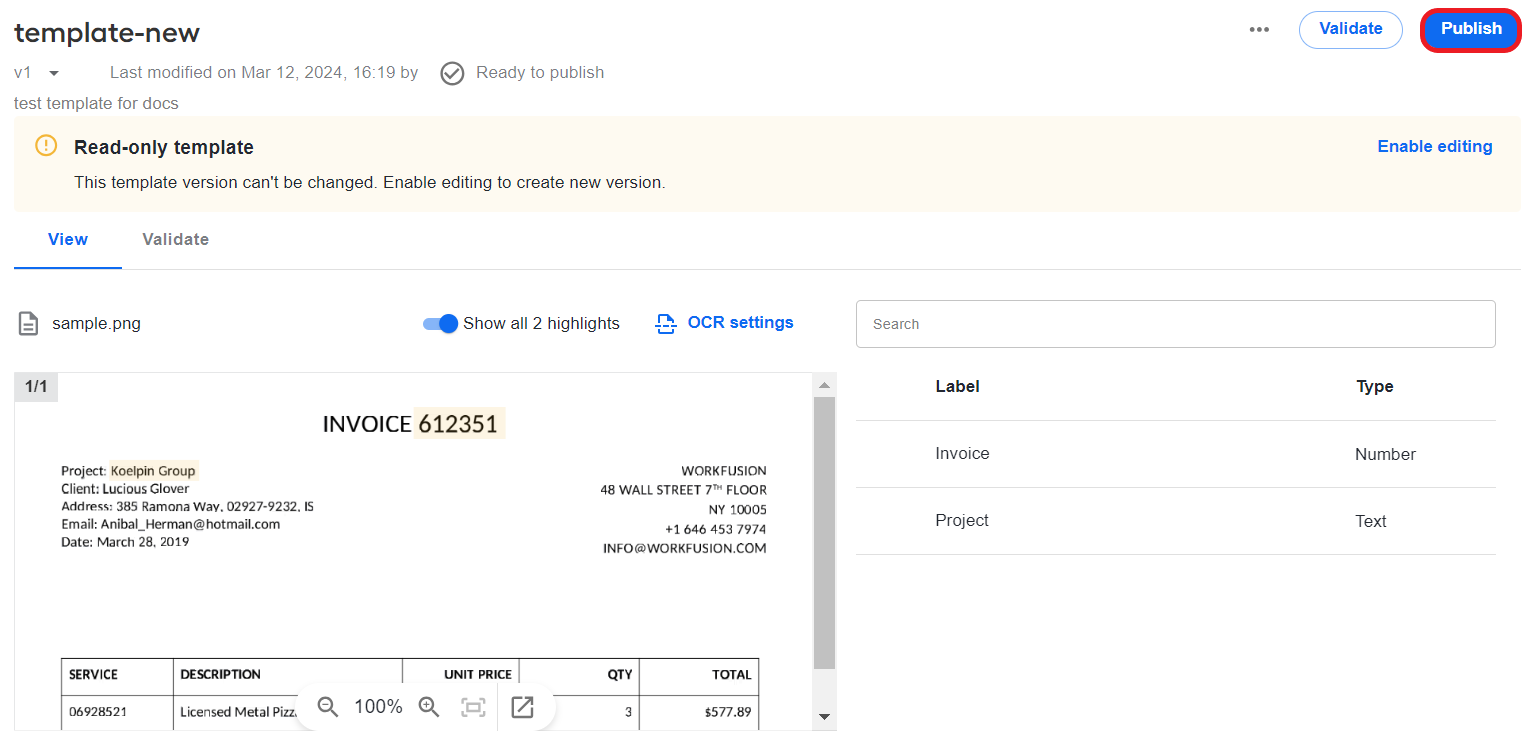
A new template version is created, whereas the current one becomes read-only and changes its status from Draft to Ready to publish. On the screen, two tabs appear:
View, where you can see the original document and labels.
Validate, where you can watch the validation progress.
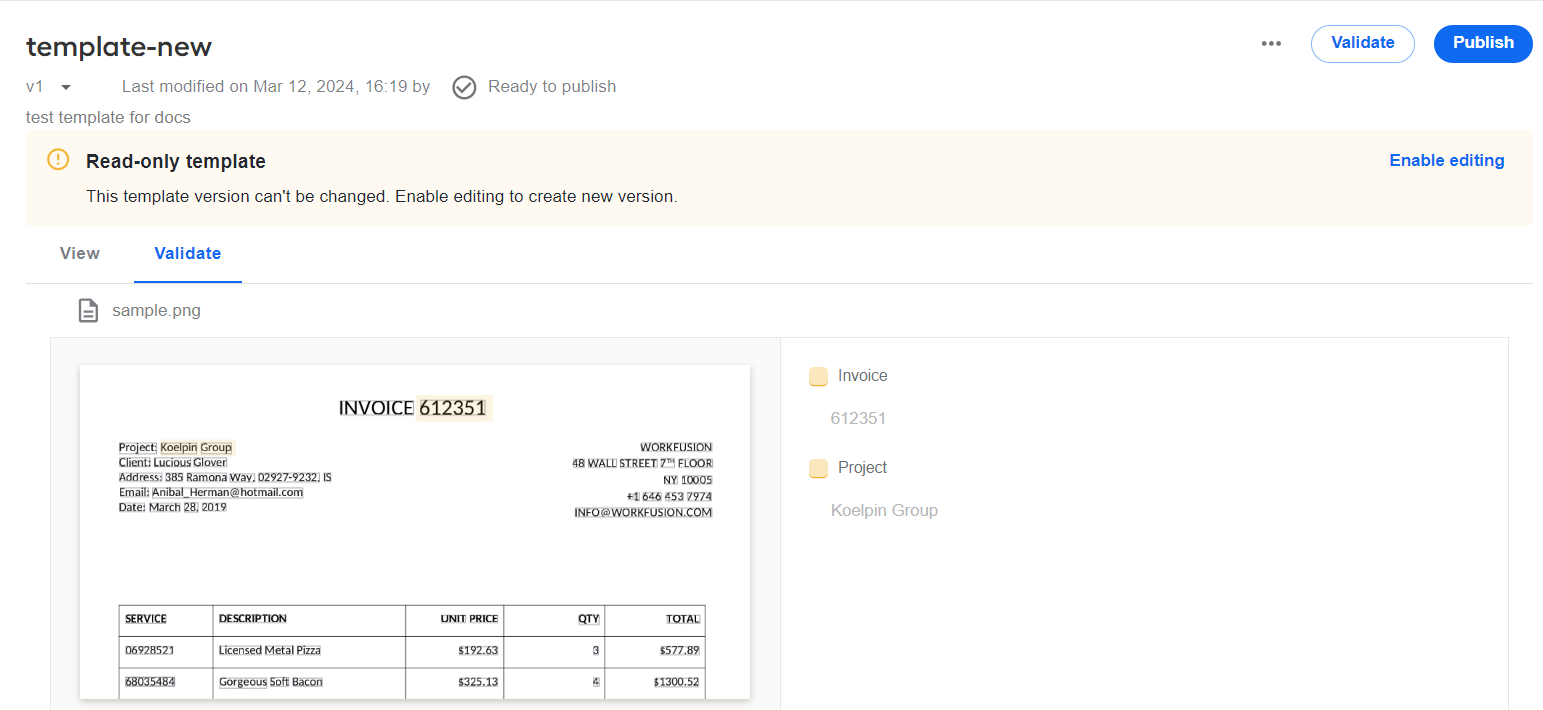
On the Validate tab, review the uploaded test document on the left and the extraction results on the right.
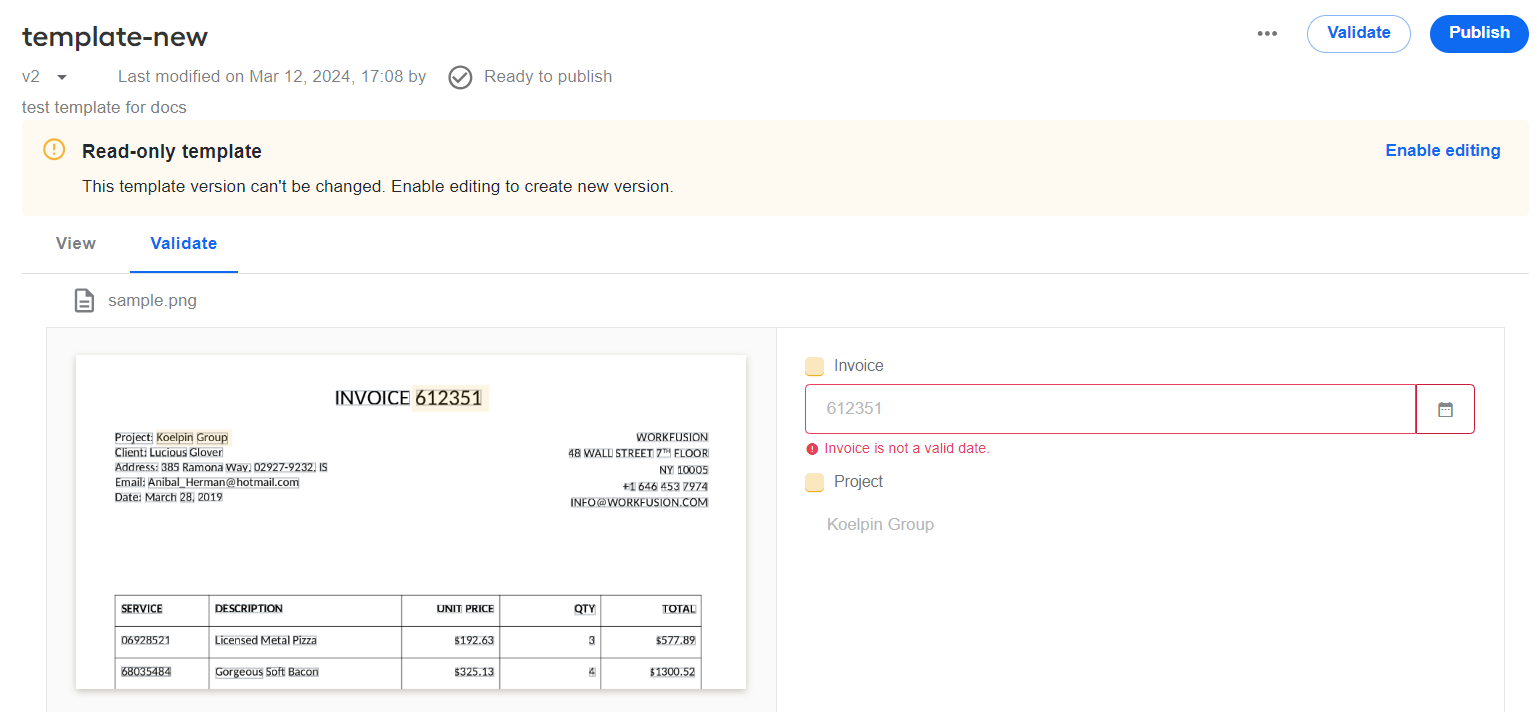
During validation, the extraction results are compared with the template on the View tab (for instance, expected value types). Any validation errors are indicated under respective fields as shown below:
Once you complete the validation flow successfully, the template model becomes available for inclusion into Business Processes and use in datasets and Manual Tasks.
In the Ready to publish status, a template version is not editable. To fix errors, click Enable editing and make necessary changes in the current unpublished and unvalidated version where you are automatically redirected. Mind that any fixes you make can be re-validated or published only as a new version, and the validation errors remain unchanged in the respective template version.
Publish template
You can publish a template version with or without validation. Open the template version you want to publish and, in the top right corner, click the Publish button.
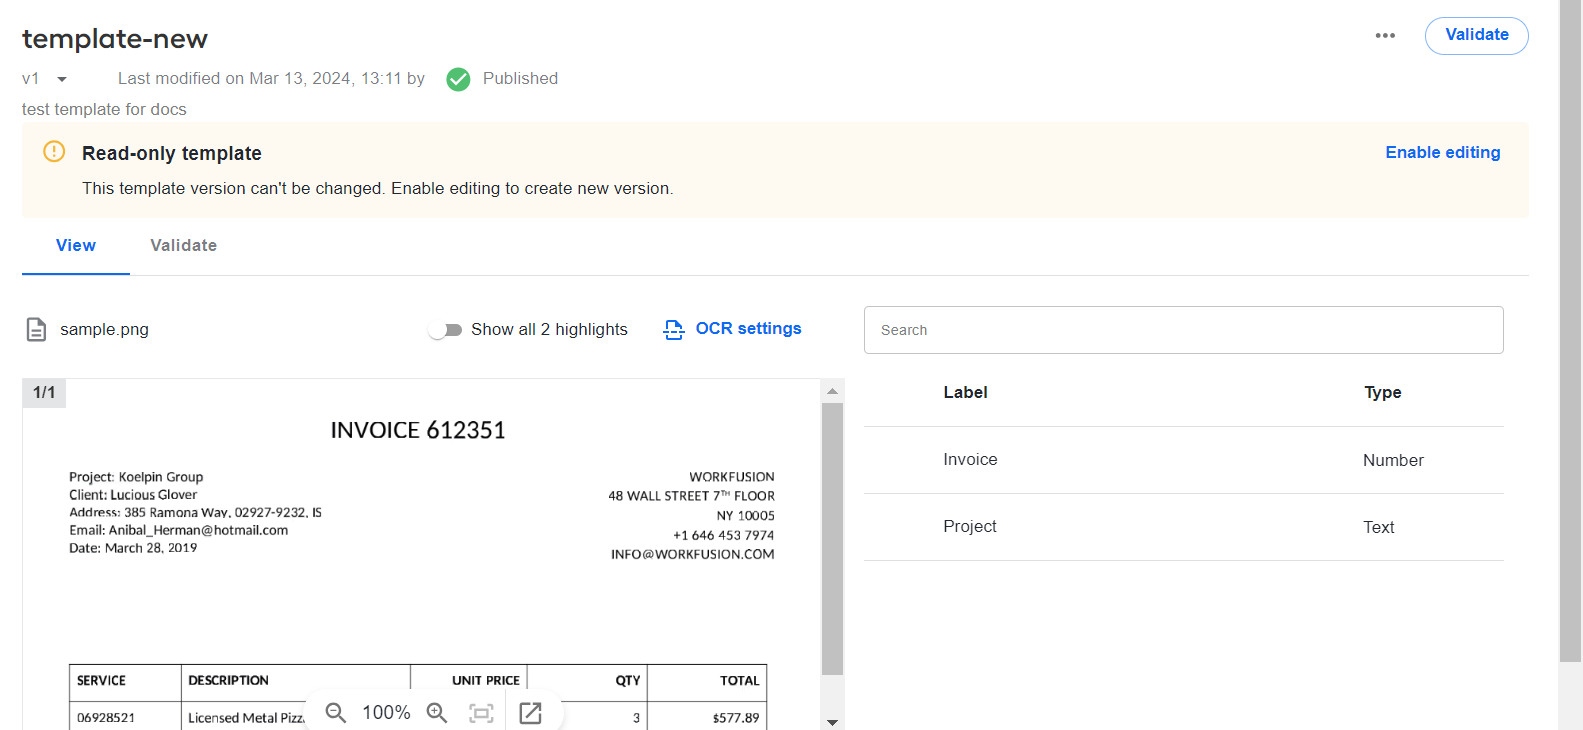
Once the template is published, its status changes from Ready to publish (Draft if you publish without validation) to Published. If you publish without validation, a new template version is created and added to the version drop-down list. You can include the published template into Business Processes and use it in datasets or Manual Tasks.
When publishing, mind the following considerations:
In the Published status, you cannot edit templates. To make changes, click Enable editing. After that, you are redirected to the current unpublished and unvalidated template version. Mind that any edits you make to the template can be published only as a new version.
If you published a template without validation, you can start the validation flow already from the published version. In this case, the validation will not create a new version, only validate the published one.
Delete template
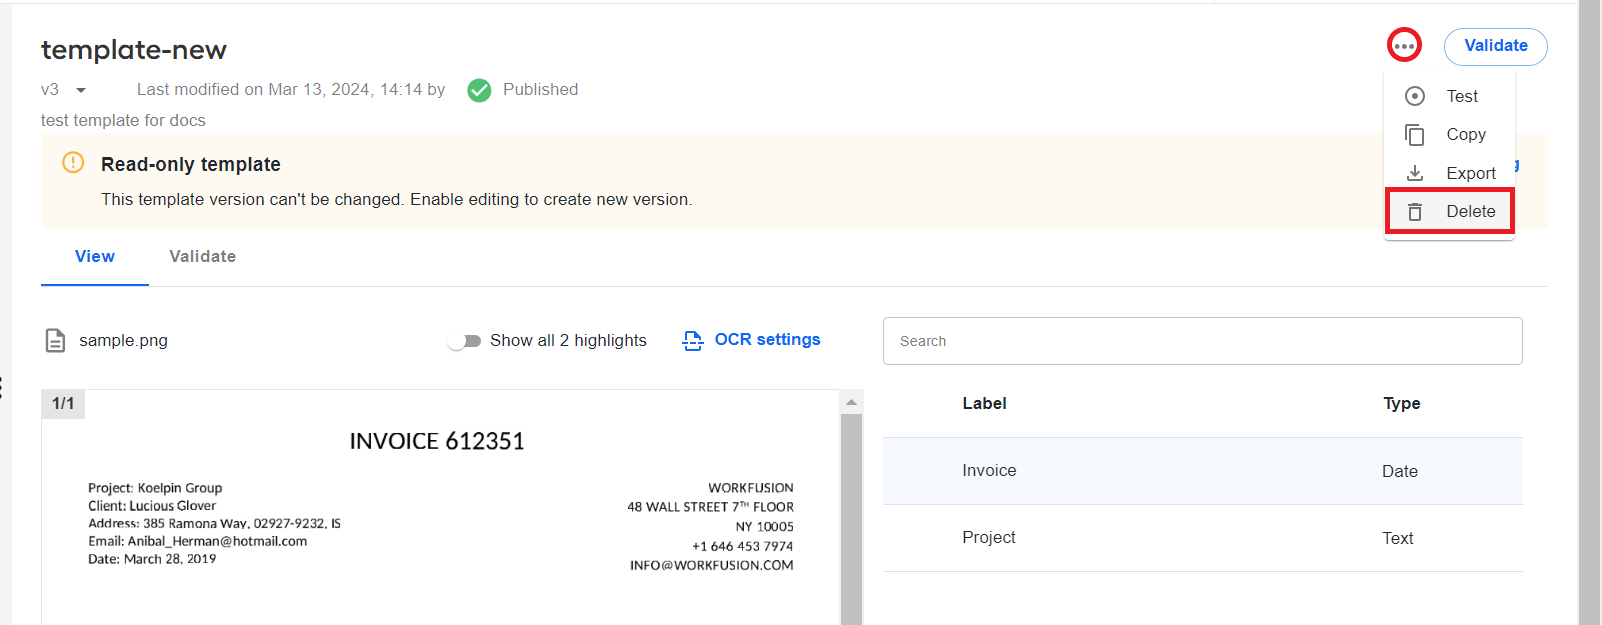
To remove a template permanently, find one in the list on the Templates page, open the Actions menu, and select Delete.
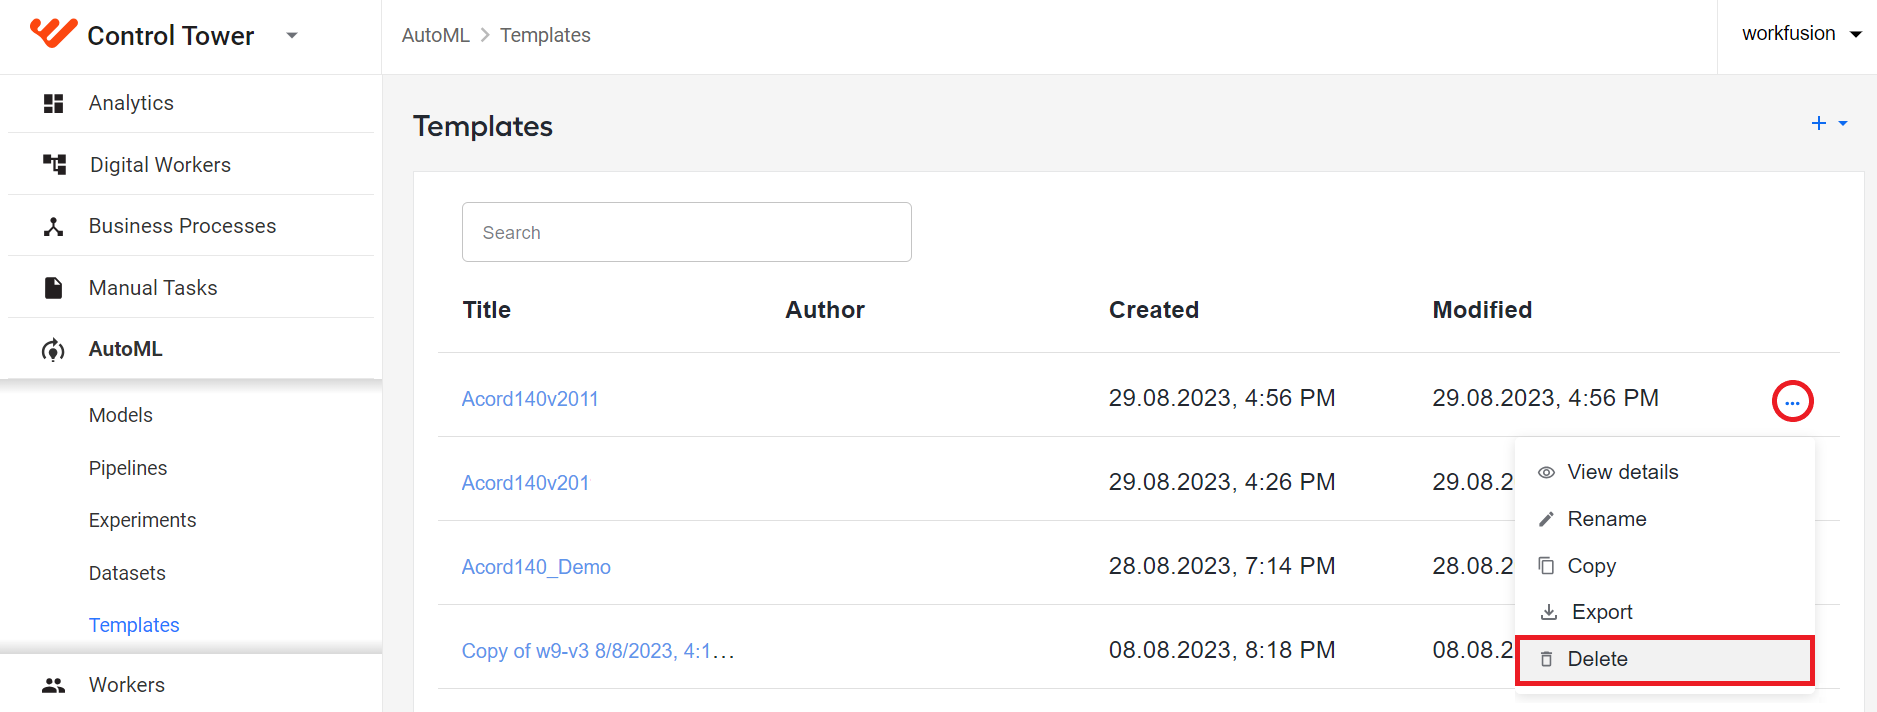
Then, confirm the deletion. The template is deleted permanently with all of its versions.
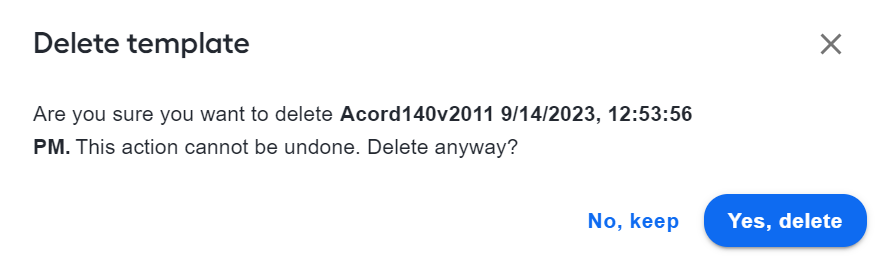
Alternatively, you can delete the template using the Delete option from the Actions menu on the specific template page.
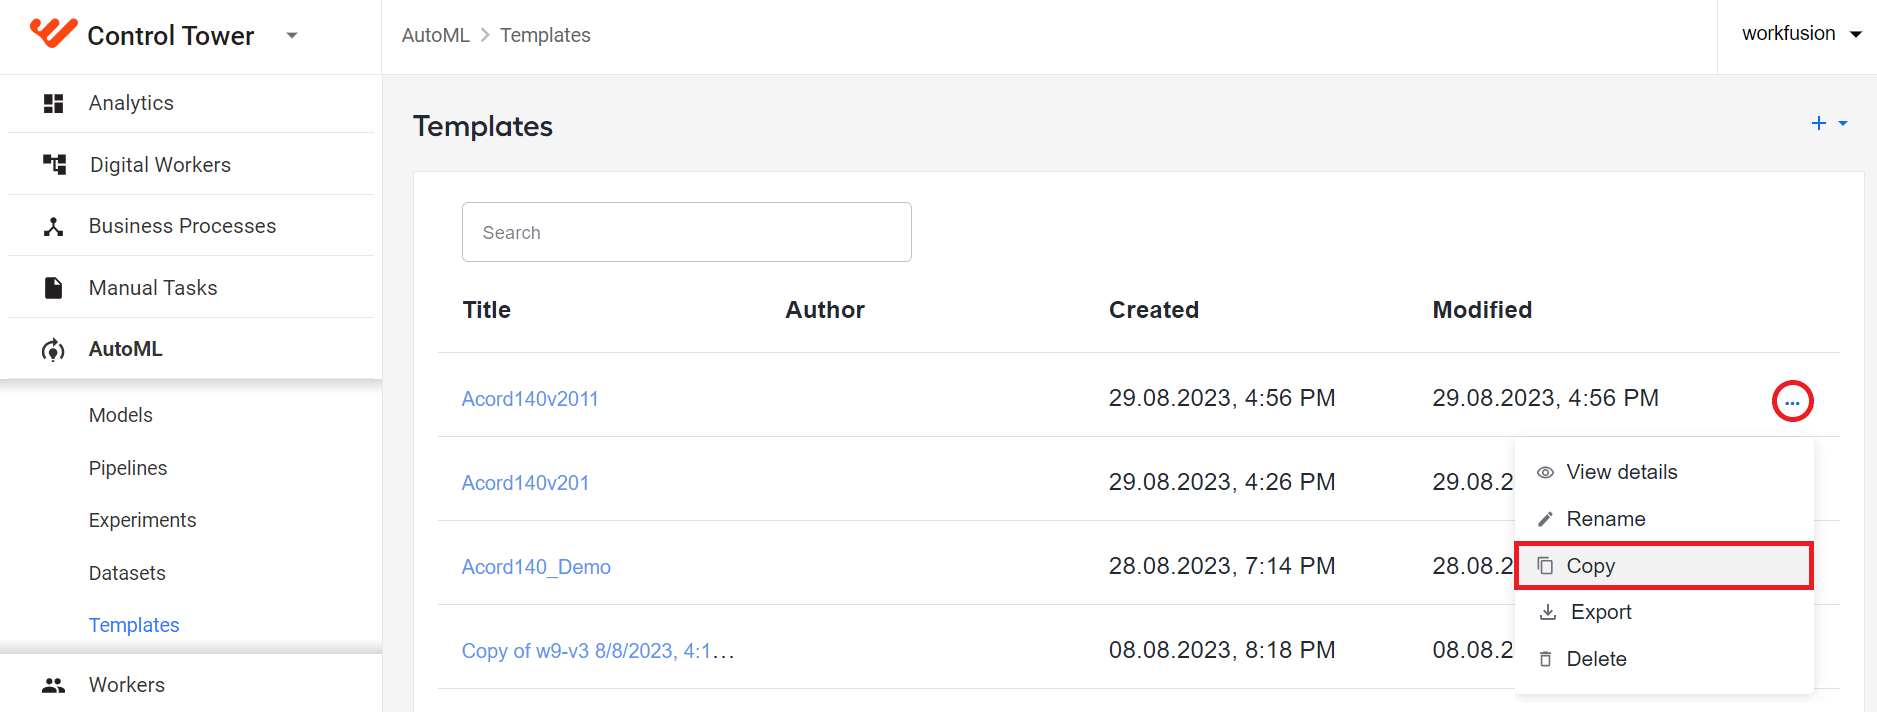
Copy template
To copy a template, find the template you want to copy in the Templates list, open the Actions menu, and select Copy.
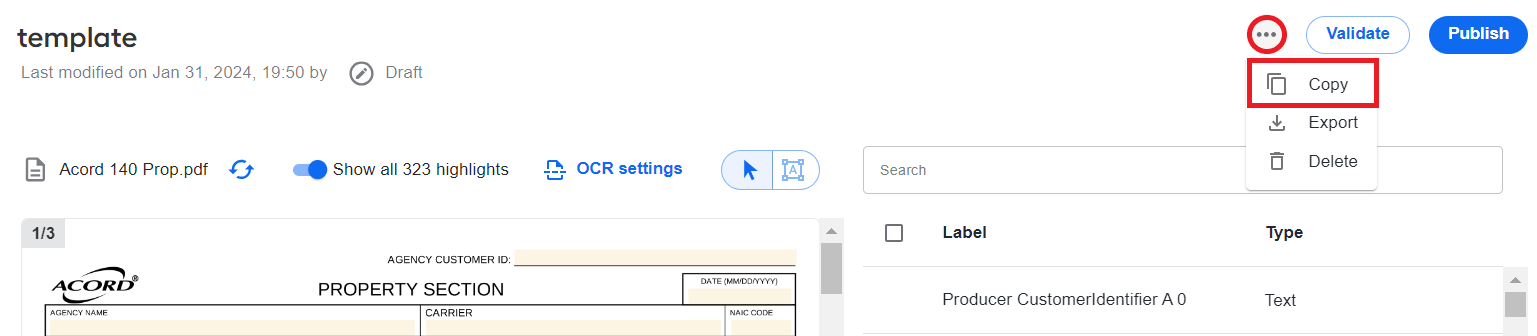
You can also make a copy using the Actions menu on a specific template page:
Export and import templates
Templates can be exported from and imported to your Control Tower instance as a zip bundle. The feature is especially useful when you frequently move templates across various environments (for instance, from dev to prod).
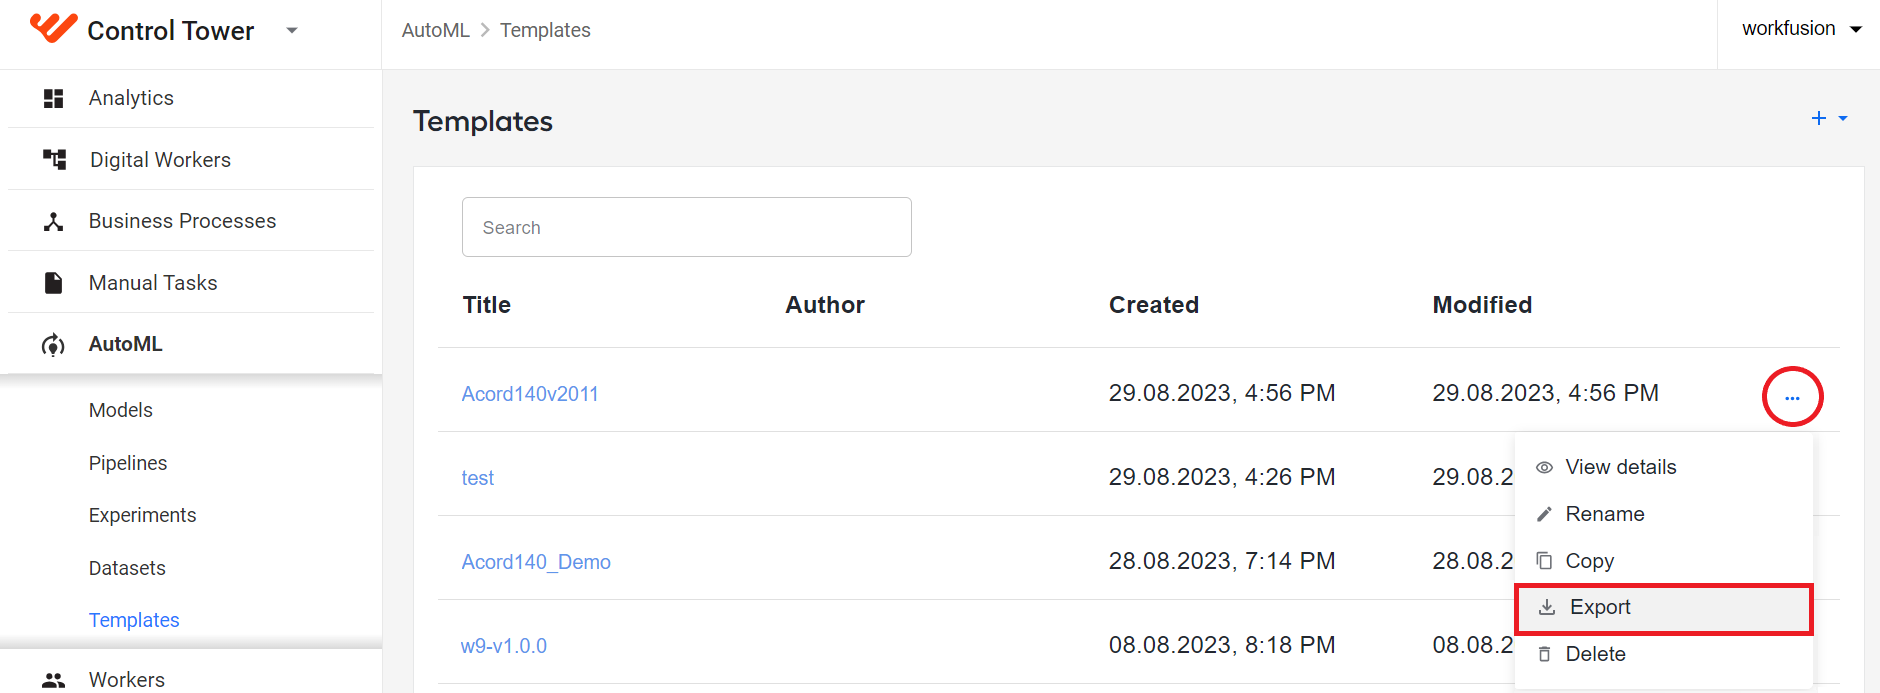
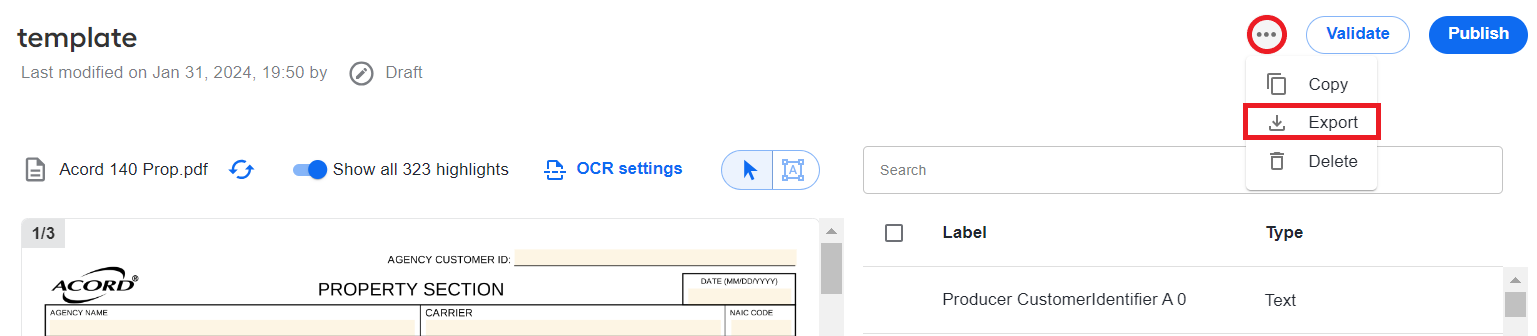
To export a template, in the list on the Templates page, find the template you want to export, open the Actions menu, and select Export.
You can also export a specific template using the Actions menu on the template's page:
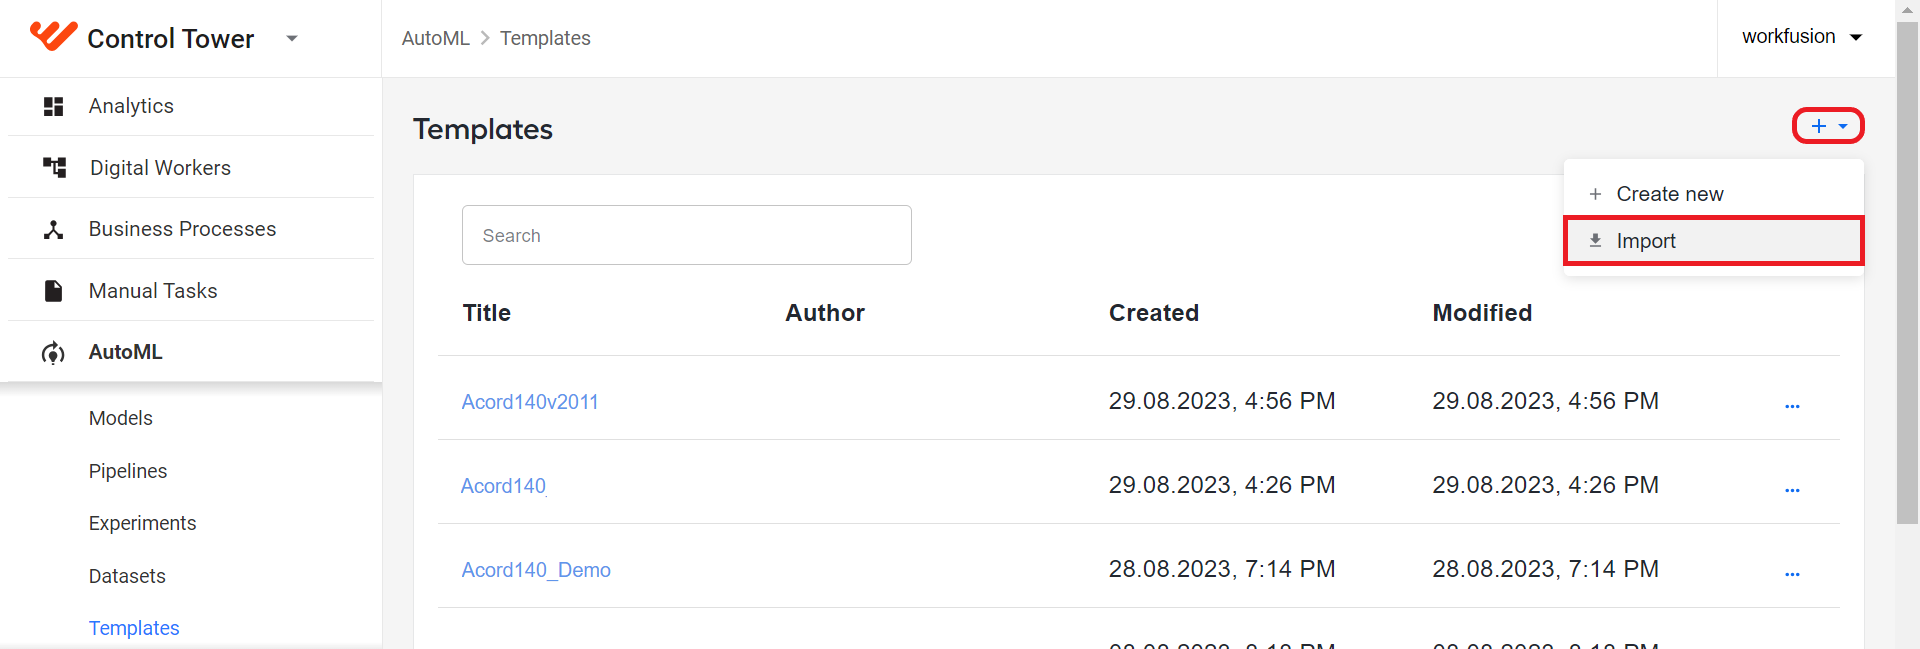
To import a template, click + in the top right corner of the Templates page and select Import.
If you are on the empty-state screen, click the Start in the Import section to initiate the template's import.
A progress bar appears at the top of the page, showing the stages of the import process.
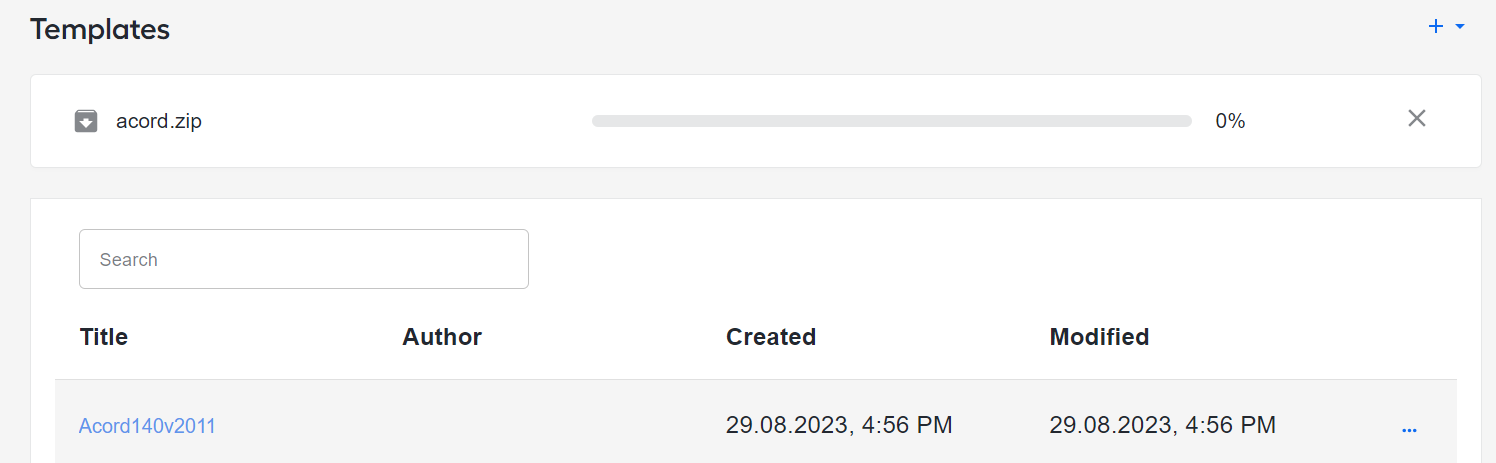
Each generated template has a unique ID and name. While the import operation is in progress, the ID and name of the imported template are compared to those of the existing templates. Conflicts are resolved in one of the following ways:
If a template with the same ID already exists at the destination, you get an error message, and the import is terminated.
If a template with the same name already exists at the destination, you get a notification where you have to choose one of the options:
Keep both: the import continues, and the conflict is resolved by automatically adding a postfix to the name of the imported template. Thus, you keep the existing template untouched and add a new one to the list.
Replace: the import continues, and the conflict is resolved by overriding the existing template with the same name.
Cancel: the import is terminated.
You can import more than one template simultaneously.
Once the import ends, the template appears on the Templates list. In the bottom right corner, an appropriate message is displayed with a View link. Click the link to open the imported template.
Test templates
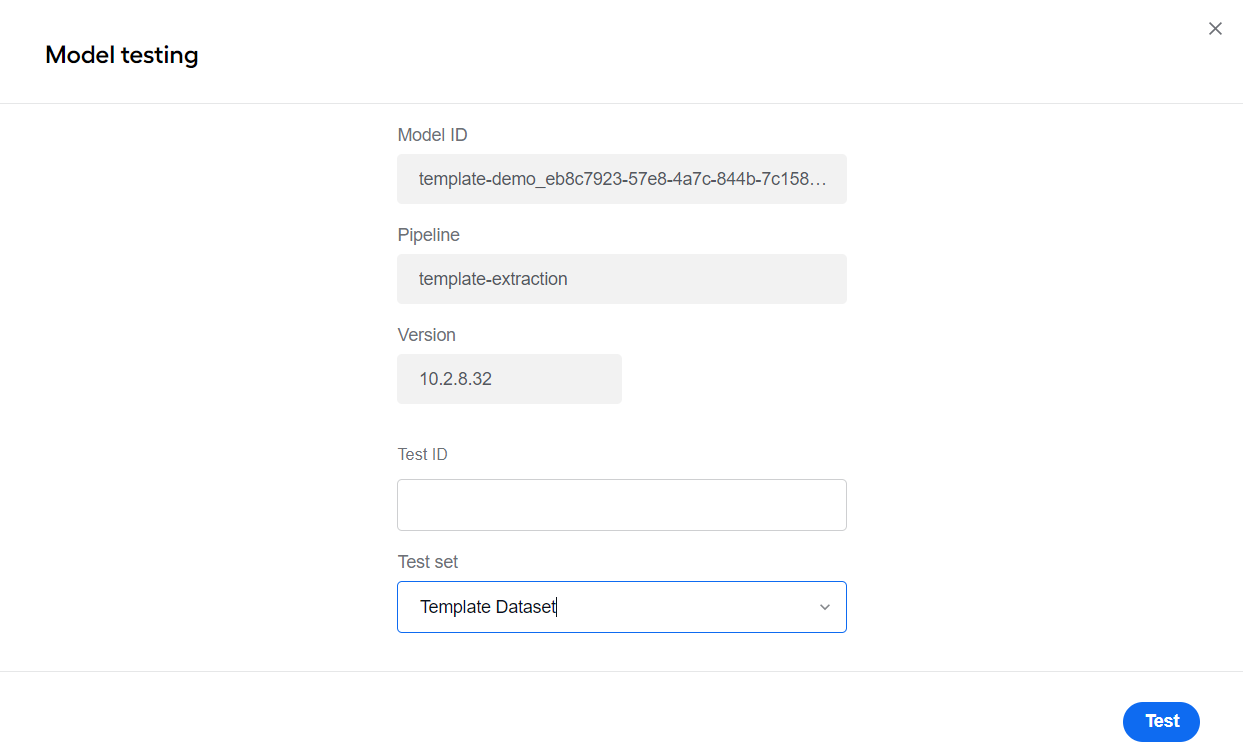
You can use model test flows to test templates and collect statics like for other Information Extraction models.
For that, start a test as described in the guide. In the Model testing window, choose a trained template model and select a prepared test set.
Use templates in Model steps
When a template transitions to the Ready to publish or Published status, the corresponding template model becomes available for usage in a Business Process. The same model also appears on the Models page of the AutoML menu if you set the Type filter to Template.
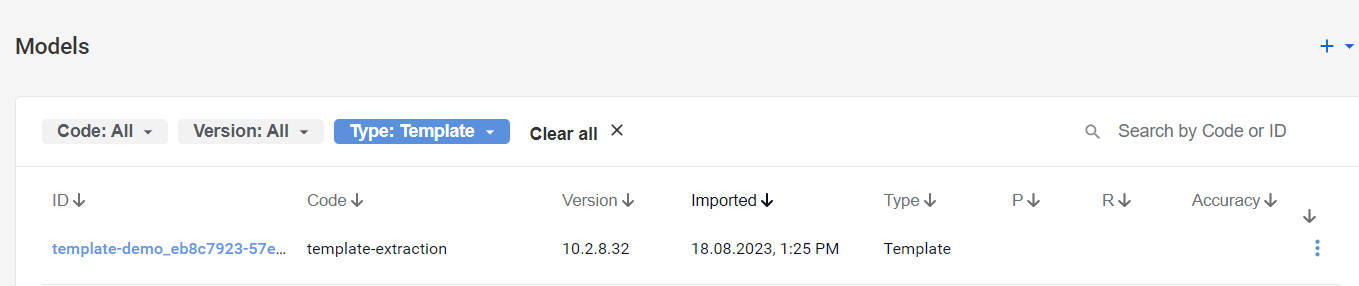
You can make use of the template model from the Model step of the Information extraction type when you build a Business Process. For details, see Add and configure Model and Dataset steps in Business Process.
Use templates to generate Manual Task forms
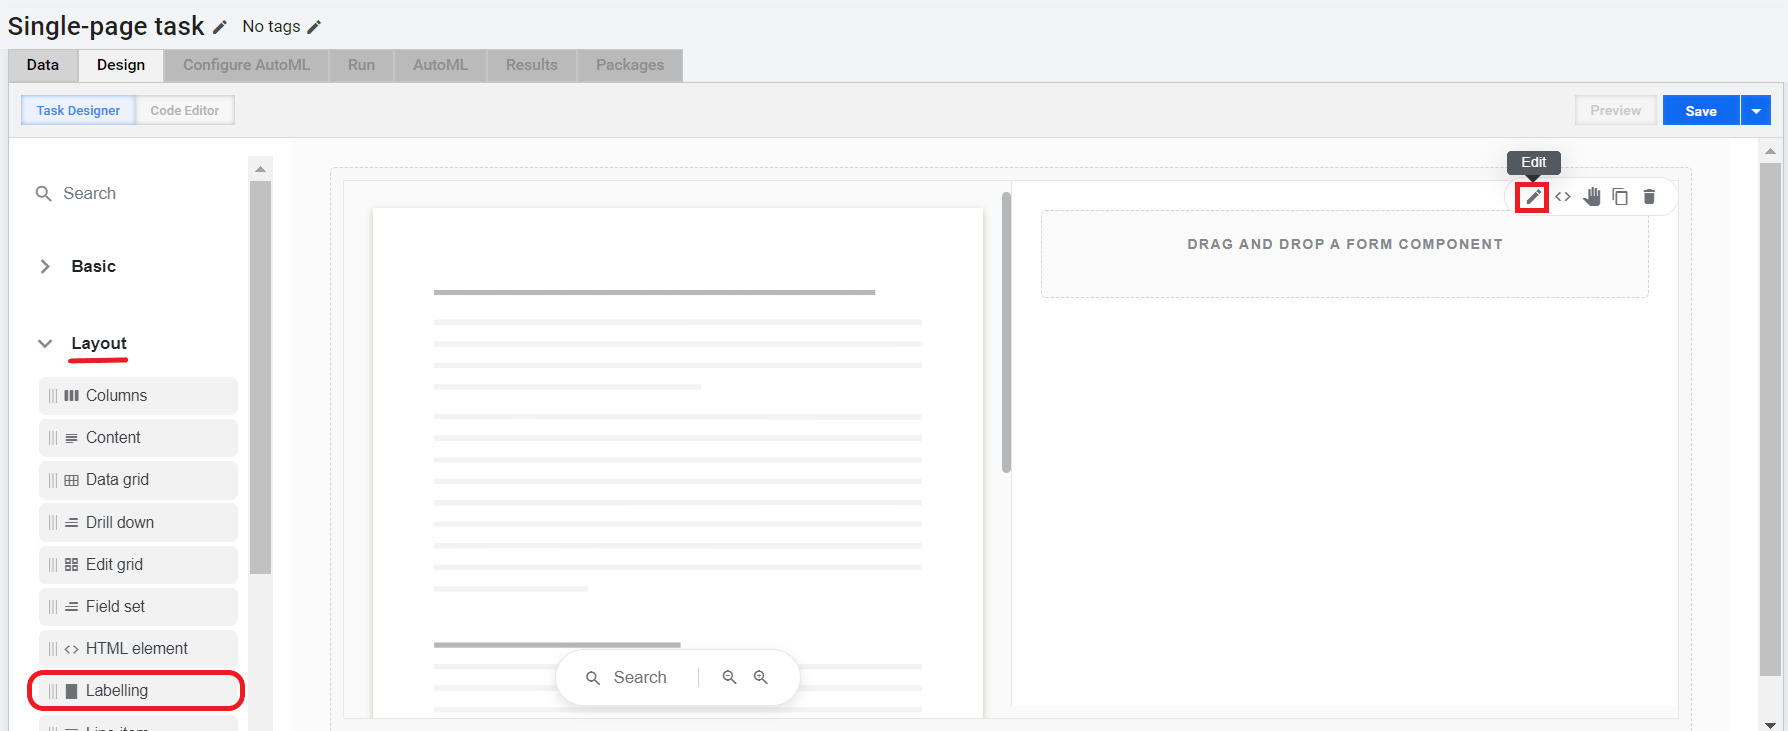
When you work in Manual Task Designer, you can use a template to build a single-page form layout with a Labelling component:
In the Layout menu, find the Labelling component and drag it to the working canvas. The component's settings page opens immediately.
Alternatively, to open the settings page, move the pointer over the Labelling component and click the Edit (pencil) button.
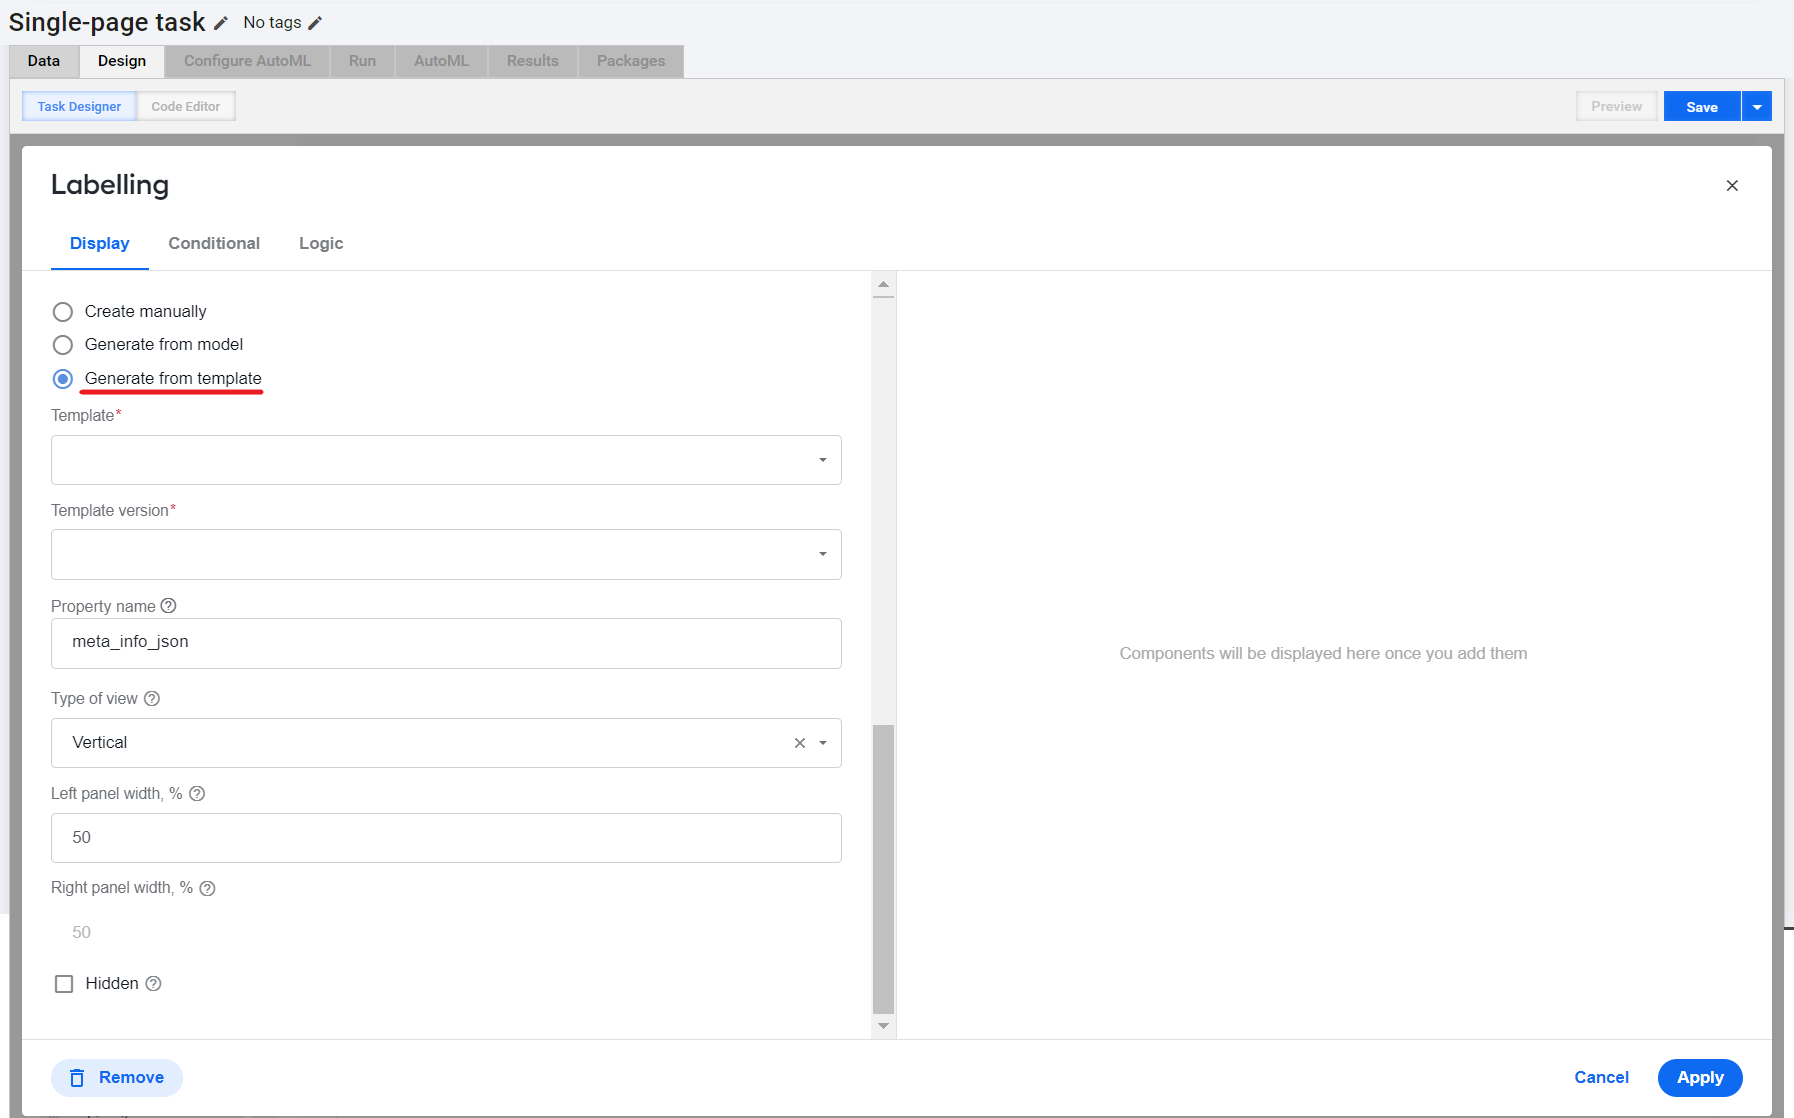
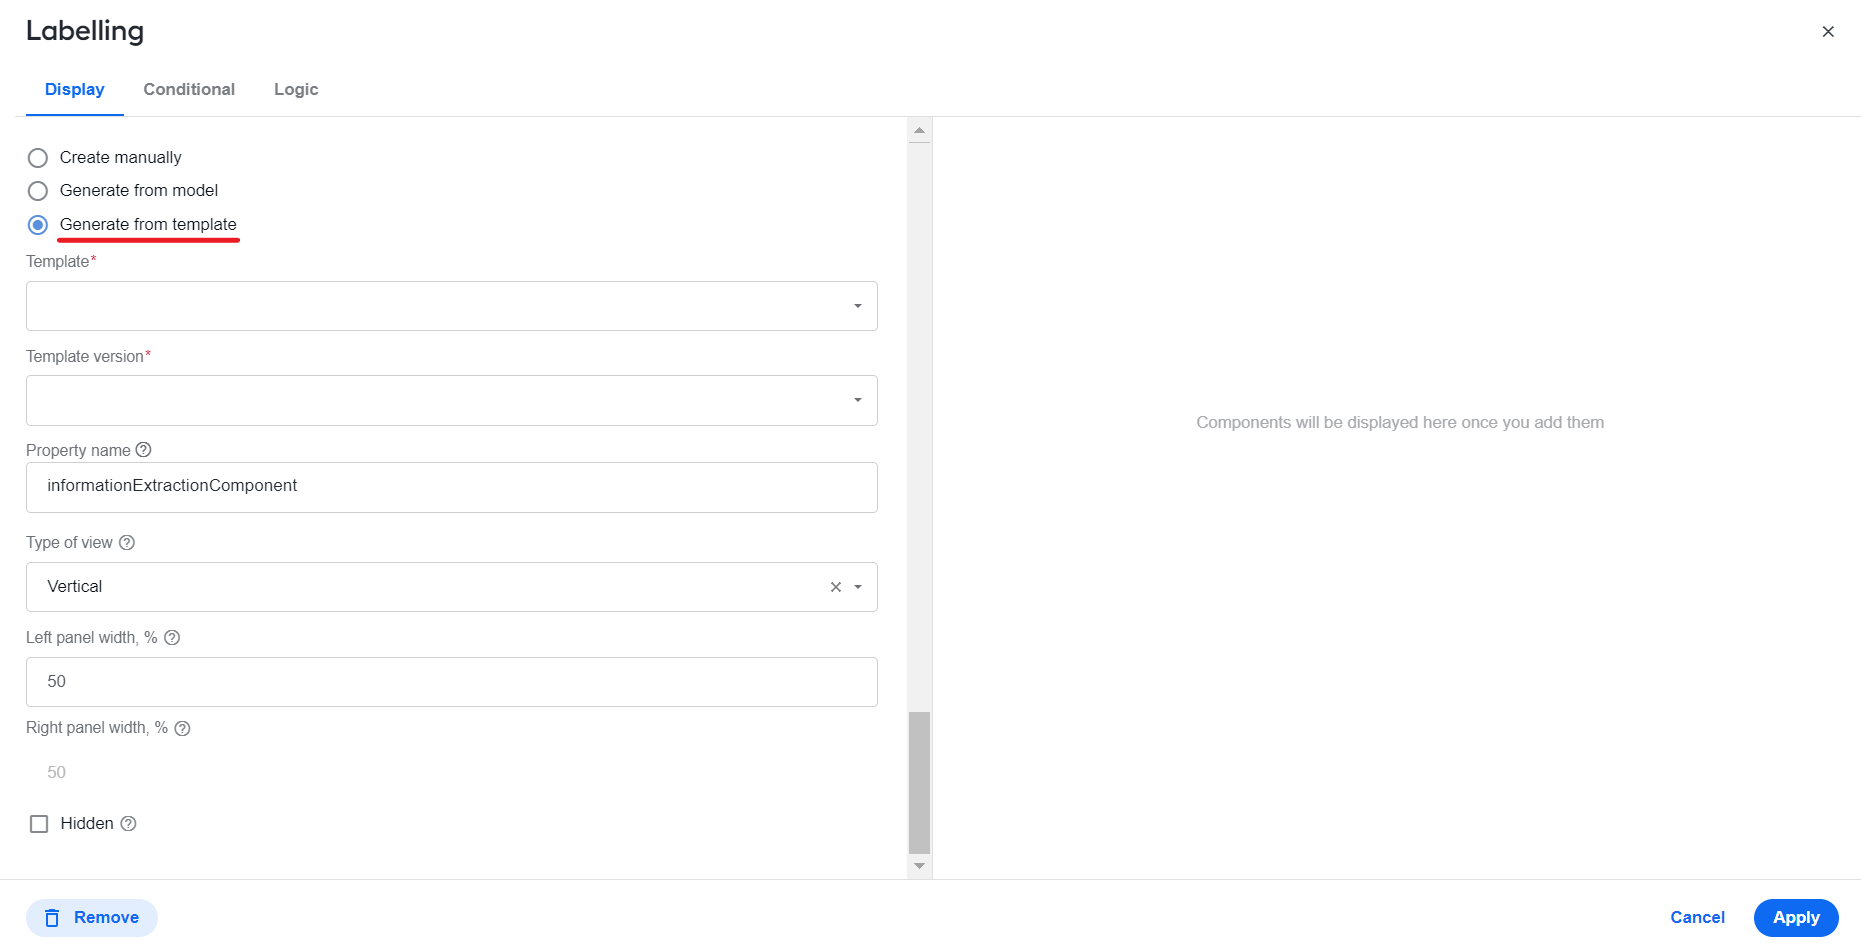
On the component's settings page, select the Generate from template option and choose a template and its version from the respective drop-down lists. Then, fill in other fields as required and click Apply.
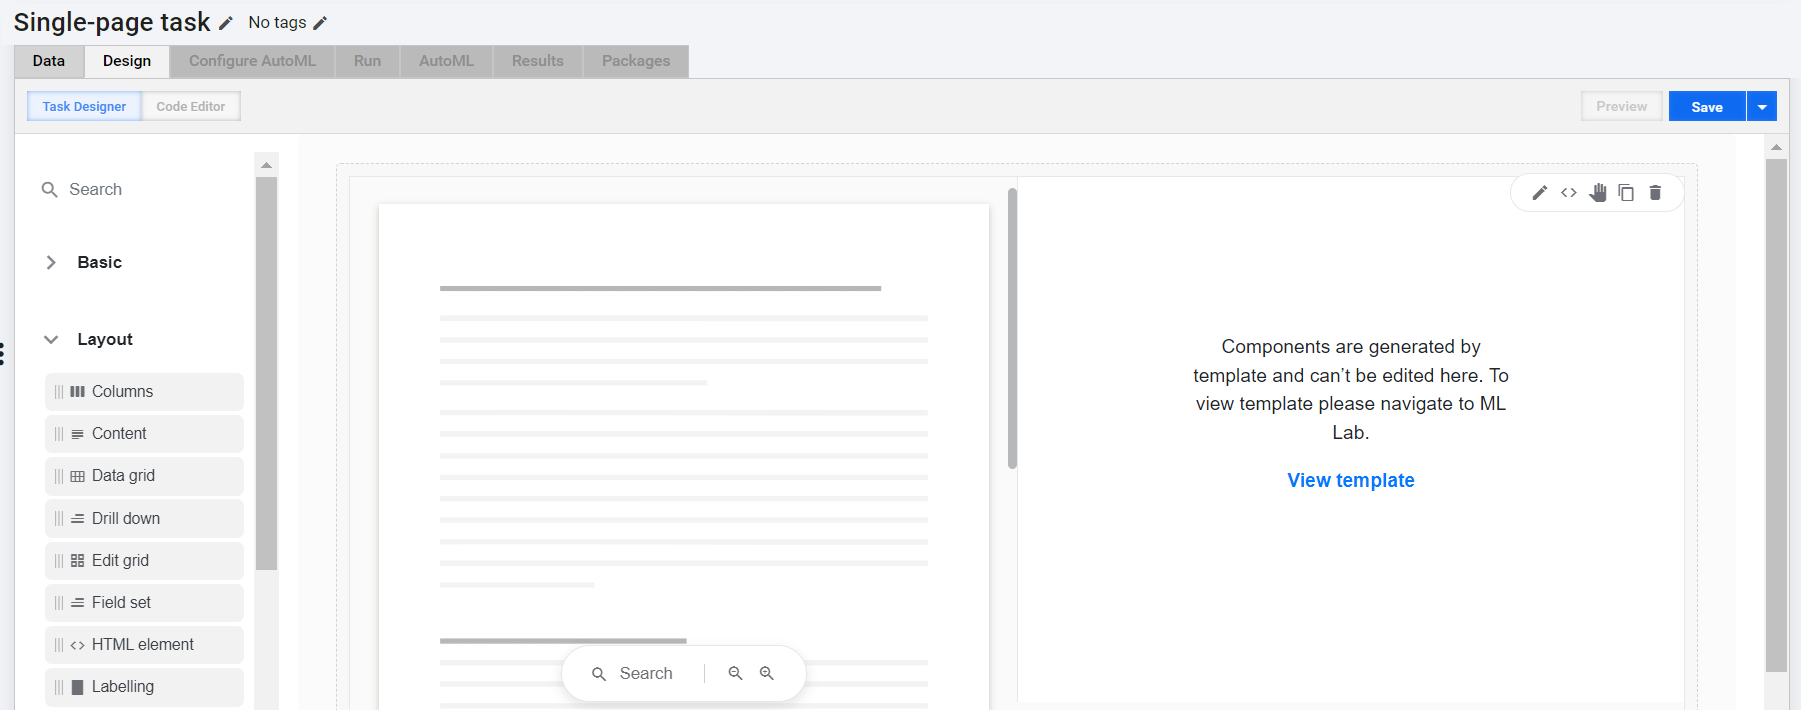
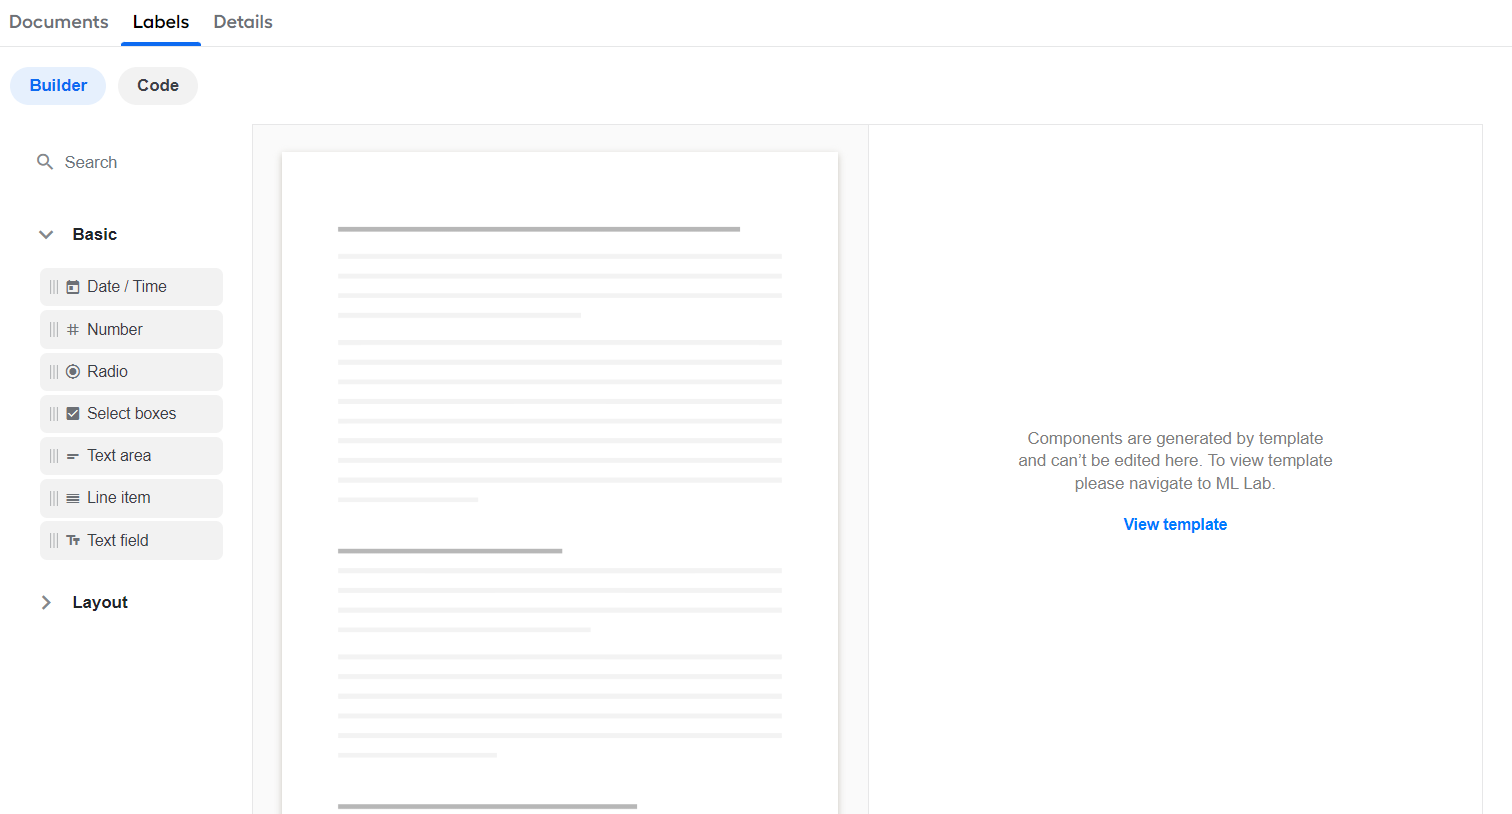
The form layout is automatically generated from the selected template. However, you cannot modify or view the template-based form configuration from Manual Task Designer. To view the form or make changes, click View template in the right panel.
For details on the single-page task layout, refer to Design Manual Tasks via Task Designer Operation.
Use templates to generate labels in datasets
Templates can be especially useful for creating test sets.
You can use templates to assist in the generation of a Document type dataset:
Create a document dataset and navigate to the Labels tab to set up labels.
On the Labels tab, make sure you are in the Builder mode. Hover over the drop area on the right panel and click the Edit button to open the settings page.
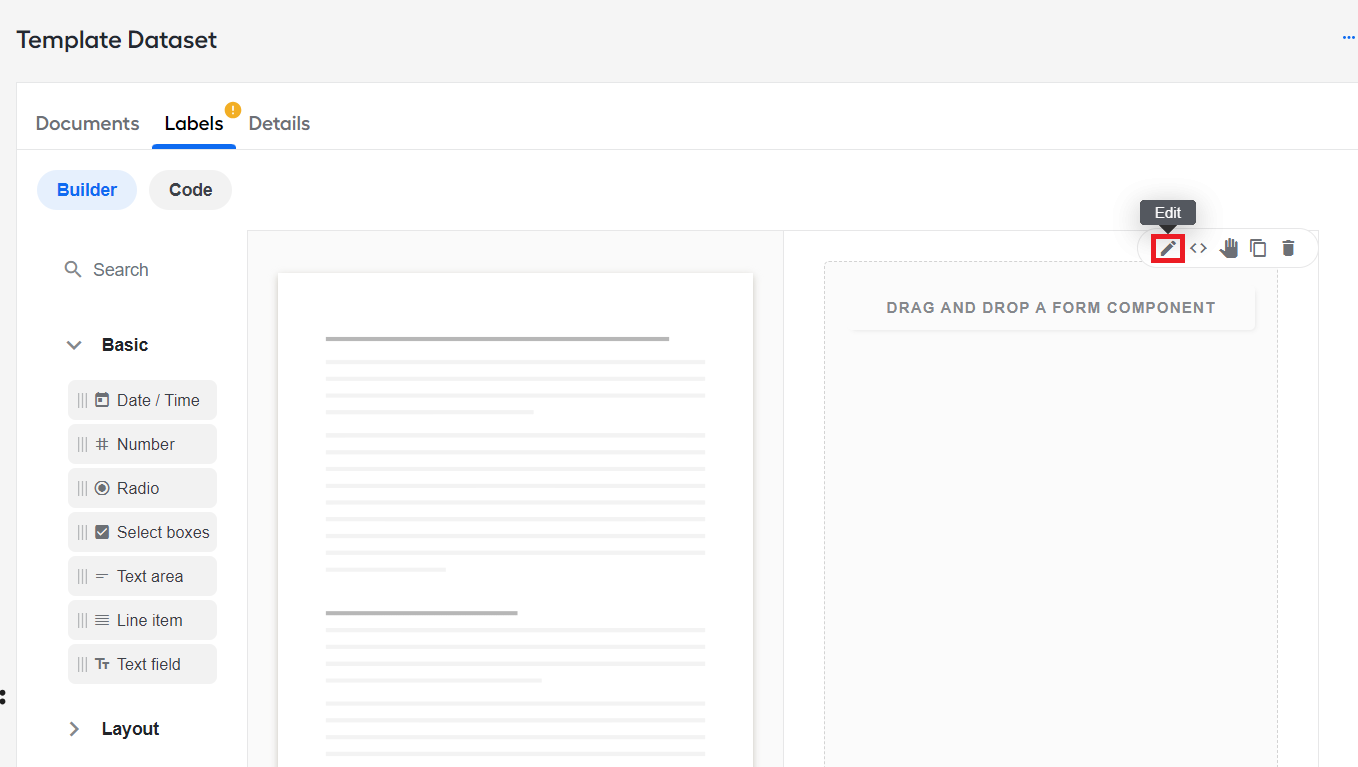
Select Generate from template, choose a template and its version from respective drop-down lists, fill in other fields, and click Apply.
The labeling layout is automatically generated from the selected template. However, you cannot modify or view it on the Labels tab. To view the layout or make changes, click View template in the right panel.
For additional information on datasets, refer to the Manage datasets guide.