Set Docker CI/CD
Requirements
| OS | CPU | RAM | Disk space |
|---|---|---|---|
| RedHat/CentOS 9.x | 2 | 8 GB | 100 GB |
The server's capacity and storage size depend on the number of implementations to be running at the same time.
Architecture
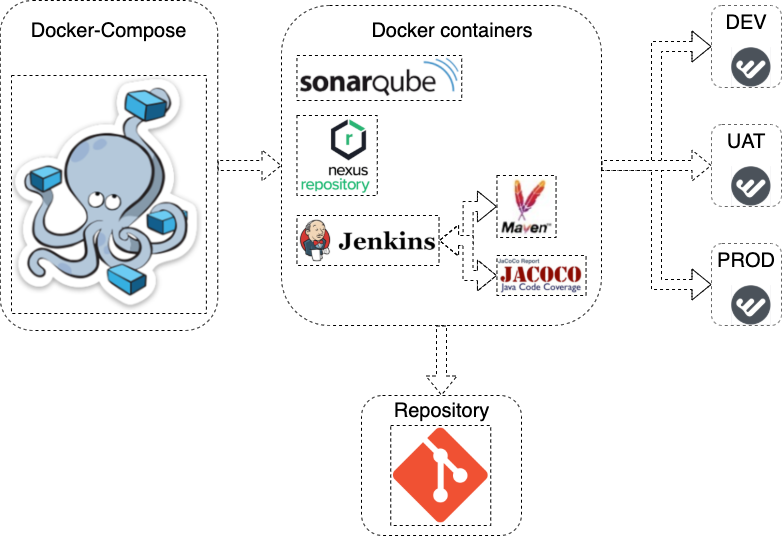
Docker Compose is the main part of this project architecture. Compose is a tool for defining and running multi-container Docker applications. With Compose, you use a YAML file to configure your application’s services. Then, with a single command, you create and start all the services from your configuration.
With the Compose commands, you can manage the whole lifecycle of your application:
- Start, stop, and rebuild services.
- View the status of running services.
- Stream the log output of running services.
- Run a one-off command on a service.
Resources
Services
| Service | License | Version |
|---|---|---|
| Docker | Apache License Version 2.0 | 19.03.11 |
| Docker-Compose | Apache License Version 2.0 | 1.25.5 |
| Jenkins | MIT | 2.222.4 (LTS) |
| Nexus Repository Manager OSS | Eclipse Public License Version 1.0 | 2.14.18-01 |
| Sonarqube | GNU Lesser GPL License Version 3 | 8.3.1 |
| Maven | GNU Lesser GPL License Version 3 | 3.5.4 |
| Java | OpenJDK / Oracle JDK | 1.8.0_242 |
Plugins
| Plugin | License | Version |
|---|---|---|
| Jacoco | MIT | 3.0.6 |
| Sonar-Scanner | GNU Lesser GPL License Version 3 | 4.3.0.2102 |
Dependencies
For additional information, see Installing ODF 2 dependencies to on-premises Nexus.
Installation
Go to https://git.workfusion.com/scm/sit/site-reliability.git for the Git repository with source files.
Download the sources to the Linux server: cicd.tar.gz.
Create the installation folder.
$ mkdir -p /opt/cicdUnpack the downloaded package to the directory.
$ tar -xvzf cicd.tar.gz -C /opt/cicd/ --strip 1Add the
server.crtandserver.keySSL certificates to the/opt/cicd/nginx/ssldirectory.Go to the installation directory and execute the installation script:
$ cd /opt/cicd
$ chmod 755 install.sh
$ ./install.sh
Cleanup
Go to the installation directory and execute the cleanup script:
$ cd /opt/cicd
$ chmod 755 clean.sh
$ ./clean.sh
Git repository configuration
Download the source files: git_files.tgz.
In the following files, replace
SERVER_ADDRwith your server's DNS:deploy.sh:source="https://SERVER_ADDR/nexus/content/sites/cicd-mvp-release"
jenkins/ci_cd_declerative.jenkinsfile: nexus_dns = 'SERVER_ADDR'
pom.xml: <url>https://SERVER_ADDR/nexus/content/repositories/wf-dependencies/</url>
pom.xml: <url>https://SERVER_ADDR/nexus/content/repositories/wf-dependencies/</url>Add the files to your Git Repository.
Commit and push the changes.
Post-installation steps
Updating secure credentials
To update the secure credentials in the Jenkins web UI, follow the steps below:
Go to Jenkins > Credentials > System > Global credentials (unrestricted).
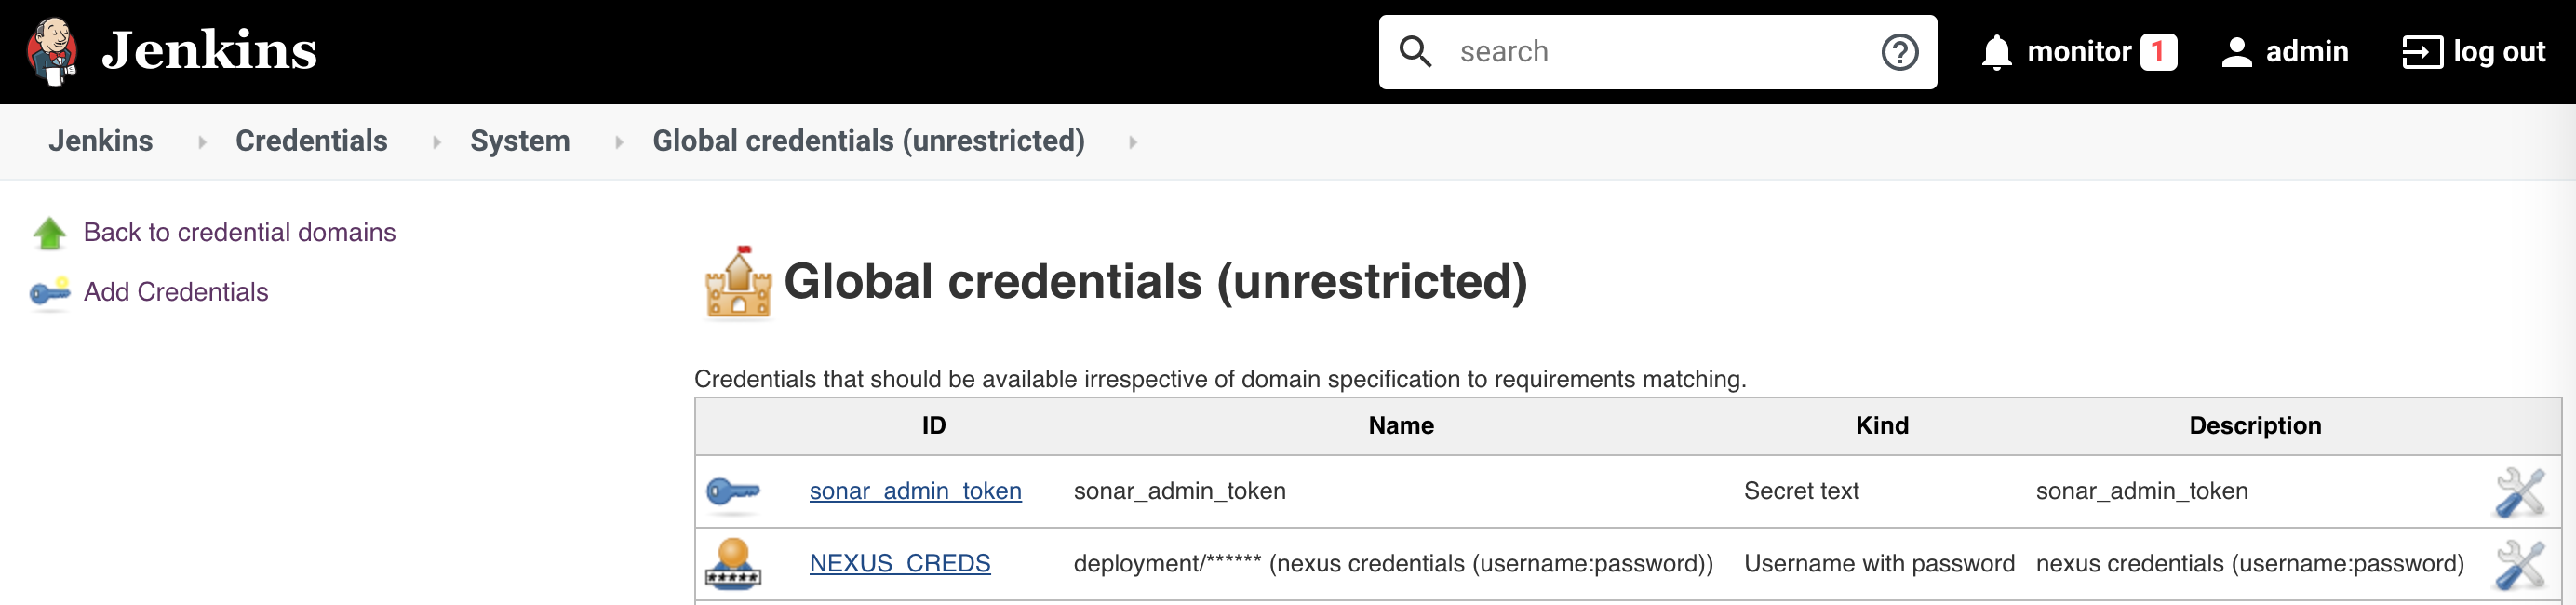
Click Add Credentials and enter the credentials for the Control Tower user.
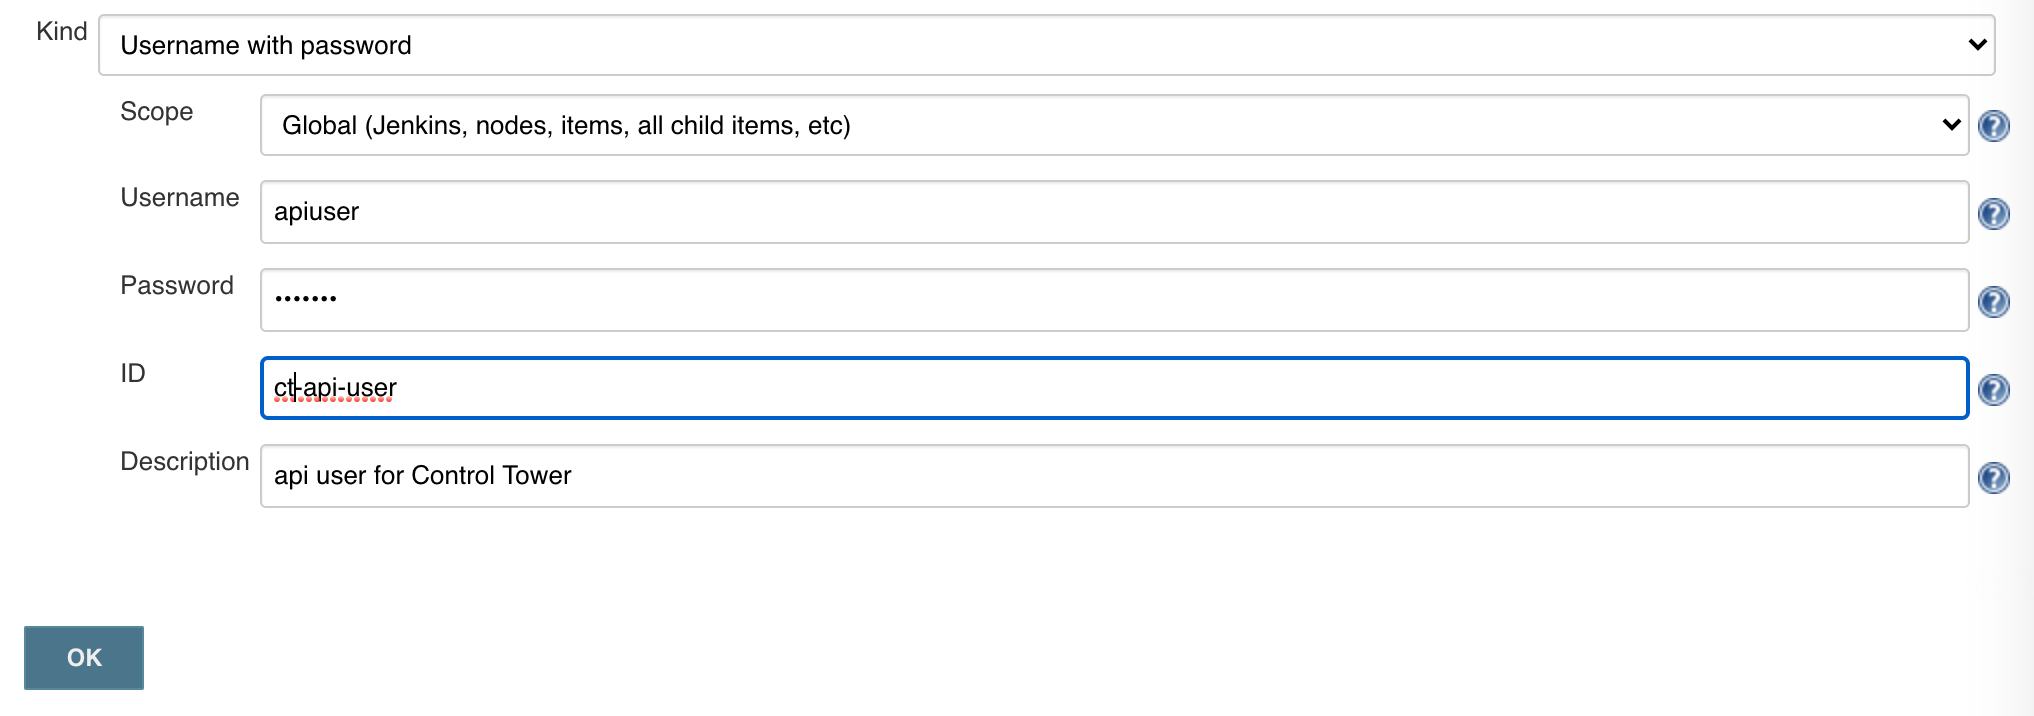
Add another record with credentials for the Git repository. Use a username with the password or SSH keys.
Defining Git Repository for Jenkins pipeline
To define a Git repository for the Jenkins pipeline configuration, follow the steps below:
Go to Jenkins > ci_cd-declerative pipeline > Configure.
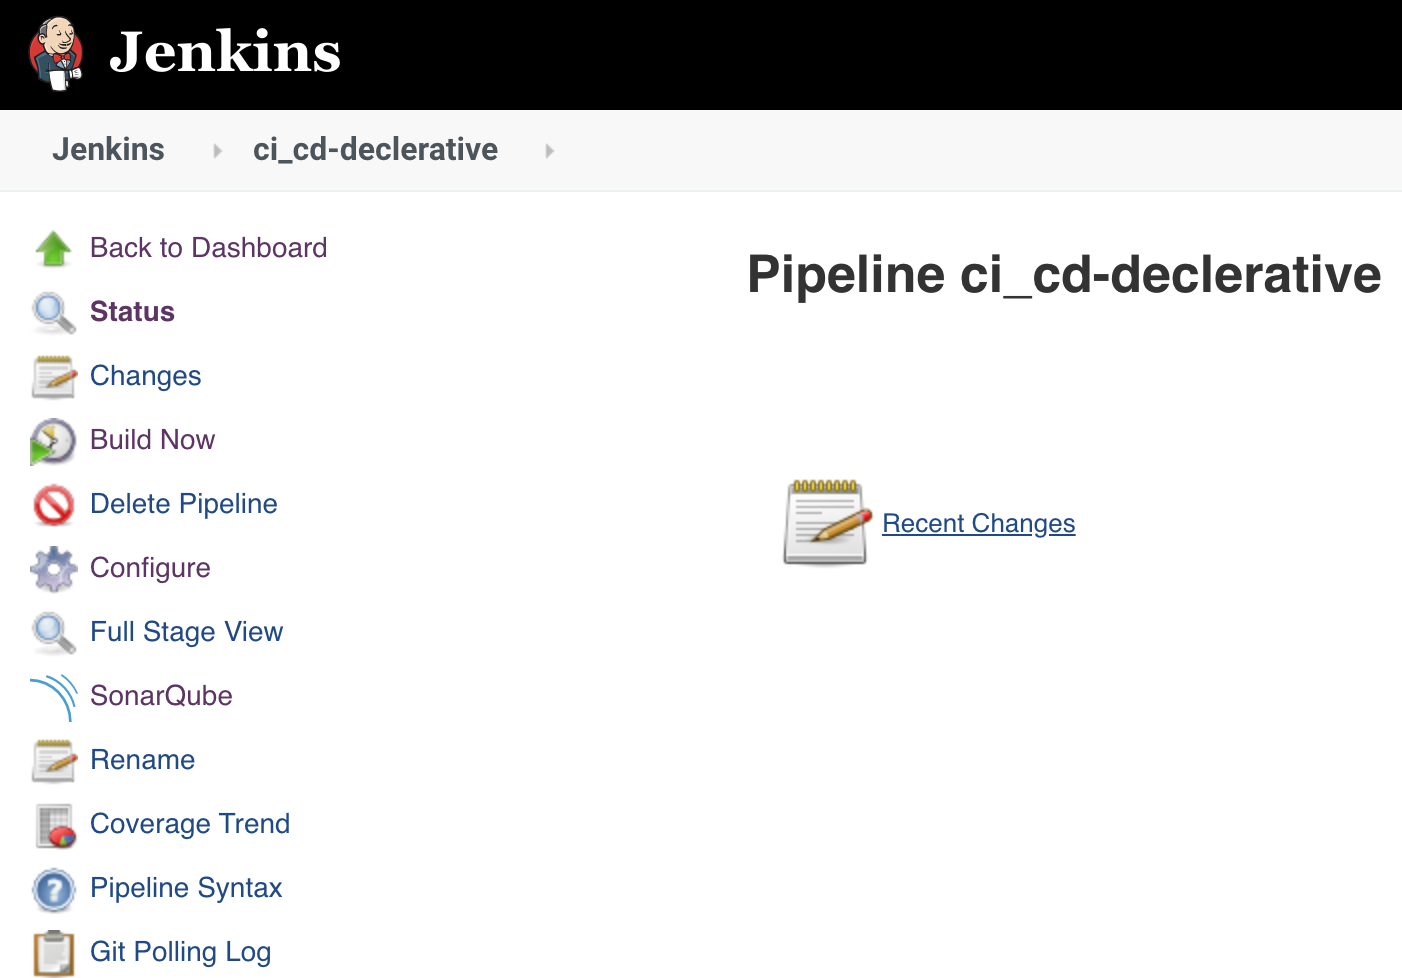
In the Pipeline section, set Repository URL, Credentials, and Branch Specifier.
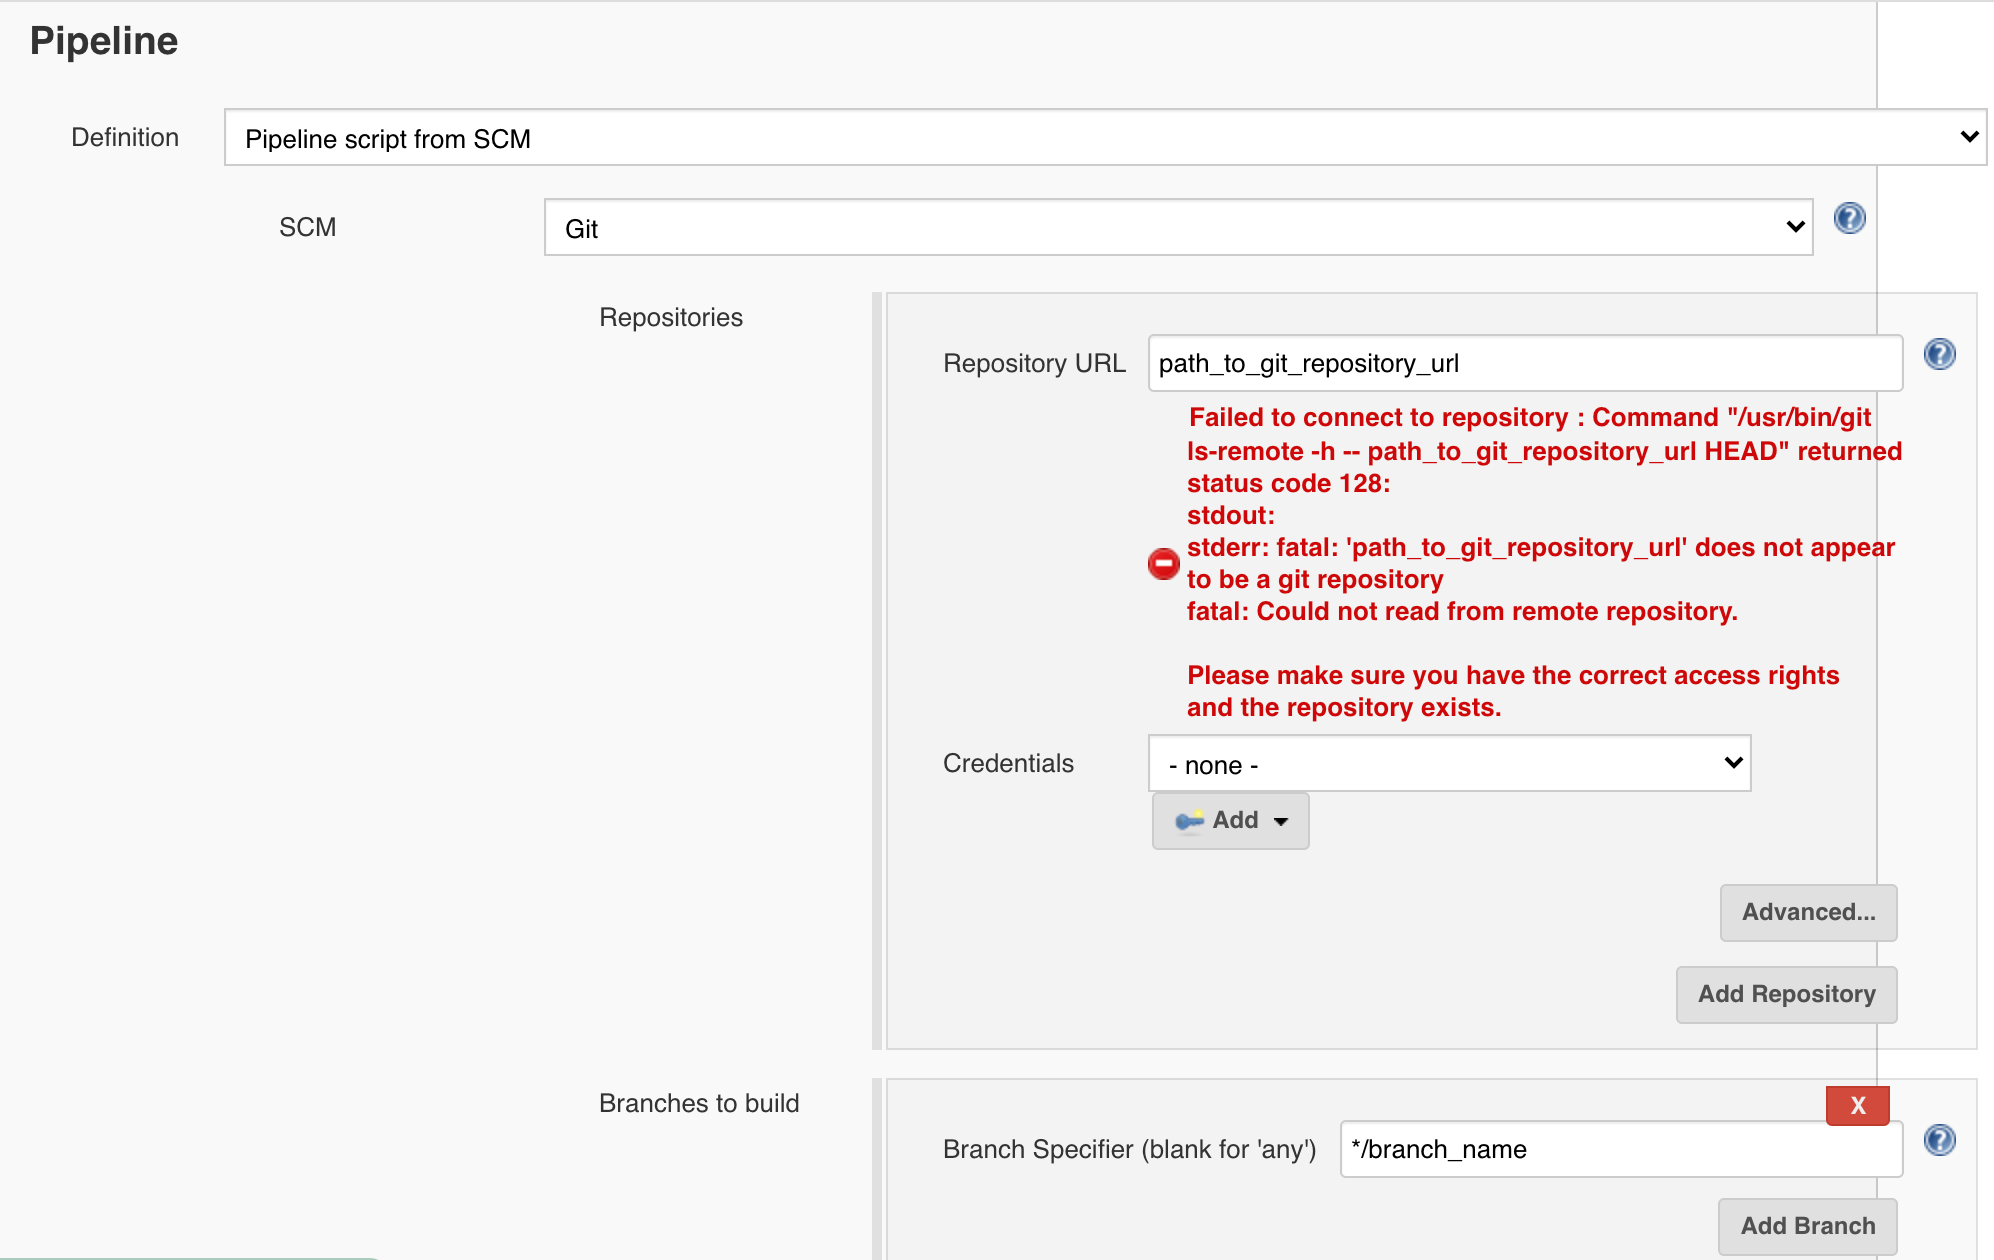
Save the changes.