Work with queues
In Workspace, you usually work with the following queues:
- The QUEUES section contains:
- All assignments: view all available assignments in the list, with the most recent ones displayed at the top. The queue is shown by default.
- My assignments: view the list of assignments assigned to you. If you have no tasks assigned, 0 assignments are displayed. If you assign assignments to yourself, the number of assignments in the queue is changed accordingly. The queue is shown by default.
- Unsaved queue: once you start filtering or sorting assignments, you are switched to Unsaved queue where you can create a new queue.
- The SAVED BY ME section contains your saved custom queues. You can remove queues from the SAVED BY ME section only. If you remove all your custom queues, the SAVED BY ME section is not shown.
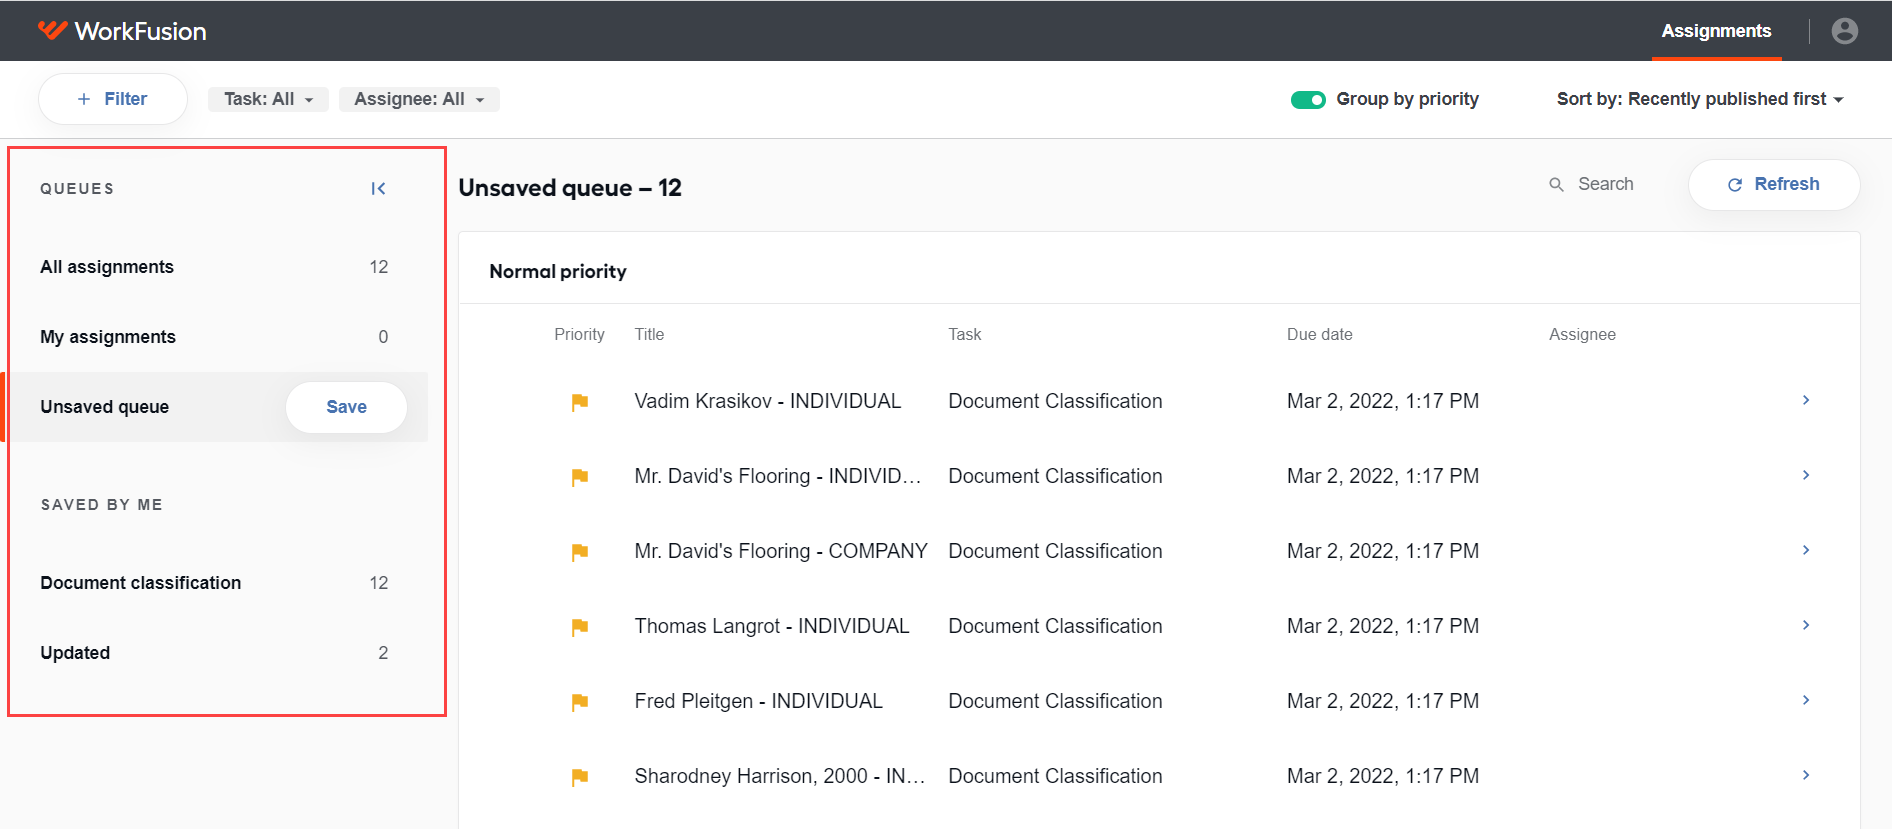
If you cannot see the QUEUES panel or access any of the functionality described in the article, check your Workspace permissions.
By default, you see all assignments grouped under the All assignments queue. You cannot edit this queue, but you can create a custom queue based on it.
A custom queue is a dynamic queue with assignments filtered using specific business attributes.
Let's consider different scenarios when working with custom queues:
You work with a queue that does not have new assignments when you work with it.
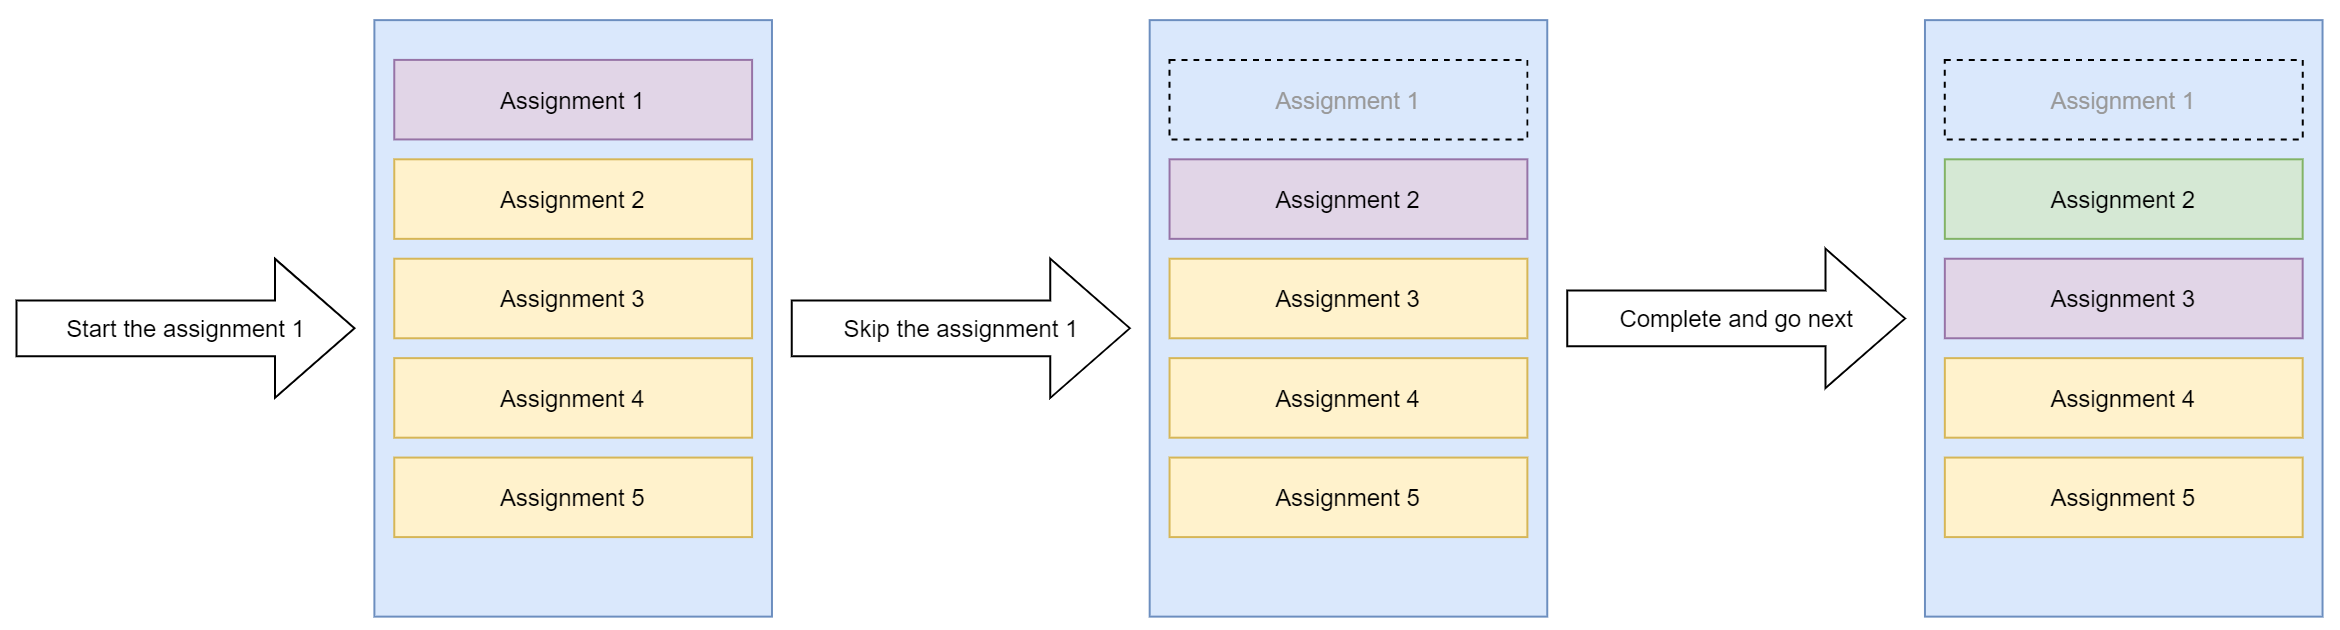
You start to work with a queue ignoring the first one or more assignments.
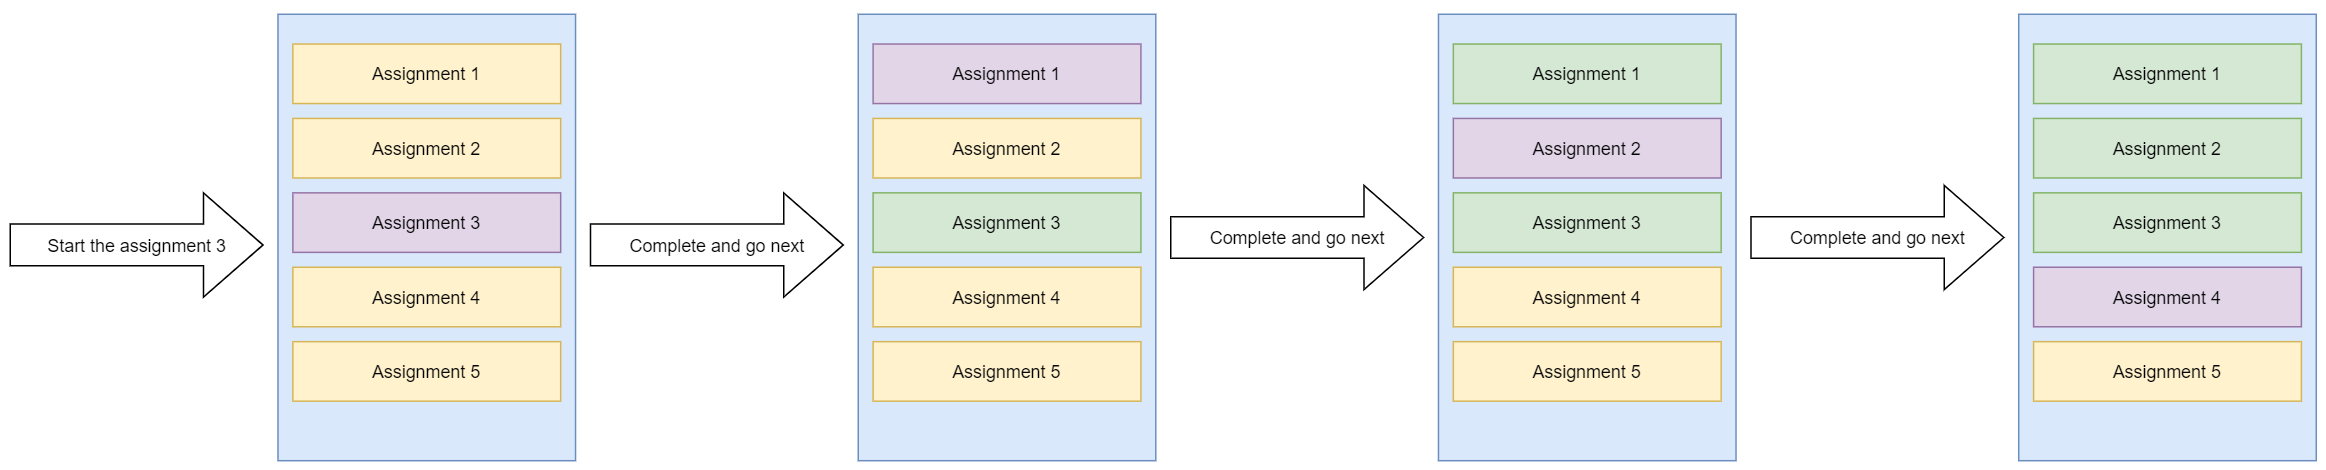
If you select an assignment from the middle of a custom queue, you begin with the first one from the queue after you complete or skip the selected assignment.
You have started to work with a queue, but you get new assignments for the queue.
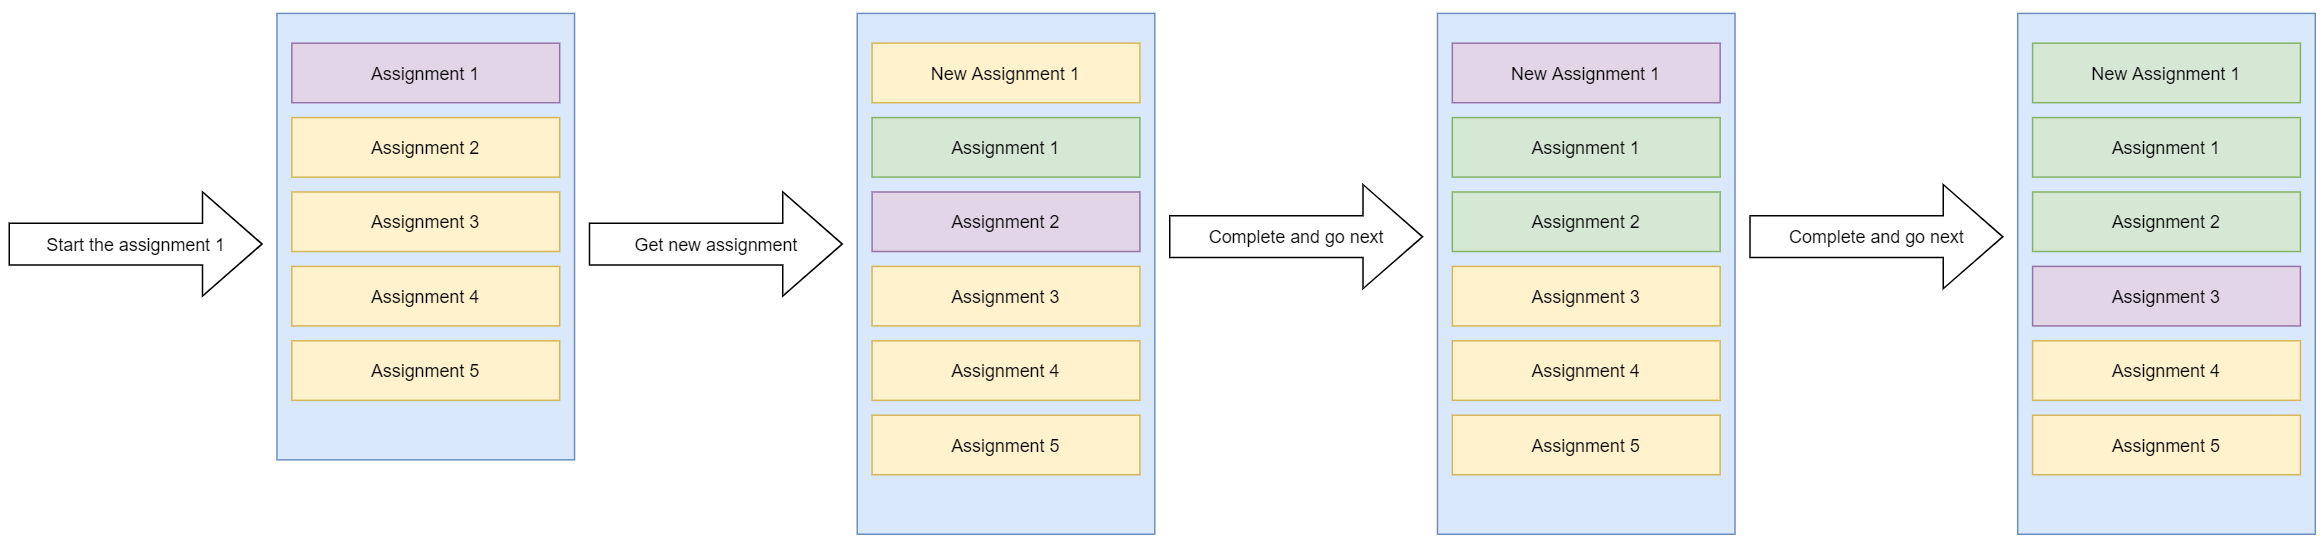
If you get a new assignment when working with a custom queue, you process the newest assignment as soon as you complete or skip the current one.
A custom queue is a dynamic structure. Custom queues of the same user or custom queues of different users can overlap.
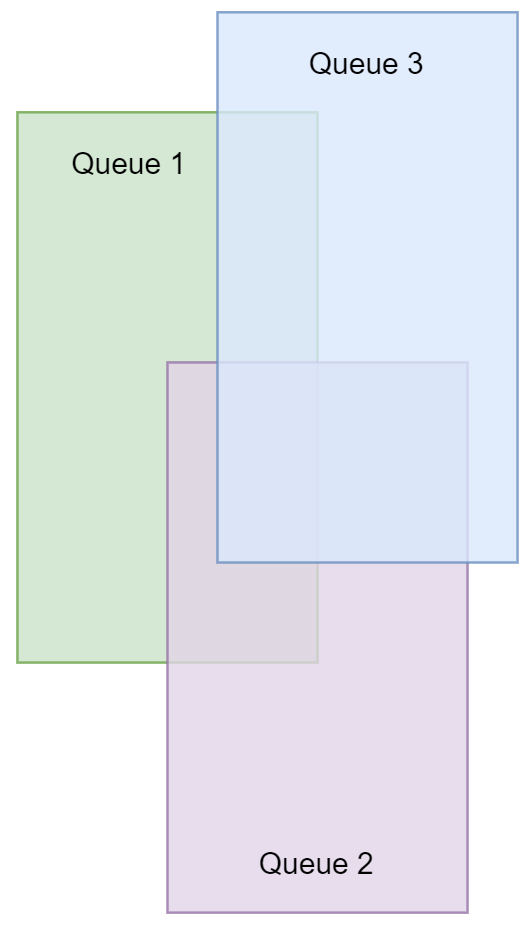
The overlapping implies: if an assignment state is changed in one custom queue, and the assignment exists in other custom queues, all custom queues are updated accordingly.
Add queue
As soon as you start filtering assignments, the assignment list changes according to selected criteria, and an unsaved queue is formed. You can start processing assignments right from the draft queue or save it.
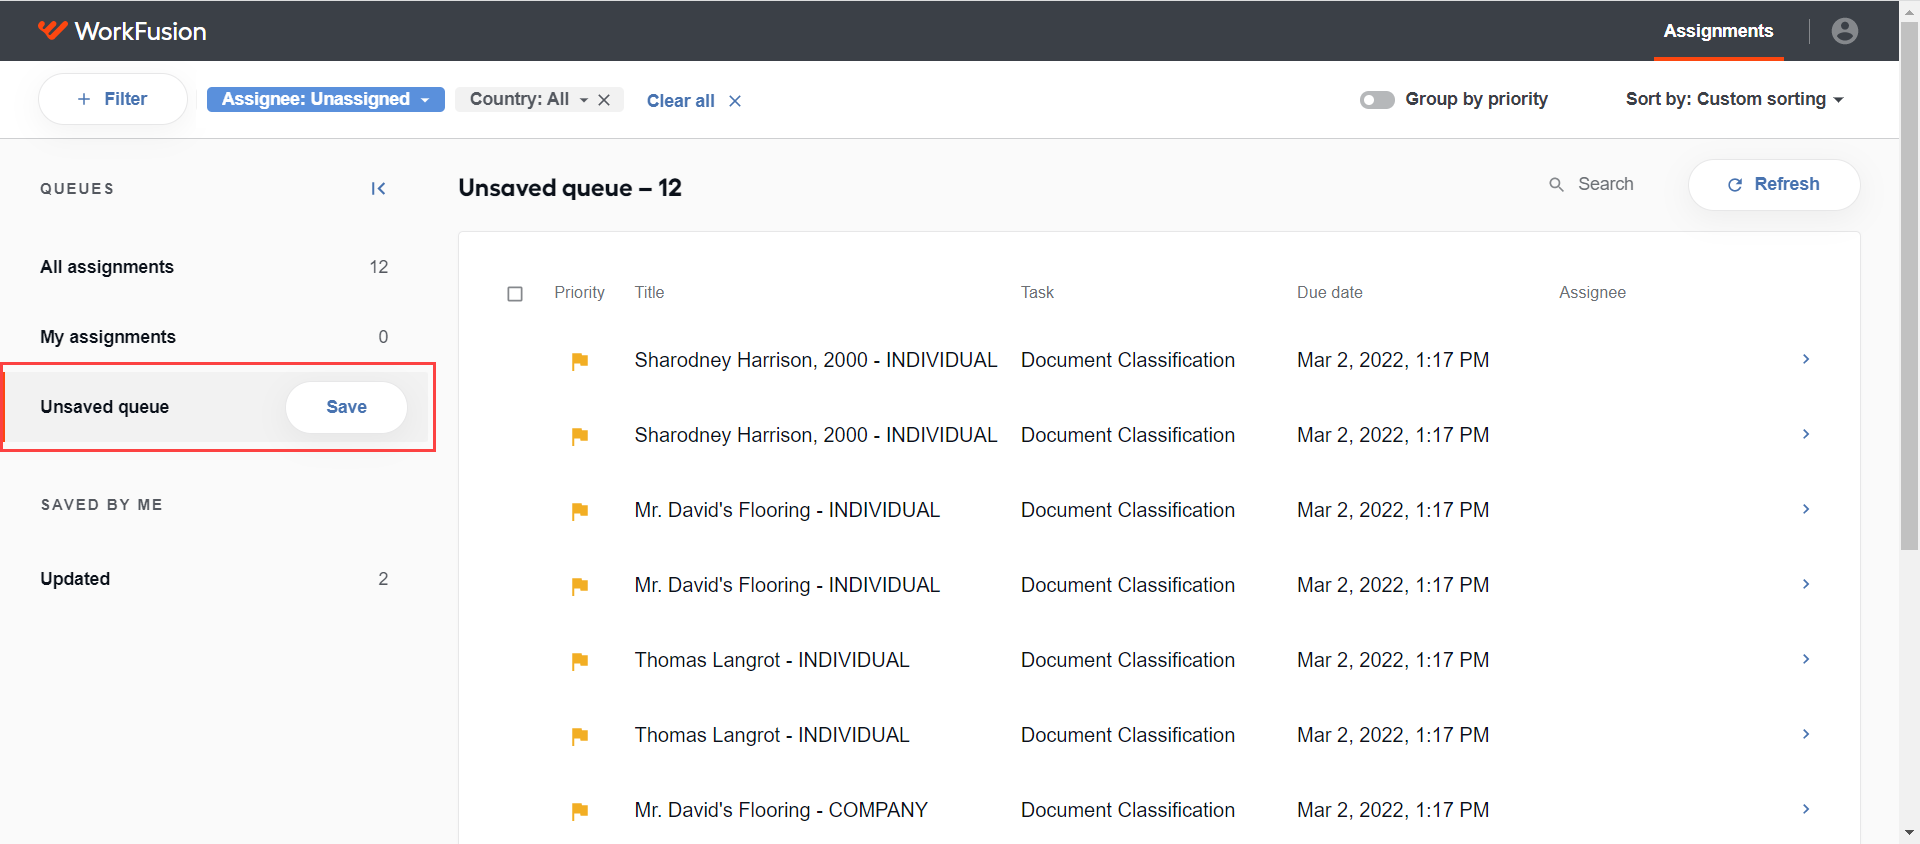
If you switch to another queue, the draft queue is discarded, and your changes are lost. But if you log out and log in again, you can continue working with it. The best option is to save the queue to avoid losing the preset filtering order.
To save a queue, do as follows:
Specify your filtering criteria.
Click Save.
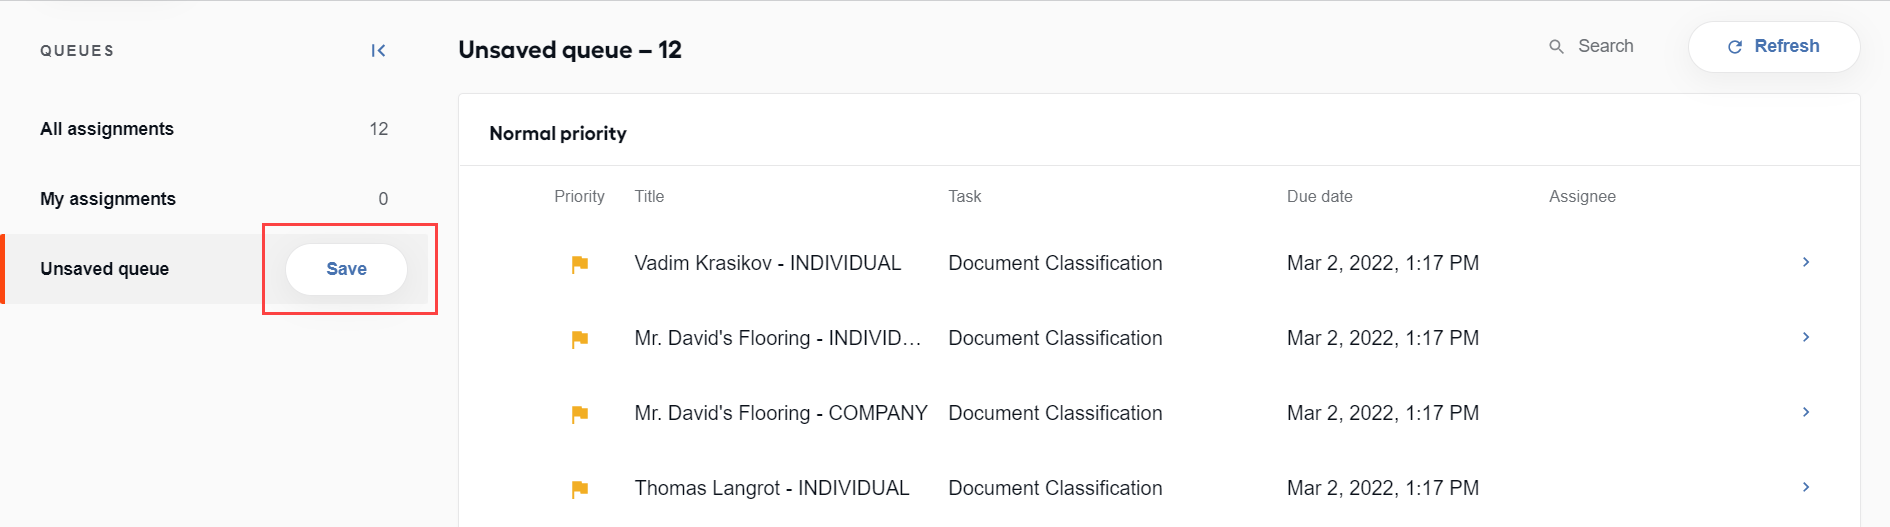
In the window that opens, specify the queue name and click Save.
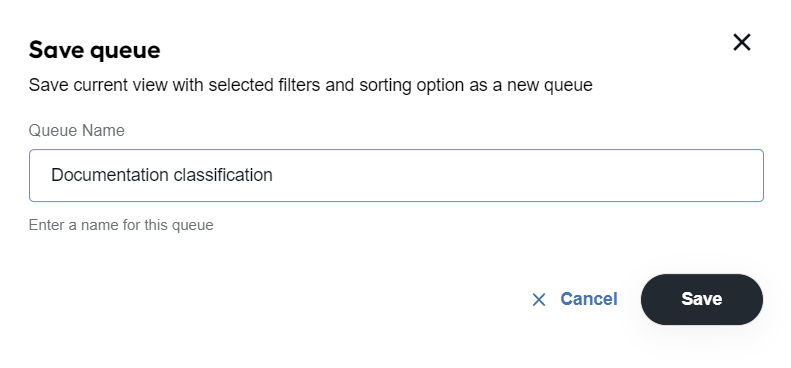
The saved queue appears in the SAVED BY ME list of queues.
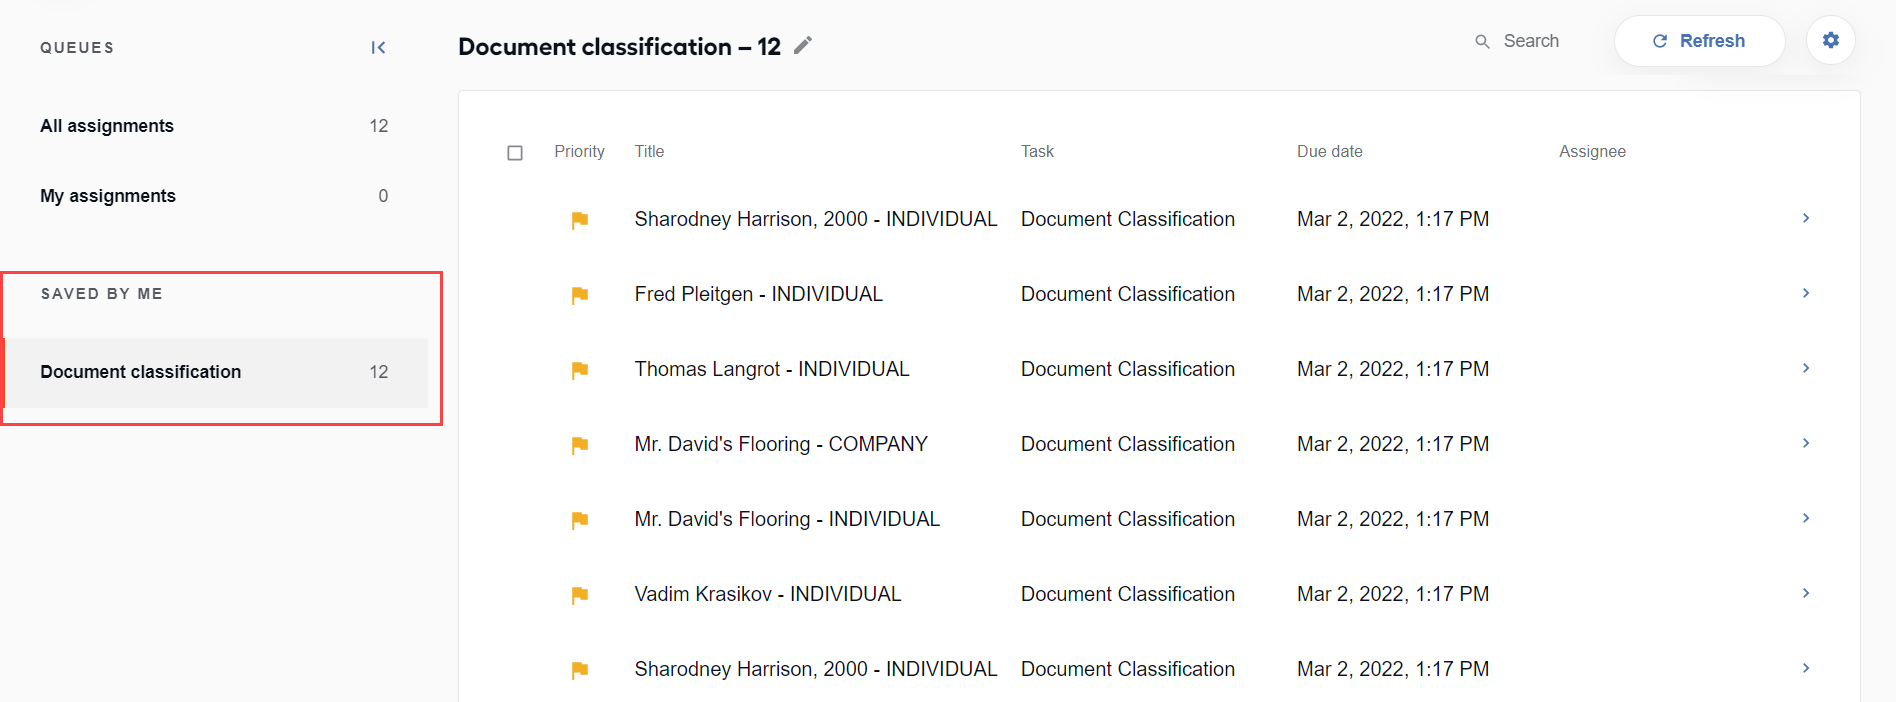
Once the custom queue is saved, you can start working on its assignments. When you initiate execution, the assignments are displayed the way they are arranged within the created queue. Custom queues are updated in real time, including the number of assignments in the list and statuses.
Also, mind the following important considerations:
If you start an assignment from the middle of a queue and complete or skip it, you resume processing the rest of the tasks from the first assignment in the queue.
If you skip an assignment from a custom queue, the assignment is returned to the common list outside the custom one and becomes available for other users. You can take this assignment later if you change your mind.
Update queue
To update a custom queue, follow the instruction below:
Select new business attributes from filtering options. The assignment list is updated according to the selected business attributes.
Click Update next to the queue name.
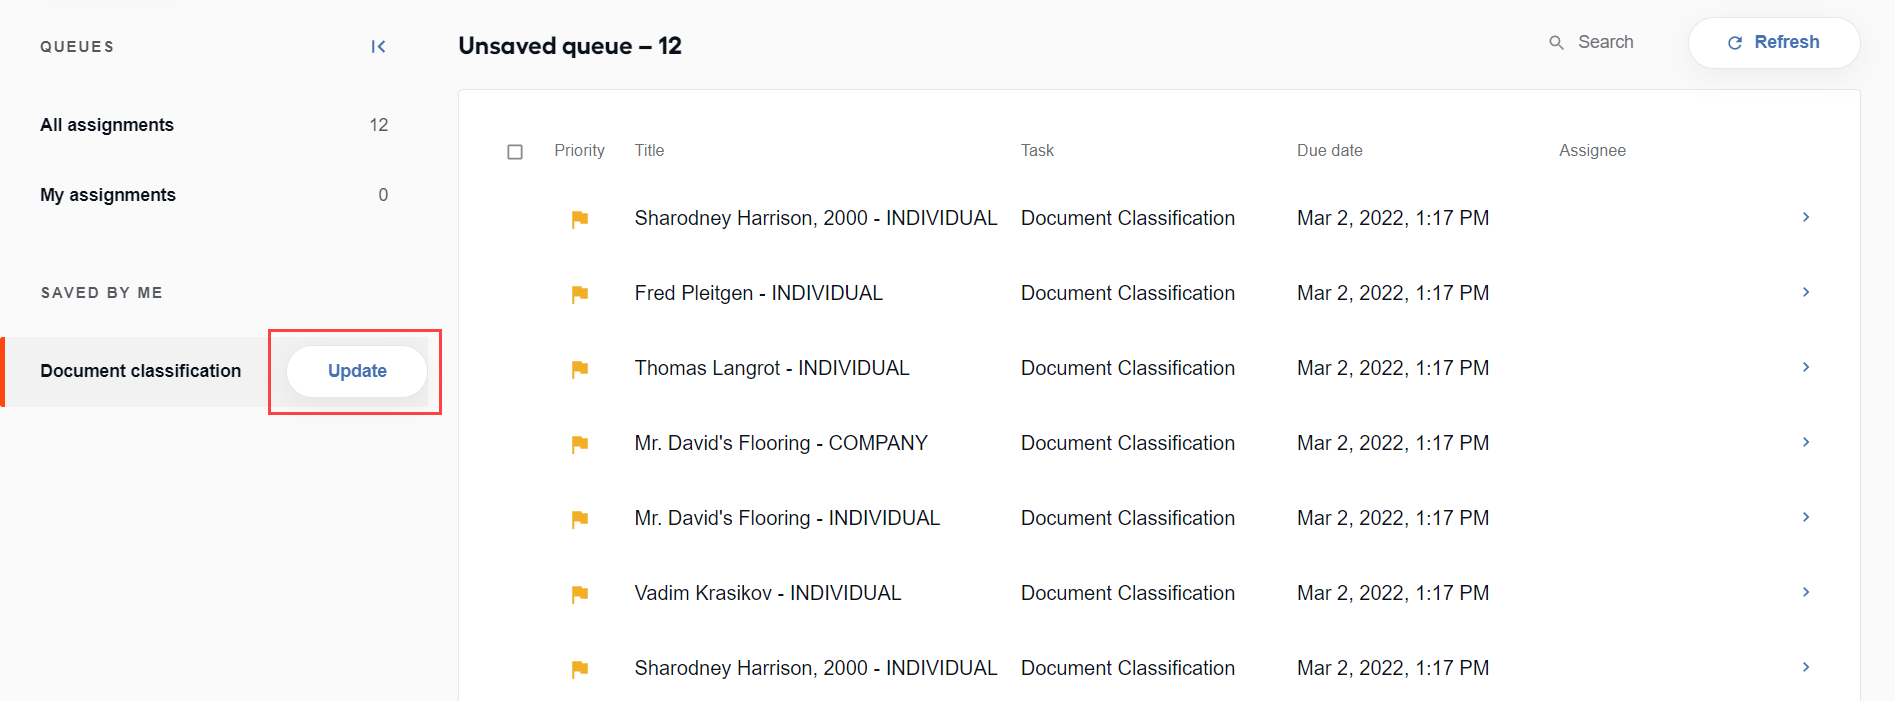
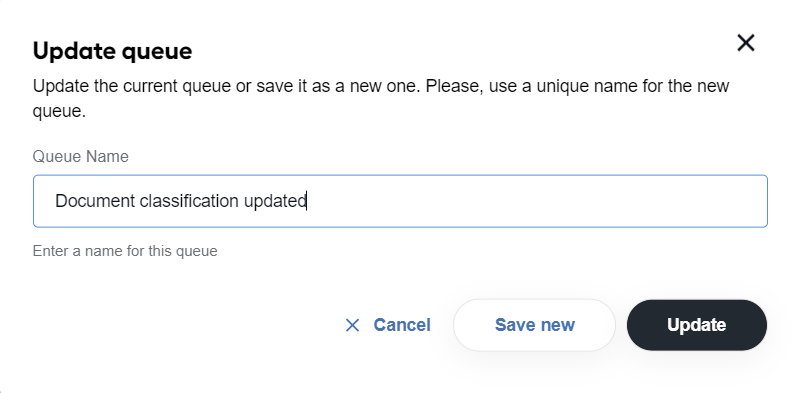
In the popup that follows, save the changes in the queue.
- To update the current queue, click Update.
- To save a new queue, specify a unique name and click Save new. The queue appears in the SAVED BY ME list of your queues.
Rename queue
To change the name of your queue, do as follows:
Hover over the queue name and click the pen icon.
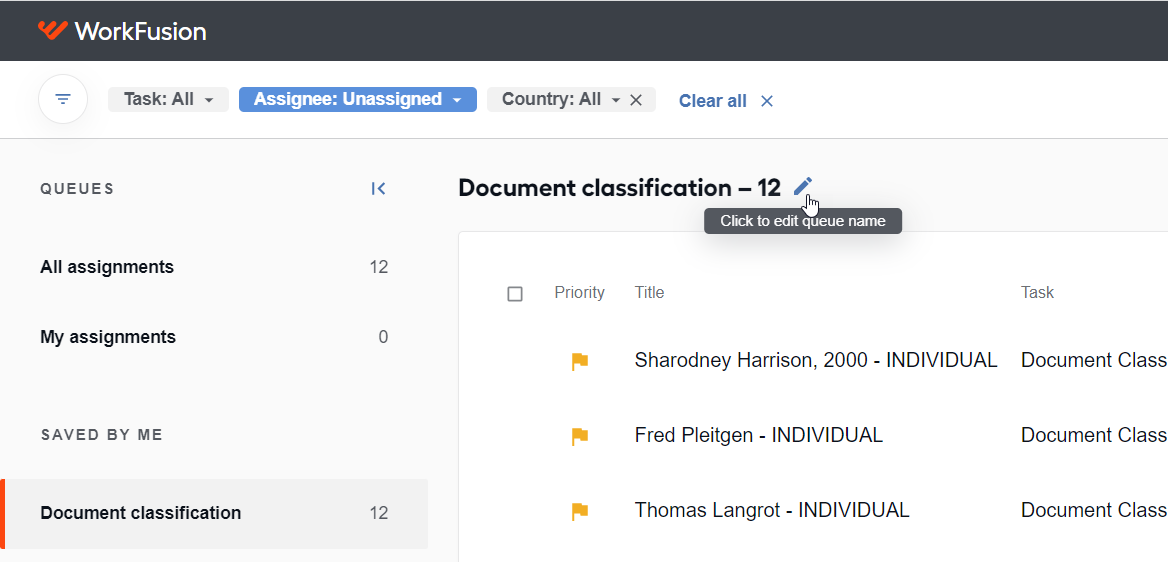
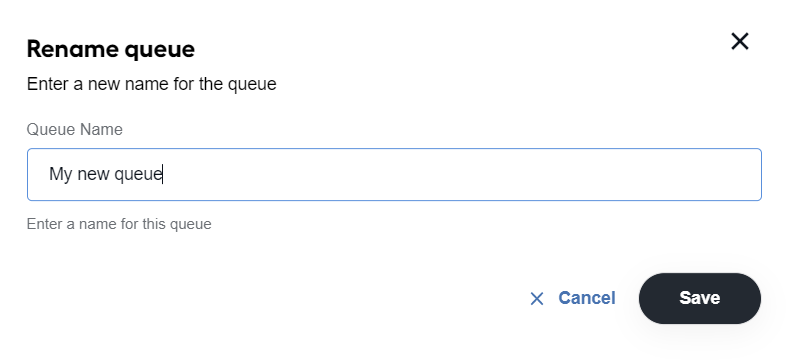
In the popup that follows, enter a new name for the queue and click Save. If you select Cancel, the changes are discarded.
Remove queue
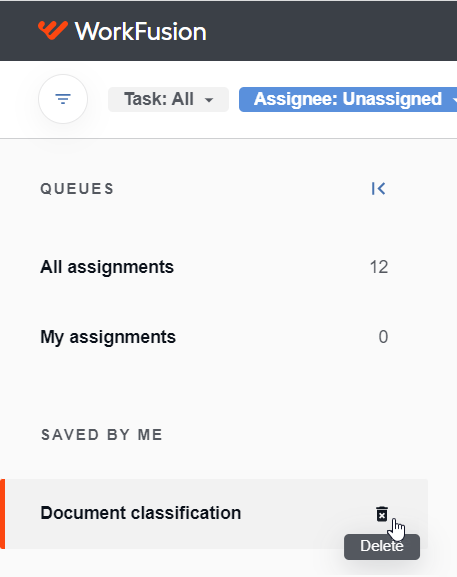
You can delete queues from the SAVED BY ME list only. Follow the instruction below:
Hover over the name of the queue you want to delete and click the bucket icon.
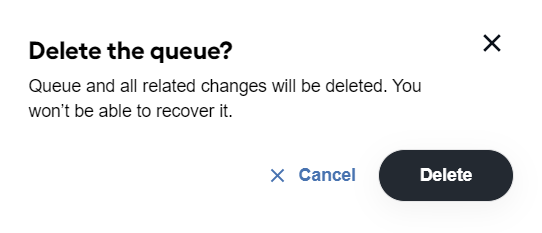
In the window that follows, click Delete to confirm the deletion. Mind that you will not be able to recover a removed queue.
For more information on working with queues, read the Workspace how-tos.