Work with queues
In WorkSpace, you usually work with the following queues:
- The QUEUES section contains:
- All assignments: view all available assignments in the list, with the most recent ones displayed at the top. The queue is shown by default.
- My assignments: view the list of assignments assigned to you. If you have no tasks assigned, 0 assignments are displayed. If you assign assignments to yourself, the number of assignments in the queue is changed accordingly. The queue is shown by default.
- Unsaved queue: once you start filtering or sorting assignments, you are switched to Unsaved queue where you can create a new queue.
- The SAVED BY ME section contains your saved custom queues. You can remove, update, rename, or share queues from the SAVED BY ME section only. If you remove all your custom queues, the SAVED BY ME section is not shown.
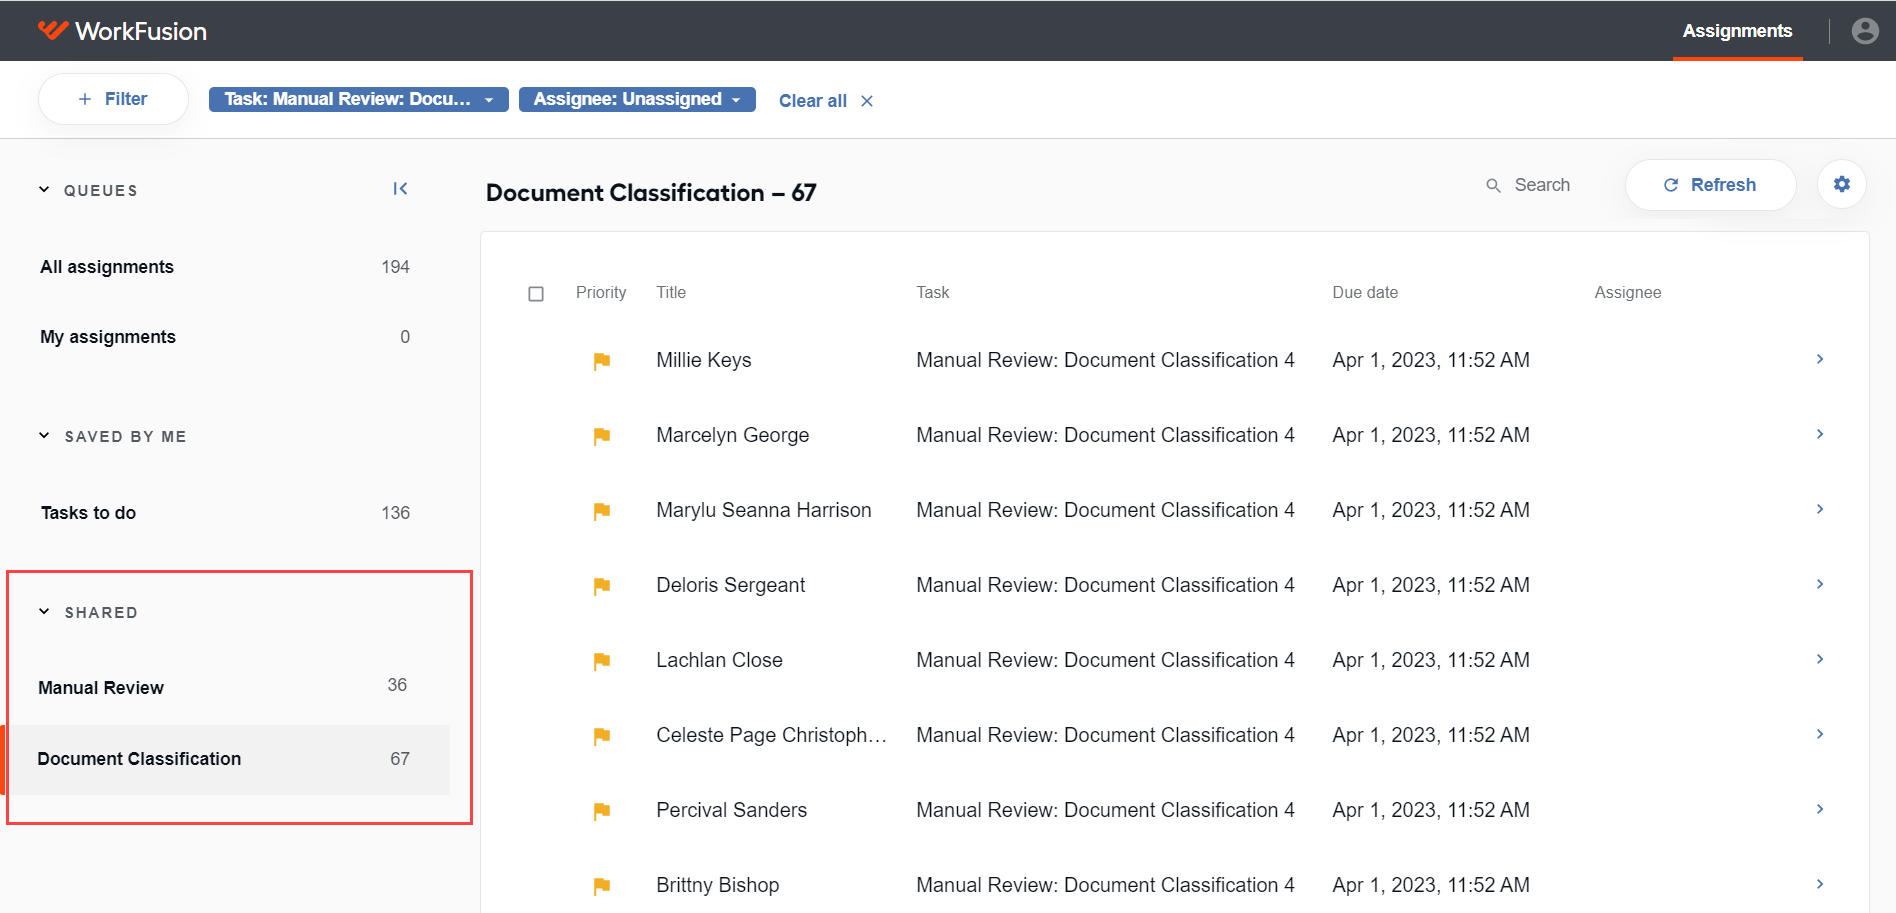
- The SHARED section contains queues shared with you. If no queues are shared with you, the SHARED section is not shown.
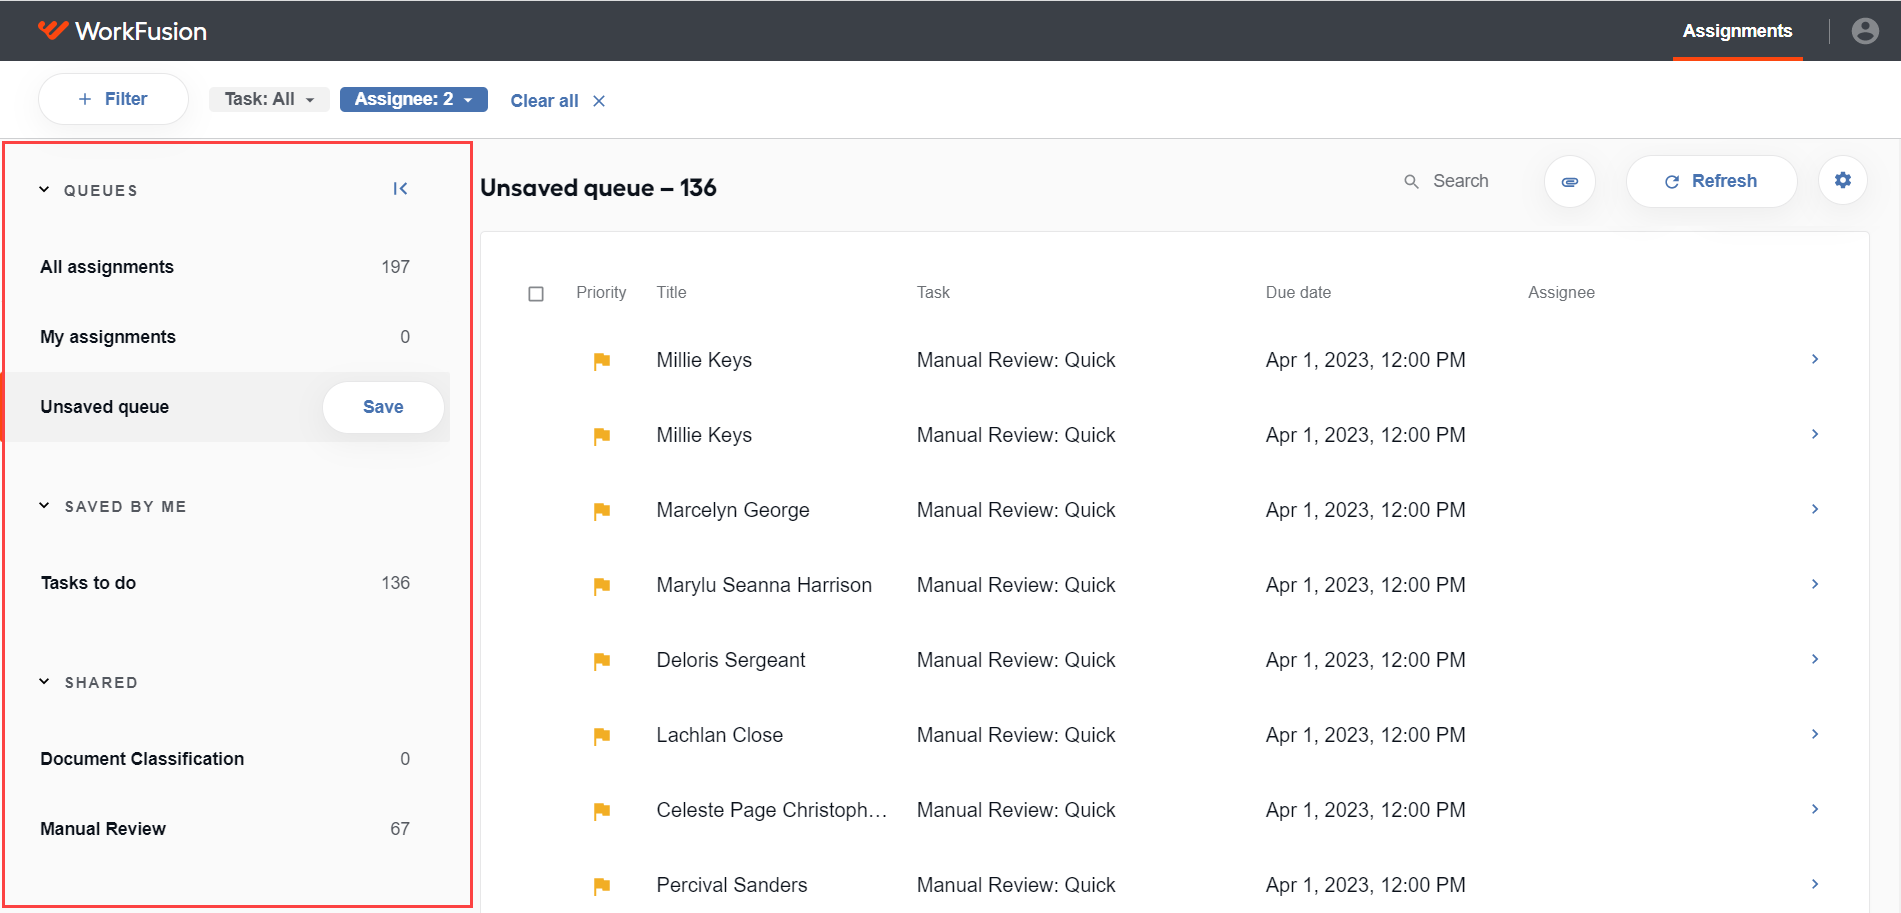
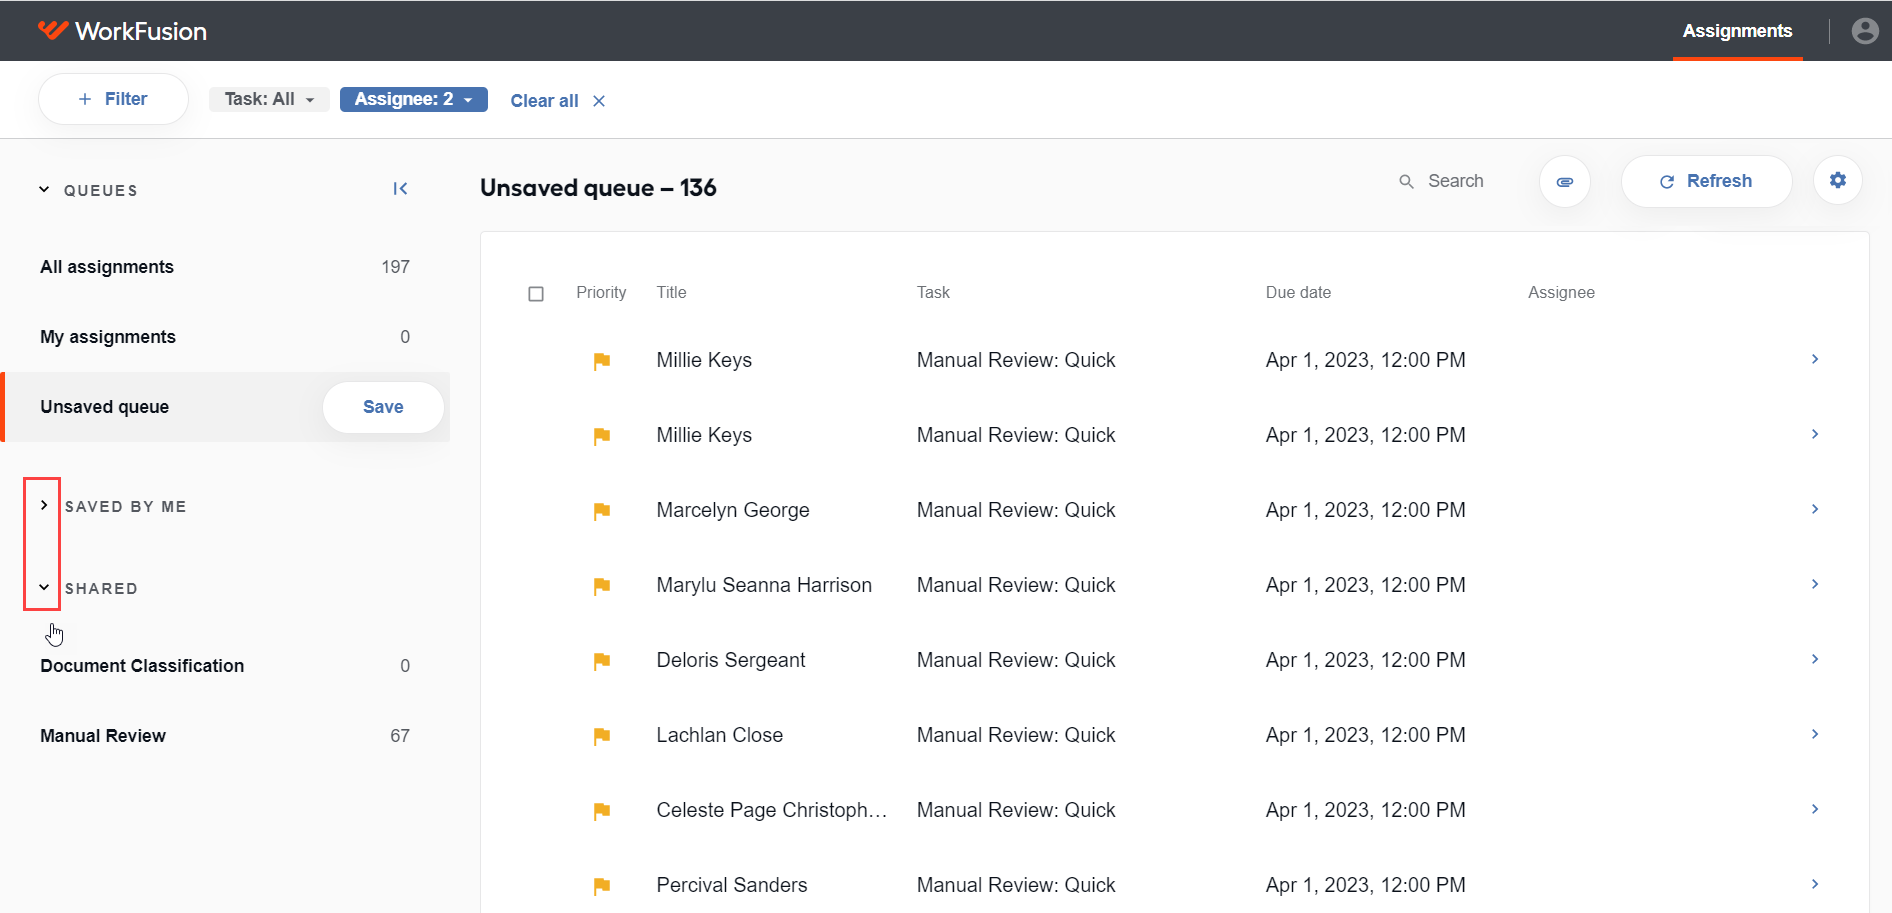
To collapse lists of queues when working with them, click the arrow next to the relevant section.
If you cannot see the QUEUES panel or access any of the functionality described in the article, check your Workspace permissions.
By default, you see all assignments grouped under the All assignments queue. You cannot edit this queue, but you can create a custom queue based on it.
A custom queue is a dynamic queue with assignments filtered using specific business attributes.
Let's consider different scenarios when working with custom queues:
You work with a queue that does not have new assignments when you work with it.
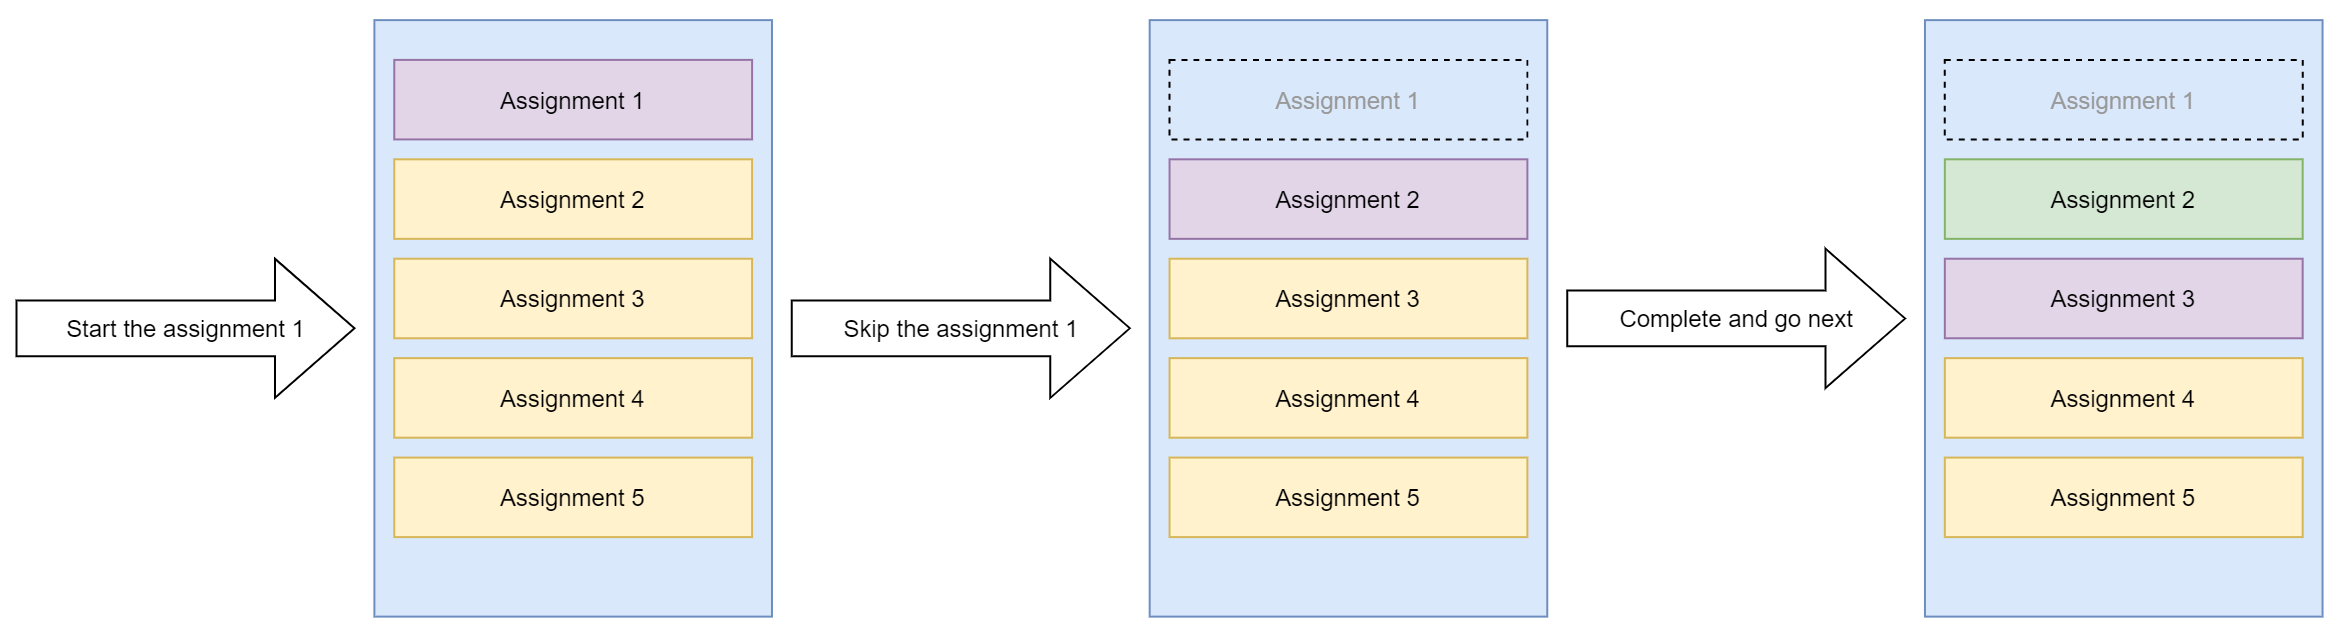
You start to work with a queue ignoring the first one or more assignments.
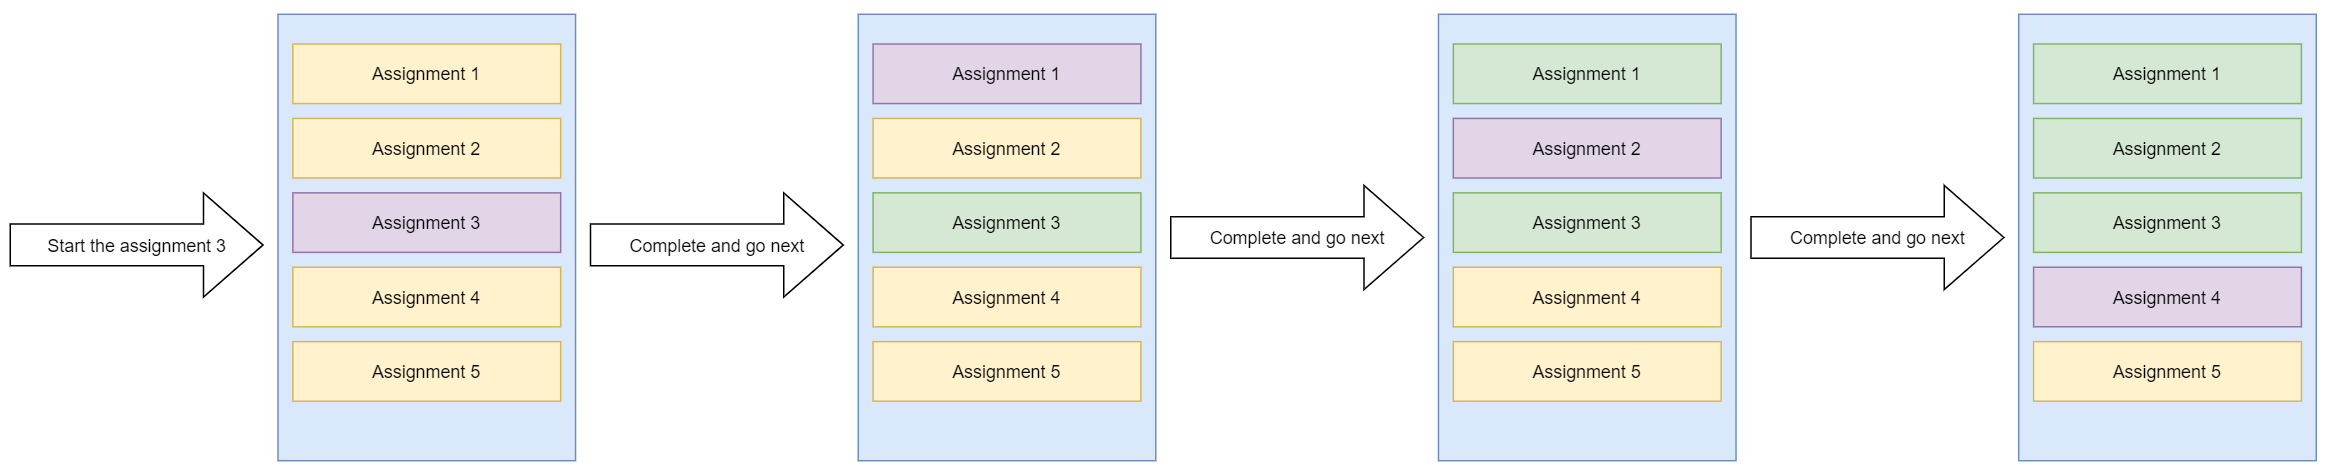
If you select an assignment from the middle of a custom queue, you begin with the first one from the queue after you complete or skip the selected assignment.
You have started to work with a queue, but you get new assignments for the queue.
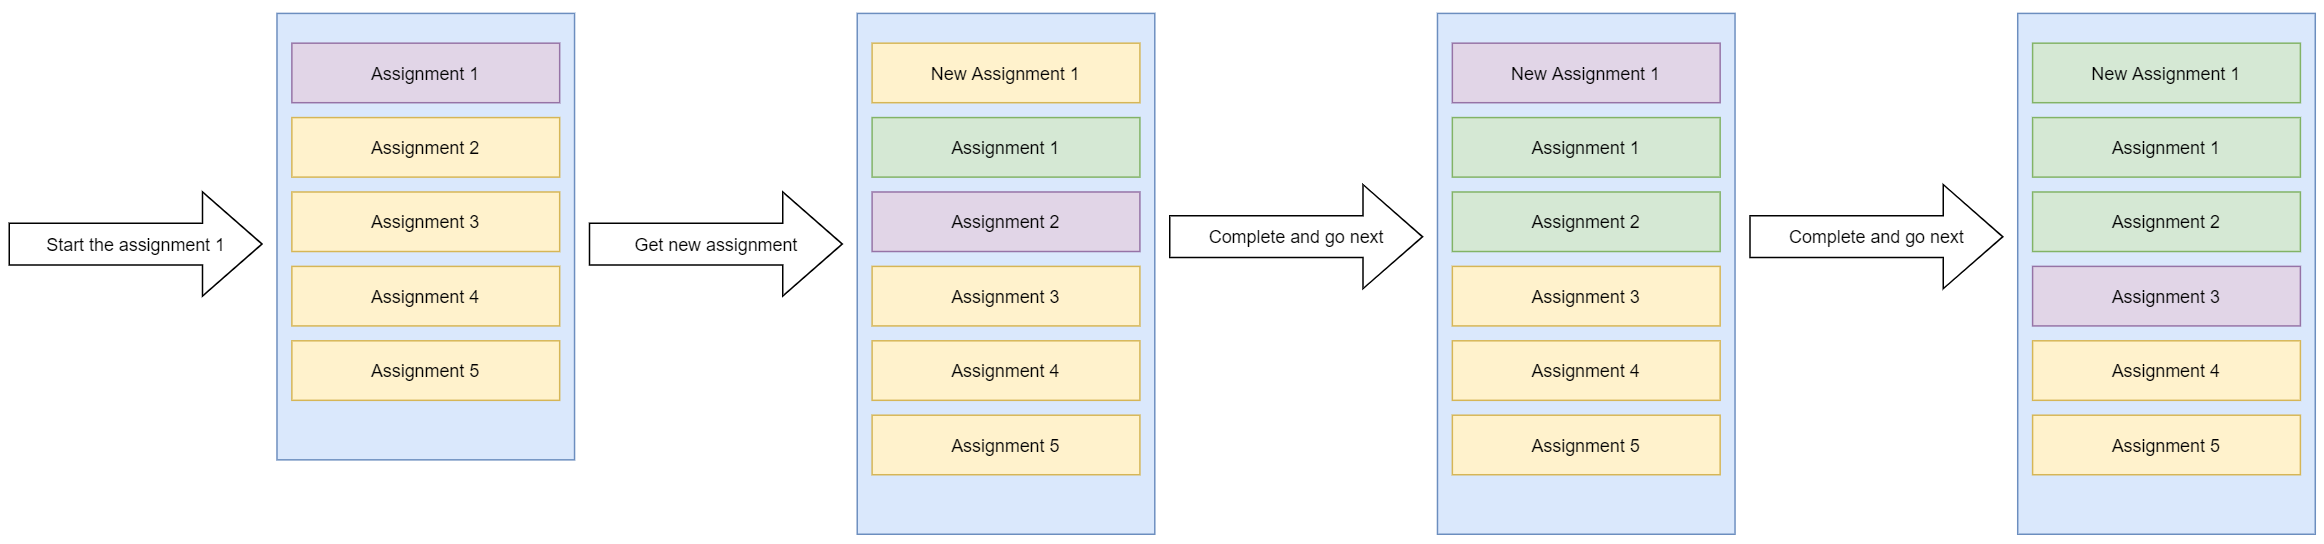
If you get a new assignment when working with a custom queue, you process the newest assignment as soon as you complete or skip the current one.
A custom queue is a dynamic structure. Custom queues of the same user or custom queues of different users can overlap.
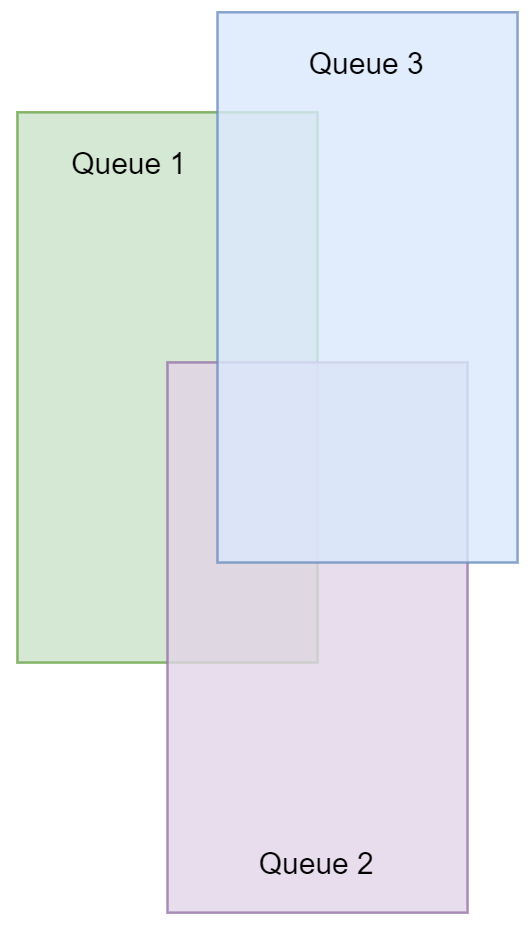
The overlapping implies: if an assignment state is changed in one custom queue, and the assignment exists in other custom queues, all custom queues are updated accordingly.
Add queue
As soon as you start filtering assignments, the assignment list changes according to selected criteria, and an unsaved queue is formed. You can start processing assignments right from the draft queue or save it.
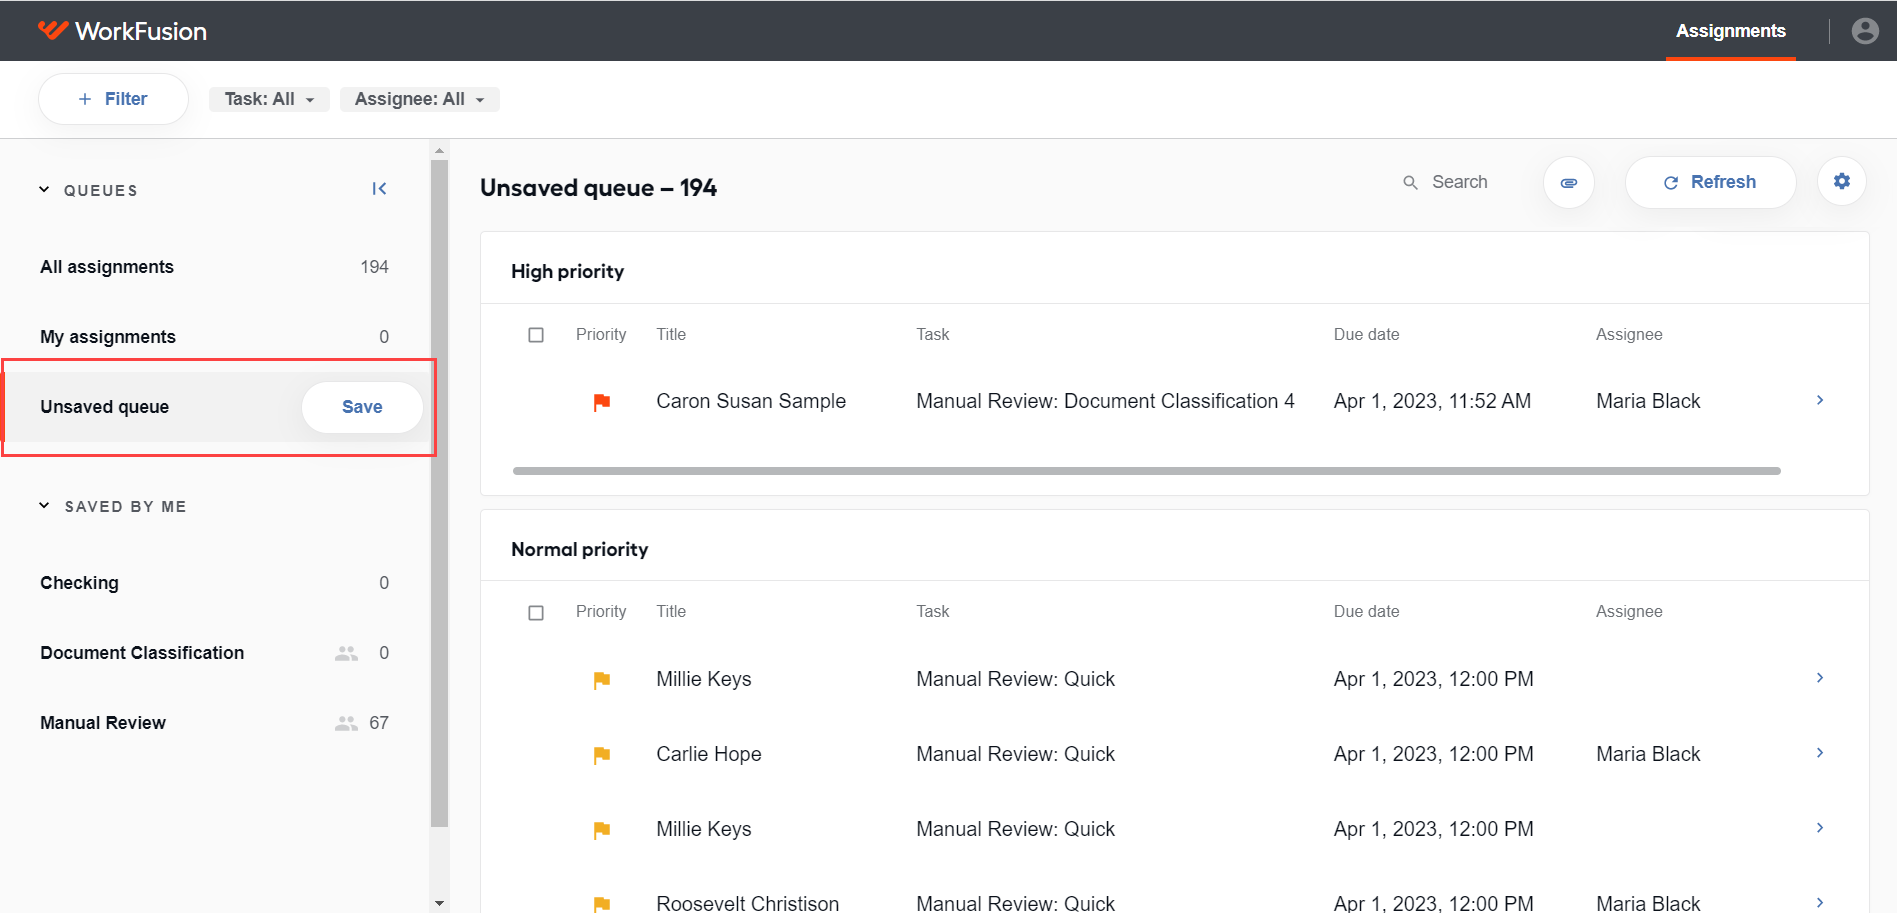
When you filter the assignments, you can generate a link to a queue—even the unsaved one—to share it with any WorkSpace user. To do that, click the Get link button. For more details, see the Get link to queue section.
If you switch to another queue, the draft queue is discarded, and your changes are lost. But if you log out and log in again, you can continue working with it. The best option is to save the queue to avoid losing the preset filtering order.
To save a queue, do as follows:
Specify your filtering criteria.
Click Save.
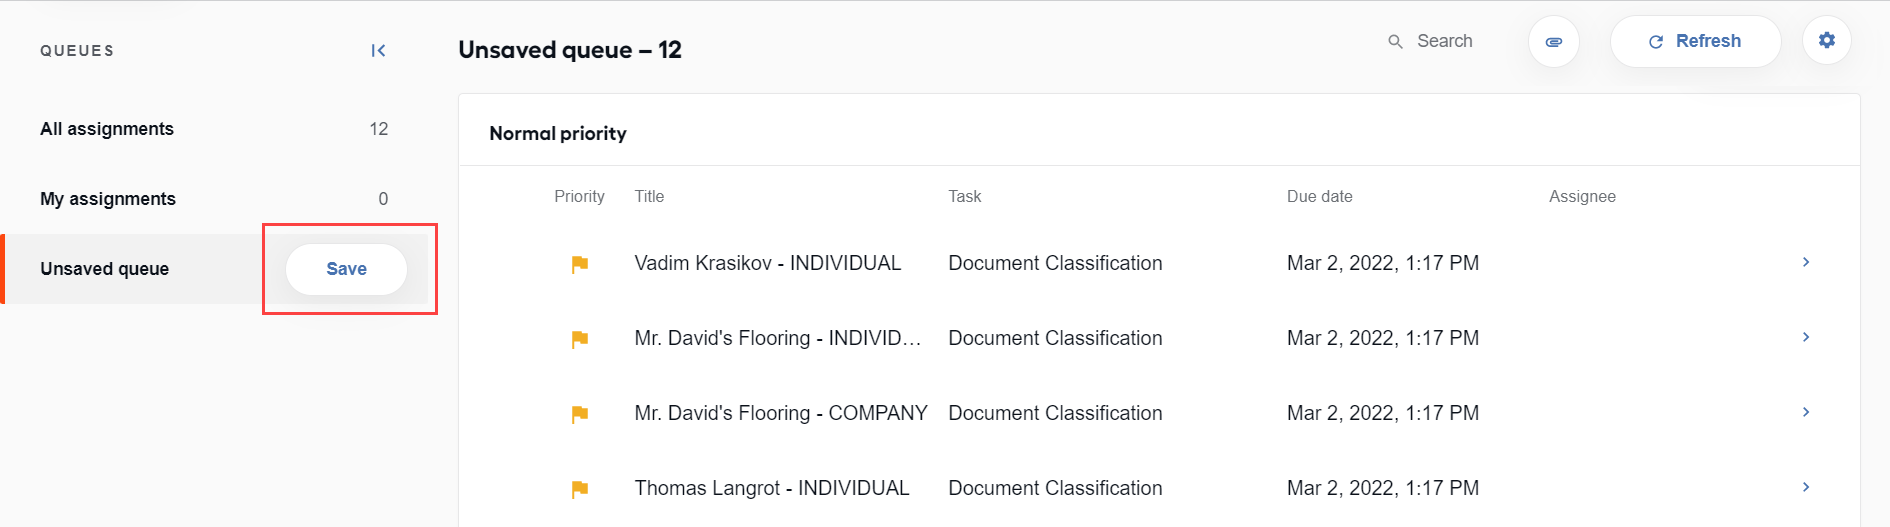
In the window that opens, specify the queue name and click Save.
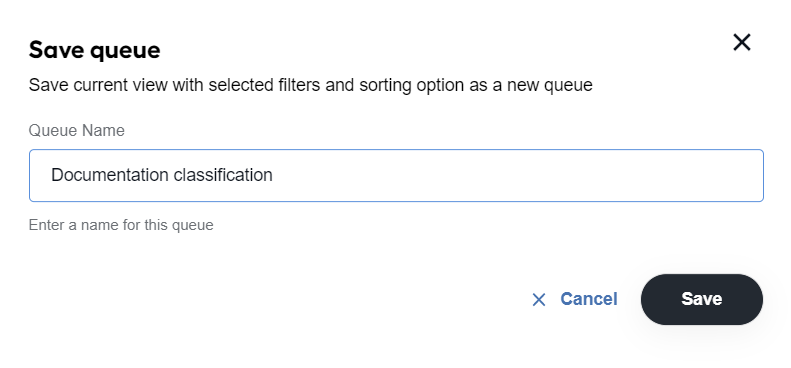
The saved queue appears in the SAVED BY ME list of queues.
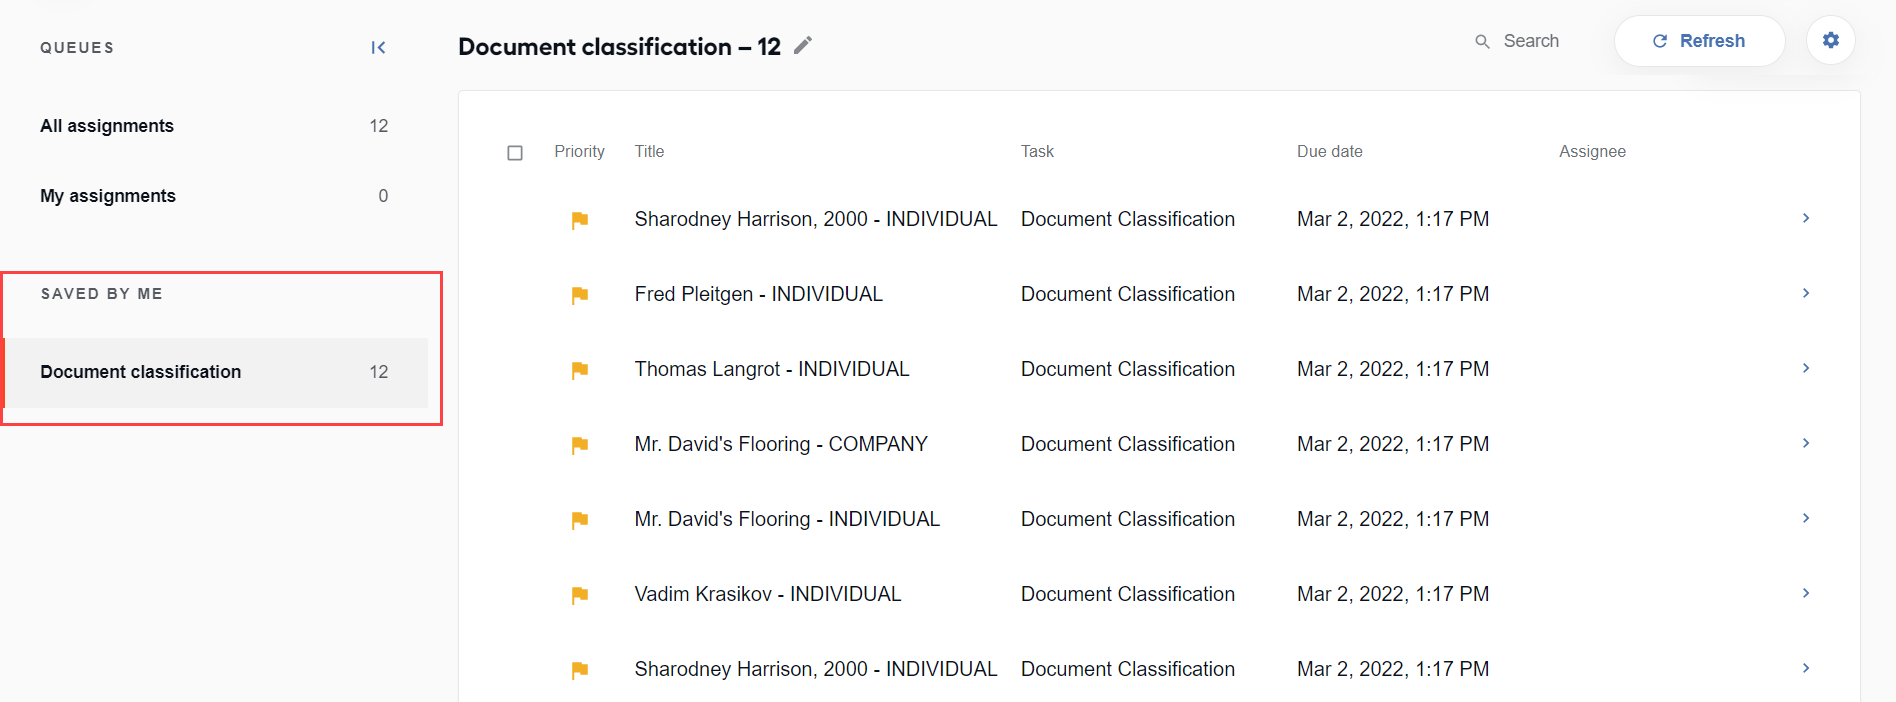
Once the custom queue is saved, you can start working on its assignments. When you initiate execution, the assignments are displayed the way they are arranged within the created queue. Custom queues are updated in real time, including the number of assignments in the list and statuses.
Also, mind the following important considerations:
If you start an assignment from the middle of a queue and complete or skip it, you resume processing the rest of the tasks from the first assignment in the queue.
If you skip an assignment from a custom queue, the assignment is returned to the common list outside the custom one and becomes available for other users. You can take this assignment later if you change your mind.
Update queue
To update a custom queue, follow the instruction below:
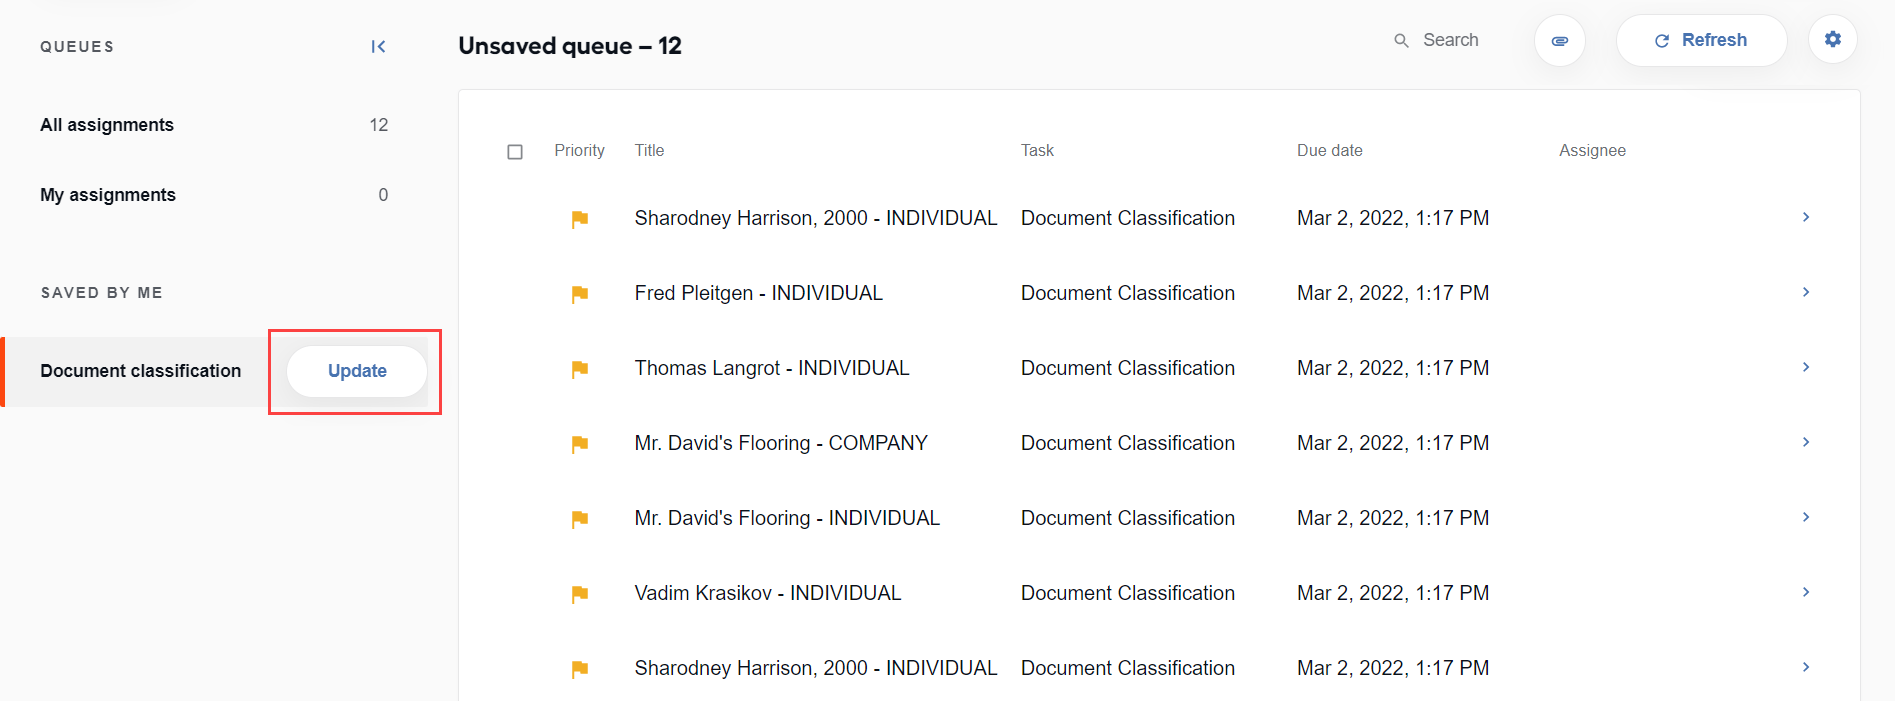
Select new business attributes from filtering options. The assignment list is updated according to the selected business attributes.
Click Update next to the queue name.
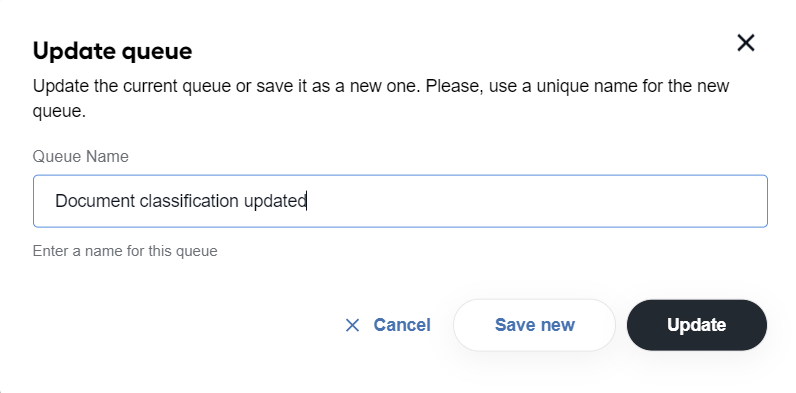
In the popup that follows, save the changes in the queue.
- To update the current queue, click Update.
- To save a new queue, specify a unique name and click Save new. The queue appears in the SAVED BY ME list of your queues.
Rename queue
To change the name of your queue, do as follows:
In the SAVED BY ME section, hold the pointer over the queue name and select Rename in the list of options.
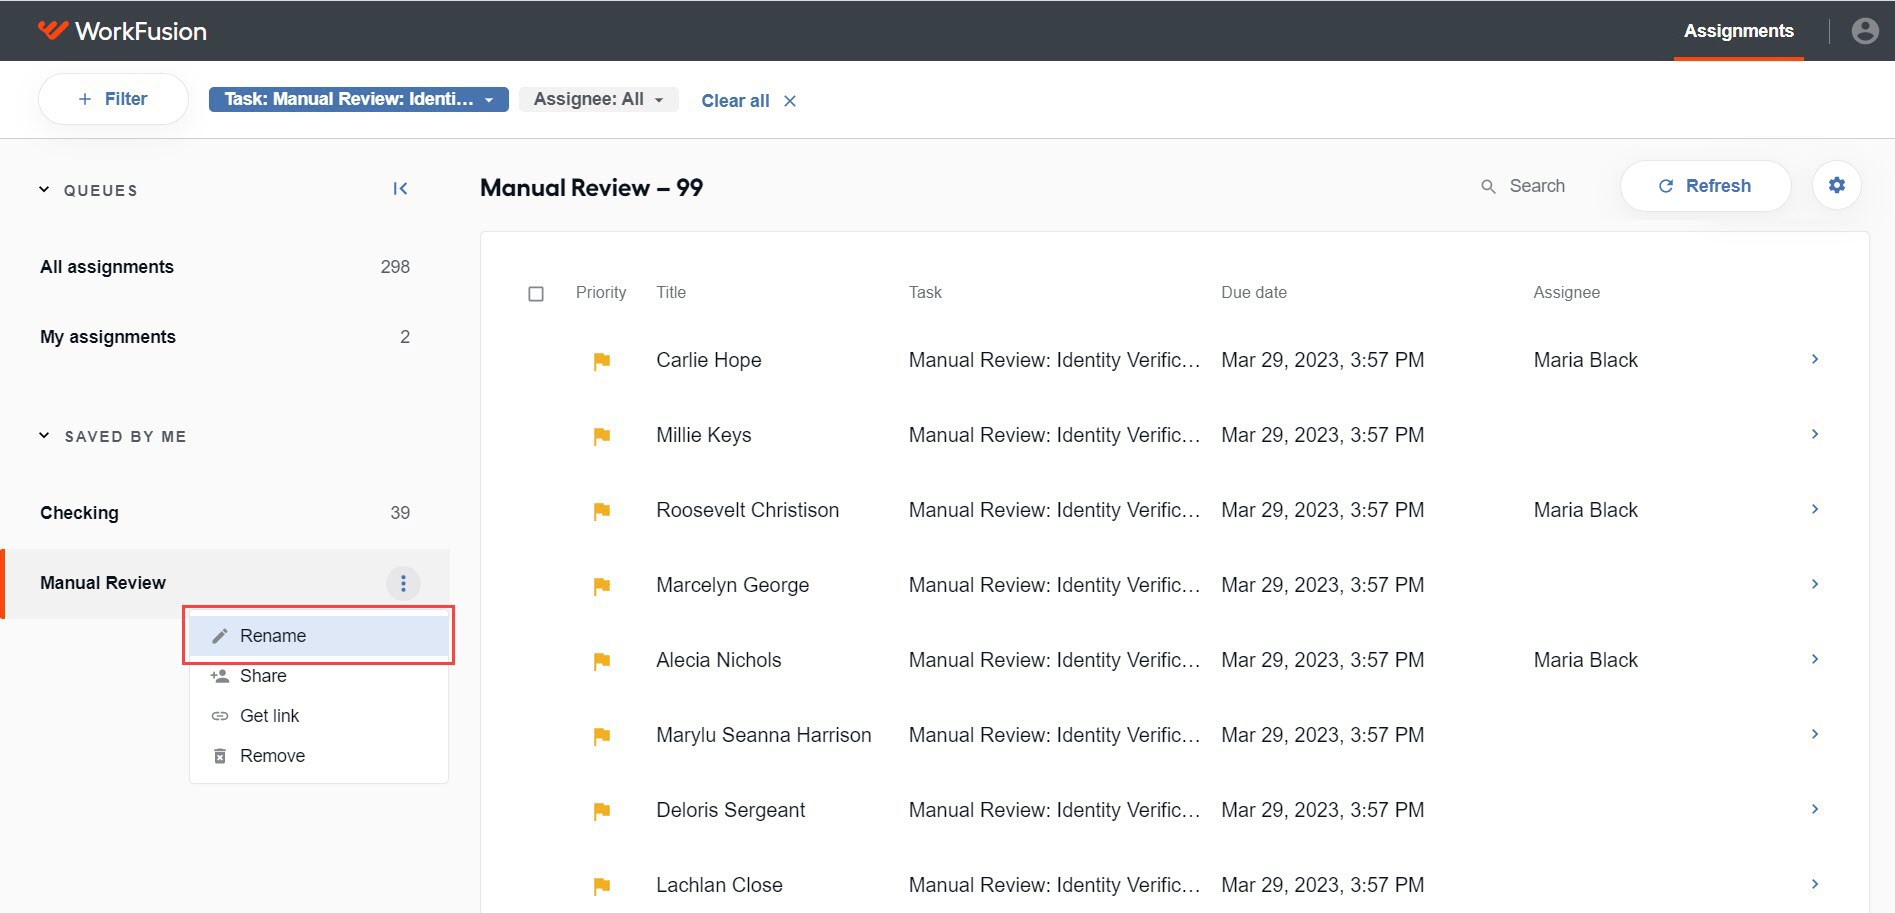
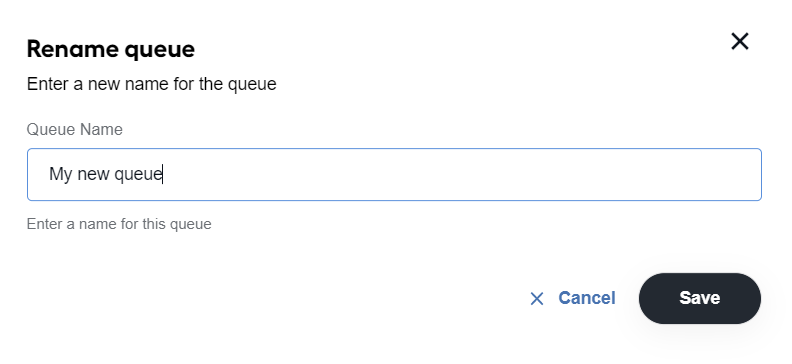
In the popup that follows, enter a new name for the queue and click Save. If you select Cancel, the changes are discarded.
Work with shared queue
To achieve higher efficiency in manual handling, you can distribute assignments to your team members according to their qualification and responsibilities with the help of shared queues.
Share queue
- To share any queues, you should have the Share queues permission.
- The person you are sharing the queue with should have the View queues permission level. For more details, refer to the instruction on configuring Workspace permissions.
To share a queue, do as follows:
In the SAVED BY ME section, hold the pointer over a queue you want to share and select Share in the list of options.
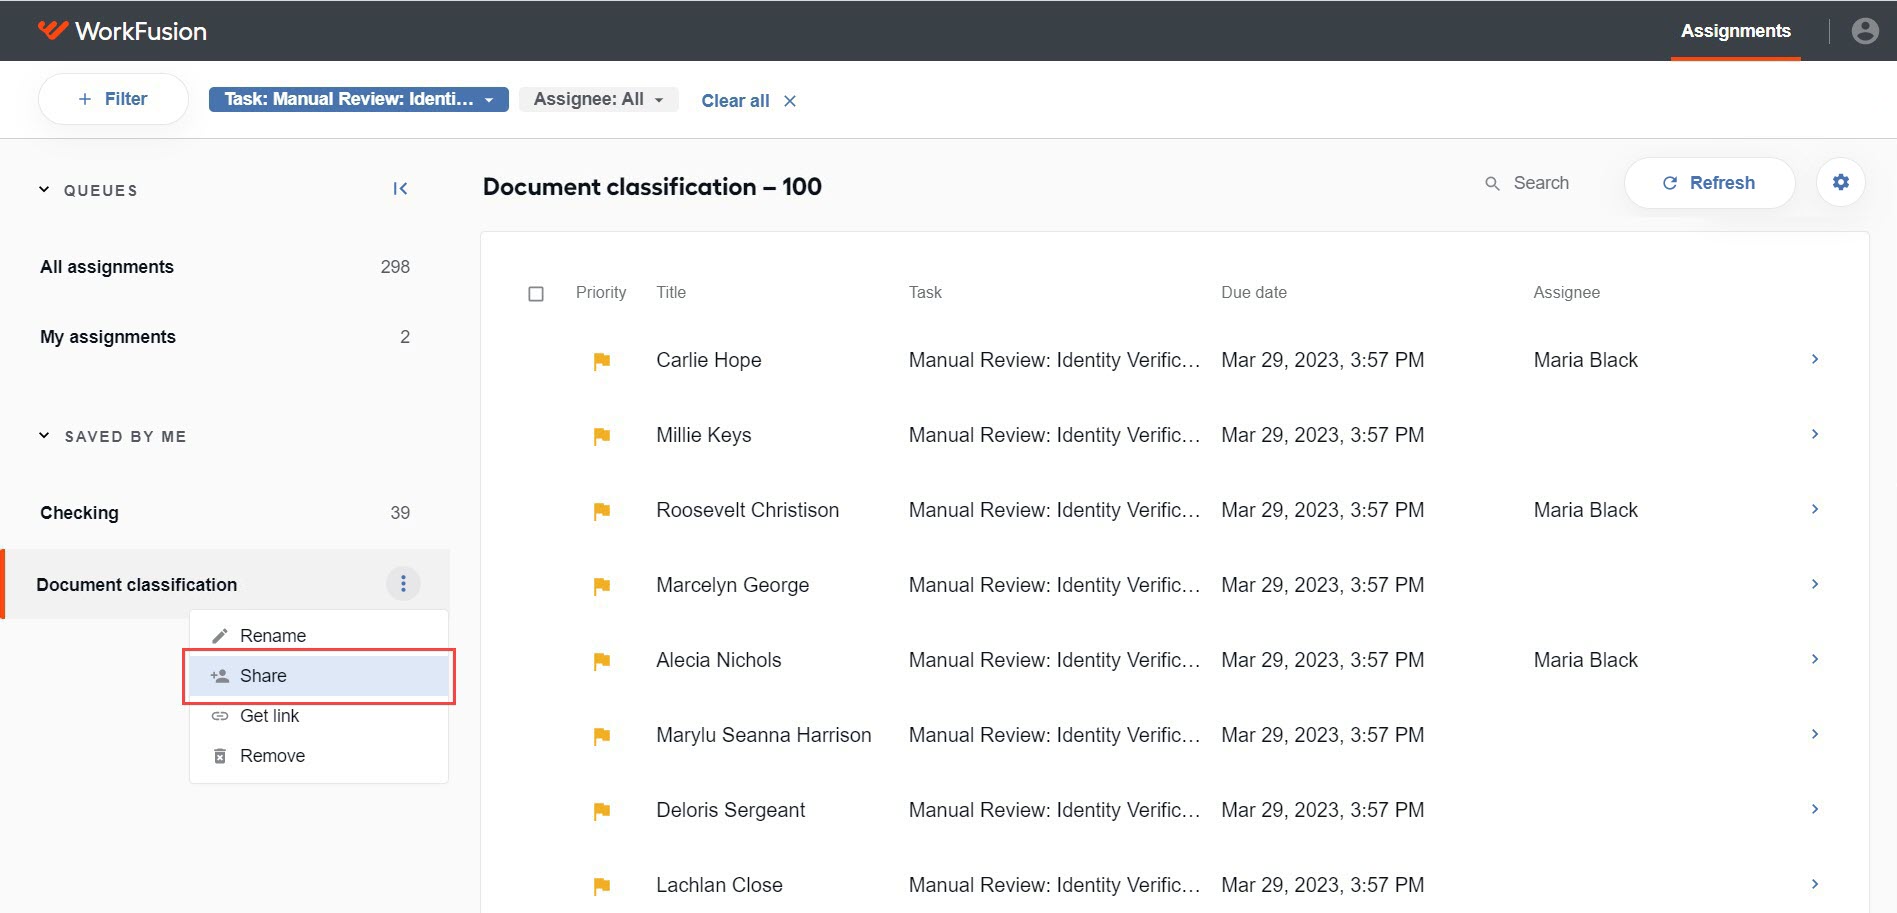
In the Share queue window, click the User name field and add users with whom you want to share the selected queue.
- Select the usernames from the drop-down menu.
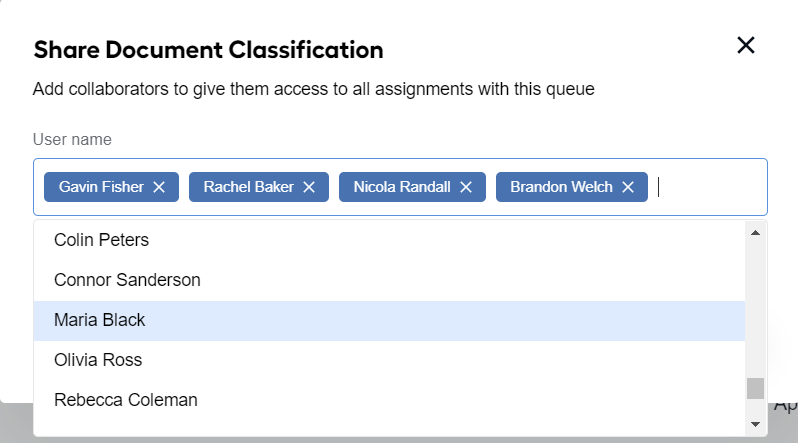
- Search for a needed username by entering the name or last name of the user.
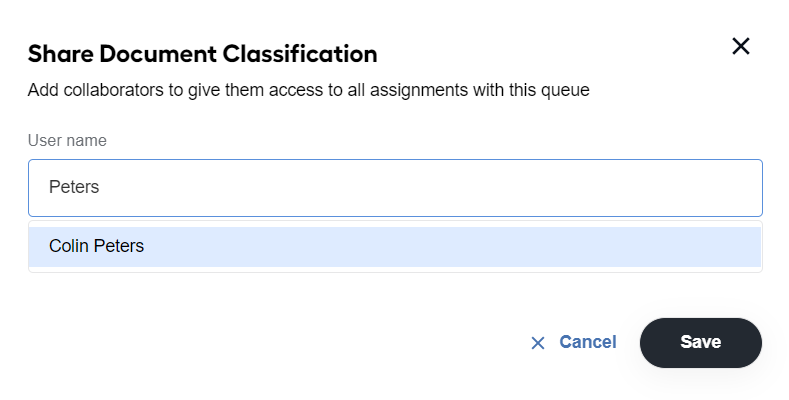
If a user is already added in the User name field, you cannot find them as they are no longer displayed in the drop-down menu. If no users are found, the "No matches" message is shown.
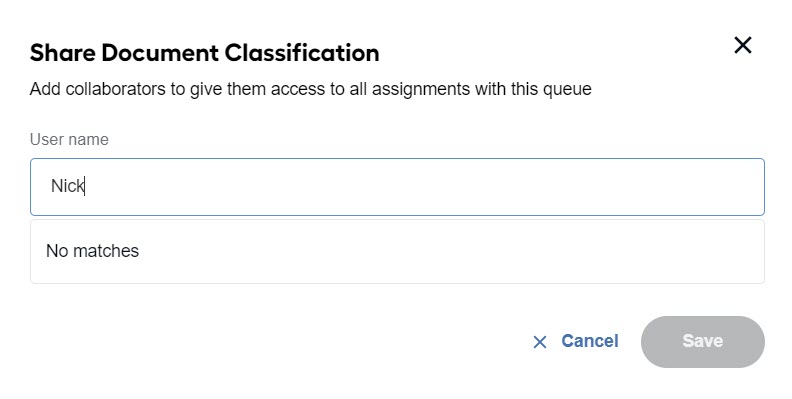
Click Save to share the queue. Mind that the Save button is disabled unless you add at least one user in the User name field.
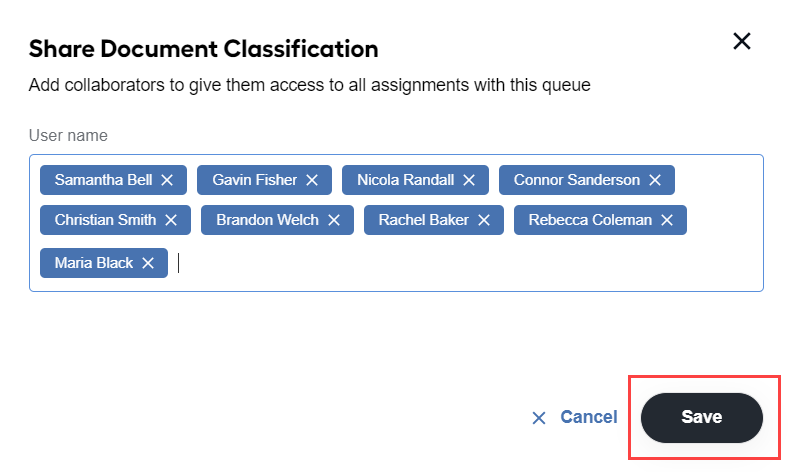
To discard your changes, click the Cancel button or x next to the selected user.
As soon as you share the queue, it is marked with the Shared queue icon meaning that the queue is shared.
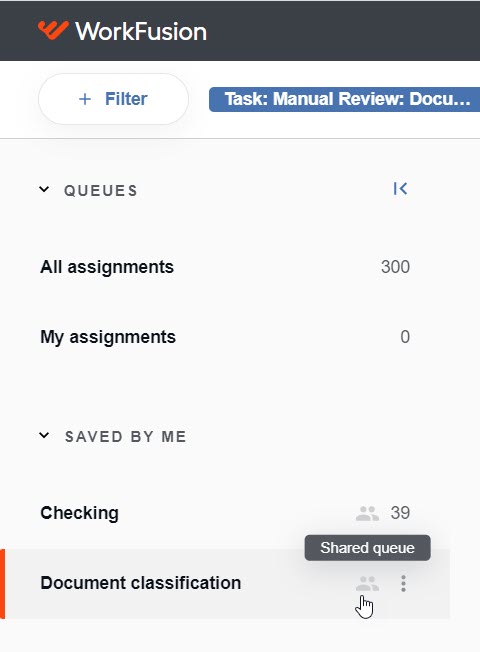
Once you share the queue, the users you specified in the User name field can see it in the SHARED section.
Edit shared queue
To modify an already shared queue:
In the SAVED BY ME section, hold the pointer over a queue you want to edit, select the Share option, and specify your changes:
- To add more users, select usernames in the User name drop-down menu.
- To remove a user from the list, click x next to the username.
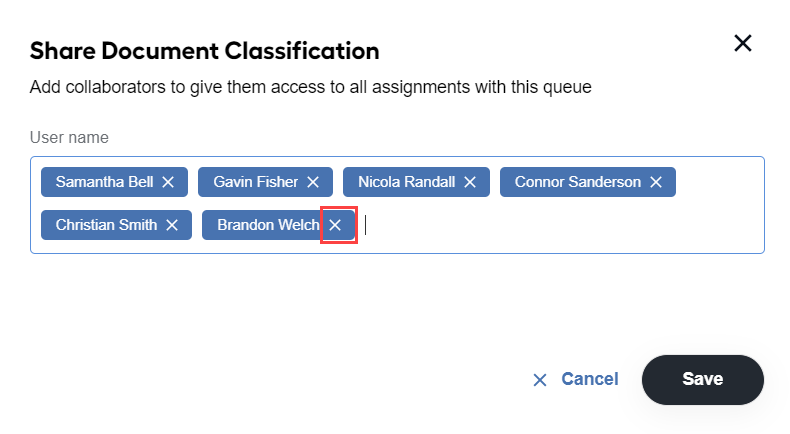
Click Save.
Unshare queue
To stop sharing a queue, follow the steps below:
In the SAVED BY ME section, hold the pointer over a queue you want to unshare and select the Share option.
Remove all the users in the list by clicking x next to their usernames.
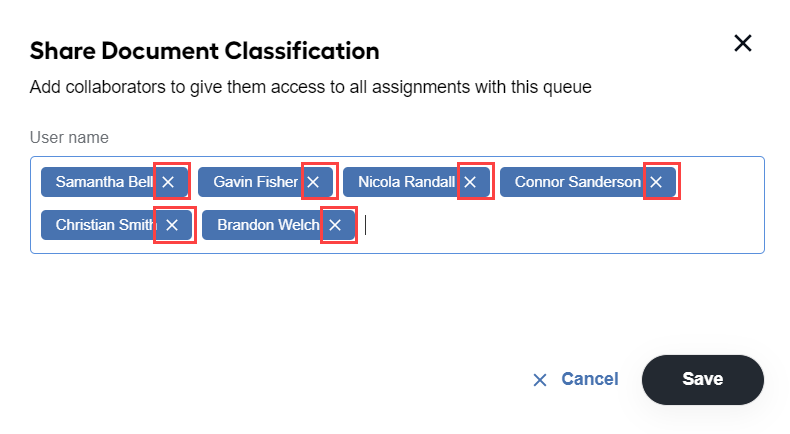
Click Save.
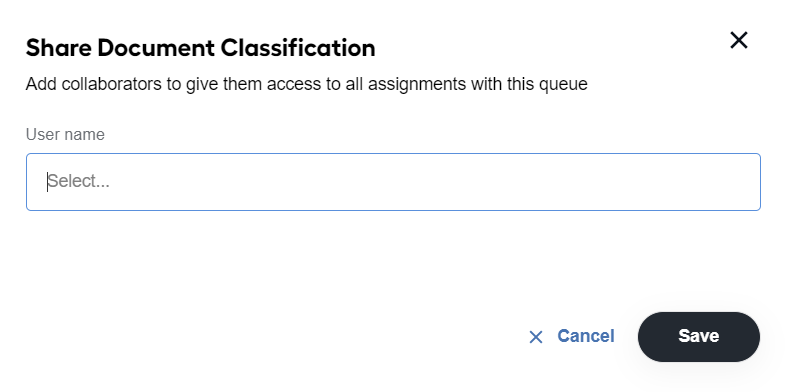
The queue gets unshared and disappears from the list of shared queues for the users with whom you stopped sharing the queue.
Get link to queue
You can generate a link to a queue whether you saved a queue or not:
To get a link to an unsaved queue, click the Get link button next to the Refresh option.
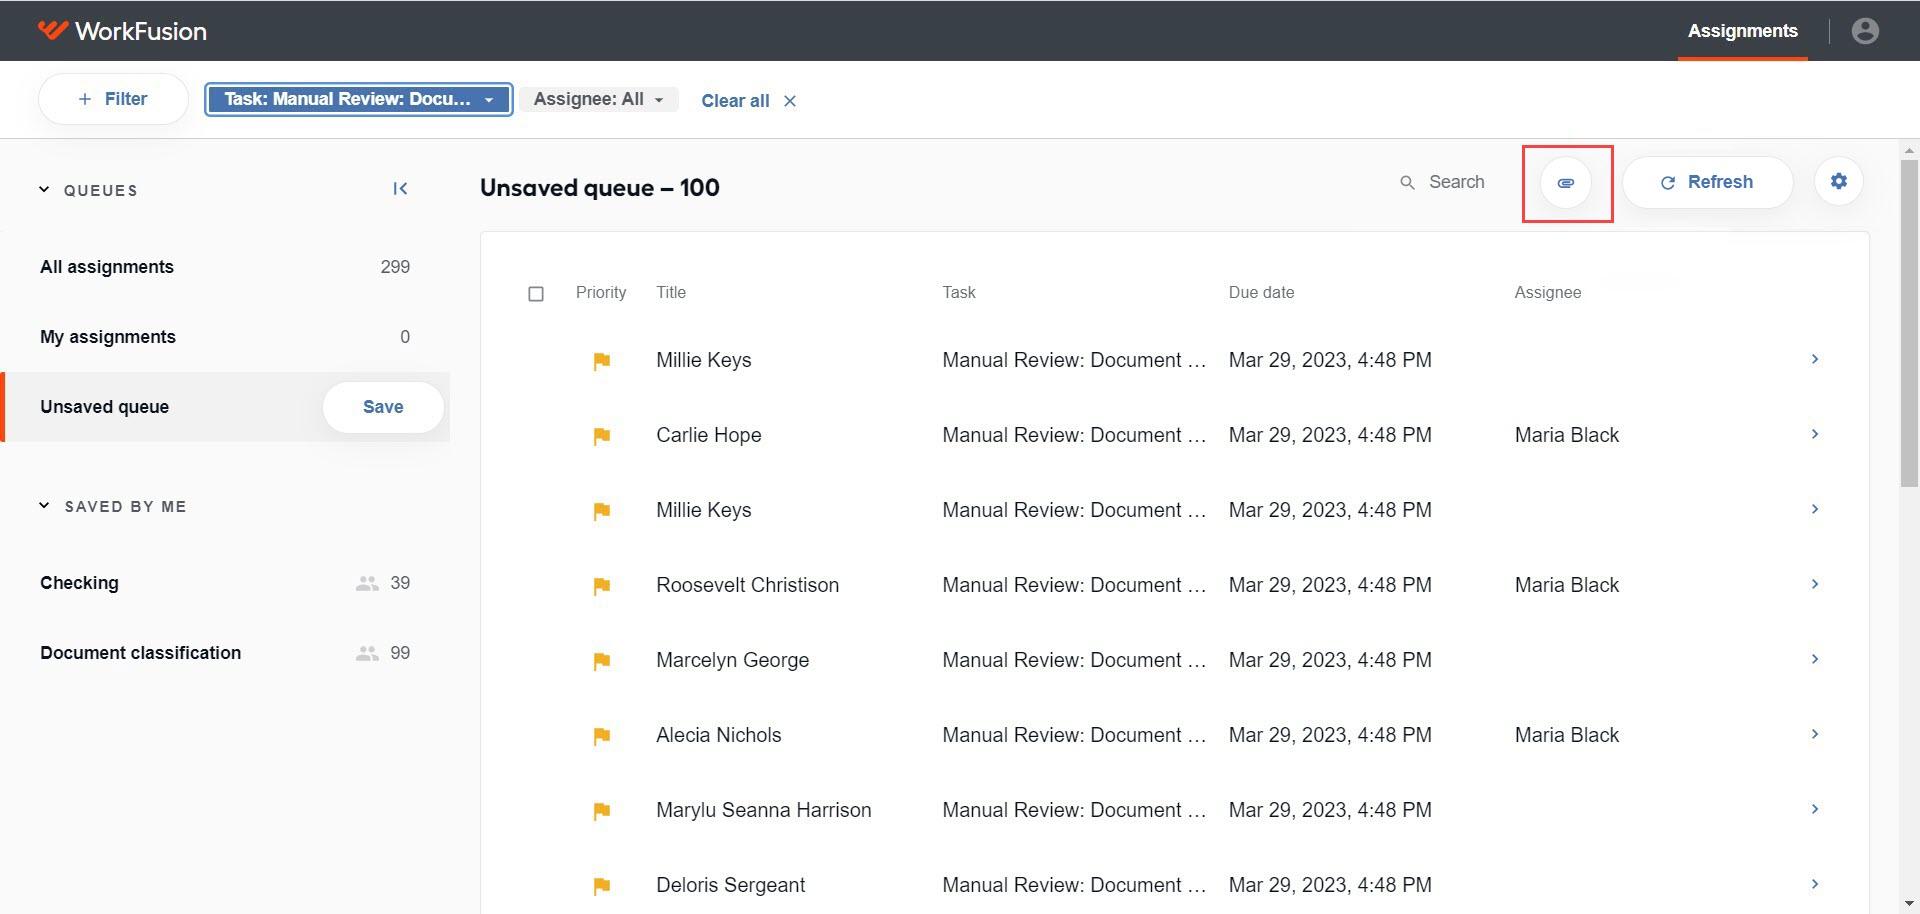
In the window that opens, a link to the queue is preselected by default. To copy, click Copy or press
Ctrl + C. The Cancel button closes the window.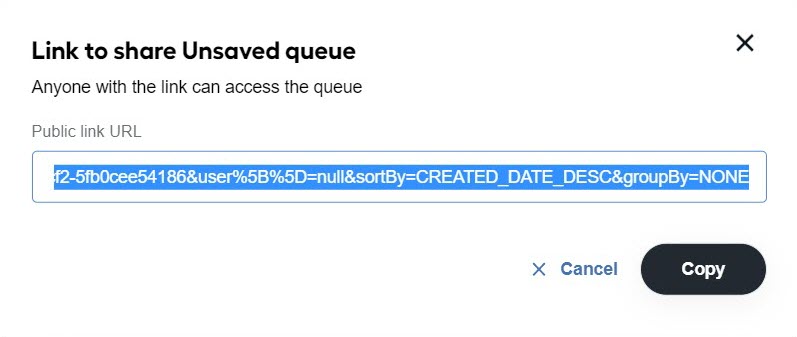
To get a link to any queue in the list of your saved queues, hold the pointer over a queue in the SAVED BY ME section and select the Get link option.
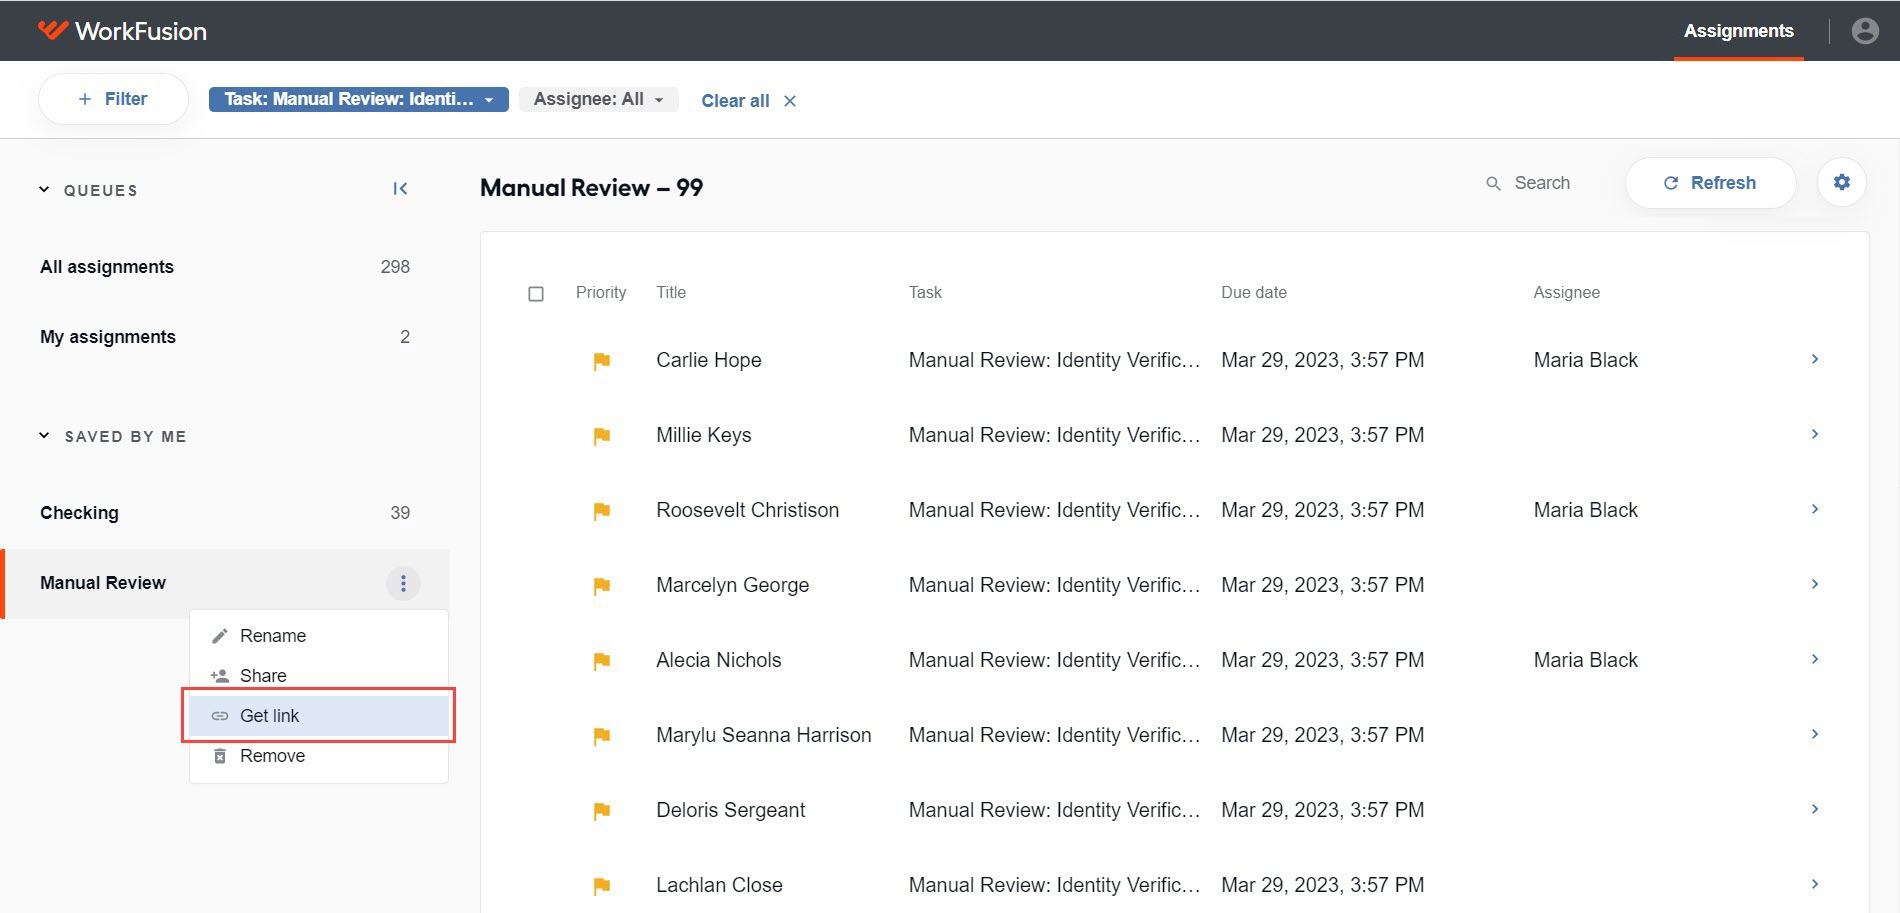
In the window that opens, a link to the queue is preselected by default. Click Copy or press
Ctrl + Cto copy it. The Cancel button closes the window.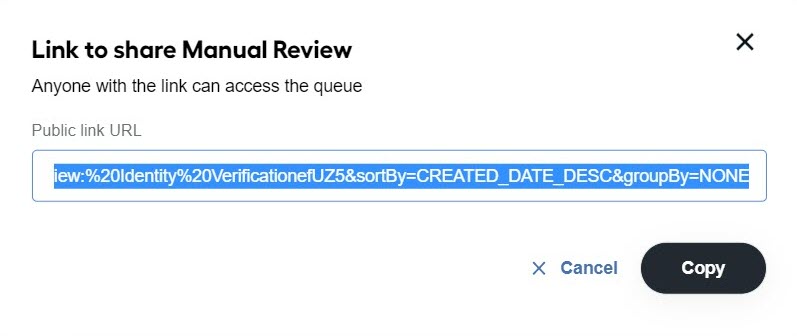
After that, the window closes, and the link is copied to the clipboard for you to share it with any WorkSpace user.

You can also paste the link to the browser address line to open the filtered assignments in a separate browser tab.
- If you send a link to an unshared queue, a person with the link can view this queue as an unsaved one with pre-configured filters.
- If you send a link to a person who does not have enough permissions (for example, you shared the queue with other users), this person can view the queue as an unsaved one with pre-configured filters.
- If you have already shared the queue with a person to whom you send the link, this person can view it within the list of their shared queues. In this case, the link works even if you change any configurations within the queue.
Remove queue
To remove a queue, follow the steps below:
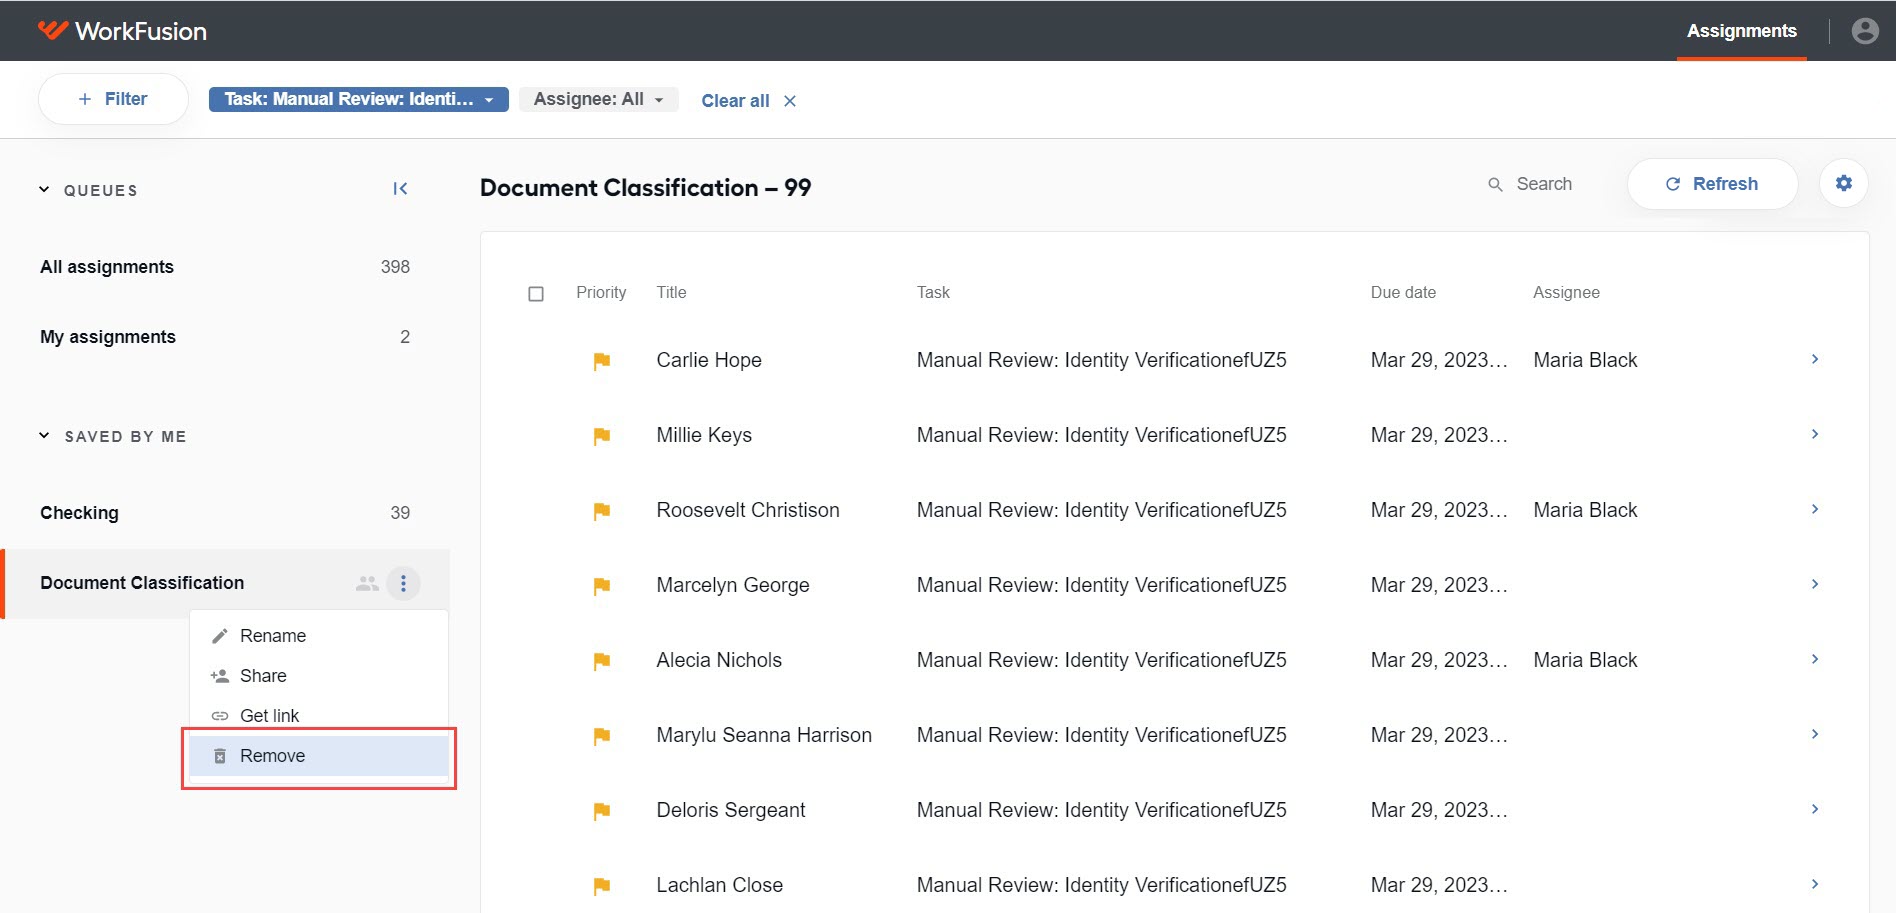
In the SAVED BY ME section, hold the pointer over the name of the queue you want to delete and select Remove in the list of options.
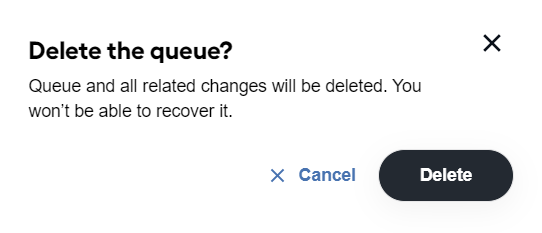
In the window that follows, click Delete to confirm the deletion. Mind that you will not be able to recover a removed queue.
There is a mechanism for clearing outdated shared queues automatically according to the specified schedule. Your shared queue is cleared in case of:
- Removing permissions for a user
- Deactivating a user
- Deleting a user
For more information on working with queues, read the Workspace how-tos.