Backup and restore custom Tableau dashboards
General migration flow
Workbook migration flow includes the following steps:
- Download a workbook.
- Change data source connections if needed.
- Rename a workbook according to the naming convention.
- Publish a workbook to a new instance.
Backup
To backup dashboards means to download them from WorkFusion Analytics Server. To indentify custom dashboards, look for the _custom postfix in their names.
WorkFusion Analytics Server 9
To backup WorkFusion Analytics Server 9:
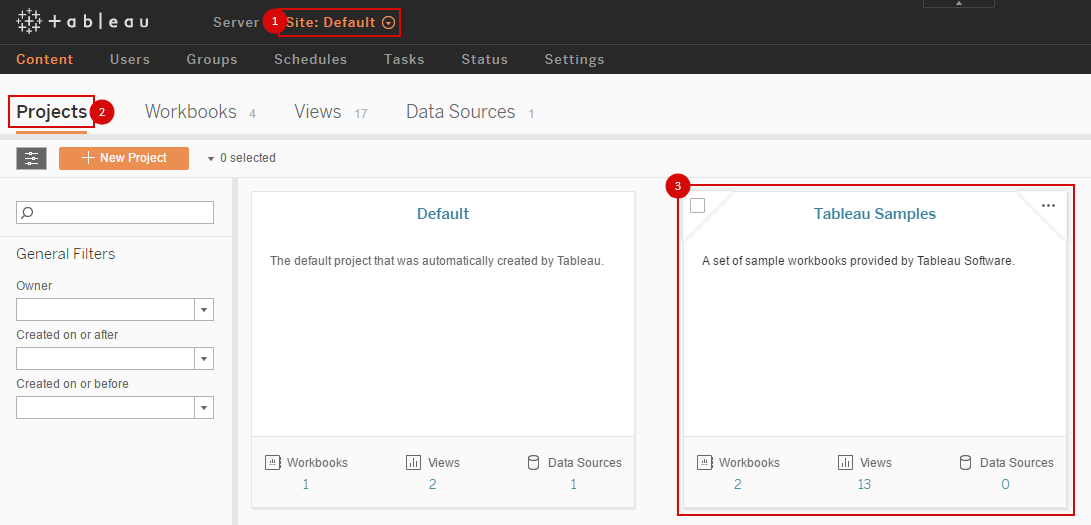
Open the WorkFusion Analytics Server page and select appropriate Site.
Click Projects.
Select the required project.
Find a workbook for downloading and expand the workbook menu by clicking the menu button (...).
Click Download. The workbook file in the
.twbxformat will be downloaded.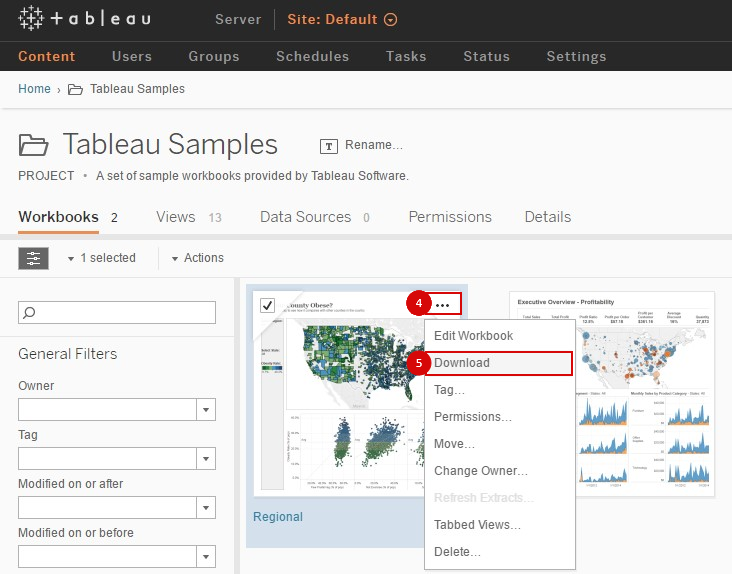
WorkFusion Analytics Server 10
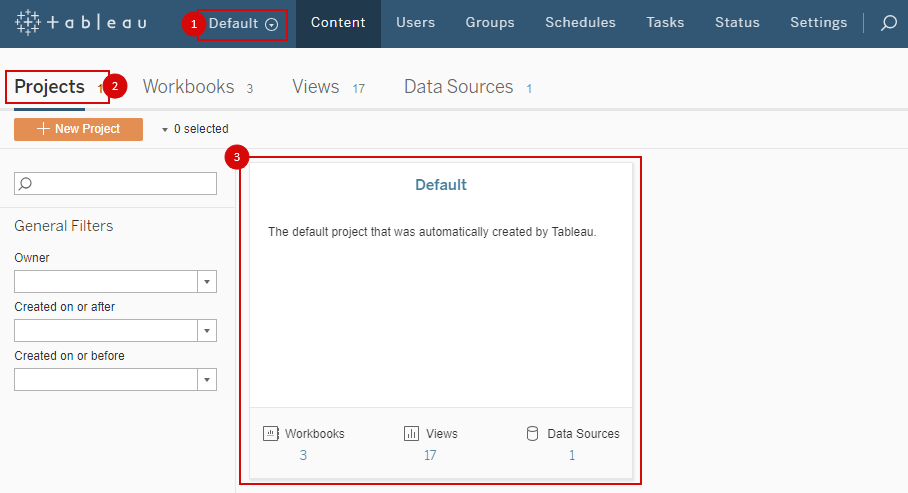
- Open the WorkFusion Analytics Server page and select appropriate Site.
- Click Projects.
- Select the required project:
- Find a workbook for downloading and expand the workbook menu by clicking the menu button (...).
- Click Download. The workbook file in the
.twbxformat will be downloaded.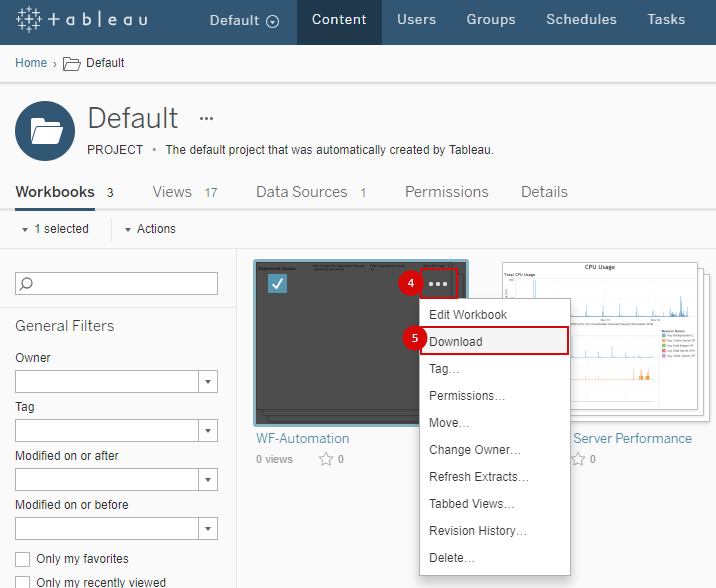
Restore
WorkFusion Analytics Desktop
Step 1: Change connections (optional)
If all connections to database server remain the same, skip the step and proceed further.
Open the recently downloaded workbook file in WorkFusion Analytics Desktop.
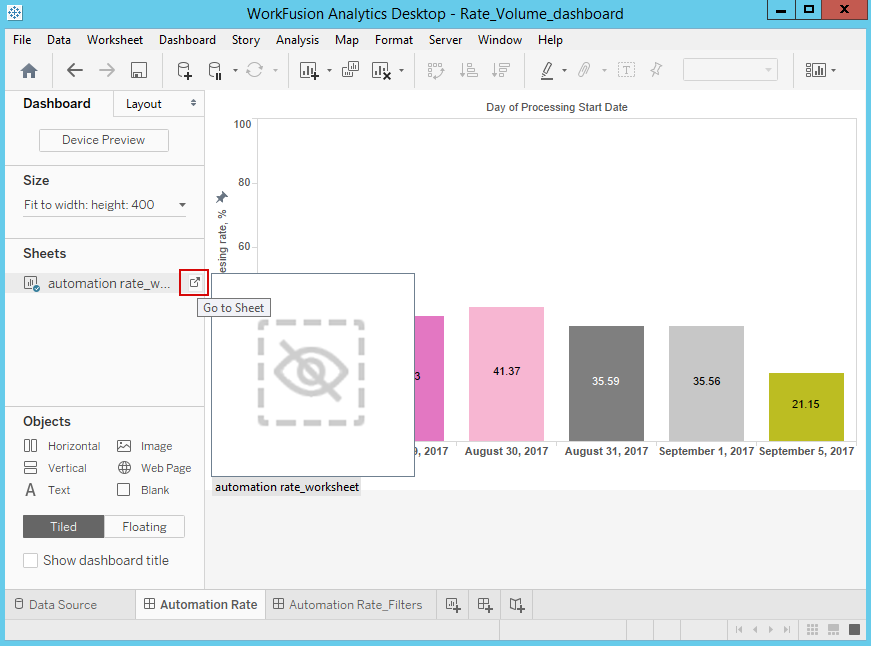
In the Dashboard section, click Go to sheet.
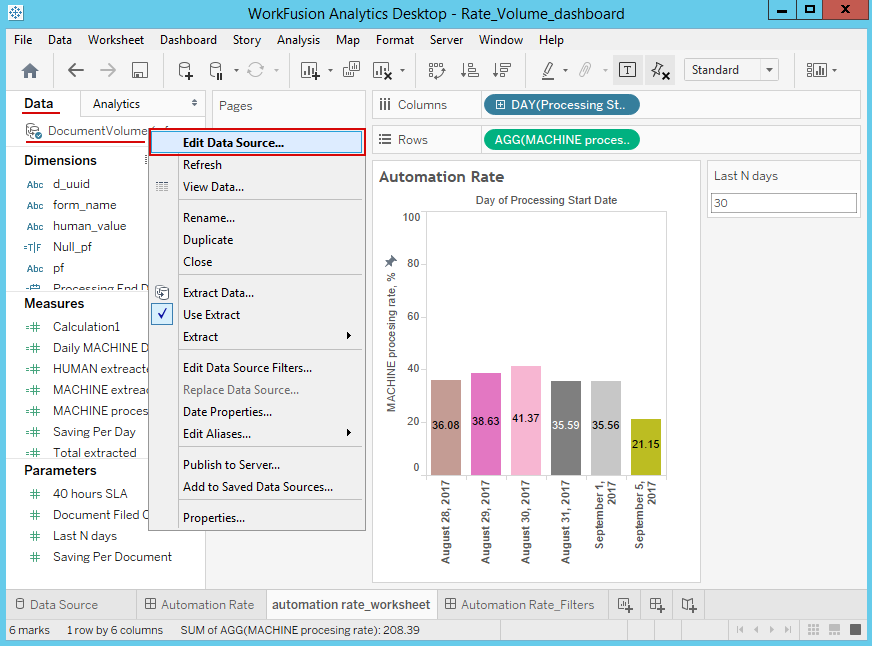
On the Data tab, right-click the data source and select Edit data source.
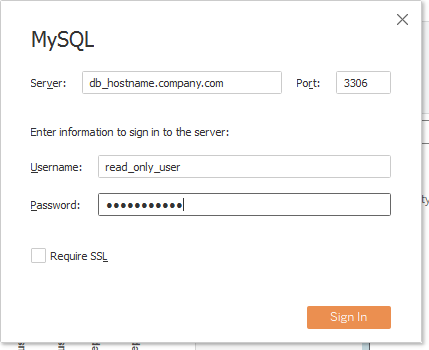
Edit data base connection settings and click OK.
Move to dashboard sheet. See step 2.
Step 2: Sign in to server
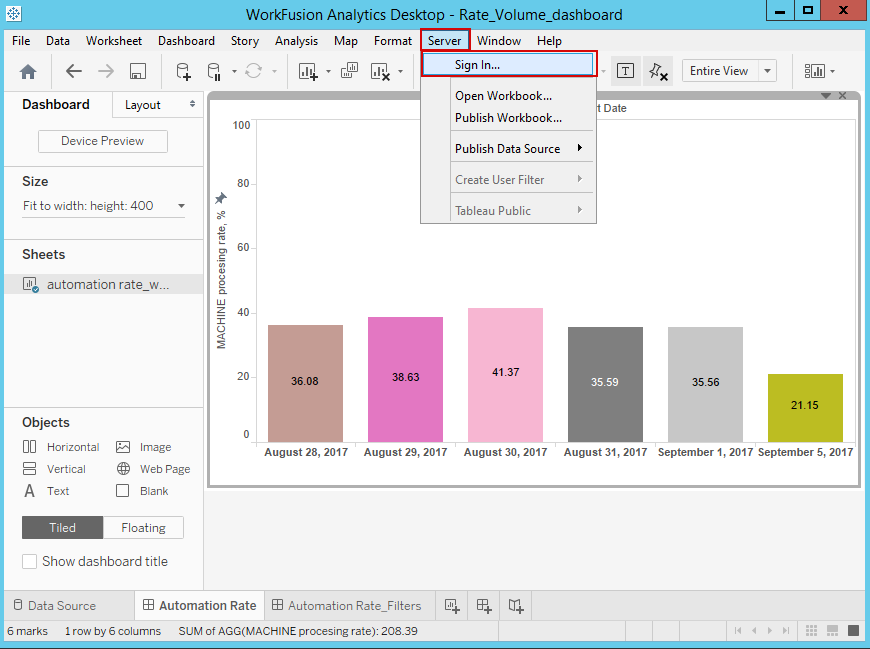
On the menu bar, click Server > Sign in.
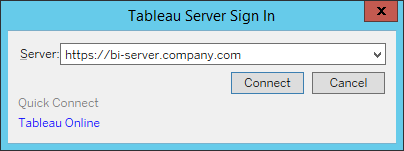
Enter the URL of the BI server, and then click Connect.
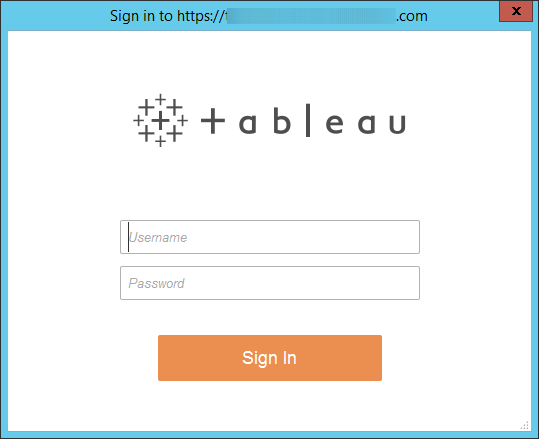
Enter the WorkFusion Analytics Server credentials, and then click Sign in. The user must have the Publisher, Site or Server Administrator role.
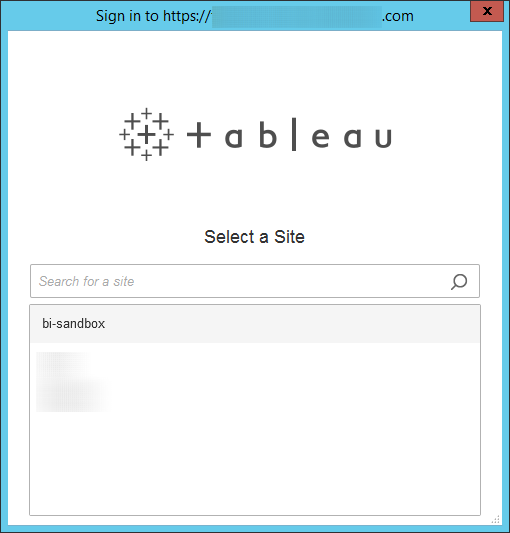
Select the required Site for publishing.
Step 3: Publish workbook
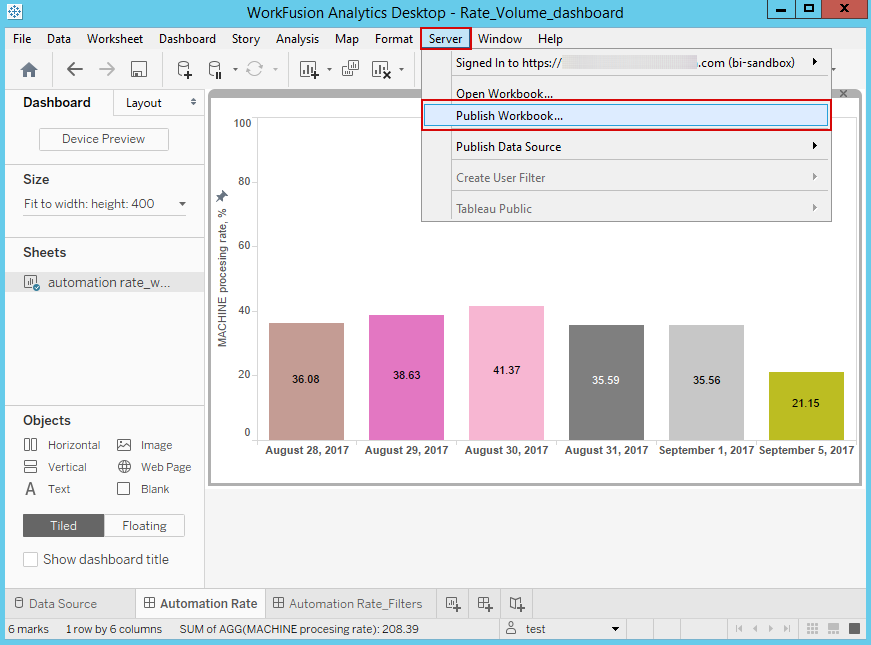
On the menu bar,click Server > Publish Workbook.
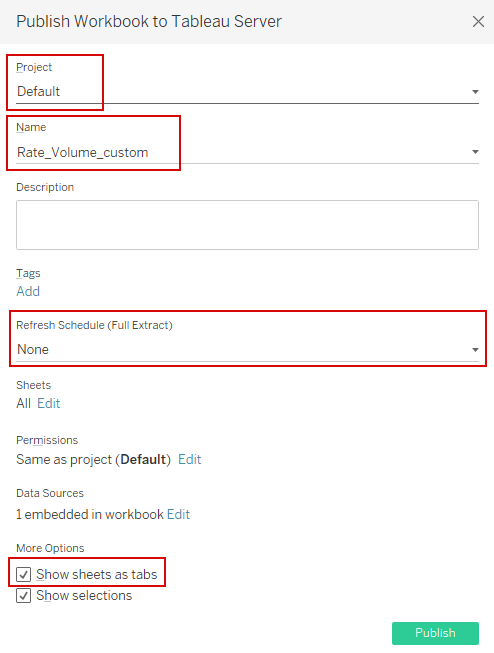
Check Project and Name fields.
We strongly recommend using the '_custom' postfix in the name to meet the WF Dashboard configuration requirements. The name must not start with a digit.
Once the workbook is published, the dashboard appears on the Analytics > Custom page of CT.
Select Show sheets as tabs option.
Optionally, you can add the Refresh extract schedule.
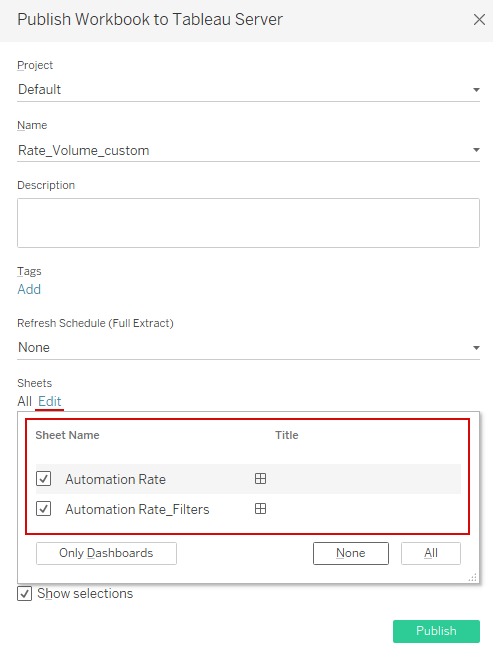
In the Sheets section, click Edit, and select sheets to publish.
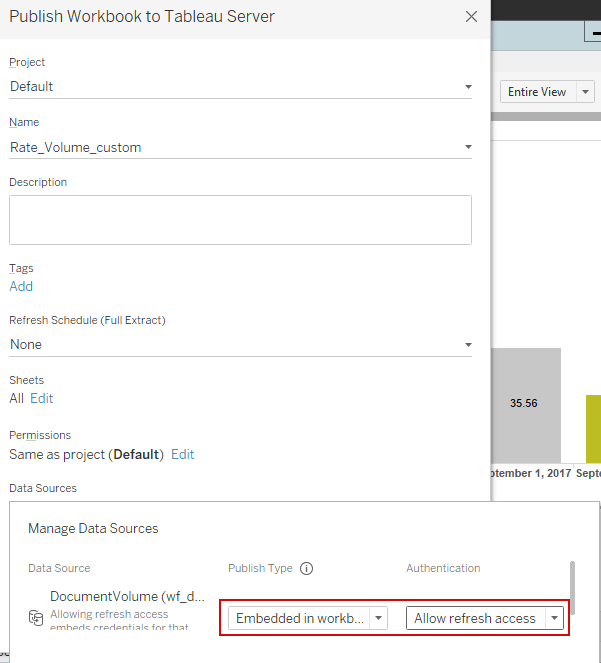
In the Data Sources section, click Edit and change the publish type to Embedded in workbook and Authentication mode to Allow refresh access.
Click Publish.
Check the published workbook on the BI server.