Install Analytics Windows Server
Install Analytics Server
Starting from 10.2.8, the default analytics tool is Superset. Tableau is available in the read only mode as an option in addition to Superset.
Starting from version 10.2.2, BI workbooks are not published by default during the installation process. If you need them to be published during the installation, go to
config.ymland set thepublish_bi_dashboardsvariable toTrue.Another option to publish BI workbooks is to run the following command at any time after the installation completes.
$ ./install.sh install bi_workbooks -e publish_bi_dashboards=true
To install the Analytics Server, follow the steps below:
On the Master server, migrate the databases:
$ cd /opt/workfusion/wf_installer
$ ./install.sh migrate bi
You can also migrate the databases after the installation. In this case, after you finish the setup, run the preceding command and restart the Analytics server to apply the changes.
Generate configuration files required by the Analytics installer and make the installer and configuration files downloadable from the Master server over HTTP. For that, replace
/opt/workfusion/wf_installerwith correctPACKAGE_DIRfor your environment, and execute the following commands on the Master server.$ cd /opt/workfusion/wf_installer
$ ./install.sh generate_conf bi
$ python -m http.server 9999Here, port 9999 is used as an example. You can use any free Master server port accessible from the Analytics ones. If, for some reason, you are not allowed to open other ports, ignore the
python -m http.server PORTcommand, and copy the files manually from the Master to Analytics servers.The Analytics Installer is now temporarily downloadable from the Master server over HTTP. You can stop the HTTP server after copying.
Connect to the Analytics server via RDP as a Windows Administrator user.
Launch PowerShell ISE as Administrator. Copy the following script and execute it in PowerShell on the Analytics servers.
See the script...
Before the execution, remember to modify the lines in the section between
# FILL IN THE PARAMETERS BELOWand# =========================================according to your configuration. Remember to change the<bi1_hostname>variable to<bi2_hostname>when installing to a second Analytics server in the high-availability mode.# INSTALL TABLEAU SERVER
# FILL IN THE PARAMETERS BELOW
$download_from = "<Master server hostname>:9999" # any port on the Master server accessbile from Analytics
$install_dir = "c:\workfusion" # The value of "bi_install_dir" you set in config.yml during the installation of Linux servers.
$bi1_hostname = "<bi1_hostname>"
$env:lic_key="trial"
$env:win_user="username" # The value of "bi_user" you set in config.yml during the installation of Linux servers.
$env:win_pass='"password"' # Leave single and double quotes in place. Replace only word password. The value of "bi_pass" you set in config.yml during the installation of Linux servers.
$env:TABLEAU_USER="username" # The value of "tableau_admin_user" you set in config.yml during the installation of Linux servers.
$env:TABLEAU_PASS="password" # The value of "tableau_admin_pass" you set in config.yml during the installation of Linux servers.
$mssql_kerberos_auth="FALSE" # The value of "mssql_kerberos_auth" you set in config.yml during the installation of Linux servers.
$mssql_dm_user="username" # The value of "mssql_dm_user" you set in config.yml. Set this value only when $mssql_kerberos_auth="TRUE"
$mssql_dm_pass="password" # The value of "mssql_dm_pass" you set in config.yml. Set this value only when $mssql_kerberos_auth="TRUE"
# IMPORTANT: do not use spaces in the below variables when separating values. It should be a comma-separated list, NOT a comma-and-space-separated list.
$env:TABLEAU_TRUSTED_HOSTS="<bi_lb_hostname>,<master1_hostname>,<master2_hostname>,<master3_hostname>" # Remove <master2_hostname> and <master3_hostname>if there is only one Master server in the environment.
$env:GATEWAY_PUBLIC_HOST="<bi_lb_hostname>,<bi1_hostname>,<bi2_hostname>" # Remove "bi2_hostname" if there is only one Analytics server in the environment.
$env:GATEWAY_TRUSTED_IP_ADDRESSES="<bi_lb_ip_address>,<bi_server_ip_address>,<master1_ip_address>,<master2_ip_address>,<master3_ip_address>,127.0.0.1" # Remove <master2_ip_address> and <master3_ip_address> if there is only one Master server in the environment
$env:GATEWAY_PUBLIC_PORT=443 # Load balancer port
$bi_installer = "<installer-name>.zip" #Specify manually. Find the name of the installer in INSTALL_DIR/sources. For example, /opt/workfusion/wf_installer/sources/WorkFusionAnalyticsInstaller-10.1.6.zip
# =========================================
Write-Host "Creating ${install_dir}\WorkFusionAnalyticsServer"
New-Item -ItemType directory -Path "${install_dir}\WorkFusionAnalyticsServer" -Force
$wc = New-Object net.webclient
Write-Host "Downloading Analytics installer"
$wc.Downloadfile("http://${download_from}/sources/${bi_installer}", "${install_dir}\${bi_installer}")
Write-Host "Unpacking Analytics installer"
Add-Type -assembly "system.io.compression.filesystem"
[System.IO.Compression.ZipFile]::ExtractToDirectory("${install_dir}\${bi_installer}", "${install_dir}\WorkFusionAnalyticsInstaller")
Write-Host "Downloading zip package with configs and certificates"
$wc.Downloadfile("http://${download_from}/win_confs/bi_configs/${bi1_hostname}/bi_installer_conf.zip", "${install_dir}\WorkFusionAnalyticsServer\bi_installer_conf.zip")
Write-Host "Unpacking configs and certificates"
Add-Type -assembly "system.io.compression.filesystem"
[System.IO.Compression.ZipFile]::ExtractToDirectory("${install_dir}\WorkFusionAnalyticsServer\bi_installer_conf.zip", "${install_dir}\WorkFusionAnalyticsServer")
Read-Host -Prompt "Confirm that you have desired content of ${install_dir}\WorkFusionAnalyticsInstaller\WorkFusionAnalyticsServer\identity_store.json by pressing Enter key"
Write-Host "Installing Tableau Server"
cd "${install_dir}\WorkFusionAnalyticsInstaller\WorkFusionAnalyticsServer"
.\install_server.ps1 -config "${install_dir}\WorkFusionAnalyticsServer\install_config.txt"Close PowerShell ISE.
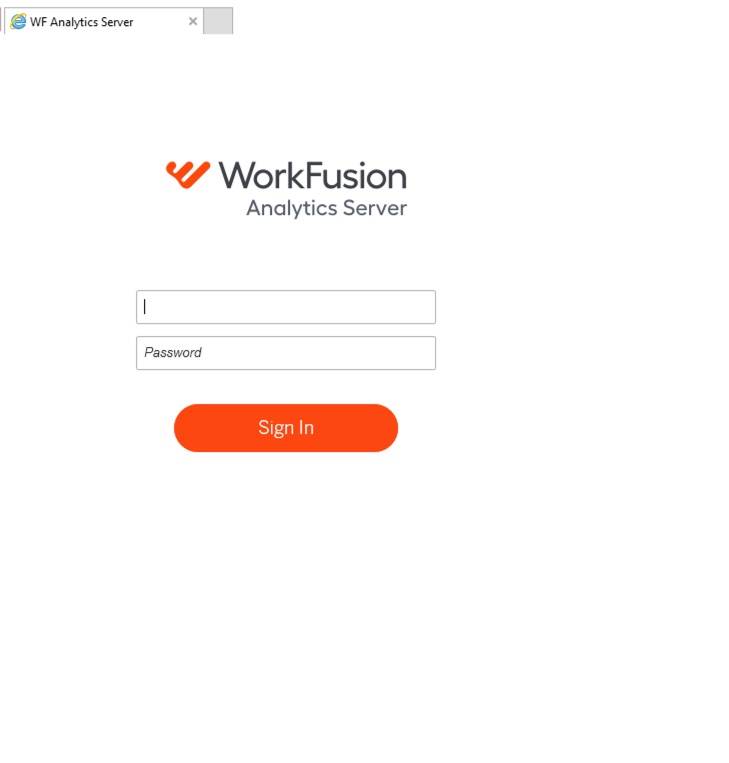
On the Analytics server, in a browser, go to https://localhost to check that the default page opens.
Install Analytics Desktop
If you are installing Analytics Desktop to a local PC, copy the Analytics installer from the Analytics server to your machine before performing the following steps.
To install the Analytics Desktop, do as follows:
On your server or PC, start the Command Prompt (not PowerShell) and go to the WorkfusionAnalyticsDesktop directory in the unpacked installation package.
Run the
install\_desktop.batinstallation batch file with the specified installation directory:$ install_desktop.bat INSTALL_DIR
# For example: install_desktop.bat C:\workfusion\WorkFusionDesktopClick the WorkFusion Analytics Desktop shortcut to start the application, and then enter the license key.
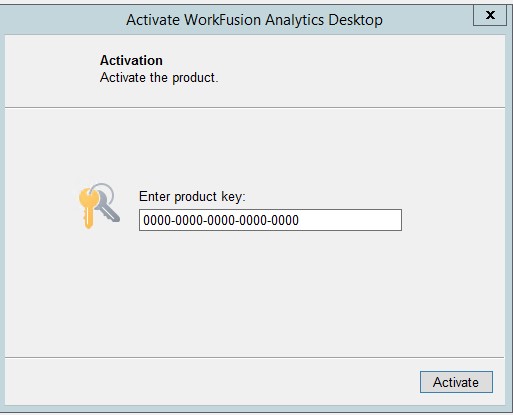
For more information on Activation options, see Manage the WorkFusion Analytics license.
Install Filebeat
To install Filebeat, follow the steps below:
Launch the New PowerShell ISE as Administrator.
Copy the following script and execute it on the Analytics server(s) in PowerShell.
Before the execution, remember to modify the lines in the section between
# TO FILL IN BY CUSTOMERand# =========================================according to your configuration.# INSTALL FILEBEAT
# TO FILL IN BY CUSTOMER
$install_dir = "c:\workfusion" # The value of "bi_install_dir" you set in config.yml during the installation of Linux servers.
$master_hostnames = "<Master1 HOSTNAME>:4567" # in HA mode "<Master1 HOSTNAME>:4567,<Master2 HOSTNAME>:4567,<Master3 HOSTNAME>:4567"
$bi_hostname = "<CURRENT Analytics SERVER HOSTNAME>"
# =========================================
$package_dir = "${install_dir}\WorkFusionAnalyticsServer"
$filebeat_dir = "${install_dir}\filebeat"
if(!$(Test-Path -Path "${install_dir}\WorkFusionAnalyticsInstaller\Filebeat\inputs.d\input-WorkfusionAnalyticsServer.yml")) {
Copy-Item "${install_dir}\WorkFusionAnalyticsInstaller\Filebeat\inputs.d\input-workfusion-analytics-server.yml" -Destination "${install_dir}\WorkFusionAnalyticsInstaller\Filebeat\inputs.d\input-WorkfusionAnalyticsServer.yml"
}
Write-Host "Installing Filebeat"
cd "${install_dir}\WorkFusionAnalyticsInstaller\Filebeat"
cmd.exe /c "install_filebeat.bat ${filebeat_dir} ${package_dir} ${bi_hostname} ${master_hostnames}"
if(!$(Test-Path -Path "${filebeat_dir}\ca.crt")) {
Copy-Item "${package_dir}\ca.crt" -Destination "${filebeat_dir}\ca.crt"
}
while(!$(Test-Path -Path "${filebeat_dir}\ca.crt")) {
Read-Host -Prompt "ca.crt not found. Confirm that you've placed it to ${filebeat_dir} directory by pressing Enter key"
}
Start-Service filebeat
Get-Service filebeat
If Filebeat starts with the "setting ‘filebeat.registry_file’ has been removed" error, open filebeat.yml and remove the line: registry_file: registry_in.
Install Metricbeat
To install Metricbeat, act as follows:
Launch the New PowerShell ISE as Administrator.
Copy the following script and execute it on the Analytics server(s) in PowerShell.
Before the execution, remember to modify the lines in the section between
# TO FILL IN BY CUSTOMERand# =========================================according to your configuration.# INSTALL METRICBEAT
# TO FILL IN BY CUSTOMER
$install_dir = "c:\workfusion" # The value of "bi_install_dir" you set in config.yml during the installation of Linux servers.
$master_hostnames = "<Master1 HOSTNAME>:4569" # in HA mode "<Master1 HOSTNAME>:4569,<Master2 HOSTNAME>:4569,<Master3 HOSTNAME>:4569"
$bi_hostname = "<CURRENT Analytics SERVER HOSTNAME>"
# =========================================
$package_dir = "${install_dir}\WorkFusionAnalyticsServer"
$metricbeat_dir = "${install_dir}\metricbeat"
Write-Host "Installing metricbeat"
cd "${install_dir}\WorkFusionAnalyticsInstaller\metricbeat"
cmd.exe /c "install_metricbeat.bat ${metricbeat_dir} ${package_dir} ${bi_hostname} ${master_hostnames}"
if(!$(Test-Path -Path "${metricbeat_dir}\ca.crt")) {
Copy-Item "${package_dir}\ca.crt" -Destination "${metricbeat_dir}\ca.crt"
}
while(!$(Test-Path -Path "${metricbeat_dir}\ca.crt")) {
Read-Host -Prompt "ca.crt not found. Confirm that you've placed it to ${metricbeat_dir} directory by pressing Enter key"
}
Start-Service metricbeat
Get-Service metricbeat
Publish out-of-the-box Tableau dashboards
Since the v.10.2.2.0 product version, it is recommended NOT to publish out-of-the-box Tableau analytics dashboards by default due to significant performance impact on the platform. However, make sure to follow the instructions below. You still need to perform preparation steps so that if, at some point in time, you decide to publish your custom analytics dashboards or out-of-the-box dashboards, you'll be able to do it with a single command.
Prerequisites
- Microsoft Server 2008 R2 or newer is installed.
- WorkFusion Analytics Server 2018.3.2 or newer is installed. The WF Analytics version in the package is 2018.3.9.
- JScript execution from the command line (CMD) is allowed on the server.
JScript is required to execute workbook publishing scripts. If, for some reason (for example, due to security restrictions), JScript is disabled on the server, enable it temporarily during the installation, and then disable it again, if needed.
Launch the New PowerShell ISE as Administrator.
Copy the following script and execute it on the Analytics servers in PowerShell. This script doesn't publish out-of-the-box analytics dashboards. The script is intended to do the following:
- Create tableau Site with a desired name for publishing analytics dashboards
- Prepare configuration files for publishing analytics dashboards
- Prepare a folder structure and the content for publishing analytics dashboards
See the script...
Before the execution, remember to modify the lines in the section between
# TO FILL IN BY CUSTOMERand# =========================================according to your configuration.# INSTALL WORKBOOKS
# TO FILL IN BY CUSTOMER
$download_from = "<Master server hostname>:9999"
$current_host = "<CURRENT Analytics SERVER HOSTNAME>"
$current_site = "<SITE NAME>" # The first octet of workfusion_lb_hostname from hosts.yml
# if workfusion_lb_hostname is "example-workfusion-lb1.workfusion.com", then $current_site = "example-workfusion-lb1"
$install_dir = "c:\workfusion" # The value of "bi_install_dir" you set in config.yml during the installation of Linux servers.
$workbooks_installer = "WorkFusionAnalyticsWorkbooks-<version>.zip" # Specify manually. Find the name of the installer in INSTALL_DIR/sources. For example, opt/workfusion/sources/WorkFusionAnalyticsWorkbooks-10.1.6.zip.
# =====================================
$tdeploy_home = "${install_dir}\tdeploy_home"
$workbooks_config = "${tdeploy_home}\deploy\config"
Write-Host "Creating tdeploy_home"
New-Item -ItemType directory -Path $tdeploy_home -Force
Write-Host "Downloading workbooks installer"
$wc = New-Object net.webclient
$wc.Downloadfile("http://${download_from}/sources/${workbooks_installer}", "${install_dir}\${workbooks_installer}")
Write-Host "Unpacking Workbooks installer"
Add-Type -assembly "system.io.compression.filesystem"
[System.IO.Compression.ZipFile]::ExtractToDirectory("${install_dir}\${workbooks_installer}", "${install_dir}\WorkbooksInstaller")
New-Item -ItemType directory -Path "${tdeploy_home}\install\" -Force
Copy-Item "${install_dir}\WorkbooksInstaller\deploy-tools\*" -Destination "${tdeploy_home}\install\" -Recurse
Write-Host "Executing install.cmd"
cd "${tdeploy_home}\install"
cmd.exe /c "install.cmd ${tdeploy_home}"
Write-Host "Executing create_sitefolder.cmd"
cd "${tdeploy_home}\deploy"
cmd.exe /c "create_sitefolder.cmd ${current_site}"
Write-Host "Downloading workbooks configs"
$wc.Downloadfile("http://${download_from}/win_confs/bi_configs/${current_host}/config.${current_site}.cmd", "${workbooks_config}\config.${current_site}.cmd")
$wc.Downloadfile("http://${download_from}/win_confs/bi_configs/${current_host}/import_users.csv", "${workbooks_config}\import_users.csv")
Write-Host "Executing manage_server.cmd"
cd "${tdeploy_home}\deploy"
cmd.exe /c "manage_server.cmd ${current_site}"
Write-Host "Copying dashboards and datasources"
Copy-Item "${install_dir}\WorkbooksInstaller\dashboards\workbook\*" -Destination "${tdeploy_home}\deploy\to_deploy\${current_site}\dashboard\" -Recurse
Copy-Item "${install_dir}\WorkbooksInstaller\dashboards\datasources\*" -Destination "${tdeploy_home}\deploy\to_deploy\${current_site}\datasource\" -RecursePublish out-of-the-box Tableau analytics dashboards. Specify the correct
$install_dirand$current_siteaccording to your setup (use the same values as in previous step), and execute in Powershell or Powershell ISE as Administrator:noteThis step is optional and not recommended when you initially install the product. Publishing out-of-the-box Tableau analytics dashboards affects the platform's performance.
$install_dir = "c:\workfusion"
$current_site = "<SITE NAME>"

$tdeploy_home        = "${install_dir}\tdeploy_home"

Write-Host "Executing publish.cmd"
cd "${tdeploy_home}\deploy"
cmd.exe /c "publish.cmd ${current_site}"
Configure schedulers
To configure schedulers, follow the steps below:
On the Analytics (Analytics) server, launch the New PowerShell ISE.
Copy and execute the following script in PowerShell ISE. Pay attention to the
$dashboards_publishedvariable in the begginning of the script. Set it to$trueonly if you published dashboards in the previous step.See the script...
Before the execution, remember to modify the lines in the section between
# TO FILL IN BY CUSTOMERand# =========================================according to your configuration.Clear-Host
[Net.ServicePointManager]::SecurityProtocol = [Net.SecurityProtocolType]::Tls12
# TO FILL IN BY CUSTOMER
$dashboards_published = $false
$bi_hostname = "" # hostname of current bi server from hosts.yml bi_hostnames
$tableau_admin_user = "" # tableau_admin_user from config.yml
$tableau_admin_pass = "" # tableau_admin_pass from config.yml
$current_site = "" # The first octet of workfusion_lb_hostname from hosts.yml
$tustAllcerts = $false # trust self-signed certificates
# =====================================
$tableau_api_version = "2.8"
$signin_address = "https://${bi_hostname}/api/${tableau_api_version}/auth/signin"
$schedules_address = "https://${bi_hostname}/api/${tableau_api_version}/schedules"
$sites_address = "https://${bi_hostname}/api/${tableau_api_version}/sites"
if($tustAllcerts) {
add-type @"
using System.Net;
using System.Security.Cryptography.X509Certificates;
public class TrustAllCertsPolicy : ICertificatePolicy {
public bool CheckValidationResult(
ServicePoint srvPoint, X509Certificate certificate,
WebRequest request, int certificateProblem) {
return true;
}
}
"@
[System.Net.ServicePointManager]::CertificatePolicy = New-Object TrustAllCertsPolicy
}
$signin_body = @"
<tsRequest>
<credentials name="${tableau_admin_user}" password="${tableau_admin_pass}" >
<site contentUrl="${current_site}" />
</credentials>
</tsRequest>
"@
$fifteen_min_schedule = @"
<tsRequest>
<schedule name="15min-schedule"
priority="50"
type="Extract"
frequency="Hourly"
executionOrder="Serial">
<frequencyDetails start="12:00:00" end="12:00:00">
<intervals>
<interval minutes="15" />
</intervals>
</frequencyDetails>
</schedule>
</tsRequest>
"@
$aa_etl_fifteen_min_schedule = @"
<tsRequest>
<schedule name="aa-etl-15min-schedule"
priority="10"
type="Extract"
frequency="Hourly"
executionOrder="Serial">
<frequencyDetails start="12:00:00" end="12:00:00">
<intervals>
<interval minutes="15" />
</intervals>
</frequencyDetails>
</schedule>
</tsRequest>
"@
$workbook_raw = @"
<tsRequest>
<task>
<extractRefresh>
<workbook id="{0}" />
</extractRefresh>
</task>
</tsRequest>
"@
$datasource_raw = @"
<tsRequest>
<task>
<extractRefresh>
<datasource id="{0}" />
</extractRefresh>
</task>
</tsRequest>
"@
Write-Host "Simulating TASK [bi_workbooks : Login into Tableau via api: POST ${signin_address}] ***"
$signin_response = Invoke-WebRequest $signin_address -Body $signin_body -Method 'POST' -Headers @{'Accept' = 'application/json'}
Write-Host "Simulating TASK [bi_workbooks : Save Tableau Access Token and Site id] ********************"
$tableau_token = ($signin_response | ConvertFrom-Json).credentials.token
$site_id = ($signin_response | ConvertFrom-Json).credentials.site.id
Write-Host "Simulating TASK [bi_workbooks : List schedules: GET ${schedules_address}] ***"
$list_schedules_response = Invoke-WebRequest $schedules_address `
-Method 'GET' `
-Headers @{'X-Tableau-Auth' = $tableau_token; 'Accept' = 'application/json'}
Write-Host "Simulating TASK [bi_workbooks : Check if '15min-schedule' created] ************************"
$schedule_exists = (($list_schedules_response | ConvertFrom-Json).schedules.schedule | where { $_.name -eq "15min-schedule" }) -ne $null
Write-Host "Simulating TASK [bi_workbooks : Check if 'aa-etl-15min-schedule' created] ************************"
$aa_etl_schedule_exists = (($list_schedules_response | ConvertFrom-Json).schedules.schedule | where { $_.name -eq "aa-etl-15min-schedule" }) -ne $null
if(!$schedule_exists) {
Write-Host "Simulating TASK [bi_workbooks : Create 15min Schedule named '15min-schedule': POST ${schedules_address}] ***"
$create_schedule_response = Invoke-WebRequest $schedules_address `
-Body $fifteen_min_schedule `
-Method 'POST' `
-Headers @{'X-Tableau-Auth' = $tableau_token; 'Accept' = 'application/json'}
}
if(!$aa_etl_schedule_exists) {
Write-Host "Simulating TASK [bi_workbooks : Create 15min Schedule named 'aa-etl-15min-schedule': POST ${schedules_address}] ***"
$create_schedule_response = Invoke-WebRequest $schedules_address `
-Body $aa_etl_fifteen_min_schedule `
-Method 'POST' `
-Headers @{'X-Tableau-Auth' = $tableau_token; 'Accept' = 'application/json'}
}
Write-Host "Simulating List schedules: GET ${schedules_address}] ***"
$list_schedules_response = Invoke-WebRequest $schedules_address `
-Method 'GET' `
-Headers @{'X-Tableau-Auth' = $tableau_token; 'Accept' = 'application/json'}
Write-Host "Simulating TASK [bi_workbooks : set_fact: save '15min-schedule' schedule Id] **************"
$schedule_id = (($list_schedules_response | ConvertFrom-Json).schedules.schedule | where { $_.name -eq "15min-schedule" }).id
Write-Host "Simulating TASK [bi_workbooks : set_fact: save 'aa-etl-15min-schedule' schedule Id] **************"
$aa_etl_schedule_id = (($list_schedules_response | ConvertFrom-Json).schedules.schedule | where { $_.name -eq "aa-etl-15min-schedule" }).id
if($dashboards_published) {
Write-Host "Simulating TASK [bi_workbooks : Query workbooks: GET ${sites_address}/${site_id}/workbooks] ***"
$list_workbooks_response = Invoke-WebRequest "${sites_address}/${site_id}/workbooks" `
-Method 'GET' `
-Headers @{'X-Tableau-Auth' = $tableau_token; 'Accept' = 'application/json'}
Write-Host "Simulating TASK [bi_workbooks : Assign 'aa-etl-15min-schedule' to workbooks: PUT ${sites_address}/${site_id}/schedules/${aa_etl_schedule_id}/workbooks] ***"
($list_workbooks_response | ConvertFrom-Json).workbooks.workbook | ForEach-Object -Process {
if($_.project.name -eq $current_site) {
$assign_schedule_response = Invoke-WebRequest "${sites_address}/${site_id}/schedules/${aa_etl_schedule_id}/workbooks" `
-Body ($workbook_raw -f $_.id) `
-Method 'PUT' `
-Headers @{'X-Tableau-Auth' = $tableau_token; 'Accept' = 'application/json'}
}
}
Write-Host "Simulating TASK [bi_workbooks : Query datasources: GET ${sites_address}/${site_id}/datasources] ***"
$list_datasources_response = Invoke-WebRequest "${sites_address}/${site_id}/datasources" `
-Method 'GET' `
-Headers @{'X-Tableau-Auth' = $tableau_token; 'Accept' = 'application/json'}
Write-Host "Simulating TASK [bi_workbooks : Assign '15min-schedule' to datasources: PUT ${sites_address}/${site_id}/schedules/${schedule_id}/datasources] ***"
($list_datasources_response | ConvertFrom-Json).datasources.datasource | ForEach-Object -Process {
if($_.project.name -eq $current_site) {
$assign_schedule_response = Invoke-WebRequest "${sites_address}/${site_id}/schedules/${schedule_id}/datasources" `
-Body ($datasource_raw -f $_.id) `
-Method 'PUT' `
-Headers @{'X-Tableau-Auth' = $tableau_token; 'Accept' = 'application/json'}
}
}
}
Enable Tableau dashboard
By default, after the installation, the Tableau analytics dashbords are switched off. To use the dashboards, you have to enable them.
To enable the Tableau analytics dashboards in Control Tower, do as follows:
After installing the Analytics server, deploy workbooks to the server as described earlier.
Enable the WorkFusion Analytics server on the WorkFusion platform:
On the Master Server, check and configure the Vault secure properties file. The file must already be configured before the installation.
<!-- Set bi_lb_hostname of Analytics server -->
tableau.dashboard.host=https://bi-lb.example.com

<!-- Set login and password for connection to Analytics server -->
tableau.dashboard.username=tableau_user
tableau.dashboard.password=tableau_pass
Property Name Example Value Description Required for tableau.dashboard.hosthttps://bi-lb.example.com WorkFusion Analytics Server website URL for Dashboard WorkFusion Analytics Dashboard tableau.dashboard.usernametableau_user WorkFusion Analytics Server website username for dashboard (was used in import_users.csv) WorkFusion Analytics Dashboard tableau.dashboard.passwordtableau_pass WorkFusion Analytics Server website password for dashboard (was used in import_users.csv) WorkFusion Analytics Dashboard On the Master Server, restart the Workfusion service as the application user:
wfmanager restart workfusion
Run Tableau analytics as database AD user
Only for the installation with database logins from Active Directory.
To run Tableau analytics as an AD user, follow the steps below:
Go to the
BI_HOSTNAMEand, in your browser, log in to Tableau at https:/localhost:wf_tableau_port asBI_USER.In the main menu, click Configuration > Security > Run As Service Account, and select User Account. Enter the domain username
mssql_dm_userand the password.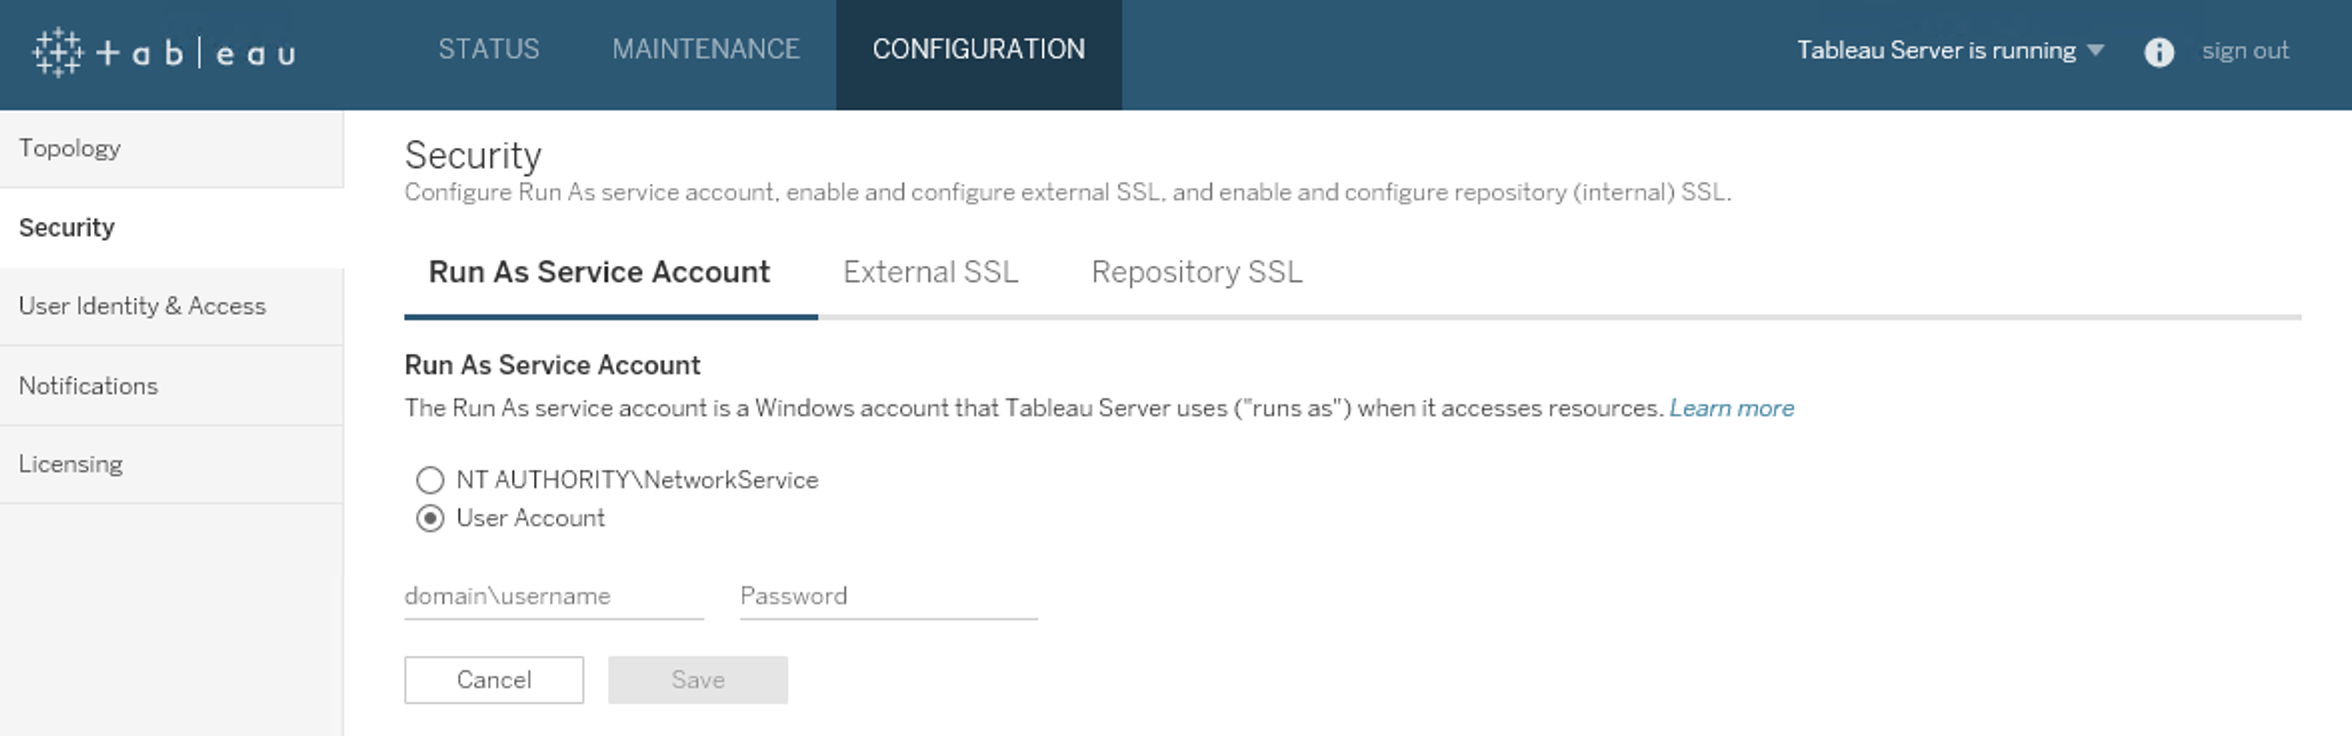
Сlick Save > Pending Changes > Apply Changes and Restart and wait until the restart process ends.
Stop standby Tableau server
For the high-availability installation only.
On the second Tableau server, run the following commands in Powershell as Administrator:
cd <bi_dir>\packages\bin.20183.19.0714.2346
.\tsm login -u .\<bi_user> -p <bi_pass>
.\tsm stop
Stopping service...
Job id is '4', timeout is 30 minutes.
Service stopped successfully.