Mouse
The Mouse action group is intended to interact with user interface using mouse.
All the Mouse actions are automatically recorded when you manipulate your mouse during the recording process.
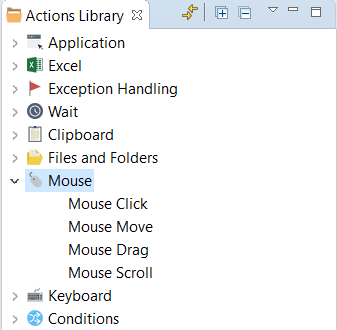
You can add the Mouse Click, Mouse Move, Mouse Drag, or Mouse Scroll actions manually by dragging from Actions Library to Actions Flow.
Mouse action location
Each mouse action needs a specific location (target), that is a place on the computer screen or application where the action is applied to. Currently, Recorder supports four types of targets.
- Window control: a Windows Desktop application component selected by its property, for example,
Class,Name, and so on. - Image: a graphical image of a UI control (button, input field, link, etc.) which Bot tries to find and click (hover, drag, scroll) while script execution. See Editing Images for more details.
- Position: X and Y coordinates of a point from the top left screen corner.
- Web element: an XML or HTML document element selected using a Text or XPath expression.That is the most reliable way to specify the location, as it depends on the web document (page) structure, not on the color scheme or location on the screen that may vary from one machine to another.
Window Control
In this mode, Recorder captures UI controls of Windows applications selected for Bot to click during script execution.
The mode is used for Windows applications only. Thus, you cannot select an object on a web page, or inside certain documents.
By default, Recorder uses Window controls for capturing user actions in the recording mode and tries to find the same elements and click on them during script execution. If you record your actions in a browser, Window controls are recorded by default for mouse actions on the web page, but will fail during execution. You need to edit mouse actions in the browser by switching them to the Image mode (images are recorded as a fallback option).
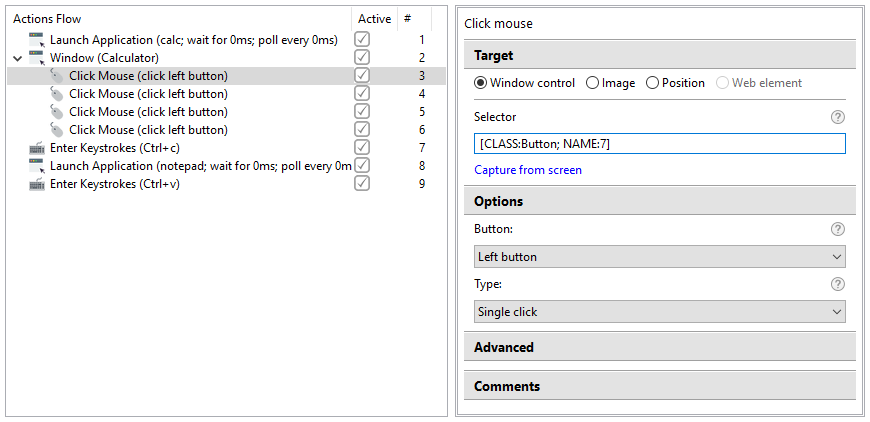
To set up the Mouse Click action for a UI control, follow a short instruction below.
Before using Mouse Click for a control, make sure to switch to the application window with the help of the Window action.
Select Window control in Target.
Enter a selector for your application control.
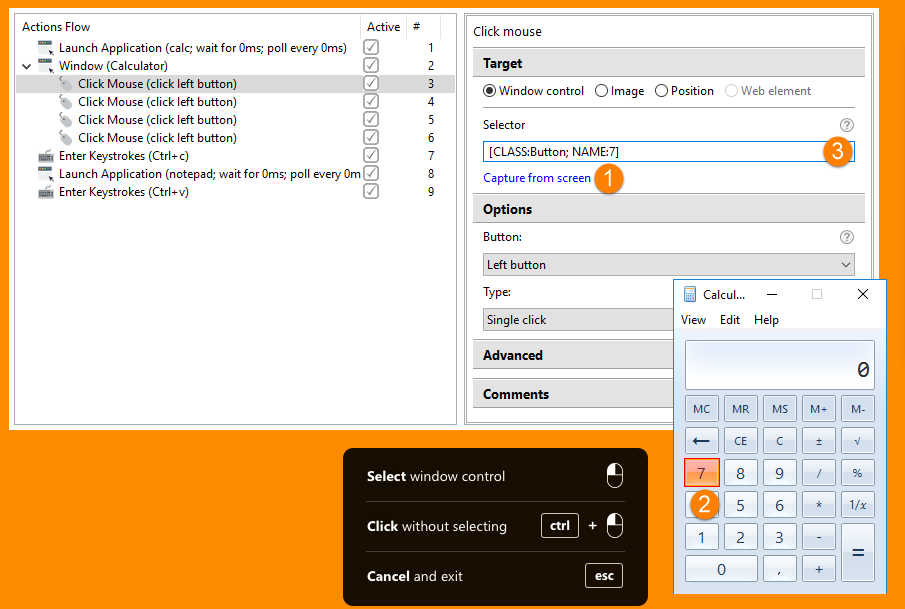
- Use the Capture from screen option (1) and click the desired window control in the application (2). The selector is automatically entered into the Selector field (3).
There are cases when you need to click a control without the selector being assigned to the element, for example, to explore other application options or switch to another application. Use the black menu as a prompt.
- To click the control without its selector being selected, use the left mouse click + Ctrl.
- To cancel capturing, press Esc.
In the example above, the button \"7\" is selected in Calculator.
- Make sure Calculator is open and click Capture from screen.
- Switch to Calculator and click 7.
- The element selector consisting of the
ClassandNameproperties is automatically inserted into the Selector field.
Image
By default, Bot clicks (hovers, scrolls, drags) directly into the center of the captured image.
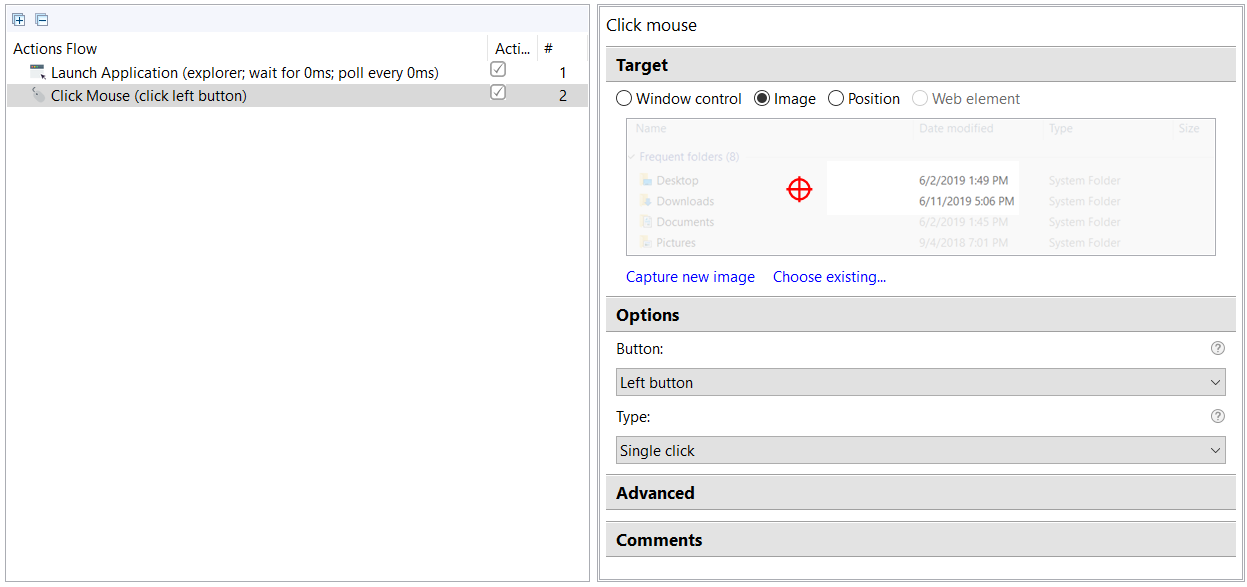
To set the crosshair to a custom place, do as follows:
Click the image.

A pop-up dialog with 100% zoom on the image is shown.
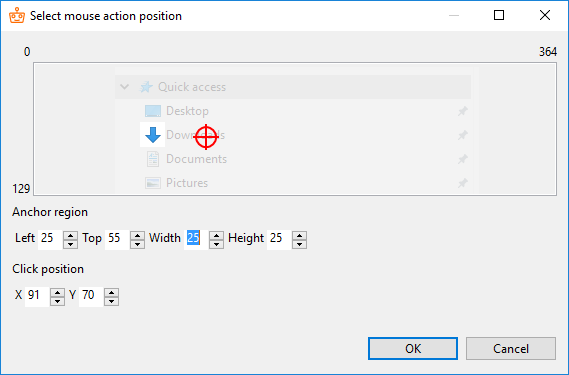
Set up the location for Bot to click.
Anchor region: the selected area that defines what Bot should find on the screen (an anchor) as a reference point to location where it should perform the action.
- Edit values in the Left, Top, Width, Height fields.
- Or use Arrow Up/Arrow Down to increase/decrease the value to 1 respectively, or PgUp/PgDn keys to increase/decrease the value to 5 respectively.
Click position: the place for Bot to click.
- Click on the image to move the crosshair to this position.
- Or set the values in the X and Y fields.
When executing a script, Bot:
- In the currently open window, searches for an area that looks practically the same as the Anchor area.
- If the area is found, performs action at the Crosshair position (determined by the Offset parameter).
- If the area is not found, informs about an error occured, and the execution stops.
- The image in the Anchor area should contain static info (input label, icon, heading, table column name) that will not be changed if new data is displayed.
- Bot will NOT search for image that is outside the Anchor area (grayed-out part).
- The crosshair can be placed inside or outside the Anchor area, depending on where the action is applied.
Position
Clicking on position is not a stable solution, because it requires the same window size, screen resolution, and content layout for each Bot launch.
Mouse actions by position in web are NOT supported. Do not select this option if the Mouse action is nested in Open Website or Switch to Browser action.
To make Bot click on screen coordinates, do as follows.
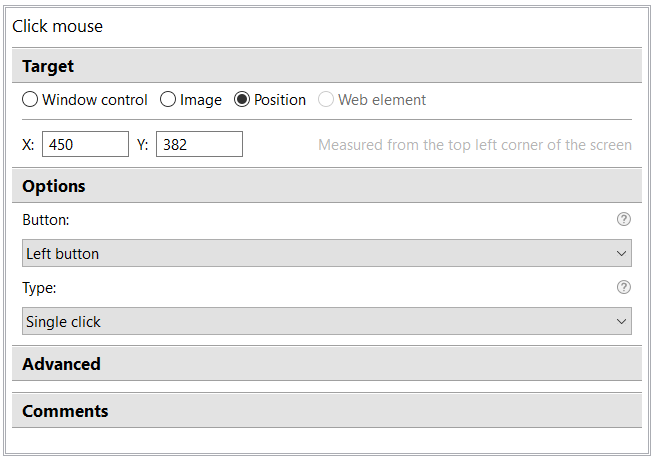
Select the Position option.
Enter the X and Y coordinates of the action point (from the top-left screen corner).
Web Element
You can use Mouse Click with Web Element with the Open Website action only.
The action is performed on web page elements, for example, buttons, links, or input fields.
Mouse actions
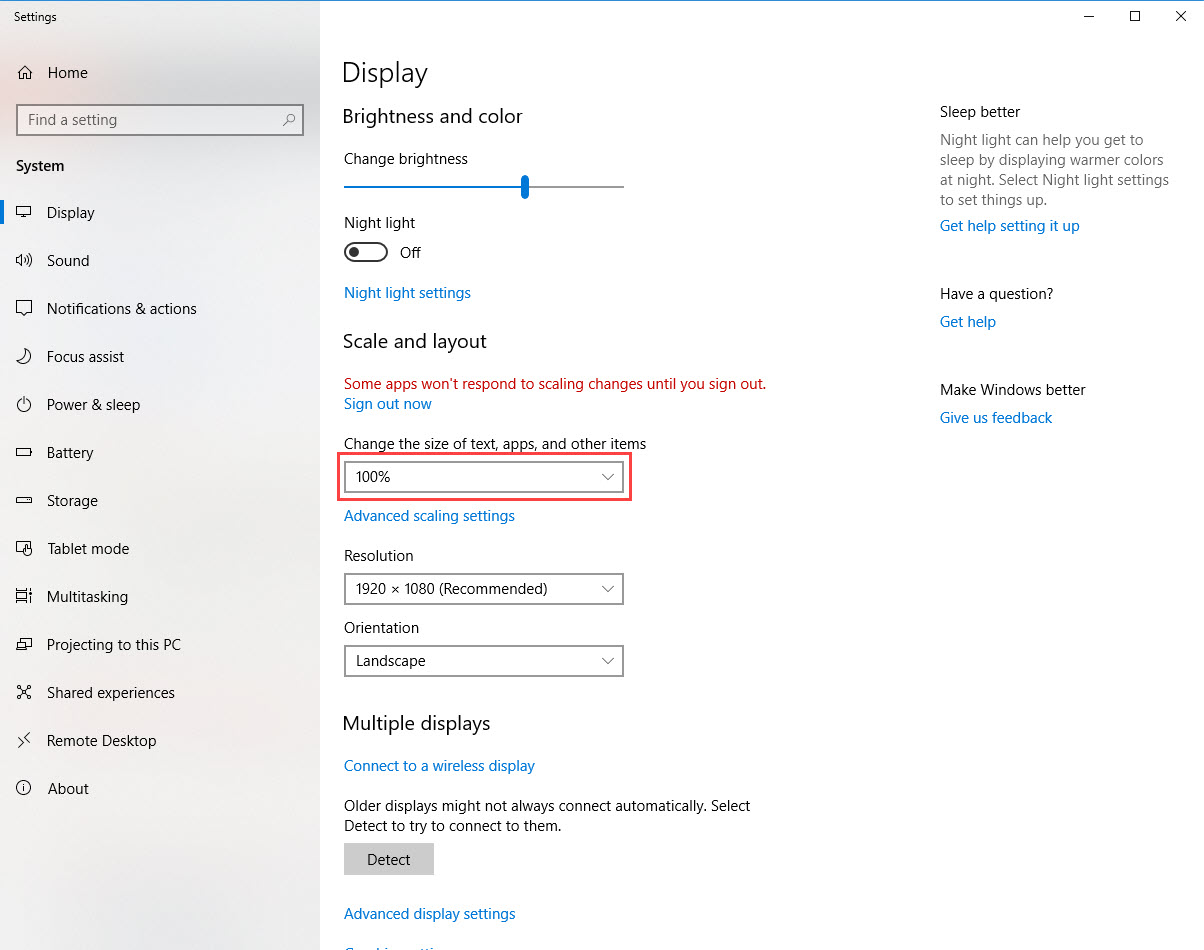
If you use Internet Explorer as a browser for automating, make sure your Windows display scaling is set up to 100%, otherwise a Bot will not be able to click on the needed elements.
Expand to see the scaling settings
Go to Start > Settings > System > Display.
In Scale and Layout, select 100% for Change the size of text, apps, and other items. The changes apply automatically.
Mouse Click
The Mouse Click action represents a mouse click on a given image, XPath, or position, and supports different types of clicks and buttons.
- Mouse button:
- Left
- Right
- Middle (wheel)
- Types of click:
- Single
- Double
- Triple
- Hold down
- Release
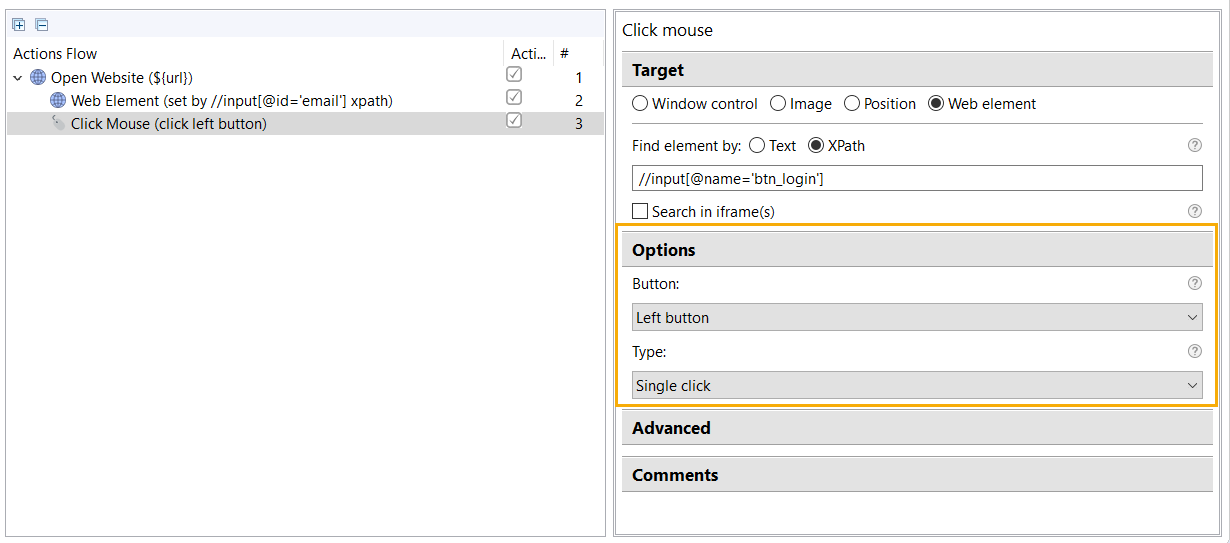
Find element by text
You can use Mouse Click with Web Element with the Open Website action only.
Add Mouse Click to Open Website, choose Web Element as Target, and select the Find element by Text option.
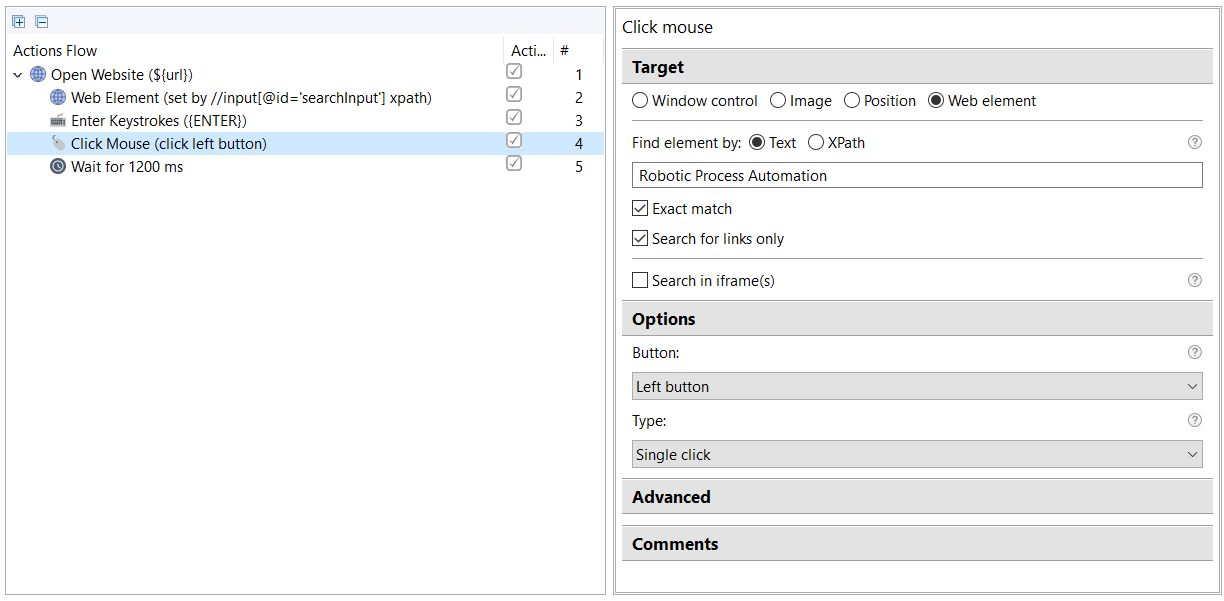
Enter Text of your link in the respective field.
Select Exact match to enable the strict search.
Select Search for links only to search for the text in the links only, for example, in the HTML elements enclosed in the
<a>tag.When you use Find element by Text with selected Search for links only, for example,
My Site, Bot clicks the following link:<a href='http://mysite.com'>My Link</a>. If the text in your link is enclosed to some other tags, for example,<bold>, Bot is not able to find the text:<a href='http://mysite.com'><bold>My Link</bold></a>Select Search in iframe(s), if the link you need to click on is located in an iframe (or iframes) as shown on the image below.
The iframe containing the link can be enclosed in another iframe. In this case, you should define each iframe separately.

For this purpose, click Add XPath frame and define the iframe that holds the iframe with the link.
When defining the iframes, you should keep to the following order.
- The first iframe: the iframe containing the link.
- The second iframe: the parent iframe that the previous iframe is enclosed in.
- More enclosed iframes: all of them are defined one by one so as the root iframe takes the last place.
Mind that frames and iframes perform similar functions of embedding a resource into the web page, still they are different. The frameset splits a browser window into multiple frames, with each frame having its own contents not intercepting the other frame. An iframe, on the other hand, embeds a frame directly in line with other elements of a web page. In spite of this difference, frames and iframes are treated in the same way in Recorder.
Choose the button to be used and the click type.
Find element by XPath
You can use Mouse Click with Web Element with the Open Website action only.
Add Mouse Click to Open Website, choose Web Element as Target, and select the Find element by XPath option.
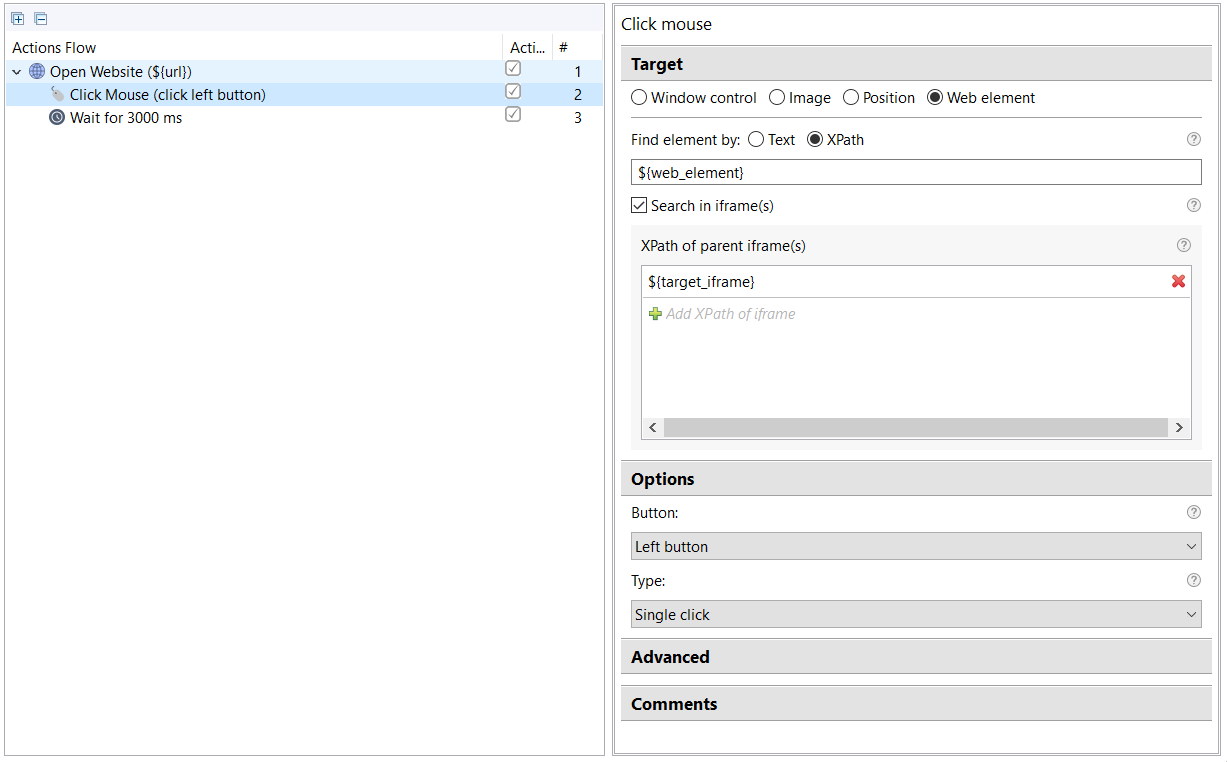
Enter your XPath in the respective field. For more details see the XPath guide.
Search in iframe(s): use the option, if the element you need to click on is located in an iframe (or iframes).
The iframe containing the web element can be enclosed in another iframe. In this case, you should define each iframe separately.
For this purpose, click Add XPath of iframe and define the iframe which holds the iframe with the web element. When defining the iframes you should keep the following order.
- The first iframe: the iframe containing the web element.
- The second iframe: the parent iframe that the previous iframe is enclosed in.
- More enclosed iframes: all of them are defined one by one so as the root iframe takes the last place.
Choose the button to be used and the click type.
Find element example
Expand to see the example
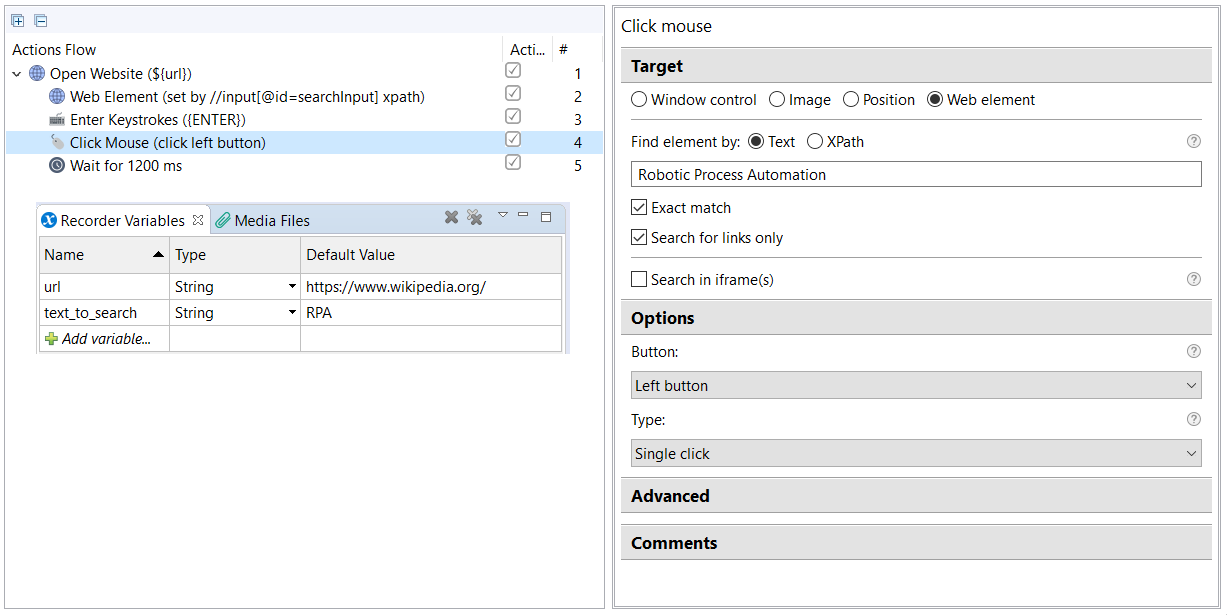
In this sample, we open Wikipedia, search for RPA, and open the page referred to Robotic Process Automation.
Open the website with the help of the Open Website action. Site URL is
https://www.wikipedia.org/.Enter text to search using Web Element.
- Mode: Set value
- Input:
${text_to_search}= RPA - Options > XPath of the element:
//input[@id="searchInput"]
Start search by Enter keystrokes.
- Mode: Key combination
- Input: ENTER
Click the link in the search results to go to the page.
- Target
- Web element
- Find element by Text
- Text to find:
Robotic Process Automation - Select Exact match
- Select Search for links only
- Options
- Button: Left button
- Type: Single click
- Target
Play the recording to make sure, that all data are entered correctly and the Robotic Process Automation page opens.
You can download sample recording for further tests.
Mouse Move
The action represents a mouse move (hover) on a given image or coordinates and is recorded when user stops moving cursor for more than for 1 second.
Recording of the Mouse Move action is disabled by default. You can enable it in the Recorder's preferences.
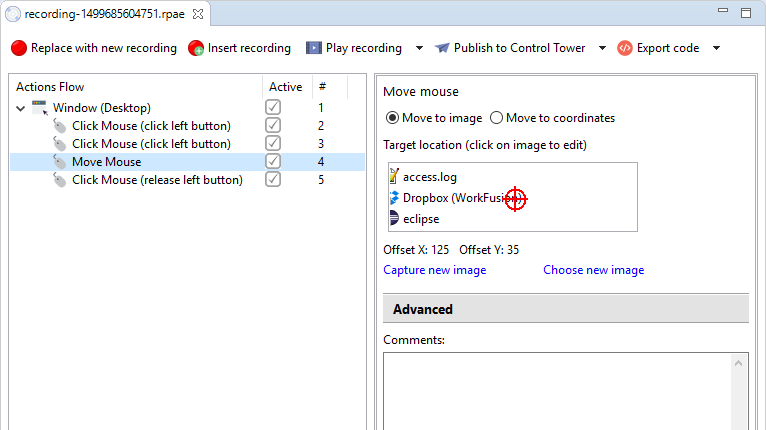
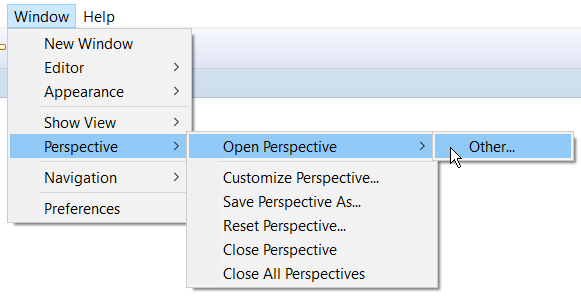
The action can be used for automating dynamic menus navigation where you need to hover over an item to select its child.
Mouse Drag
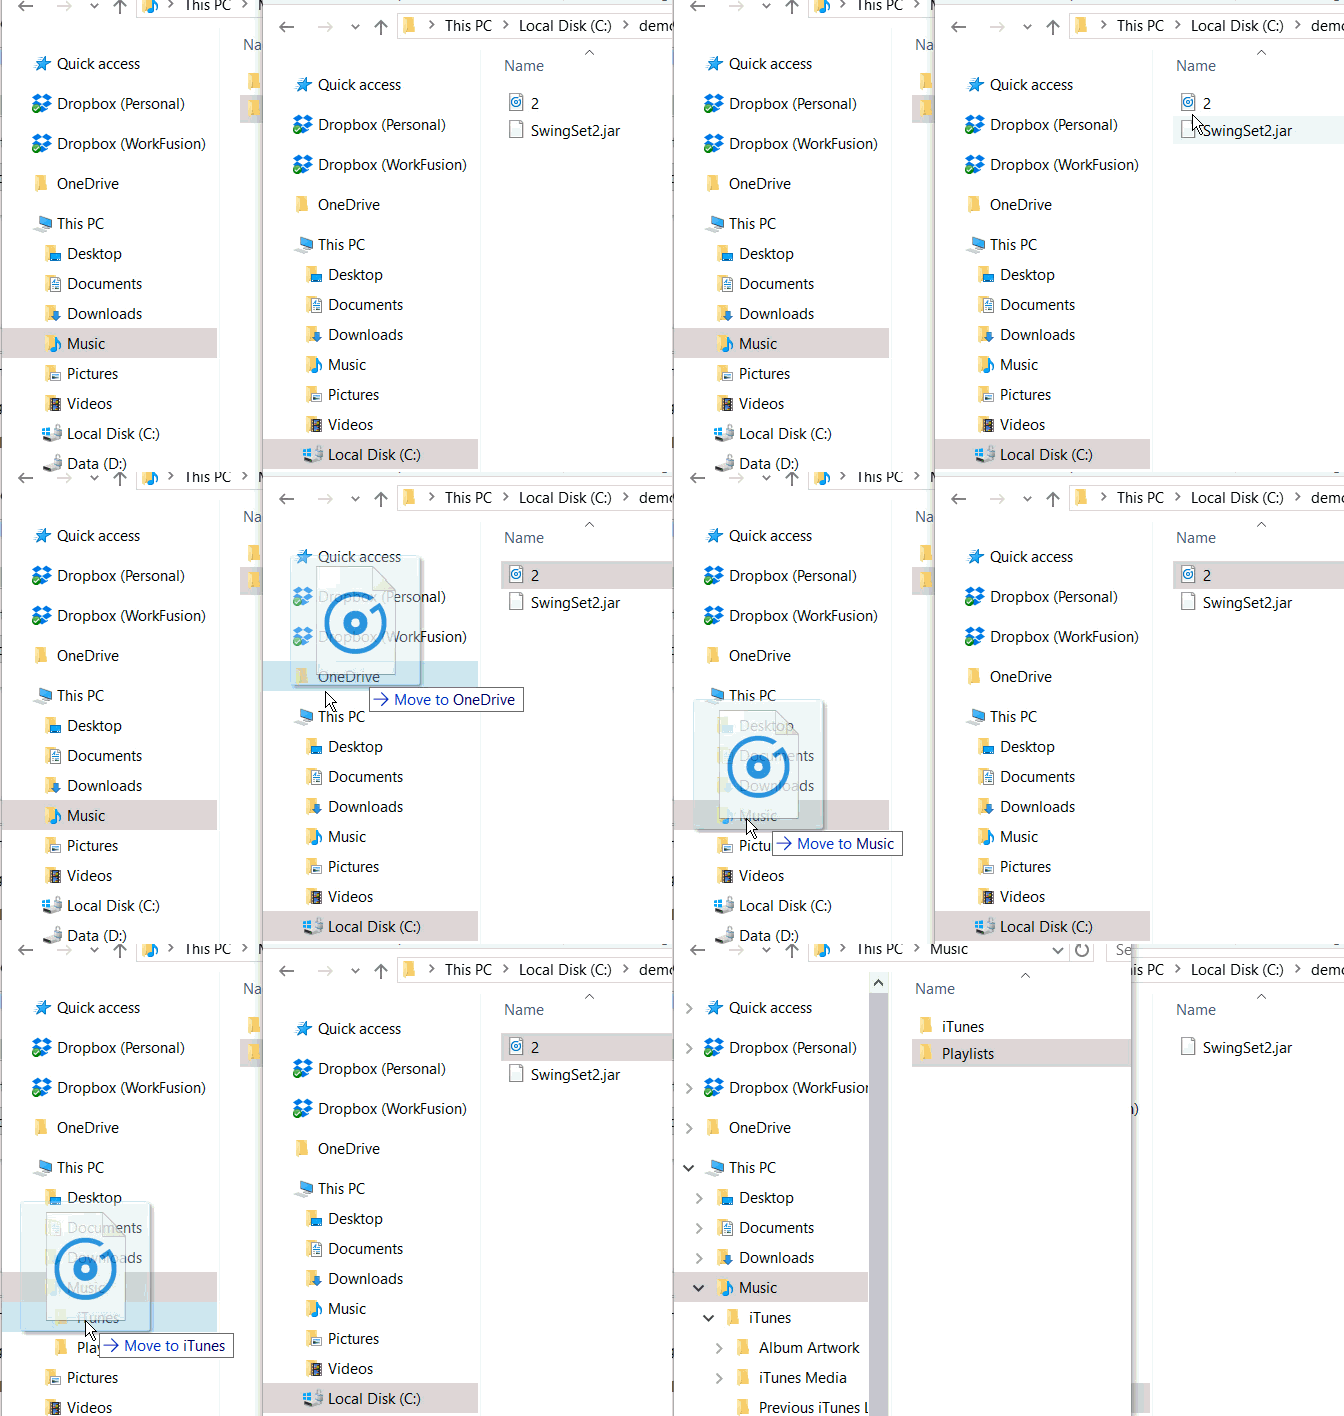
The action represents a drag and drop operation from one point (start) to another point (finish) on the screen and is recorded when user performs a mouse click and moves cursor while holding the mouse button.
The action can be used for dragging an element from one panel and dropping it to another, using slider controls.
Expand to see the automation examples

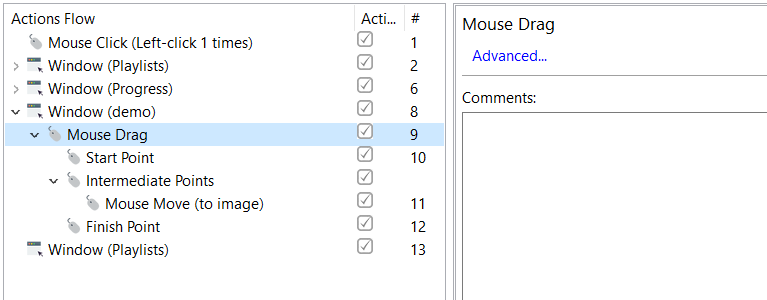
The Mouse Drag action has no specific parameters and contains the following subactions.
Start Point: the place where you start to hold the mouse button.
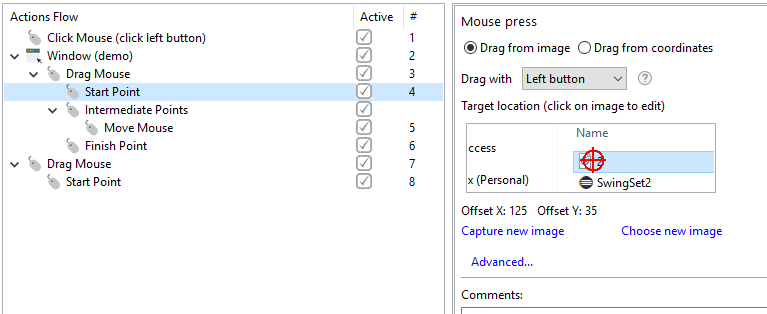
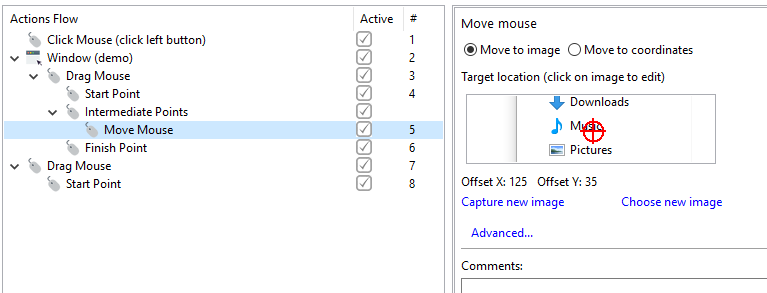
Intermediate Points: the place(s) where you stop moving cursor for more than 1 second while still holding the mouse button, for example, when needed to drag an element to a nested list.
The block can contain the Mouse Move actions only.
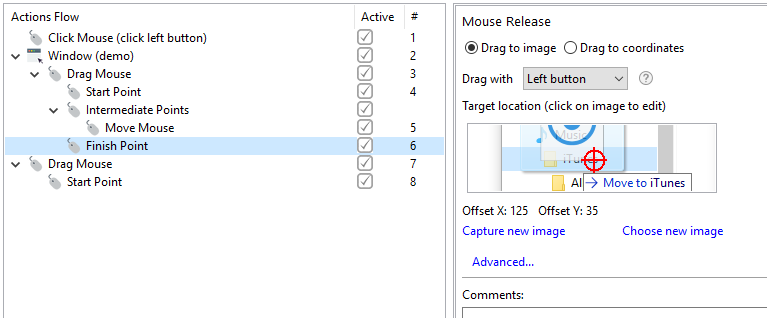
Finish Point: the place where you release the mouse button (drop).
Mouse Scroll
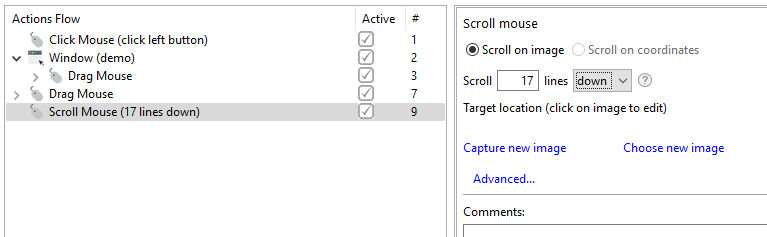
The action represents a vertical scroll operation from a defined point on the screen measured in lines (upwards or downwards) and is recorded when you scroll a page using mouse wheel.
The Mouse Scroll action has three properties. These are as follows.
- Image: Bot searches for the specified image and, if found, puts the cursor at the crosshair position and scrolls a defined number of lines.
- Number of lines to scroll: how many screen lines are to be scrolled.
- Scroll direction: either up or down.