Migrate from qualifications to ACL
The WorkFusion platform (previously IA Cloud Enterprise) v10.2 no longer supports qualifications. Instead, Workspace 2.0 employs a new approach to managing user permissions and restrictions, where:
- Each assignment has its owner and an ACL (Access Control List).
- ACL is based on users and user groups managed via Keycloak.
The approach allows Business Processes (BPs) and assignment data to be securely restricted only to users who are allowed to access the data and complete the assignment.
For more information about user management via Keycloak, refer to the Keycloak admin guide.
Migrate qualifications to WS v2.0
If your Business Processes use qualifications and you want to move these BPs to WS v2.0 together with the qualifications, you need to complete the following steps:
Make sure you have the platform v10.2 deployed, and your users are migrated to Keycloak. For migrating users to Keycloack, use its built-in Identity Brokering and User Federation features or create users manually.
Configure user groups in Keycloak.
Configure a Manual Task in Control Tower.
Configure user groups in Keycloak
The configuration flow is as follows:
Log in to Keycloak and create user groups to match your qualifications. Name the Keycloak user groups the same way you used to name the qualifications.
Add Keycloak users to the created user groups.
Configure Manual Task in Control Tower
Control Tower utilizes Workspace API to set access to assignments via the Workspace Preview mechanism, which requires using a system attribute—for example, _sys_user_groups. To set the attribute, complete the following steps:
Configure a field scheme:
- Go to System settings > Field schemes. Click Create Field Scheme.
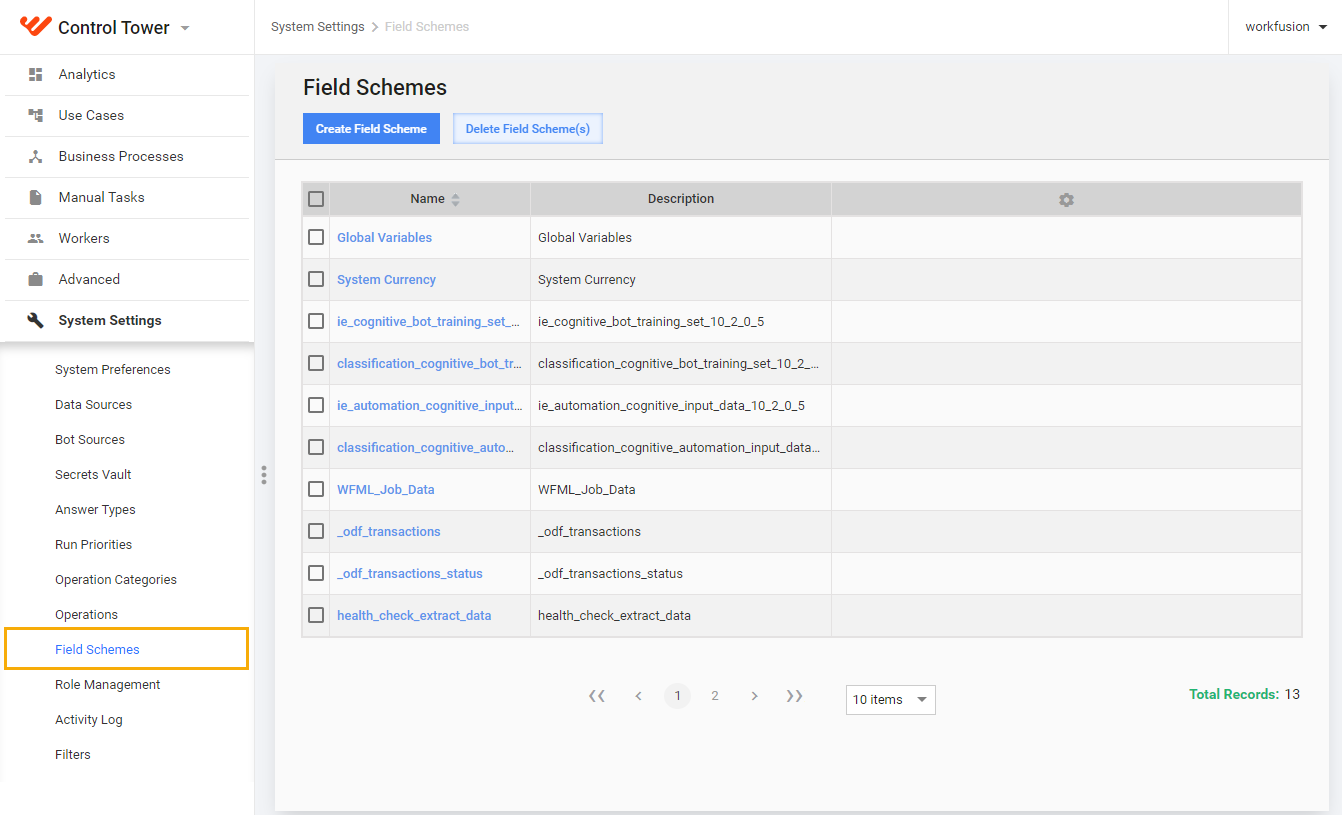
- Enter the name of the scheme you are going to use. Click Add answer.
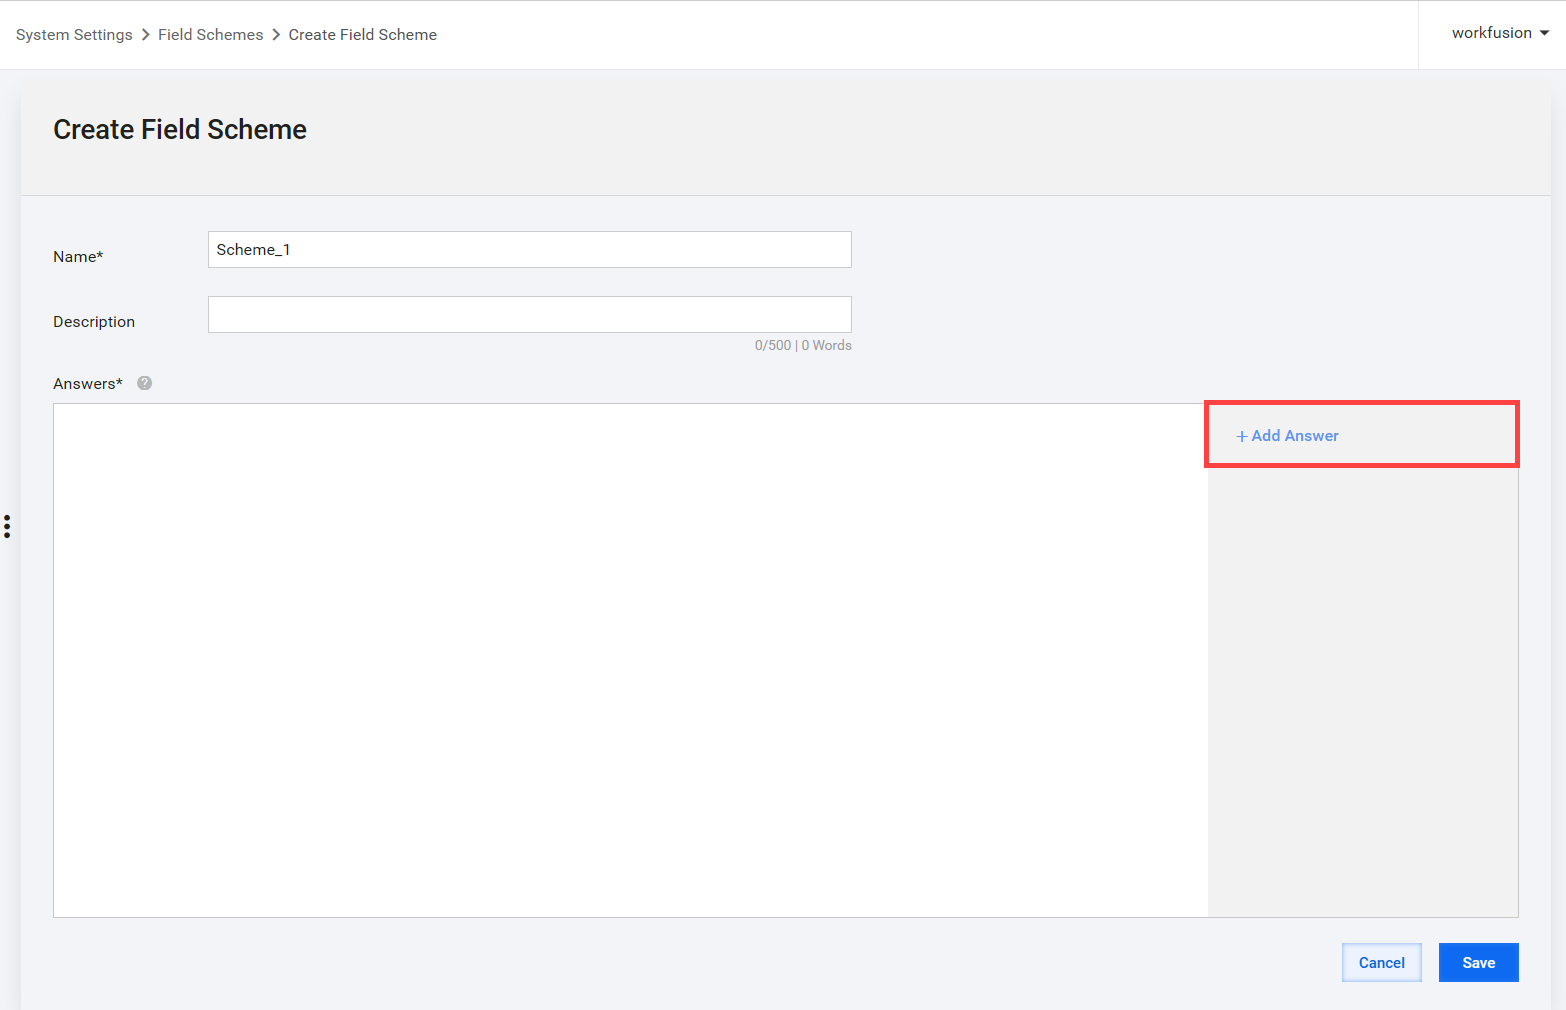
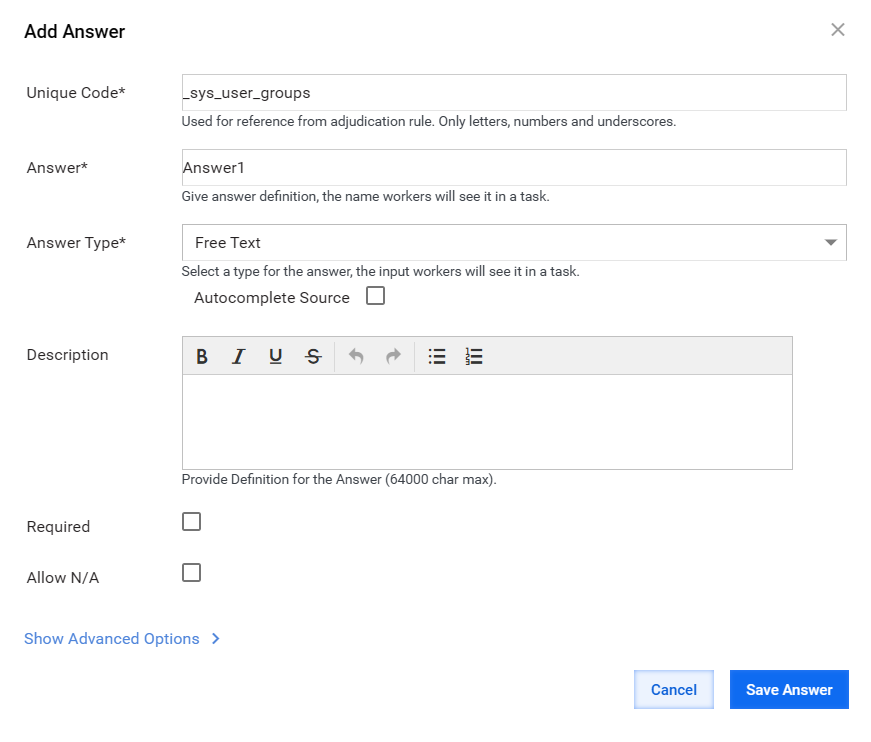
- Set the Answer type field to the Free Text type and the Unique Code field to _sys_user_groups. Click Save answer.
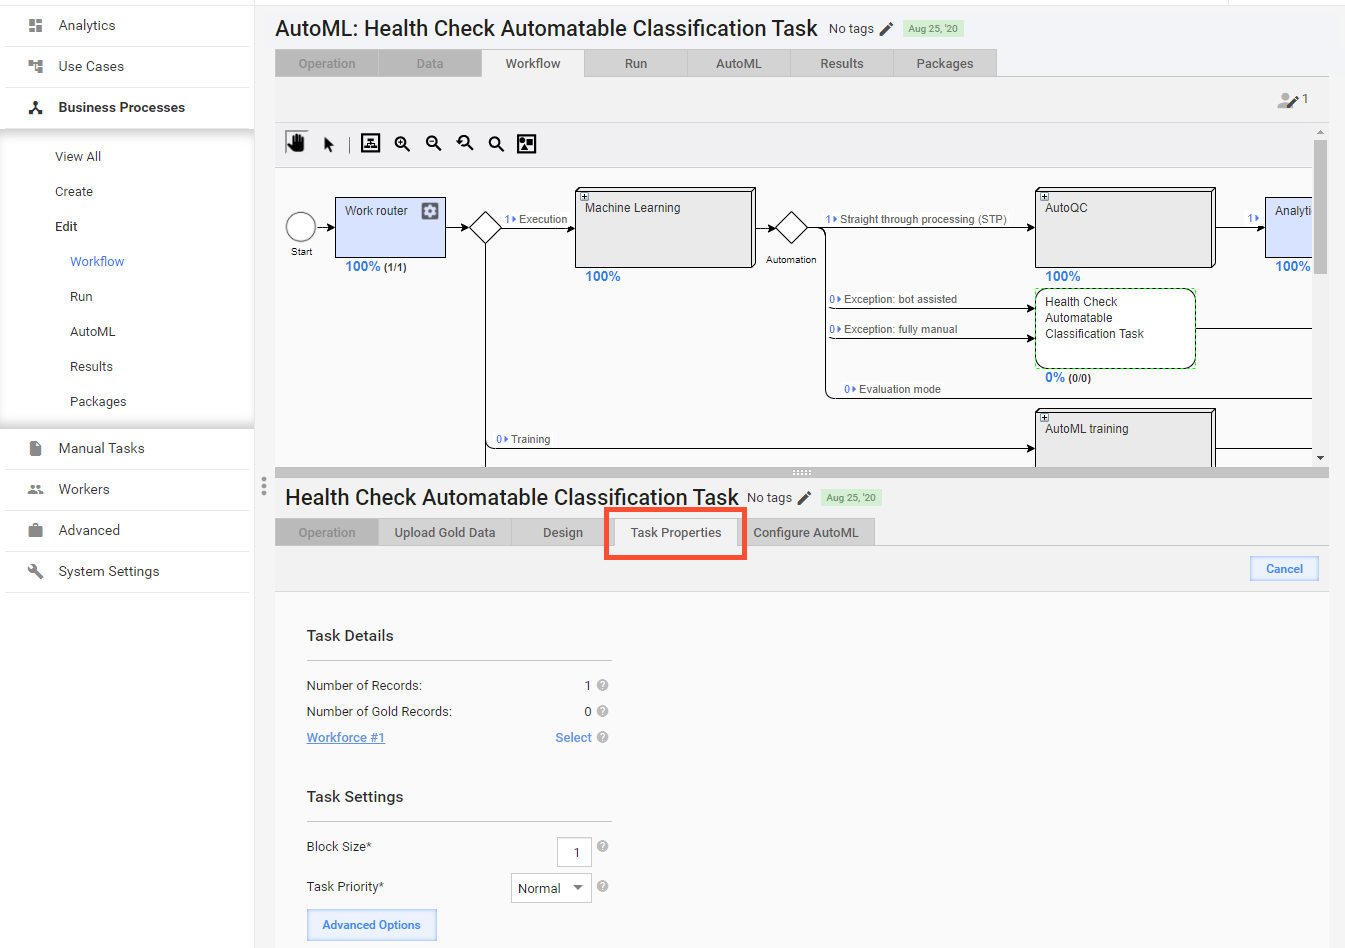
- Create a Manual Task, go to Business processes > Workflow, and double-click the task. Then, go to the Task Properties tab and click Advanced Options.
Add a _sys_user_groups column into your input data file. Write a group with a slash, for example,
/your user group.To map the column to the Field scheme field, go back to Advanced Options, select the Workspace Preview tab, choose the scheme you created, and click the Apply button.
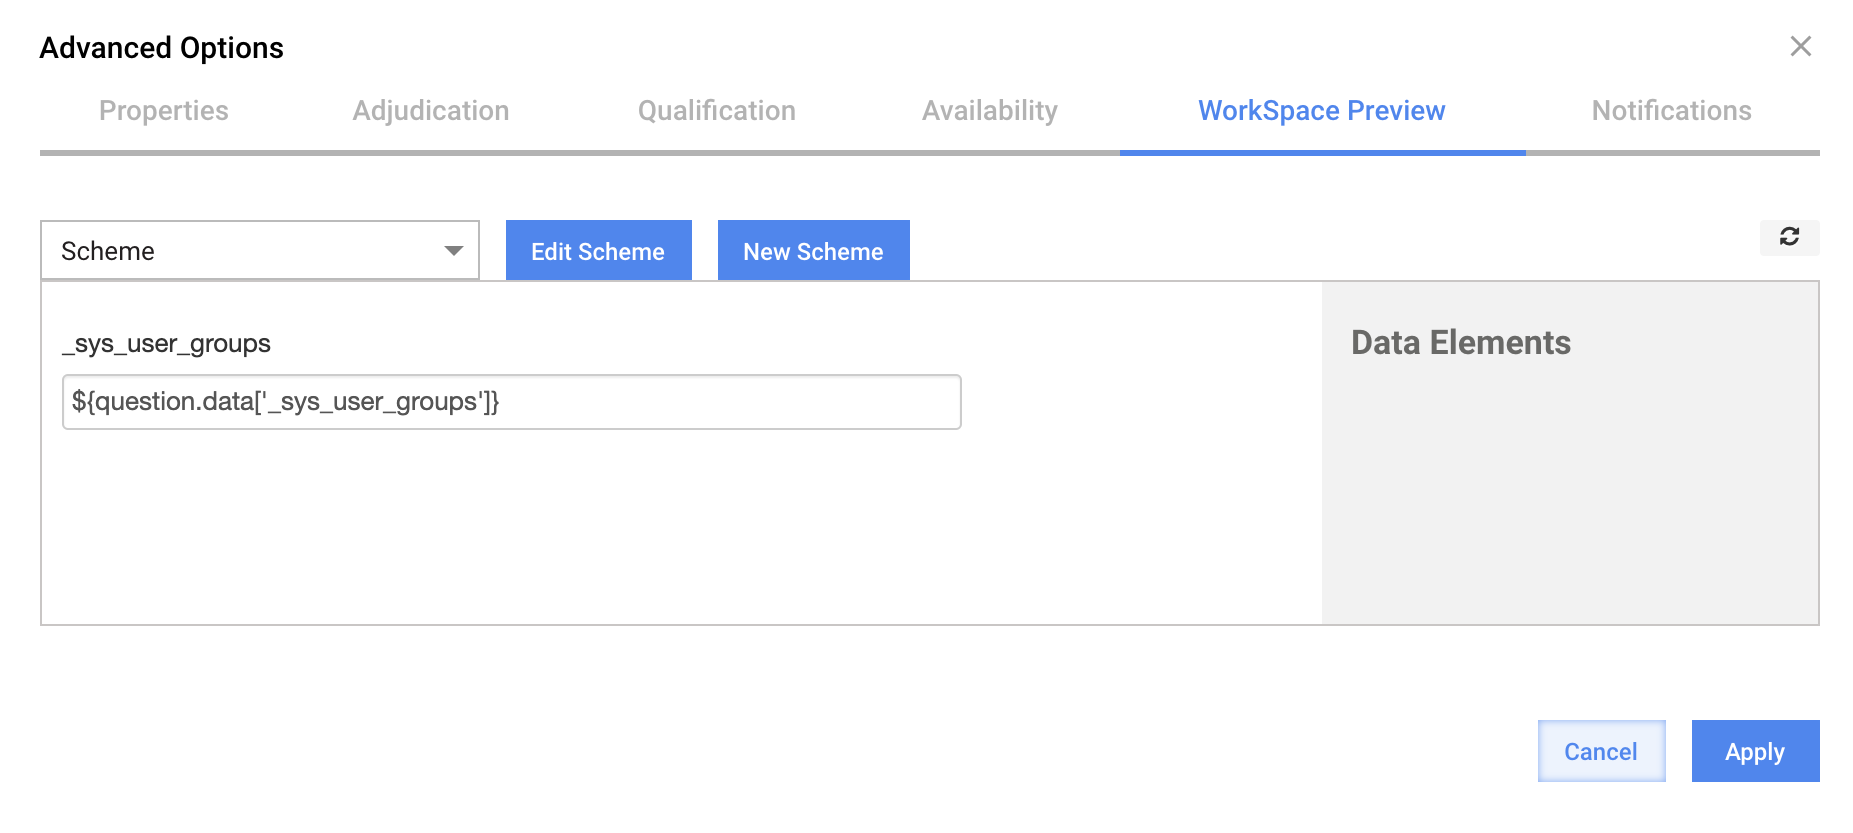
Instead of creating a field scheme, you can update an existing one. For more information, refer to the Migration use case section.
When everything is configured as described above, your BP creates assignments in WS v2.0 with access based on the user groups configured in Keycloak.
Check migration Use Case
The use case below illustrates the migration from qualifications to ACL under the following assumptions:
- You have 2 BPs. BP1 has one Manual Task (MT), BP2 has two MTs.
- MT1 has Qualification 1 Requirement, MT2 has Qualification 2 and 3 Requirement, MT3 has the Qualification 3 Requirement.
- You have 5 Workers: Worker 1 has no Qualifications, Worker 2 has Qualification 1, Worker 3 has Qualifications 2 and 3, Worker 4 has Qualification 3, Worker 5 has Qualification 2.
- You have the platform v10.2 deployed, and the Workers are migrated to Keycloak and available as Keycloak users.
For migrating users to Keycloack, use its built-in Identity Brokering and User Federation features or create users manually.
The general migration flow is to create groups in Keycloack to match the Qualifications, distribute the Workers across the groups based on their Qualifications, and configure the Manual Tasks related to the migrated BPs in CT.
Create groups in Keycloak
Log in to KeyCloak under the Admin account and create three user groups with the names Qual_1, Qual_2, Qual_3 following the instruction:
On the left menu, select Groups.
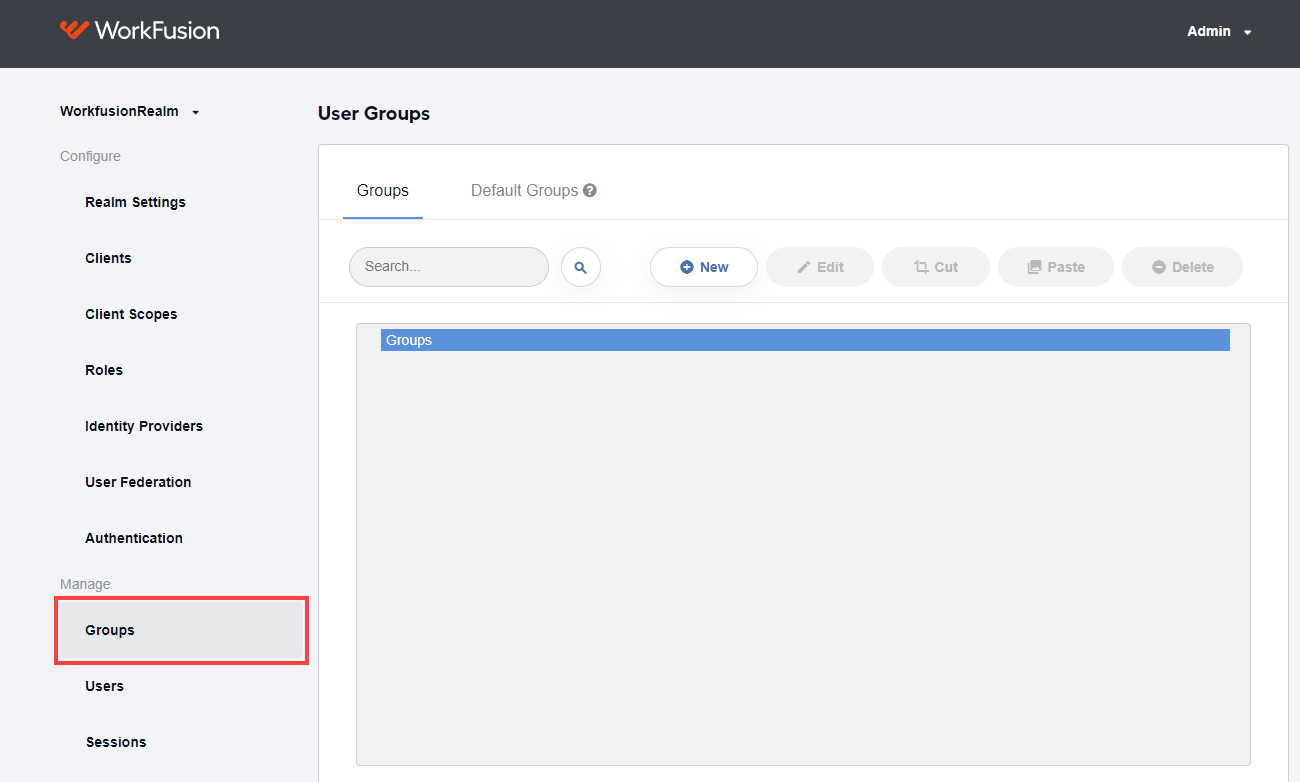
On the right, click the New button. In the Create group dialog, type in the group name (for example, Qual_1).

On the left menu, click Groups again. The created group appears in the hierarchical structure on the right.
Repeat steps 1-3 to create two more groups. Only name them Qual_2 and Qual_3.
Distribute Workers across Keycloak groups
Considering the above assumptions, distribute Workers—who are Keycloak users now—across the created groups as follows:
- Add Worker 2 to the Qual_1 group.
- Add Worker 3 to the Qual_2 and Qual_3 groups.
- Add Worker 4 to the Qual_3 group.
- Аdd Worker 5 to the Qual_2 group.
- Worker 1 does not belong to any group based on qualifications.
To add Workers to the created user groups:
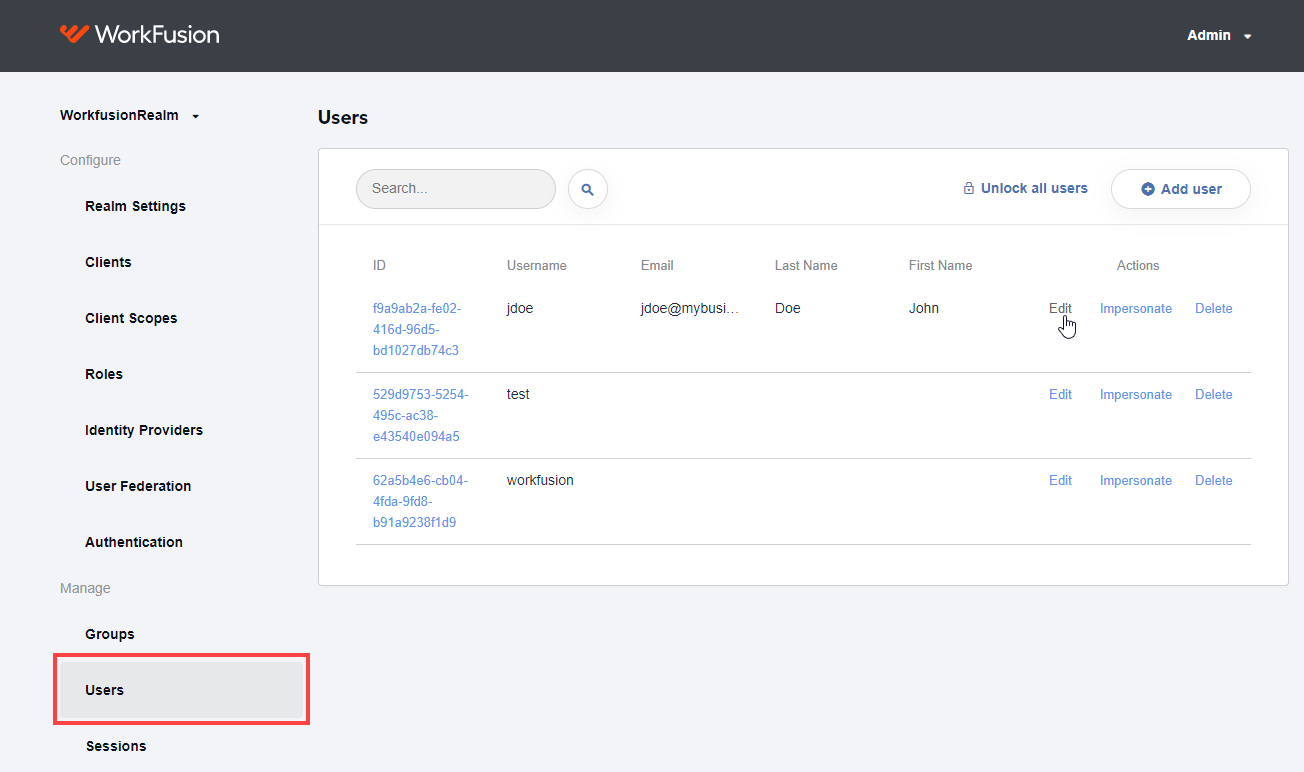
Log in to Keyсloak. On the left menu, click Users and find your Worker in the User list on the right. For instance, you can search by name (for example, John Doe).
Click Edit next to the user's name.
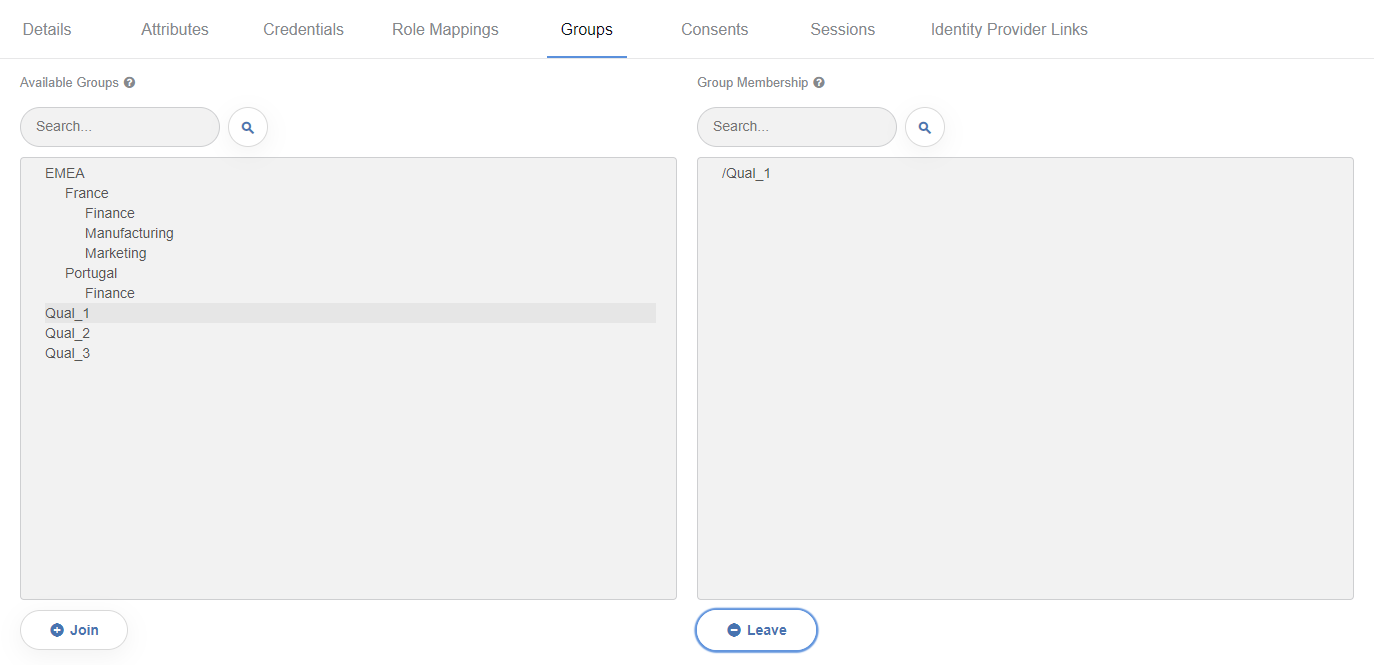
Go to the Groups tab. In the Available groups section, select the required group, and click Join.
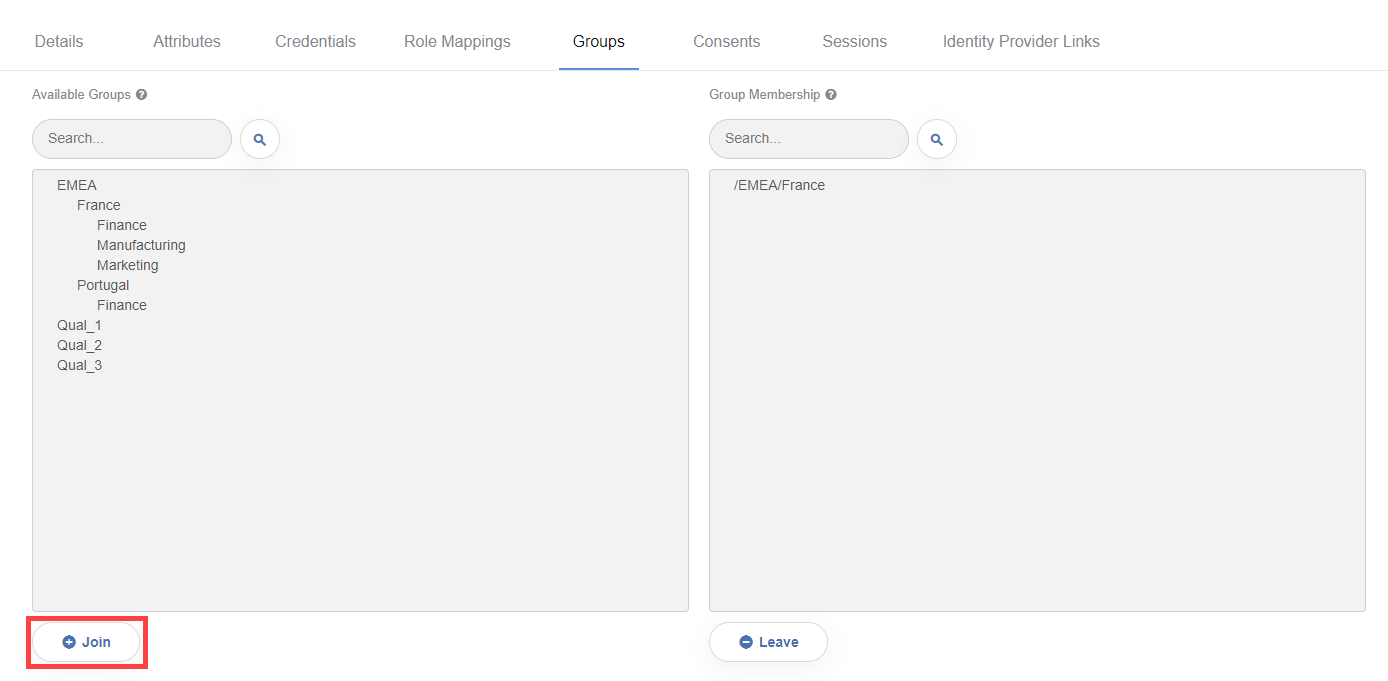
The Group Membership section updates accordingly.
Configure Manual Tasks in Control Tower
Edit the existing Field Scheme for the MT in BP1:
- Double-click the MT in the BP1 workflow. Then, go to the Task properties, click the Advanced Options button.
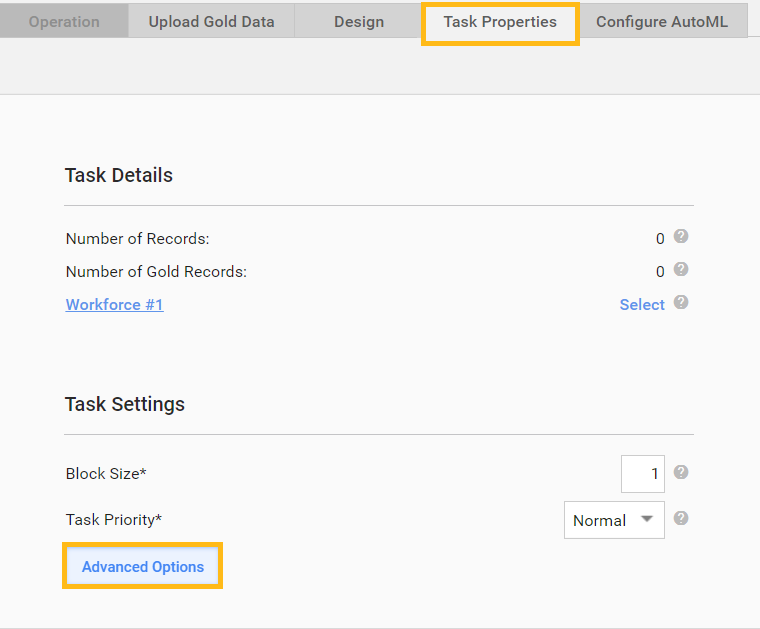
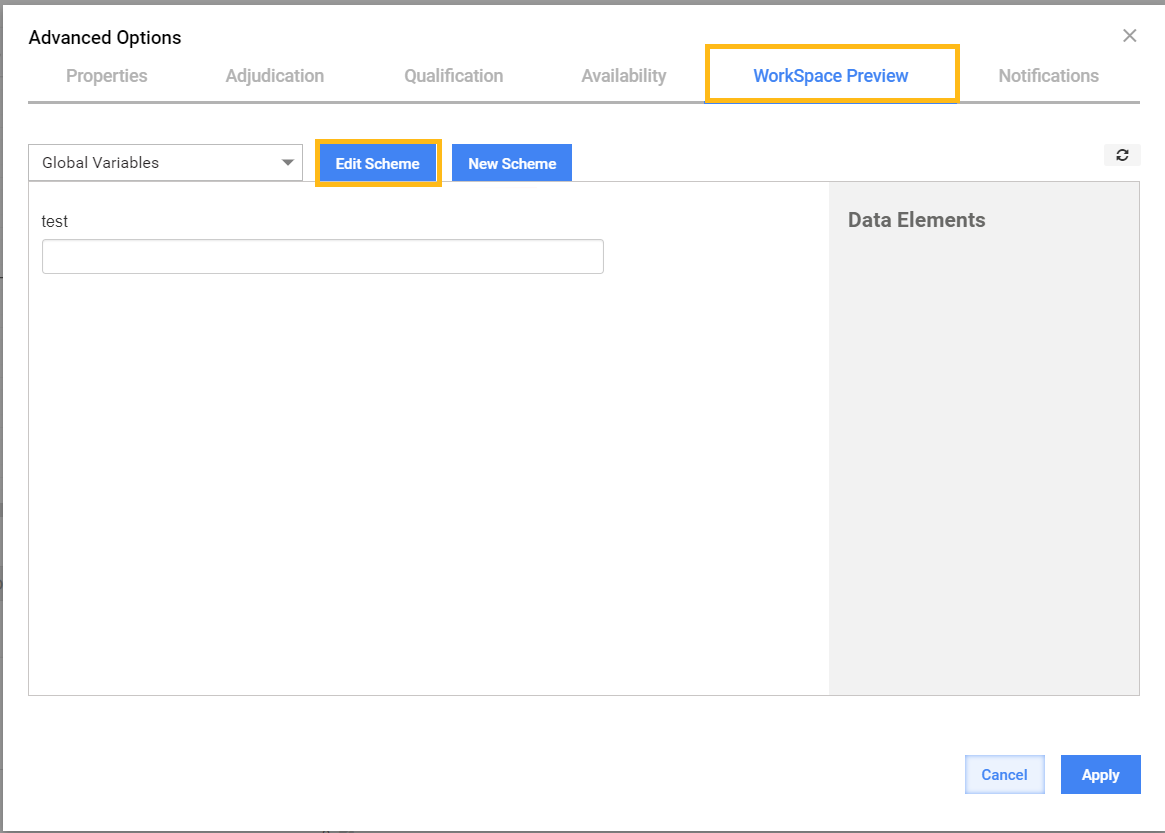
- Select the Workspace Preview tab and click the Edit Scheme button.
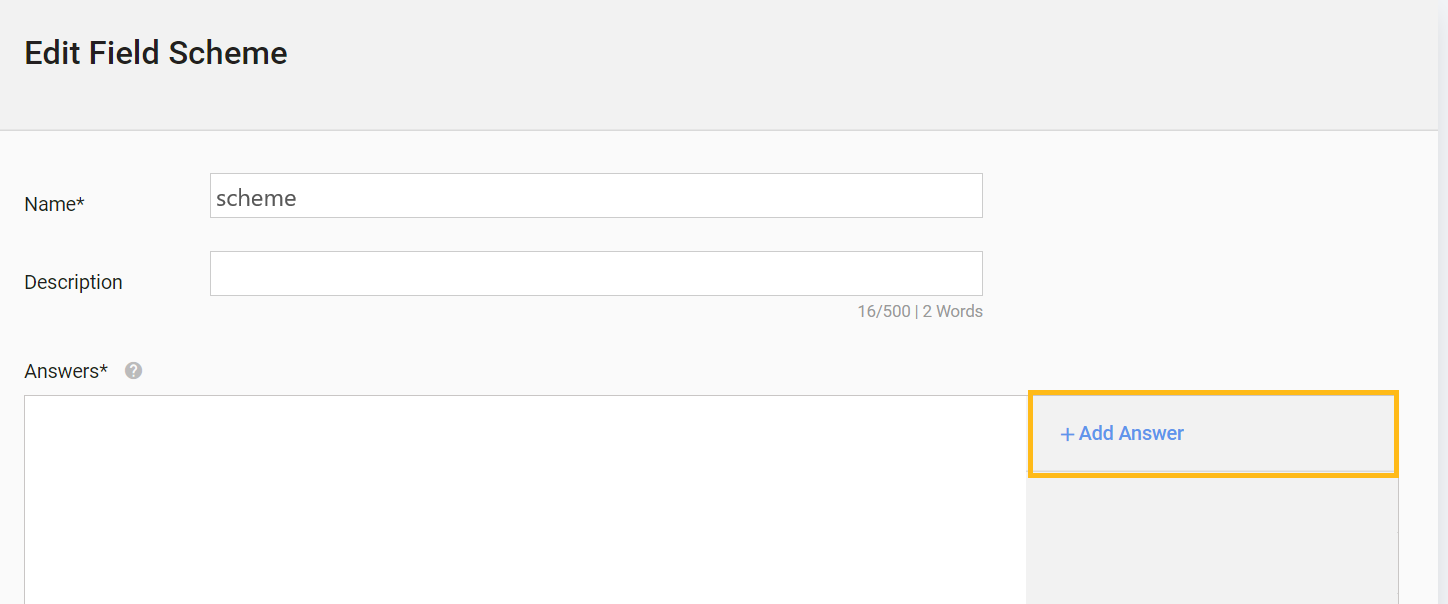
- In the Edit Field Scheme dialog, click Add Answer.
- Set the Answer type field to the Free Text type and the Unique Code field to _sys_user_groups. Click Save answer.
Add a _sys_user_groups column into your input data file for the Manual Task.
To map the column to the field scheme, go back to the Workspace Preview tab. Select _sys_user_groups in Data Elements and click Apply.
To configure MT1 and MT3, edit the existing field schemes for the Tasks, and complete steps 1 to 3.
Alternatively, you can create field schemes as described in Configure Manual Task in Control Tower.
For troubleshooting guides, refer to the following support guides: