Explore Recorder features
Recorder is one of the main Work.AI Developer components that provides the ability for a Power User to automate web, desktop, and mainframe applications in a natural macro-like way without any coding or scripting.
Recorder allows you to create RPA bots using the low-code approach. Developers are not the target audience for Recorder, but they can also benefit from its features.
By default, Recorder uses the object recording approach as a primary mode. The bot captures object properties with their values of active elements while recording and tries to find the same elements and click on them while script execution.
At the same time, surface-based (image-based) automation is used as a fallback to support. The bot captures images of active elements while recording and tries to find the same images and click (hover, drag, scroll) on them while script execution.
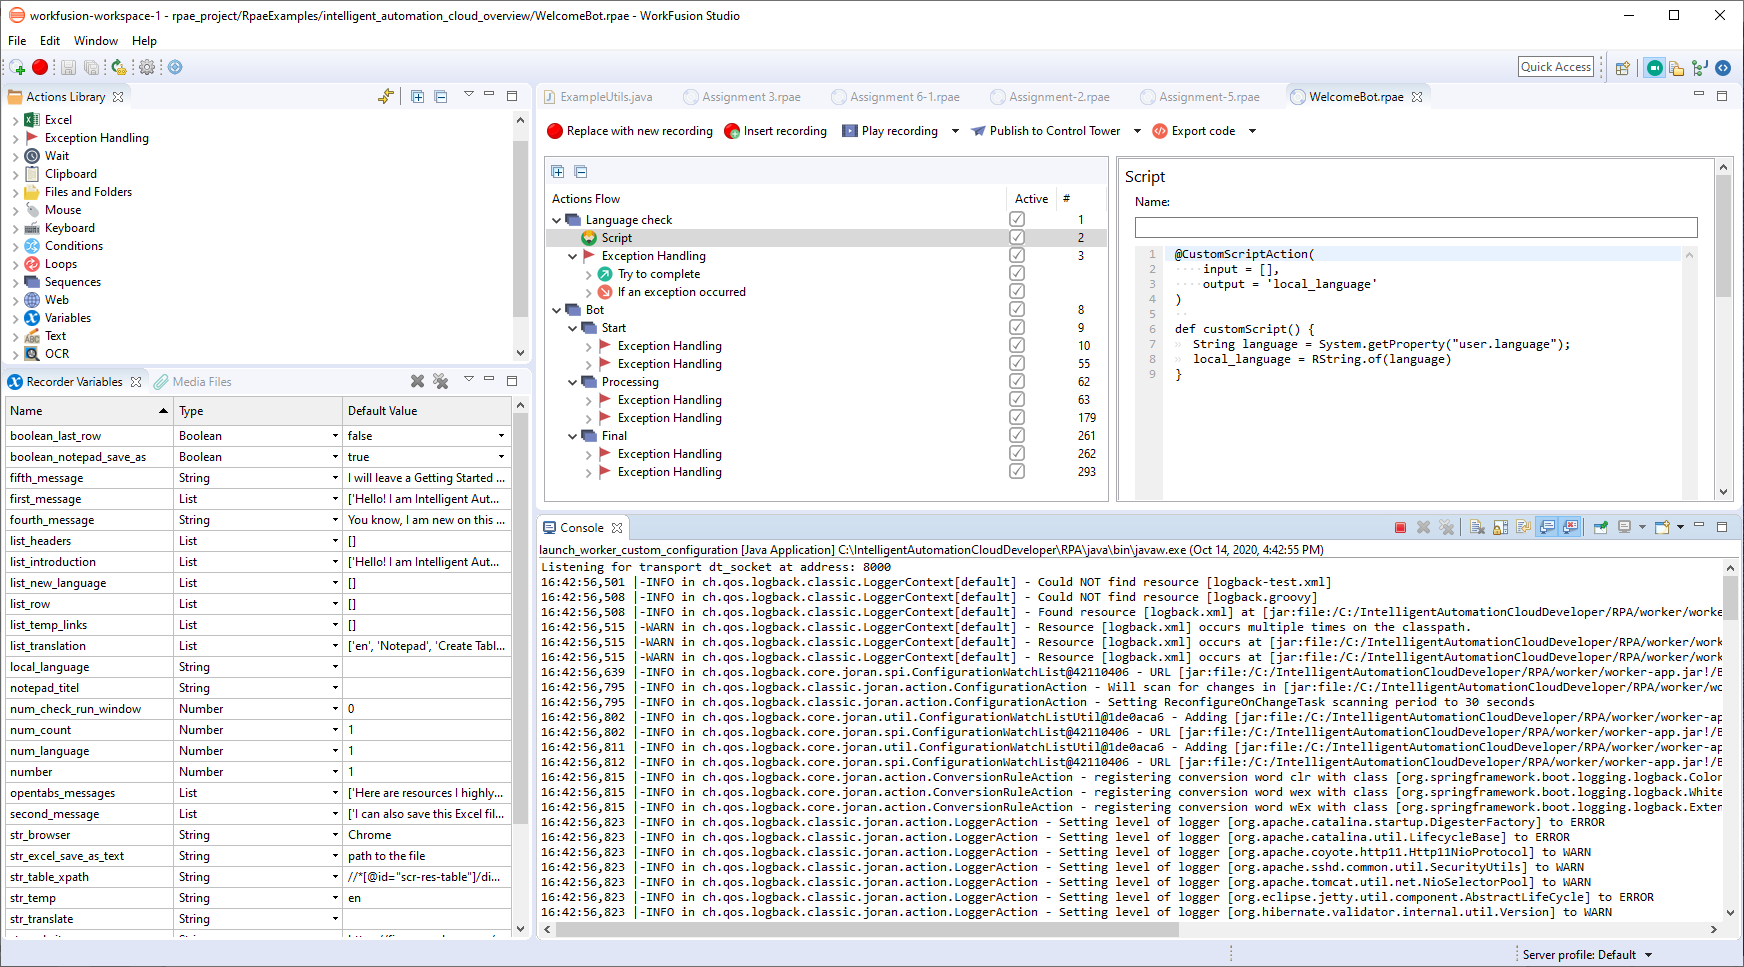
Additionally, you can add some system actions when editing a workflow, for example, opening applications, switching to a specific window, manipulating Excel files, working with the clipboard, and so on.
View Recorder main window
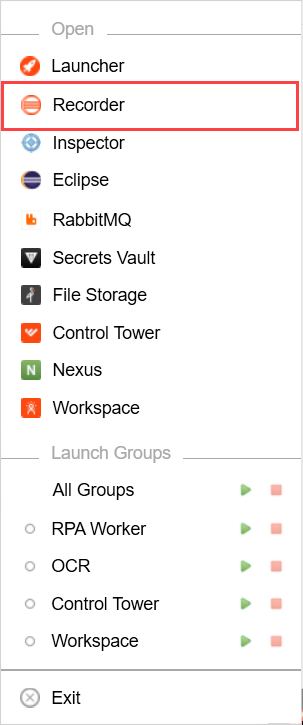
To open Recorder, right-click the Work.AI Developer icon in the system tray and select Recorder.
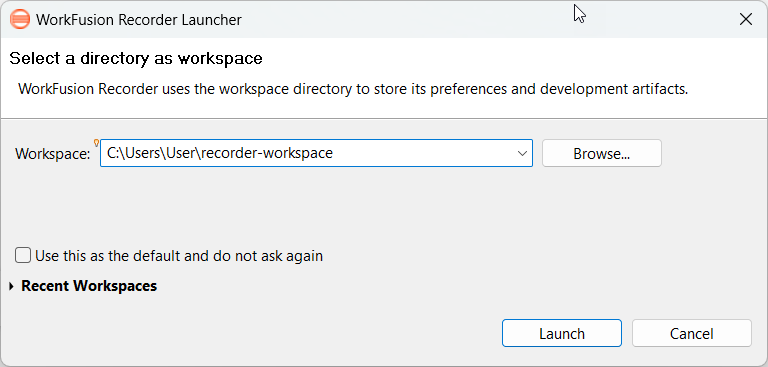
On starting Recorder, specify a folder for its workspace and click Launch.
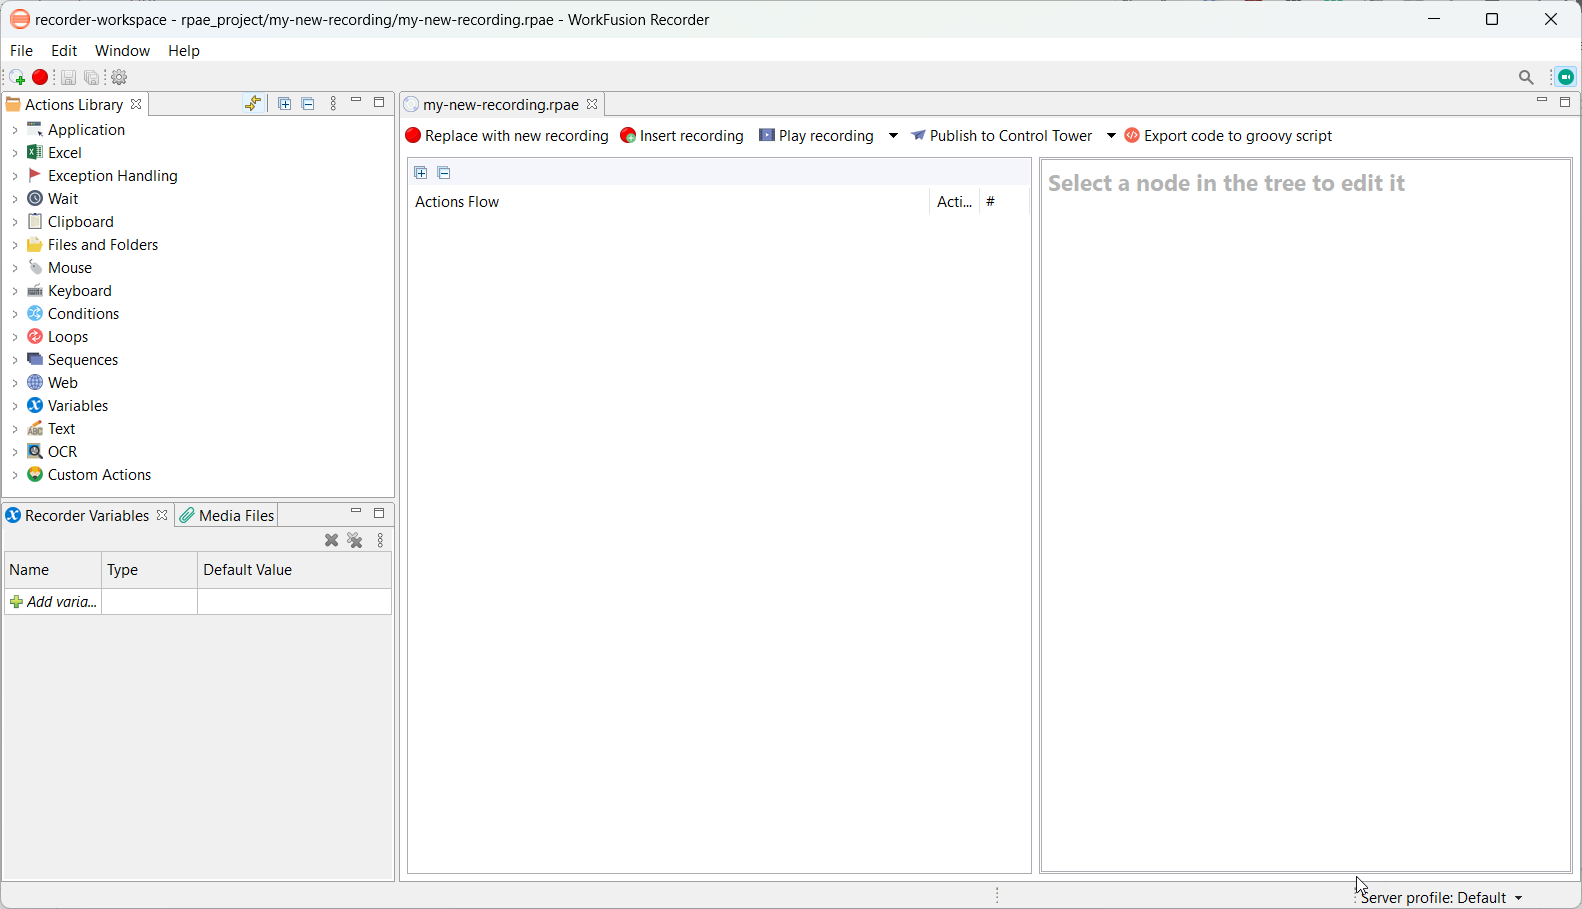
The Recorder main window with available options appears.
Recording toolbar
The toolbar contains a group of buttons to perform main operations with the recording.
 Create New Recording (or
 Ctrl + 5): Create a new blank recording. Start New Recording (or
 Ctrl + 6): Create and start a recording in a natural macro-like way. Save Recording (or
 Ctrl + S): Save the current recording. Save All Recordings (or
 Ctrl + Shift + S): Save all open recordings. Settings: Open Preferences.
Actions library
The library contains all the actions that can be added to Actions Flow without recording them. See Actions Library for more details.
Recording window
The window appears as soon as you create a new recording or after you finish the recording process. You can play, rewrite, append, or publish the recording to Control Tower.

Replace with new recording: Replace the current content of the recording with the new one.
Insert recording: Append new recorded steps to the current recording.
Play recording: Start playback of the recording content from the beginning.
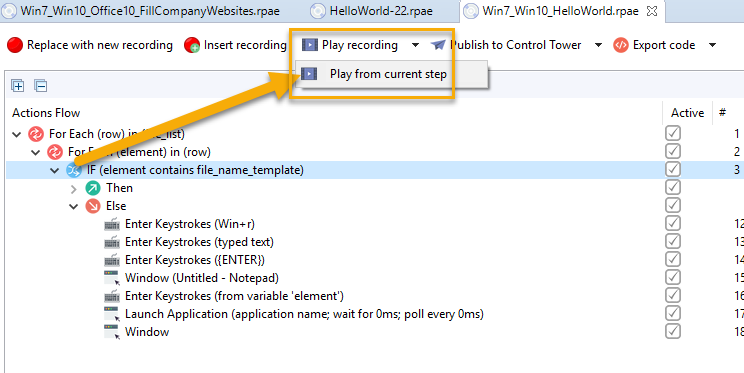
- Play from current step: Start the recording playback from the selected step. The option is selected from the Play recording drop-down menu.

Publish to Control Tower: Create a new Business Process or update the existing one from the recording in Control Tower.
- As new business process: Publish to Control Tower as a new Business Process regardless of whether such a Business Process has been published before and is available in Control Tower. The option is selected from the Publish to Control Tower drop-down menu.

Export code: Export the recording code. The code opens in a separate window for you to copy it and insert either in your script or in a Bot Task. There are two options available:
- Export code to groovy script: Export the recording to a Groovy script to insert to a script.
- Export code to bot task: Export the recording to XML to insert in a Bot Task.

Actions Flow
The window displays all the recorded steps with their main parameters. Actions can be nested inside each other, each action having a unique number showing its execution order.
Action properties
The window contains a detailed view of the currently selected action with all the parameters that can be edited.
Recorder variables
The section includes a list to define the recording variables. Refer to Specify Recorder variables for more information.
Media files
The tree of media files presents the explorer panel to display all the recordings from your project. Each recording represented as a folder contains a recording script and screenshots (if there are any).
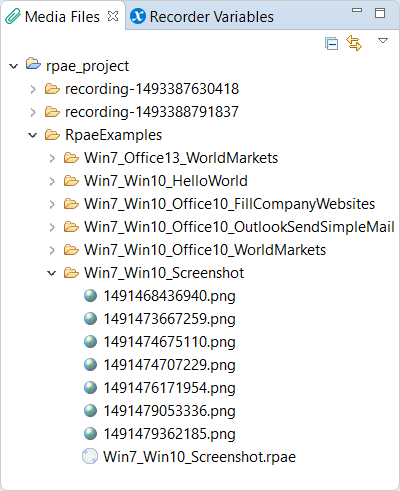
Right-click the project in the tree to open the context menu.
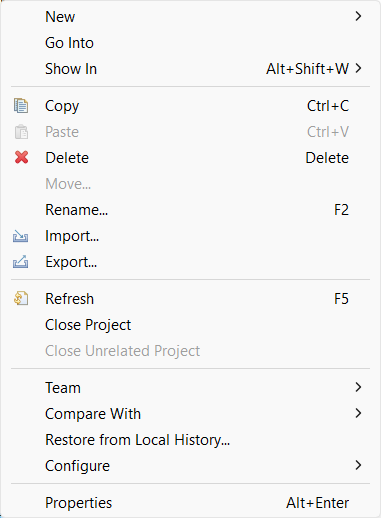
General operations
General operations with media files are intended to manage selected files within your project. The list of options is available via the context menu on right-clicking.
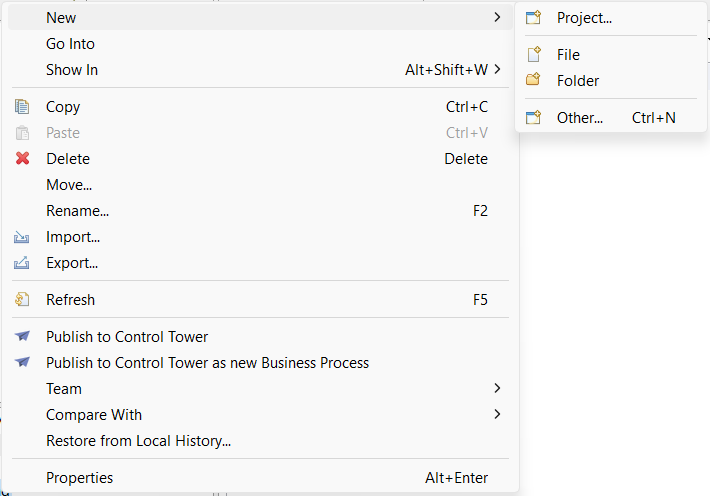
New > Folder: create a new folder to store the selected element.
Copy (or
Ctrl+C): copy an element.Paste (or
Ctrl+V): paste the copied element to a new location.tip- Avoid copying one recording to another.
- To avoid inconsistency and losing screenshots and image files, when copying a recording, do not copy a single recording file but the folder.
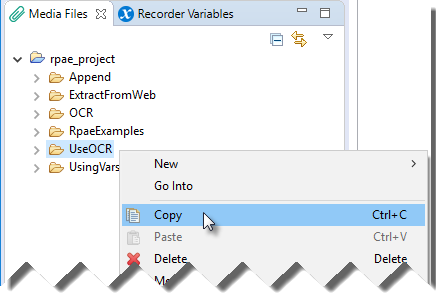
Or copy the entire folder content.
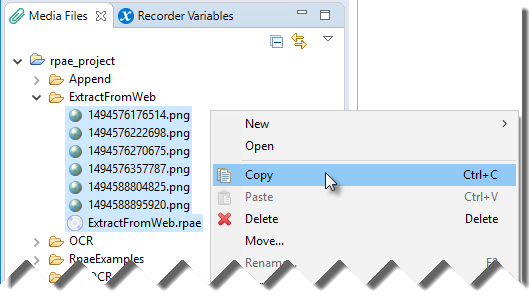
- If you copy a recording to create a new one out of the source, rename a new recording upon copying.
- To back up the recording, create a new folder and then copy the entire folder there.
Delete (or the Delete keyboard button): remove the element.
Move: move the element to another location.
Rename: rename the element.
Refresh (or
F5): refresh.
Import and export operations
Import and export options allow to import and export a wide variety of objects, projects, configurations, Bot Tasks, and so on. For these purposes, specific import and export wizards are used.
Publish operations
You can publish a recording to Control Tower as a new Bot Task for a Business Process (the Business Process is created automatically) or update the Bot Task exported before.
If you exported a Bot Task to Control Tower, you can update it with your recent modifications.
Select the recording, right-click and choose Publish to Control Tower.
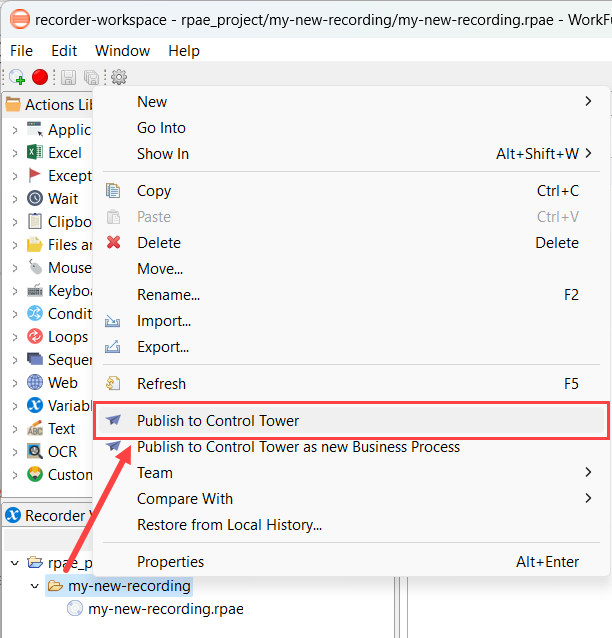
As the selected recording is already published to Control Tower, it is updated with the new content.
Click Finish to update the Bot Task in Control Tower.
You can also create a new Business Process in Control Tower:
Select the recording, right-click and choose Publish to Control Tower as new Business Process.
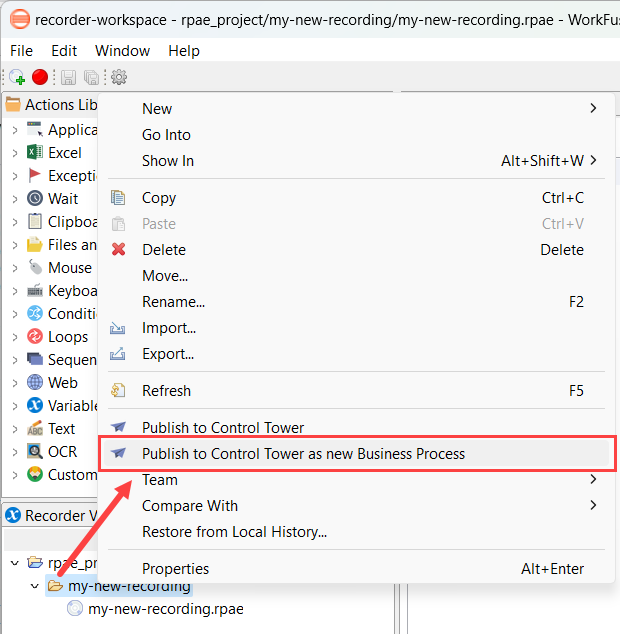
Enter the Business Process name.
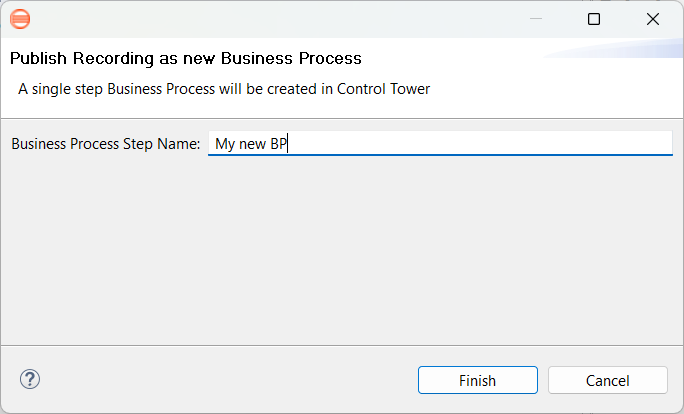
Click Finish to complete the export. The selected recording is published to Control Tower as a new Business Process.
Console
As soon as your RPA script is executed, view the console where log data is displayed.
On the Problems tab, errors could be caused by, for example, an incorrect RPA script (a window selector or a timeout) or a desktop application failure, and so on.
To resolve, close the console and open the appropriate batch file again or modify the script code.
Use Recorder
The section explains general operations performed by Recorder, such as creating, editing, and publishing recordings. Descriptions illustrate how to use a typical robotic automation workflow.
Level of experience required:
- Basic knowledge of macro recording in Word and Excel
- Understanding of simple algorithmization concepts, for example, loops, variables, conditions
Start Recorder
To start Recorder, select Recorder in the available Developer options.
Start recording process
To start recording your workflow, follow the instruction below:
Click the red button or press
CTRL + 6.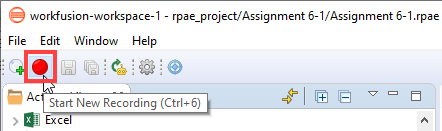
Enter a file name for the recording and click OK.

In the bottom-right corner, the Recorder panel with a running timer appears.

Perform your workflow actions in a natural way. Remember to follow our recommendations.
tip- Do not be fast during the recording process and take small pauses after each action.
- The Mouse Move event (hover) is recorded after the cursor is not moving for 1 s and more. It can be used to automate navigation through dynamic menus collapsed on hovering.
- If one mouse action is located near another (two buttons close to each other), after clicking the first button, move the cursor aside and then click the second button.
- Do not perform unneeded mouse moves, clicks, and scrolls.
- Use keyboard hotkeys where possible.
If needed, pause and resume the recording by clicking the appropriate buttons.

To finish the recording process, click the Stop button (
CTRL + ALT + S), or close the Recorder window. As a result, all the steps are displayed in the Actions Flow panel.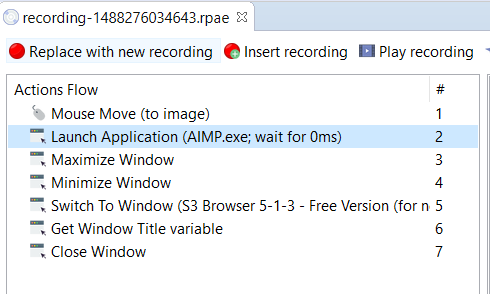
Play recording
On finishing the recording process, test it and play the recorded flow:
Click the Play recording button.

The progress bar indicating the bot process, together with the number of executed steps and overall status, appears.

Pause, resume, or stop the execution, if needed.

If a step cannot be executed, the progress bar turns red with the Error occurred message and the step number (#3 on the screenshot) shown.

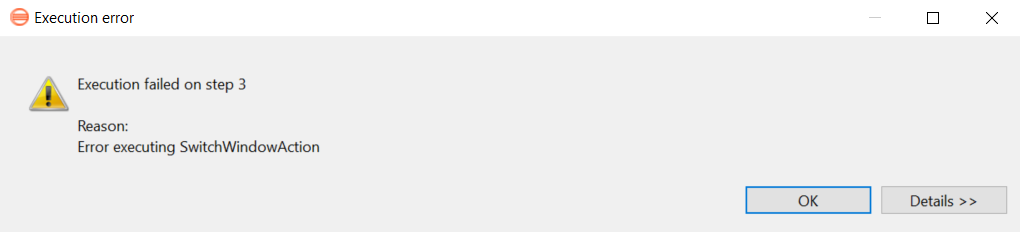
To fix the recording, edit the failed step.
After the bot execution is finished or stopped, each step's result status is shown in the Actions Flow panel.
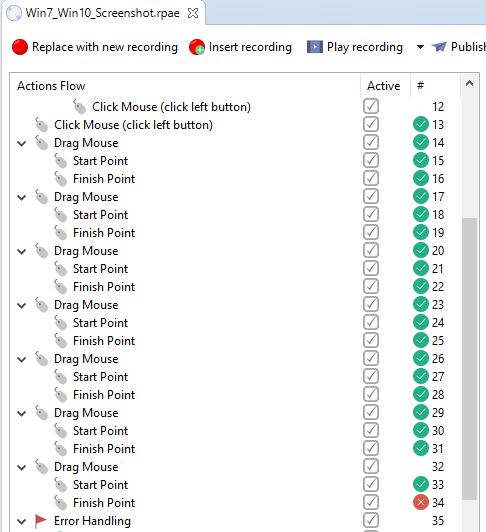
You can record your workflow in chunks by appending each new recording to the existing file.
Create a new recording.
Perform the required actions.
Stop the recording.
(Optional) Test the recorded chunk by playing it and fixing steps, if needed.
Click the Insert Recording button.

Repeat steps 2-5 as many times as needed.
Play from current step
When creating complex automation flows, it is recommended to run bot execution not from the beginning but the current step, thus saving time and effort.
Select some action in Actions Flow.
Click the arrow next to the Play recording button to open the drop-down menu.
Click Play from current step.
Disable steps
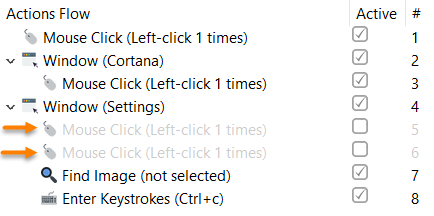
When testing various actions, it is recommended to temporarily disable some steps, excluding them from the execution flow though not completely deleting.
To disable a step, uncheck the respective checkbox in the Active column. The step gets grayed out. To enable a step, check the respective checkbox again.
View Recorder variables log
When the playback is finished, you can check the Recorder variables values. For more details, see Specify Recorder variables for more information.
Add recording
There are cases when you download a sample recording. To play it, add it to your Media Files first:
- Unzip a sample.
- Copy unzipped files into your workspace folder (by default
C:/Users/%USER_NAME%/workfusion-workspace/rpae_project). - Right-click the
rpa_projectfolder in Media Files and select Refresh or pressF5. On finishing these actions, you can see a new project that is an RPAE file in your Media Files.
Edit recording
Work with images
Recorder uses surface-based (image-based) and object automation approaches.
The image-based approach refers to the bot capturing images of active elements while recording and finding the same images and click (hover, drag, scroll) them during the script execution.
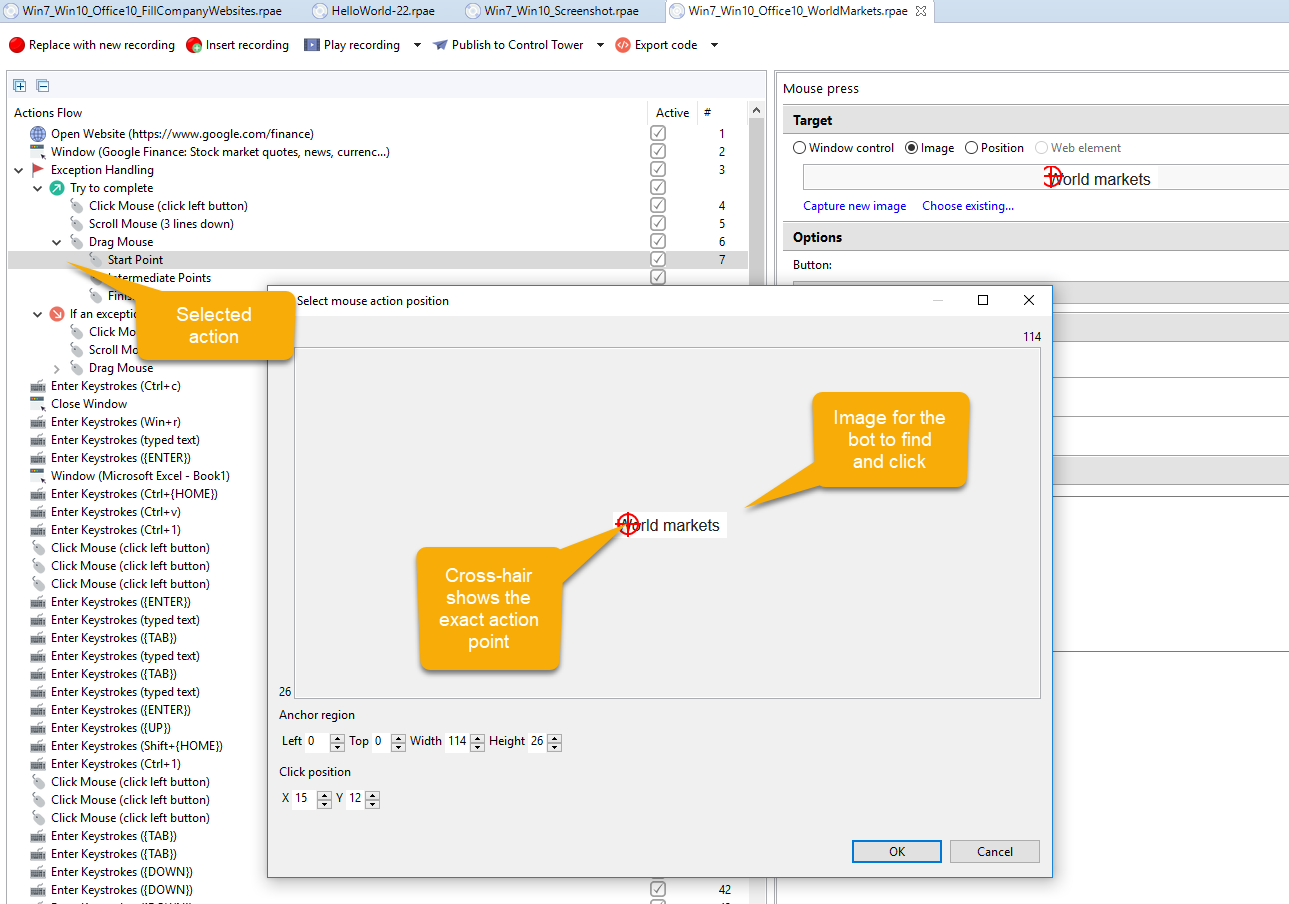
In some cases, the screenshots taken by the bot can be too large or small, not unique, or can have some unnecessary elements, for example, tooltips, pop-up windows from other applications, and so on.
Bad screenshot example is as follows:

To resolve, capture a new image manually or edit image offsets.
Capture new images
To capture a new image, perform the following steps:
Click Capture new image under the action screenshot.
A countdown in the bottom-right corner allows you to get prepared for the screen capturing. Meanwhile, you can switch to another app, open menu items, and so on. Before capturing starts, an overlay with the help text appears.

Select the required region by dragging.

Finally, the captured screenshot is applied to the active action.
You can set the delay before screen capturing in Window > Preferences > WorkFusion Recorder > RPA Recorder > Image.
Edit image offsets
By default, the bot clicks (hovers, scrolls, drags) directly into the center of the captured image. You can set the crosshair to a custom place by clicking the image.
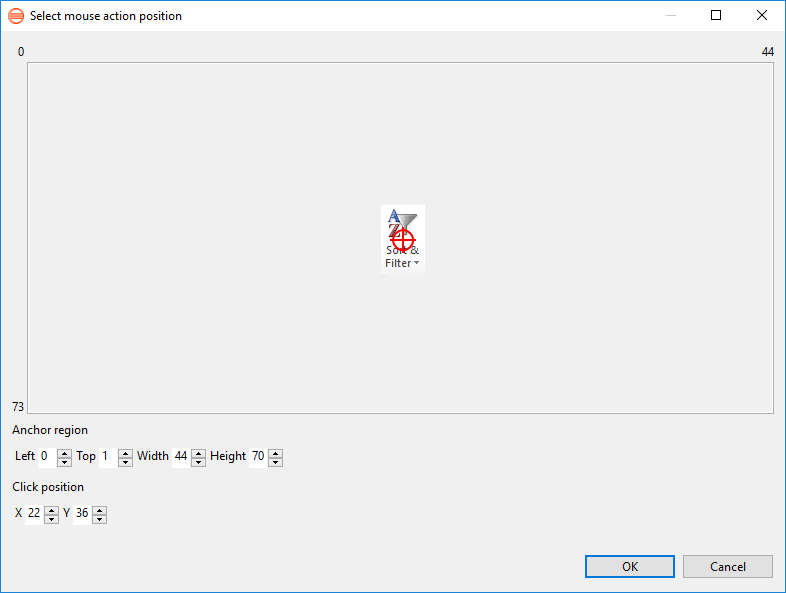
A pop-up dialog with 100% zoom on image is shown. Here, you have an option to set the offsets:
- By clicking on the image: The crosshair is moved to this position.
- By editing the Offset X and Offset Y fields.
Choose another image
You can choose any image located in the project folder for the active action:
Select Target > Image and click Choose existing.
Choose an image in the list and click OK.
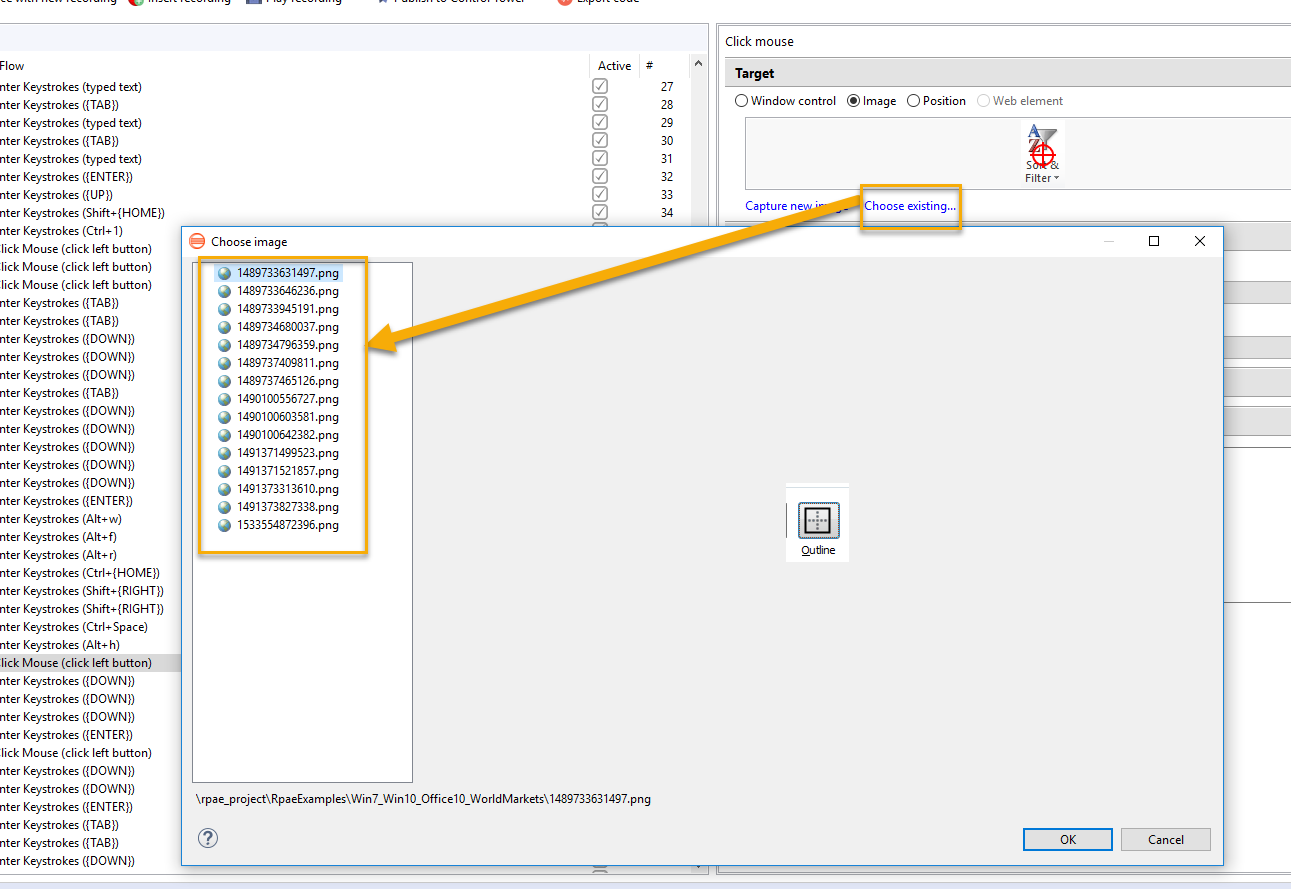
You can copy the image from any folder on your machine using drag-and-drop or copy-paste actions.
Set action delays
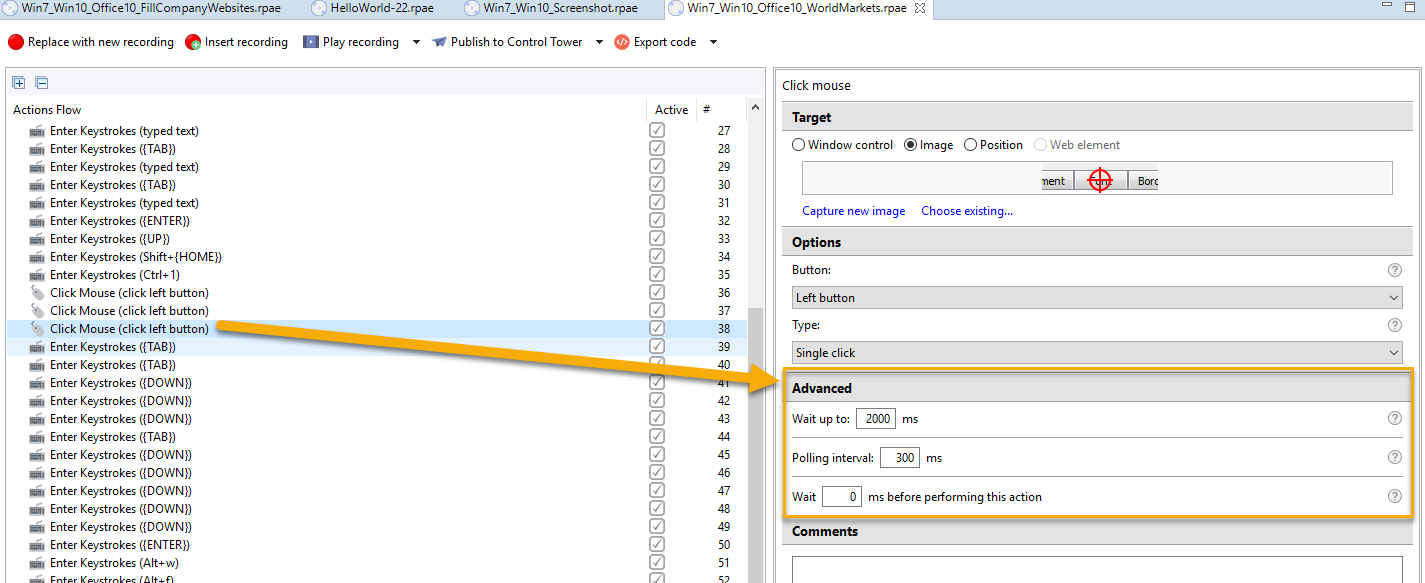
In automation workflows, most actions are executed quite quickly, but some actions require a pause before their execution, for example, page loading, document saving, opening new applications, and so on.
To set action delays, proceed as follows:
Click the Advanced link.
Set a delay type:
- Wait up to XX ms: The bot retries executing an action during the specified timeout if the action fails. As soon as the action is executed, the bot proceeds to the next one.
- Polling interval XX ms: The interval between retries.
- Wait XX ms before performing this action: The delay before action execution. No retries are done if the action fails.
 tip
tipUse retries rather than delays before action.
Use variables
You can use variables to store initial or run-time values that must be entered from the keyboard or copied to the clipboard. For more details, refer to Specify Recorder variables.
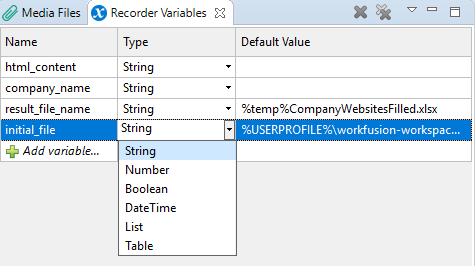
Define all variables in the Recorder variables table to be used in in the actions' parameters.
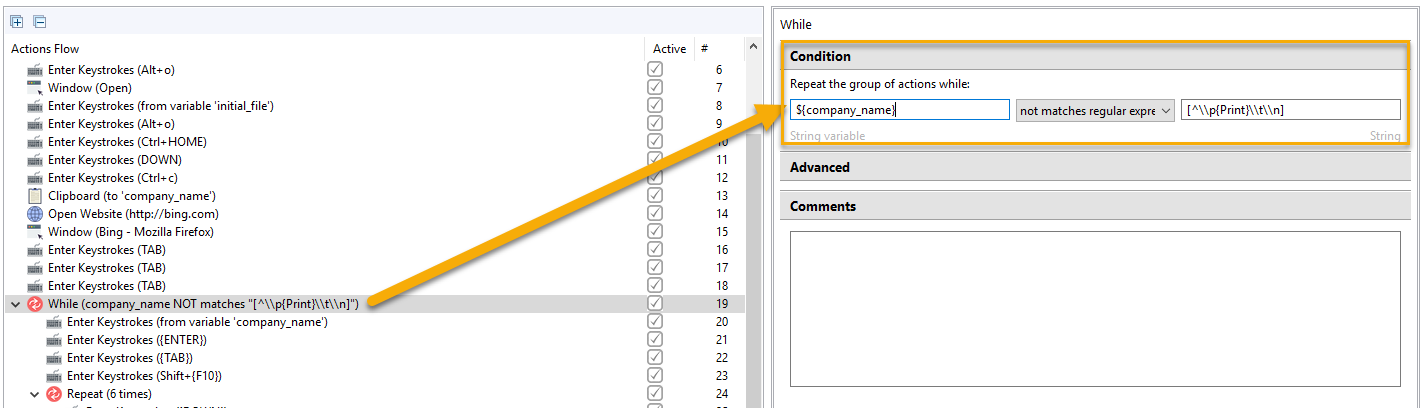
As the workflow completes, the variables with changed values are reset to their defaults.
Use loops
You can use loops:
- To repeat a sequence of actions until some condition is met (While, Retry) or a defined number of times (Repeat).
- To iterate through lists and tables (For Each).
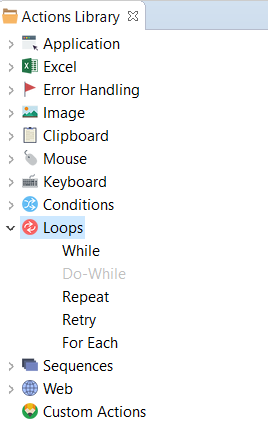
Loops can also contain other actions (clicks, drags, keystrokes) as their children. To read more, refer to Loops.
Publish recording to Control Tower
When the automation is tested and appears to run smoothly, you can publish it to Control Tower:
Click the Publish to Control Tower button.
Enter Business Process Step Name.
Click the Finish button.
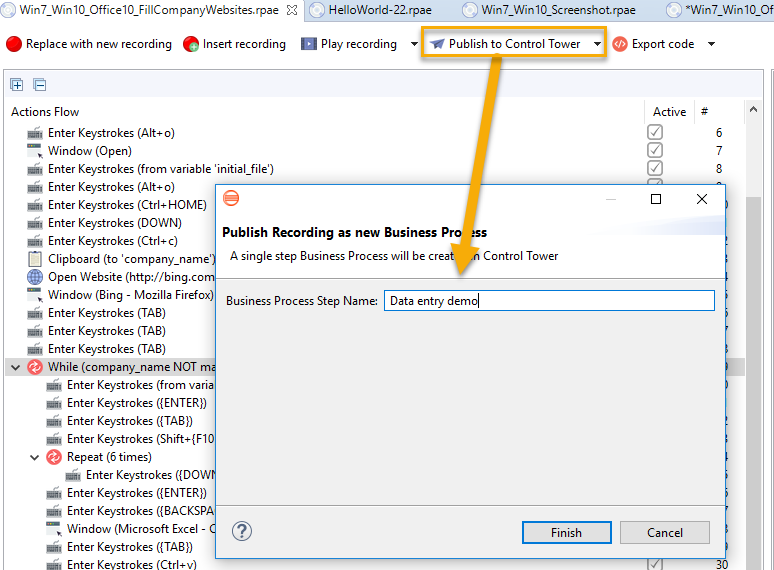
The exported recording is automatically packed into a bot step of a Business Process and is opened in Control Tower.
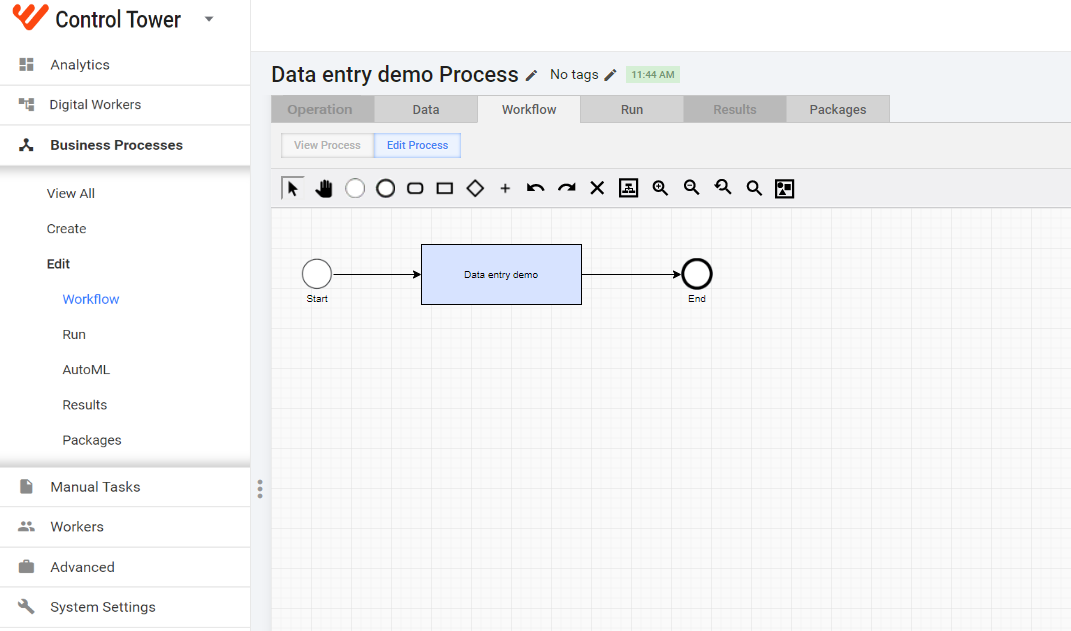
Afterward, you can run this process and watch its execution on your local machine.
For troubleshooting tips, refer to Troubleshoot Eclipse and Recorder.