Manage Workspace roles and permissions
To access any Workspace functionality, each user must have a role and permissions assigned to them.
Workspace roles
The roles for Workspace users are assigned via the single user management system implemented based on Keycloak. You can assign a default role or create a custom one.
In Keycloak, there are three default roles pre-configured for the wf-workspace client:
- Administrator
- Manager
- Worker
The roles have different sets of permissions assigned to them by default as described in the Explore default permissions section.
Create roles
To create a custom role, follow the steps below:
Sign in to Keycloak and choose the WorkFusion realm.
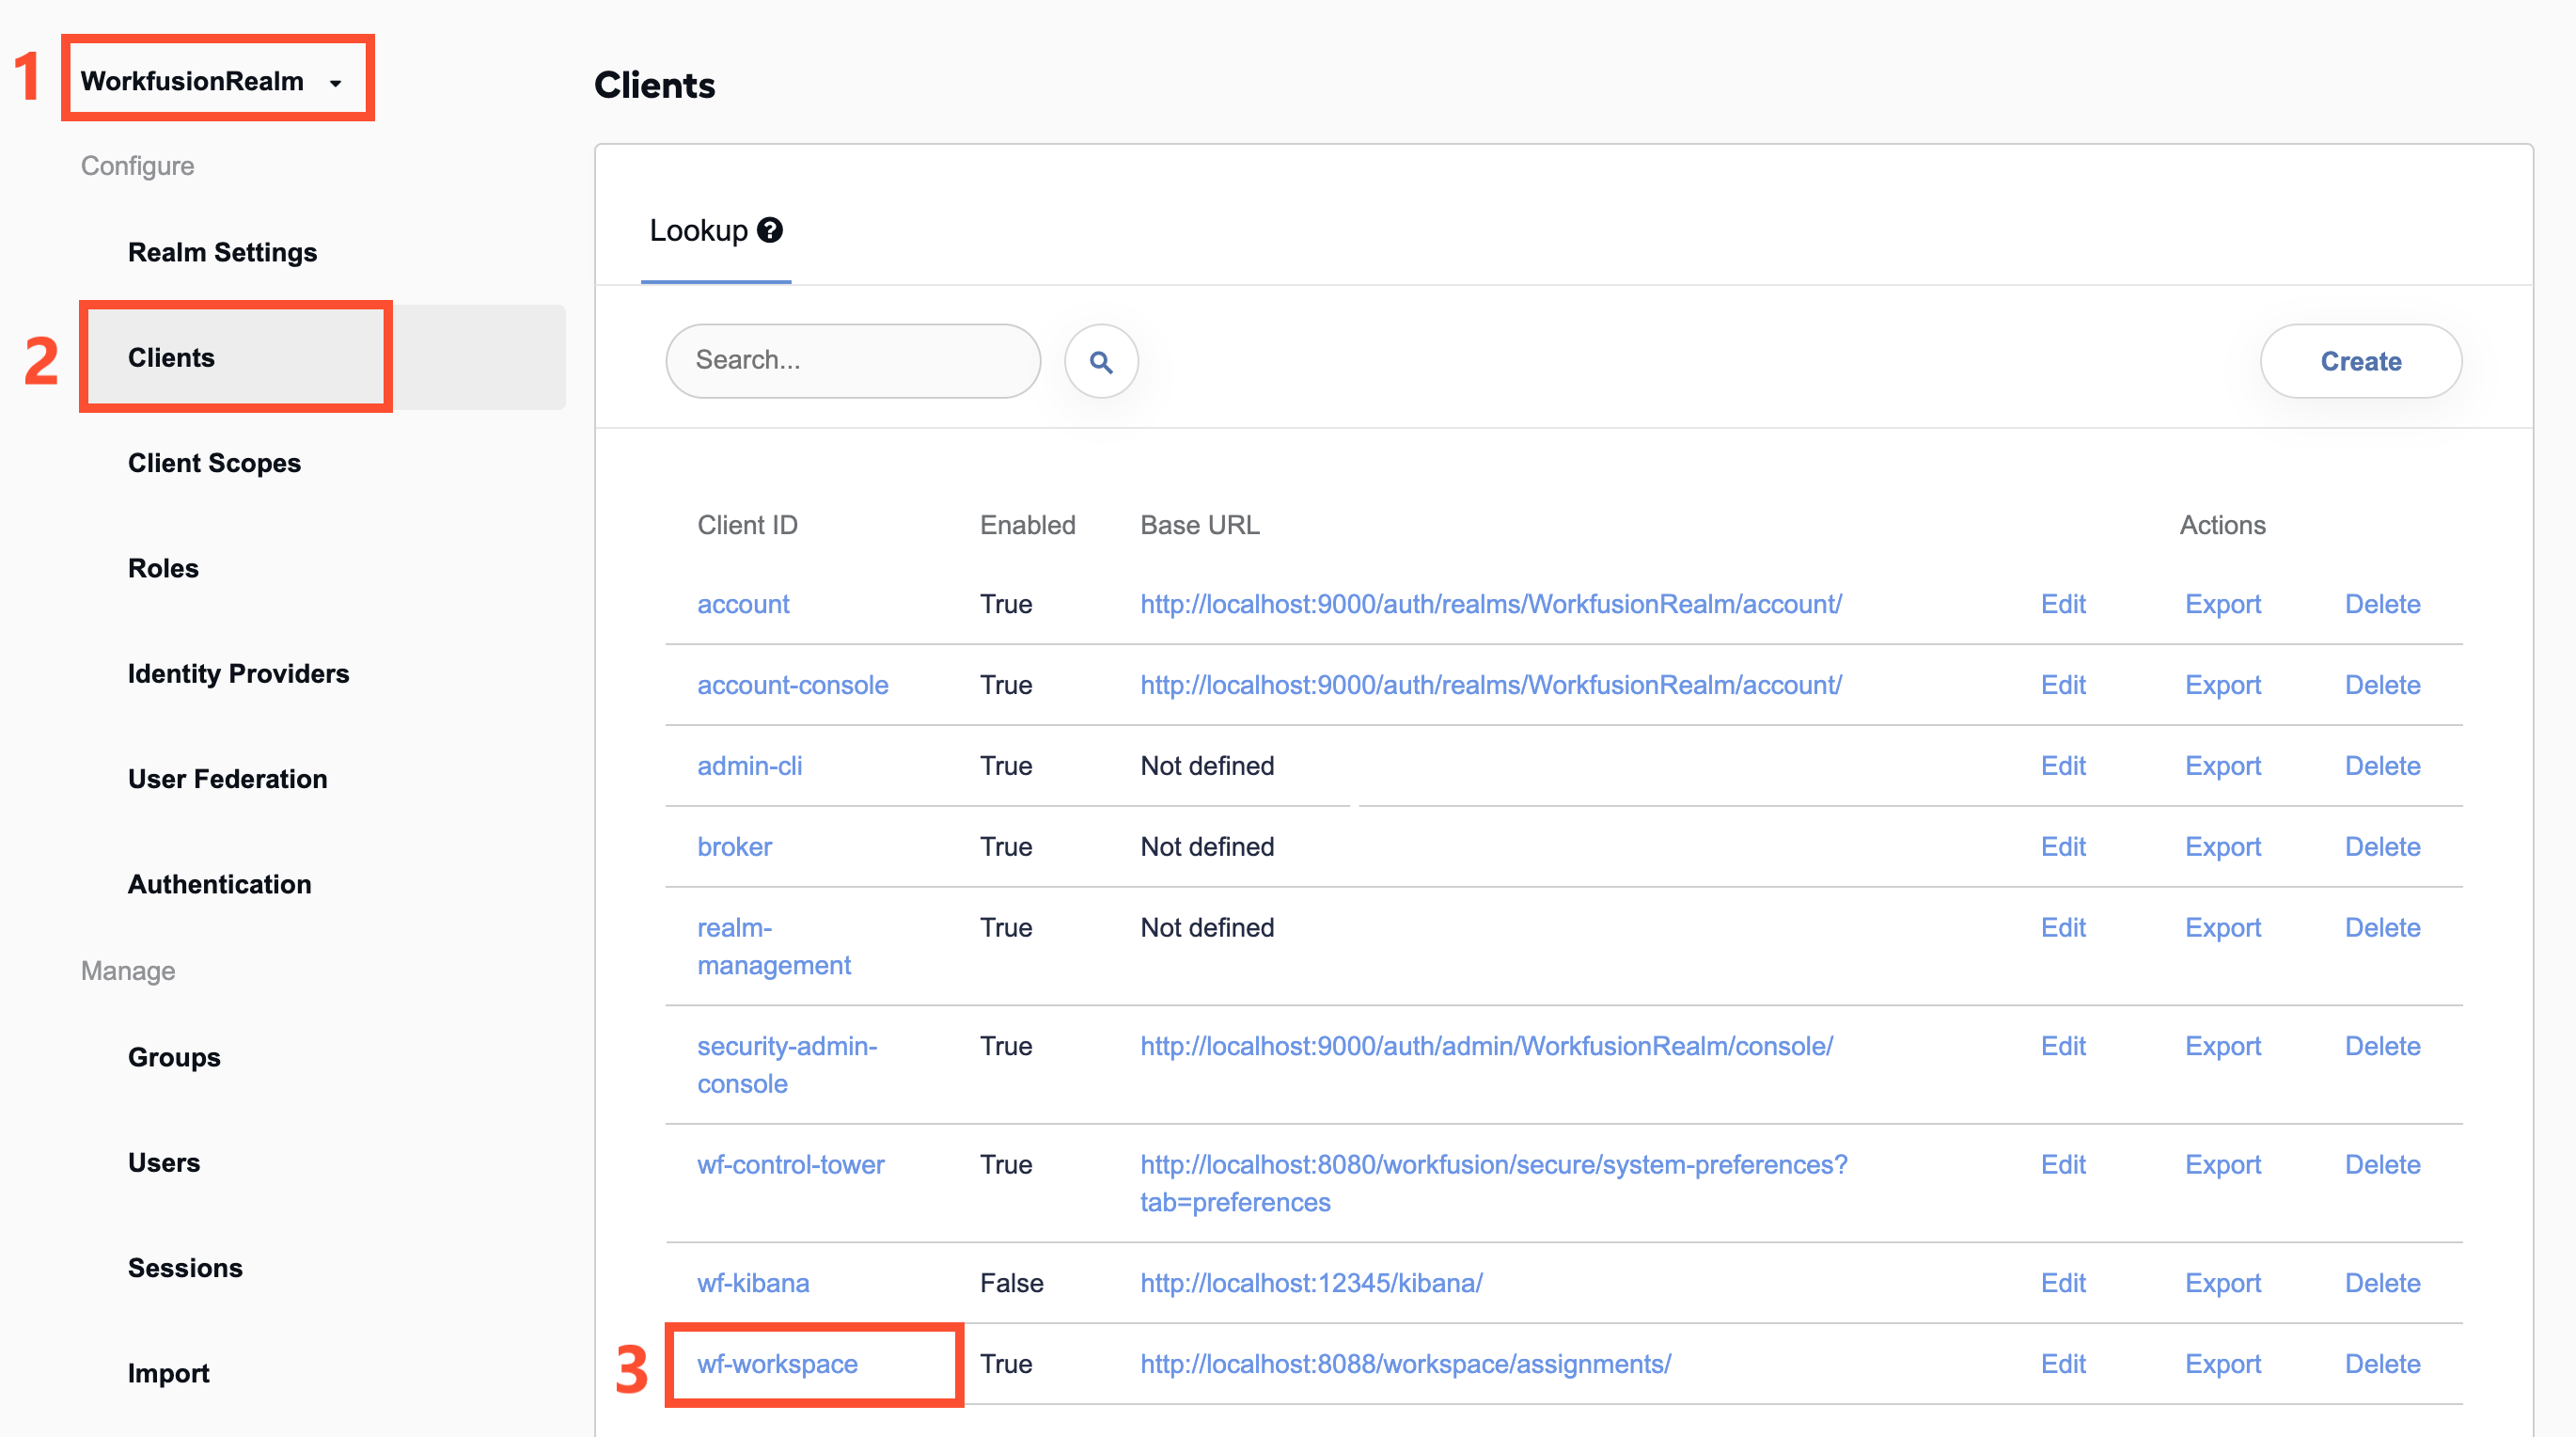
Click Clients.
In the list on the right, select the wf-workspace client.
Follow the steps to add a role as described in the instruction.
It takes five minutes for any role created in Keycloak to be synchronized with Workspace.
Map roles to users
To assign a role to a user, follow the steps below:
Sign in to Keycloak and choose the WorkFusion realm.
Follow the standard role mapping procedure.
User migration and roles
If you upgrade from a previous platform version where users have Workspace roles assigned to them, the migration tool will migrate the roles together with the users. Otherwise, you must assign roles to users manually as described in the Map roles to users section.
Workspace permissions
Each default or custom role from Keycloak must have permissions assigned to them in Workspace.
By default, managing permissions in Workspace is available only for users under the Administrator role or the additional Role Manager role you can set up based on this guide to segregate administration functions.
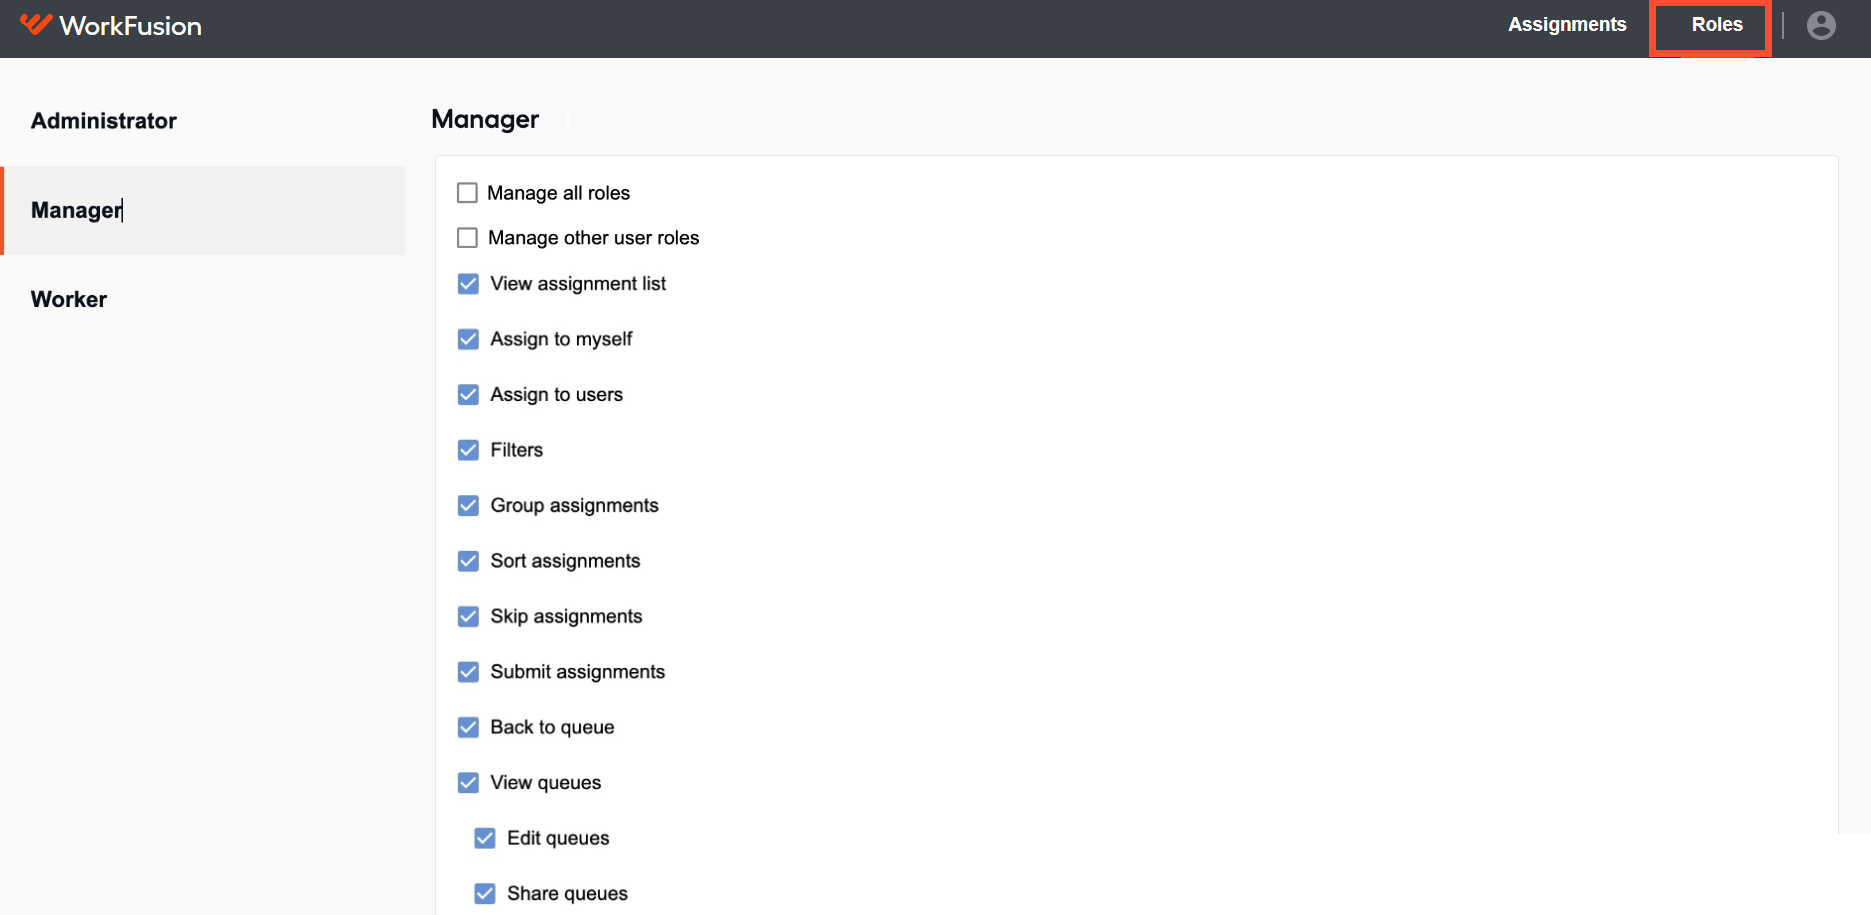
To see the list of available Workspace permissions, go to the Roles tab and, in the menu on the left, choose one of the roles.
Explore default permissions
The table below is the default permission matrix. For in-depth understanding of the roles, read the Study permission descriptions section.
| Permission | Administrator | Manager | Worker |
|---|---|---|---|
| Manage all roles | ✓ | ||
| Manage other user roles | |||
| View assignment list | ✓ | ✓ | ✓ |
| Assign to myself | ✓ | ✓ | ✓ |
| Assign to users | ✓ | ✓ | |
| Filters | ✓ | ✓ | ✓ |
| Group assignments | ✓ | ✓ | ✓ |
| Sort assignments | ✓ | ✓ | ✓ |
| Skip assignments | ✓ | ✓ | ✓ |
| Submit assignments | ✓ | ✓ | ✓ |
| Back to queue | ✓ | ✓ | ✓ |
| View queues | ✓ | ✓ | ✓ |
| Edit queues | ✓ | ✓ | ✓ |
| Share queues | ✓ | ✓ | ✓ |
| VIEW_USERS_ANALYTICS | ✓ | ✓ | |
| VIEW_MY_ANALYTICS | ✓ | ✓ | ✓ |
Set permissions
To set permissions for a role, follow the steps:
Go to the Roles tab and, in the menu on the left, select a role.
Select or deselect any of the permission checkboxes.
Click the Save button.
Study permission descriptions
Manage all roles
The permission lets you assign Workspace permissions to any default or custom roles. By default, it is enabled only for the Administrator role. The permission is mutually exclusive with the Manage other user roles.
For security reasons, the permission is locked in the enabled state. When the permission is disabled, the Roles page becomes unavailable: no such tab is displayed in the Workspace UI, and, by a direct link, users get "Access denied."
Manage other user roles
The permission lets you manage Workspace permissions for all roles, except for the ones you may have as a grantee. The permission is used with the additional Role Manager role you can set up based on this guide to segragate administration functions.
The Manage all roles and Manage other user roles permissions are mutually exclusive: you can choose only one of them.
View assignment list
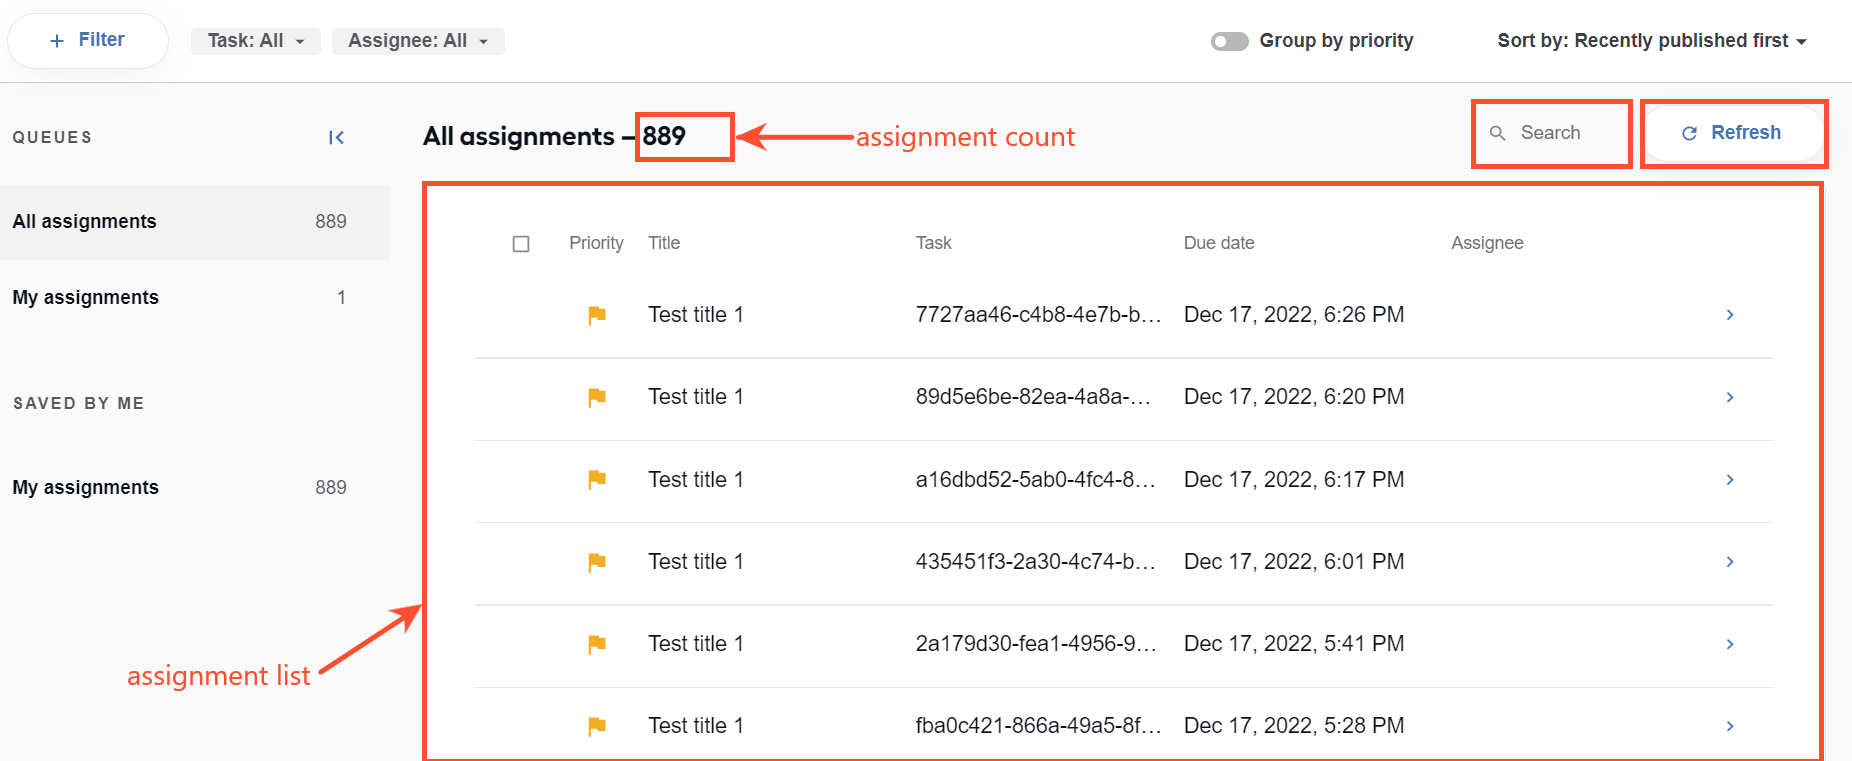
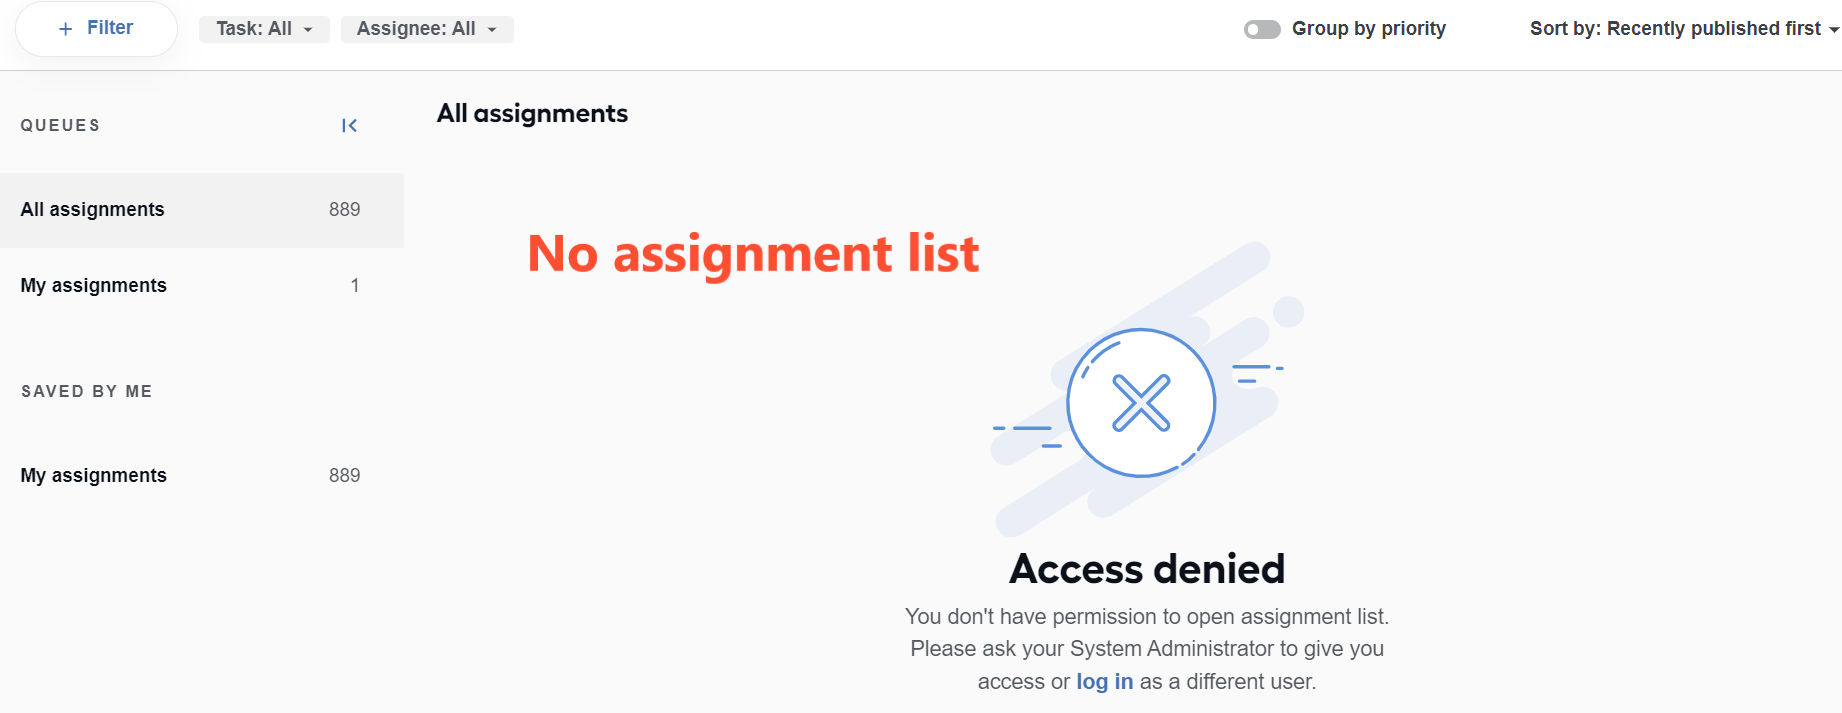
The permission lets you view the full assignment list and the total count of available assignments, as well as apply the Search and Refresh buttons.
Without it, assignments are available only via direct links, and you cannot see their total count. The Assignments list, the Search and Refresh buttons are not visible.
| Permission enabled | Permission disabled |
|---|---|
 |  |
Assign to myself
The permission lets users assign tasks from the Assignment list to themselves. When it is disabled, the Assign to me button is not visible, and the user is not shown among the options in the Assign to dialog.
| Permission enabled | Permission disabled |
|---|---|
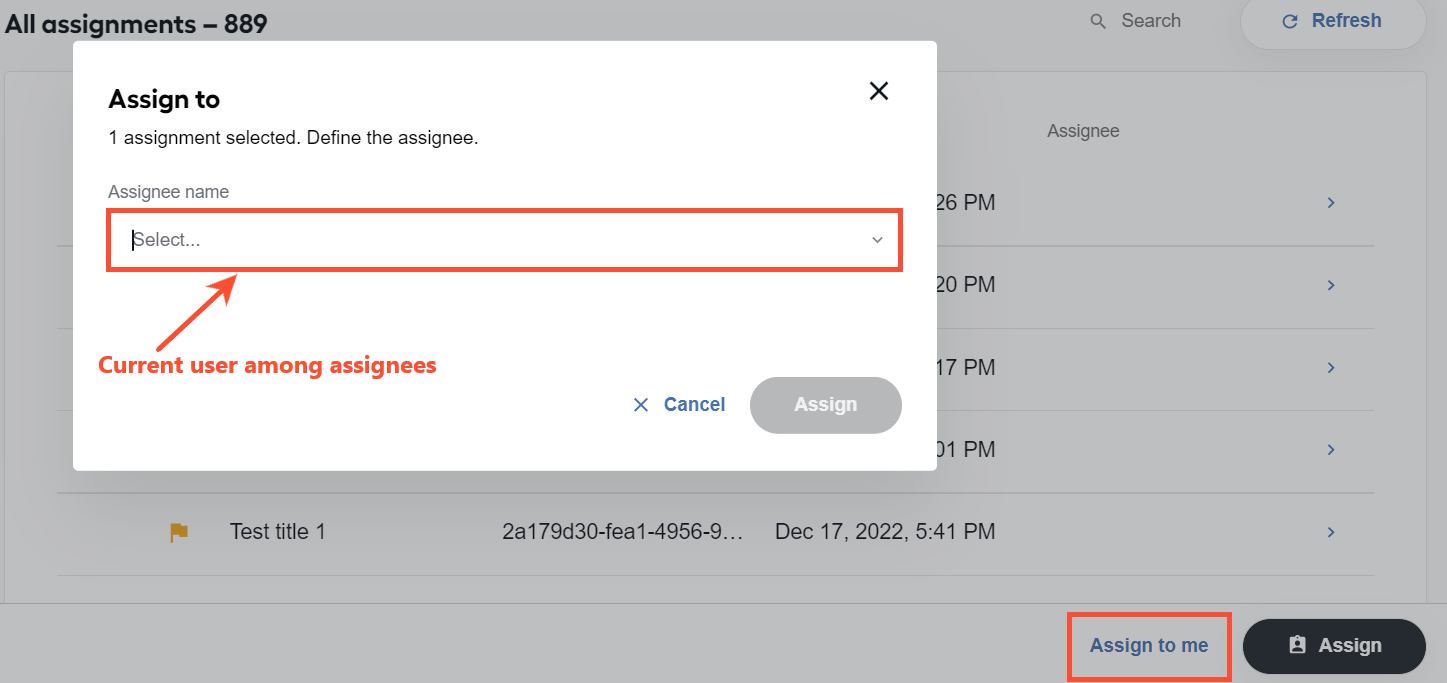 | 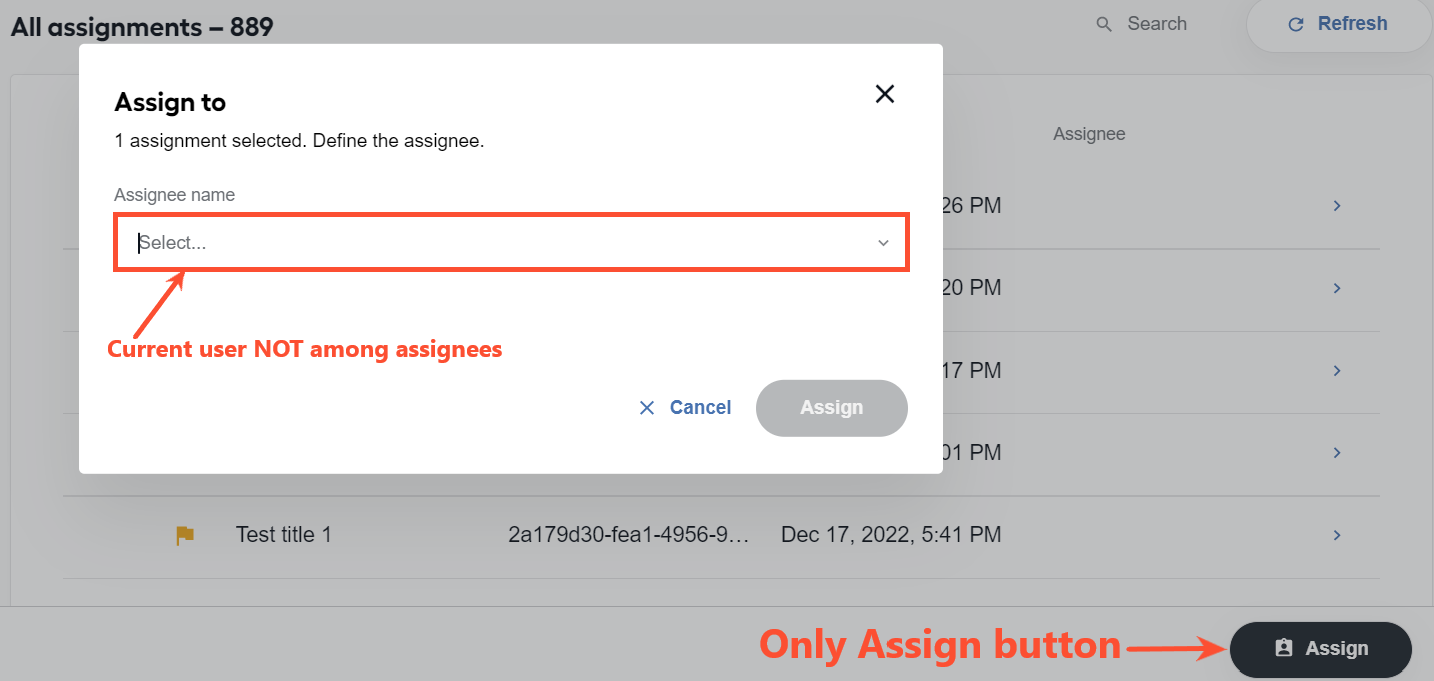 |
Assign to users
The permission allows you to assign tasks from the Assignment list to other users. Without it, only Assign to me button appears after you select an assignment from the list.
| Permission enabled | Permission disabled |
|---|---|
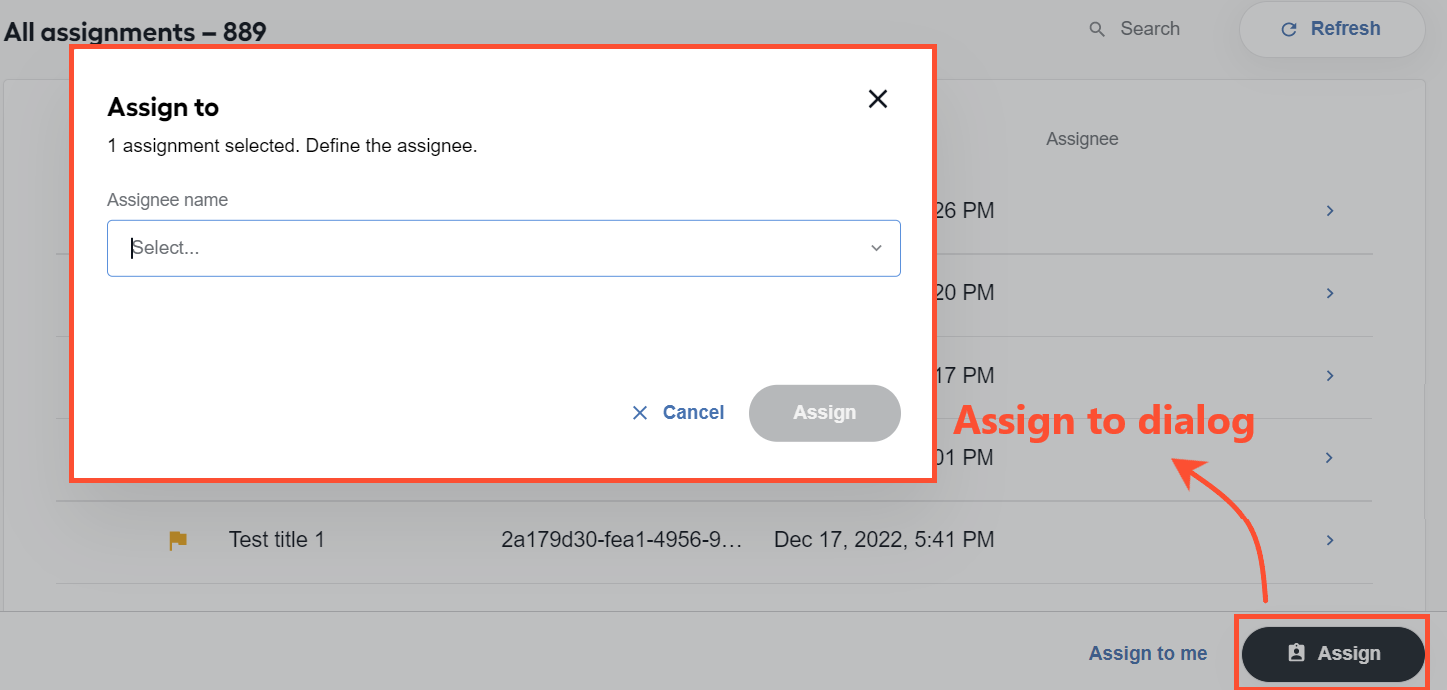 | 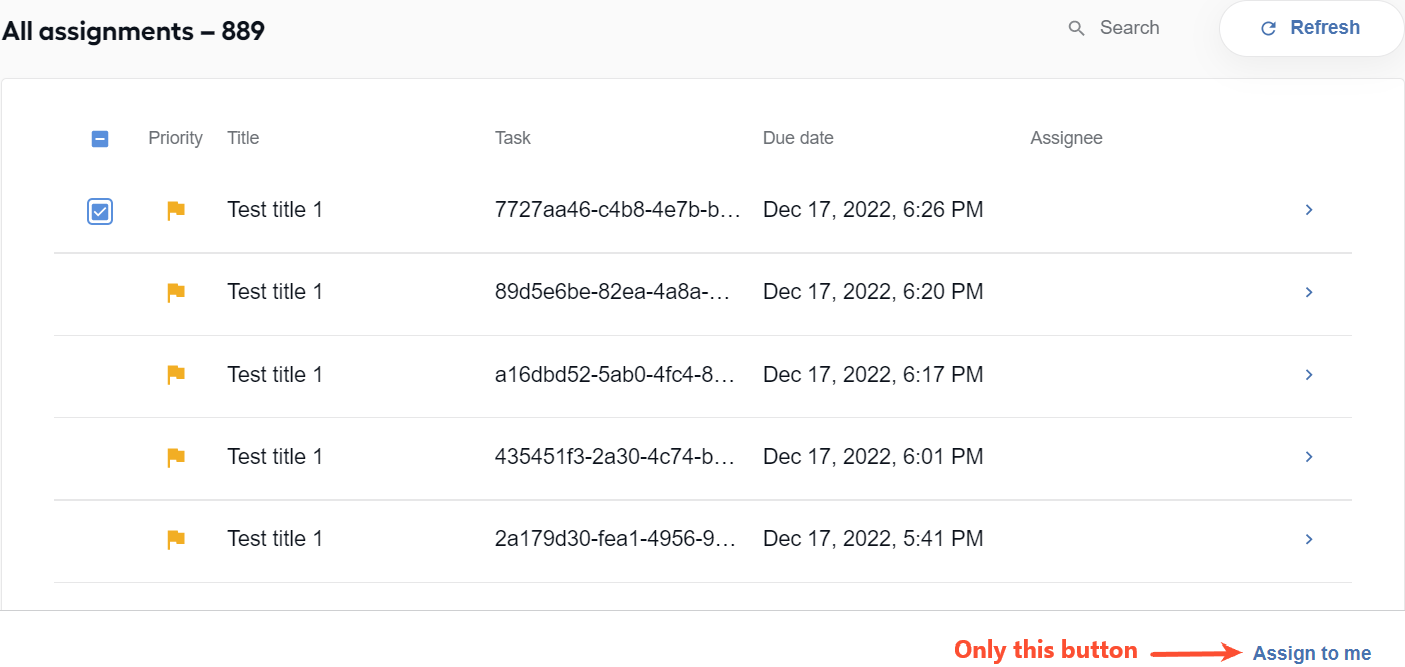 |
Filters
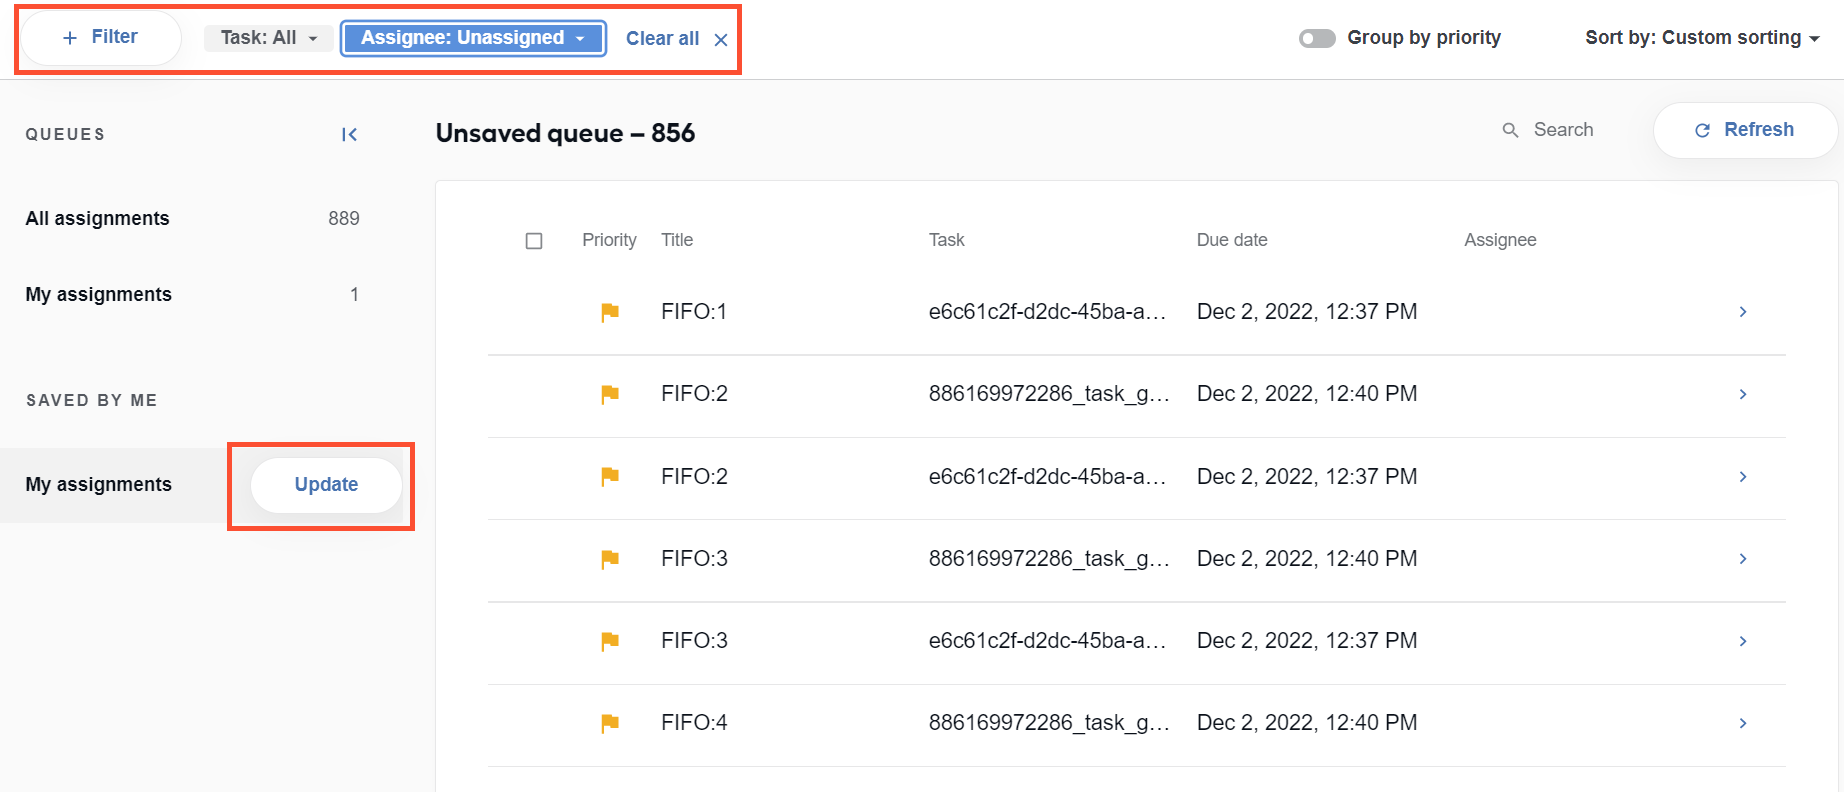
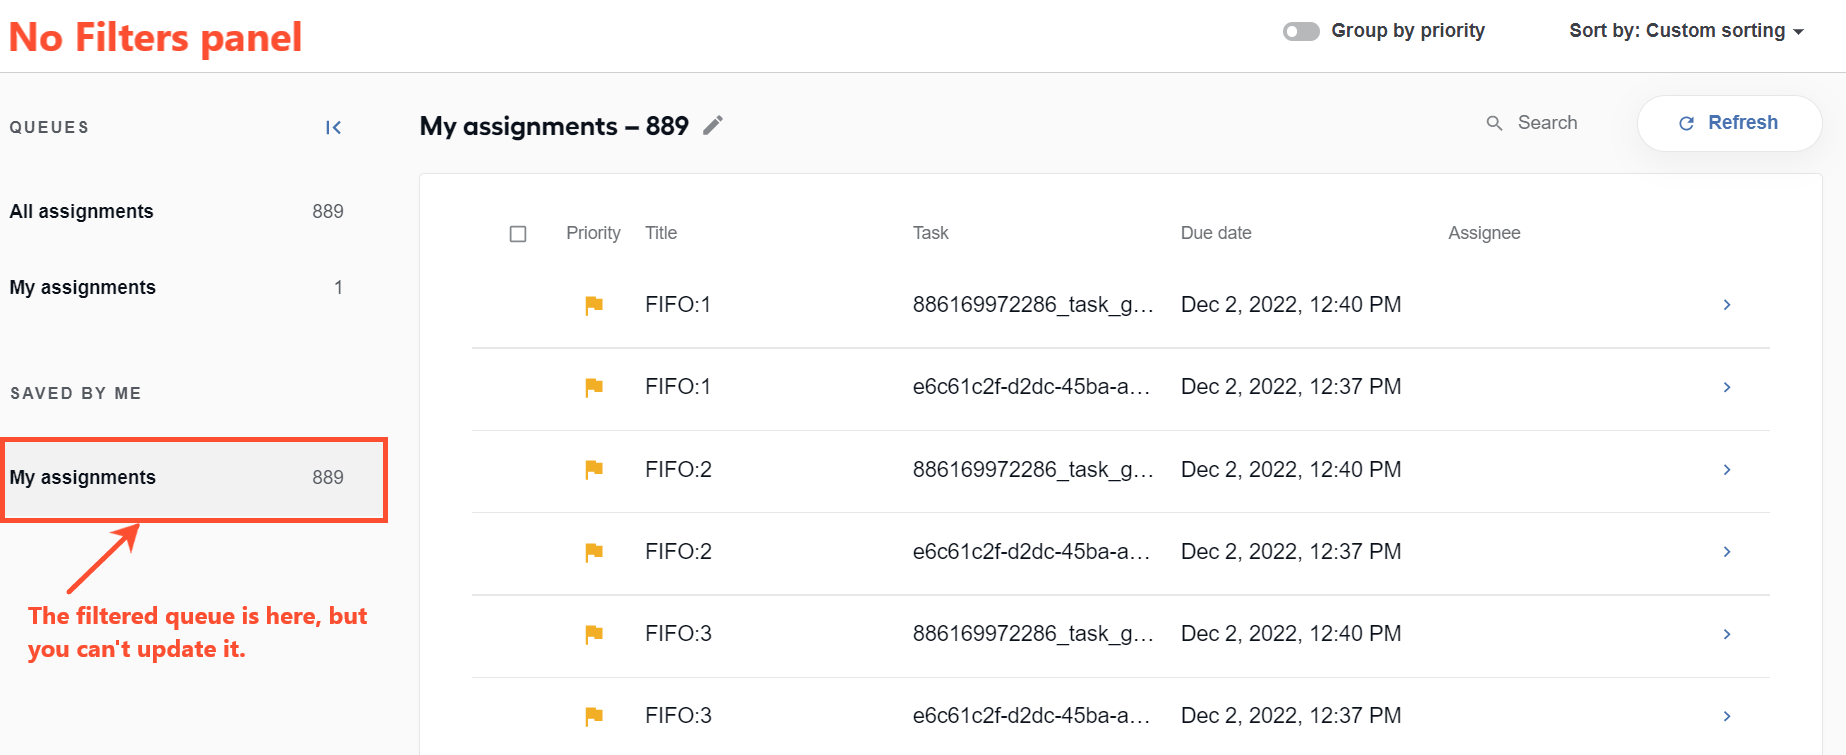
The permission lets you apply filters to assignment queues. Without it, filters are hidden. You can still view and work with any filtered queues, but you cannot update them.
| Permission enabled | Permission disabled |
|---|---|
 |  |
Group assignments
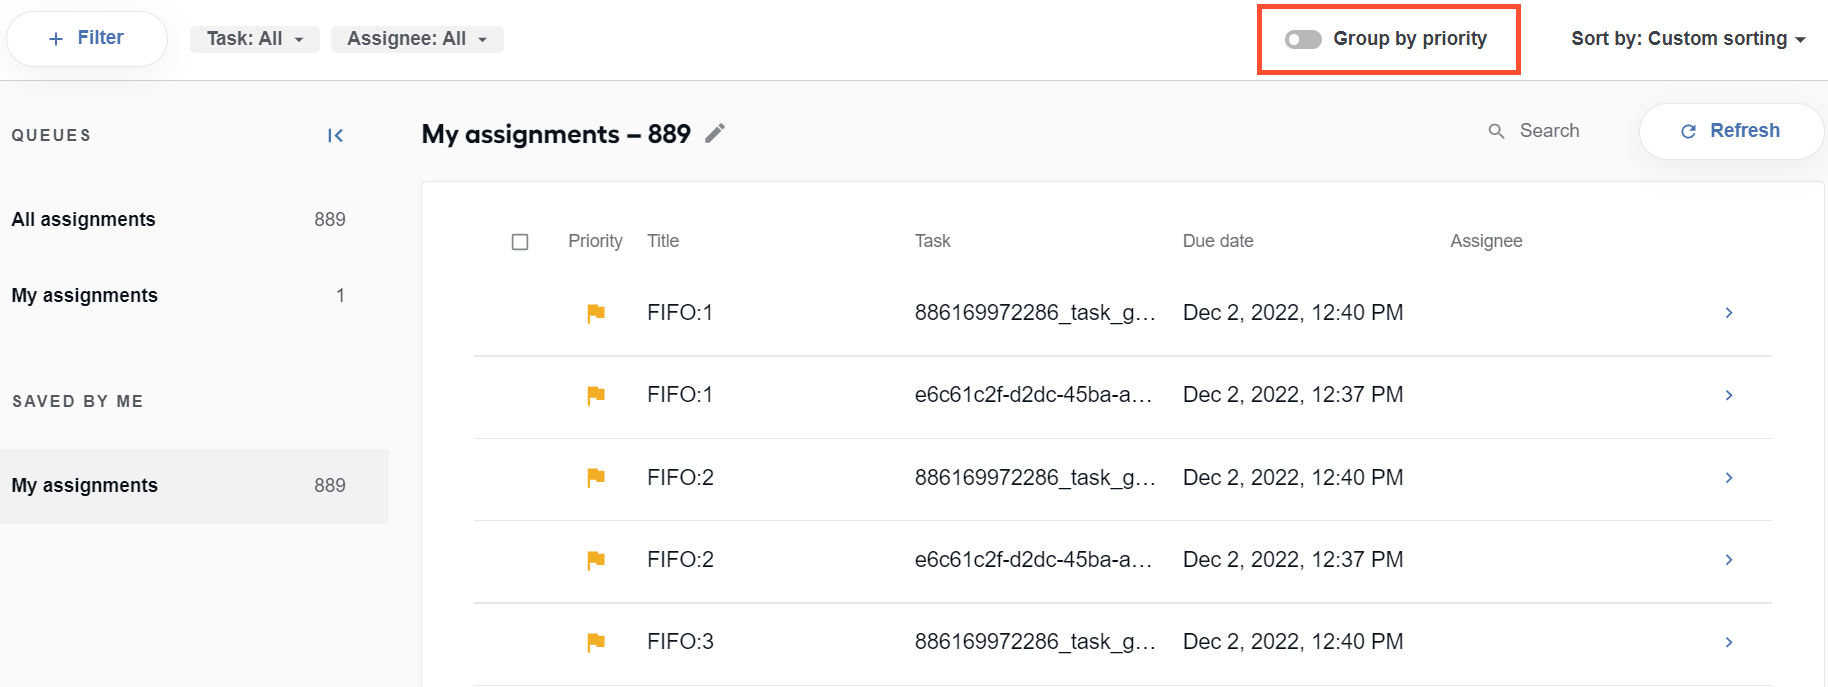
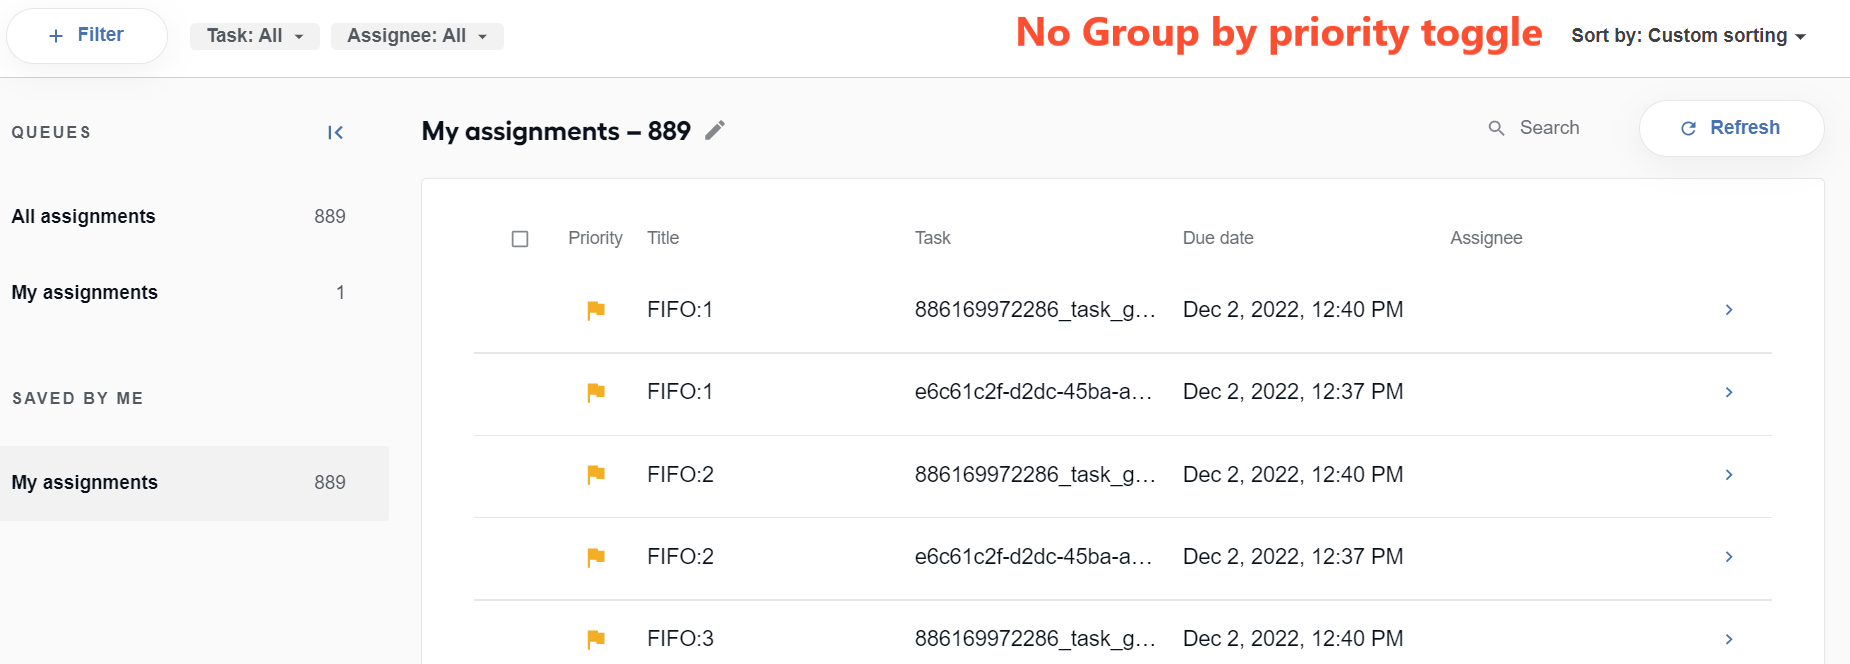
The permission makes it possible to group assignments by priority. When you do not have it, the Group by priority toggle is not visible.
| Permission enabled | Permission disabled |
|---|---|
 |  |
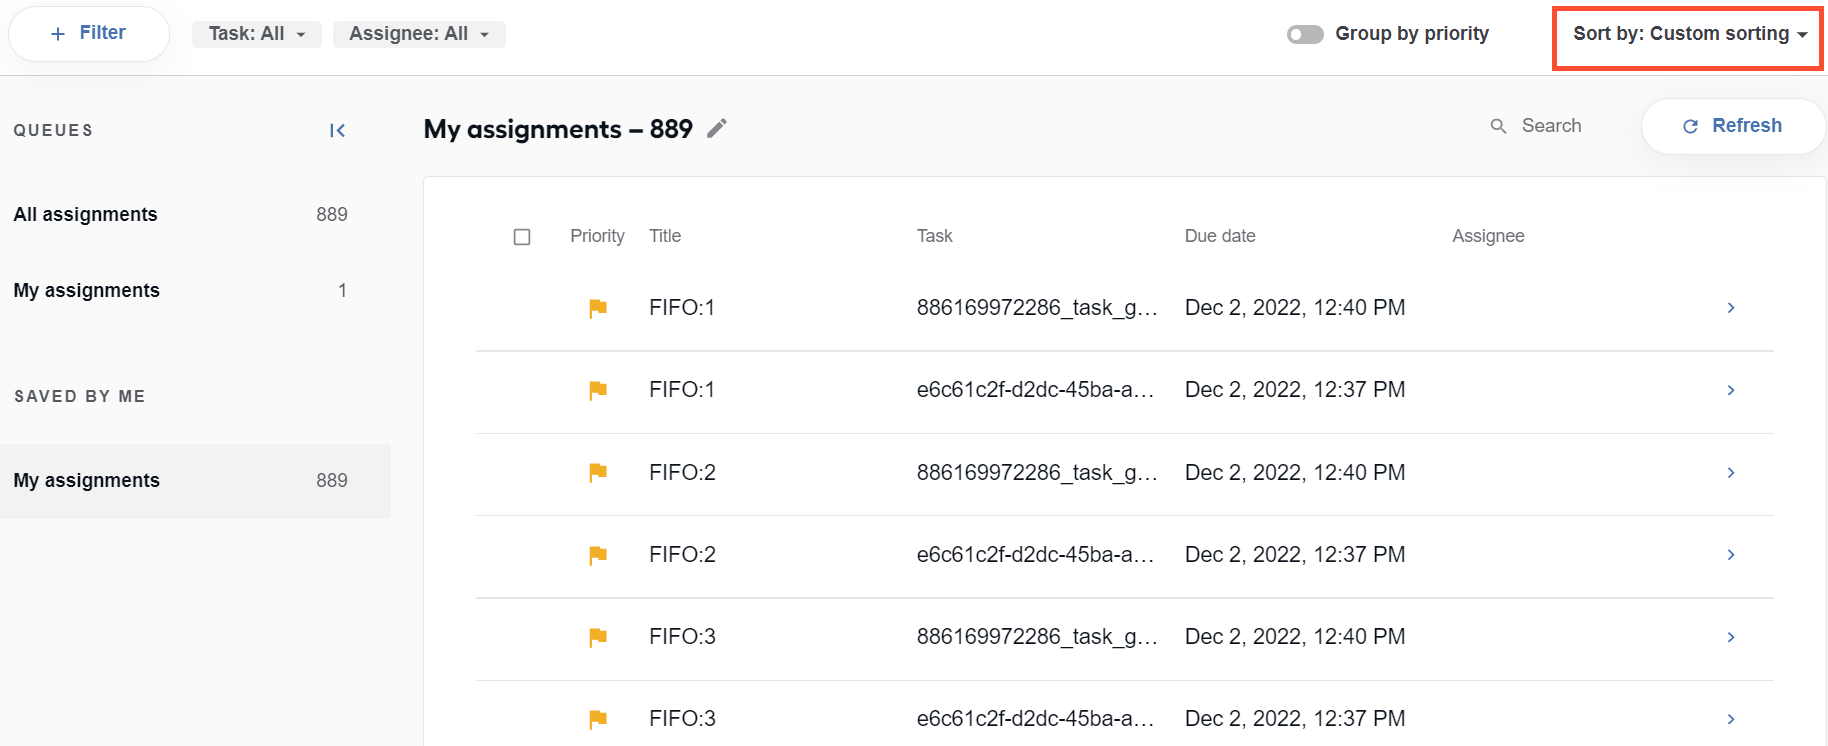
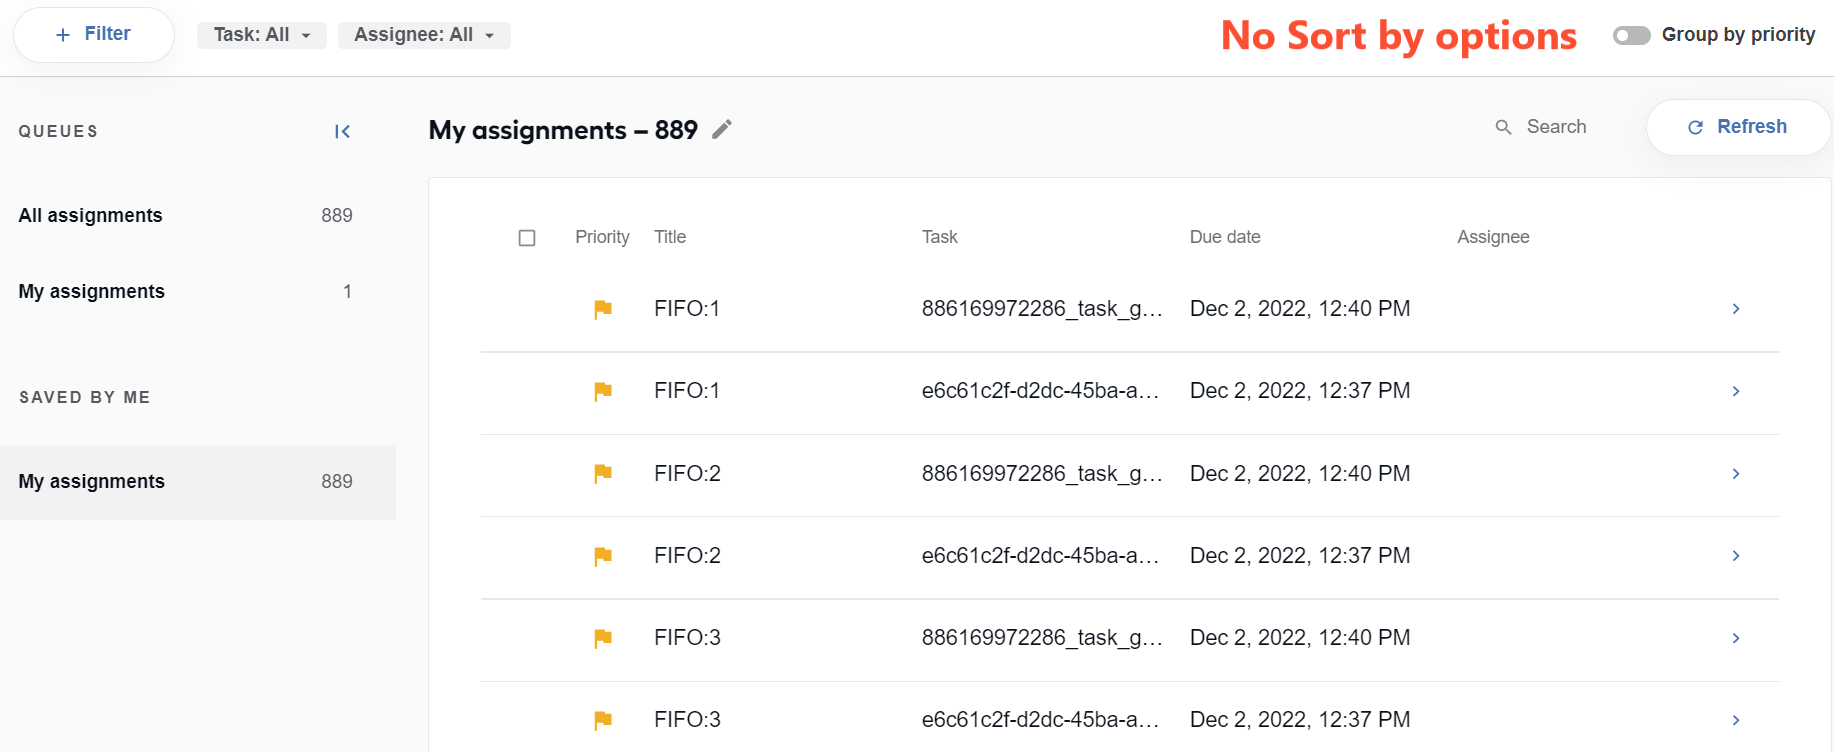
Sort assignments
The permission lets you sort the assignments in the list by a number of criteria. Without it, the Sort by drop-down field is not visible.
| Permission enabled | Permission disabled |
|---|---|
 |  |
Skip assignments
The permission lets you to skip assignments. When it is disabled, the Skip button inside your assigments is no longer visible.
| Permission enabled | Permission disabled |
|---|---|
 |  |
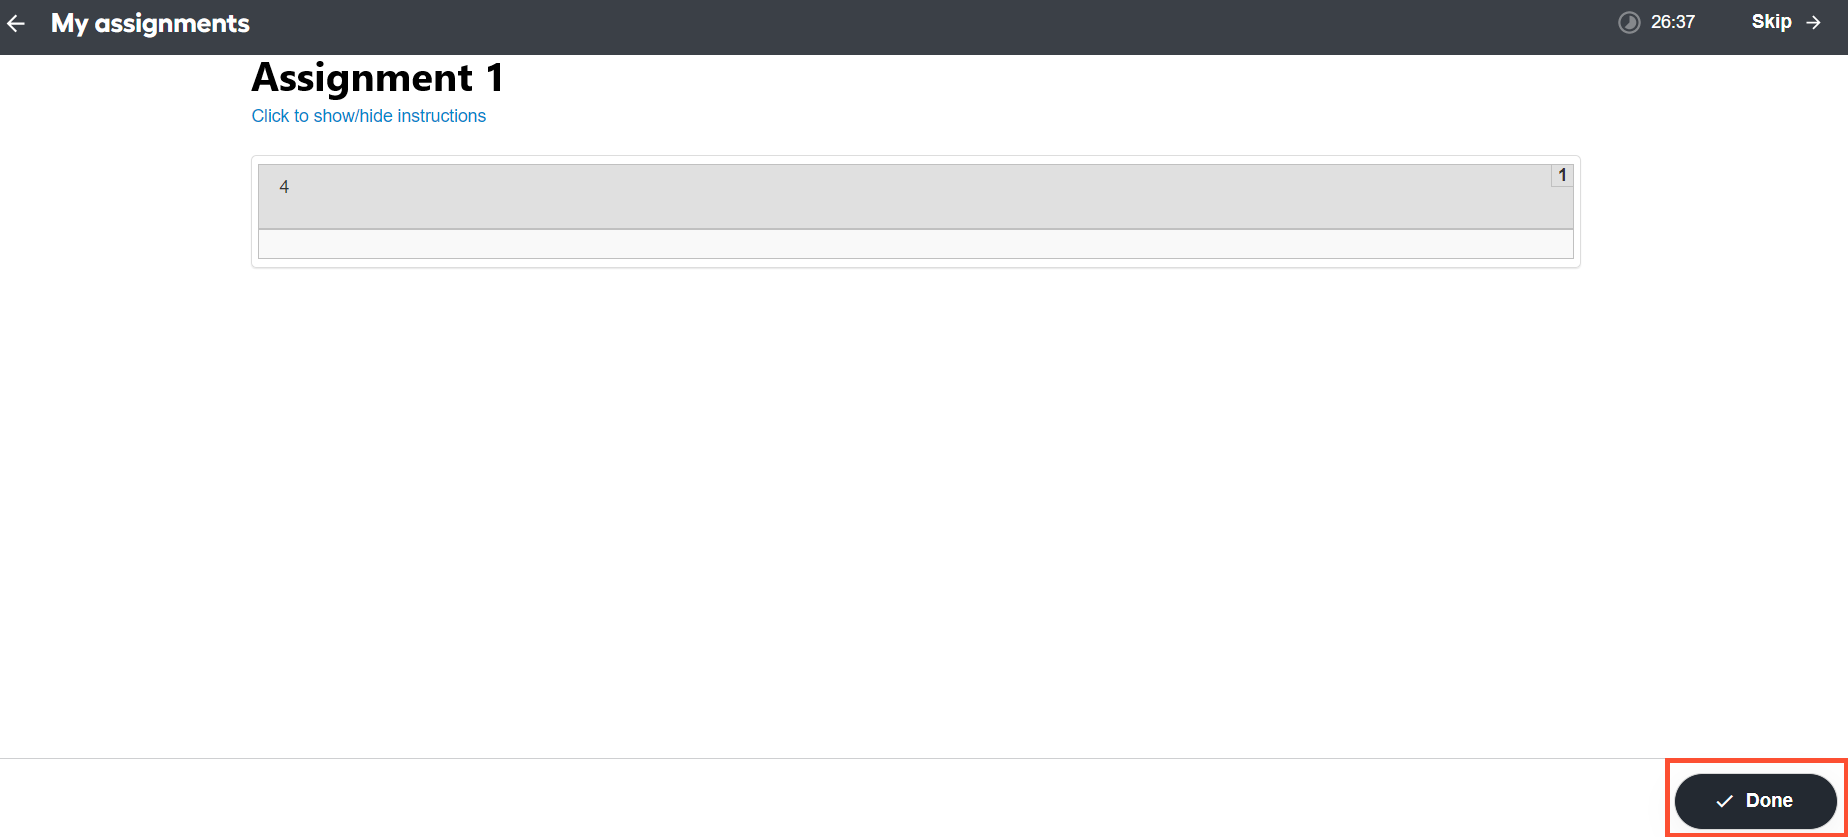
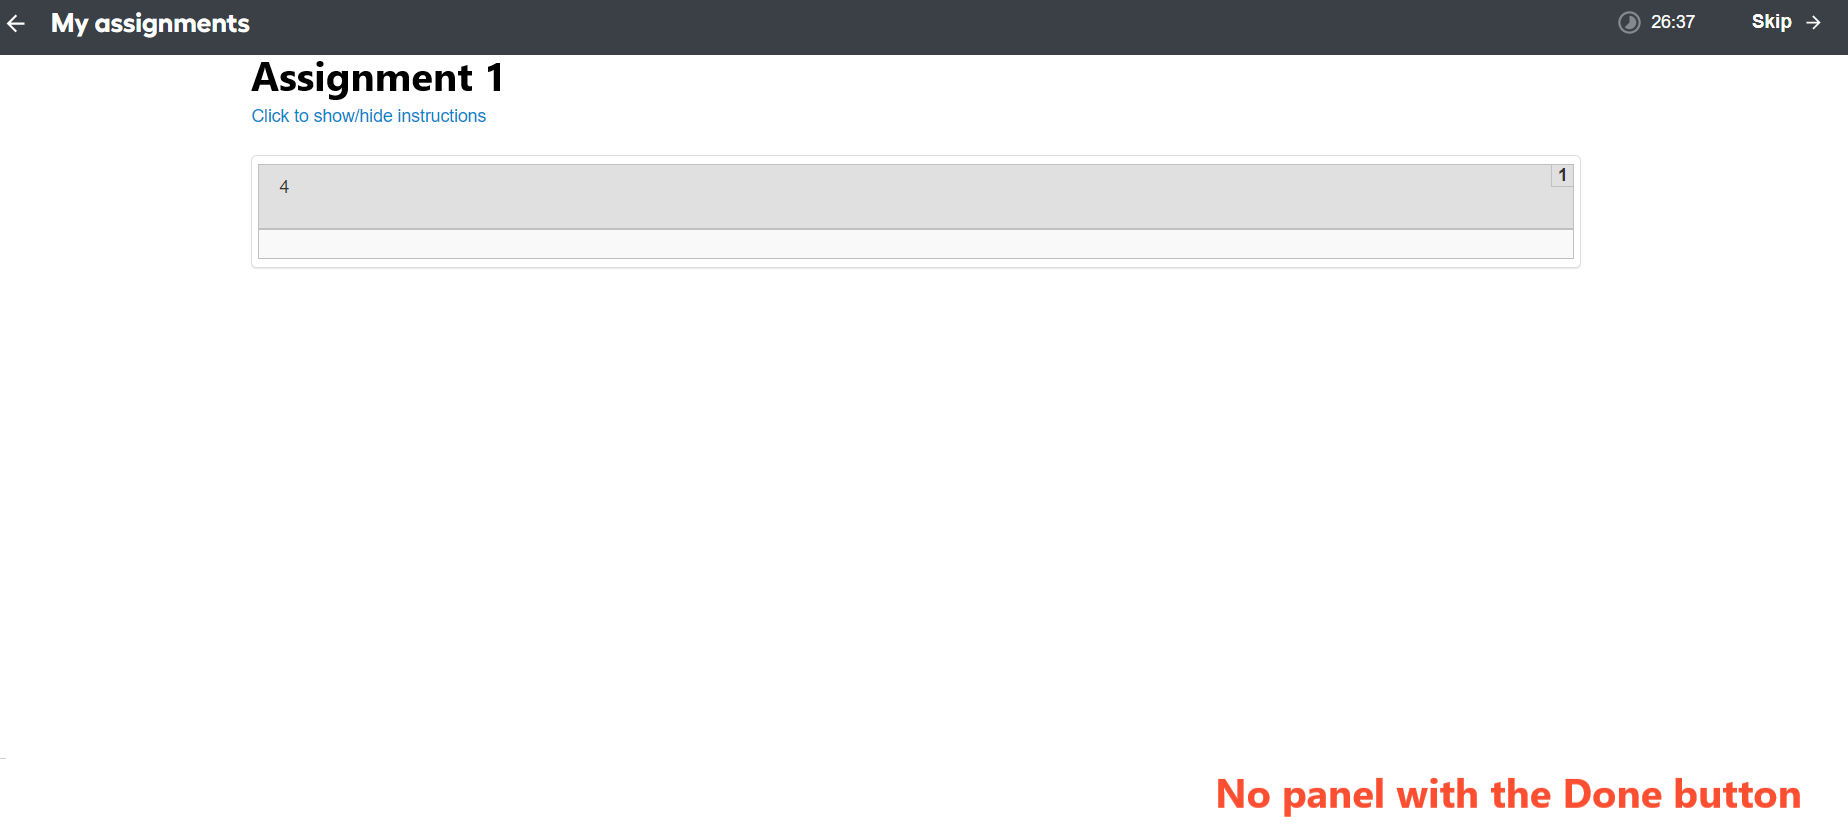
Submit assignments
The permission lets you submit completed assignments. Without it, the Done button inside your assignments is no longer visible. Users can only view assignments.
| Permission enabled | Permission disabled |
|---|---|
 |  |
Back to queue
The permission makes it possible to go back to the queue from an individual assignment. Without it, there is no button to go back to the assignment list of the queue you are working on.
| Permission enabled | Permission disabled |
|---|---|
 |  |
View queues
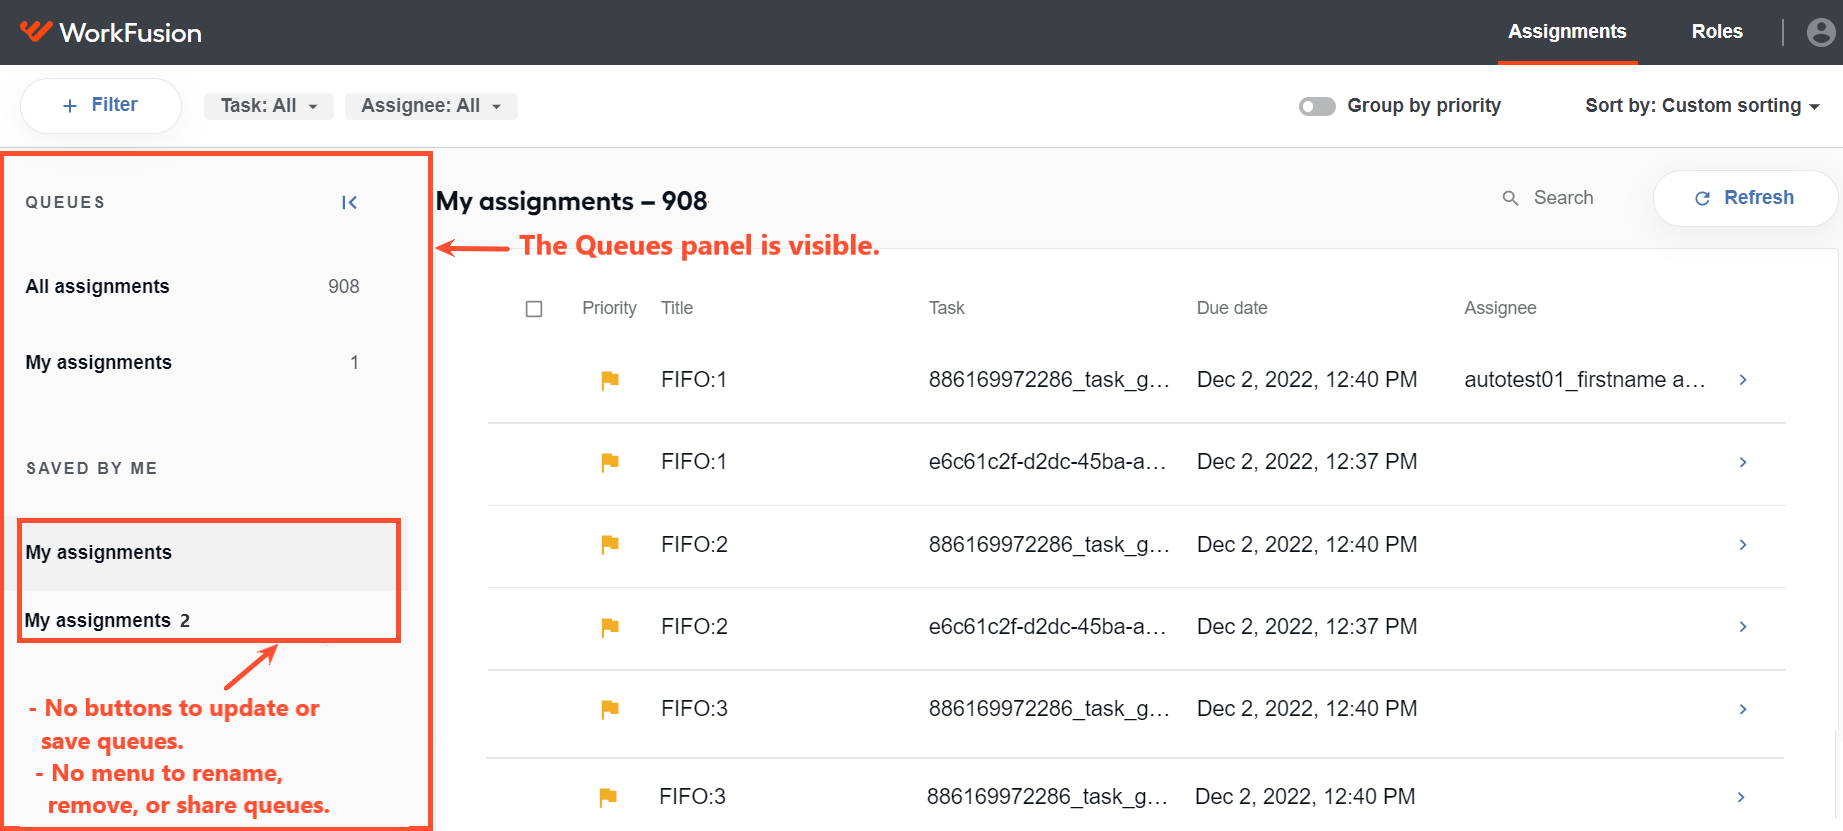
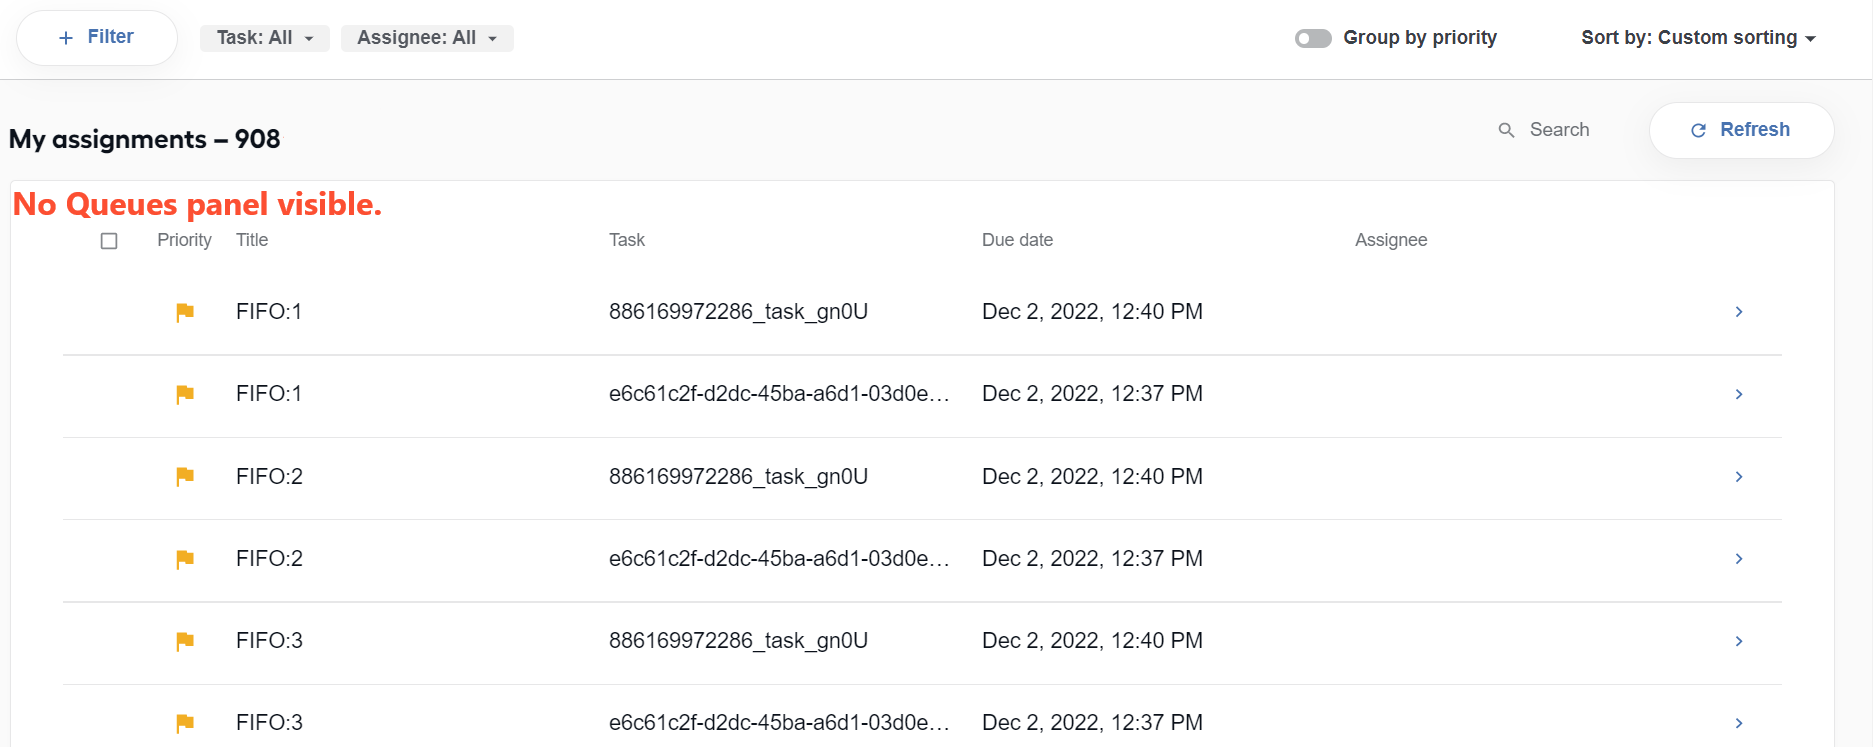
The permission lets you view the assignment queue panel, including all custom and shared queues. However, you cannot perform any actions (for instance, update or share) with the displayed queues unless you select Edit queues or Share queues permissions additionally.
| Permission enabled | Permission disabled |
|---|---|
 |  |
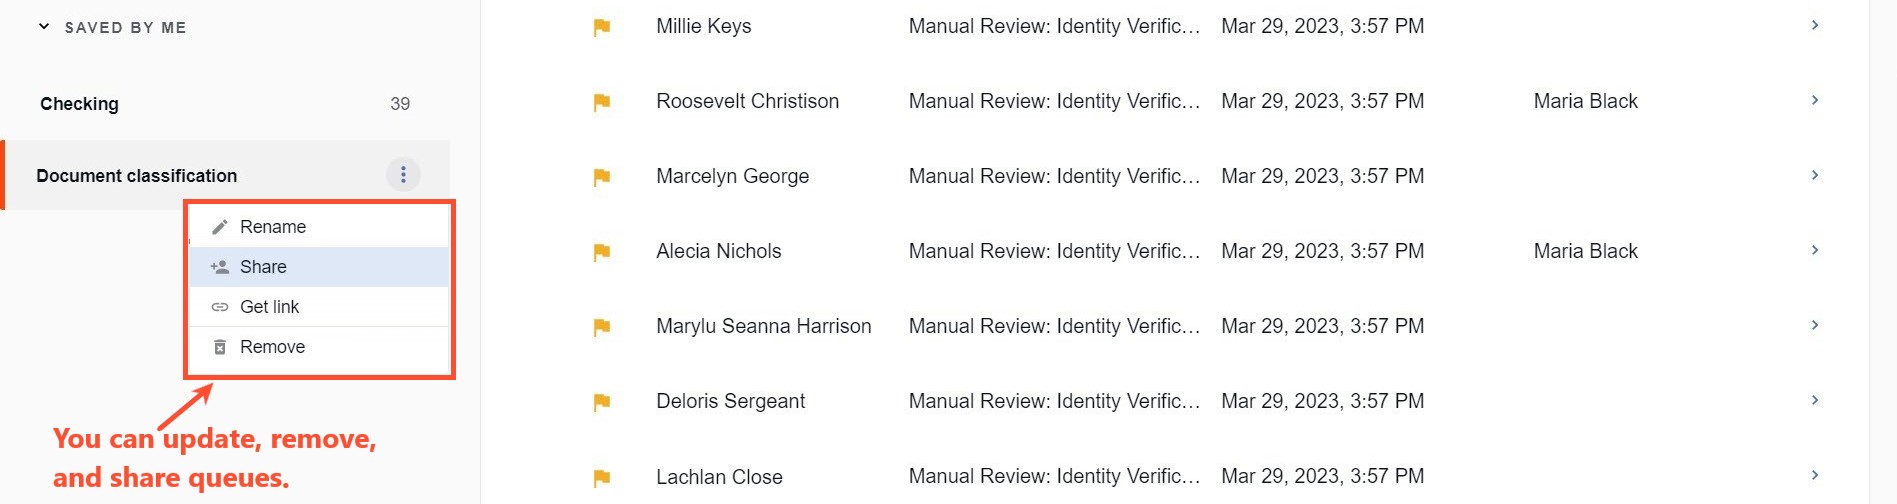
Edit queues
The option becomes active only after you select the View queues permission and works only in combination with the latter. The Edit queues permission lets you save, update, rename, or delete queues. Without it, the associated action buttons and action menu options are not visible.
When the Edit queues permission is enabled in combination with View queues, the following capabilities are available:
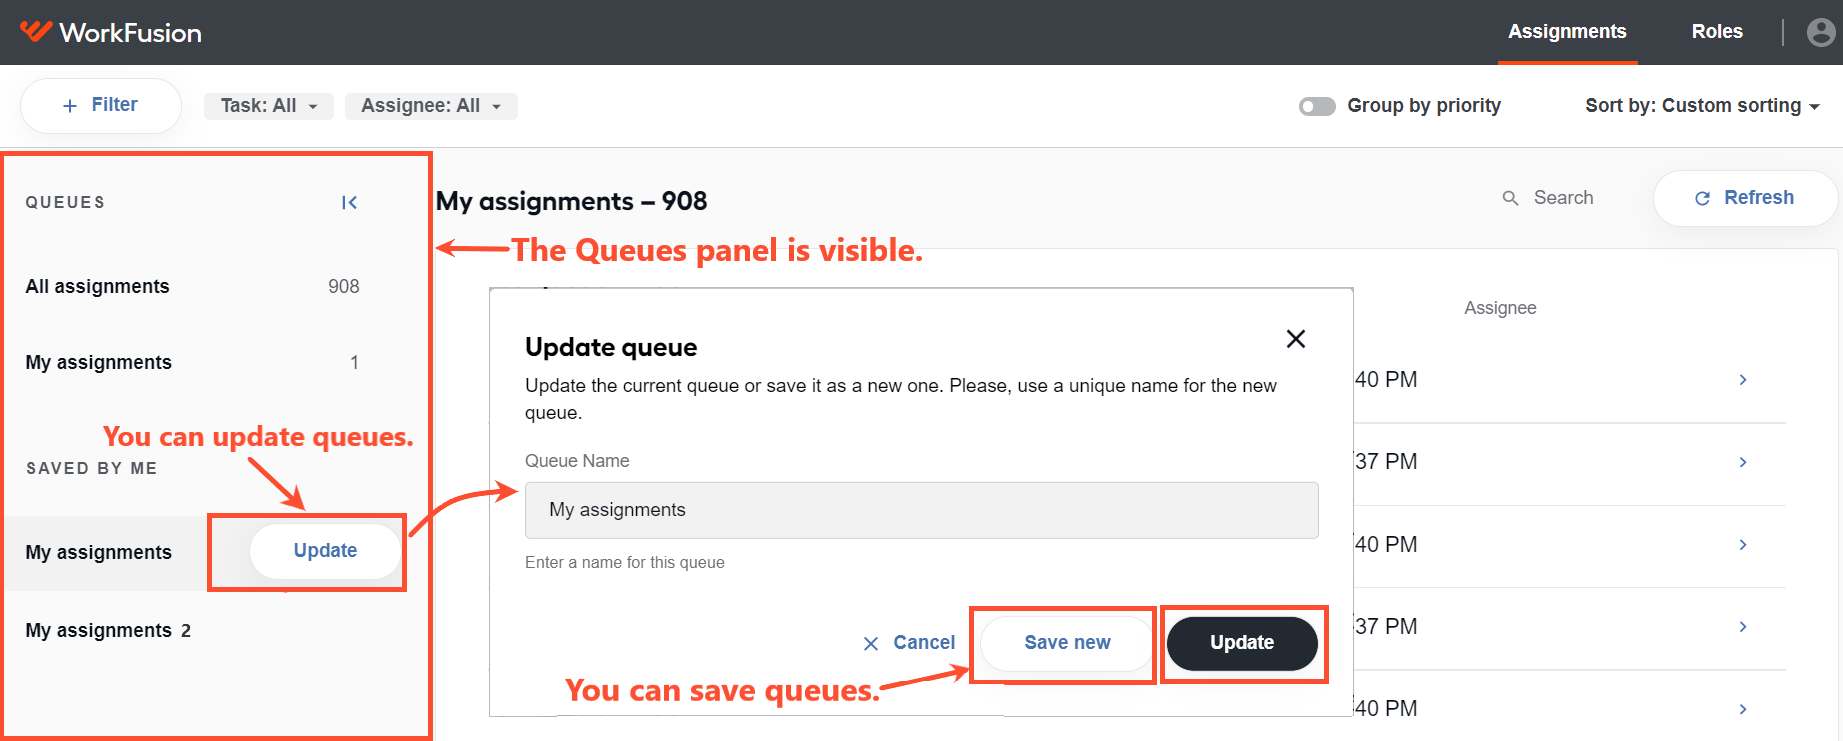
Plus Share queues permission disabled
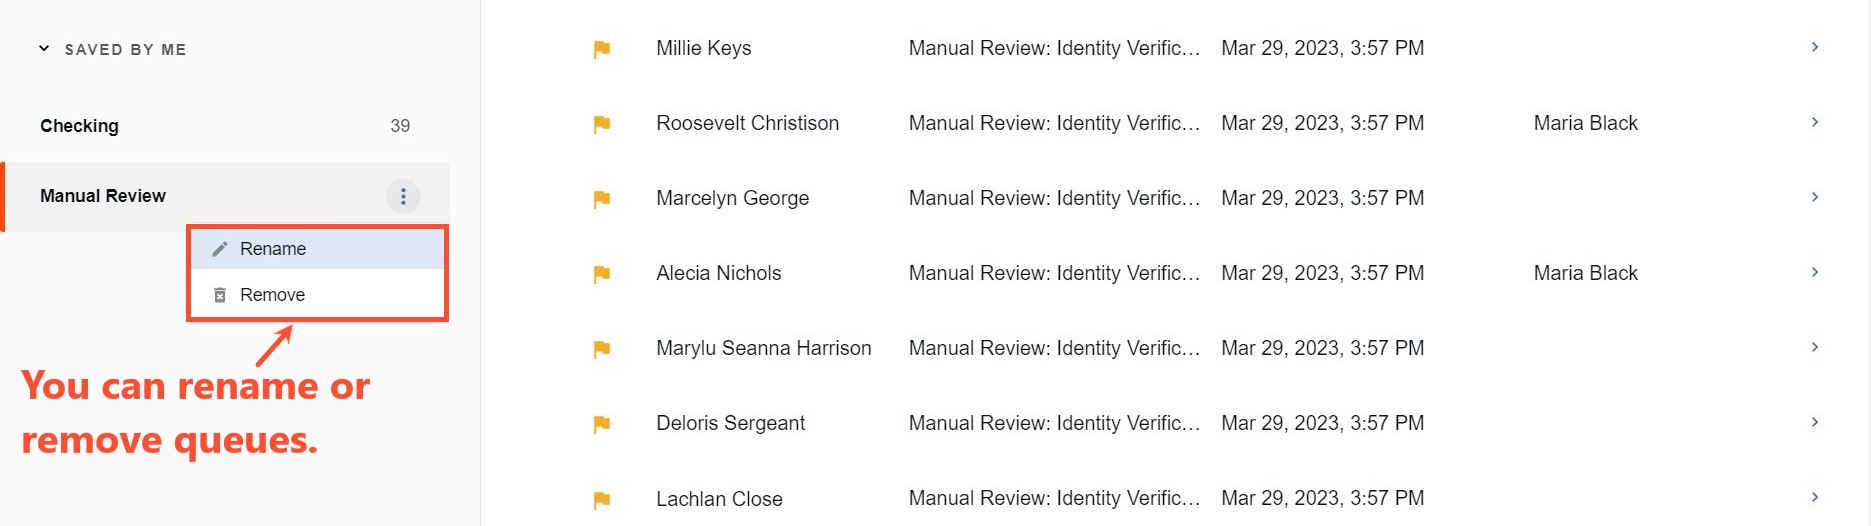
Plus Share queues permission enabled
When the permission is disabled, the following variants are possible:
Plus Share queues permission disabled
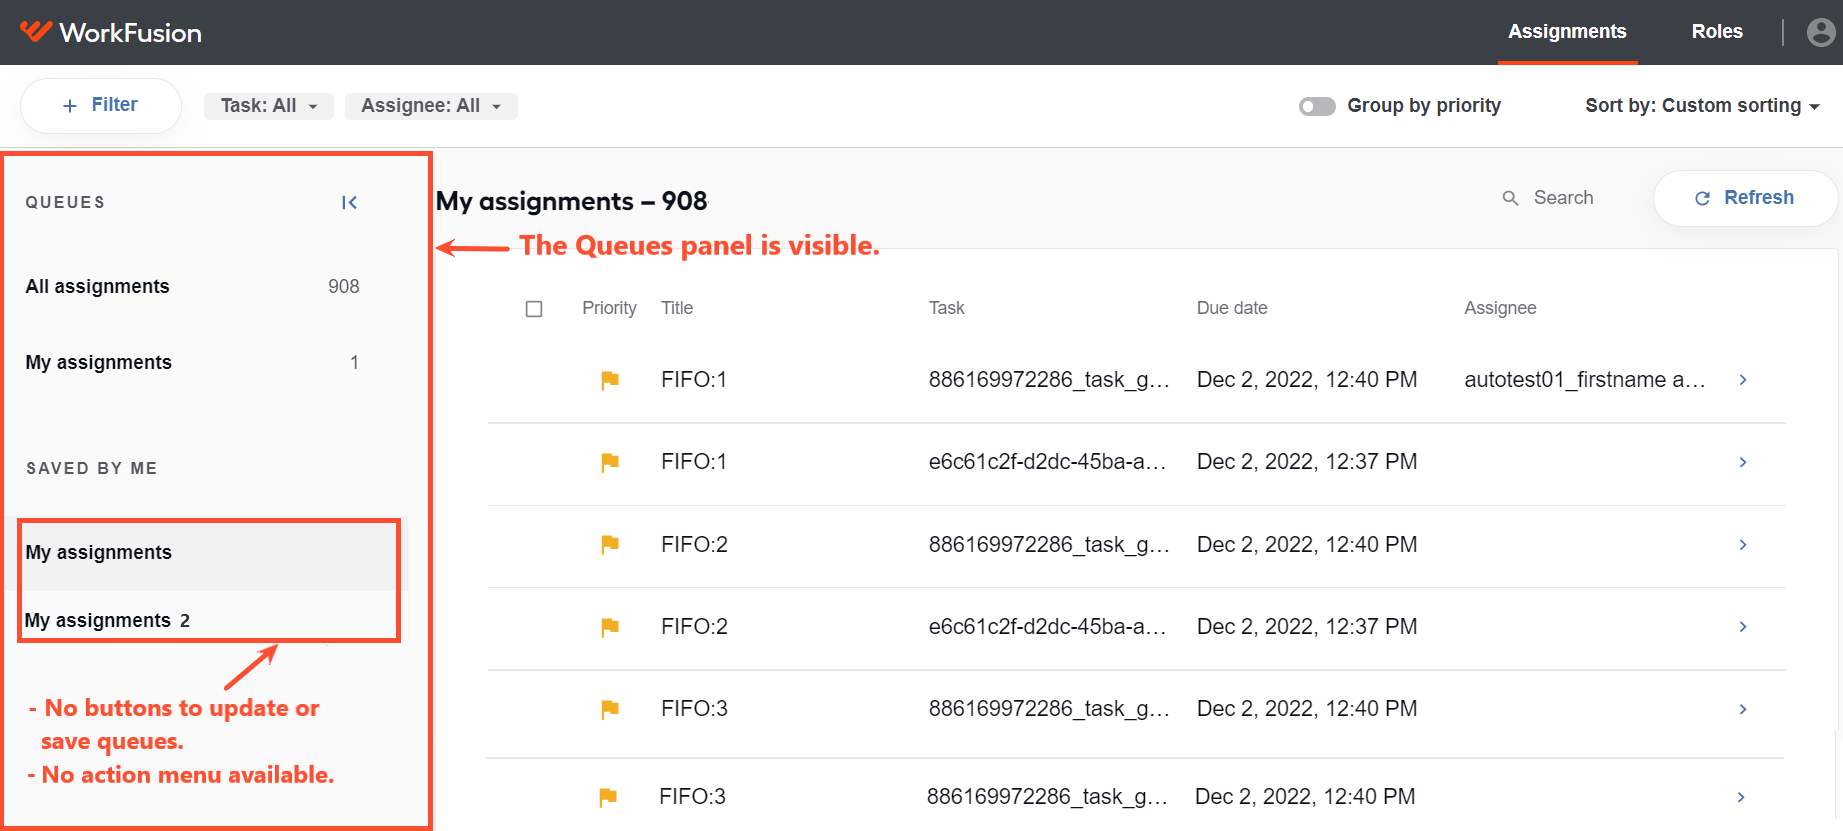
Plus Share queues permission enabled
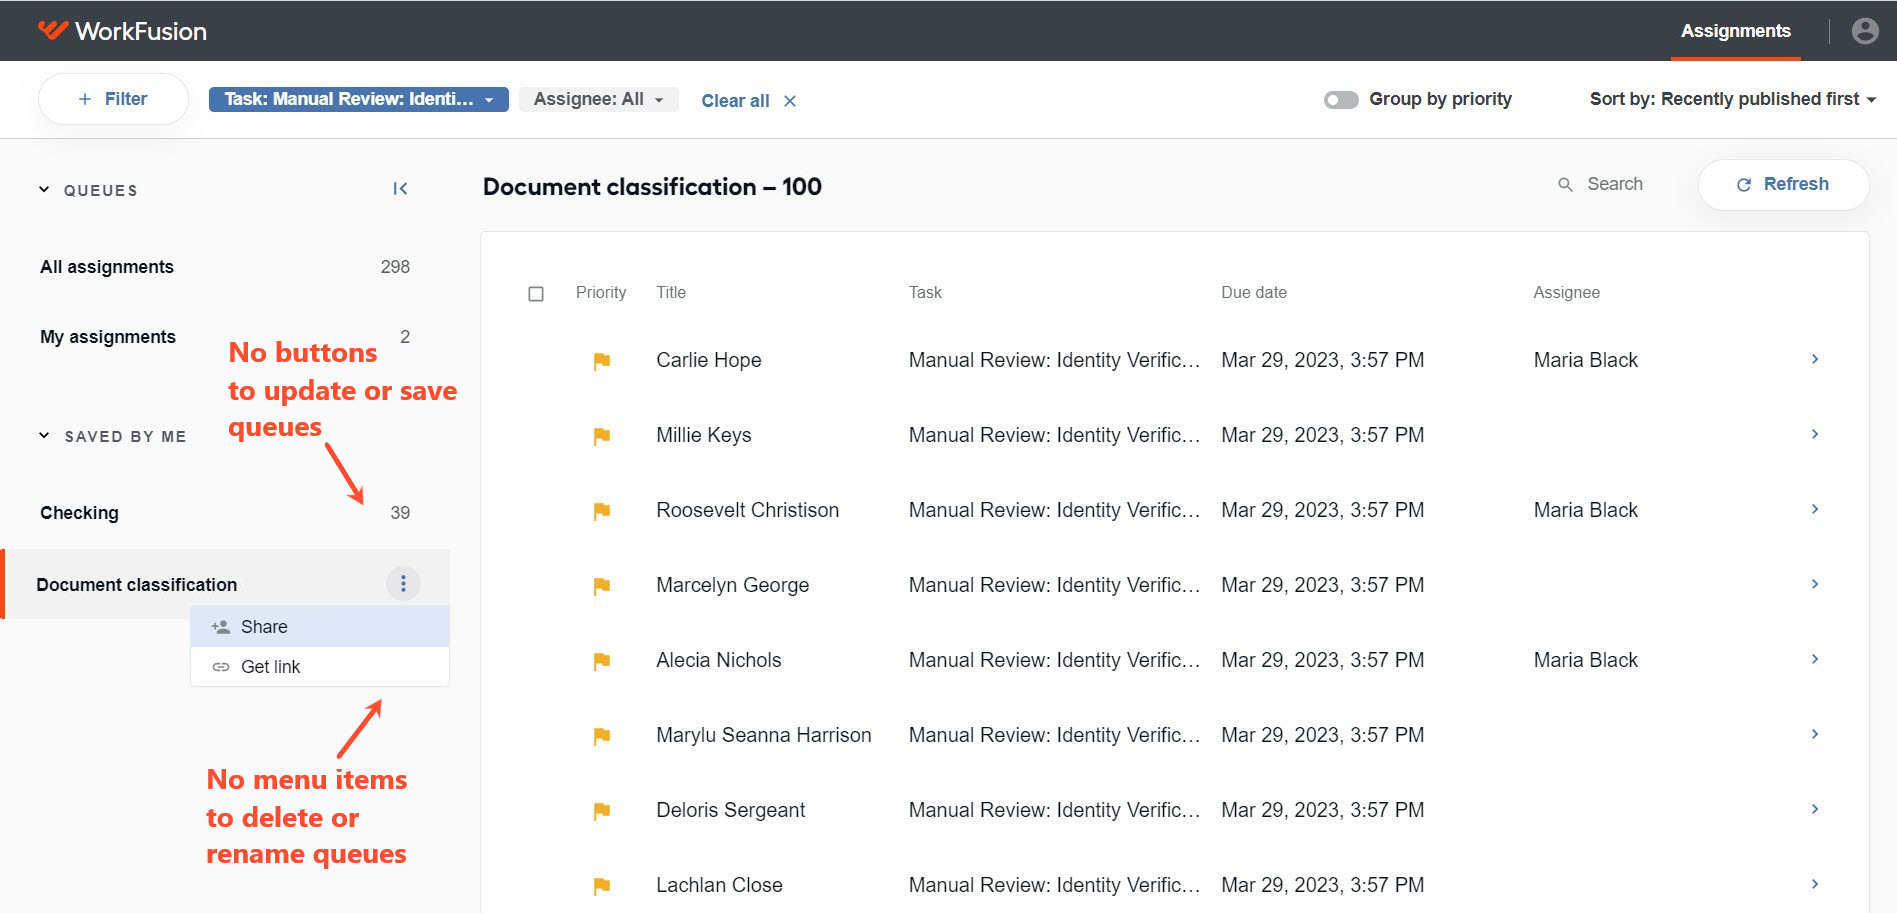
Share queues
The option becomes active only after you select the View queues permission and works only in combination with the latter. The Share queues permissions lets you share queues and manage shared queues. For detailed information about managing shared queues, refer to the Work with queues guide.
The person with whom you are sharing a queue must have the View queues permission to see the queue you shared.
When the Share queues permission is enabled in combination with View queues, the following capabilities are available:
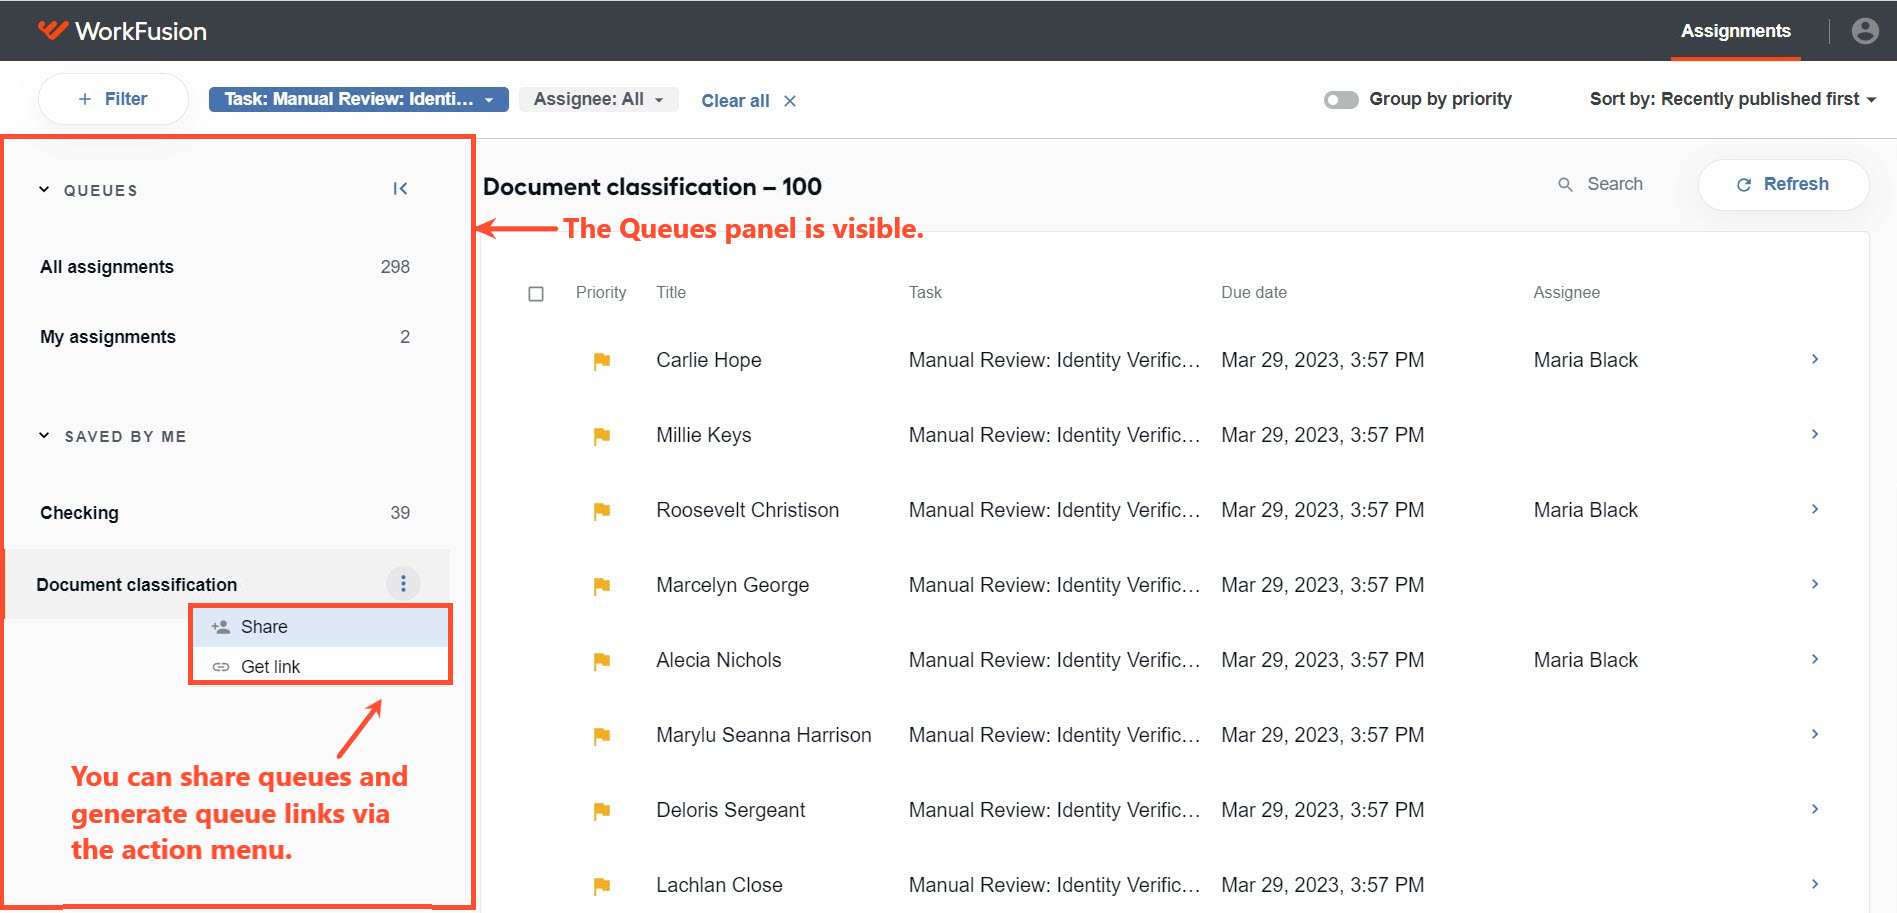
Plus Edit queues permission enabled
Plus Edit queues permission disabled
When the permission is disabled, the following variants are possible:
Plus Edit queues permission enabled
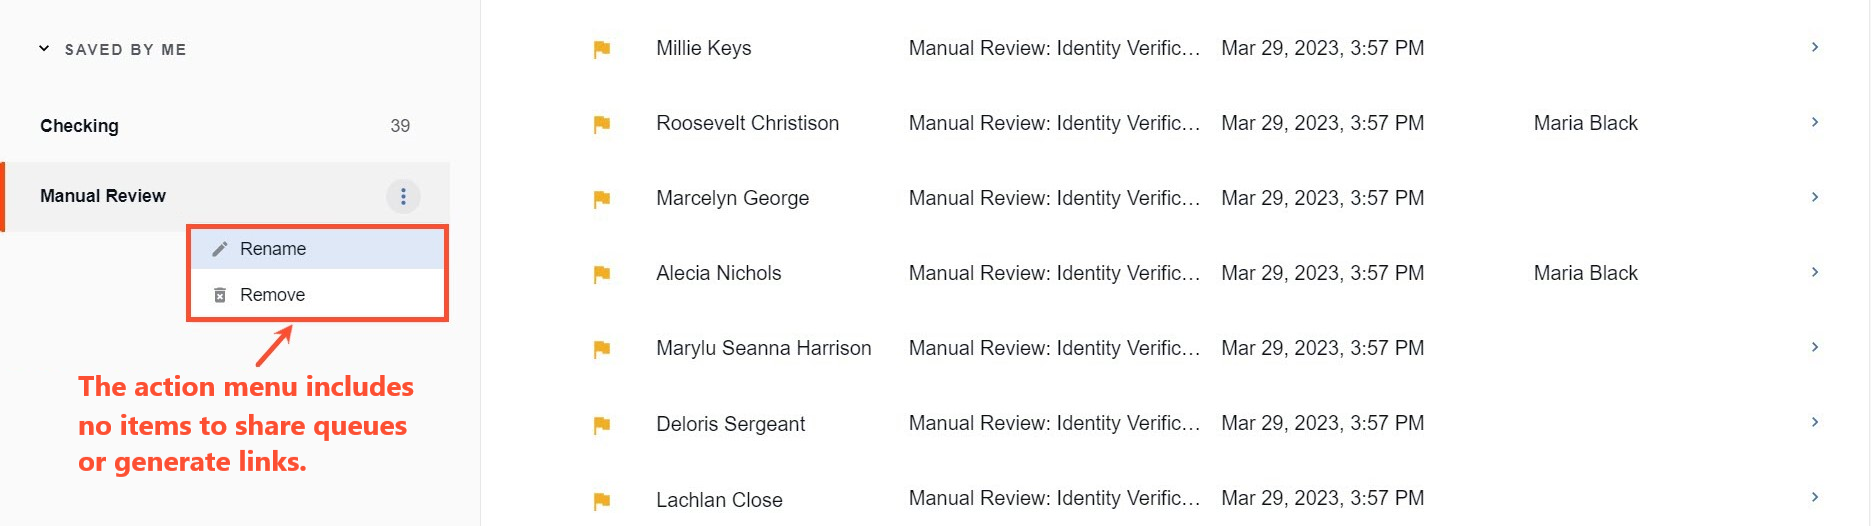
Plus Edit queues permission disabled
View my analytics
The permission lets you view only the metrics for the Workspace tasks assigned to you. By default, the permission is enabled for all user roles: Admin, Manager, and Worker.
View users analytics
The permission allows you to view the Analytics metrics not only for the Workspace tasks assigned to you but also for those assigned to all other users. By default, the permission is enabled for the Admin and Manager users.