Add RPA Unit to RPA server
Prerequisites
Make sure the RPA server is already installed and configured.
Add new RPA Unit on production server
Register new Bot Units in Secrets Vault in Control Tower. To do that, add secret entries with Alias for Bot Unit(s). The Key field stands for the username, while Value is for the password.
The Bot Unit user secret entry includes the following:
- Alias = rpa. + {RPA_HOSTNAME} + .rdp.unitX.credentials
- Key = Bot Unit username
- Value = Bot Unit password
Here, X in unitX is the ID of a new Bot Unit.
There is mapping between IDs in each config file, so X, or the ID number, must be the same.
Log in to the RPA Server as a user with Administrator permissions.
Create a new RPA user and add it to the Remote Desktop Users (mandatory) Administrators (optional) group.
Give full privileges to the RPA installation folder.
Go to
C:\RPA\bot-agent\conf\and modify thebot-agent-master.ymlfile. Change a number in the id line and change the localhost address to the next one. The example below is for ID=2.- id: unit2 address: "127.0.0.2" expression: "cmd /c start /wait mstsc unit.rdp /v:127.0.0.2" directory: "rdp" tag: "rdp"The full description of processes should look as follows:
processes:
- id: unit1
    address: "127.0.0.1"
    expression: "cmd /c start /wait mstsc unit.rdp /v:127.0.0.1"
    directory: "rdp"
    tag: "rdp"
- id: unit2
    address: "127.0.0.2"
    expression: "cmd /c start /wait mstsc unit.rdp /v:127.0.0.2"
    directory: "rdp"
    tag: "rdp"
- id: rpa.nginx
    expression: "cmd /c start /wait start_nginx.bat"
    directory: "../nginx"
    tag: "nginx"
- id: rpa.filebeat
    expression: "cmd /c start /wait filebeat-pipeline.bat ${environment.agent.hostname} ${logstash.filebeat-endpoints}"
    directory: "../filebeat"
    tag: "filebeat"
- id: rpa.metricbeat
    expression: "cmd /c start /wait metricbeat-pipeline.bat ${environment.agent.hostname} ${logstash.metricbeat-endpoints}"
    directory: "../metricbeat"
    tag: "metricbeat"
In the
C:\RPA\bot-agent\confdirectory, create a newunit<ID>.ymlfile with the following content. The example below is for ID=2.unit_id: 2 fleet: shared server.port: 1000${unit_id} logging.folder: logs/unit${unit_id} worker_port: 1520${unit_id} bot.agent.context.path: "/unit${unit_id}" environment.agent.ns: "${environment.agent.hostname}:${server.port}" bot.agent.master.port: 10000In the
C:\RPA\nginx\conf\bot-unitsdirectory, create a newunit<ID>.conffile with the following content. Theunitidparameter must be the same as the ID in the filename. The example below is for ID=2.location /unit2/ { proxy_pass http://127.0.0.1:10002/; }In the
C:\RPA\bot-agent\bindirectory, create a newbot-agent-unit<ID>.batfile with the following content. Theunitidparameter must be the same as the ID in the filename. The example below is for ID=2.@ECHO OFF set unitid=2 cd %~dp0 set config=conf\bootstrap.yml,conf\environment.yml,conf\units\unit%unitid%.yml,conf\bot-agent-unit.yml call bot-agent.cmd run Unit%unitid% "%config%"In Task Scheduler, create a new task, similar to the existing one for the Bot Unit. The difference is the path to the
.batfile on the Actions tab.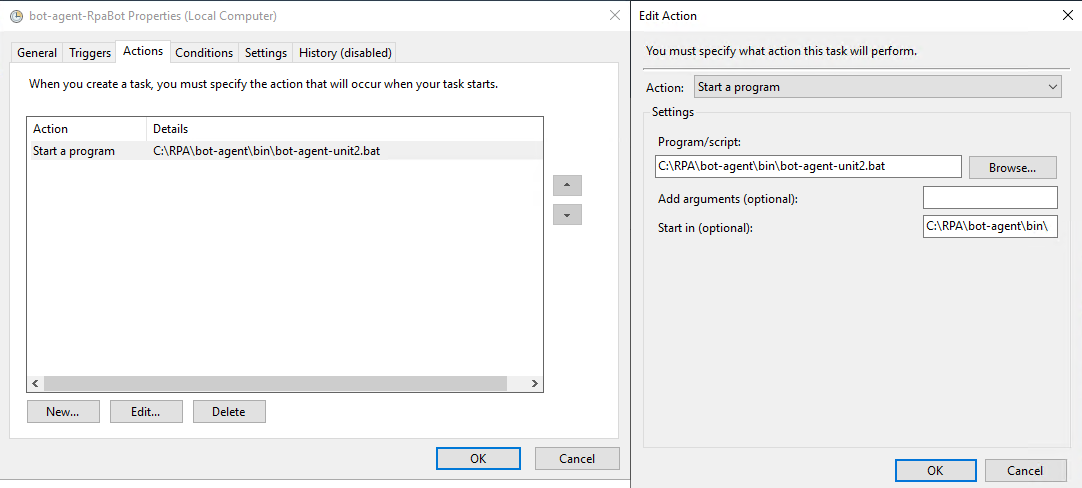
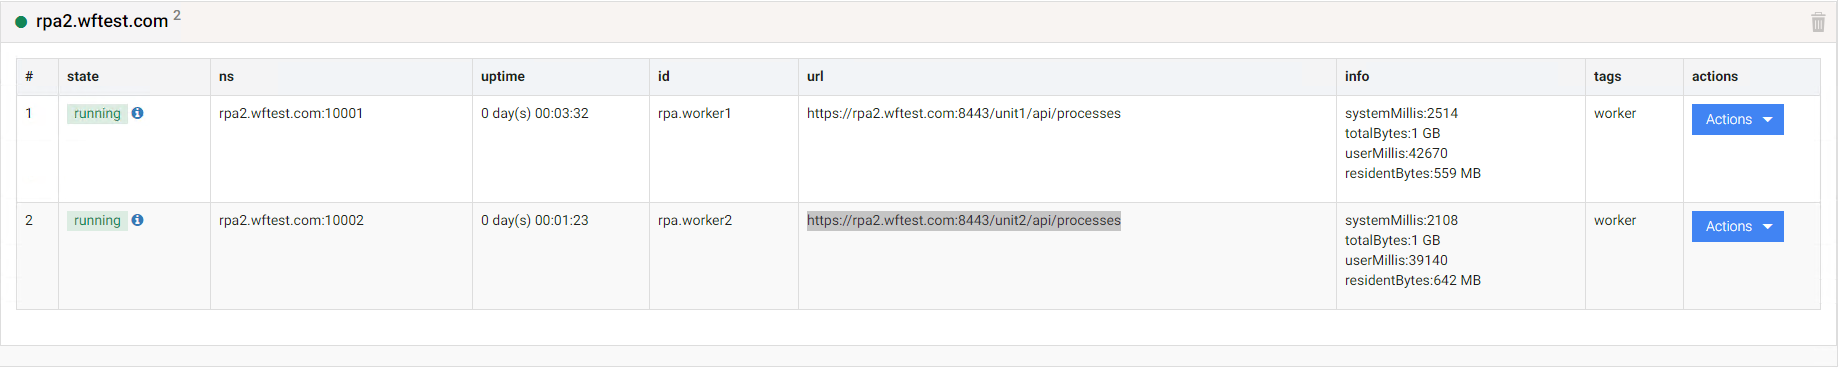
A new RPA Unit appears in the Bot Manager console, and an RDP connection automatically opens on the new host with the changed configuration files.