
Configure users
Users always belong to and are created within a particular realm or imported into a realm from an external identity or storage provider.
important
To manage users (together with associated groups and roles), you must have the MANAGE_USERS permission in Control Tower and such roles as manage-users, view-clients, query-groups, view-realm in the realm-management client of Keycloak.
To access the functionality for creating and managing users in Keycloak, select a realm in the top left-hand corner of the Keycloak console and then click Users. On the right, you can see a list of the realm's users (if any).
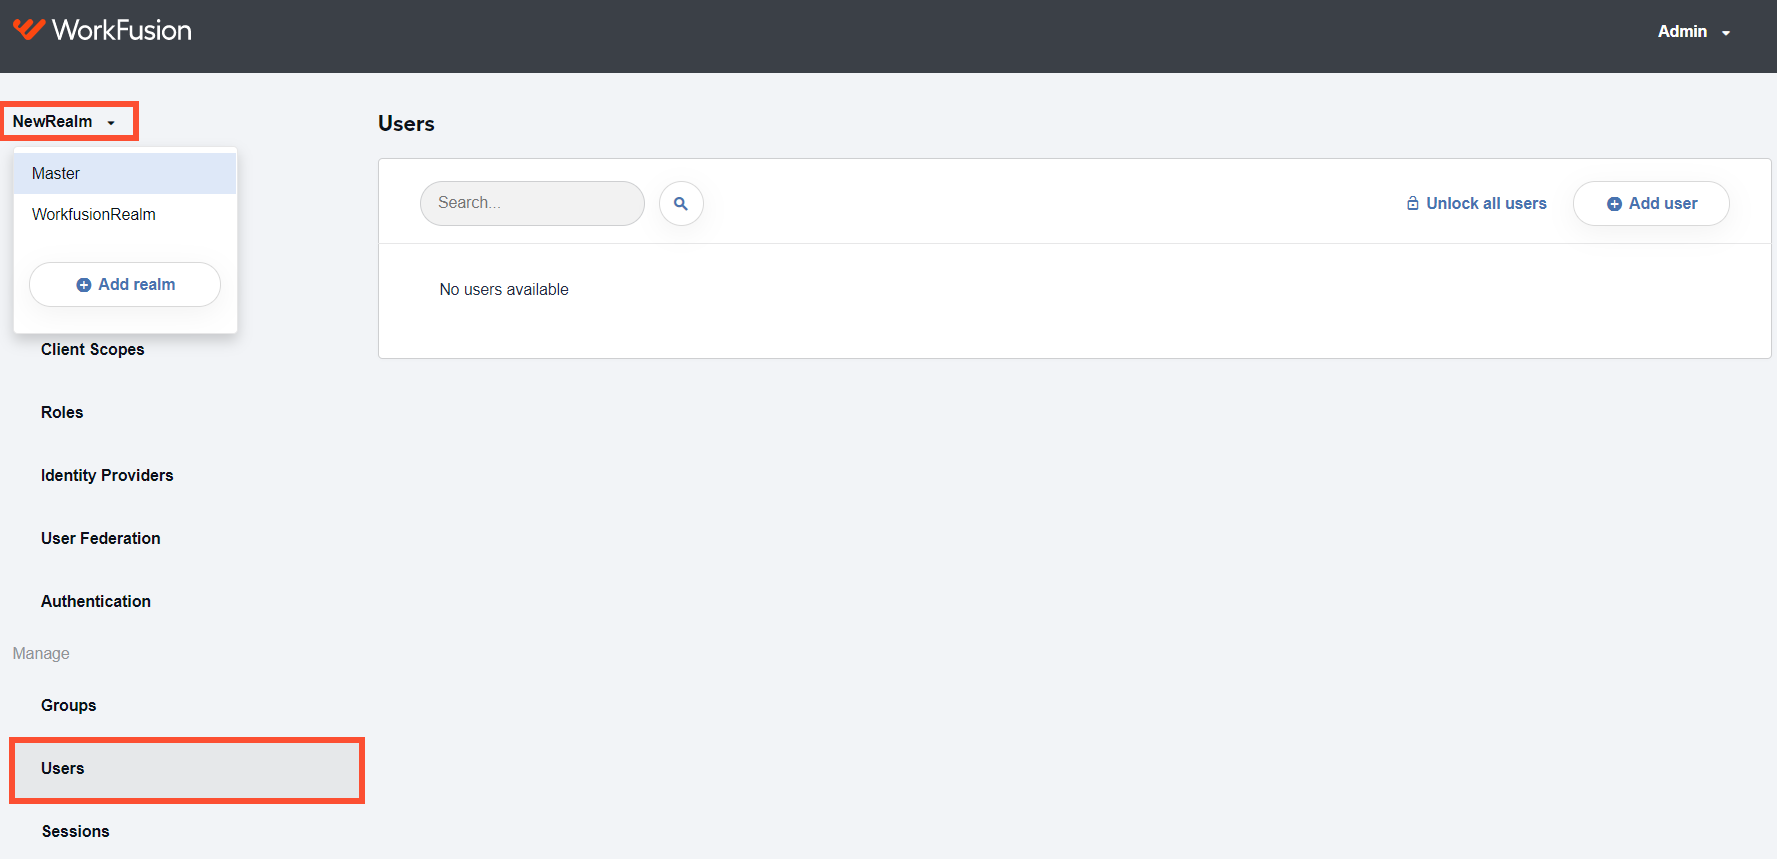
Create users
To create a user, follow the steps below:
In the right-hand corner of the Users list, click the Add user button.
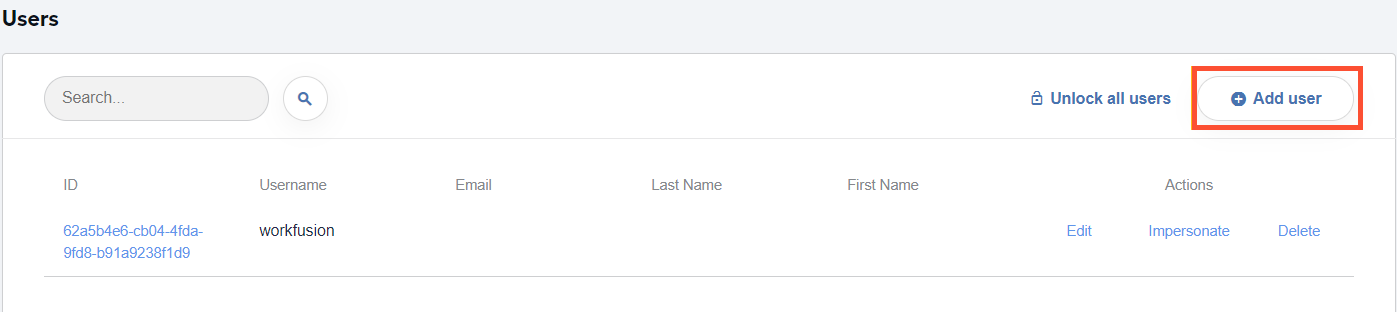
In the window that follows, type in user data. Pay special attention to the following elements—the Username and the Email fields, the Email verified toggle, and the Required User Actions drop-down box.
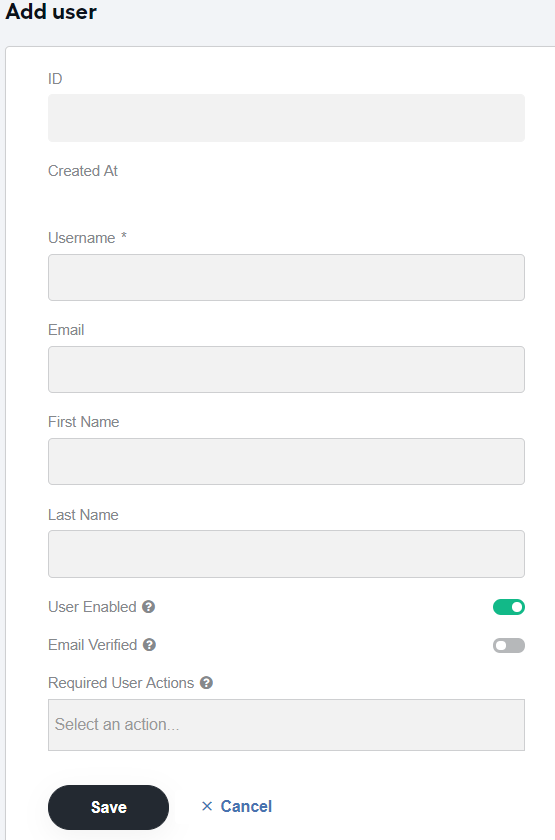
In the Required User Actions drop-down box, you can select an additional action that the user is to complete when logging in:
- Update Password: change the initial password.
- Configure OTP: install and configure a password generator (for example, Free OTP or Google Authenticator) on their mobile devices.
- Update Profile: add or edit personal information, such as name, address, phone number, and so on.
- Update User Locale: change their present locale for correct internationalization.
- Verify User Email: at the first login, confirm the availability of a valid email account.
When the Email verified toggle is on, this means the particular user verified the address in the Email field and can receive notifications to the address or use it for authentication. When the toggle is off, set up the user's email verification by selecting Verify User Email in the Required User Actions box.
important
Verifying user emails is essential for the WorkFusion email notification functionality to work correctly.
After you complete the steps, click the Save button. Keycloak creates a new user, assigning the user a unique ID and adding a Created At timestamp. It also opens a page where you can configure the user settings.
Configure user settings
To access the settings page for a particular user, on the Keycloak menu, select Users. Then, either click the ID of the required user or Edit next to the username. This brings you to the Details tab of the settings page.
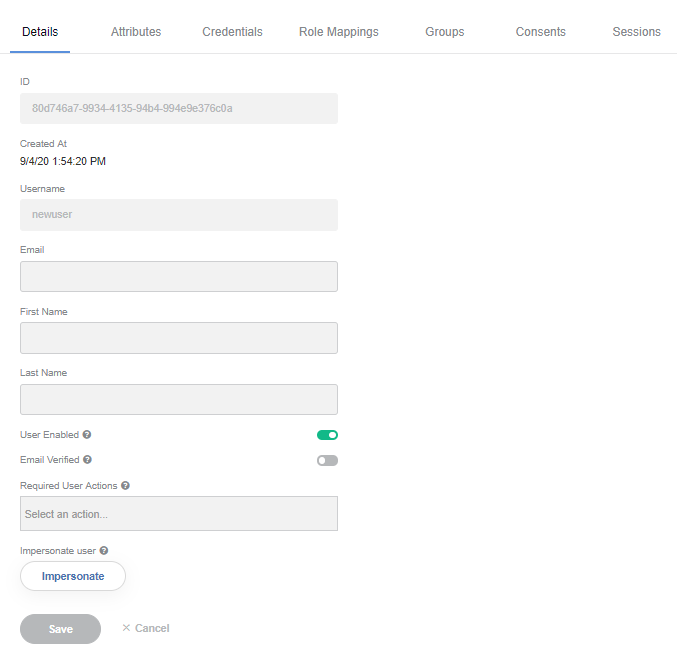
On the Details tab, you can edit the user data (for example, name, surname, and so on), actions that the user is required to complete when logging in, as well as impersonate, enable, or disable the user.
Disable or enable users
To disable a user, go to the Details tab, turn off the User Enabled toggle, and click the Save button. The opposite action of turning on the toggle enables any disabled user. By default, users are created with the toggle on.
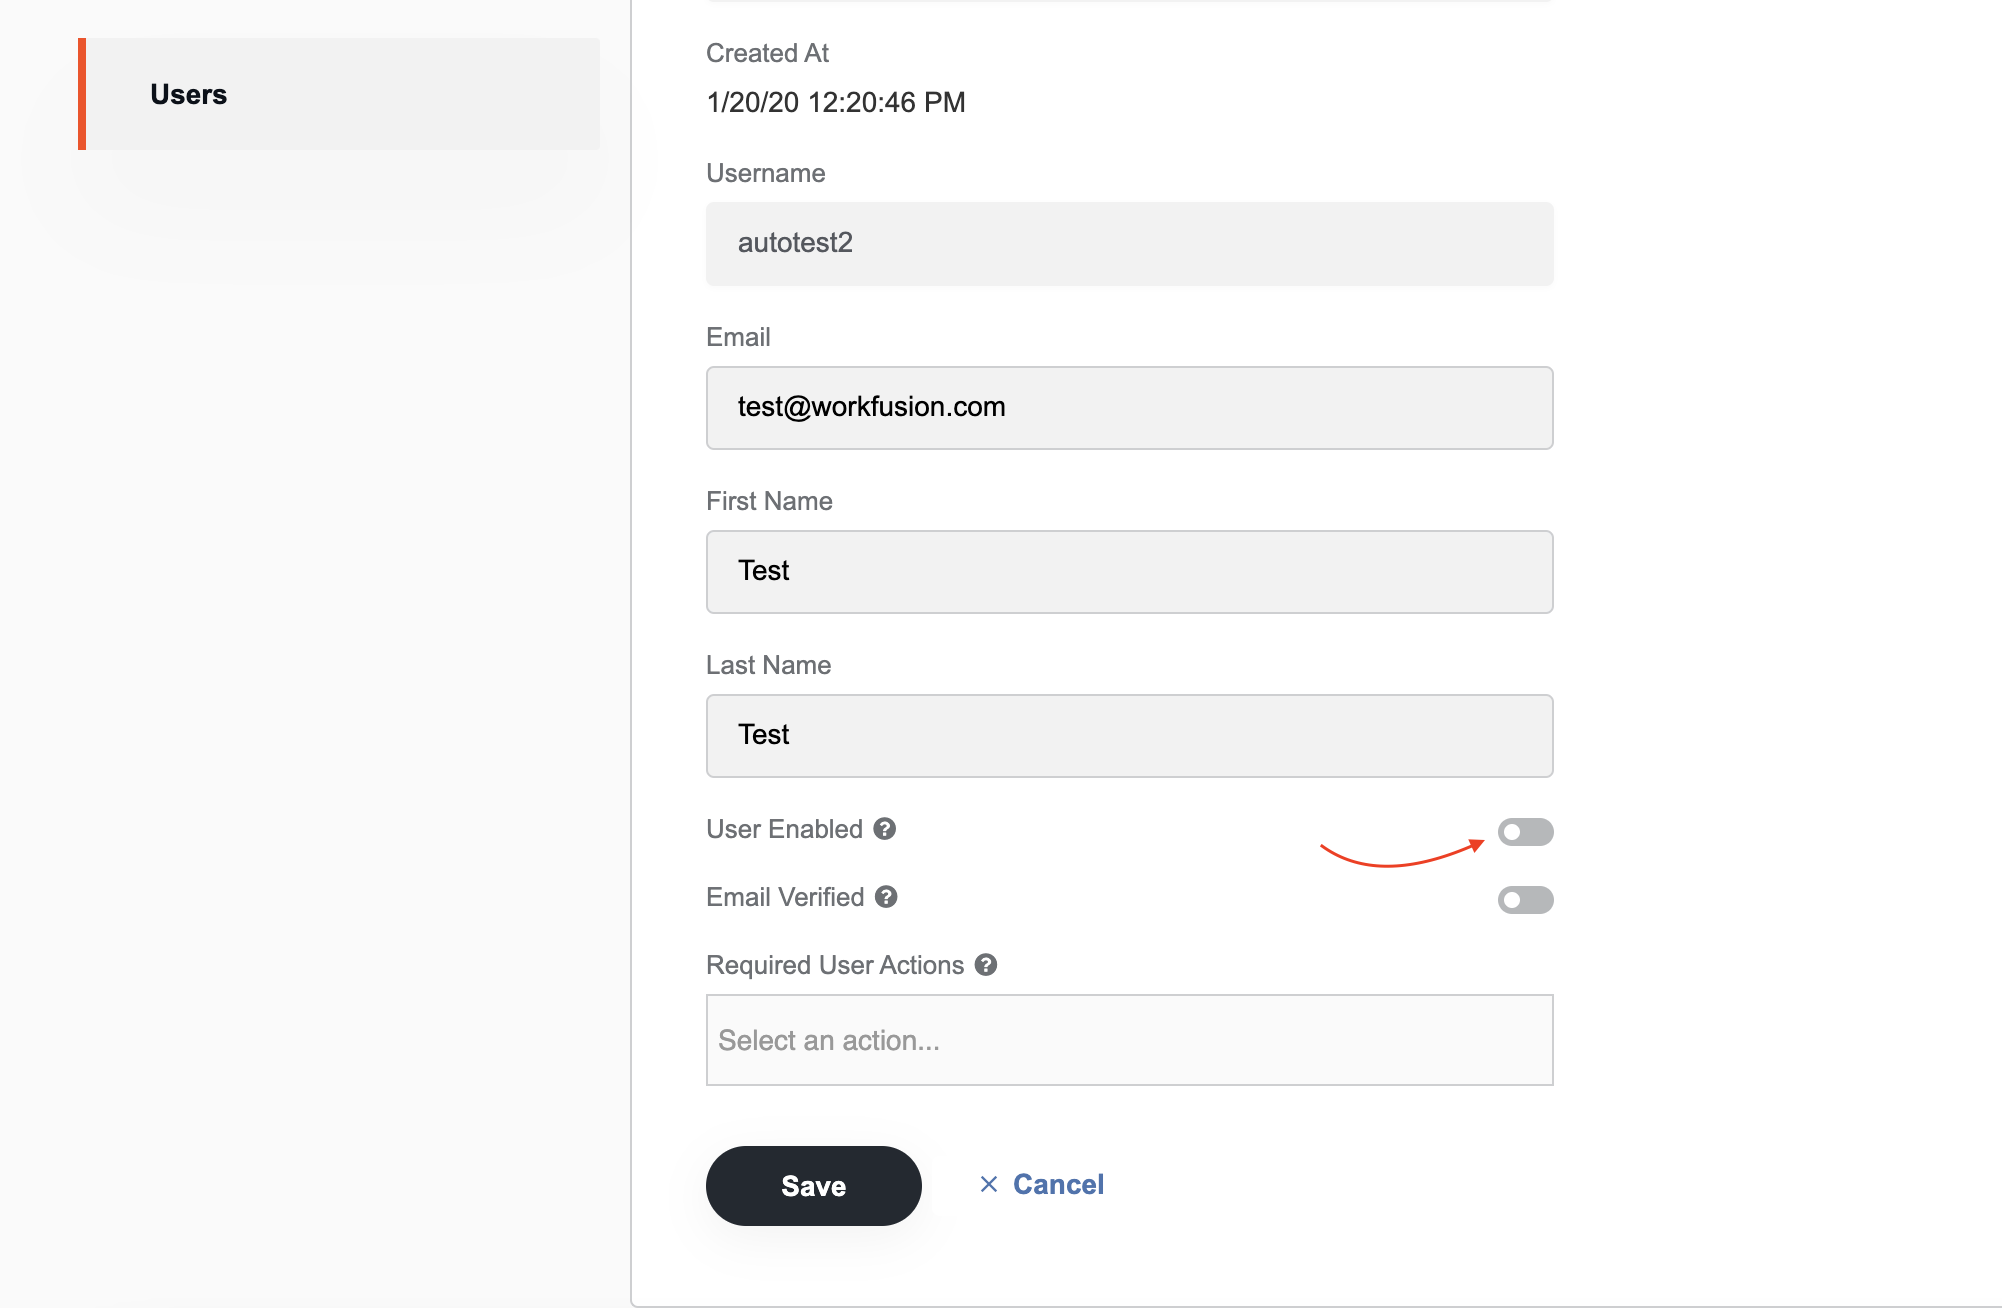
Note that if a user is disabled or deleted on the IDP side, they are not disabled or deleted automatically in Keycloak. Hence, you need to manually disable the user in Keycloak:
- Go to the Details tab.
- Turn off the User Enabled toggle.
- Click the Save button.
This ensures consistency with your IDP user lists. After a user is disabled in Keycloak, they can no longer authenticate via REST API with default Control Tower (CT) credentials.
Maintain the same consistency with LDAP. The recommended approach is to disable those Keycloak users that don't exist on the LDAP side. For MSAD (Miscrosoft Active Directory), it is also possible to enable automatic user synchronization:
Go to User Federation and choose your LDAP provider.
Open Mappers and add MSAD account controls—the msad-user-account-control-mapper type.
This mapper integrates a MSAD user account state (account enabled, password is expired, and so on) into the Keycloak one using the
userAccountControlandpwdLastSetMSAD attributes. For example, ifuserAccountControlis 514, indicating a disabled account, the Keycloak user is disabled as well. The mapper can also handle exception codes for the LDAP user authentication.
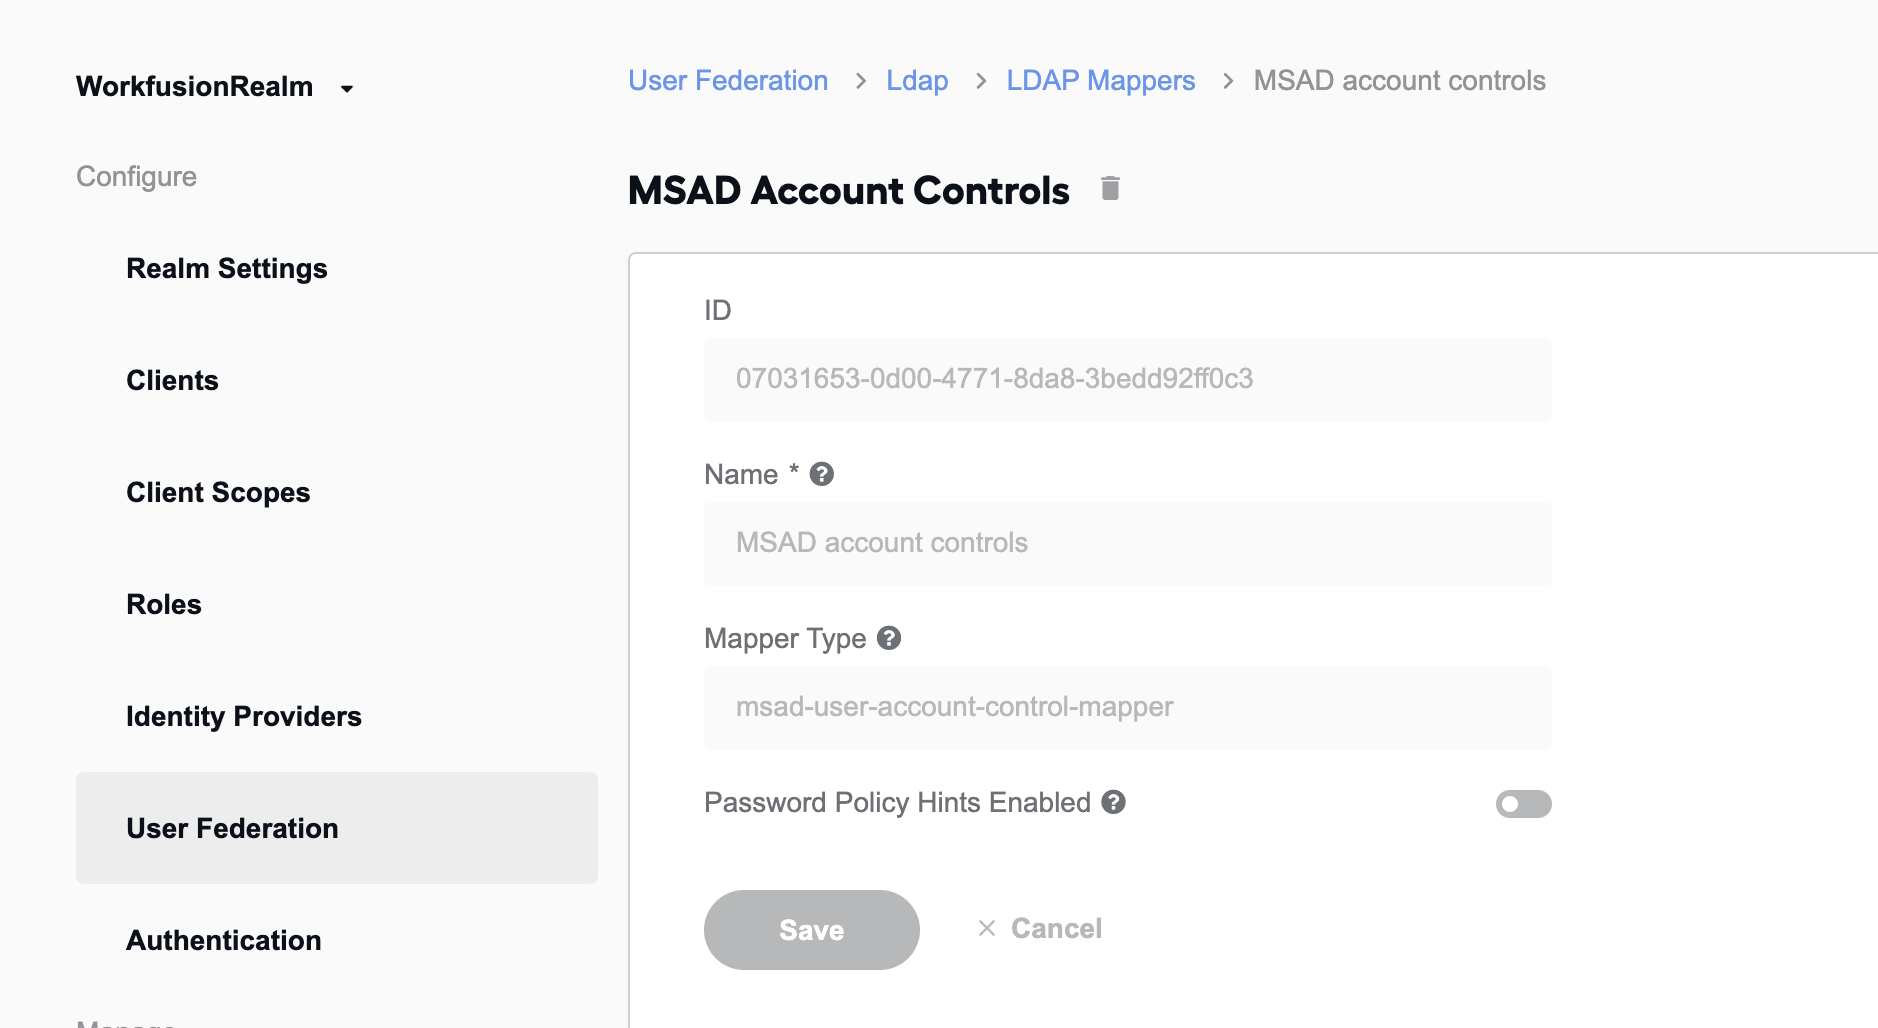
If both LDAP and IDP are set up for a user, the user is stored on the LDAP side. Hence, if a user gets either deleted or disabled on the LDAP side, make sure this state is properly mapped to Keycloak—for MSAD, the MSAD account controls mapper is set.
Group users
For instructions on adding users to groups, refer to Create groups| Add user to group.
Impersonate users
The impersonation feature is essential for admins when they need to authenticate as another user. For example, a user may be experiencing an issue with the application, and the admin impersonates the user to see if they can duplicate the problem.
Non-admin users can also apply the impersonation feature when granted appropriate administration permissions—the impersonation role. To do that, perform the following steps for the selected users:
- Open the settings page for a user and go to the Role Mappings tab.
- In the Client Roles box, select the realm-management client role.
- In the Available Roles field, find the impersonation role and click Add.
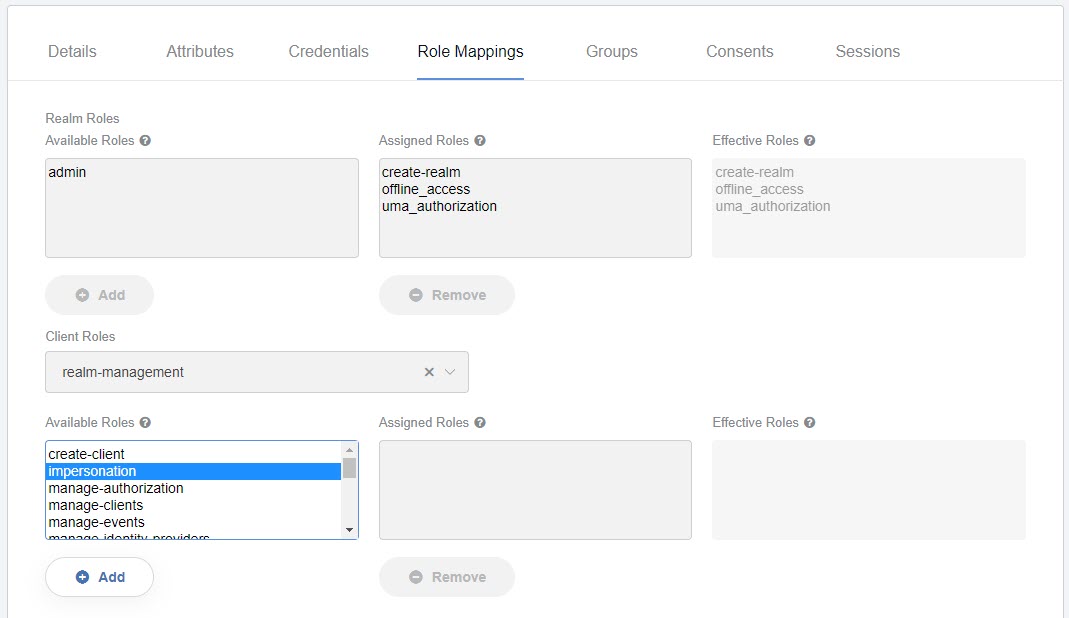
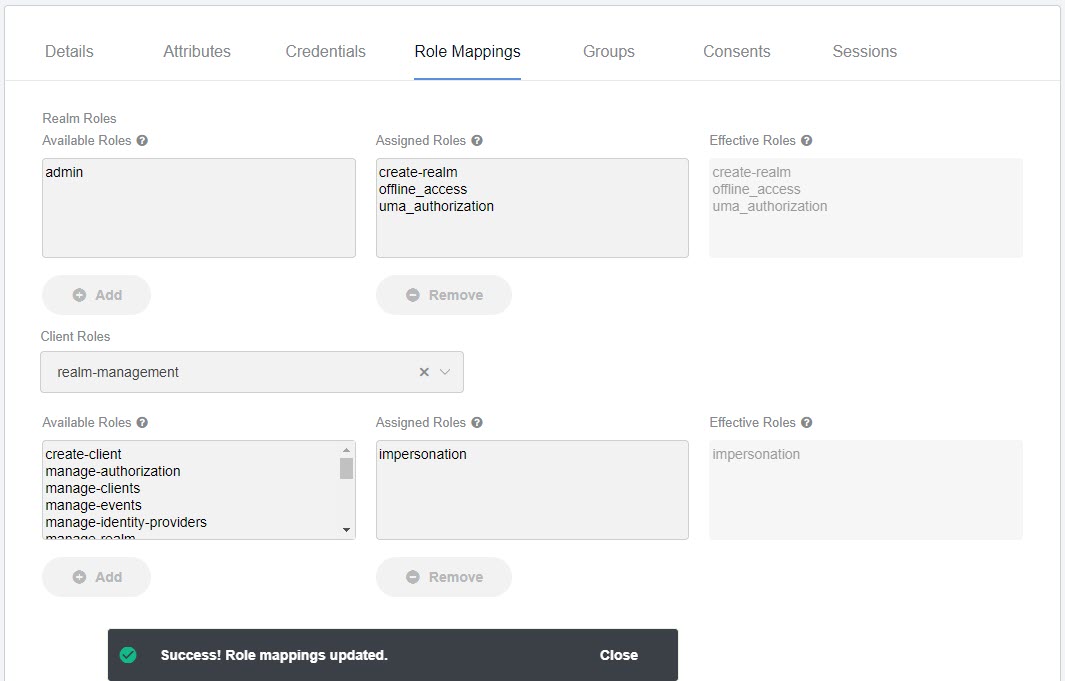
The impersonation role is successfully moved to the Assigned Role field.
For impersonation purposes, when an admin and a user to be impersonated are in the same realm, the admin is logged out and logged back in as the impersonated user. When the admin and the user to be impersonated are in different realms, the admin remains logged in both as the admin in their realm and as the impersonated user in the user's realm.
Keycloak offers two methods to impersonate a user:
From the Details tab: click the Impersonate button at the bottom of the tab.
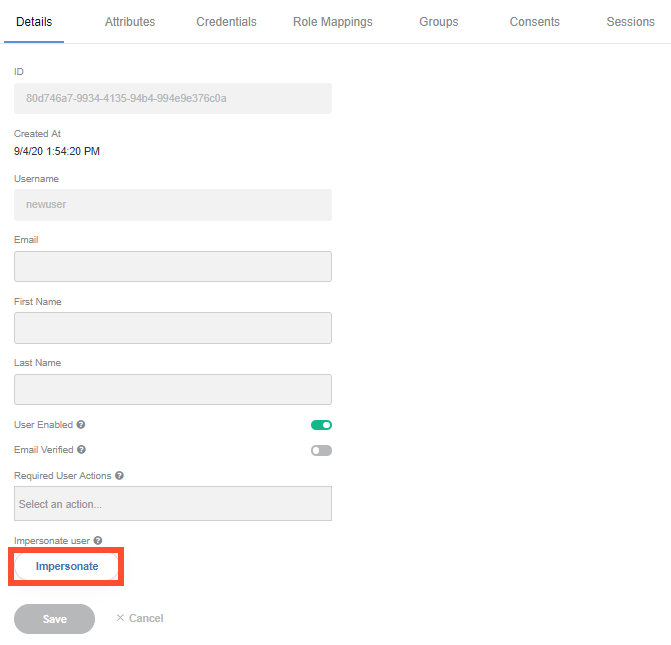
From the Users list page: click Impersonate next to the user you want to impersonate.

In both cases, you are redirected to the User Account Management page.
Assign role to user
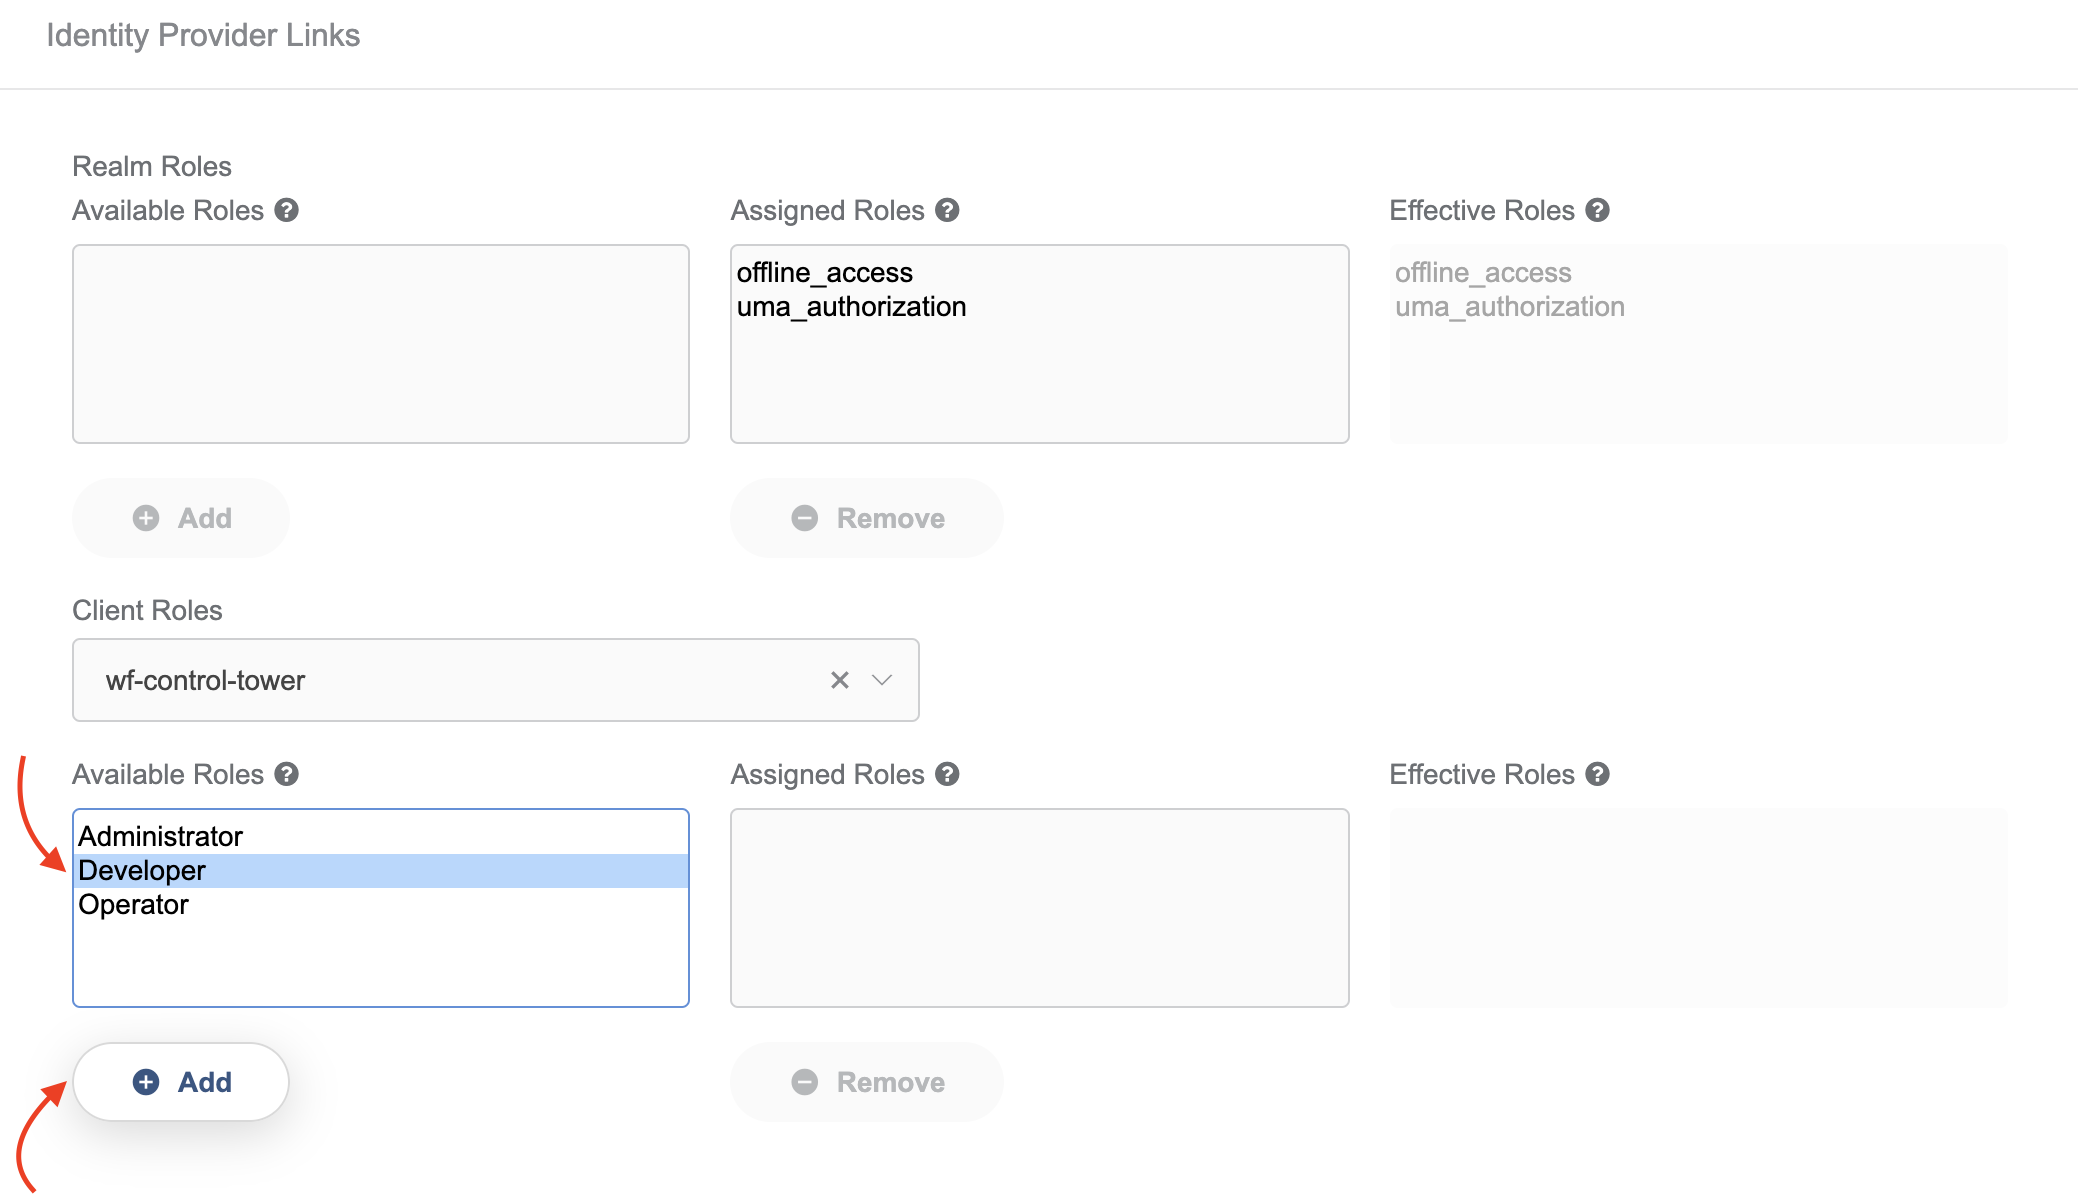
Keycloak allows you to assign a specific client-provided role to a user. For example, for the wf-control-tower client, there are three default roles: Administrator, Developer, and Operator. Each of these roles has its own set of default permissions and allows users to access specific resources.
It's important to assign required roles to a user, as without any, the user cannot access role-associated resources. For instance, without any wf-control-tower roles, a user won't have access to anything on the CT application side. For more information, read the Manage Control Tower roles and permissions guide.
It's also possible to create a custom user role in Keyclock. For detailed instructions, go to the Manage and assign realm and client roles guide.
To assign a role to a user, follow the steps below:
On the Users list, select a user, go to Role Mappings.
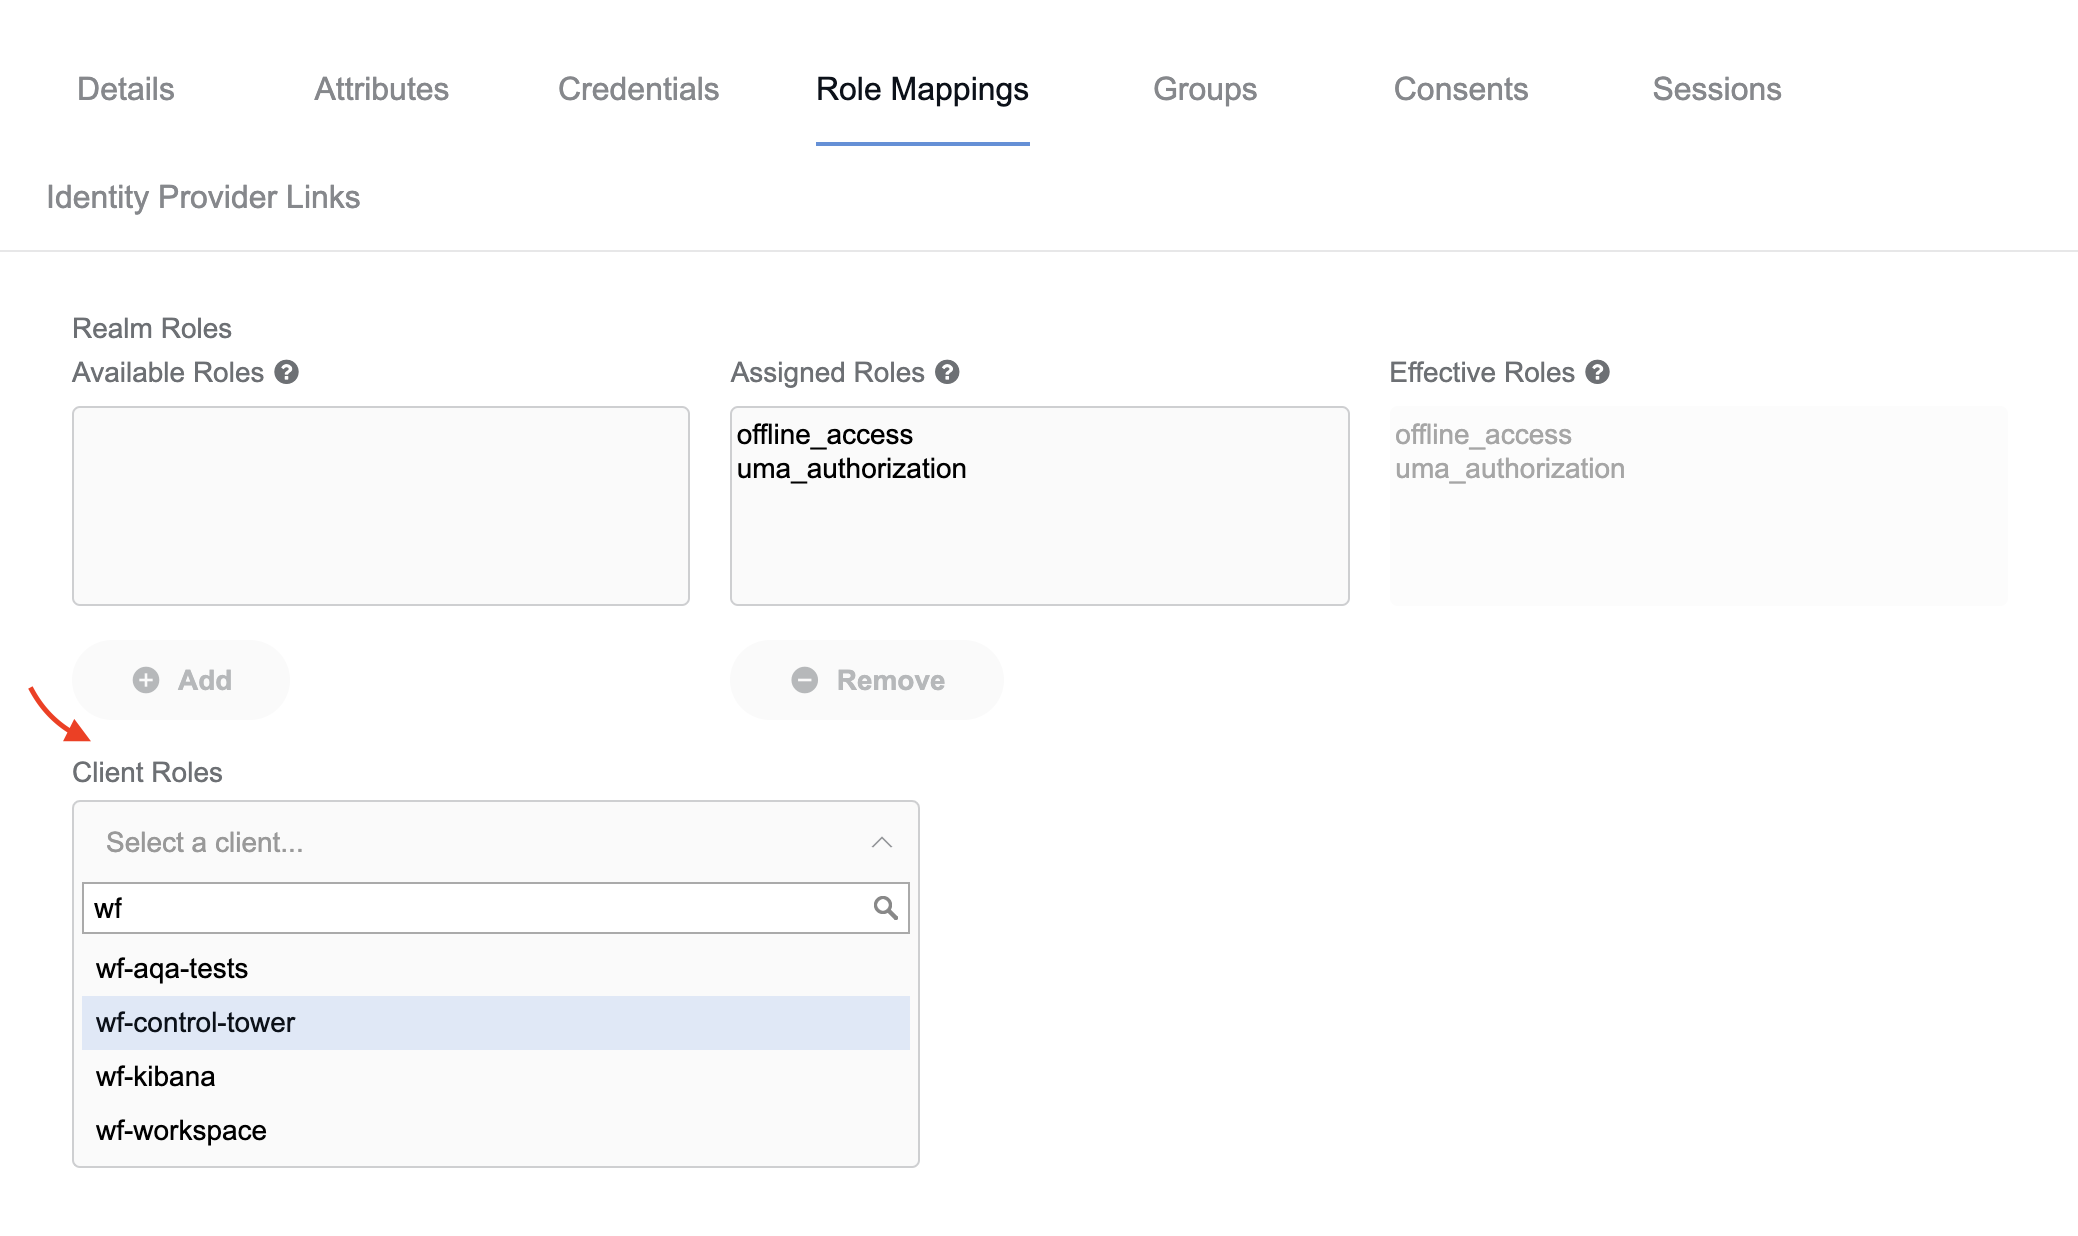
In the Client Roles drop-down box, select a client:
Choose the role that you want to add to the list of available roles and click the Add button:
If see the Success! Role mappings updated message appear on the screen, you have successfully assigned the role to the user.
Set user attributes
Attributes are additional user data, apart from basic data, such as names and emails, that you can store in Keycloak. To create and add an attribute for a particular user, follow the steps below:
Go to the Attributes tab of the user settings page.
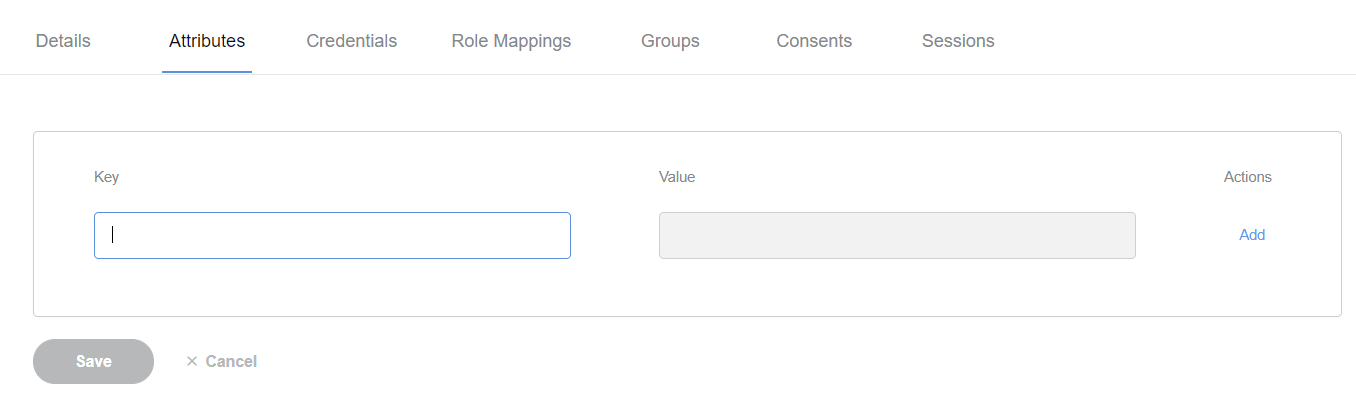
In the Key field, type in a name for the attribute and specify the attribute value in the Value field.
Click Save to add the attribute.
To specify more attributes, click Add.
Configure user credentials
To configure user credentials, go to the Credentials tab of the user settings page.
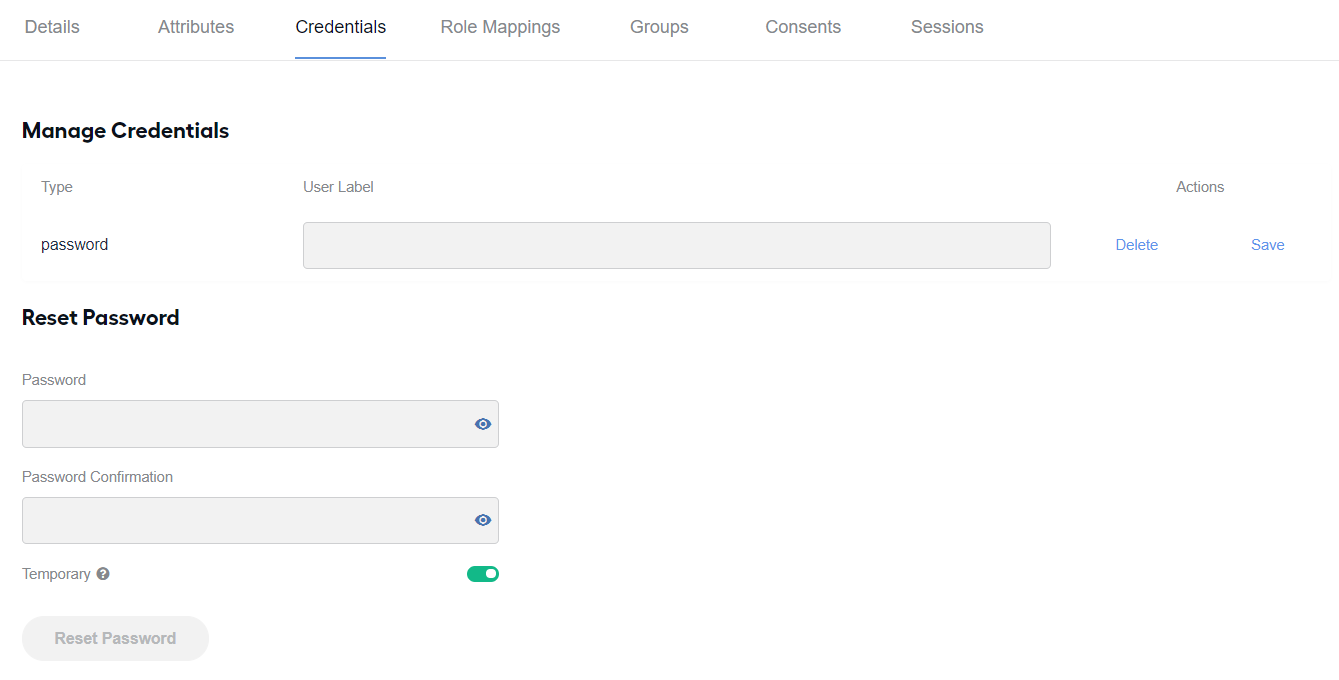
The tab lists the credentials available for management (if any). The credentials are arranged into a table with the following columns:
Type: displays the type of the credential (for example, password or OTP).
User label: set it to any value to describe how the user will see the credential on the login page.
Action: comprises the Save button to save the credentials and the Delete button to remove them.
In the Set password section of the Credentials tab, you can also set a password in case the user does not have one.
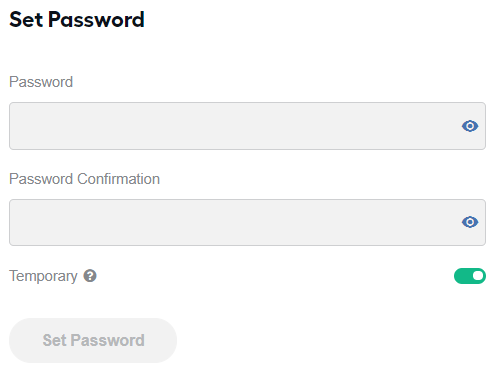
To set a password, specify and confirm it in the appropriate fields of the section and click the Set password button. When a user already has an assigned password, you see the Reset password section instead of the Set password one.
Mind that a user can have only one credential of the password type. Managing credentials other than passwords is the responsibility of the user. You can only delete user-defined credentials from the list on the Credentials tab (for example, when those were compromised).
If you the Temporary toggle is on, the user can use the preset password one time only and is requested to reset it after logging in.
important
If there is an IDP set up and a user defines a password, this does not affect the password used for UI login because the IDP password is not changed. However, the password change affects the REST API login.
If there is LDAP configured and a user defines a password, it affects both the UI login and REST API login. However, the defined password is stored only locally in Keycloak.
Configure user authentication settings
Set password policy
By default, all WorkFusion user passwords are required to meet the following criteria:
- Minimum length of eight (8) symbols
- At least one (1) uppercase letter
- At least one (1) lowercase letter
- At least one (1) special character
- At least one (1) digit
- Not identical to the username
- Not in the password history
- Not in the 5,000,000 of most popular passwords
However, admin users can set a custom password policy to match their organization's requirements:
On the left menu, click Authentication and navigate to the Password policy tab.
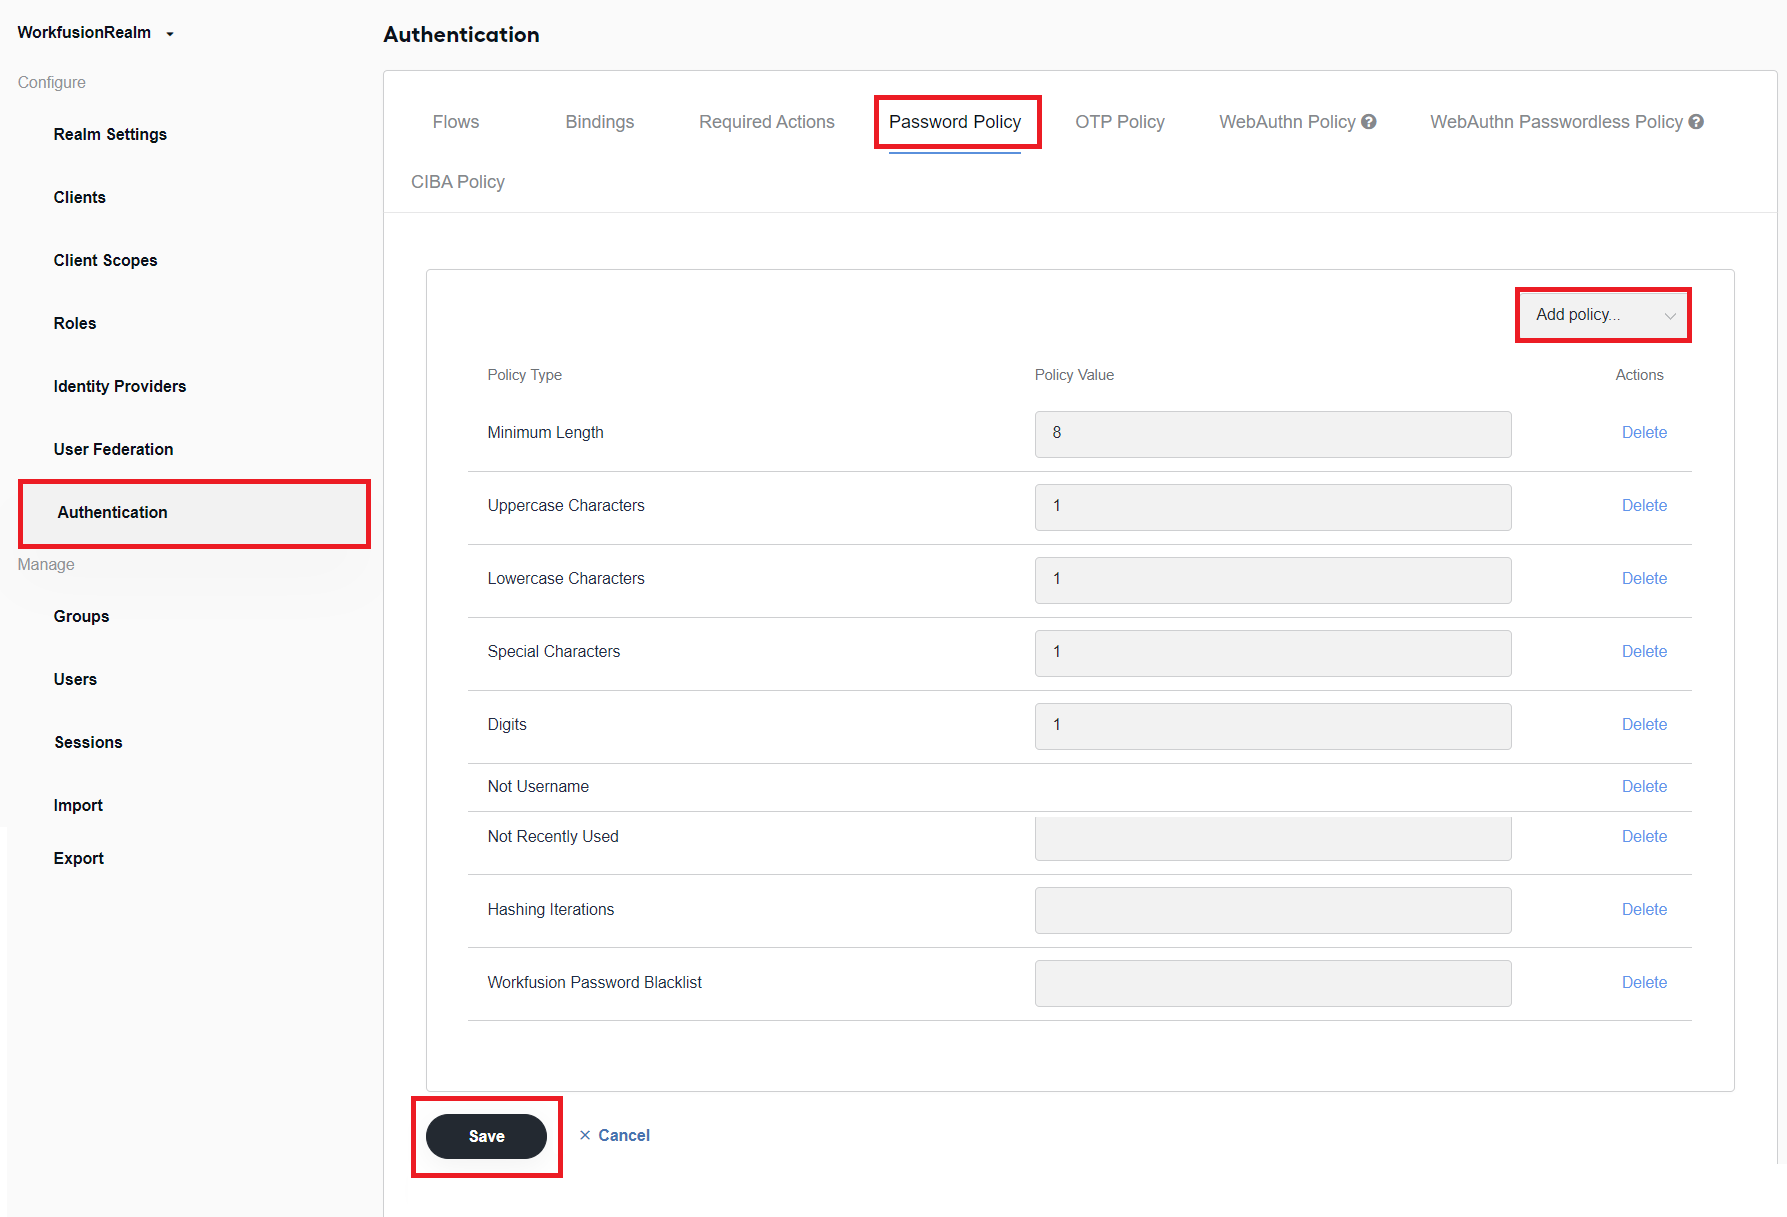
In the Add policy... drop-down box, choose one or more policy types. The chosen policies appear in the table at the centre of the page.
Configure each chosen policy type by changing the parameter in the Policy Value field.
Click the Save button to apply the custom password policies. After that, the user registration and the Update Password required action will enforce the new policy.
note
If the password policy is updated, set an Update Password required action for every user on the dedicated settings page.
Configure security lockouts
Via Keycloak, it is possible to configure two types of lockouts:
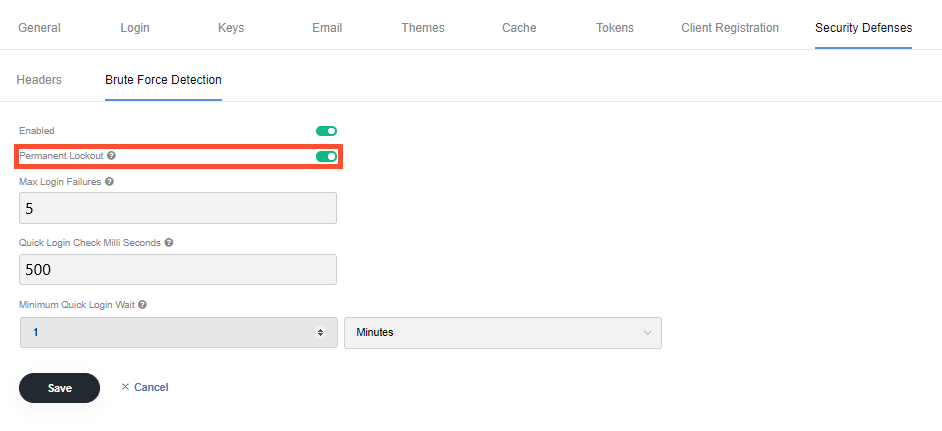
- A permanent lockout disables a user account after an attack until the administrator decides otherwise.
- A timeout-based lockout disables a suspicious user account for a limited period. The longer the attack continues, the longer the period becomes.
The lockout settings are configured for each particular realm and applied to anyone attempting to log into the realm. To configure the settings, complete the steps below.
- Make sure you are in the right realm.
- Select Realm Settings > Security Defenses > Brute Force Detection.
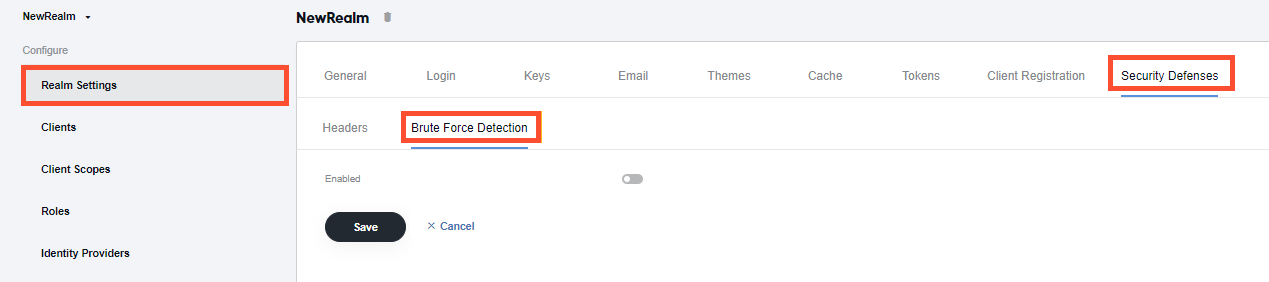
- Since the Brute Force Detection feature is disabled by default, click the Enable toggle to proceed. A configuration window appears on the screen with default brute force settings.
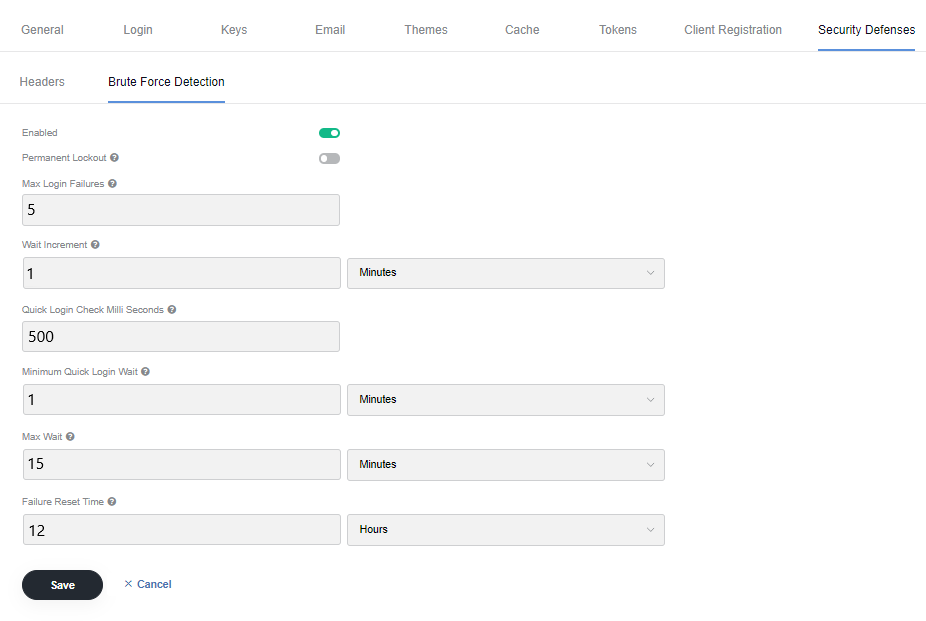
- To enable a timeout-based lockout, leave the default settings as shown above, or change them as appropriate. To enable a permanent lockout, turn on the Permanent lockout toggle and either change the default values or leave them as they are.
- Click Save.
Delete users
To remove a user permanently, follow the instruction below:
On the Users list, find the user you want to delete. When needed, use the search functionality.
Click Delete next to the user and confirm the deletion.
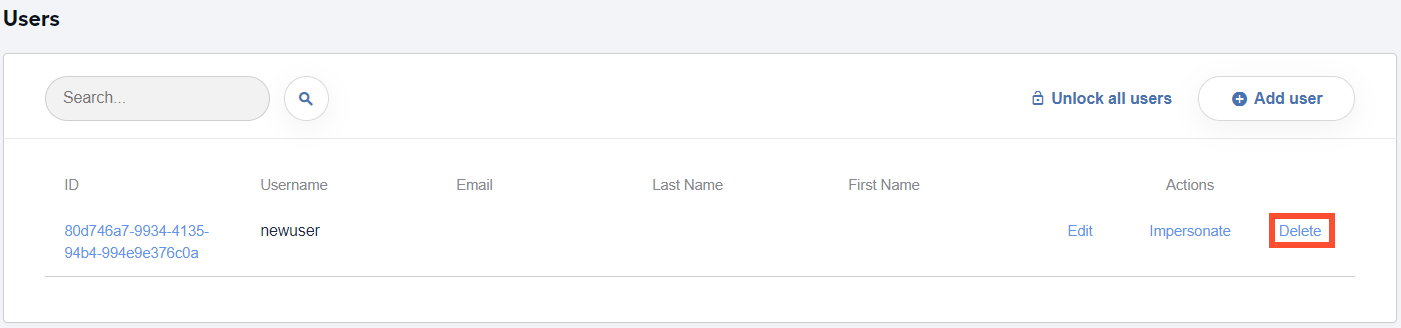
After a user is deleted, they are no longer available on the Users list.
Deactivate users
You can lock a user's account after a predefined period of inactivity, for example, three months. For more information, see the Deactivate users guide.