
Migrate Use Cases to Control Tower
Intelligent Automation Cloud 10.2 is more Use Case centric. Control Tower users now have a new point of view to their automation—the Use Cases they have automated including:
- the easier visual distinction of Business Processes into Use Cases
- Use Case level analytics
- Use Case A/B testing
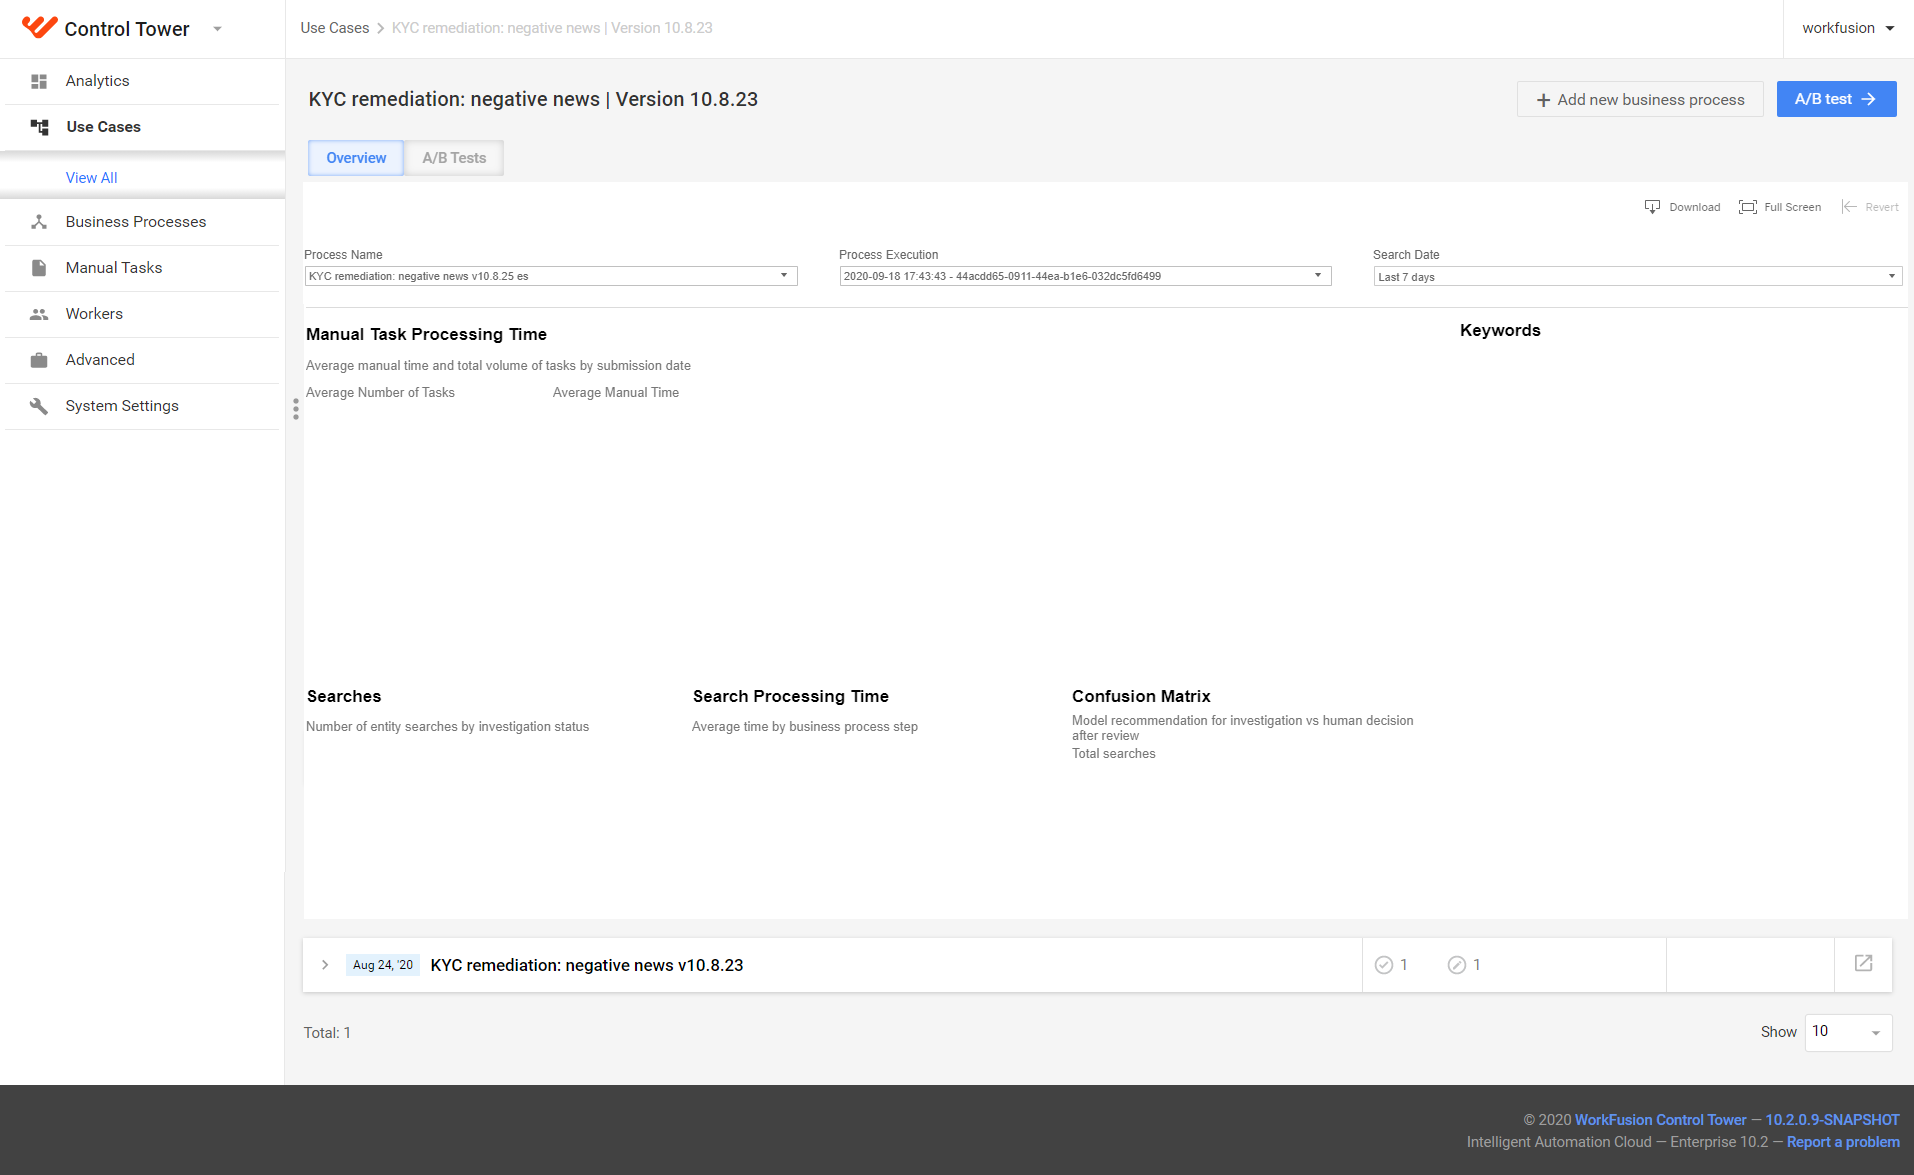
The instruction provides guidance on how to make Use Cases you develop appear in Control Tower as an instance of a new Use Case entity.
I'm developing a brand new Use Case to run on Intelligent Automation Cloud v10.2 or higher
Basic scenario
ODF is a recommended framework for implementation of new Use Cases if you create your Use Case project based on this guide. To proceed, do as follows.
Go to the
[ARTIFACT]-packagemodule of your project.Open the meta-info.json file.
Specify the following attributes in the file:
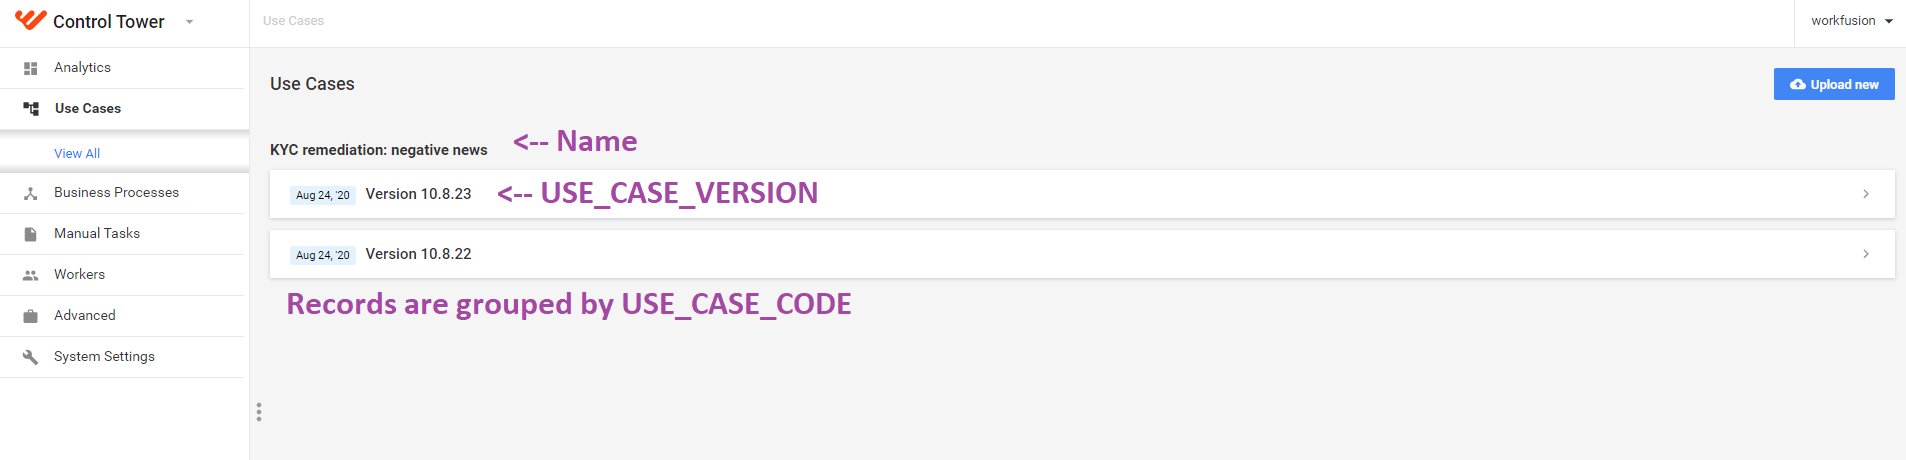
USE_CASE_CODE—is a unique identifier of the Use Case entity and also is used for identifying the set of metrics to compare Use Case different versions.
If you customize a pre-packaged Use Case with the known GTM Use Case Code, use the GTM Use Case code as the value. For GTM Use Case codes, refer to the Use Case Navigator site or see here.
Otherwise, select a unique code that won't overlap with any other Use Case Codes on the customer's environment. Maintain the same Use Case code as you develop your Use Case—don't change it from version to version.USE_CASE_VERSION—specify the version number of your Use Case, for instance, 10.8.18.NAME—populate it with the Use Case name.
If you have Analytics dashboards, place their assets into the bundle.
- If you use one of your dashboards for Use Case overview, rename its workbook so that it ends with overview, for example, en_NSS_overview.twbx.
- Put needed Liquibase migration scripts to impact Data Marts into dashboard/site/migration.
- Put needed Tableau Data Sources into dashboard/site/datasource.
- Put needed Tableau workbooks into dashboard/site_
/workbook . If you have multiple workbooks for different environment locales, you need a separate /site_/workbook folder for each workbook.
Build your project's Asset Bundle and deploy it to the environment. For more information, refer to Publish bundle to Control Tower.
To check that everything is done correctly, go to Control Tower and open Use Cases > View All. You should see something like this.
To check that your Overview dashboard is also visible, click the Use Case version details. The dashboard appears on the page.
Adjustments to project specifics
- Question: My project is more complex than the one provided in the guide, for example, I have multiple
packagemodules that generate multiple Asset Bundles on the Build phase. What am I supposed to do?
Answer: You have to modify the respective meta-info.json in every module that generates an Asset Bundle with the same attributes. We don't provide any tools to do it in one action. - Question: Will this work for Use Cases based on the IDP Use Case template?
Answer: Yes, it will. Since IDP Use Case project template is an example of a project with multiple modules that generate an Asset Bundle, the advice above works. You have to modify respective meta-info.json in every module that generates the Asset Bundle specifying the same values of attributesUSE_CASE_CODE,USE_CASE_VERSION,NAME. - Question: We don't use the Asset Bundle Import functionality on our project. It's overkill for us. We deploy BCB to development environment, build a Business Process there and migrate Business Process to higher environments. How do we make this work for us?
Answer: The only way to have Use Case entity created in Control Tower is by uploading an Asset Bundle. In fact, deployment via the Asset Bundle isn't an overkill, it's the easier way to do the same deployment procedure. All you need is to put your Business Process into the business-process folder of your[ARTIFACT]-packagemodule and build the Asset Bundle which will deploy both BCB and the Business Process to the target environment. See Publish bundle to Control Tower for more details. - Question: I have a separate team working on analytics dashboards for the Use Case. We don't share a common project, how do we make their dashboard appear on Use Case version details?
Answer: Either you or the other team has to prepare an Asset Bundle which includes the Overview dashboard. The easiest would be to put the Tableau workbook into the dashboard/workbook folder of your[ARTIFACT]-packagemodule.
I have my Use Case deployed to earlier 10.x version of Intelligent Automation Cloud
The guide assumes that:
- You have a pre-10.2 installation with IA Cloud Enterprise.
- You have some Business Processes (one or more) that logically belong to the same Use Case that you want to view when you dive into this Use Case version details.
Recommended approach—I have access to my Use Case project
This scenario is pretty similar to creating a new Use Case as you can modify the package module of your project, build an Asset Bundle, and deploy it as if it's a new Use Case.
Go to
[ARTIFACT]-packagemodule of your project.Open the /datastore folder and rename the CSV files in the folder. This is needed not to have your Data Stores content overwritten on the Asset Bundle import which you'll have to do next. If you have any custom solution that allows you to version your project's assets, follow your project guidelines.
Open the meta-info.json file.
Specify the following attributes in the file:
USE_CASE_CODE—is a unique identifier of the Use Case entity and also is used for identifying the set of metrics to compare Use Case different versions.
If you customize a pre-packaged Use Case with the known GTM Use Case Code, use the GTM Use Case code as the value. For GTM Use Case codes, refer to the Use Case Navigator site or see here.
Otherwise, select a unique code that won't overlap with any other Use Case Codes on the customer's environment. Maintain the same Use Case code as you develop your Use Case—don't change it from version to version.USE_CASE_VERSION—specify the version number of your Use Case, for instance, 10.8.18.NAME—populate it with the Use Case name.
If you have Analytics dashboards, place their assets into the bundle.
- If you use one of your dashboards for Use Case overview, rename its workbook so that it ends with overview, for example, en_NSS_overview.twbx.
- Put needed Liquibase migration scripts to impact Data Marts into dashboard/site/migration.
- Put needed Tableau Data Sources into dashboard/site/datasource.
- Put needed Tableau workbooks into dashboard/site_
/workbook . If you have multiple workbooks for different environment locales, you need a separate /site_/workbook folder for each workbook.
Build your project's Asset Bundle and deploy it to the environment. Refer to Publish bundle to Control Tower. To ensure correct deployment, your Use Case's Business Processes shouldn't be running at the target environment.
To check that everything is done correctly, go to Control Tower and open Use Cases > View All. You should see something like this.
To check that your Overview dashboard is also visible, click the Use Case version details. The dashboard appears on the page.
To continue maintaining the project, rename the CSV files in the /datastore folder back to the original state.
Workaround—I don't have access to my Use Case project, but I have an Asset Bundle
If you have an Asset Bundle file but don't have access to the Use Case project, you can modify your Asset Bundle to let the platform know about your Use Case. Note that if your Use Case project development continues and new versions of the Use Case are going to be deployed, you have to follow the recommended approach or repeat this workaround for every new version of the Use Case.
Unzip your Asset Bundle.
Open the meta-info.json file in the root of the folder.
Modify the file specifying the following attributes. The order doesn't matter but you have to maintain a valid JSON file structure:
USE_CASE_CODE—is a unique identifier of the Use Case entity and also is used for identifying the set of metrics to compare Use Case different versions.
If you customize a pre-packaged Use Case with the known GTM Use Case Code, use the GTM Use Case code as the value. For GTM Use Case codes, refer to the Use Case Navigator site or see here.
Otherwise, select a unique code that won't overlap with any other Use Case Codes on the customer's environment.
Maintain the same Use Case code as you develop your Use Case—don't change it from version to version.USE_CASE_VERSION—specify the version number of your Use Case, for instance, 10.8.18.NAME—populate it with the Use Case name.
If you have the /datastore folder, open it and remove all CSV files from there.
Archive the assets back into an Asset Bundle. Make sure it has the same structure, and meta-info.json is still at the root level of the Asset Bundle structure.
Open Control Tower and go to Use Cases > View All. You should have the Manage Use Cases permission to view this page.
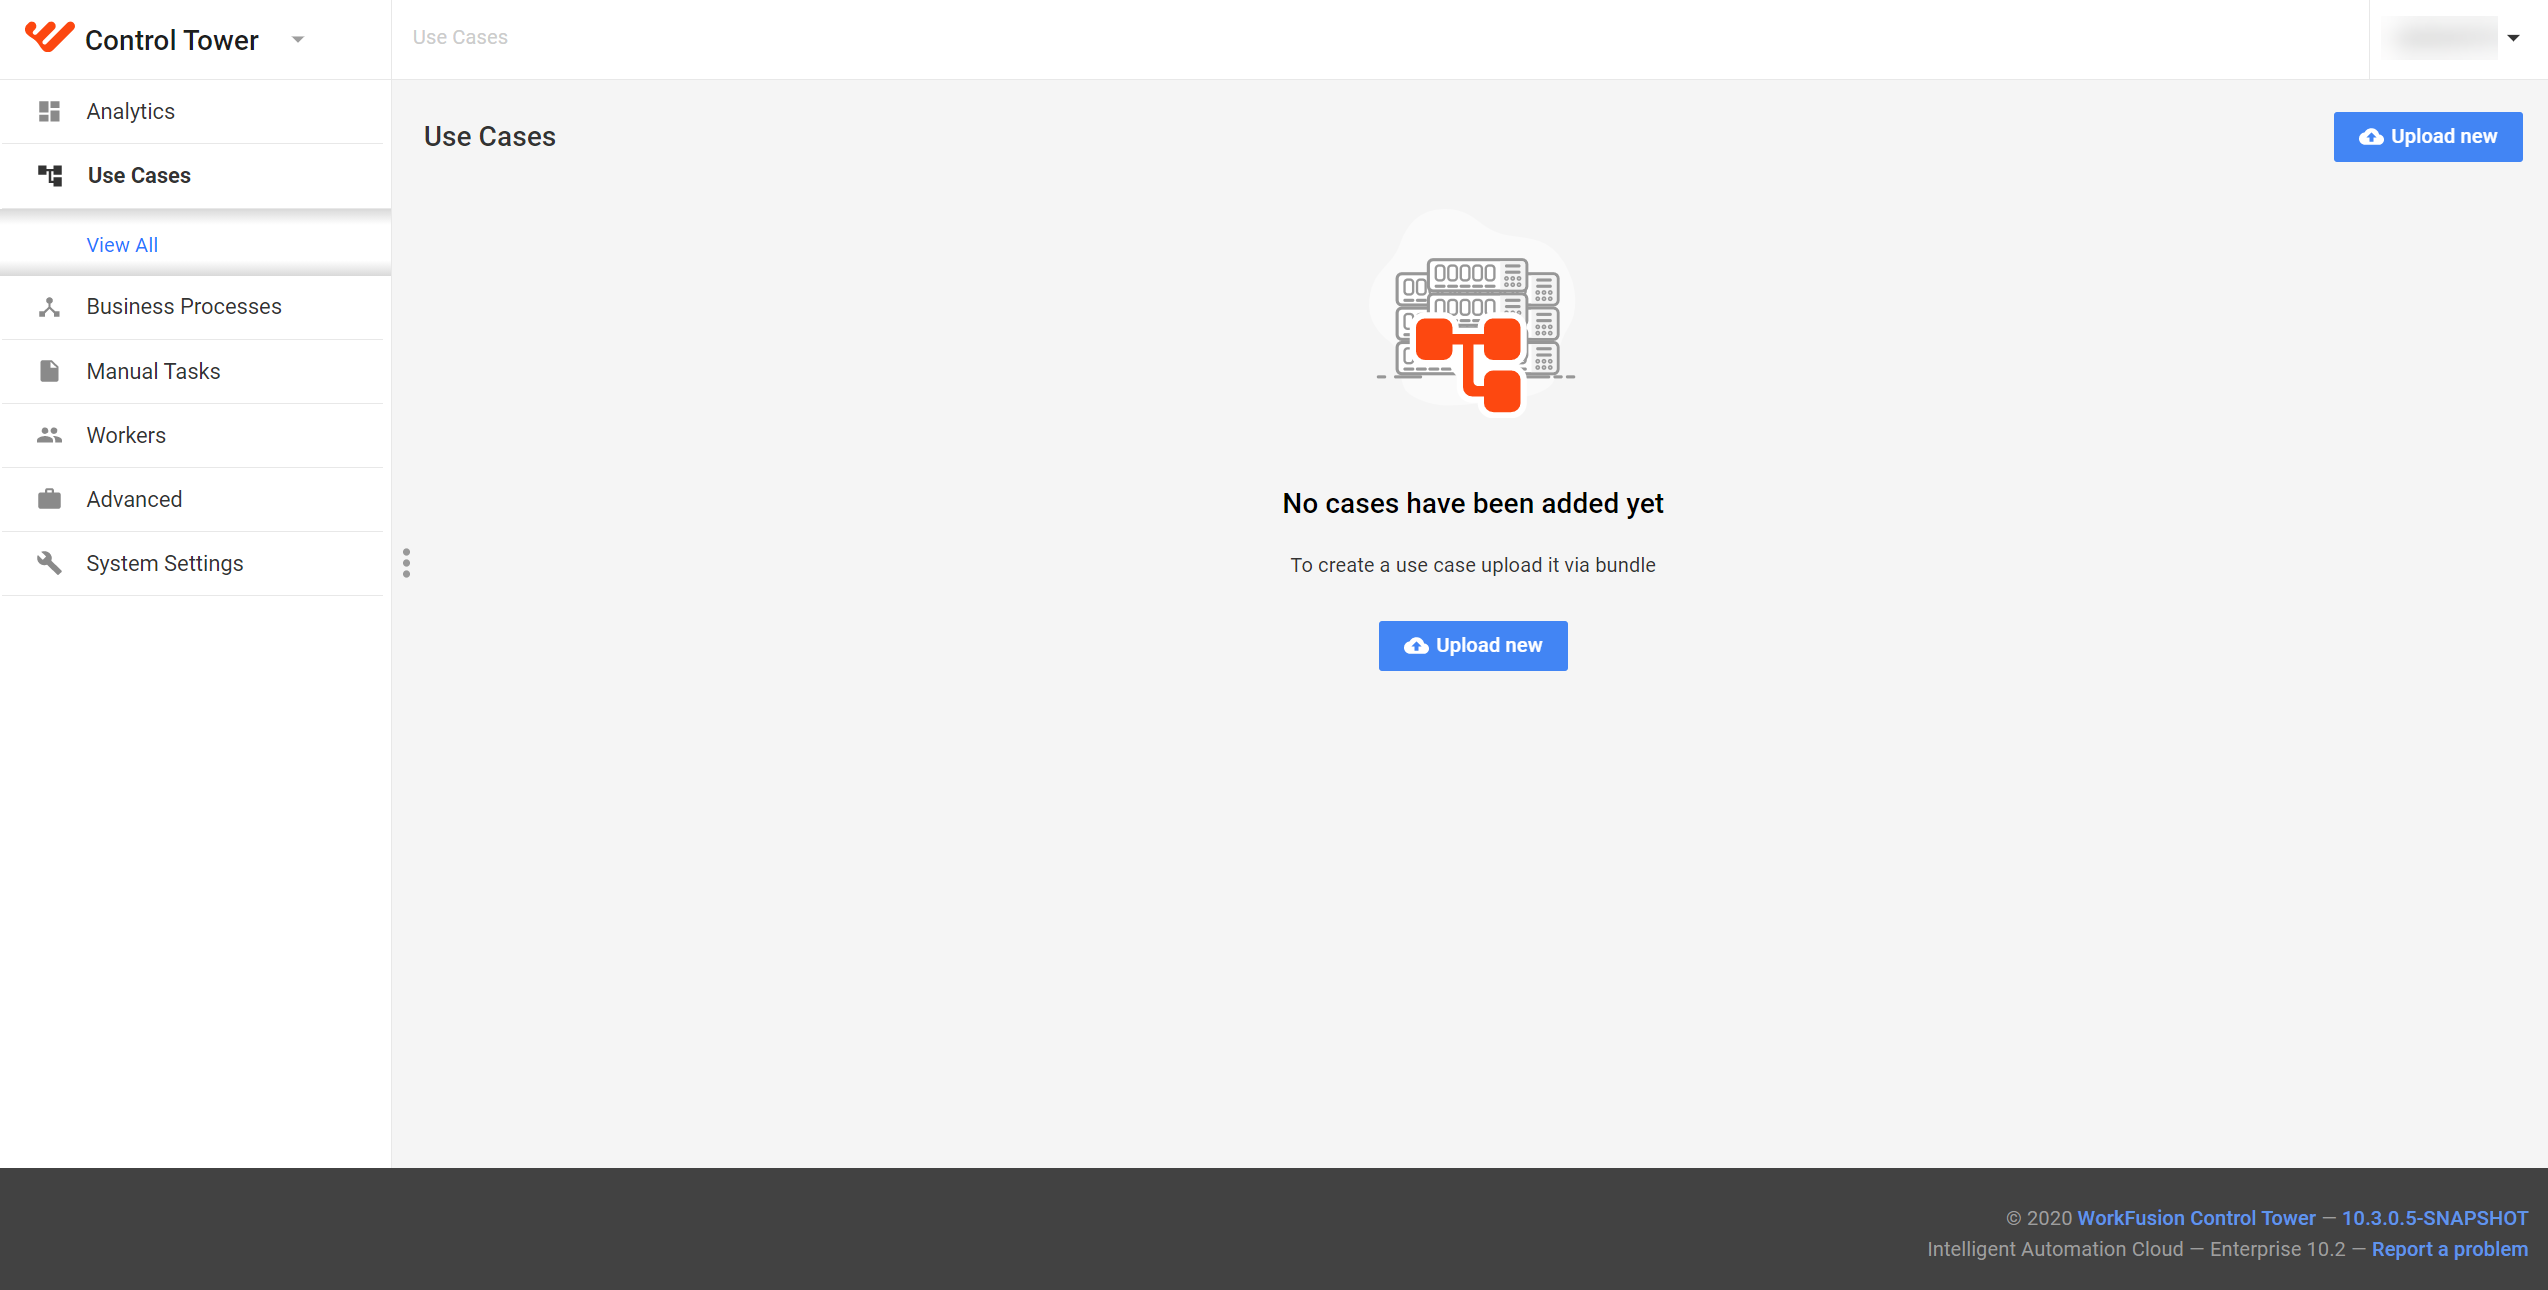
Click the Upload New button. You should have Export/Import and Advanced Package Import permissions to do so.
Click the Add button in the popup window and select your Asset Bundle file in the file selection dialog.
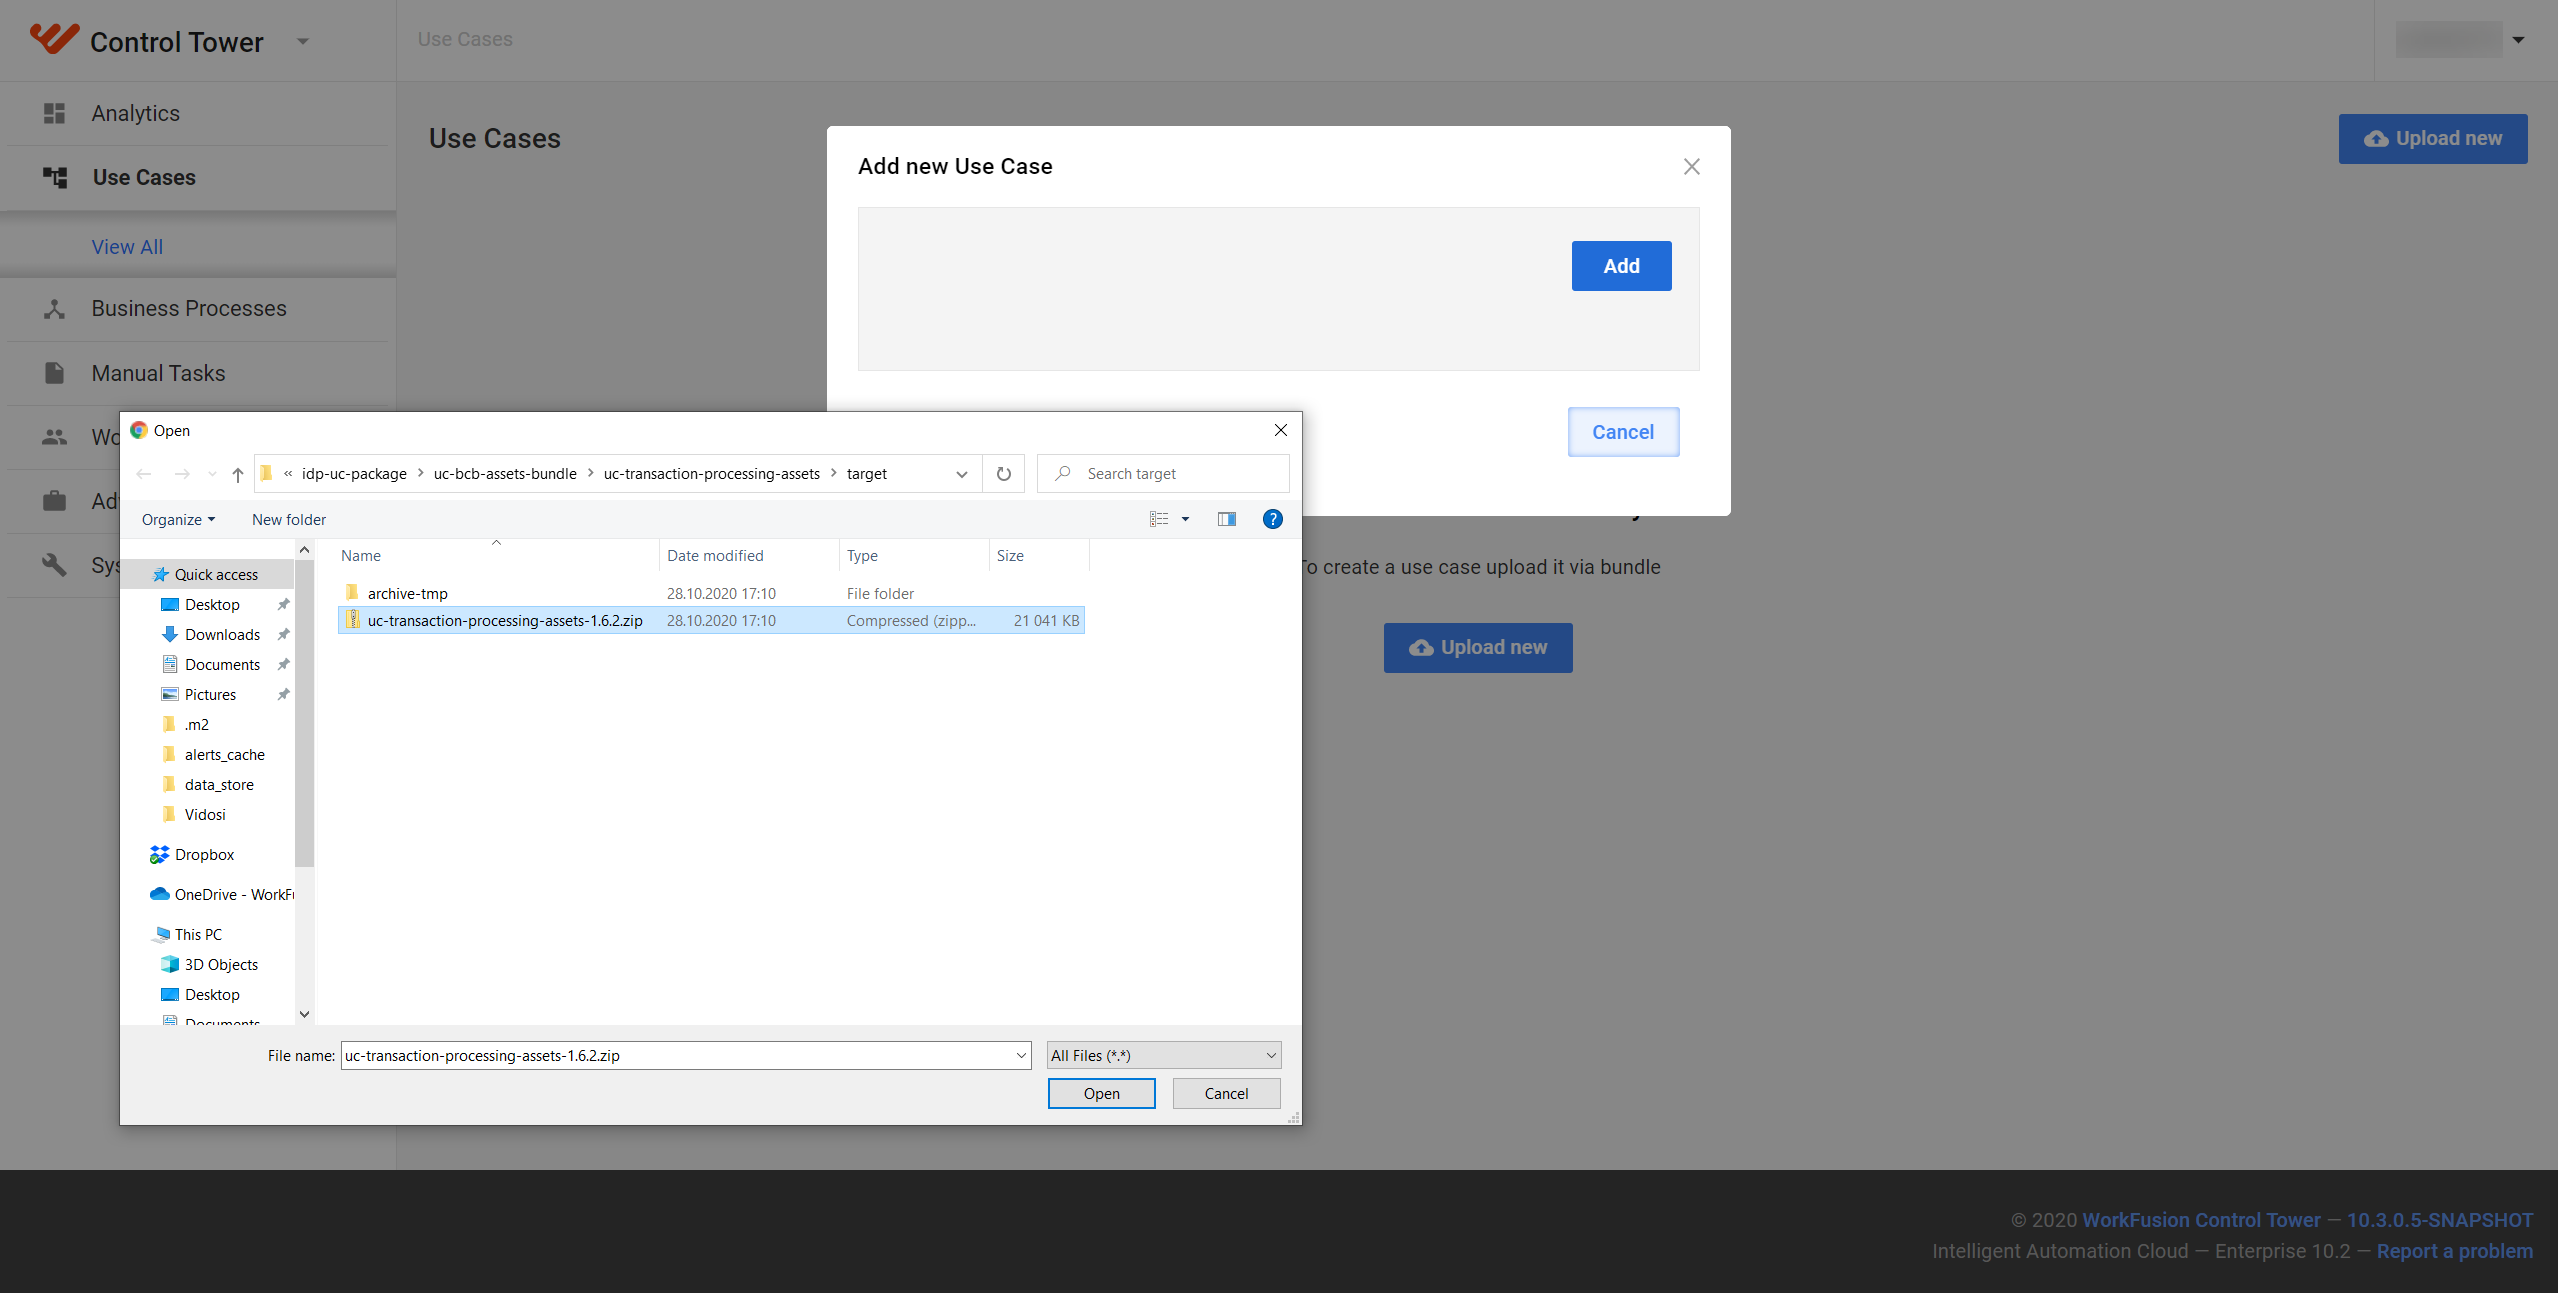
After you confirm the file selection, the Asset Bundle file uploads to your environment, and you can cancel the process until the upload finishes. After that, the import process begins. You can track the import progress on the screen. If you see a disabled Finish and show use case button at the right bottom part of the screen, it indicates that your meta-info.json file is modified correctly. You can see the attributes you provided in the Asset bundle details section:
- Use Case name
- Code
- Version
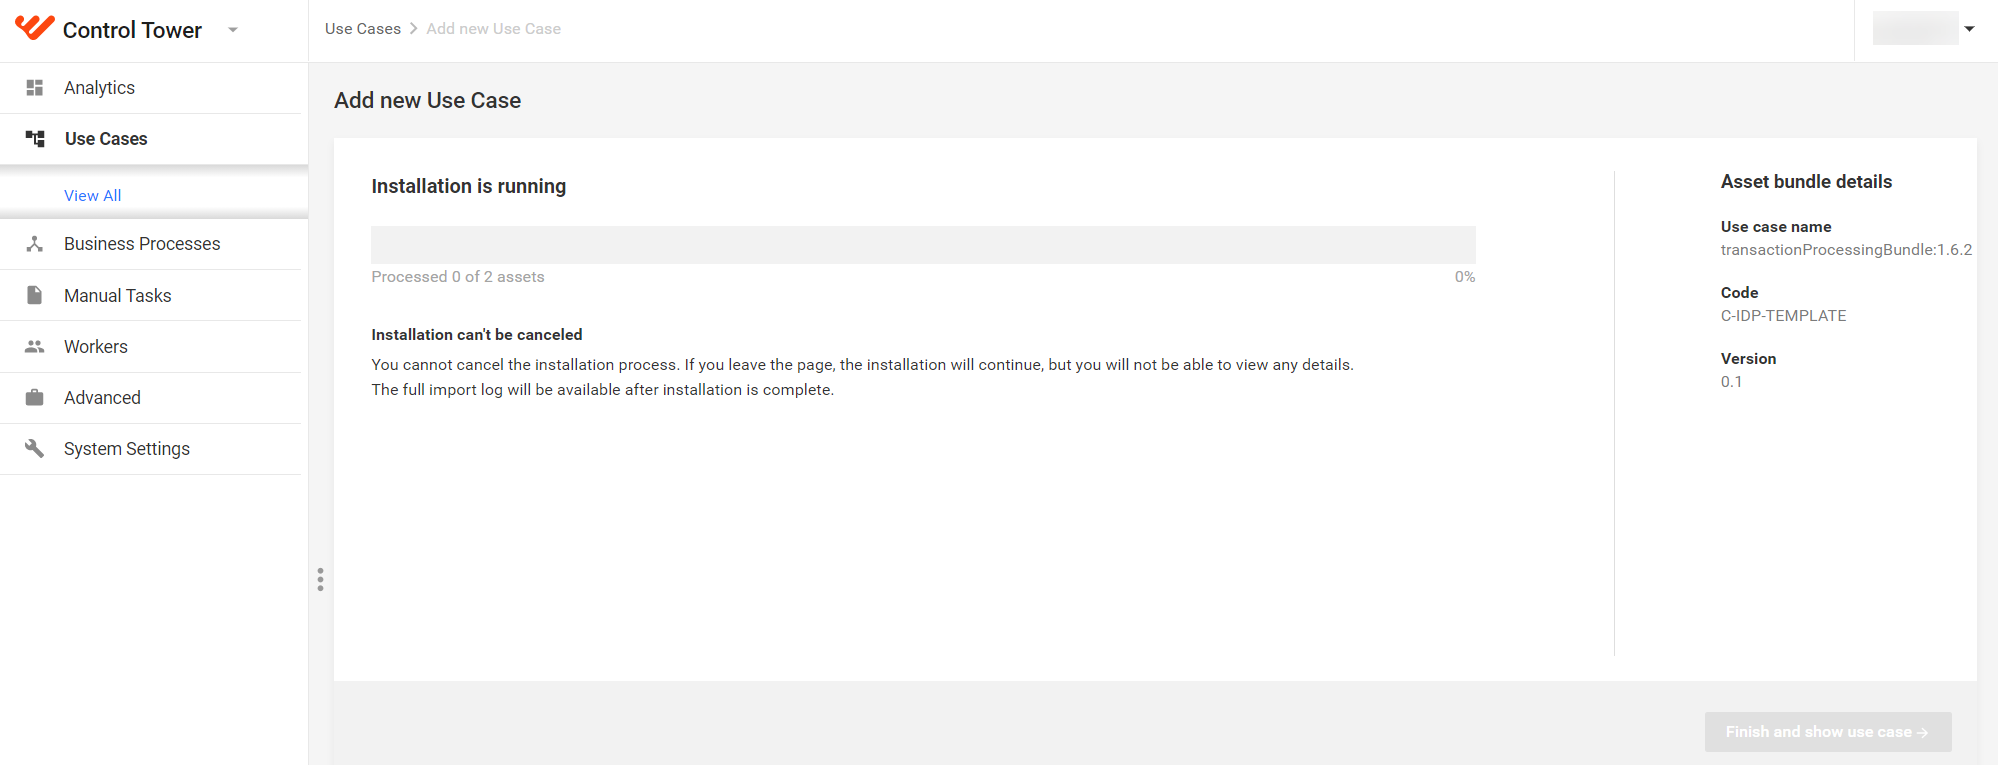
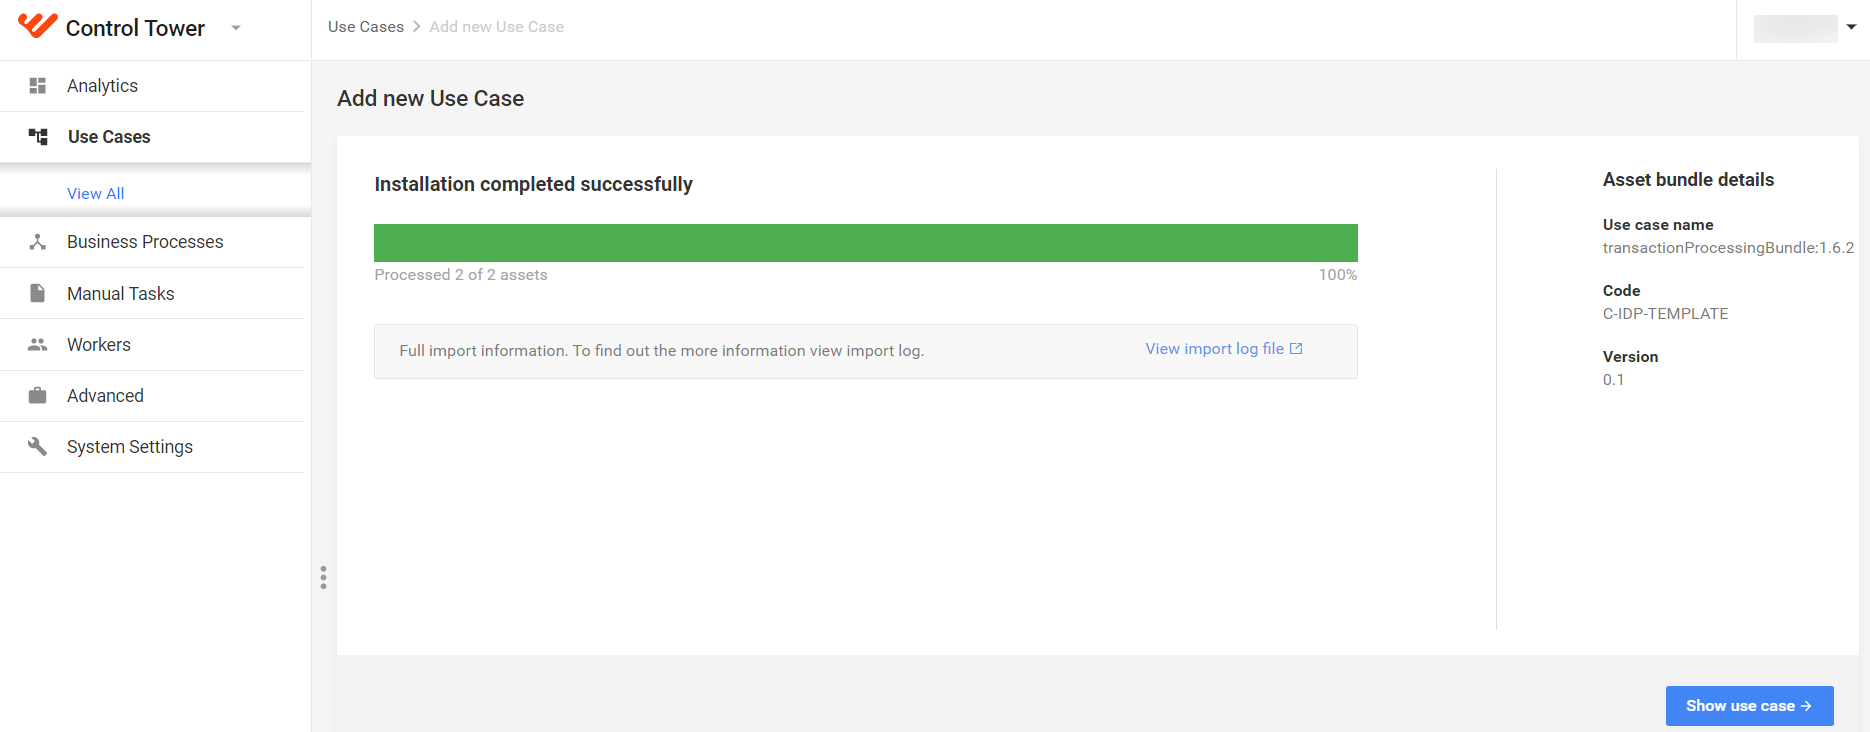
After import finishes, you can view your Use Case details by clicking on the button at the bottom right corner. You can also access the import log to see if there were any warnings during the import procedure.
Not recommended—I don't have access to my Use Case project and I don't have the Asset Bundle but I have the Use Case deployed to my environment
Although the approach might seem the easiest, it's not recommended as it doesn't tie all Use Case assets except Business Processes to the Use Case. It may cause some new functionality that will use internal Use-Case-Asset relation to malfunction. You also won't be able to see the Overview dashboard on the Use Case details page if you follow this approach. However, there may be some reasons to follow this approach. For example, you know your next version is almost ready and packaged in a way that supports its display on the Use Cases view and the current one is getting obsolete soon.
Export all Business Processes related to your Use Case using the Business Process Package Export feature.
Create a folder named business-process.
Put all BP Packages in the business-process folder.
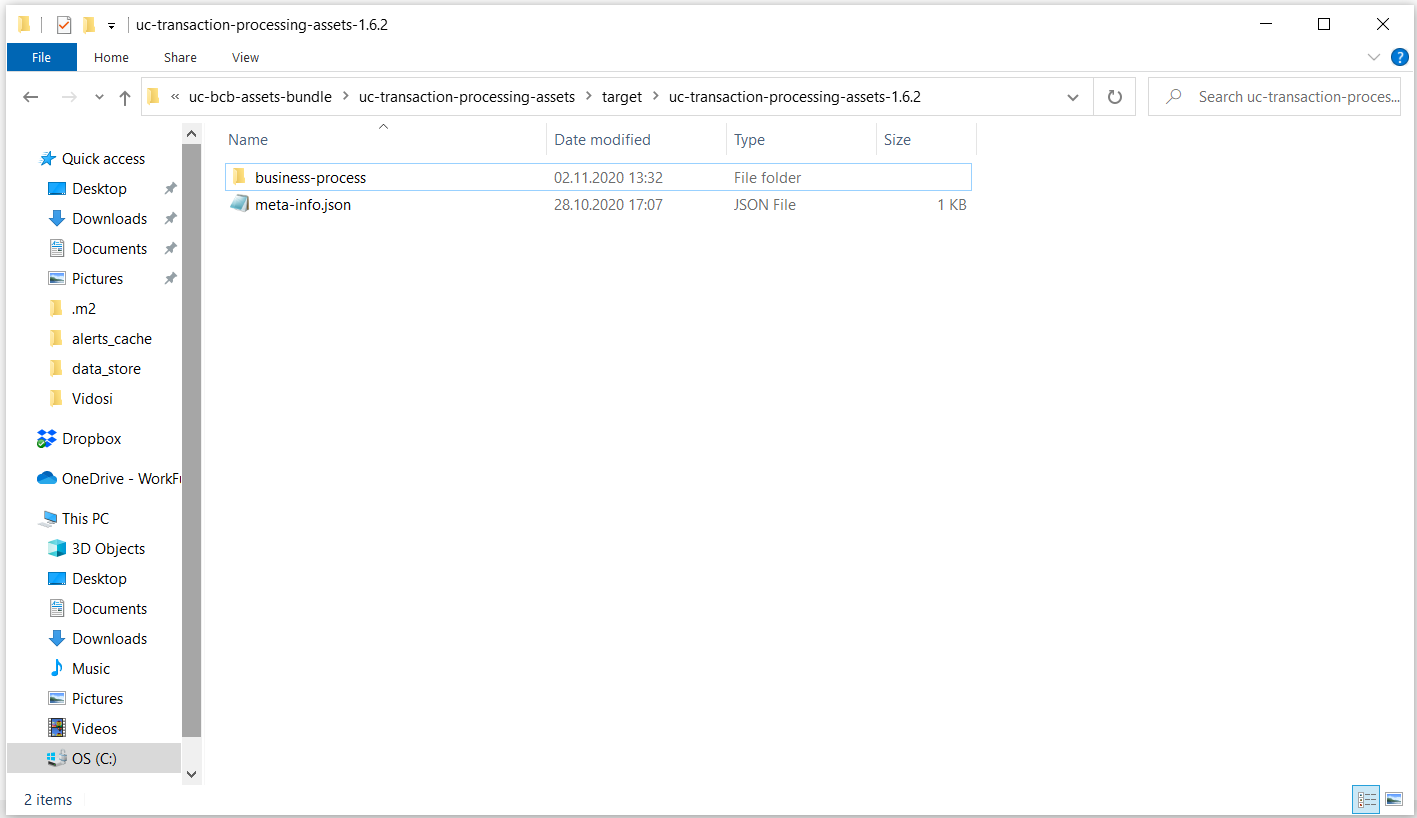
Create an empty meta-info.json file in the same place where the business-process folder resides. The structure should look like this:
Edit the meta-info.json file specifying the following attributes:
USE_CASE_CODE—is a unique identifier of the Use Case entity and also is used for identifying the set of metrics to compare Use Case different versions. If you customize a pre-packaged Use Case with the known GTM Use Case Code, use the GTM Use Case code as the value. For GTM Use Case codes, refer to the Use Case Navigator site or see here.
Otherwise, select a unique code that won't overlap with any other Use Case Codes on the customer's environment.
Maintain the same Use Case code as you develop your Use Case—don't change it from version to version.USE_CASE_VERSION—specify the version number of your Use Case, for instance, 10.8.18.NAME—populate it with the Use Case name.WF_VERSION—specify your platform version, for example, 10.2 or 10.2.1.
Archive the folder and file into the Asset Bundle. Make sure it has the correct structure, and meta-info.json is at the Asset Bundle structure's root level.
Open Control Tower and go to Use Cases > View All. You should have the Manage Use Cases permission to view this page.
Click the Upload New button. You should have the Export/Import and Advanced Package Import permissions to do so.
Click the Add button in the popup window and select your Asset Bundle file in the file selection dialog.
After you confirm the file selection, the Asset Bundle file uploads to your environment, you can cancel the process until the upload finishes. After that, the import process begins. You can track the import progress on the screen. If you see a disabled Finish and show use case button at the right bottom part of the screen, it indicates that your meta-info.json file is modified correctly. You can see the attributes you provided in the Asset bundle details section:
- Use Case name
- Code
- Version
After import finishes, you can view your Use Case details by clicking the button at the bottom right corner. You can also access the import log to see if there were any warnings during the import procedure.