Locate UI elements and windows
Web applications do not always confine themselves to working entirely on the web. Sometimes they need to interact with the desktop to do things like downloads and uploads. Automating these sorts of workflow is tricky in using WebDriver. WebDriver is confined to automating browsers, so desktop windows are out of scope.
Selectors can be extracted with the help of specific tools. The usual workflow contains the following steps:
- Inspect UI controls.
- Check selectors.
- Apply selectors.
General overview
To perform actions in any desktop application, a bot has to find particular elements to interact with (type, click, focus, and so on). For that purpose, a selector, or a unique link to a window or UI control, is used.
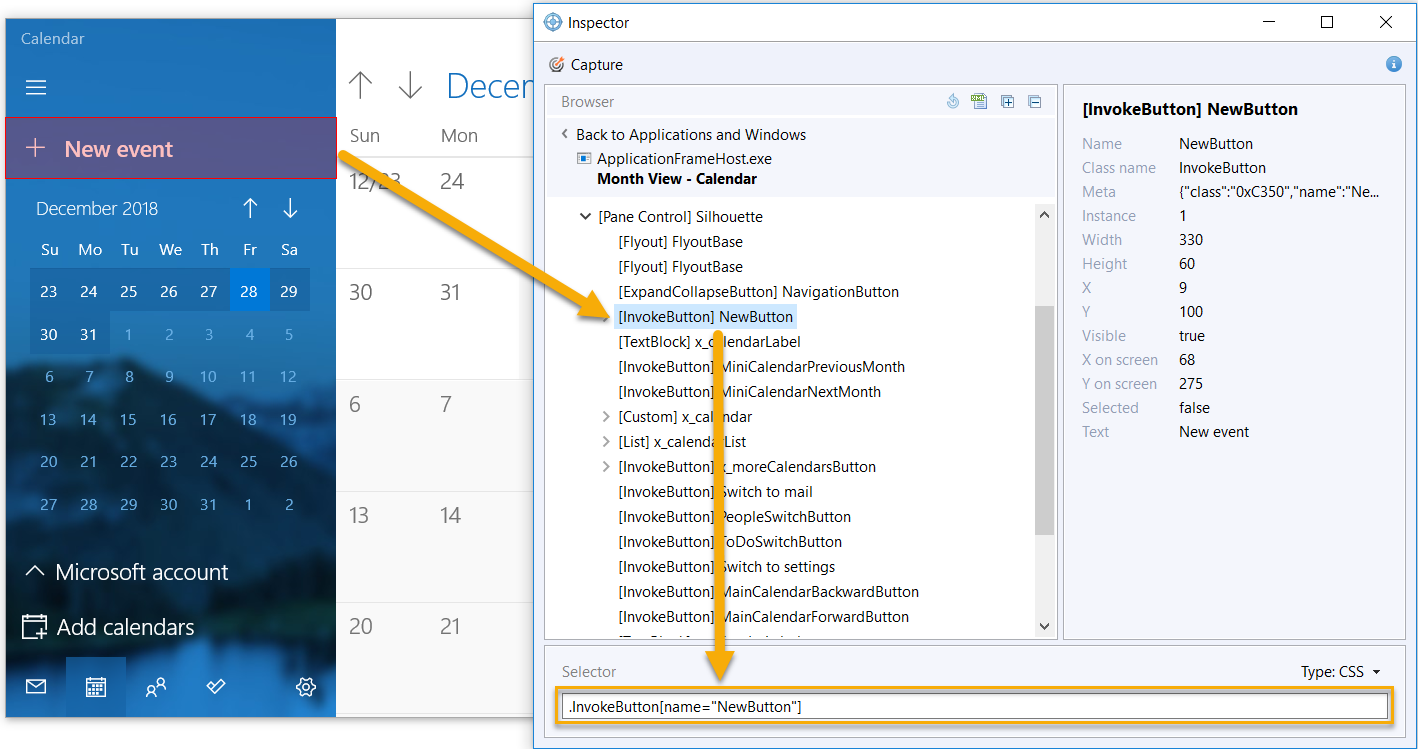
A selector is a unique property or the combination of several unique properties related to windows or UI controls. It is captured as a property name and a property value. The result is inserted into the Selector field to let the bot know which object to click. The most commonly used selector properties are enumerated in the table below.
| Property | Description | CSS selector | Object selector | XPath selector |
|---|---|---|---|---|
CLASS | class | .TextBlock | [CLASS:TextBlock] | //*[@class='TextBlock'] |
TITLE | title | .ApplicationWindow[title="Calendar"] | [CLASS:ApplicationWindow; TITLE:Calendar] | //*[@class='ApplicationWindow'][@title='Calendar'] |
NAME | instance name | .TextBlock[name="calendarLabel"] | [CLASS:TextBlock; NAME:calendarLabel] | //*[@class='TextBlock'][@name='calendarLabel'] |
TEXT | text attribute | .TextBlock[text="2019"] | [CLASS:TextBlock; TEXT:2019] | //*[@class='TextBlock'][@text='2019'] |
INSTANCE | instance number | .TextBlock[instance="48"] | [CLASS:TextBlock; INSTANCE:48] | //*[@class='TextBlock'][@instance='48'] |
The class and title properties are used to define both applications and UI controls, while others are applied for UI controls only.
The class and title properties are used to define both applications and UI controls, while others are applied for UI controls only.
Apply Inspector tool
You can use Inspector distributed with the RPA package. Inspector is a built-in tool to explore properties and values of objects in the application that you automate.
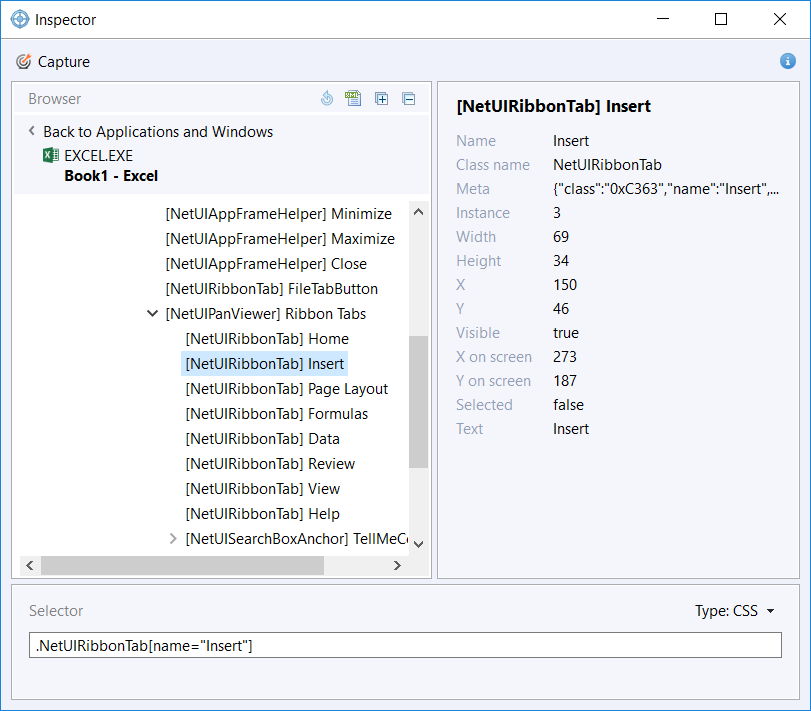
For more details, refer to the Inspector documentation.
Apply Inspect.exe
If Inspector does not provide information about a UI control, you can use Inspect for that.
Inspect (Inspect.exe) is a Windows-based tool that enables you to select any UI element and view the element's accessibility data. You can view Microsoft UI Automation and Microsoft Active Accessibility properties. Inspect also enables you to test the navigational structure of the automation elements in the UI Automation tree and accessible objects in the Microsoft Active Accessibility hierarchy.
Inspect is installed with the Windows Software Development Kit (SDK), also available in the previous versions of Windows SDK. It is located in the \bin\<version>\<platform> folder of the SDK installation path (Inspect.exe).
For more details about the tool, follow the links below:
Apply browser inspectors
All modern browsers have a Web Inspector, the built-in tool for examining the structure of webpages.
Activate Web Inspector
You can activate the Web Inspector in any browser by right-clicking any element on a page. A pop-up menu should appear with the option to Inspect Element. You can also use the shortcut key for the Inspector, which is F12.
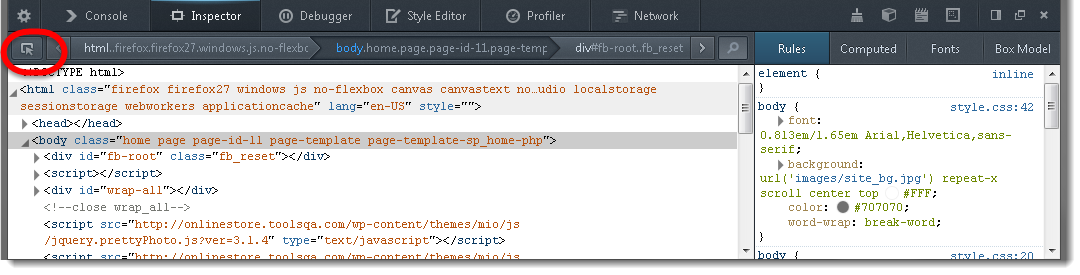
A panel showing the HTML source appears usually in the bottom half of your browser. The red circle points to the Element Inspector in Firefox.
Select elements
Once you click the inspector icon from the bottom panel, the Element Inspector is active. As you move the mouse pointer around the page, the element under it is highlighted with a dotted border, and an annotation displays its HTML tag. At the same time, its HTML definition is displayed in the Inspector's left-hand pane.
In the screenshot below, the My Account button is inspected. In the bottom panel of the browser, the Inspector highlights in the HTML where the My Account button appears.
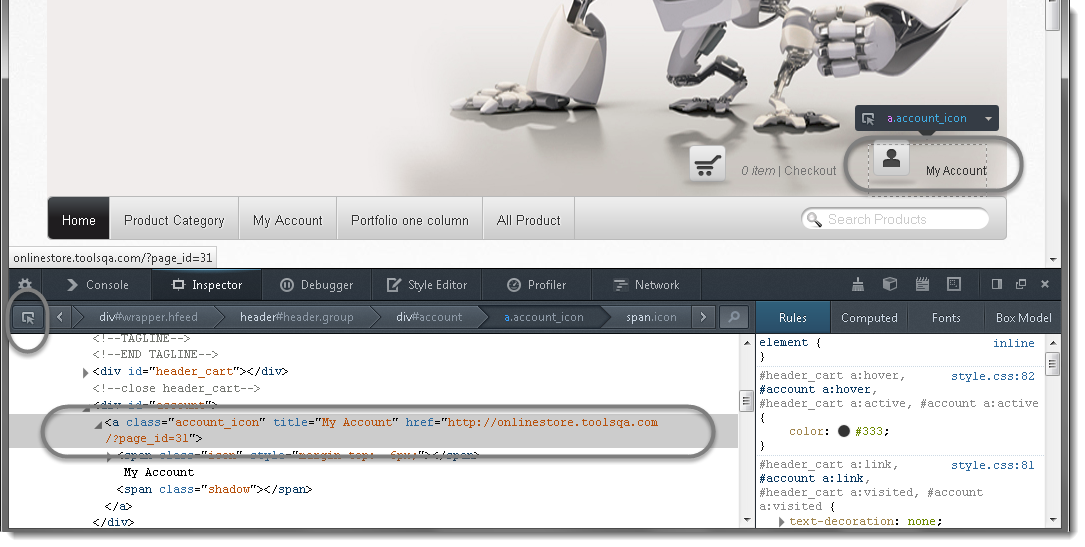
You can insert the above HTML code in your script:
$(byClassName('account_icon')).click()
The next example refers to looking for the Username Element attributes. The annotation for the element gets a button on the left and a button on the right. The button on the left unlocks the element, enabling you to select a new element on the page. The button on the right displays a popup menu for the element.
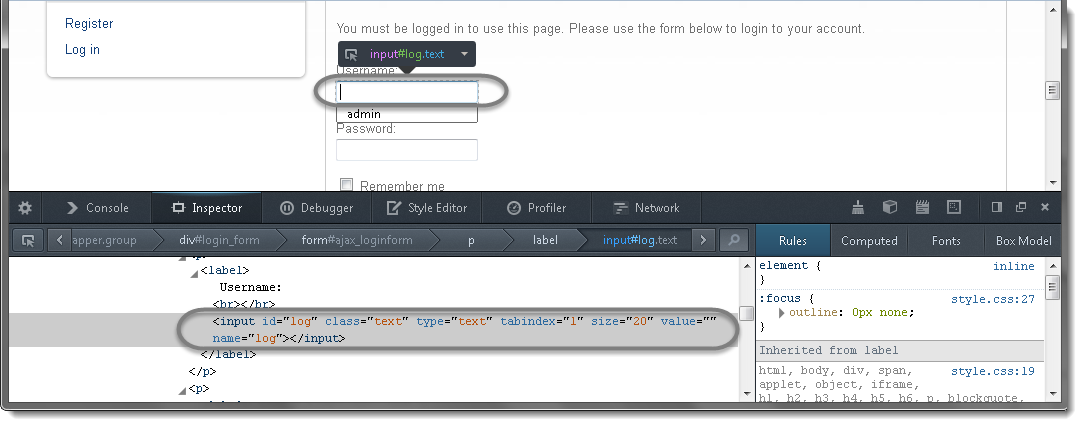
Your code will be like this:
$(byId('log')).sendKeys('user_1')
Alternatively, you can also write your code like this:
$(byName('log')).sendKeys('user_1')
Use WebDriver element locator
WebDriver Element Locator is a decent add-on for the Firefox browse. To use it, right-click the web element you wish to locate, select an appropriate locator string, and it will be copied to your clipboard. The element locator is displayed with the complete robotic script in different languages like C#, Java, Python, and Ruby.
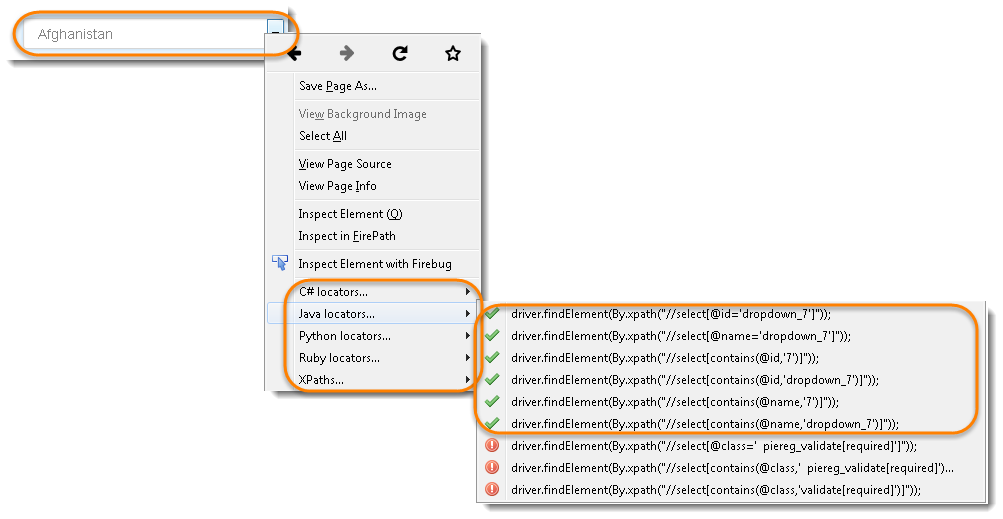
To disable any locator types you don’t need (for example, Support, Ruby), go to Tools > Add-ons (Ctrl+Shift+A), and un-check them in the add-on options.
To download the add-on, perform the following steps:
- Go to Tools > Add-ons.
- Search for WebDriver Element Locator.
- Click Install.
- Restart the Firefox Browser.
The WebDriver element locator's features are as follows:
- The WebDriver element locator checks locators for uniqueness, signified by red crosses and green ticks.
- If elements have long, fragile, auto-generated attributes, for example,
id="ctl00_ElementContainer_Inputs_txtForename", it will attempt to locate based on the final and most significant part of the value only. - If locating via attributes is difficult, it also attempts to locate via a text value.
- The extension will attempt to populate the context menu with usable WebDriver XPath-based
findElementcommands for the .Net, Python, and Ruby bindings and Support Locator Library references for the focused web element.