Integrate GitHub with Jenkins
Create Docker container
To create a Docker container using the jenkins:lts image, follow the steps below:
The default ports to be used are 8080, 50000, 8082.
Run the following command:
docker container run -d -p 50000:50000 -v jenkins-vol:/var/jenkins_home --name jenkins-fresh-intall --network iac-env --privileged jenkins/jenkins:ltsTo apply port-forwarding for local purposes, follow the guide at https://ngrok.com/ and install
ngrokfor Windows or macOS.After that, route all the traffic to
localhost:50000by running thengrok http 5000command.Use the address obtained in Step 2 to configure the Jenkins server URL and GitHub webhook in the following steps.

Configure Jenkins
To configure Jenkins, follow the steps below:
Access the URL obtained in Step 3 earlier and unlock Jenkins using the Administrator password. The password is located inside your
server/dockercontainer in theJENKINS_HOMEdirectory, in thesecretssub-folder.To run Docker inside the Jenkins container, log in as root and execute the following command:
docker exec -u 0 -it <CONTAINER_ID> bashIf you run a Jenkins pipeline containing a Docker agent and encounter the
Permission deniederror while connecting to the Docker socket, run the following command:sudo chmod 666 /var/run/docker.sockOn the startup screen, install recommended plugins.
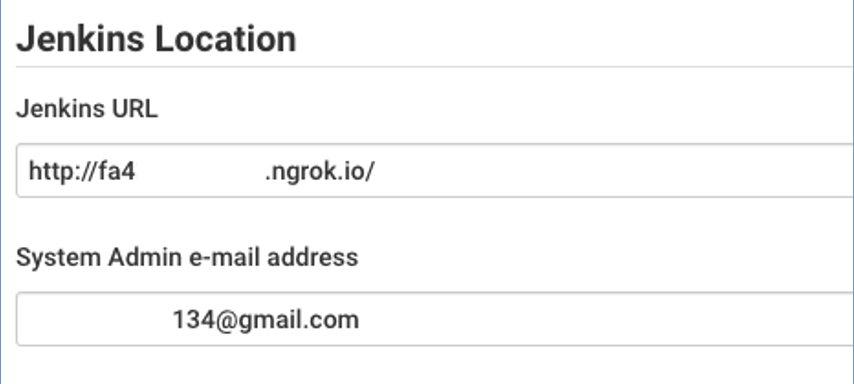
Go to Manage Jenkins > Configure System > Jenkins Location and change the server URL to the address given by
ngrok. If you have a dedicated Ec2/on-prem server, use the server address instead.
Configure Github
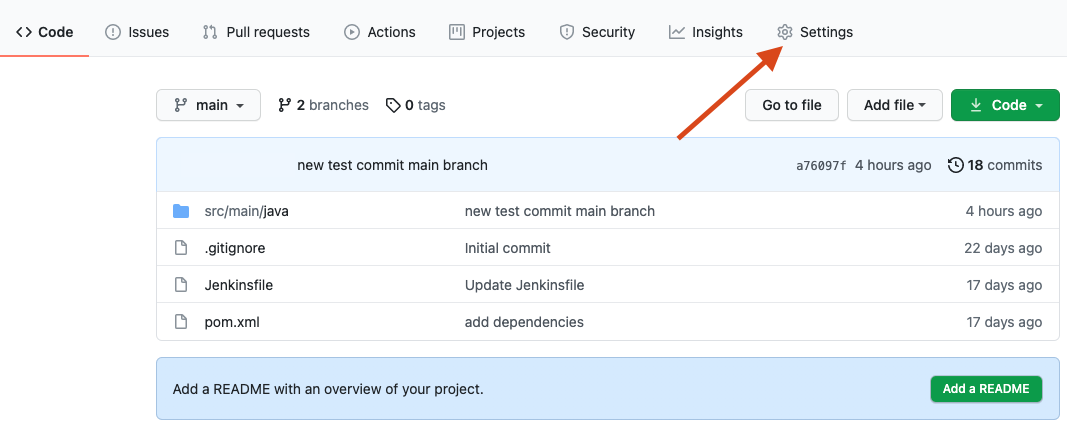
Go to your GitHub repository and click Settings.
Click Webhooks > Add webhook.
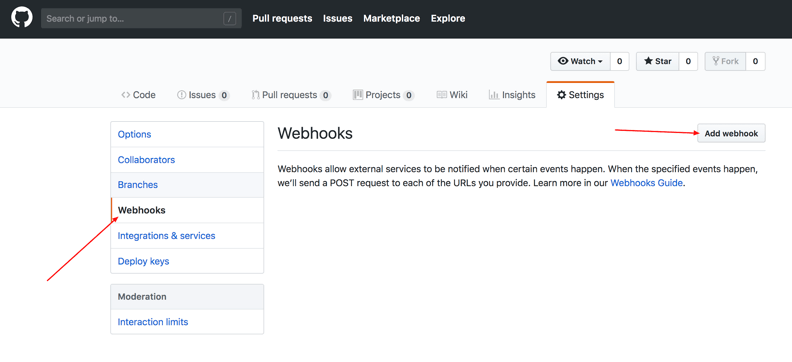
In Payload URL, paste your Jenkins environment URL and add /github-webhook/ (JENKINS_URL/github-webhook/).
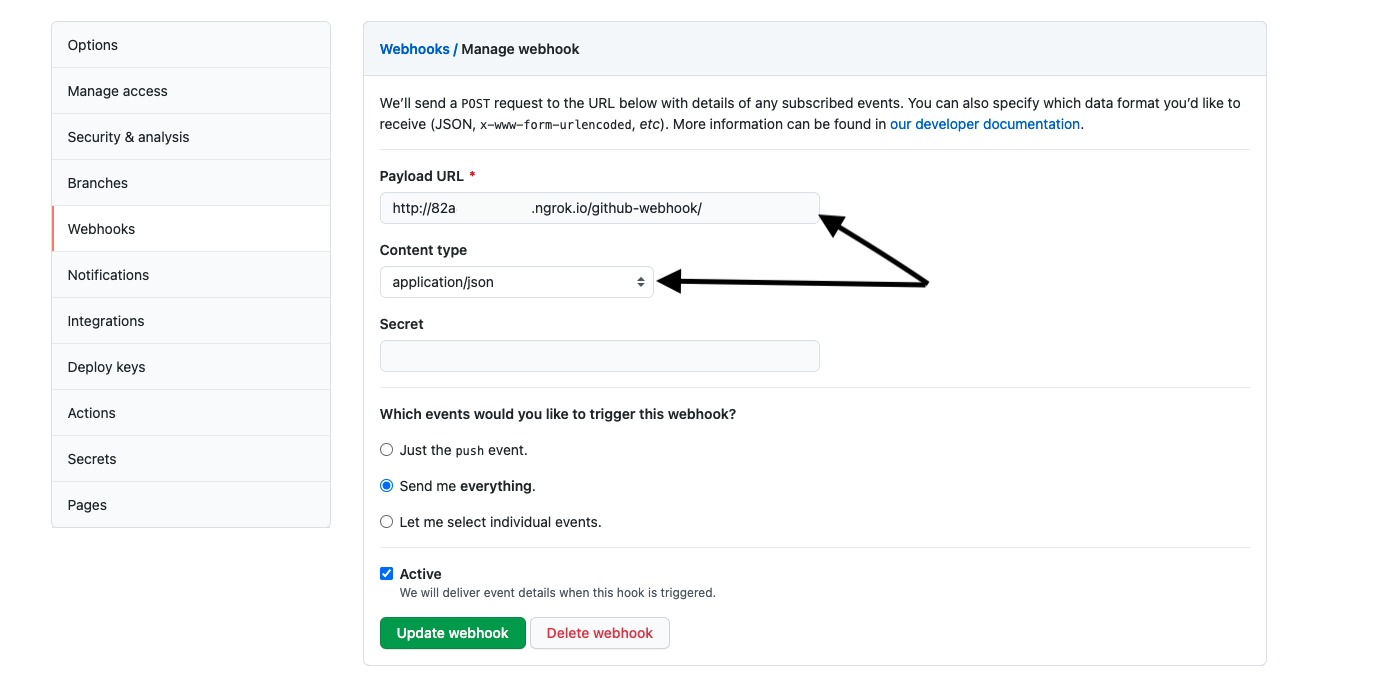
In Content type, select application/json. Leave the Secret field empty.
To answer Which events would you like to trigger this webhook?, choose Let me select individual events. Then, select the Pull Requests and Pushes checkboxes. Make sure to select the Active checkbox and click Add webhook.
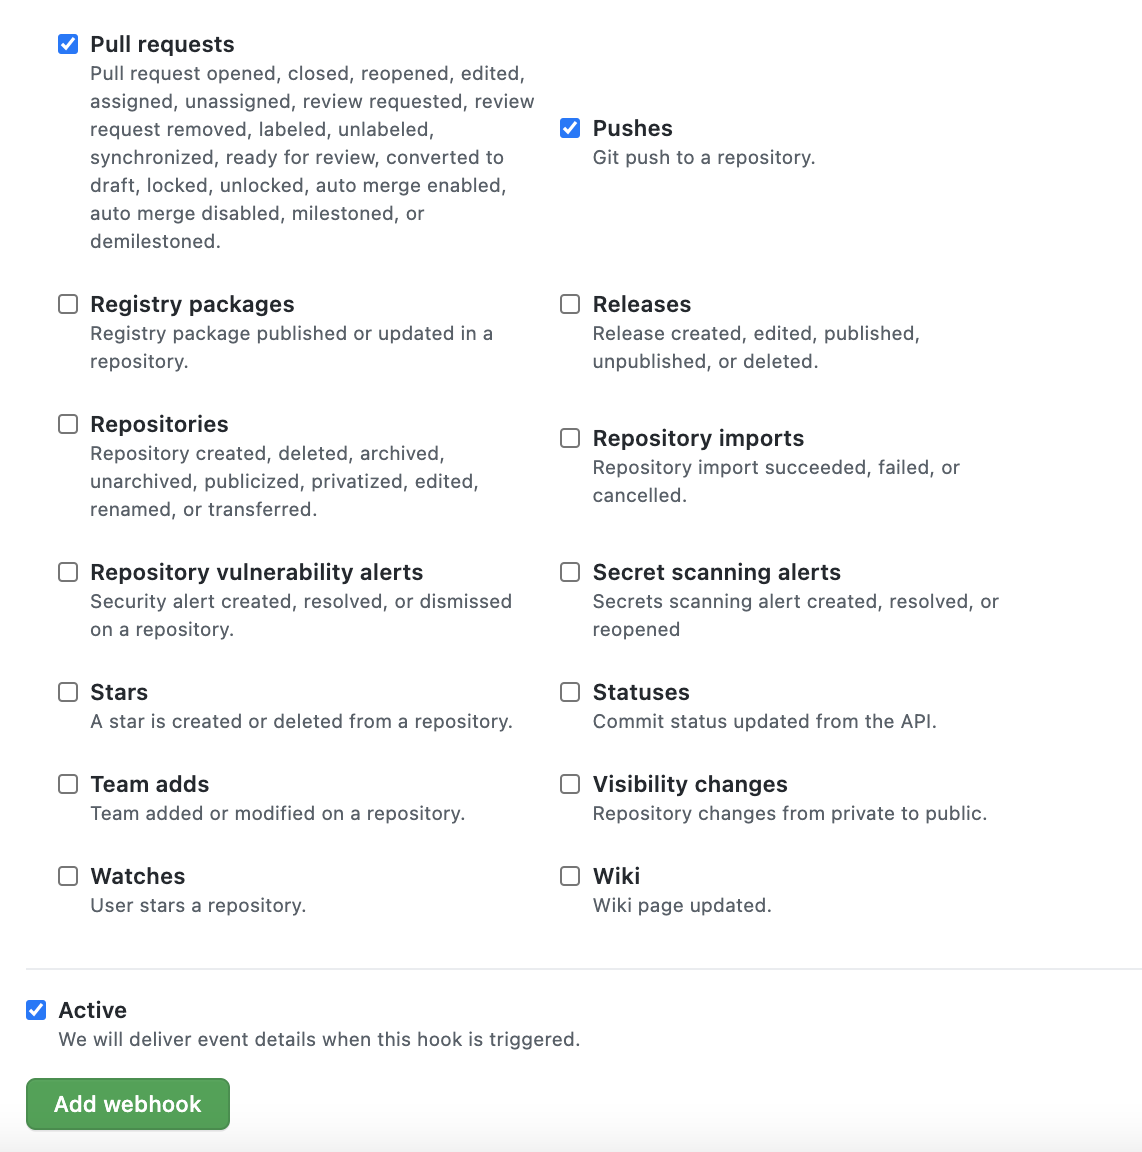
For testing and demo purposes, you can select most of the events listed in this section to test various types of actions triggered by Git actions and triggers.
Create your GitHub personal access token:
On the top right corner of the screen, click your profile icon and select Settings > Developer Settings > Personal access tokens > Generate New Token.
In the Select scopes section, choose the required scopes based on the integrations you would like to have in the pipeline. The recommended scopes are located in the repo section.
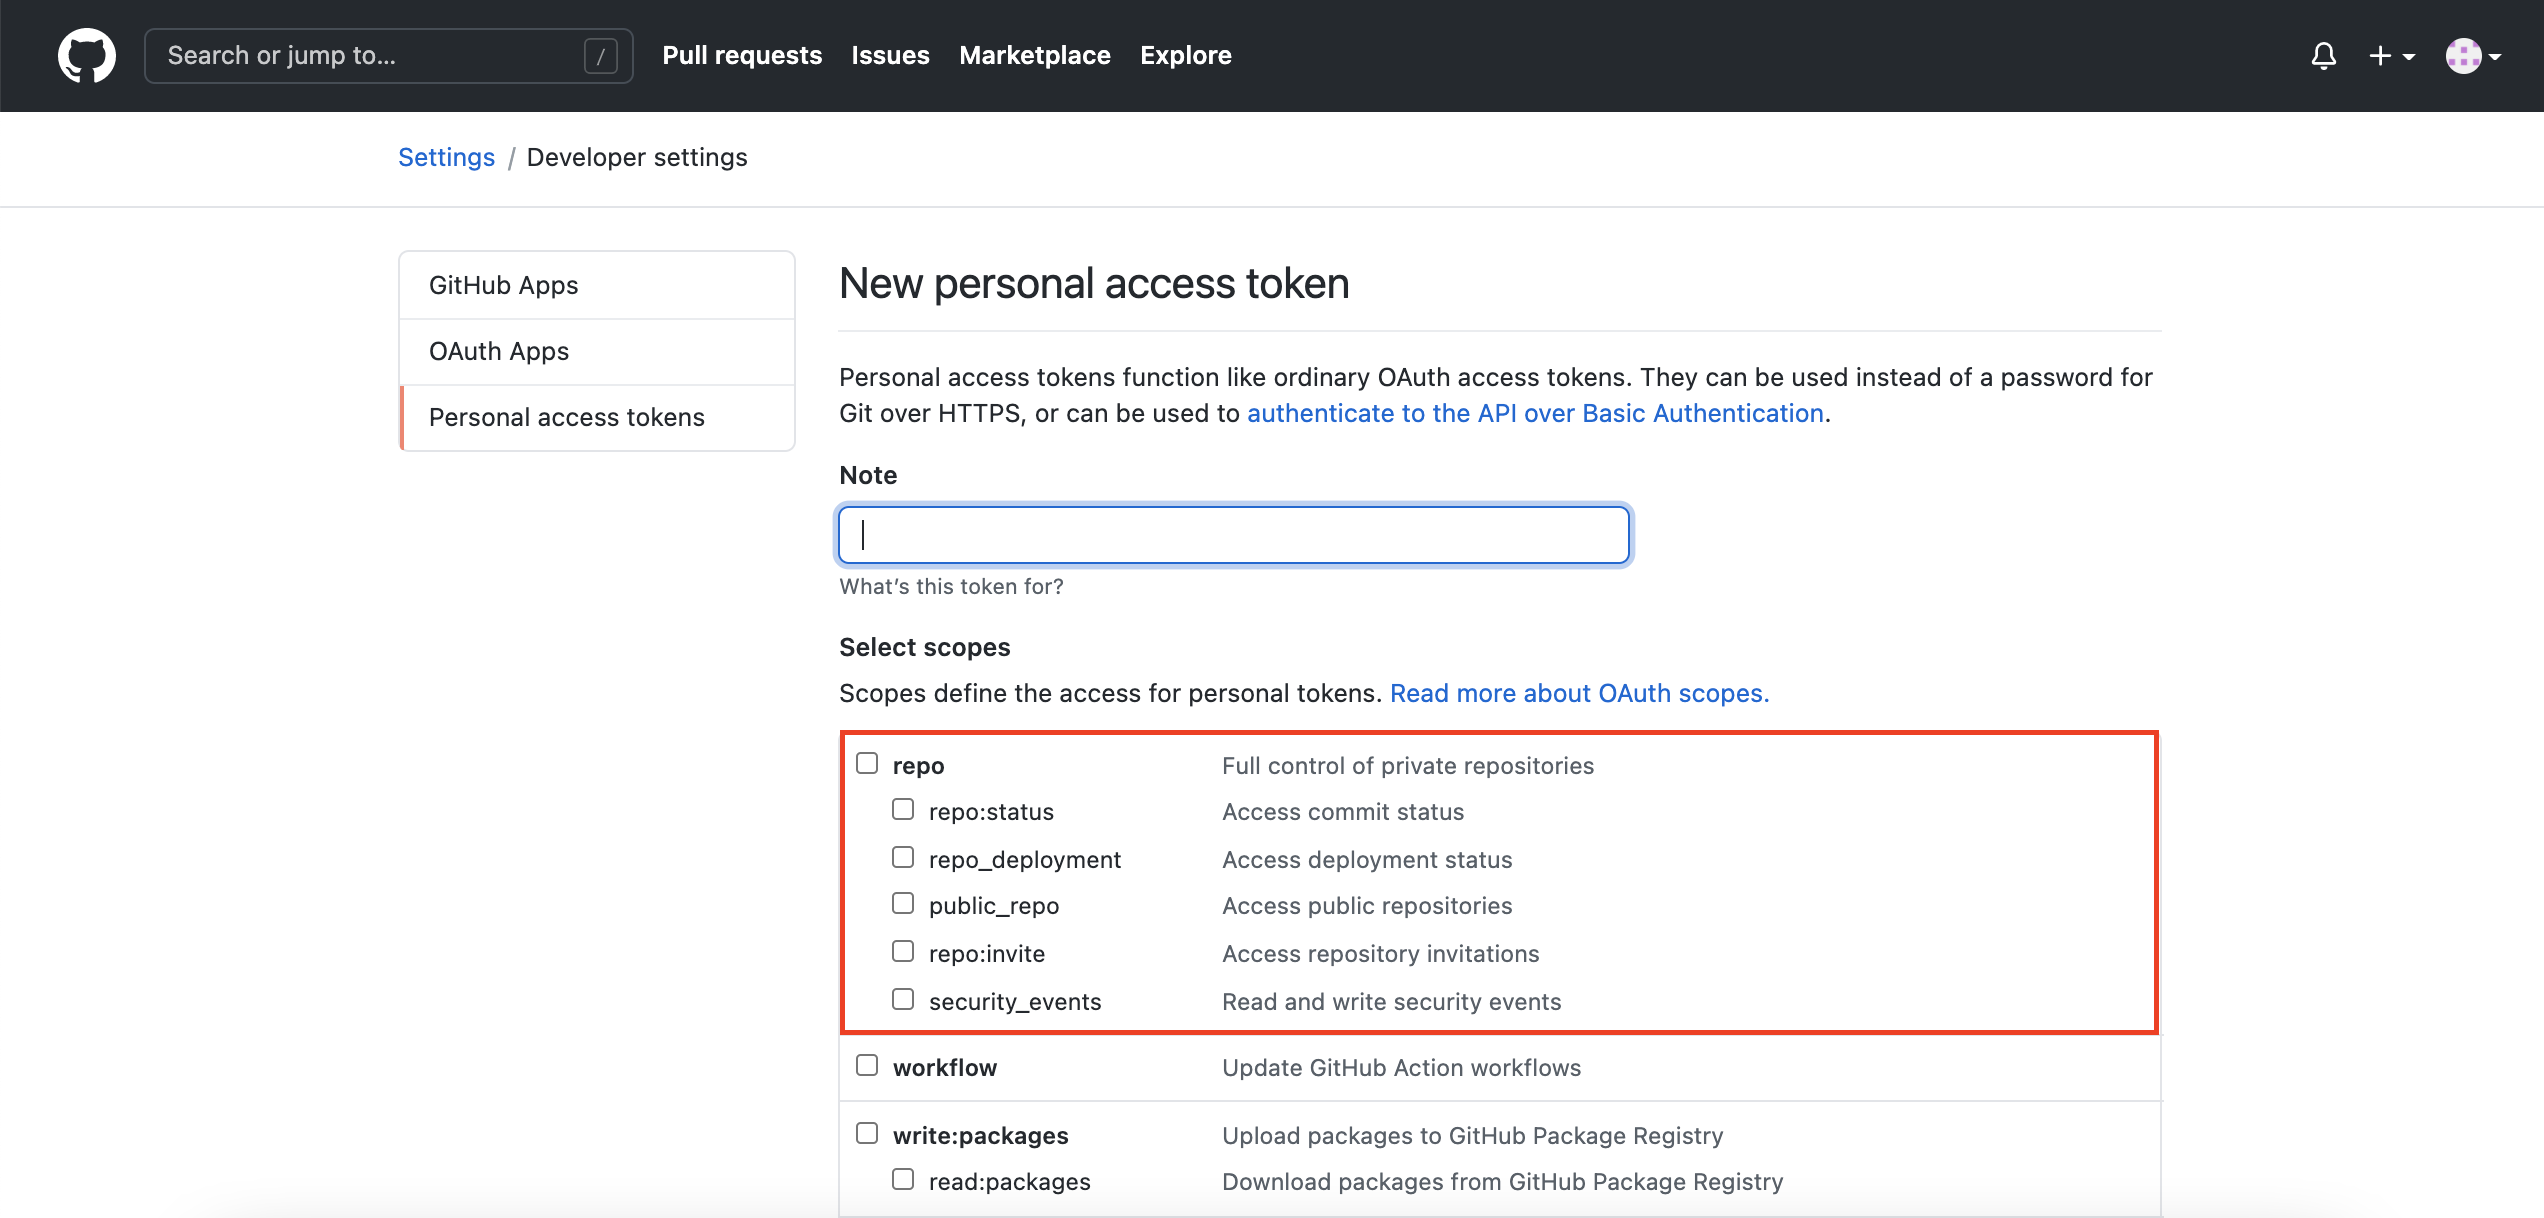
To generate the token, click Generate Token.
Install GitHub-related plugins
To install GitHub-related plugins:
Go to Dashboard > Manage Jenkins > Manage Plugins. On the Installed tab, in the Filter menu, type "Github" and check whether the following plugins are already installed:
- Git Plugin
- Git Client Plugin
- GitHub API Plugin
If any plugin is missing, go to the Available tab, search for the plugins and install them. You can install plugins without restart or select the checkbox to restart Jenkins after installation.
In addition to the preceding plugins, install the following ones as well:
- GitHub Authentication Plugin
- GitHub Integration Plugin
- GitHub Plugin
- GitHub Pull Request Builder
The following image shows all GitHub-related plugins:
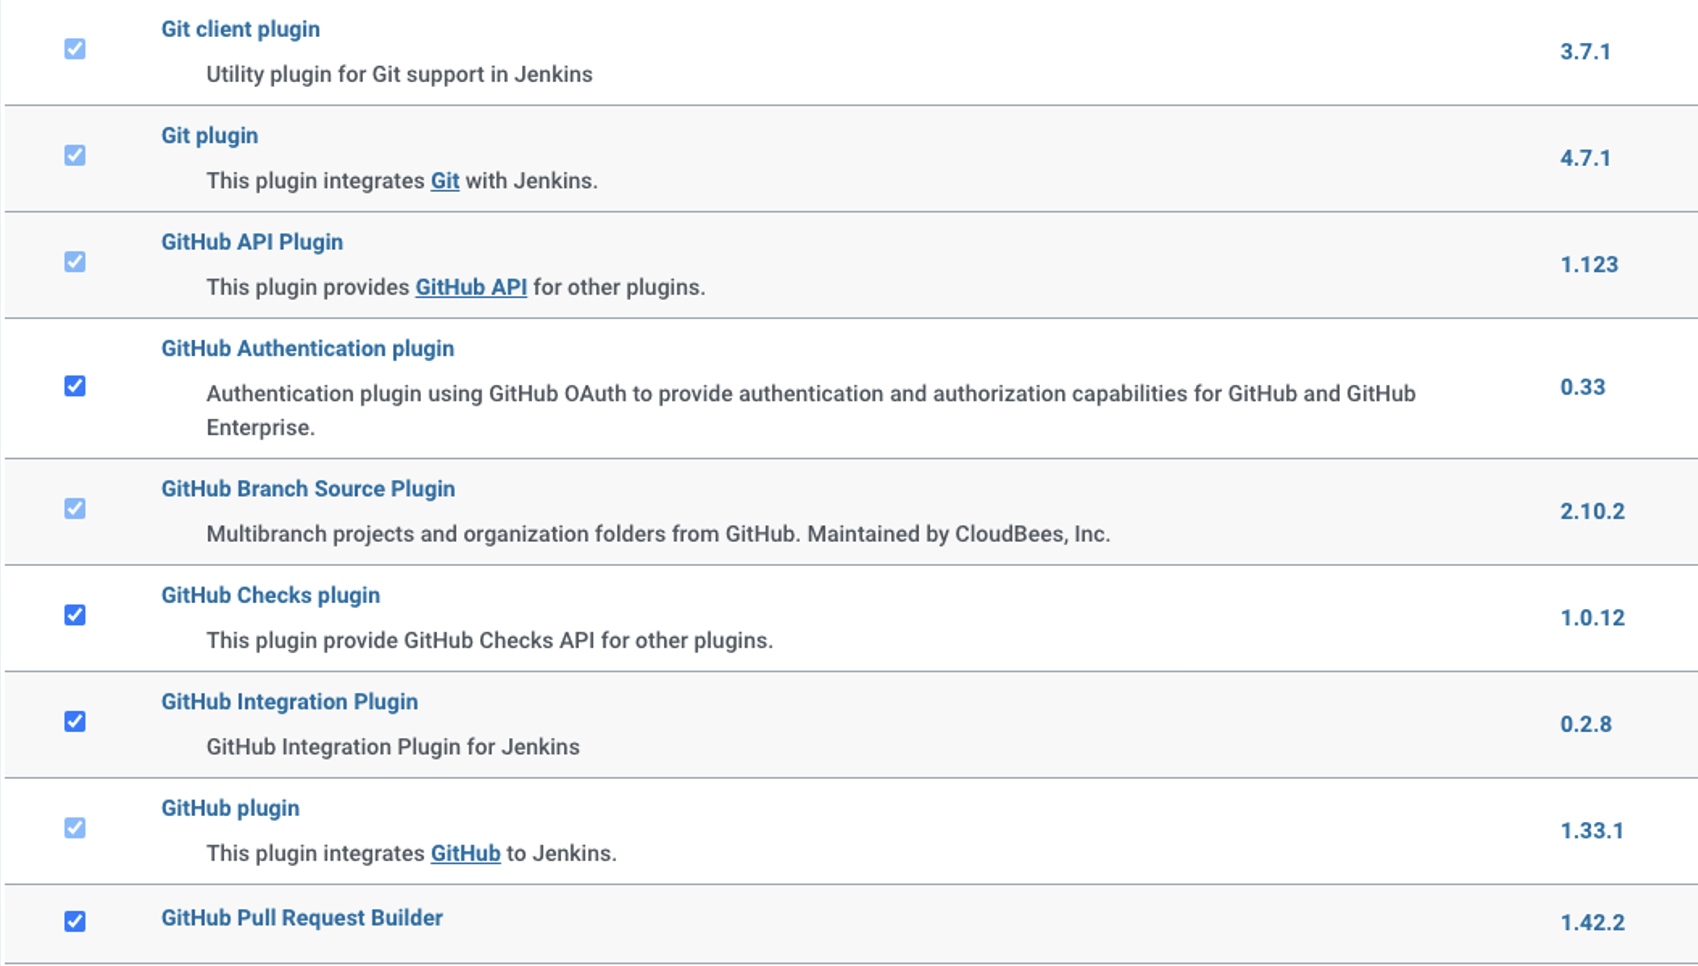
Restart Jenkins after the installation is complete.
Create pipeline
To create a job or pipeline, follow the steps below:
Install the Maven Integration plugin to build a simple pipeline for a Maven project.
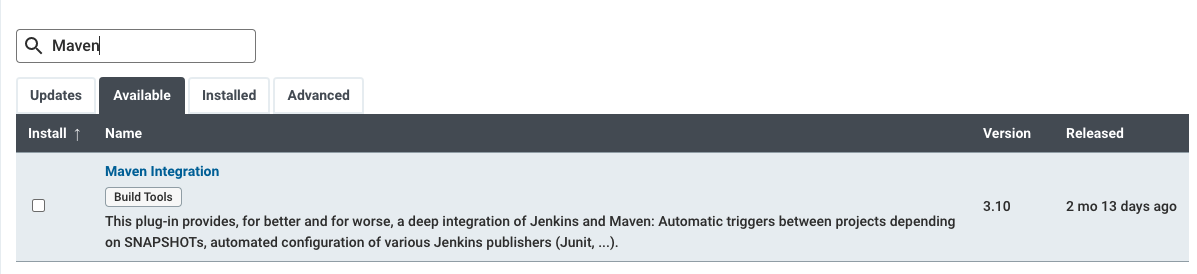
Go to Dashboard > New Item, click Maven project, and enter a name for your project. Click OK.
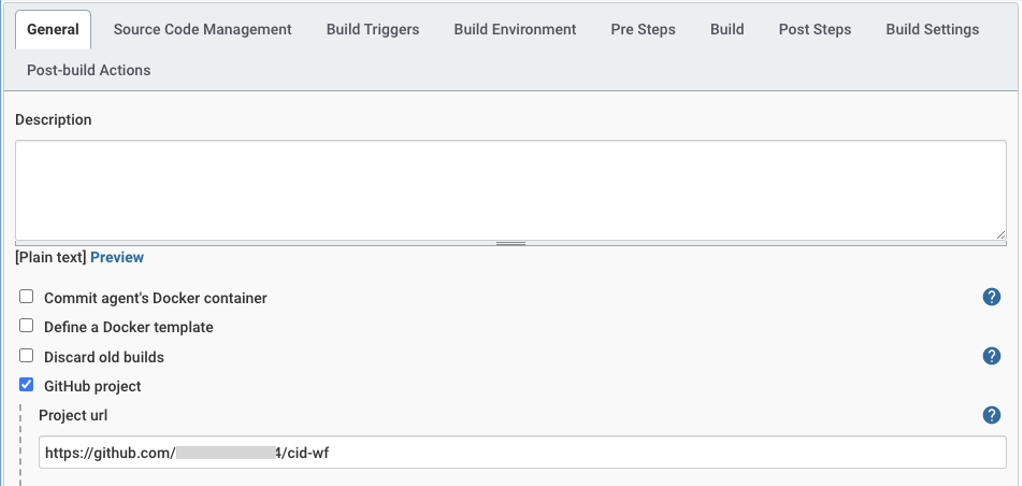
On the General tab, click GitHub project and enter your project URL.
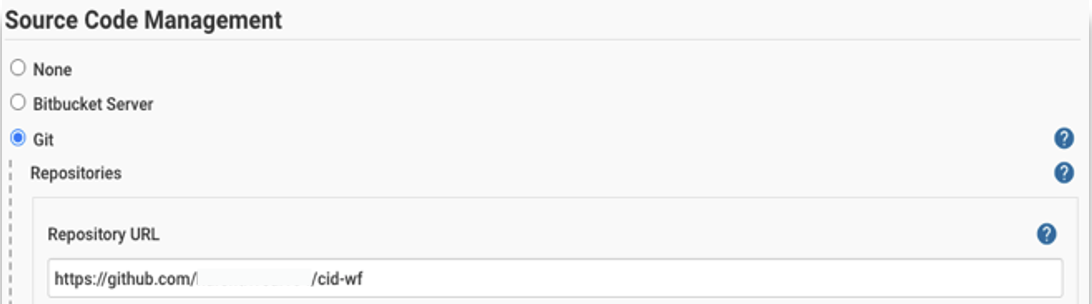
In the Source Code Management section, select Git and enter the repository URL.
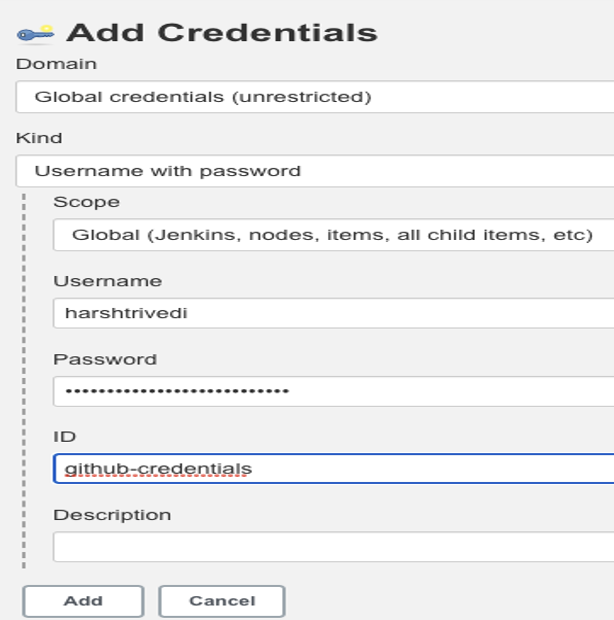
For credentials, click Add and specify the following settings:
- Domain: Global
- Kind: Username with a password. Here, you can enter your GitHub username and password or use the personal access token configured earlier in the Password section. Enter any ID value for Jenkins to identify it in the Global Credentials section.
Specify the name of the branch for triggering the build. In most cases, it is master, but check if it is the correct word.
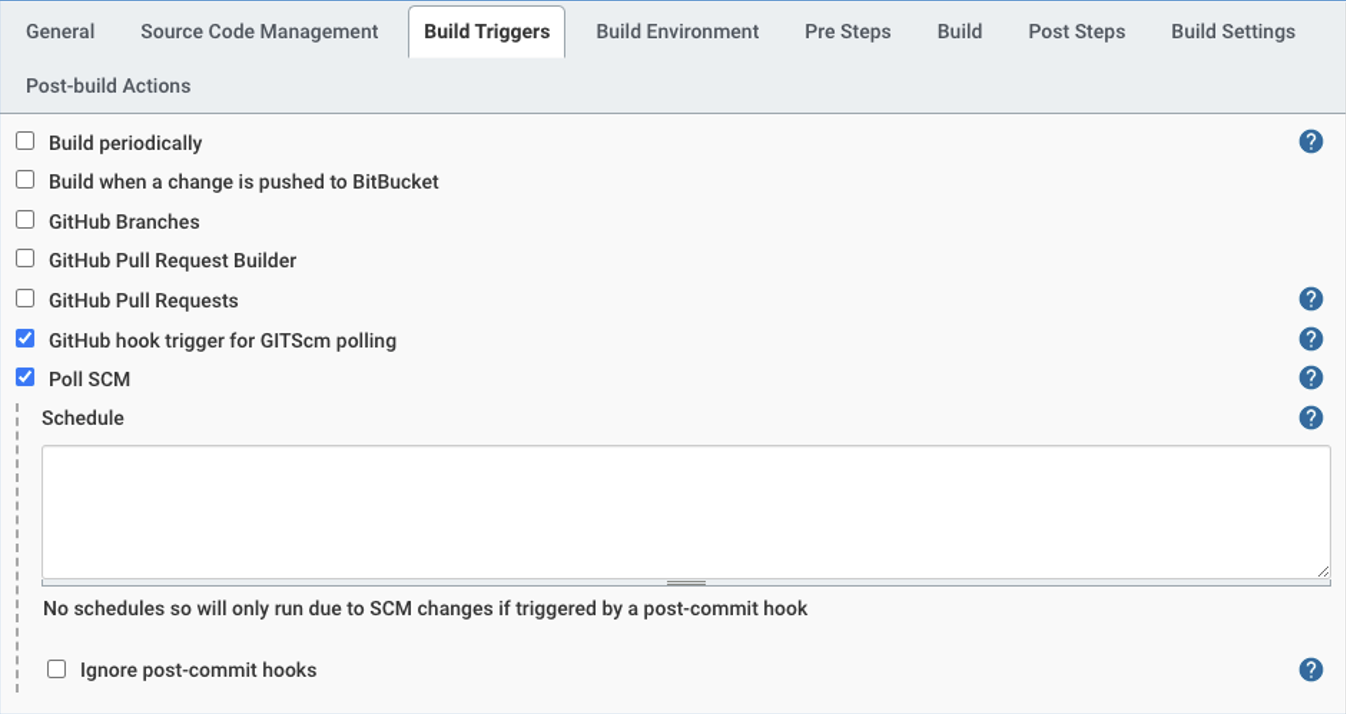
On the Build Triggers tab, select the GitHub hook trigger for GITScm polling and Poll SCM checkboxes and leave Schedule empty.
A build is triggered whenever you push a commit via the Jenkins webhook added to your GitHub repository.
On the Build tab, in Root POM, specify
pom.xmlof your project. In Goals and options, setmvn clean install.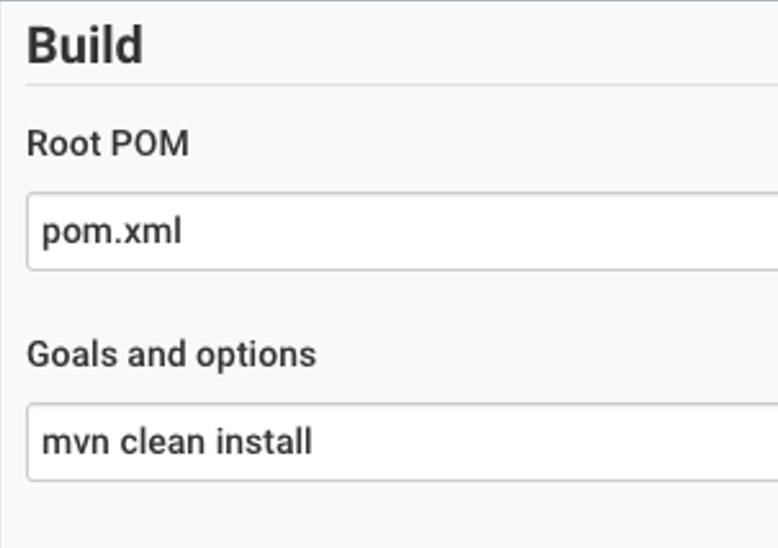
Click Save and Apply.
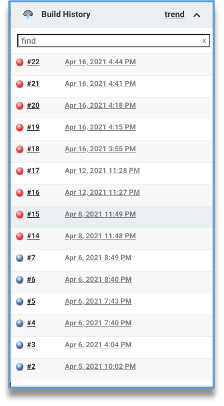
You have now successfully set up a primary pipeline. Push a commit to your repository to see the Maven job triggered in Jenkins and check the console output.
Set commit build status via Jenkins
To set a commit build status in GitHub via Jenkins, follow the steps below:
Go to the Plugins section, switch to the Available tab, search for Post build task, and install the following plugins. Restart Jenkins after installing.
In Jenkins, go to your project, click Configure, go to the Post steps tab, and select the Check Run regardless of Build result checkbox.
In Build Settings, select the Email Notification checkbox. Additionally, select one or more checkboxes for custom notifications related to the build and enter an email address for them.
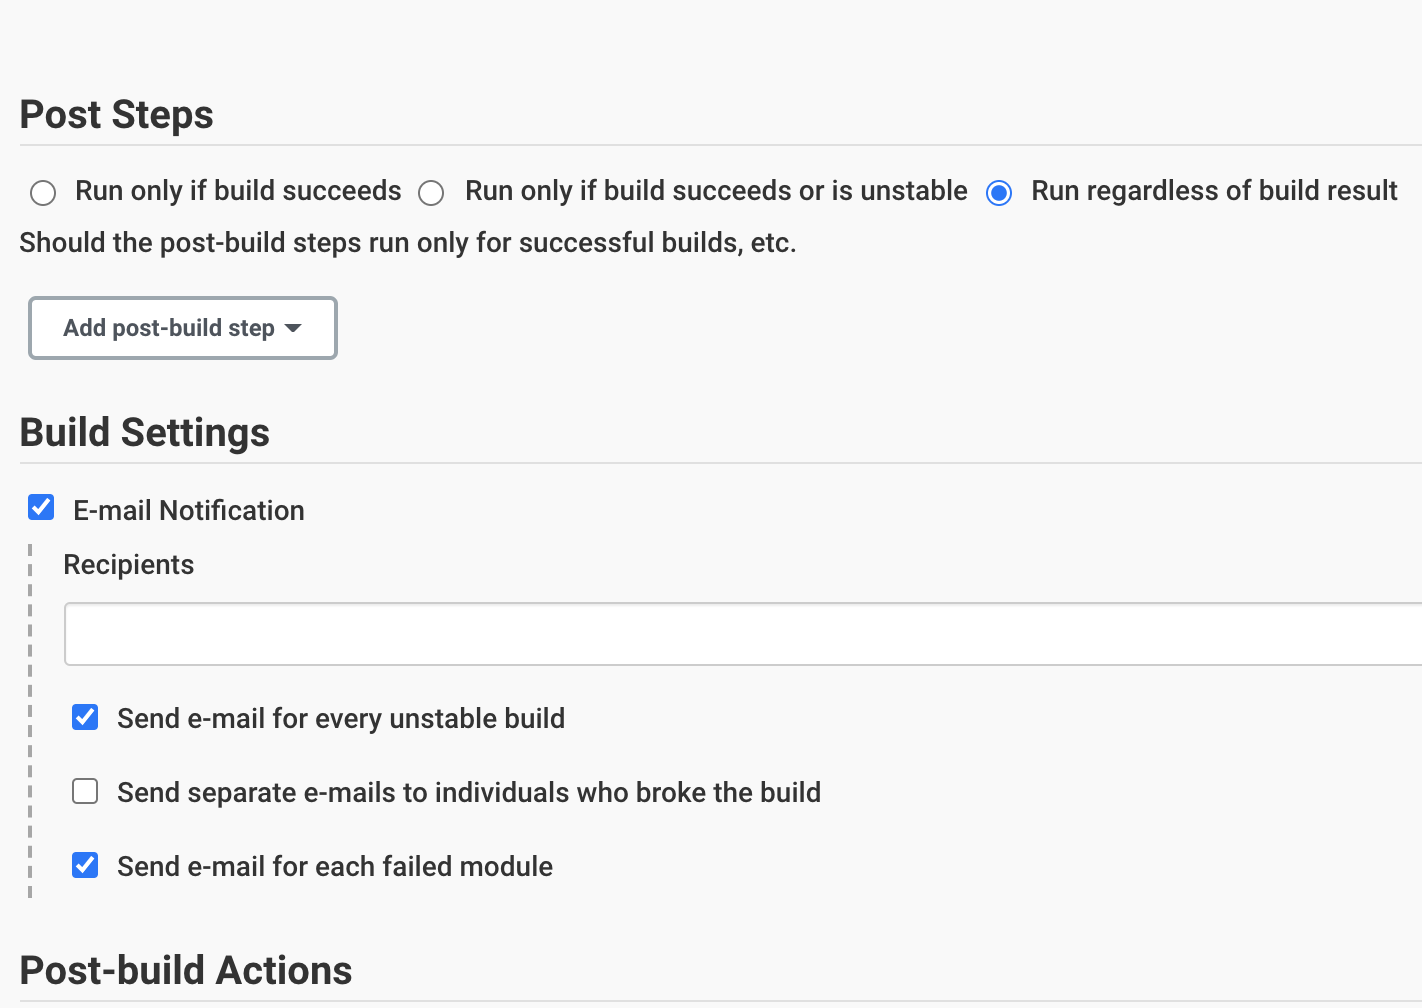
Scroll down and go to Post Build Actions > Add Post Build Task. Add two post-build tasks:
For a successful build:
Build status = success:
Set Log text = “SUCCESS” Operation  = “AND”
In the Script box, insert the following command:
curl -H 'Authorization: token $GITHUB_ACCESS_TOKEN' "https://api.GitHub.com/repos/<GitHubUserName>/<REPO_NAME>/statuses/$GIT_COMMIT?access_token=<YOUR_GITHUB_TOKEN>" \
-H "Content-Type: application/json" \
-X POST \
-d "{\"state\": \"success\",\"context\": \"continuous-integration/jenkins\", \"description\": \"Jenkins\", \"target_url\": \"<YOUR_JENKINS_URL>/job/<JenkinsProjectName>/$BUILD_NUMBER/console\"}"
Here,
<GITHUB_ACCESS_TOKEN>is the access token created in previous steps.<GitHubUserName>/<REPO_NAME>is your username and repository name on GitHub.<YOUR_JENKINS_URL>is the server URL configured in Step 1 (server address).<JenkinsProjectName>is your Jenkins project's name displayed in the dashboard.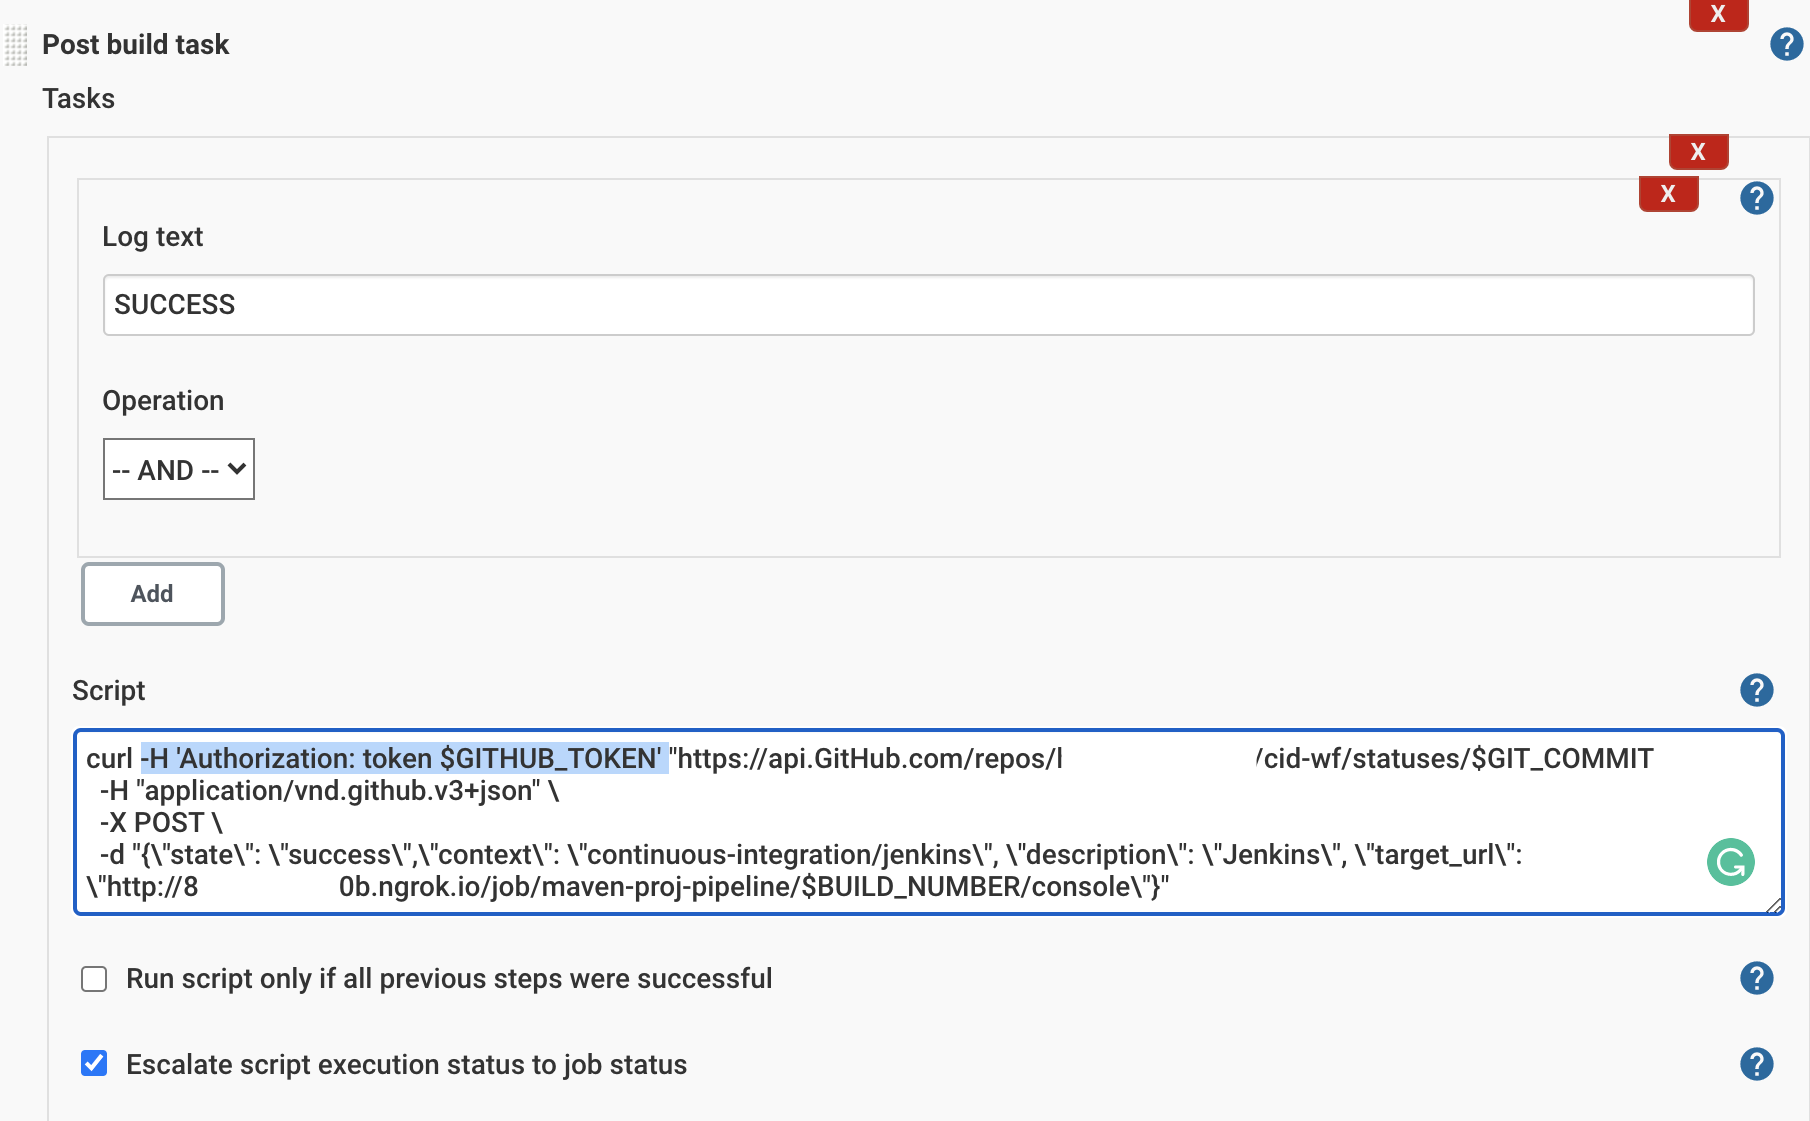
For failed builds:
Build status = failure:
Set Log text = FAILURE Operation  = “AND”
In the Script box, insert the following command:
curl -H 'Authorization: token $GITHUB_ACCESS_TOKEN' "https://api.GitHub.com/repos/<GitHubUserName>/<REPO_NAME>/statuses/$GIT_COMMIT?access_token=<YOUR_GITHUB_TOKEN>" \
-H "Content-Type: application/json" \
-X POST \
-d "{\"state\": \"failure\",\"context\": \"continuous-integration/jenkins\", \"description\": \"Jenkins\", \"target_url\": \"<YOUR_JENKINS_URL>/job/<JenkinsProjectName>/$BUILD_NUMBER/console\"}"
Thus, in GitHub, you can see a green or red checkmark for that particular commit, denoting the build status.

Set email notifications
To set an SMTP connection for build notifications and various activities, follow the steps below:
Install the following plugins for setting up email notifications related to Jenkins build:
- Email Ext Recipients Column Plugin
- Email Extension Plugin
- Email Extension Template Plugin
- Extreme Notification Plugin
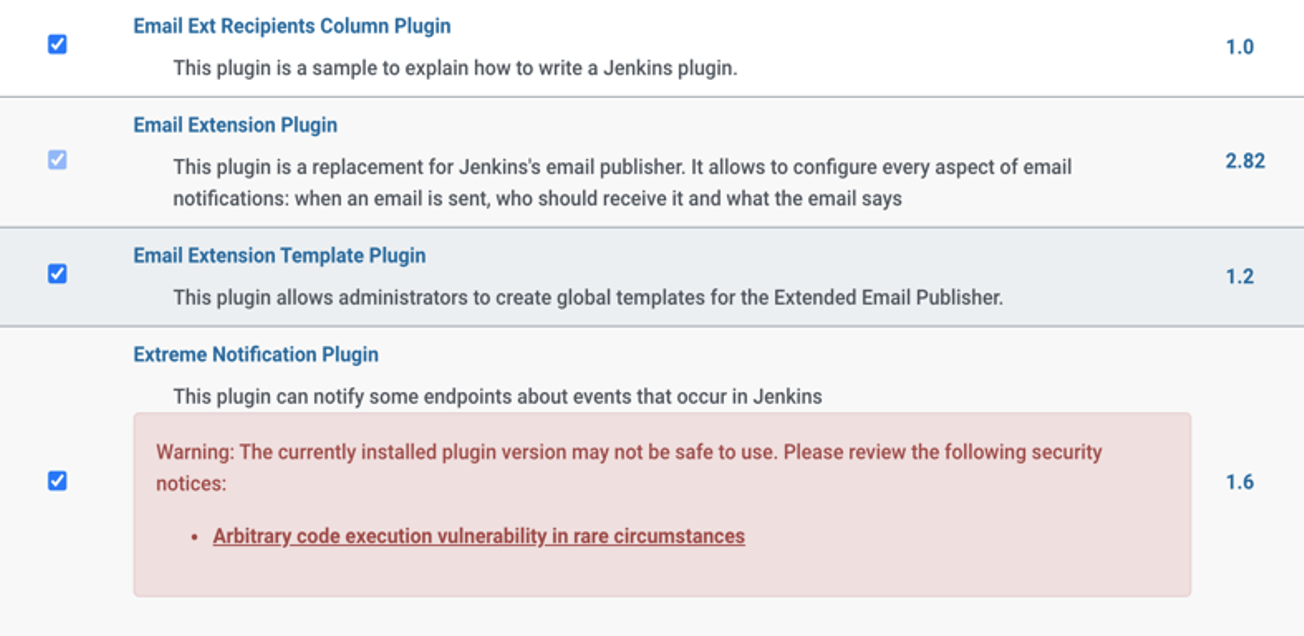
Restart Jenkins after the installation is completed.
Go to Manage Plugins > System Configuration > Configure System > Extended E-mail Notification.
Click the Advanced button. Based on the domain, configure the specific SMTP settings from your email provider. Outlook and Gmail have standard settings. Leave other properties in this section as default.
If you are using 2FA in Gmail, create an application password separately and enter that password here instead of your default password.
Click Use SMTP authentication.
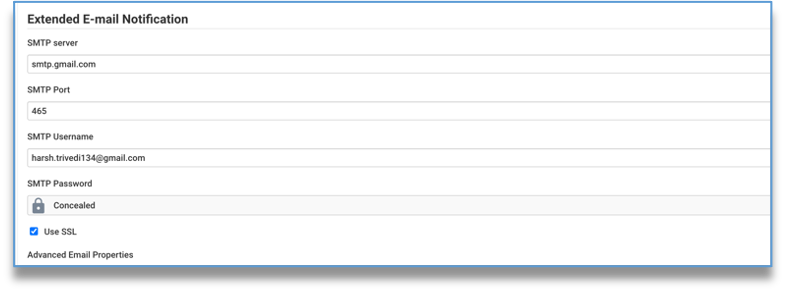
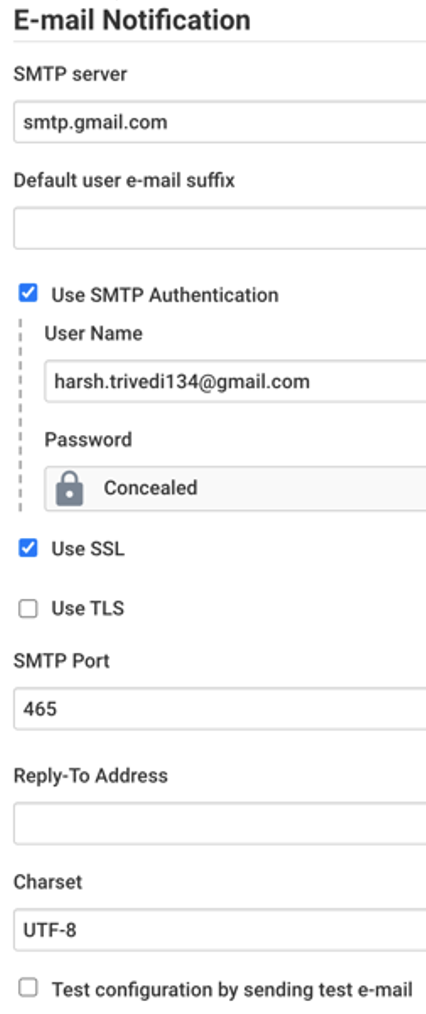
Scroll down to the E-mail Notification section and configure the SMTP server:
- Select the Use SSL checkbox.
- Configure the SMTP port.
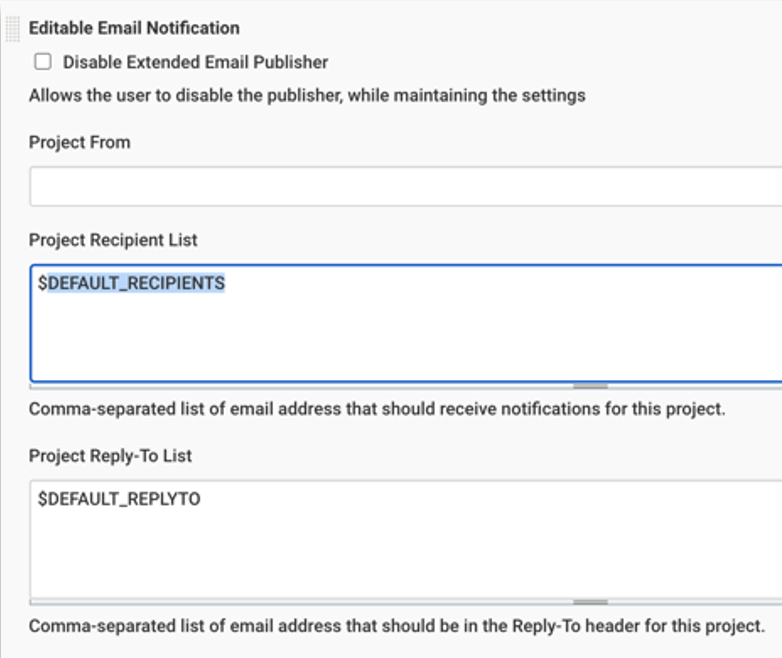
In your Jenkins build job or project configuration, on the Post-build Actions tab, add post-build-task = Editable Email Notification.
The default properties are already selected here. Make sure that Attach Build Log is present and contains the Attach build log value.