
Update from 10.0.3 to 10.1.4
The following guide describes the upgrade process on the existing servers from 10.0.3 to 10.1.4 using a multi-point (legacy) installation approach. This means that each server of initial 10.0.3 environment was provisioned from within the same host, and the 10.0.3 installer is present on each Linux server.
Prerequisites
Before upgrading IA Cloud Enterprise, make sure that your environment meets the following requirements. Failing to do so results in extended time of the upgrade and may cause errors.
The environment meets all the requirements that are listed in the System requirements section:
-
Make sure that all ports that are listed on the page are open.
-
Make sure that the required Bot Master and Bot Unit users are present on the RPA server.
-
Also make sure that your database has a user with the enabled db_owner role.
-
Also, make sure that installation users on the Analytics and RPA server have either WinRM or the RDP access.
-
If your certificates were changed since the last installation, fix ca.crt and server.crt to meet the requirements and update them according to the guide.
Only for the high-availability setup. The settings and ports of the external load balancer are configured, as described in Configure Load Balancer. Note that v. 10.1.4 features new load balancer's port 8202.
You have WorkFusion Intelligent Automation Cloud 10.1.2 up and running.
No Business Processes are running.
You have backups of the following components:
- Directories /opt/workfusion/workfusion and /opt/workfusion/wokspace.
- Vault properties for all components.
- Zookeeper settings that were changed since the last installation.
- Any system files that were changed since the last installation.
The
rootaccess is provided.SSH access to Linux hosts is enabled.
If SSO or LDAP authentication are enabled on the existing environment, verify that they are working before the upgrade of each coresponding component.
Before you start
Before the upgrade, run the health check Business Process to verify that IA Cloud Enterprise is up and running.
In case you have SSO configured for Workspace, before the upgrade, verify whether vault property ws.sso.saml.idp.metadata is empty. If it is empty, copy the value of property ws.sso.saml.idp.file.metadata to the value of ws.sso.saml.idp.metadata. After the upgrade you may revert it back to the empty value.
Overview
The update from 10.0.3 to 10.1.4 includes the following steps:
- Create 11 additional DNS records for the IP addresses of the APP server and prepare hosts.yml file for 10.1.4 installation. You are going to create the new hosts_10.1.4.yml file on the APP server of the current 10.0.3 environment.
- Prepare certificate files (server.crt, server.key, and ca.crt) for 10.1.4 installation. Workfusion IA Cloud 10.1.4 expects server.crt certificate's Subject CommonName, or its Subject Alternative Names to match DNS names of all servers. Detailed certificate requirements will be described further. In this step, we'll put server.crt, server.key, and ca.crt on APP server of current 10.0.3 environment for later usage.
- Prepare the MS SQL server. In 10.1.4 version, one new MS SQL login should be created for the automl-model-management service before proceeding with installation. 10.1.4 installer will not create this MSSQL login because this operation requires Administrative access to the MS SQL server. So, this action should be performed beforehand by MS SQL Server administrator. We'll also create and map respective DB user to the created login and create new "automl_mms" schema in "workfusion" DB.
- Upload and unarchive Workfusion IA Cloud installer v10.1.4 on each Linux server of the environment (INT, BEP-MASTER, BEP-AGENT(s), APP, and OCR servers).
- Prepare config.yml file for running 10.1.4 installer on APP server of current 10.0.3 environment. Some of the settings in previously used config.yml are changed - so, we'll adjust the config for 10.1.1.
- Copy the prepared in previous steps config files and certificates from APP server to all other Linux servers (INT, BEP-MASTER, BEP-AGENT(s), and OCR);
- Backup current Vault settings. In 10.1.4 Vault storage backend was changed from files-based storage to zookeeper. So, any previous data will be lost.
- Stop all currently running 10.0.3 services on all Linux servers;
- Cleanup rudiments on each Linux server;
- Move Minio, Nexus, and Logstash aggregated logs into the new location on INT server;
- Run 10.1.4 installation on each Linux server one by one. Details with exact commands are provided further.
- Restore Kibana and Elasticsearch SSO configuration.
- Upload RPA installer to the RPA windows server. Uninstall the current version of RPA, and install a new version of RPA.
- Upload Analytics Installer to BI windows server. Uninstall the current version of Tableau, and install a new version of Tableau.
important
All domain names in the instruction, for example, rcm-3655-int1.workfusion.com, are for example only. Remember to replace them with your own DNS names.
Create additional DNS records for APP server and prepare hosts.yml
The communication scheme between components in IA Cloud Enterprise
10.1.4 now features the High Availability mode. Most services communicate via internal HAProxy, which is installed to the APP server and routes traffic according to the "Host" headers of the requests. As a result,
the APP server must have 13 DNS records assigned, compared to version 10.0.3, where only two DNS records were used. See parameters app\_hostname and s3_hostname* in hosts.yml file used during
the installation.
Comparing to the previous IA Cloud Enterprise versions, hosts.yml has the following changes:
The new setting has appeared:
topology: default_large # should be used when upgrading from versions below 10.1.4.Most of the variable names are changed to plural:
[int_hostname:        rcm-3655-int1.workfusion.com]       --> [int_hostnames:        rcm-3655-int1.workfusion.com]
[app_hostname:        rcm-3655-ct1.workfusion.com]        --> [app_hostnames:        rcm-3655-ct1.workfusion.com]
[ocr_hostname:        rcm-3655-ocr1.workfusion.com]       --> [ocr_hostnames:        rcm-3655-ocr1.workfusion.com]
[bi_hostname:         rcm-3655-bi1.workfusion.com]        --> [bi_hostnames:         rcm-3655-bi1.workfusion.com]
[bep_master_hostname: rcm-3655-bepmaster1.workfusion.com] --> [bep_master_hostnames: rcm-3655-bepmaster1.workfusion.com]
[bep_agent_hostnames: rcm-3655-bepagent1.workfusion.com,rcm-3655-bepagent2.workfusion.com,rcm-3655-bepagent3.workfusion.com] - the variable name not changed, the value is copied to the new hosts_10.1.4.yml file.
[mssql_hostname:      rcm-3655-mssql1.workfusion.com] - the variable name not changed, the value is copied to the new hosts_10.1.4.yml file.
[rpa_hostnames:       rcm-3655-rpa1.workfusion.com]   - the variable name not changed, the value is copied to the new hosts_10.1.4.yml file.
s3_hostname setting is renamed to minio_lb_hostname. The value is copied to the new hosts_10.1.4.yml file:
[s3_hostname: rcm-3655-ct1-s3.workfusion.com] --> [minio_lb_hostname: rcm-3655-ct1-s3.workfusion.com]Additional DNS names are added. These settings are required for the IP address of the APP server's network interface:
11 DNS names which you need to create now
vault_lb_hostname:       rcm-3655-vault-lb1.workfusion.com
nexus_lb_hostname:       rcm-3655-nexus-lb1.workfusion.com
rabbitmq_lb_hostname:    rcm-3655-rabbitmq-lb1.workfusion.com
mesos_lb_hostname:       rcm-3655-mesos-lb1.workfusion.com
marathon_lb_hostname:    rcm-3655-marathon-lb1.workfusion.com
workspace_lb_hostname:   rcm-3655-workspace-lb1.workfusion.com
workfusion_lb_hostname:  rcm-3655-workfusion-lb1.workfusion.com
bot_manager_lb_hostname: rcm-3655-bot-manager-lb1.workfusion.com
kibana_lb_hostname:      rcm-3655-kibana-lb1.workfusion.com
ocr_lb_hostname:         rcm-3655-ocr-lb1.workfusion.com
bi_lb_hostname:          rcm-3655-bi-lb1.workfusion.com
Though you may create any different 11 DNS records, we recommend making them informative to reflect the services they are intended for. This might be helpful, when there is a need to troubleshoot some issues, it's easier to read logs and understand the requests.
For example, DNS name of vault endpoint is
vault_lb_hostname:vault_lb_hostname: any-prefix-you-wish-vault.workfusion.com -- good choice vault_lb_hostname: foo-bar.workfusion.com -- bad choice
To prepare hosts.yml for the update:
Create the required DNS records for the APP server in your DNS provider.
Log in via SSH to the APP server of the 10.0.3 environment and open the hosts.yml file:
$ cat /opt/workfusion/wf_installer/hosts.ymlPay attention to the following part of the file:
The main settings from old hosts.yml
int_hostname:        rcm-3655-int1.workfusion.com
app_hostname:        rcm-3655-ct1.workfusion.com
s3_hostname:         rcm-3655-ct1-s3.workfusion.com
ocr_hostname:        rcm-3655-ocr1.workfusion.com
ocrwin_hostname:
bi_hostname:         rcm-3655-bi1.workfusion.com
mssql_hostname:      rcm-3655-mssql1.workfusion.com
bep_master_hostname: rcm-3655-bepmaster1.workfusion.com
bep_agent_hostnames: rcm-3655-bepagent1.workfusion.com,rcm-3655-bepagent2.workfusion.com,rcm-3655-bepagent3.workfusion.com
rpa_hostnames:       rcm-3655-rpa1.workfusion.com
Other lines can be ignored.
On the APP server, create the hosts_10.1.4.yml file:
$ vi /opt/workfusion/wf_installer/hosts_10.1.4.ymlCopy the following lines to hosts_10.1.4.yml:
Lines with comments are also important, they must be present in the file
# At least one space should be present between each 'key: value'

topology: default_large
# topology affects memory allocation for product components.
# available options for topology: 'default', 'default_large', 'default_small'
# 'default'       - stancard memory allocation (suitable for heavy workloads). Should be use on clean installations.
# 'default_large' - legacy memory allocation (for product versions below 10.1.4). Should be used only during upgrade to 10.1.4 and higher.
# 'default_small' - small memory allocation. Should be used only for POC environments. Doesn't support HA mode, limited performance.

# Provide DNS names of Workfusion SPA servers
mssql_hostname:        rcm-3655-mssql1.workfusion.com
int_hostnames:         rcm-3655-int1.workfusion.com
app_hostnames:         rcm-3655-ct1.workfusion.com
ocr_hostnames:         rcm-3655-ocr1.workfusion.com
ocrwin_hostnames:
bi_hostnames:          rcm-3655-bi1.workfusion.com
bep_master_hostnames:  rcm-3655-bepmaster1.workfusion.com
bep_agent_hostnames:   rcm-3655-bepagent1.workfusion.com,rcm-3655-bepagent2.workfusion.com,rcm-3655-bepagent3.workfusion.com
rpa_hostnames:         rcm-3655-rpa1.workfusion.com

# IMPORTANT: Read carefully!!!
# IMPORTANT: ALL below variables MUST be set for both HA and non-HA installations
# For HA installation all below DNS names must be assigned to IP address of external (client-provided) load balancer
# For non-HA installation all below DNS names must be assigned to IP address of APP server.
# ALL below DNS names MUST be DIFFERENT (must differ from each other and must differ from DNS names provided above for servers)
vault_lb_hostname:       rcm-3655-vault-lb1.workfusion.com
minio_lb_hostname:       rcm-3655-ct1-s3.workfusion.com
nexus_lb_hostname:       rcm-3655-nexus-lb1.workfusion.com
rabbitmq_lb_hostname:    rcm-3655-rabbitmq-lb1.workfusion.com
mesos_lb_hostname:       rcm-3655-mesos-lb1.workfusion.com
marathon_lb_hostname:    rcm-3655-marathon-lb1.workfusion.com
workspace_lb_hostname:   rcm-3655-workspace-lb1.workfusion.com
workfusion_lb_hostname:  rcm-3655-workfusion-lb1.workfusion.com
bot_manager_lb_hostname: rcm-3655-bot-manager-lb1.workfusion.com
kibana_lb_hostname:      rcm-3655-kibana-lb1.workfusion.com
ocr_lb_hostname:         rcm-3655-ocr-lb1.workfusion.com
bi_lb_hostname:          rcm-3655-bi-lb1.workfusion.com

# The variables below are only for internal usage, they should not be edited by end user.
lb_hostname:
You must fill in this file now, copy it later into the 10.1.4 installer directory, and rename to hosts.yml after you download and extract the 10.1.4 installer to the APP server.
After the DNS records are created, validate whether they resolve to the same single IP address. For that, on one of the servers (for example, on the APP server, as you currently have opened SSH session), run the following commands:
$ getent ahostsv4 rcm-3655-ct1.workfusion.com | head -1 | awk '{print $1}'             # Initial DNS name for APP server which already exists (app_hostnames)
10.100.18.177

$ getent ahostsv4 rcm-3655-ct1-s3.workfusion.com | head -1 | awk '{print $1}'          # Initial DNS name for APP server which already exists (minio_lb_hostname)
10.100.18.177

$ getent ahostsv4 rcm-3655-vault-lb1.workfusion.com | head -1 | awk '{print $1}'       # Newly created DNS name for APP server (vault_lb_hostname)
10.100.18.177

$ getent ahostsv4 rcm-3655-nexus-lb1.workfusion.com | head -1 | awk '{print $1}'       # Newly created DNS name for APP server (nexus_lb_hostname)
10.100.18.177

$ getent ahostsv4 rcm-3655-rabbitmq-lb1.workfusion.com | head -1 | awk '{print $1}'    # Newly created DNS name for APP server (rabbitmq_lb_hostname)
10.100.18.177

$ getent ahostsv4 rcm-3655-mesos-lb1.workfusion.com | head -1 | awk '{print $1}'       # Newly created DNS name for APP server (mesos_lb_hostname)
10.100.18.177

$ getent ahostsv4 rcm-3655-marathon-lb1.workfusion.com | head -1 | awk '{print $1}'    # Newly created DNS name for APP server (marathon_lb_hostname)
10.100.18.177

$ getent ahostsv4 rcm-3655-workspace-lb1.workfusion.com | head -1 | awk '{print $1}'   # Newly created DNS name for APP server (workspace_lb_hostname)
10.100.18.177

$ getent ahostsv4 rcm-3655-workfusion-lb1.workfusion.com | head -1 | awk '{print $1}'  # Newly created DNS name for APP server (workfusion_lb_hostname)
10.100.18.177

$ getent ahostsv4 rcm-3655-bot-manager-lb1.workfusion.com | head -1 | awk '{print $1}' # Newly created DNS name for APP server (bot_manager_lb_hostname)
10.100.18.177

$ getent ahostsv4 rrcm-3655-kibana-lb1.workfusion.com | head -1 | awk '{print $1}'     # Newly created DNS name for APP server (kibana_lb_hostname)
10.100.18.177

$ getent ahostsv4 rcm-3655-ocr-lb1.workfusion.com | head -1 | awk '{print $1}'         # Newly created DNS name for APP server (ocr_lb_hostname)
10.100.18.177

$ getent ahostsv4 rcm-3655-bi-lb1.workfusion.com | head -1 | awk '{print $1}'          # Newly created DNS name for APP server (bi_lb_hostname)
10.100.18.177
Prepare certificates
In version 10.0.3, before the installation, you had to prepare eight server certificates, their respective private keys, and one Root CA certificate. Each certificate had to match the respective hostname. For example, if you log in to the APP server over SSH, you'll find the following certificate files in /opt/workfusion/wf_installer/certificates/ directory:
$ ls -la /opt/workfusion/wf_installer/certificates/
total 192
drwxr-xr-x.  2 wfuser wfuser 4096 Dec 23 20:04 .
drwxr-xr-x. 12 wfuser wfuser 4096 Dec 24 23:54 ..
-rw-rw-r--.  1 wfuser wfuser 4835 Dec 23 20:04 app.crt           # server certificate for APP host which matches app_hostname from old hosts.yml
-rw-rw-r--.  1 wfuser wfuser 1674 Dec 23 20:04 app.key           # private key for app.crt
-rw-rw-r--.  1 wfuser wfuser 4835 Dec 23 20:04 bep_agent.crt     # server certificate for BEP-AGENT host(s) which matches bep_agent_hostnames from old hosts.yml
-rw-rw-r--.  1 wfuser wfuser 1674 Dec 23 20:04 bep_agent.key     # private key for bep_agent.crt
-rw-rw-r--.  1 wfuser wfuser 4835 Dec 23 20:04 bep_master.crt    # server certificate for BEP-MASTER host which matches bep_master_hostname from old hosts.yml
-rw-rw-r--.  1 wfuser wfuser 1674 Dec 23 20:04 bep_master.key    # private key for bep_master.crt
-rw-rw-r--.  1 wfuser wfuser 4835 Dec 23 20:04 bi.crt            # server certificate for BI host which matches bi_hostname from old hosts.yml
-rw-rw-r--.  1 wfuser wfuser 1674 Dec 23 20:04 bi.key            # private key for bi.crt
-rw-r--r--.  1 wfuser wfuser 2984 Dec 23 20:01 ca.crt            # Root CA certificate. All server certificates are signed by this Root CA.
-rw-rw-r--.  1 wfuser wfuser 1424 Dec 23 20:04 elk-ca.crt
-rw-rw-r--.  1 wfuser wfuser 1766 Dec 23 20:04 elk-ca.key
-rw-r--r--.  1 wfuser wfuser 4835 Dec 23 20:01 int.crt           # server certificate for INT host which matches int_hostname from old hosts.yml
-rw-r--r--.  1 wfuser wfuser 1674 Dec 23 20:01 int.key           # private key for int.crt
-rw-rw-r--.  1 wfuser wfuser 1757 Dec 23 20:04 kibana.crt
-rw-rw-r--.  1 wfuser wfuser 3272 Dec 23 20:04 kibana.key
-rw-rw-r--.  1 wfuser wfuser 1761 Dec 23 20:04 logstash.crt
-rw-rw-r--.  1 wfuser wfuser 3268 Dec 23 20:04 logstash.key
-rw-rw-r--.  1 wfuser wfuser 4013 Dec 23 20:04 logstash.p12
-rw-rw-r--.  1 wfuser wfuser 1428 Dec 23 20:04 mtls-ca.crt
-rw-rw-r--.  1 wfuser wfuser 1766 Dec 23 20:04 mtls-ca.key
-rw-rw-r--.  1 wfuser wfuser 1769 Dec 23 20:04 mtls-client.crt
-rw-rw-r--.  1 wfuser wfuser 3272 Dec 23 20:04 mtls-client.key
-rw-rw-r--.  1 wfuser wfuser 4835 Dec 23 20:04 ocr.crt           # server certificate for OCR host which matches ocr_hostnames from old hosts.yml
-rw-rw-r--.  1 wfuser wfuser 1674 Dec 23 20:04 ocr.key           # private key for ocr.crt
-rw-rw-r--.  1 wfuser wfuser 6381 Dec 23 20:03 openssl.cnf
-rw-rw-r--.  1 wfuser wfuser 4835 Dec 23 20:04 rpa.crt           # server certificate for RPA host which matches rpa_hostnames from old hosts.yml
-rw-rw-r--.  1 wfuser wfuser 1674 Dec 23 20:04 rpa.key           # private key for rpa.crt
-rw-rw-r--.  1 wfuser wfuser 4835 Dec 23 20:04 s3.crt            # server certificate for S3 endpoint (over APP host) which matches s3_hostname from old hosts.yml
-rw-rw-r--.  1 wfuser wfuser 1674 Dec 23 20:04 s3.key            # private key for s3.crt
-rw-rw-r--.  1 wfuser wfuser 1298 Dec 23 20:04 vault_admin.crt
-rw-rw-r--.  1 wfuser wfuser 2517 Dec 23 20:04 vault_admin.p12
-rw-rw-r--.  1 wfuser wfuser 1298 Dec 23 20:04 vault_workfusion.crt
-rw-rw-r--.  1 wfuser wfuser 2517 Dec 23 20:04 vault_workfusion.p12
Most of the above files were automatically generated client certificates and were used by the IA Cloud services for authentication among each other. They are not about traffic encryption or server identity validation. These generated certificates will be used for the update to 10.1.4.
The 10.1.4 installation requires only the following files:
- Certificate server.crt. For the requirements for server.crt, see Prepare Certificates.
- Respective server.key private key
- Root CA certificate file ca.crt
The CommonName in the Subject of server.crt or its Subject Alternative Names must match all the following DNS names (or all values in hosts.yml except mssql_hostname, which is optional).
rcm-3655-int1.workfusion.com
rcm-3655-ct1.workfusion.com
rcm-3655-ocr1.workfusion.com
rcm-3655-bi1.workfusion.com
rcm-3655-bepmaster1.workfusion.com
rcm-3655-bepagent1.workfusion.com
rcm-3655-bepagent2.workfusion.com
rcm-3655-bepagent3.workfusion.com
rcm-3655-rpa1.workfusion.com
rcm-3655-vault-lb1.workfusion.com
rcm-3655-ct1-s3.workfusion.com
rcm-3655-nexus-lb1.workfusion.com
rcm-3655-rabbitmq-lb1.workfusion.com
rcm-3655-mesos-lb1.workfusion.com
rcm-3655-marathon-lb1.workfusion.com
rcm-3655-workspace-lb1.workfusion.com
rcm-3655-workfusion-lb1.workfusion.com
rcm-3655-bot-manager-lb1.workfusion.com
rcm-3655-kibana-lb1.workfusion.com
rcm-3655-ocr-lb1.workfusion.com
rcm-3655-bi-lb1.workfusion.com
Thus, your server.crt certificate is valid, if:
- The Subject has CommonName *.workfusion.com".
- The Subject of the certificate any CommonName, and includes all above DNS names, which are listed explicitly in its SANs.
- The certificate is issued to any CommonName and includes *.workfusion.com among the list of its SANs.
If you have deployed 10.0.3 product using the wildcard certificate (for example if all certificates, like, app.crt, int.crt, bep_master.crt, and so on, are the same single wildcard certificate, which is issued to *.workfusion.com and multiplied with different names), you can use the existing server.crt.
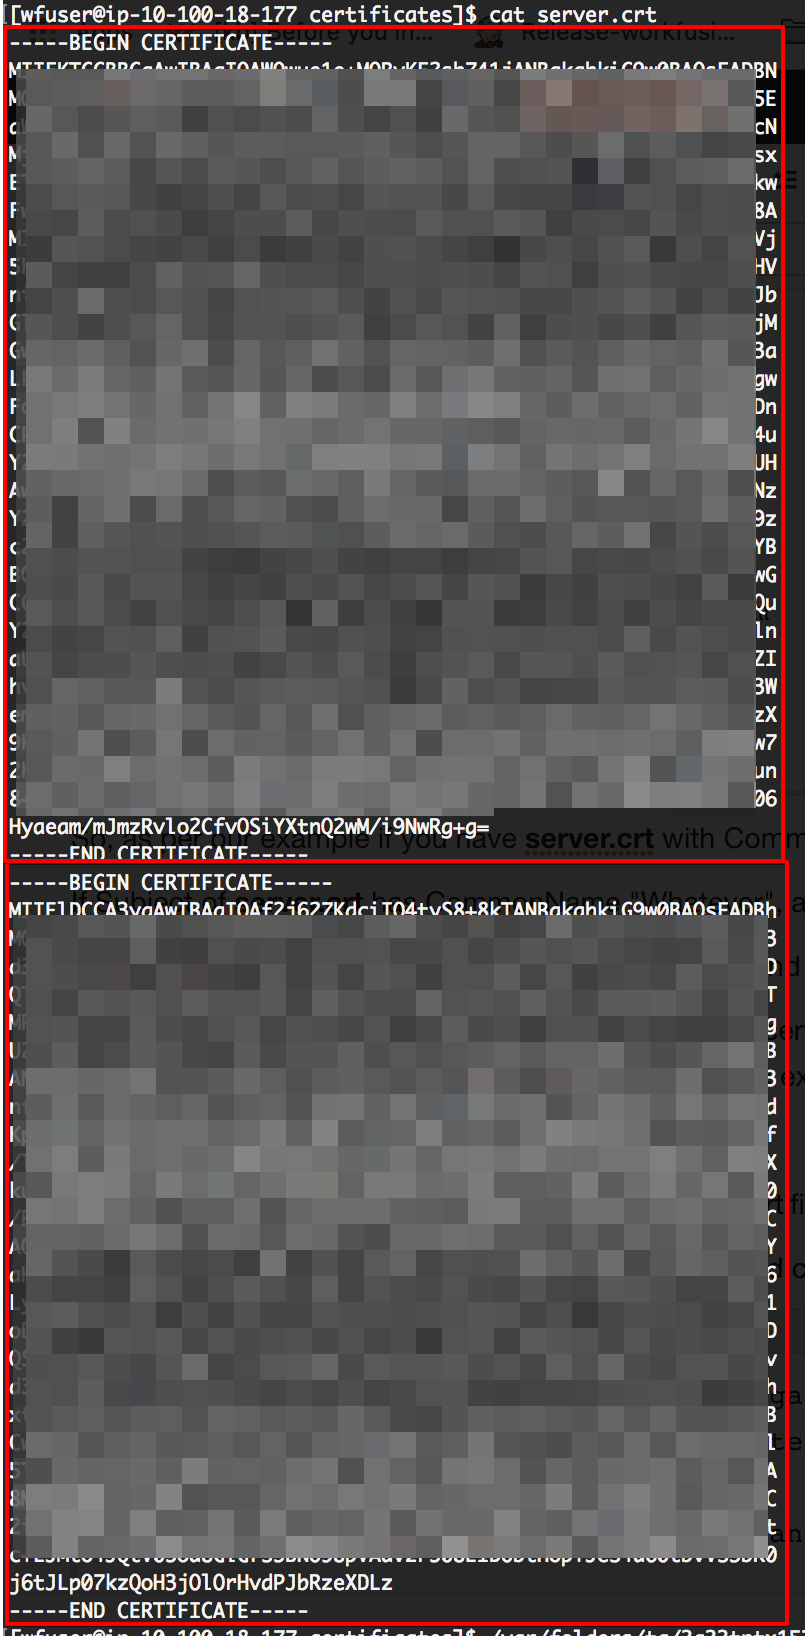
server.crt must include the end certificate (the first part on the image below) and all intermediate certificates if they exist (the second part on the image below):
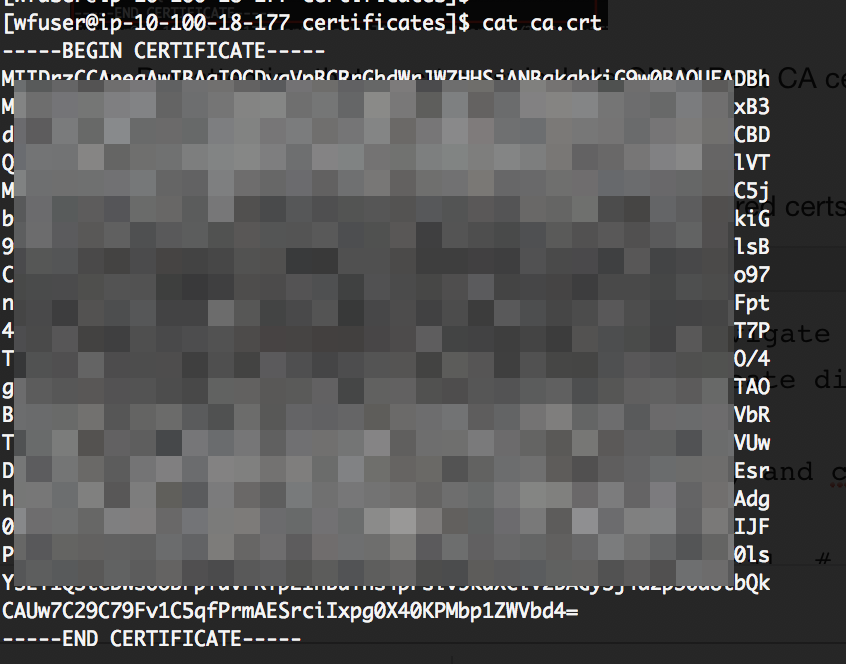
ca.crt must include only the Root CA certificate to avoid incorrect import into cacerts java truststore during 10.1.4 setup:
To prepare the required certificates:
Create a separate directory for certificates:
$ cd /opt/workfusion/wf_installer  # navigate to old installer directory
$ mkdir certificates_10.1.4      # create dir where we'll put certs for 10.1.4 setup
On the APP server, place all required certs to the certificates_10.1.4/ directory by running the following commands one by one. Remember to change the /certificates directory accordingly, if you have named it differently when installing 10.0.2:
# now put your server.crt, server.key, and ca.crt into the certificates_10.1.4/ directory
mkdir certificates_10.1.4/_auth_internal  # create directory for internal client certs (we'll reuse them from certificates/ directory of old insttaller)

# copying certs for ELK authentication (Elasticsearch validates the requests coming from Kibana and Logstash)
cp certificates/elk-ca.crt certificates_10.1.4/_auth_internal/
cp certificates/kibana.crt certificates_10.1.4/_auth_internal/
cp certificates/kibana.key certificates_10.1.4/_auth_internal/
cp certificates/logstash.crt certificates_10.1.4/_auth_internal/
cp certificates/logstash.key certificates_10.1.4/_auth_internal/
cp certificates/logstash.p12 certificates_10.1.4/_auth_internal/

# copying certs for mTLS authentication between product services
cp certificates/mtls-ca.crt certificates_10.1.4/_auth_internal/
cp certificates/mtls-client.crt certificates_10.1.4/_auth_internal/
cp certificates/mtls-client.key certificates_10.1.4/_auth_internal/

# copying certs for authentication in Hashicorp Vault service
cp certificates/vault_admin.crt certificates_10.1.4/_auth_internal/
cp certificates/vault_admin.p12 certificates_10.1.4/_auth_internal/
cp certificates/vault_workfusion.crt certificates_10.1.4/_auth_internal/
cp certificates/vault_workfusion.p12 certificates_10.1.4/_auth_internal/
The new directory must include the following files:
ls -l ./certificates_10.1.4/
drwxrwxr-x. 2 wfuser wfuser 4096 Dec 24 21:35 _auth_internal
-rw-r--r--. 1 wfuser wfuser 2984 Dec 24 21:31 ca.crt
-rw-r--r--. 1 wfuser wfuser 4835 Dec 24 21:31 server.crt
-rw-r--r--. 1 wfuser wfuser 1674 Dec 24 21:31 server.key

ls -l ./certificates_10.1.4/_auth_internal/
-rw-rw-r--. 1 wfuser wfuser 1424 Dec 24 21:35 elk-ca.crt
-rw-rw-r--. 1 wfuser wfuser 1757 Dec 24 21:35 kibana.crt
-rw-rw-r--. 1 wfuser wfuser 3268 Dec 24 21:35 kibana.key
-rw-rw-r--. 1 wfuser wfuser 1761 Dec 24 21:35 logstash.crt
-rw-rw-r--. 1 wfuser wfuser 3272 Dec 24 21:35 logstash.key
-rw-rw-r--. 1 wfuser wfuser 4013 Dec 24 21:35 logstash.p12
-rw-rw-r--. 1 wfuser wfuser 1428 Dec 24 21:35 mtls-ca.crt
-rw-rw-r--. 1 wfuser wfuser 1769 Dec 24 21:35 mtls-client.crt
-rw-rw-r--. 1 wfuser wfuser 3272 Dec 24 21:35 mtls-client.key
-rw-rw-r--. 1 wfuser wfuser 1298 Dec 24 21:35 vault_admin.crt
-rw-rw-r--. 1 wfuser wfuser 2517 Dec 24 21:35 vault_admin.p12
-rw-rw-r--. 1 wfuser wfuser 1298 Dec 24 21:35 vault_workfusion.crt
-rw-rw-r--. 1 wfuser wfuser 2517 Dec 24 21:35 vault_workfusion.p12
Prepare MS SQL Server
The preparation of the MS SQL server for the update requires the creation of an additional MS SQL login for the new automl-model-management service. You must also map the created MS SQL login to the respective DB user, and create additional "automl_mms" schema in the "workfusion" database.
Create login
To create a MS SQL login:
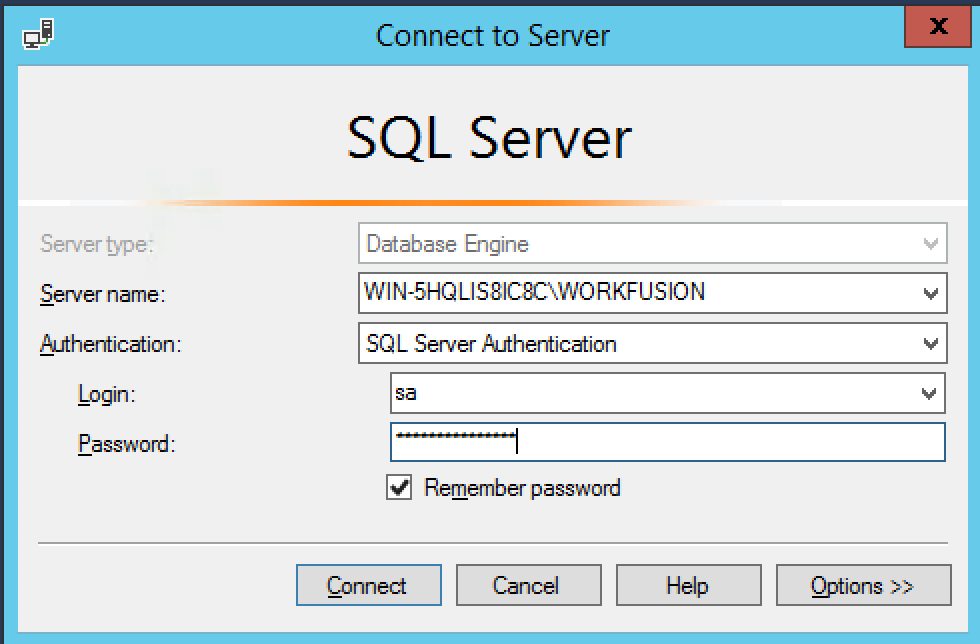
Log in to Microsoft SQL Server Management Studio as a user with permissions to create MS SQL Server Logins (for example, a user with the sysadmin Server Role):
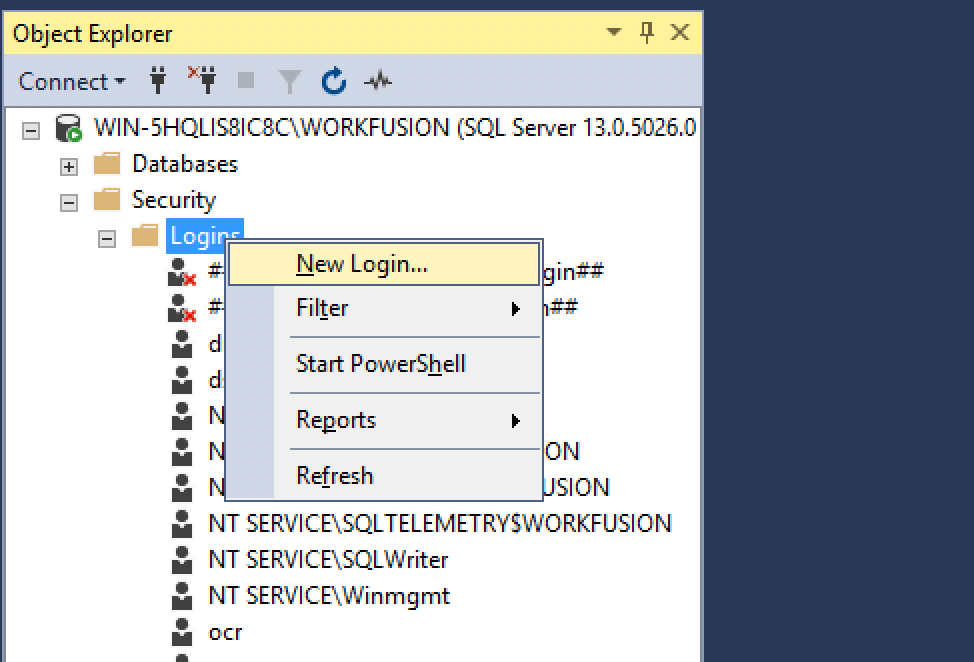
Go to Security → Logins, right-click Logins, and then click New Login.
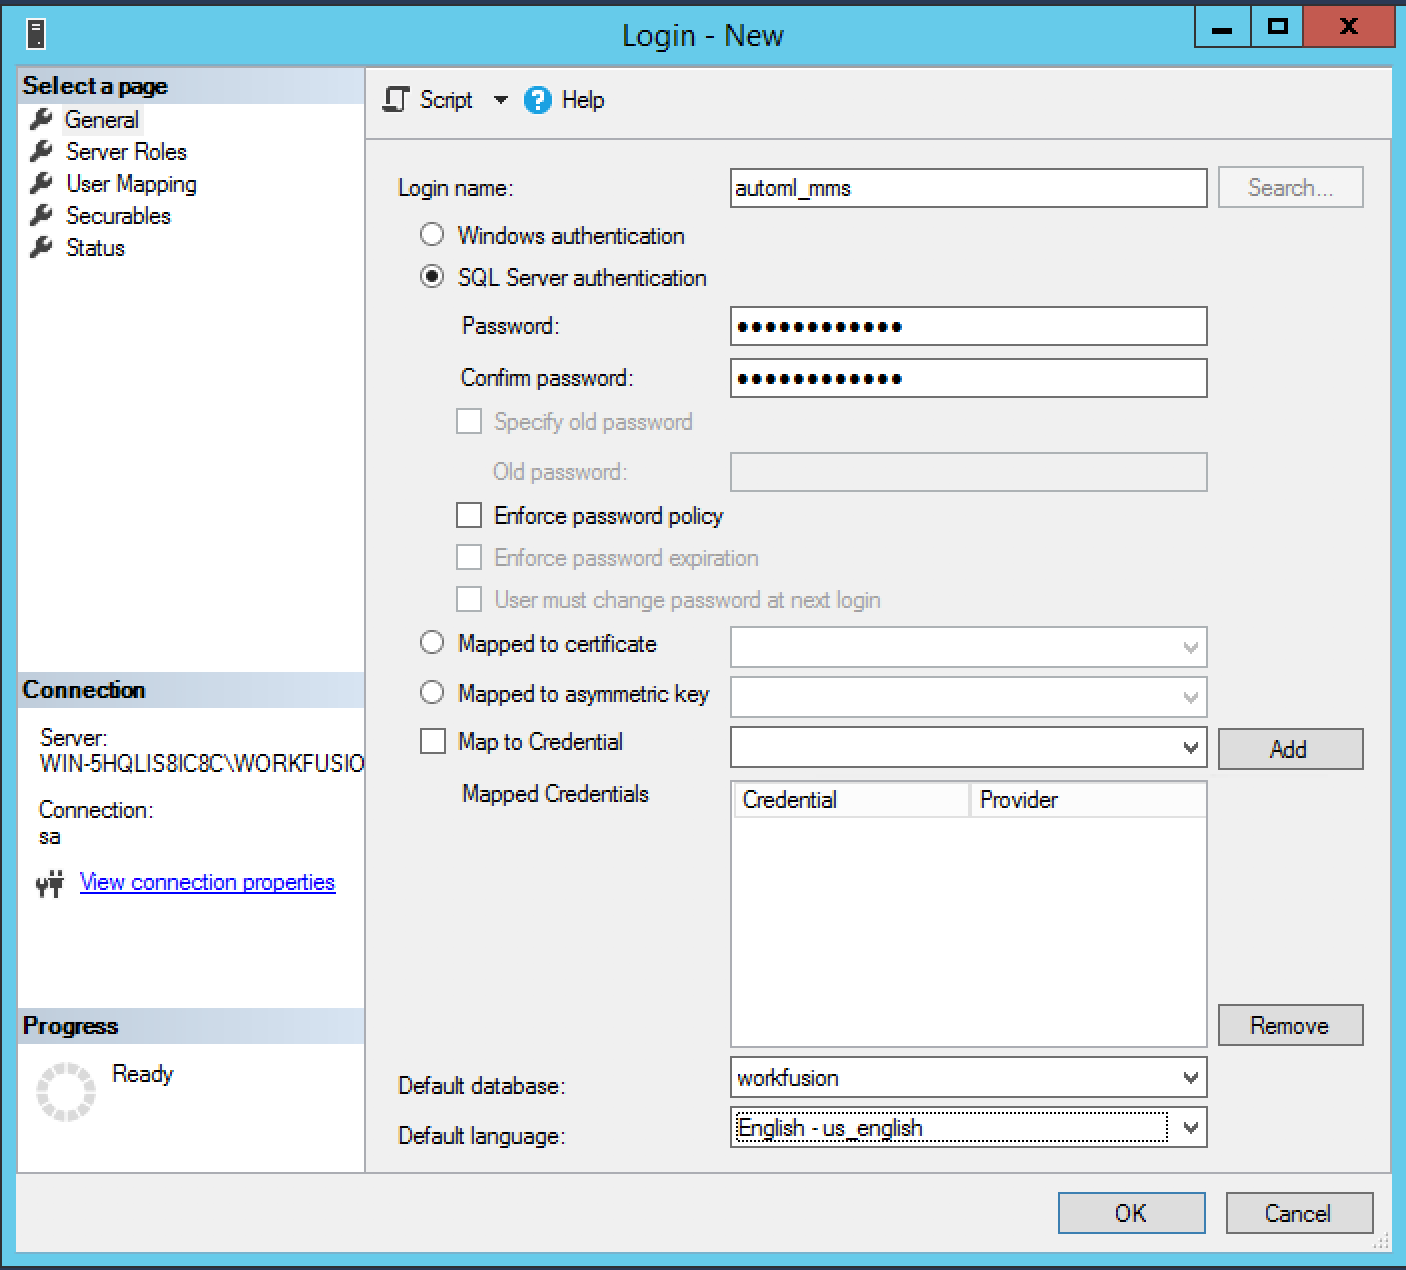
In the General section, do the following:
Enter the login name "automl_mms" (you may choose a different login name. Remember it, as you will later specify it in the config.yml file.
Select SQL Server authentication.
Enter and confirm the password. Remember it, as you will later specify it in the config.yml file.
Make sure that the "User must change password at next login" checkbox is cleared.
In the Default database field, enter "workfusion". If you have installed v.10.0.3 with a different database name, enter the corresponding name.
In the Default language field, select English - us_english.
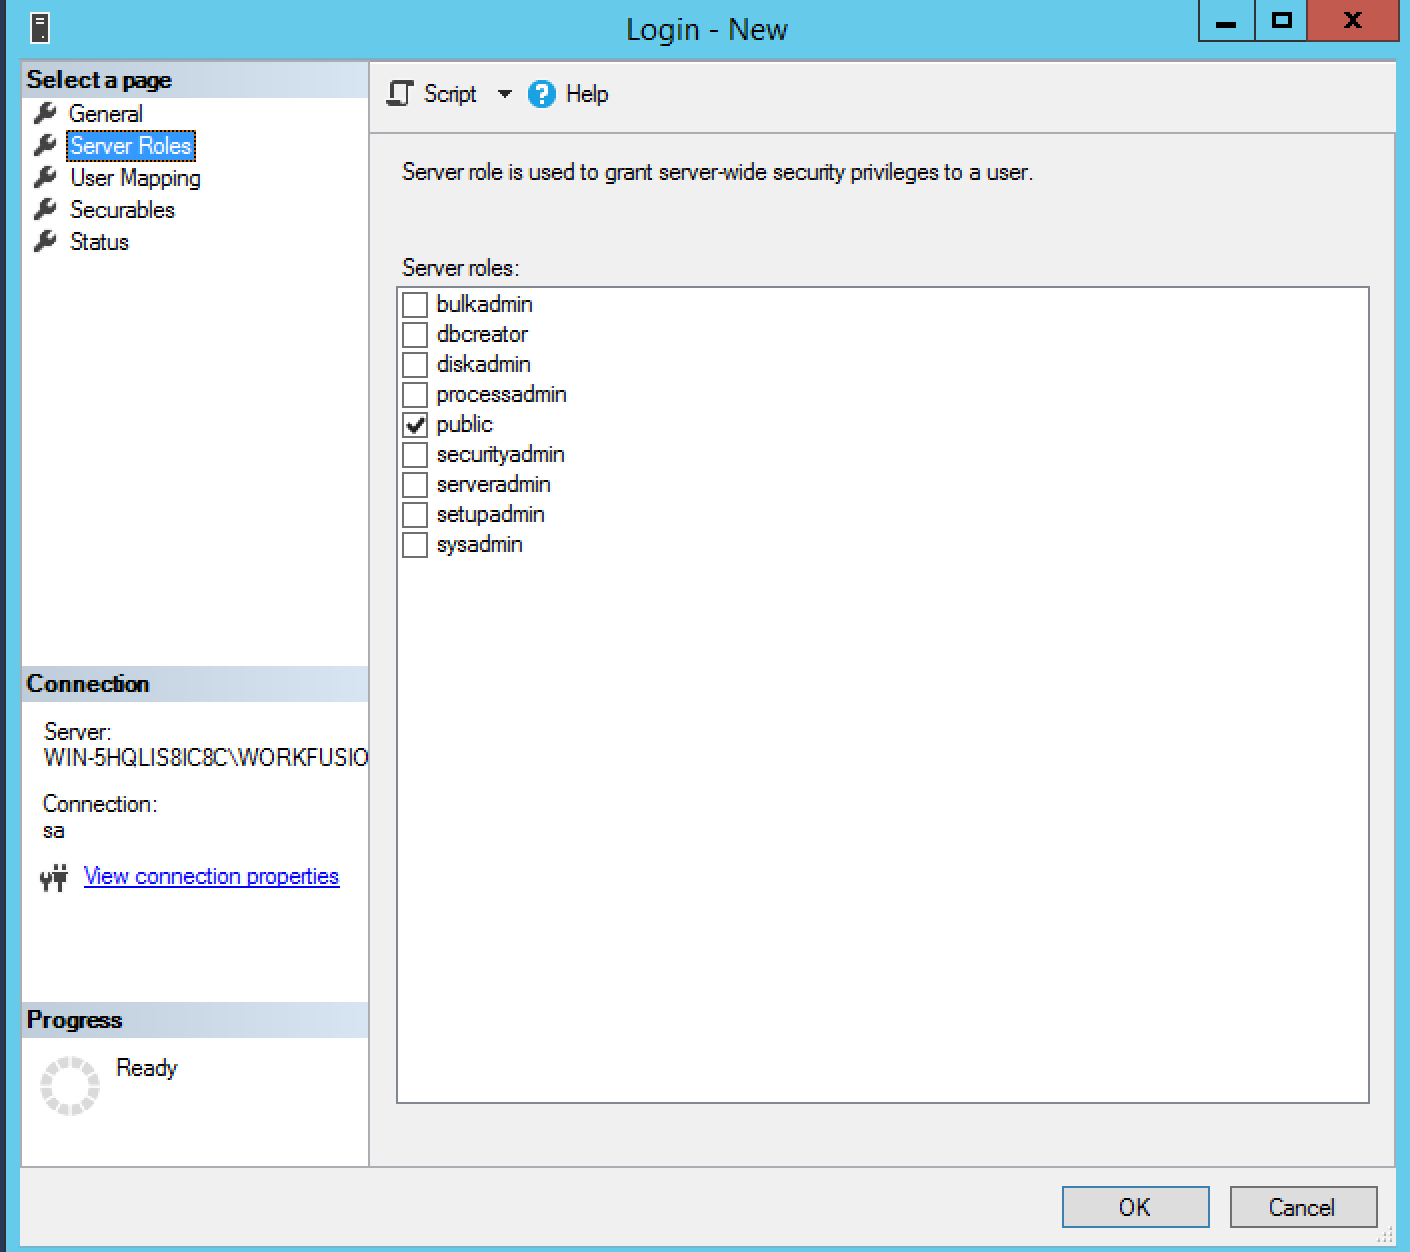
In the Server Roles section, leave the default values unchanged:
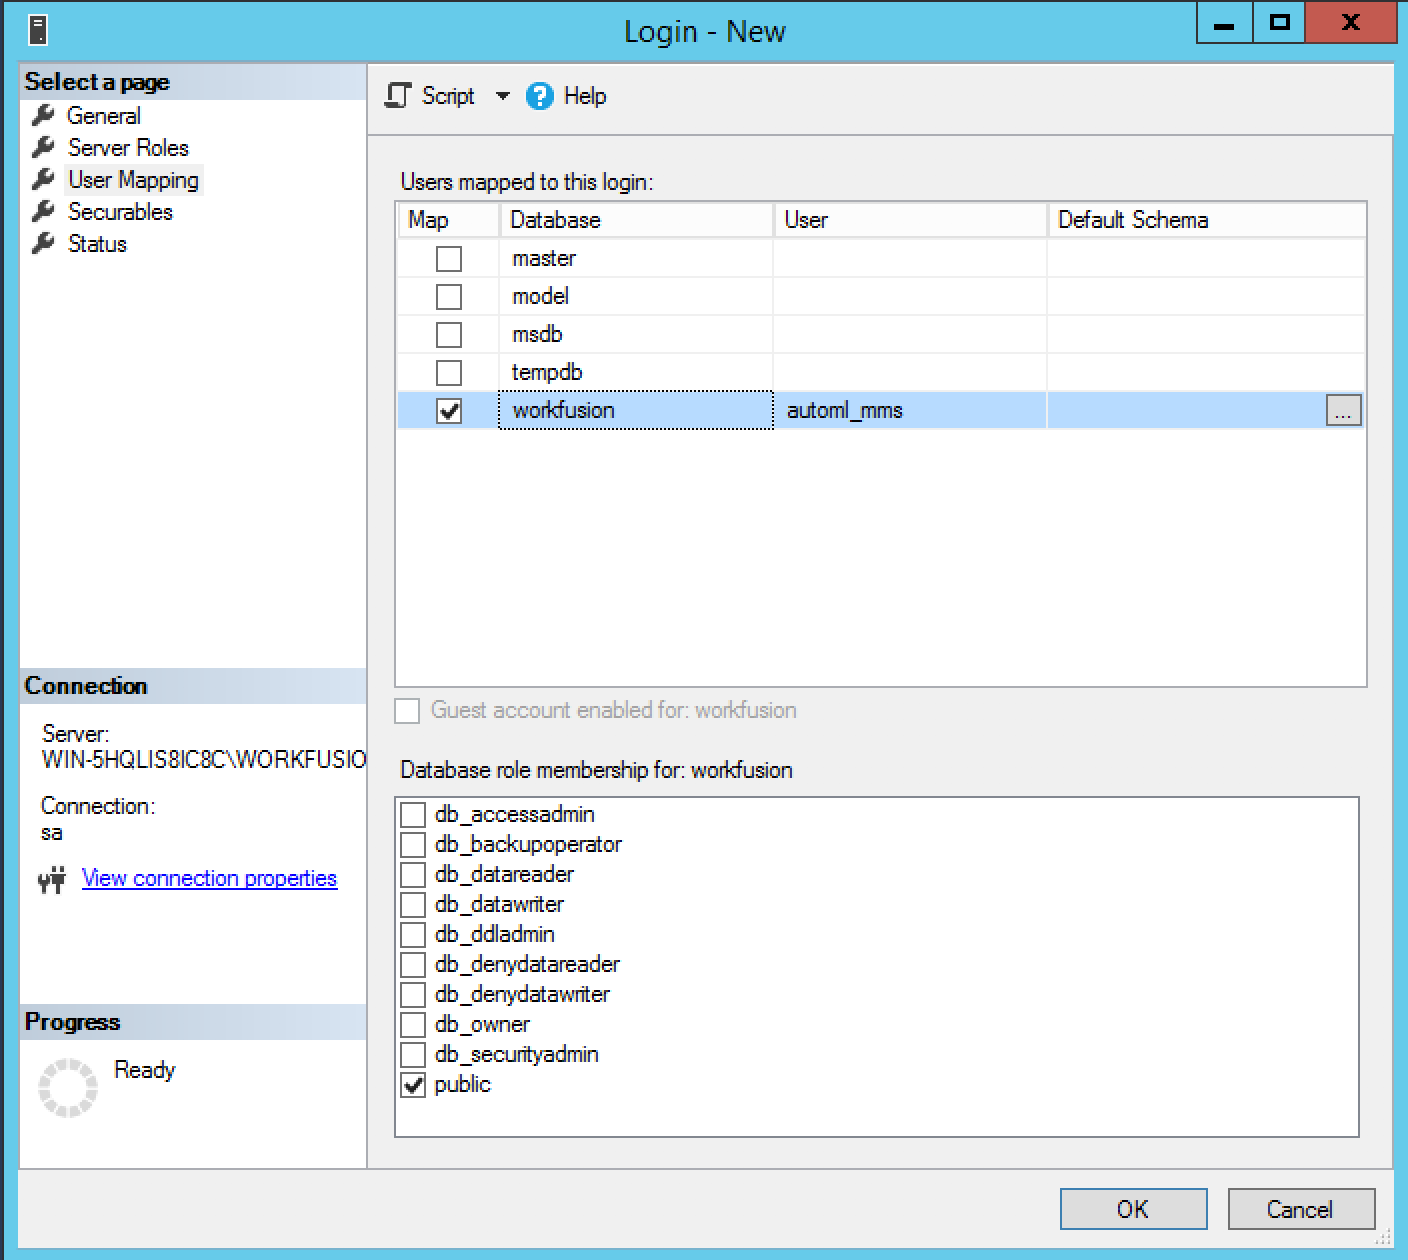
In the User Mapping section, select the workfusion checkbox. This automatically creates the respective "automl_mms" DB user and maps it to MS SQL login that you are currently creating in the workfusion DB. Leave the Default Schema cell empty. You will create the schema for this user later.
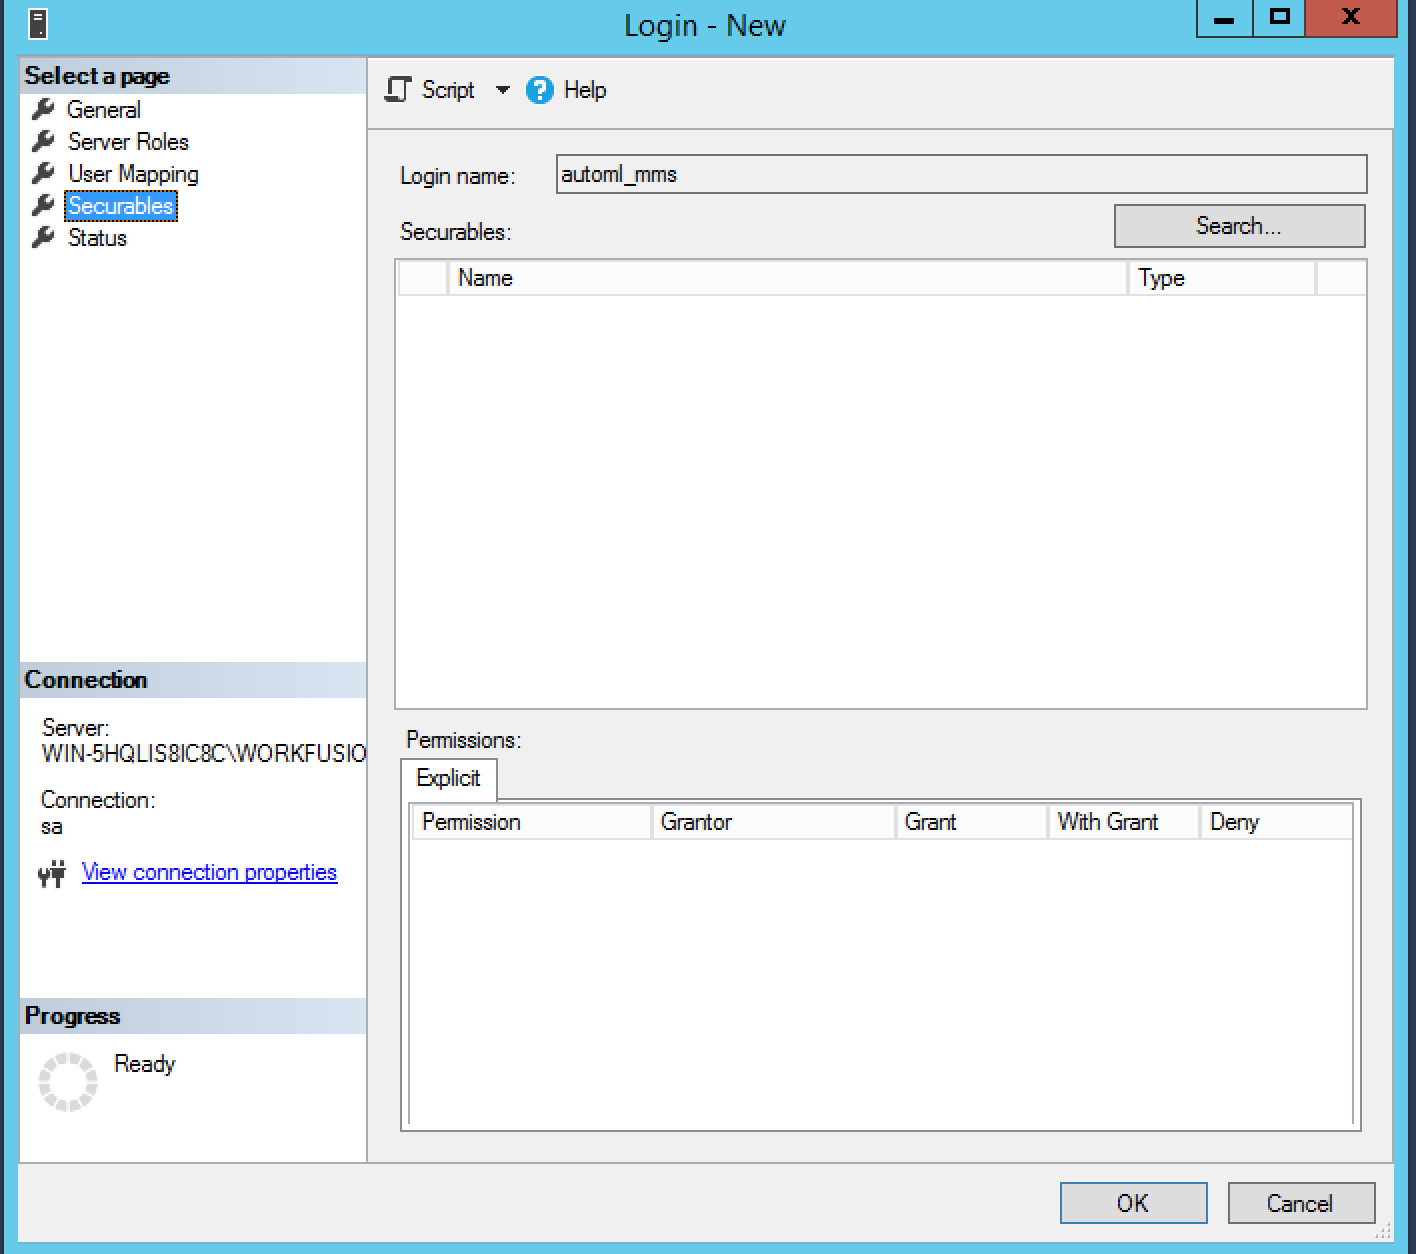
In the Securables section, leave the default values unchanged.
In the Status section, leave the default values unchanged.
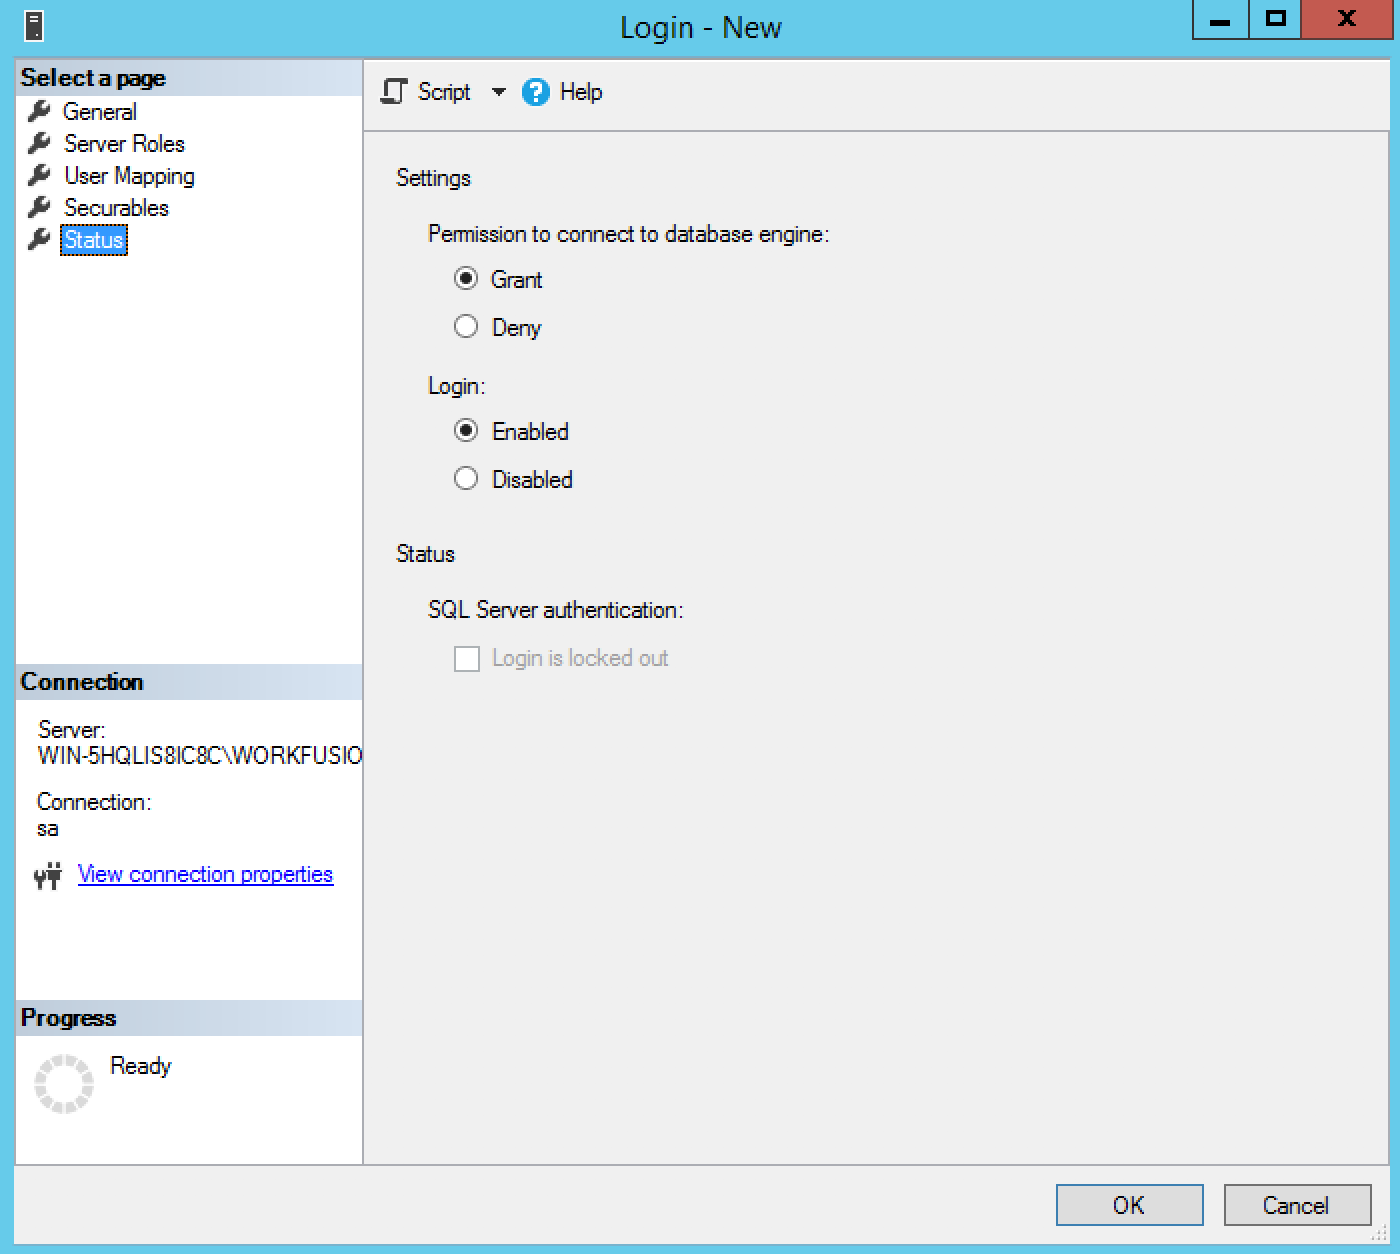
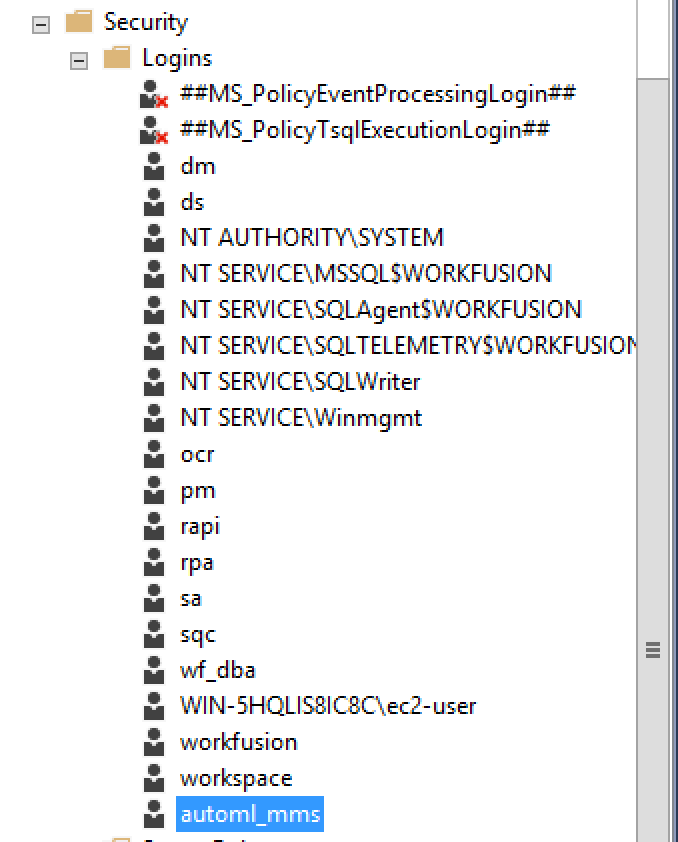
Click OK to finish MS SQL Login creation. The created login appears on the list:
Create schema
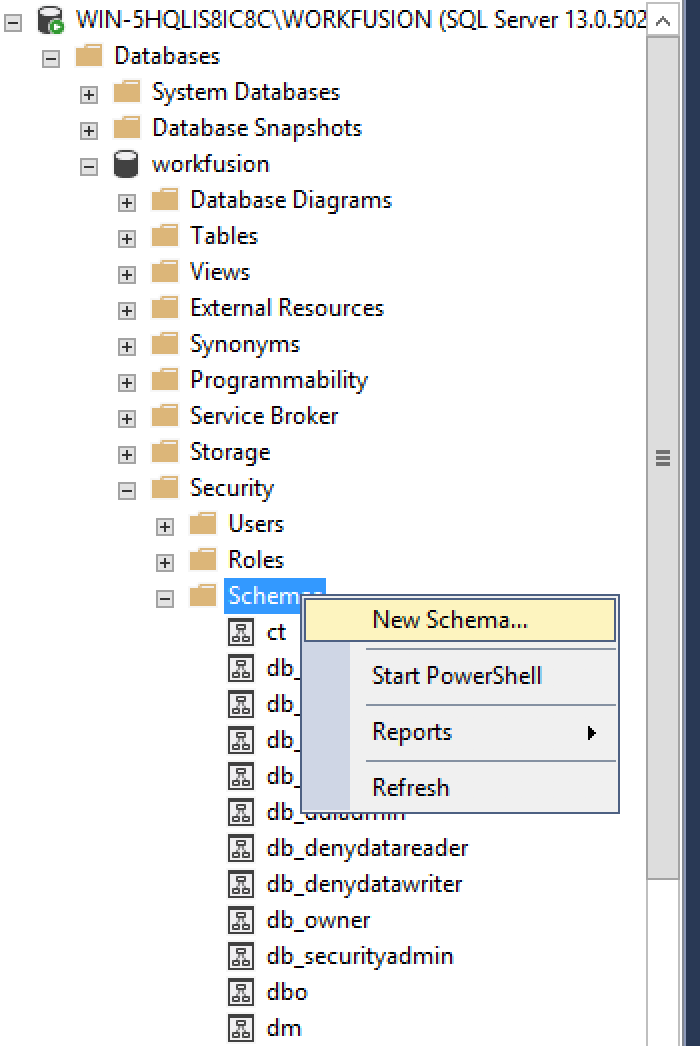
In the workfusion database, create the automl_mms" schema. Note that the name of the schema must only be named automl_mms. For that, go to Databases → workfusion → Security → Schemas. Right-click Schemas, and then click New Schema.
The Schema window appears.
In the Schema window, in the Schema name field, enter automl_mms.
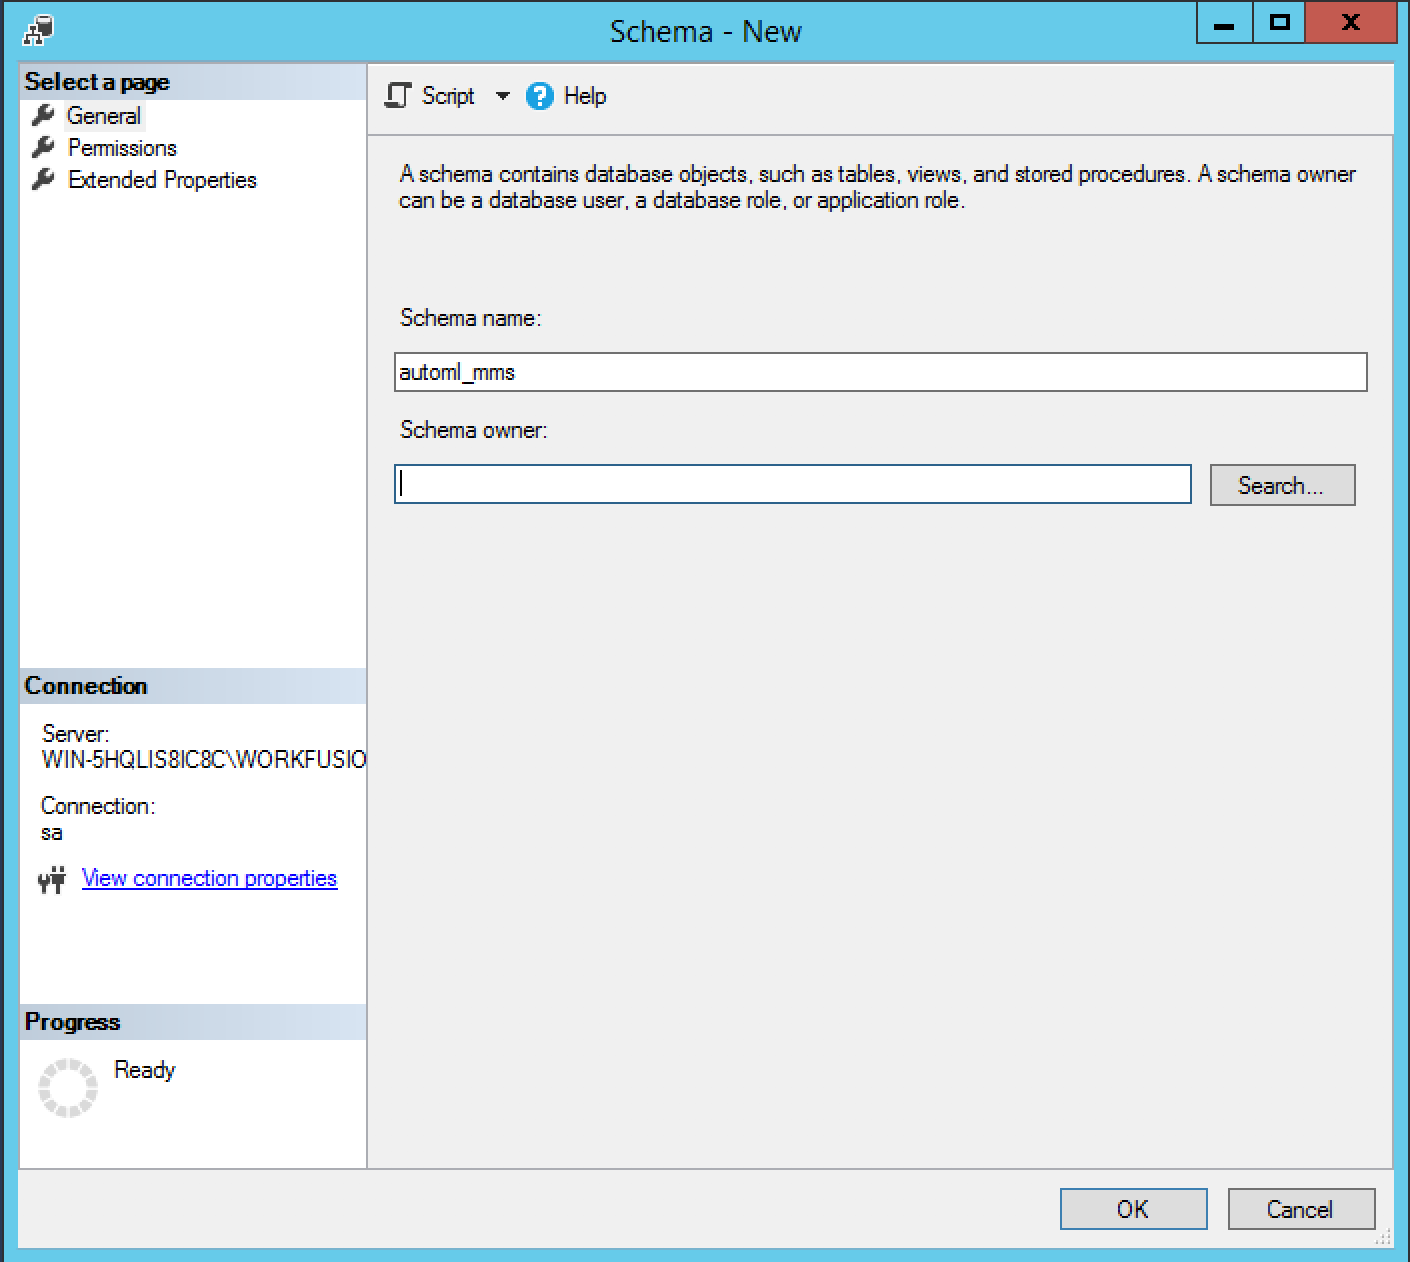
Next to the Schema owner field, click Search.
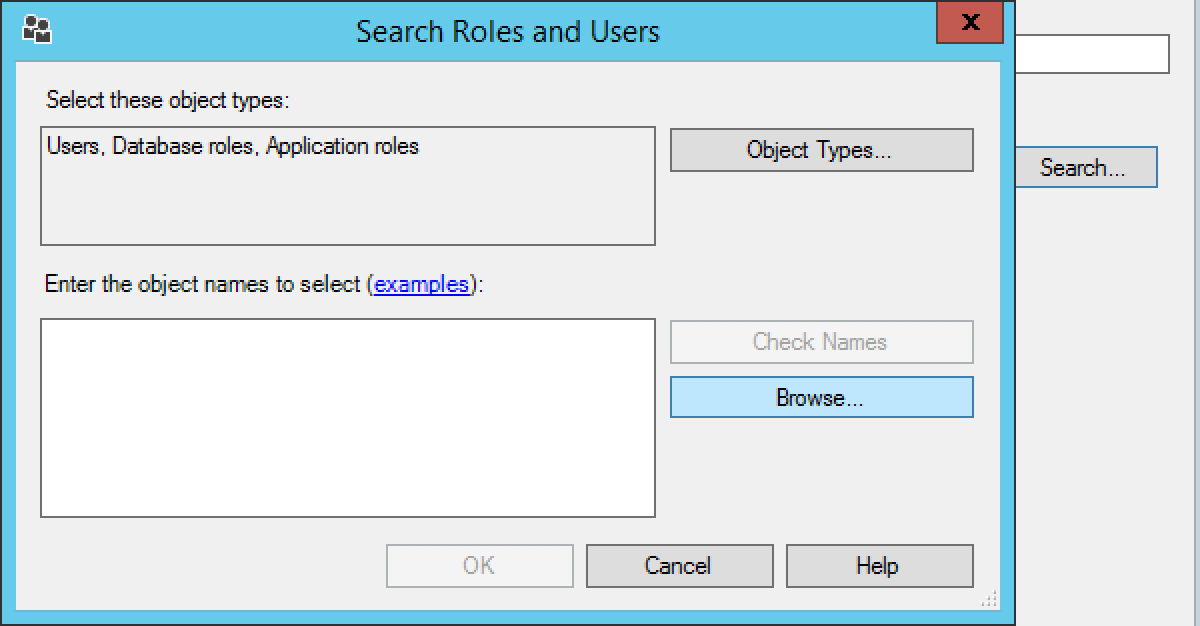
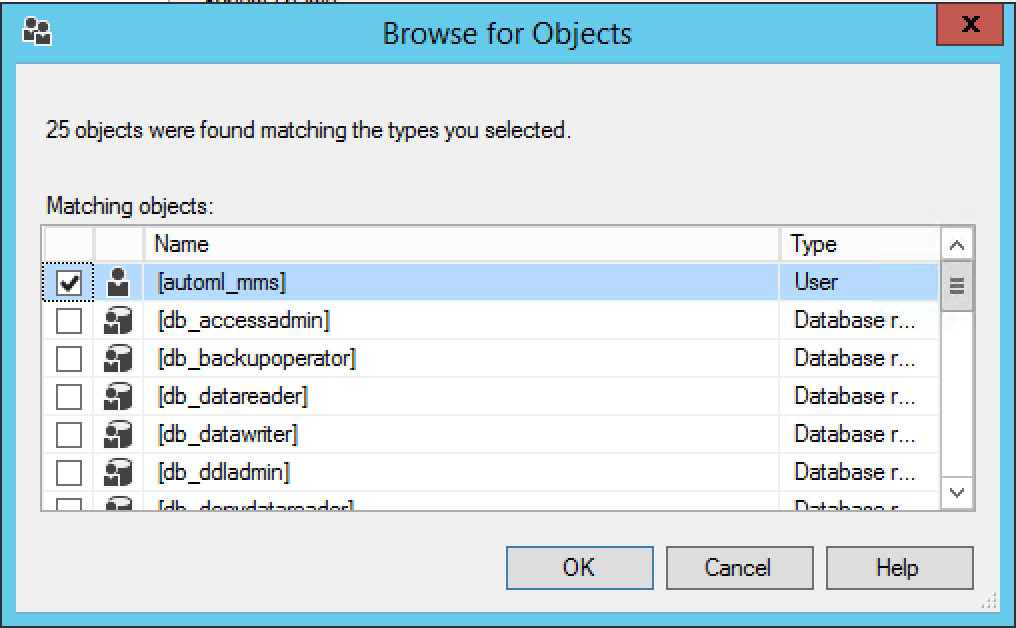
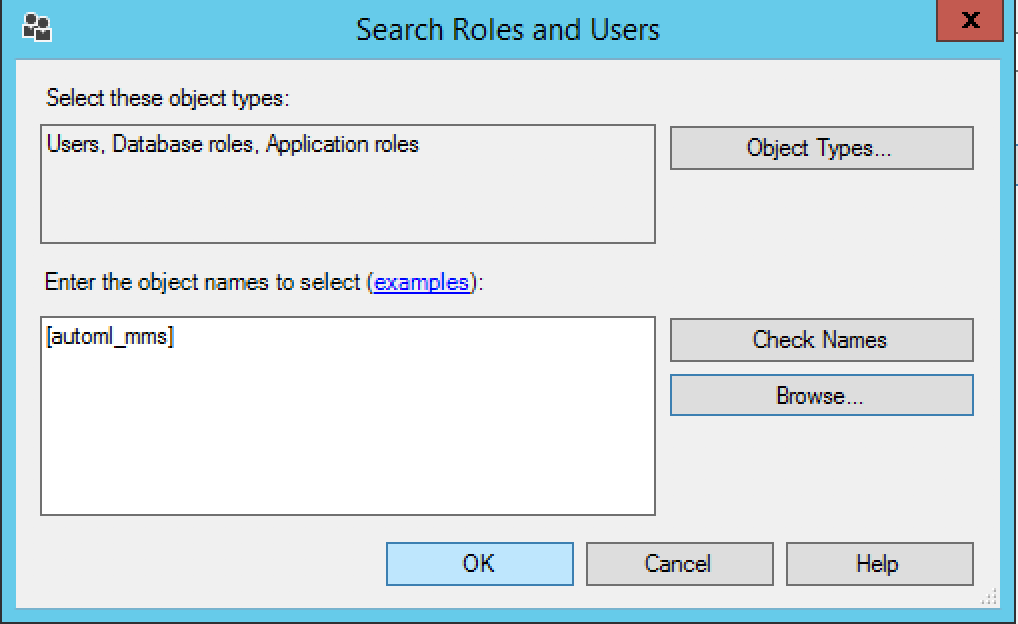
In the Search Roles and Users window, click Browse, select the created automl_mms user, click OK, and then click OK again.
In the Permissions section, leave the default values unchanged.
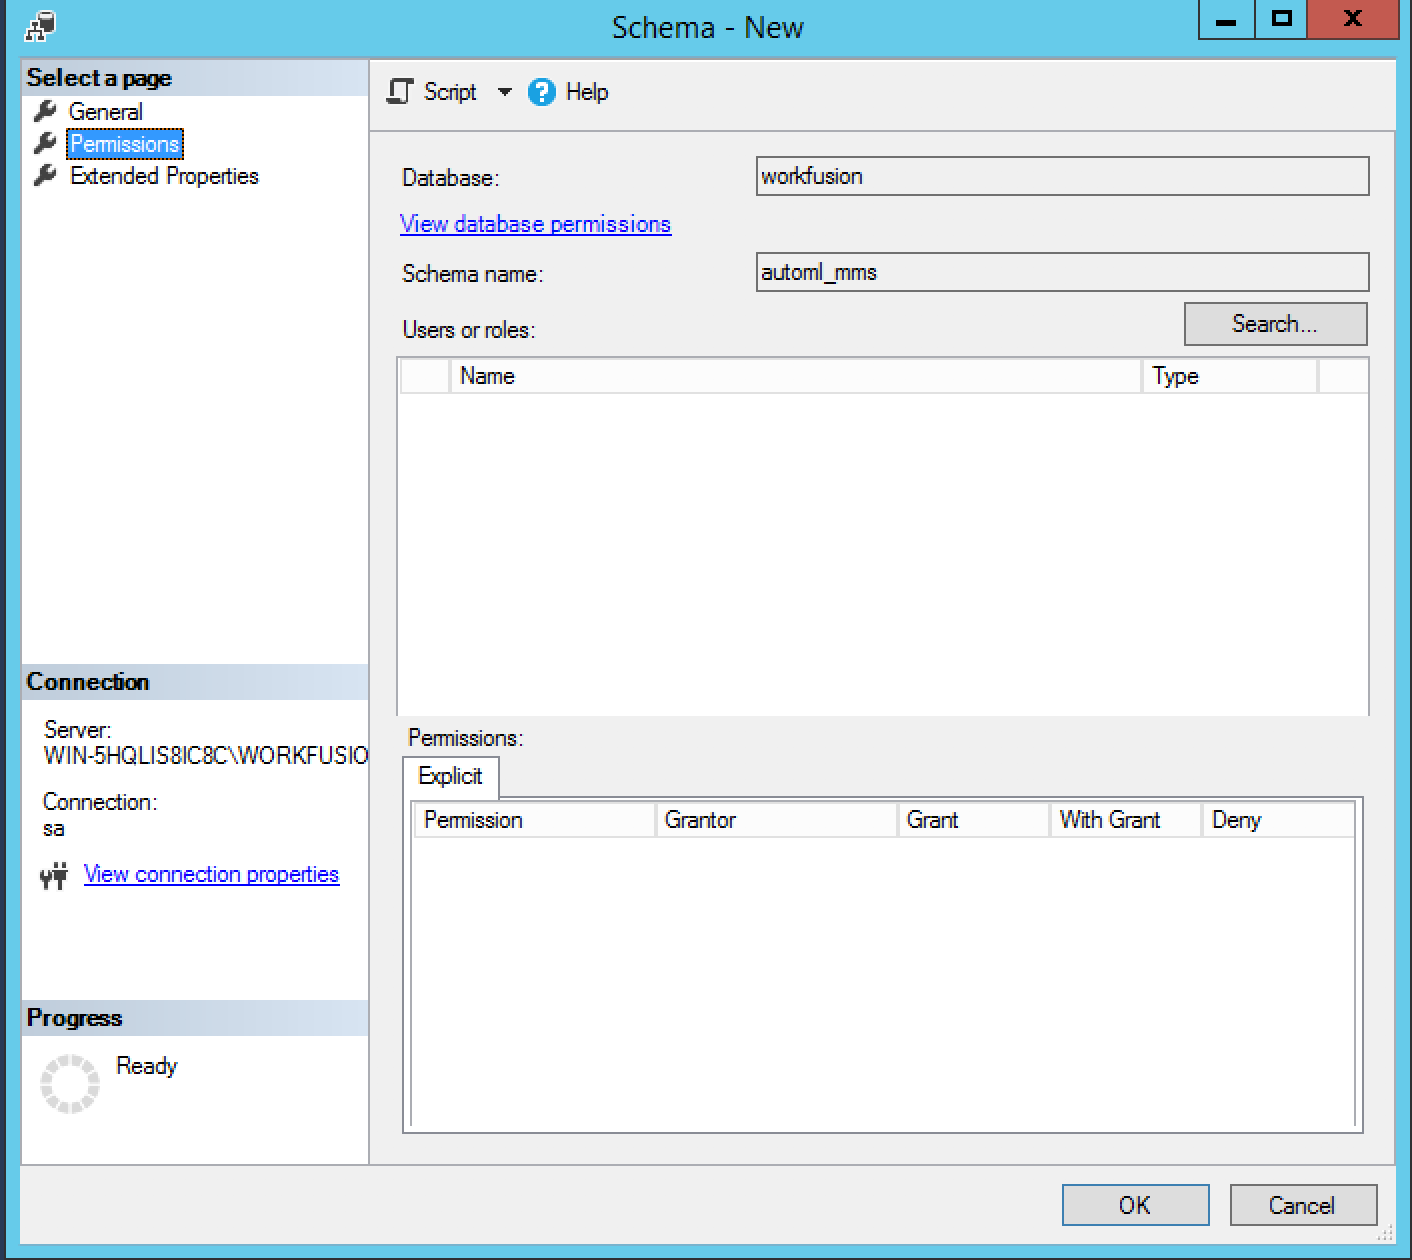
In the Extended Properties section, leave the default values, and then click OK to finish schema creation.
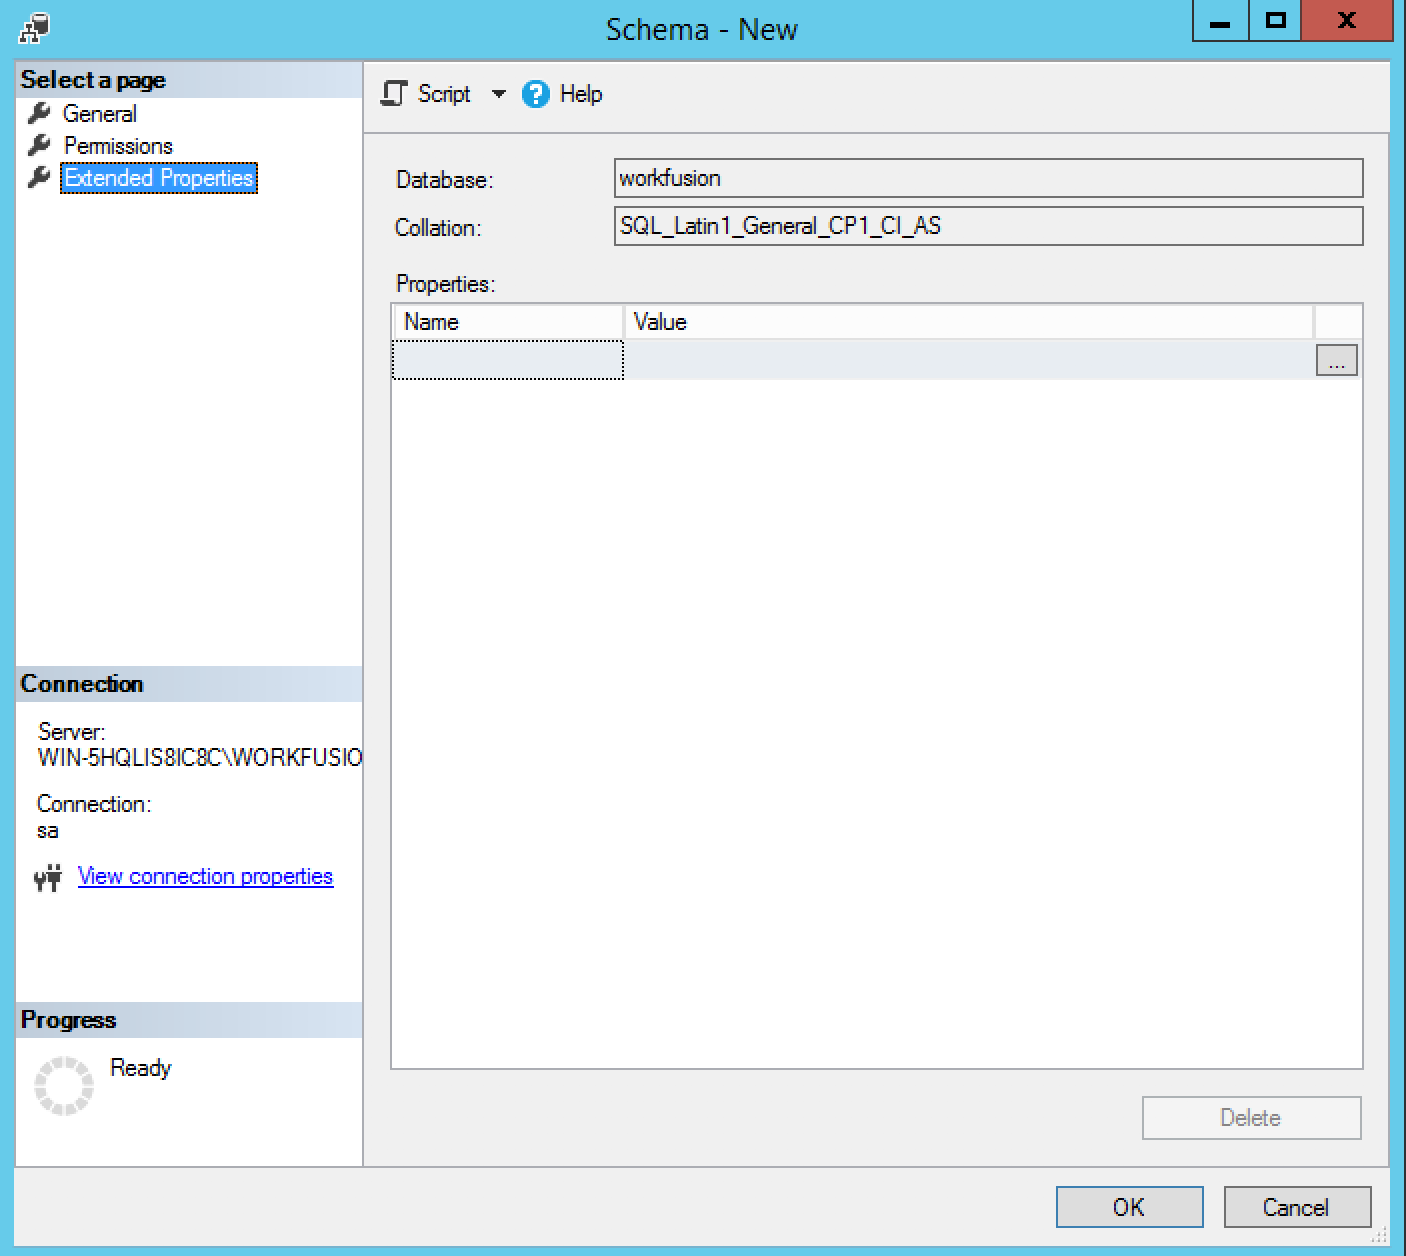
Set schema for the DB user
To set schema for the DB user:
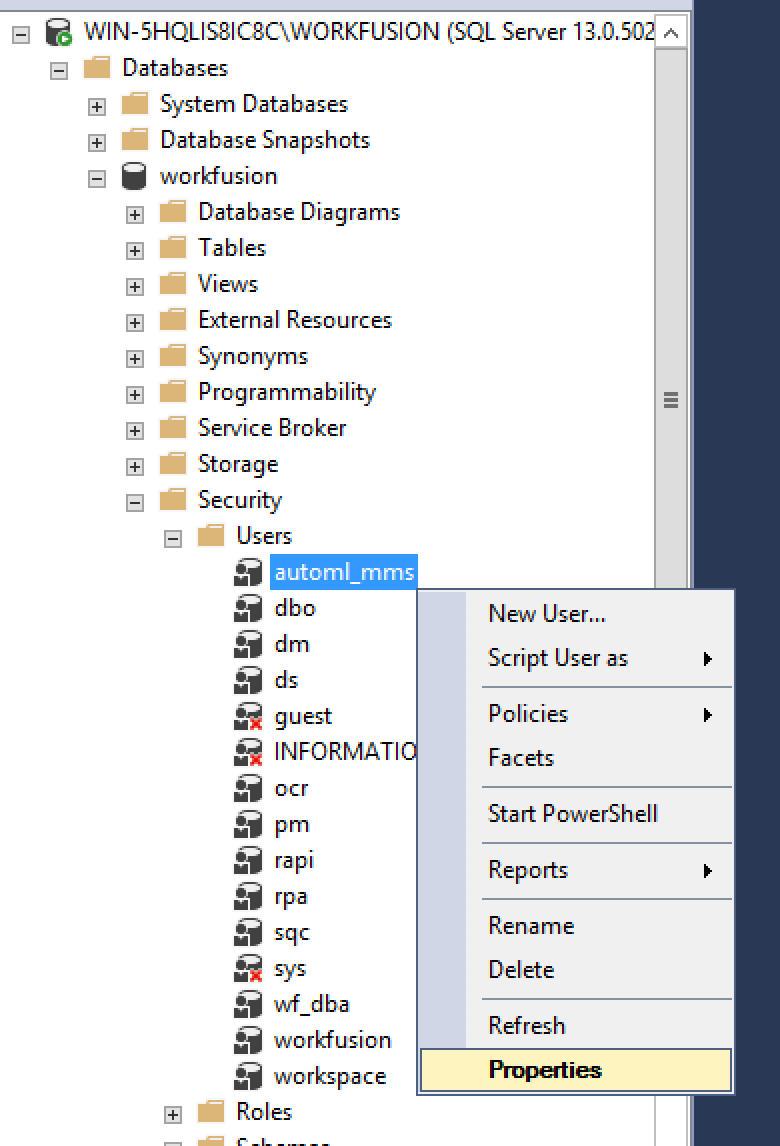
To set automl_mms as Default schema for the automl_mms DB user, go to Databases → workfusion → Security → Users. Find and right-click the recently created automl_mms user, and then click Properties.
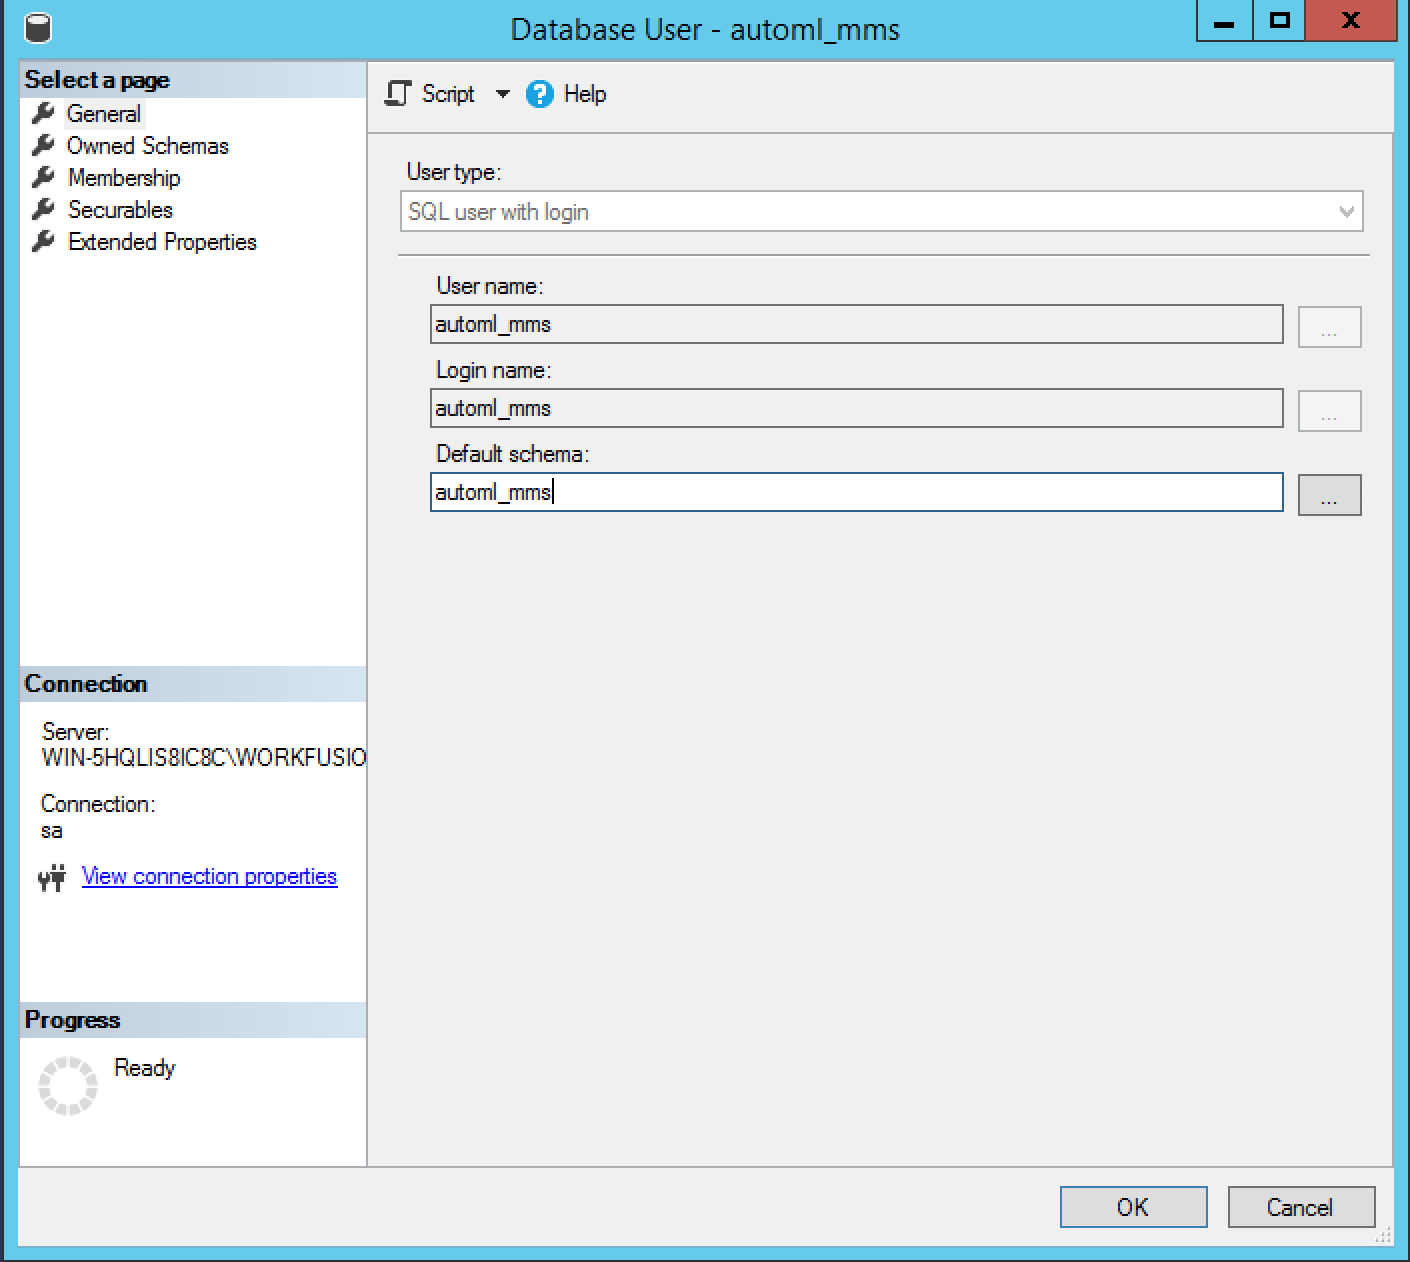
On the General tab, in the Default schema field, type automl_mms, and then click OK.
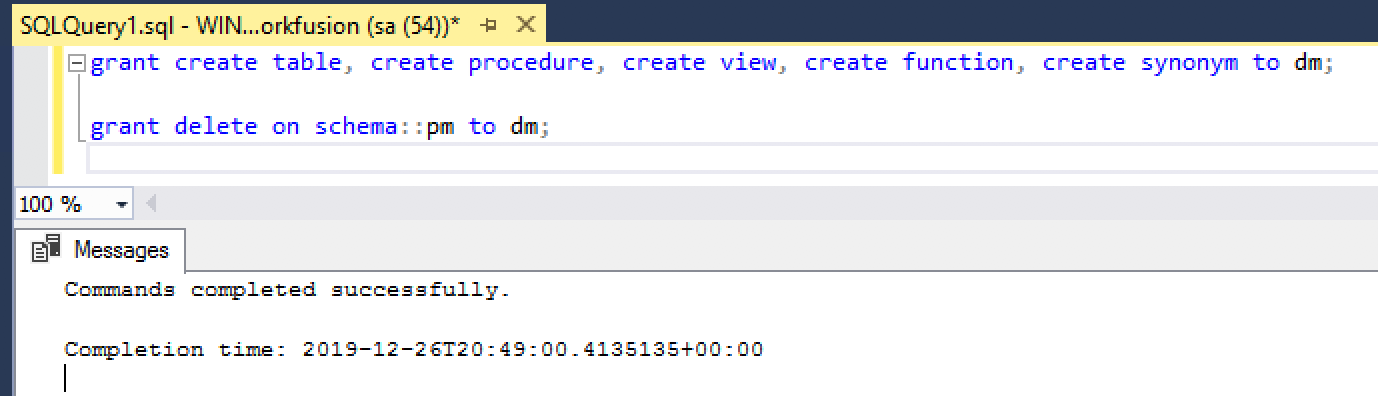
In the workfusion DB, grant additional permissions to the Analytics user (dm_user). For that:
Right-click the workfusion database and select New Query.
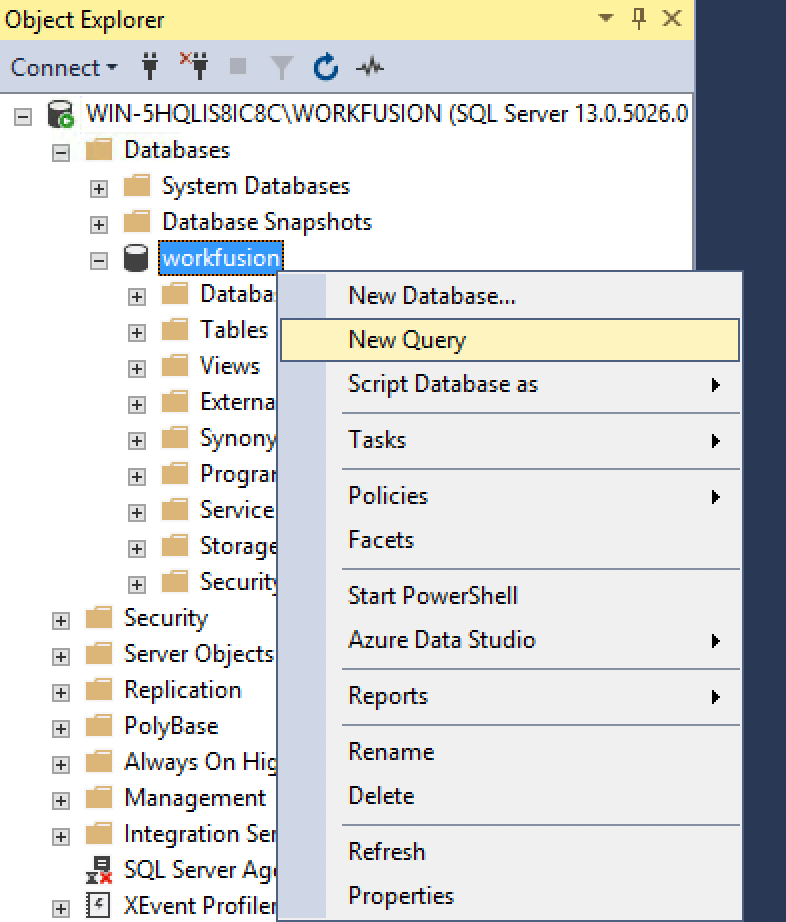
In the opened Query window, run the following query commands:
grant create table, create procedure, create view, create function, create synonym to dm;
grant delete on schema::pm to dm;
Press F5 to execute the query. The result must be the following:
Upload and unarchive installer on each Linux server
To upload and unarchive the v. 10.1.4 installer:
Open the SSH sessions to a Linux server and download the Workfusion IA Cloud installer v. 10.1.4:
cd INSTALL_DIR/wf_installer   # navigate to the wf_installer directory in your installation directory (for example, opt/workfusion/)

curl -o 'workfusion-full-package-10.1.4.0.tar.gz' '<download_link>'  # downloading 10.1.4 installer and saving it with workfusion-full-package-10.1.4.0.tar.gz file name
tar xzf workfusion-full-package-10.1.4.0.tar.gz                      # unarchiving 10.1.4 installer

rm -rf workfusion-full-package-10.1.4.0.tar.gz                       # remove archive after extraction so that it doesn't consume disk space
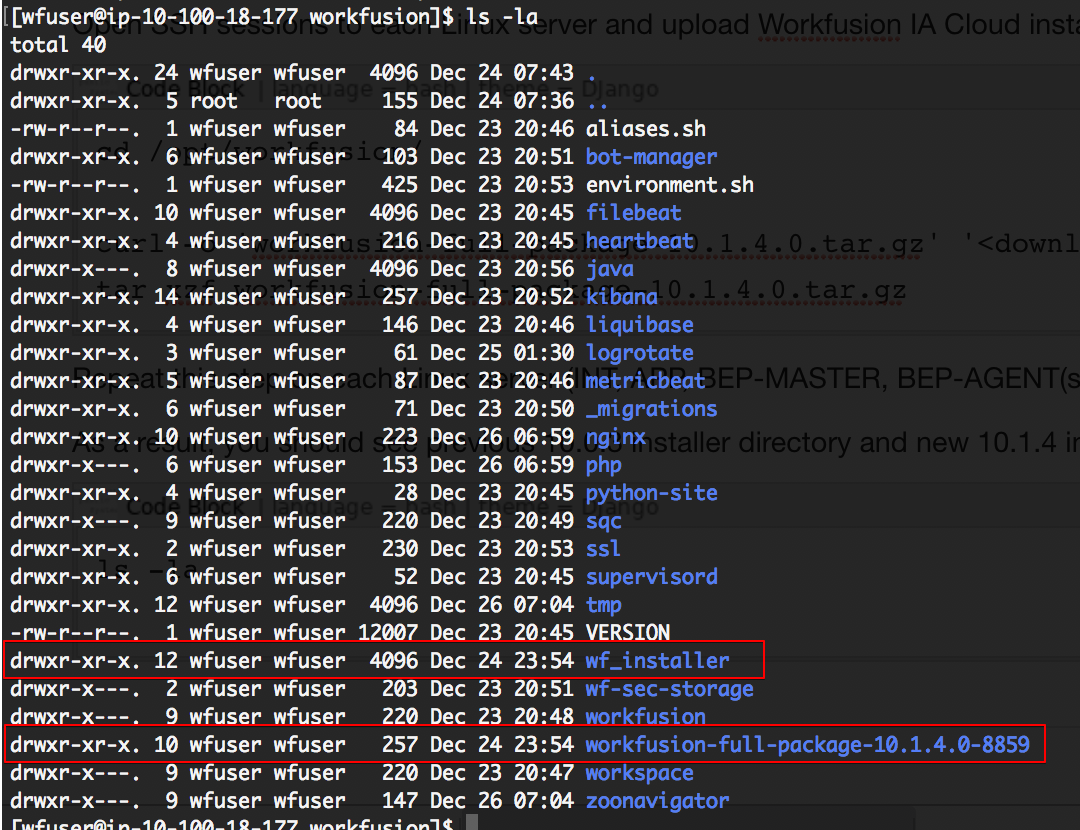
Repeat step 1 on all Linux servers: INT, APP, BEP-MASTER, BEP-AGENT(s), and OCR.As a result, each server will contain the previous 10.0.3 installer wf_installer directory and new 10.1.4 installer directory ("workfusion-full-package-10.1.4.0-.Example of the directories on the APP server:
Prepare config.yml
In version 10.1.4, config.yml was updated with new options, besides existing ones. Note that most of the internal ports-related options have been moved to the separate ports.yml file.
To migrate configuration options from the previous 10.0.3 config.yml to the new 10.1.4 one:
Decrypt the config.yml of the version 10.0.3 by running the following commands on the APP server:
$ cd /opt/workfusion/wf_installer                                      # navigate to the old 10.0.3 install_dir

# prepare variables to decrypt current config.yml
export PYTHONPATH=$PWD/ansible/lib:$PWD/ansible/lib64:$PYTHONPATH
export PATH=$PWD/ansible/bin:$PATH
export LD_LIBRARY_PATH=$PWD/ansible/lib:$LD_LIBRARY_PATH

$ ansible-vault decrypt config.yml     # you'll be prompted to enter decryption password. Enter password and press enter
Vault password:
Decryption successful
Migrate settings from the old config.yml to new config_migrated.yml:
$ cd /opt/workfusion/workfusion-full-package-10.1.4.0-8851.      # Navigating to the directory where new 10.1.4 installer was extracted

./install.sh config_yml generate -e @/opt/workfusion/wf_installer/config.yml

# You should see the similar output:
Selected topology: default
20191226_13_01_24
mkdir: created directory ‘tmp/config_yml-generate’
ERROR! input is not vault encrypted dataconfig.yml is not a vault encrypted file for config.yml
wf_user must be defined in config.yml

=> Running 'config_yml' tasks

PLAY [generate.yml] ************************************************************

TASK [Gathering Facts] *********************************************************
ok: [localhost]
included: /opt/workfusion/workfusion-full-package-10.1.4.0-8859/roles/generate-helper/tasks/config.yml for localhost

TASK [generate-helper : Generate new config.yml for upgrade: /opt/workfusion/workfusion-full-package-10.1.4.0-8859/config_migrated.yml] ***
changed: [localhost]

PLAY RECAP *********************************************************************
localhost                  : ok=1.  changed=1.  unreachable=1.  failed=0
Replace the default config.yml in the 10.1.4 installer directory with the newly generated config.yml, which includes settings migrated from version 10.0.3:
$ cd /opt/workfusion/workfusion-full-package-10.1.4.0-8851.     # Navigating to the directory where new 10.1.4 installer was extracted

$ mv config_migrated.yml config.yml    # Replacing default config.yml with the newly generated config_migrated.yml
Edit new config.yml and update the values for new settings:
vi config.yml

# Adjust the following new settings:
ha_mode: true                          # Leave it default as we're not planning to use High Availability feature (it requires additional servers and additional preparations)
tableau_admin_user: 'tableau_adm'      # Most probably you want to leave it default. Admin user for Analytics (BI). Note this setting, we'll use it during 10.1.4 BI installation.
tableau_admin_pass: '********'     # You may change the default password if you wish. Note this setting, we'll use it during 10.1.4 BI installation.
configure_mssql: True                  # Leave it default. If we set to false, installer we'll not perform the required database migrations (updating schemas for all components).
mssql_automl_mms_user: 'automl_mms'    # Specify the value for the MS SQL user name which we created previously
mssql_automl_mms_pass: '********'  # Specify the value for the MS SQL user password which we created previously
lb_port:      '80'                    # Leave it default. This is Non-SSL Haproxy port required only to make automatic redirects to 443 port (so that when you put the link in browser, you don't need to put ':443' in the end of the link)
lb_port_ssl:  '443'                   # Leave it default. This is the main entrypoint port for accessing the Product from Browser (Control Tower, Workspace, BI, Kibana, Bot-Manager, etc.). It is also the main port which is used for services intercommunication (over internal Haproxy). Previously this port was defined as 'nginx_port_ssl'. Now 'nginx_port_ssl' was moved to ports.yml file and its value was changed to 8443. Most of the services communication now happens over internal Haproxy service located on APP server, while nginx stands for additional proxy level which also plays important role in the product.
Generate rpa.yml:
./install.sh rpa_yml generate -e @/opt/workfusion/wf_installer/config_old.yml
Copy prepared configs and certificates to other Linux servers
To copy all files that are required for 10.1.4 setup to all other Linux servers.
On APP server, prepare the files:
cd /opt/workfusion/workfusion-full-package-10.1.4.0-8851.   # Navigate to the directory where new 10.1.4 installer was extracted

cp -r ../wf_installer/certificates_10.1.4/* ./certificates/  # Copy all certificates that we prepared previously

cp ../wf_installer/hosts_10.1.4.yml ./hosts.yml              # Copy hosts.yml that we prepared previously

cp ../wf_installer/license.properties ./license.properties   # We're also copying license.properties file on APP server (it is required to be present only on APP server, so we'll not need to copy it to other servers)
On the APP server, encrypt config.yml (the same password will be used for encryption as it was used previously in 10.0.3). You may also edit config.yml file and update the value of
ansible\_vault\_passwordsetting if you wish to set new config encryption password. In this example we want to preserve the same encryption password. Execute the command./install.sh encrypt configYou will see similar output.
Selected topology: default_large
20191226_19_42_49
mkdir: created directory ‘tmp/encrypt-config’

=> Running 'encrypt' tasks

PLAY [config.yml] **************************************************************

TASK [[precheck] Check if ansible_vault_password is not standard] **************
ok: [localhost -> localhost] => changed=false
msg: All assertions passed

TASK [Try to encrypt config file: /opt/workfusion/workfusion-full-package-10.1.4.0-8859/playbooks/../config.yml] ***
changed: [localhost -> localhost]

TASK [Fixing permissions for config.yml] ***************************************
changed: [localhost -> localhost]

PLAY RECAP *********************************************************************
localhost                  : ok=1.  changed=1.  unreachable=1.  failed=1.

20191226_19_42_52
Cleaning up ansible temp working directory: /opt/workfusion/workfusion-full-package-10.1.4.0-8859/tmp/encrypt-config/
On the APP server, make the archive of config files for transfer to other servers:
$ tar czvf configs_10.1.4.tar.gz config.yml hosts.yml ports.yml certificatesAs a result, you'll see in current directory the file configs_10.1.4.tar.gz:
$ ls -l configs_10.1.4.tar.gz
-rw-rw-r--. 1 wfuser wfuser 49485 Dec 26 19:57 configs_10.1.4.tar.gz
In the current directory on APP server execute the following command to make the created archive downloadable over HTTP from other servers:
$ python -m SimpleHTTPServer 9999    # Starting HTTP server in current directory (you may choose any FREE port on APP server). Ensure that port is not blocked by firewall from other servers

# You'll see the output
Serving HTTP on 0.0.0.0 port 9999 ...
Open SSH sessions in terminal to all other Linux servers (INT, BEP-MASTER, BEP-Agent(s) (all bep agents), and OCR (all OCR servers if you have multiple in your environment)), download and extract the archive "configs_10.1.4.tar.gz". Execute on every linux server (except APP):
$ cd /opt/workfusion/workfusion-full-package-10.1.4.0-8851.  # Navigate to the directory where 10.1.4 installer was extracted.

curl -o 'configs_10.1.4.tar.gz' http://rcm-3655-ct1.workfusion.com:9999/configs_10.1.4.tar.gz   # Downloading configs_10.1.4.tar.gz from APP server

tar xzvf configs_10.1.4.tar.gz     # Unarchive the downloaded configs_10.1.4.tar.gz

# You'll see the following output:
config.yml
hosts.yml
ports.yml
certificates/
certificates/_auth_internal/
certificates/_auth_internal/elk-ca.crt
certificates/_auth_internal/kibana.crt
certificates/_auth_internal/kibana.key
certificates/_auth_internal/logstash.crt
certificates/_auth_internal/logstash.key
certificates/_auth_internal/logstash.p12
certificates/_auth_internal/mtls-ca.crt
certificates/_auth_internal/mtls-client.crt
certificates/_auth_internal/mtls-client.key
certificates/_auth_internal/vault_admin.crt
certificates/_auth_internal/vault_admin.p12
certificates/_auth_internal/vault_workfusion.crt
certificates/_auth_internal/vault_workfusion.p12
certificates/ca.crt
certificates/server.crt
certificates/server.key
On the APP server, stop the HTTP server by pressing Ctrl+C:
$ $ python -m SimpleHTTPServer 9999
Serving HTTP on 0.0.0.0 port 9999 ...
10.100.18.139 - - [26/Dec/2019 20:31:54] "GET /configs_10.1.4.tar.gz HTTP/1.1" 200 -
10.100.28.17 - - [26/Dec/2019 20:32:09] "GET /configs_10.1.4.tar.gz HTTP/1.1" 200 -
10.100.19.6 - - [26/Dec/2019 20:32:13] "GET /configs_10.1.4.tar.gz HTTP/1.1" 200 -
10.100.28.99 - - [26/Dec/2019 20:32:27] "GET /configs_10.1.4.tar.gz HTTP/1.1" 200 -

# Press "Ctrl + C" now.
# You'll see the output:
^CTraceback (most recent call last):
File "/usr/lib64/python2.7/runpy.py", line 162, in _run_module_as_main
    "__main__", fname, loader, pkg_name)
File "/usr/lib64/python2.7/runpy.py", line 72, in _run_code
    exec code in run_globals
File "/usr/lib64/python2.7/SimpleHTTPServer.py", line 220, in <module>
    test()
File "/usr/lib64/python2.7/SimpleHTTPServer.py", line 216, in test
    BaseHTTPServer.test(HandlerClass, ServerClass)
File "/usr/lib64/python2.7/BaseHTTPServer.py", line 599, in test
    httpd.serve_forever()
File "/usr/lib64/python2.7/SocketServer.py", line 236, in serve_forever
    poll_interval)
File "/usr/lib64/python2.7/SocketServer.py", line 155, in _eintr_retry
    return func(*args)
KeyboardInterrupt
Backup current Vault settings
In 10.1.4 version, Vault storage backend was changed from "file" to "zookeeper". You must make a backup of current "key-values" in "customer" Vault namespace, as well as the LDAP and SSO related settings from vault used by Control Tower and Workspace.
Follow the steps below on INT server:
$ cd /opt/workfusion/wf-sec-storage/

$ ./loader.sh customer review 2> /dev/null | grep -v 'You are working' | grep -v 'Properties from secure' | grep -v 's all' | grep -v 'Key : Value' | grep '\[INFO \]' | sed 's/ : /=/g' | sed 's/\[INFO \] //g' > vault_customer_backup_10.0.3

$ ./loader.sh wfagent review 2> /dev/null | grep -v 'You are working' | grep -v 'Properties from secure' | grep -v 's all' | grep -v 'Key : Value' | grep '\[INFO \]' | grep -E 'ldap|sso' | sed 's/ : /=/g' | sed 's/\[INFO \] //g' > vault_ldap_sso_backup_10.0.3
As a result, you'll see two new files in the current directory:
- vault_customer_backup_10.0.3
- vault_ldap_sso_backup_10.0.3
The content of the files contains the key-values which we need to preserve. After 10.1.4 INT server installation we'll restore the backed up settings into Vault. Here is the example content of the files:
$ cat vault_customer_backup_10.0.3

rpa.rcm-3655-rpa1.workfusion.com.rdp.master.password=Test111
rpa.rcm-3655-rpa1.workfusion.com.rdp.master.user=BotMaster


$ cat vault_ldap_sso_backup_10.0.3

ldap.bind.dn=ldap-user-distinguished-name
ldap.bind.password=ldap-user-password
ldap.server.url=ldaps://ldap.example.com:636
wf.sso.saml.idp.file.metadata=/path/to/idp/file/metadata.xml
wf.sso.saml.idp.metadata=https://SAML_SERVICE_URL/idp/sso
wf.sso.saml.metadata.admin.authorities=ROLE_METADATA_ADMIN
wf.sso.saml.metadata.admin.password=Dhdf)19ndT
wf.sso.saml.metadata.admin.username=workfusion
wf.sso.saml.sp.metadata=workfusion-metadata-id
wf.sso.saml.username.attribute=uid
ws.secure.ldap.bind.dn=ldap-user-distinguished-name
ws.secure.ldap.bind.password=ldap-user-password
ws.secure.ldap.server.url=ldaps://ldap.example.com:636
ws.sso.saml.idp.file.metadata=/path/to/idp/file/metadata.xml
ws.sso.saml.idp.metadata=https://SAML_SERVICE_URL/idp/sso
ws.sso.saml.sp.metadata=ws-sp-hostname
ws.sso.saml.username.attribute=mail
Stop running 10.0.3 services on all Linux servers
To stop all running services on the Linux servers, execute the following command on each linux server (APP, INT, BEP-MASTER, BEP-AGENT(s), OCR):
# On OCR:
$ wfmanager stop all
inorder: stopped
heartbeat: stopped
filebeat: stopped
metricbeat: stopped
nginx: stopped
ocr2worker: stopped
ocr2rest: stopped

wfmanager shutdown

# Ensure there are no running processes under runtime user ('wfuser' in our example)
ps aux | grep 'wfuser'    # this command must show zero running processes. If any processes are running - kill them (kill -9 <process_id>)


# On APP:
$ wfmanager stop all
inorder: stopped
heartbeat: stopped
filebeat: stopped
metricbeat: stopped
php-fpm: stopped
nginx: stopped
sqc: stopped
kibana: stopped
zoonavigator: stopped
bot-manager: stopped
workspace: stopped
workfusion: stopped

wfmanager shutdown

# Ensure there are no running processes under runtime user ('wfuser' in our example)
ps aux | grep 'wfuser'    # this command must show zero running processes. If any processes are running - kill them (kill -9 <process_id>)


# On BEP-AGENT(s):
$ wfmanager stop all
inorder: stopped
heartbeat: stopped
filebeat: stopped
metricbeat: stopped
mesos-slave: stopped
nginx: stopped

wfmanager shutdown

# Ensure there are no running processes under runtime user ('wfuser' in our example)
ps aux | grep 'wfuser'    # this command must show zero running processes. If any processes are running - kill them (kill -9 <process_id>)


# On BEP-MASTER
$ wfmanager stop all
inorder: stopped
heartbeat: stopped
filebeat: stopped
metricbeat: stopped
mesos-master: stopped
vds-whitelister: stopped
nginx: stopped
marathon: stopped
automl-gateway-service: stopped
automl-model-service: stopped
worker-management-service: stopped

wfmanager shutdown

# Ensure there are no running processes under runtime user ('wfuser' in our example)
ps aux | grep 'wfuser'    # this command must show zero running processes. If any processes are running - kill them (kill -9 <process_id>)


# On INT
$ wfmanager stop all
inorder: stopped
heartbeat: stopped
filebeat: stopped
metricbeat: stopped
nginx: stopped
zookeeper: stopped
minio: stopped
vault:vault-server: stopped
elasticsearch: stopped
task-dispatcher-service: stopped
rabbitmq: stopped
nexus: stopped
logstash: stopped

wfmanager shutdown

# Ensure there are no running processes under runtime user ('wfuser' in our example)
ps aux | grep 'wfuser'    # this command must show zero running processes. If any processes are running - kill them (kill -9 <process_id>)
Cleanup rudiments on each Linux server
To clean the rudiments from previous installation:
On the APP server, run the commands:
$ cd /opt/workfusion/workfusion-full-package-10.1.4.0-8851.  # Navigate to the directory where 10.1.4 installer was extracted.

$ export ANSIBLE_VAULT_PASS=<your-ansible-vault-password>       # Optionally, export password used for config.yml encryption to disable prompt (the value of 'ansible_vault_password' setting in config.yml)

$ ./install.sh cleanup rudiments -c local --limit rcm-3655-ct1.workfusion.com    # Use DNS name of the server you're currently connected to for '--limit' parameter
On the INT server, run the commands:
$ cd /opt/workfusion/workfusion-full-package-10.1.4.0-8859/
$ export ANSIBLE_VAULT_PASS=<your-ansible-vault-password>    # Optionally, export password used for config.yml encryption to disable prompt
$ ./install.sh cleanup rudiments -c local --limit rcm-3655-int1.workfusion.com
On the BEP Master server, run the commands:
$ cd /opt/workfusion/workfusion-full-package-10.1.4.0-8859/
$ export ANSIBLE_VAULT_PASS=<your-ansible-vault-password>    # Optionally, export password used for config.yml encryption to disable prompt
$ ./install.sh cleanup rudiments -c local --limit rcm-3655-bepmaster1.workfusion.com
On the BEP Agent server(s), run the commands:
$ cd /opt/workfusion/workfusion-full-package-10.1.4.0-8859/
$ export ANSIBLE_VAULT_PASS=<your-ansible-vault-password>    # Optionally, export password used for config.yml encryption to disable prompt
$ ./install.sh cleanup rudiments -c local --limit rcm-3655-bepagent1.workfusion.com
On the OCR server, run the commands:
$ cd /opt/workfusion/workfusion-full-package-10.1.4.0-8859/
$ export ANSIBLE_VAULT_PASS=<your-ansible-vault-password>    # Optionally, export password used for config.yml encryption to disable prompt
$ ./install.sh cleanup rudiments -c local --limit rcm-3655-ocr1.workfusion.com
Move Minio, Nexus, and Logstash logs
In 10.1.4 the locations for Minio, Nexus, and logsttash aggregated logs was changed.
To move their directories respectively, log in to the INT server via SSH and execute:
$ cd /opt/workfusion/      # Navigate to current install_dir
$ mkdir -p shared          # create "shared" directory. This doesn't mean that the directory is indeed shared. It is named so for unification with High Availability setup.
$ mv minio shared/         # move "minio" dir into "shared/" directory
$ mv nexus shared/         # move "nexus" dir into "shared/" directory
$ mv logs shared/          # move "logs" dir into "shared/" directory
Update Linux servers to 10.1.4
warning
If you have configured the AD realm for Elasticsearch according to the Kibana and Active Directory integration guide, before the update, on the INT server, run the following command:
/opt/workfusion/elasticsearch/bin/elasticsearch-keystore remove xpack.security.authc.realms.active_directory.secure_bind_password
To update Linux servers:
On the APP server, install internal HAPROXY service as a
rootuser:cd /opt/workfusion/workfusion-full-package-10.1.4.0-8859/ export ANSIBLE_VAULT_PASS=<your-ansible-vault-password> # Optionally, export password used for config.yml encryption to disable prompt ./install.sh preinstall lb -c local --limit rcm-3655-ct1.workfusion.com # Use DNS name of the server you're currently connected to for '--limit' parameterOn the APP server, run the following commands as runtime user ("
WFUSER"):cd /opt/workfusion/workfusion-full-package-10.1.4.0-8859/ export ANSIBLE_VAULT_PASS=<your-ansible-vault-password> # Optionally, export password used for config.yml encryption to disable prompt ./install.sh install lb -c local --limit rcm-3655-ct1.workfusion.com # Use DNS name of the server you're currently connected to for '--limit' parameter ./install.sh check lb -c local --limit rcm-3655-ct1.workfusion.com # Use DNS name of the server you're currently connected to for '--limit' parameterOn the INT server, run the following commands as
root:cd /opt/workfusion/workfusion-full-package-10.1.4.0-8859/ export ANSIBLE_VAULT_PASS=<your-ansible-vault-password> # Optionally, export password used for config.yml encryption to disable prompt ./install.sh preinstall int -c local --limit rcm-3655-int1.workfusion.com # Use DNS name of the server you're currently connected to for '--limit' parameterOn the INT server run the following commands as runtime user ("
WFUSER"):cd /opt/workfusion/workfusion-full-package-10.1.4.0-8859/ export ANSIBLE_VAULT_PASS=<your-ansible-vault-password> # Optionally, export password used for config.yml encryption to disable prompt ./install.sh install int -c local --limit rcm-3655-int1.workfusion.com # Use DNS name of the server you're currently connected to for '--limit' parameter ./install.sh check int -c local --limit rcm-3655-int1.workfusion.com # Use DNS name of the server you're currently connected to for '--limit' parameter # Restore Vault secrets which we previously backed up: cd /opt/workfusion/wf-sec-storage/ ./loader.sh customer vault_customer_backup_10.0.3 # restoring Vault secrets into "customer" safe ./loader.sh wfagent vault_ldap_sso_backup_10.0.3 # restoring Vault secrets into "WF_internal" safe # Now we may remove files with secrets rm -f vault_customer_backup_10.0.3 vault_ldap_sso_backup_10.0.3On the BEP Master server, run the followiong commands as
rootto install the BEP Master component:cd /opt/workfusion/workfusion-full-package-10.1.4.0-8859/ export ANSIBLE_VAULT_PASS=<your-ansible-vault-password> # Optionally, export password used for config.yml encryption to disable prompt ./install.sh preinstall bep-master -c local --limit rcm-3655-bepmaster1.workfusion.com # Use DNS name of the server you're currently connected to for '--limit' parameterOn the BEP Master server, run the following commands as
WFUSER:cd /opt/workfusion/workfusion-full-package-10.1.4.0-8859/ export ANSIBLE_VAULT_PASS=<your-ansible-vault-password> # Optionally, export password used for config.yml encryption to disable prompt ./install.sh install bep-master -c local --limit rcm-3655-bepmaster1.workfusion.com # Use DNS name of the server you're currently connected to for '--limit' parameter ./install.sh check bep-master -c local --limit rcm-3655-bepmaster1.workfusion.com # Use DNS name of the server you're currently connected to for '--limit' parameterOn the BEP Agent server, run the followiong commands as
rootto install the BEP Agent component:cd /opt/workfusion/workfusion-full-package-10.1.4.0-8859/ export ANSIBLE_VAULT_PASS=<your-ansible-vault-password> # Optionally, export password used for config.yml encryption to disable prompt ./install.sh preinstall bep-agent -c local --limit rcm-3655-bepagent1.workfusion.com # Use DNS name of the server you're currently connected to for '--limit' parameterNote: Remember to use correct "--limit <current_hostname>" when running the command on different BEP Agents
Execute on BEP-AGENT server as runtime user ("
WFUSER"):cd /opt/workfusion/workfusion-full-package-10.1.4.0-8859/ export ANSIBLE_VAULT_PASS=<your-ansible-vault-password> # Optionally, export password used for config.yml encryption to disable prompt ./install.sh install bep-agent -c local --limit rcm-3655-bepagent1.workfusion.com # Use DNS name of the server you're currently connected to for '--limit' parameter ./install.sh check bep-agent -c local --limit rcm-3655-bepagent1.workfusion.com # Use DNS name of the server you're currently connected to for '--limit' parameterInstall 10.1.4 APP server. For that execute on APP server as root:
cd /opt/workfusion/workfusion-full-package-10.1.4.0-8859/
export ANSIBLE_VAULT_PASS=<your-ansible-vault-password>                          # Optionally, export password used for config.yml encryption to disable prompt
./install.sh preinstall app -c local --limit rcm-3655-ct1.workfusion.com         # Use DNS name of the server you're currently connected to for '--limit' parameter
Execute on APP server as runtime user ("
WFUSER"):cd /opt/workfusion/workfusion-full-package-10.1.4.0-8859/ export ANSIBLE_VAULT_PASS=<your-ansible-vault-password> # Optionally, export password used for config.yml encryption to disable prompt ./install.sh install app -c local --limit rcm-3655-ct1.workfusion.com # Use DNS name of the server you're currently connected to for '--limit' parameter ./install.sh check app -c local --limit rcm-3655-ct1.workfusion.com # Use DNS name of the server you're currently connected to for '--limit' parameterInstall 10.1.4 OCR server(s).
Execute on OCR server as root:
cd /opt/workfusion/workfusion-full-package-10.1.4.0-8859/
export ANSIBLE_VAULT_PASS=<your-ansible-vault-password>                           # Optionally, export password used for config.yml encryption to disable prompt
./install.sh preinstall ocr -c local --limit rcm-3655-ocr1.workfusion.com         # Use DNS name of the server you're currently connected to for '--limit' parameter
Execute on OCR server as runtime user ("
WFUSER"):cd /opt/workfusion/workfusion-full-package-10.1.4.0-8859/ export ANSIBLE_VAULT_PASS=<your-ansible-vault-password> # Optionally, export password used for config.yml encryption to disable prompt ./install.sh install ocr -c local --limit rcm-3655-ocr1.workfusion.com # Use DNS name of the server you're currently connected to for '--limit' parameter ./install.sh check ocr -c local --limit rcm-3655-ocr1.workfusion.com # Use DNS name of the server you're currently connected to for '--limit' parameter
warning
If you have configured the AD realm for Elasticsearch according to the Kibana and Active Directory integration guide, restore AD realm after the update:
In /opt/workfusion/elasticsearh/config/elasticsearch.yml, change the lines:
xpack.security.authc.realms:
active_directory:
type: active_directory
order: 0
domain_name: <your domain name>
url: <your AD controller url>
bind_dn: "<your DN>"
to the following ones:
xpack.security.authc.realms:
active_directory:
active_directory1:
order: 0
domain_name: <your domain name>
url: <your AD controller url>
bind_dn: "<your DN>"
In the
orderparameter, remember to adjust order of other security realms.Run the command:
/opt/workfusion/elasticsearch/bin/elasticsearch-keystore add xpack.security.authc.realms.active_directory.active_directory1.secure_bind_passwordIn /opt/workfusion/elasticsearh/config/, copy the contents of the previous config role_mapping.yml.
to the current config role_mapping.yml, and add the following line to it: superuser: - "" Restart Elasticsearch by running the command:
wfmanager restart elasticsearchGo to the APP server, and in /opt/workfusion/kibana/config/, copy the contents of the previous config kibana.yml.
to the current config kibana.yml, and add the following line to it: elasticsearch.username: elasticsearch.password:On the APP server, restart Kibana by running the command:
wfmanager restart kibana
Restore Kibana and Elasticsearch SSO configuration
If you have SSO configured for Kibana and Elasticsearch in your environment, you need to restore SSO-related configuration.
On INT server restore Elasticsearch SSO configuration:
cd /opt/workfusion/elasticsearch/config    # Navigate to Elasticsearch config directory

# Listing directory content:
[wfuser@ip-10-100-18-139 config]$ ls -la
total 32
-rw-rw----. 1 wfuser wfuser  233 Dec 30 21:29 elasticsearch.keystore
-rw-r-----. 1 wfuser wfuser 1409 Dec 30 21:17 elasticsearch.yml
-rw-r-----. 1 wfuser wfuser  690 Dec 23 20:21 elasticsearch.yml.30649.2019-12-30@21:17:54~
-rw-r-----. 1 wfuser wfuser 2889 Dec 30 21:17 jvm.options
-rw-r-----. 1 wfuser wfuser 2889 Dec 23 20:21 jvm.options.30672.2019-12-30@21:17:55~
-rw-r-----. 1 wfuser wfuser 5090 Dec 23 20:21 log4j2.properties
-rw-r-----. 1 wfuser wfuser  144 Dec 23 20:21 role_mapping.yml
-rw-r-----. 1 wfuser wfuser    0 Dec 30 21:30 users
-rw-r-----. 1 wfuser wfuser    0 Dec 30 21:30 users_roles

# Note "elasticsearch.yml.30649.2019-12-30@21:17:54~" file (in your environment this file will have different Date suffix).
# Open it and move SSO-related configuration from this file to "elasticsearch.yml" config file
# Then execute:
wfmanager restart elasticsearch
On the APP server restore Kibana SSO configuration:
cd /opt/workfusion/kibana/config    # Navigate to Kibana config directory

# Listing directory content:
[wfuser@ip-10-100-18-139 config]$ ls -la
total 32
-rw-rw----. 1 wfuser wfuser  233 Dec 30 21:29 kibana.yml
-rw-rw----. 1 wfuser wfuser  233 Dec 30 21:29 kibana.30649.2019-12-30@21:40:45~

# Note "kibana.30649.2019-12-30@21:40:45~" file. Open it and move SSO-related configuration from this file to "kibana.yml" config file
# Then execute:
wfmanager restart kibana
Update RPA Windows server
Upgrade of RPA server includes the following steps:
- Uninstall current RPA version;
- Upload 10.1.4 RPA installer to RPA server;
- Install 10.1.4 RPA.
- Uninstall current RPA version.
- Connect over RDP to RPA server, and navigate to the directory where
10.0.3 RPA installer was extracted:
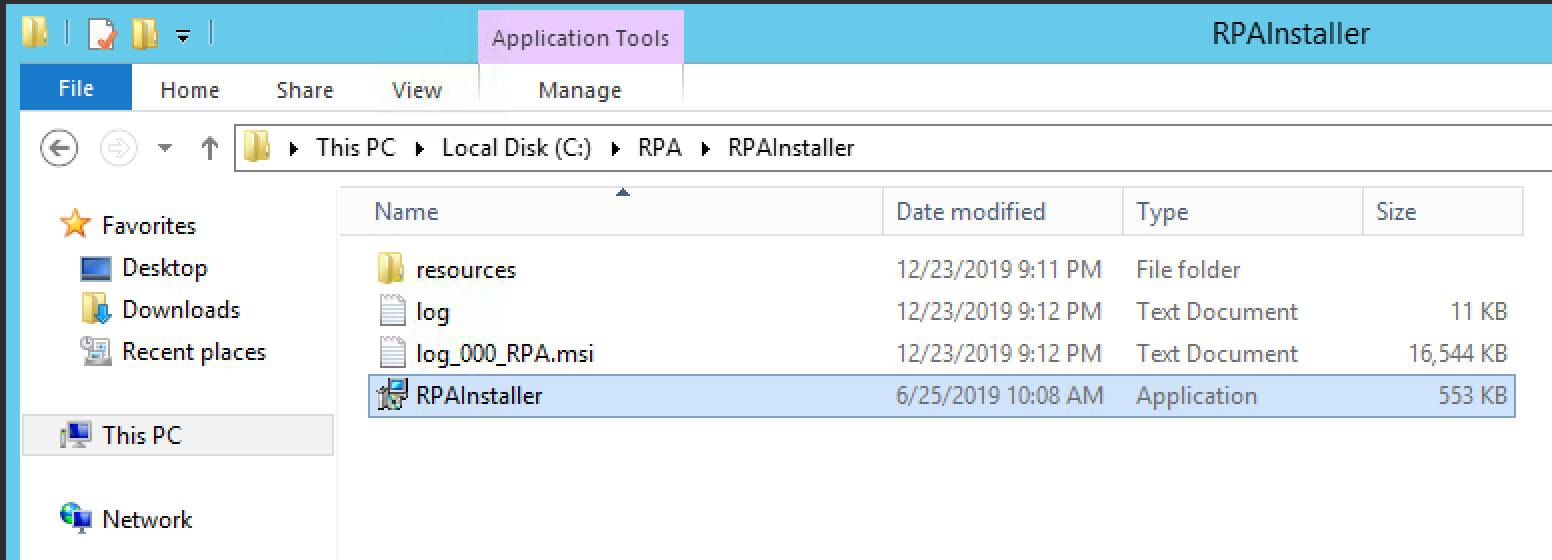
- Double-click RPAInstaller → click "Uninstall":
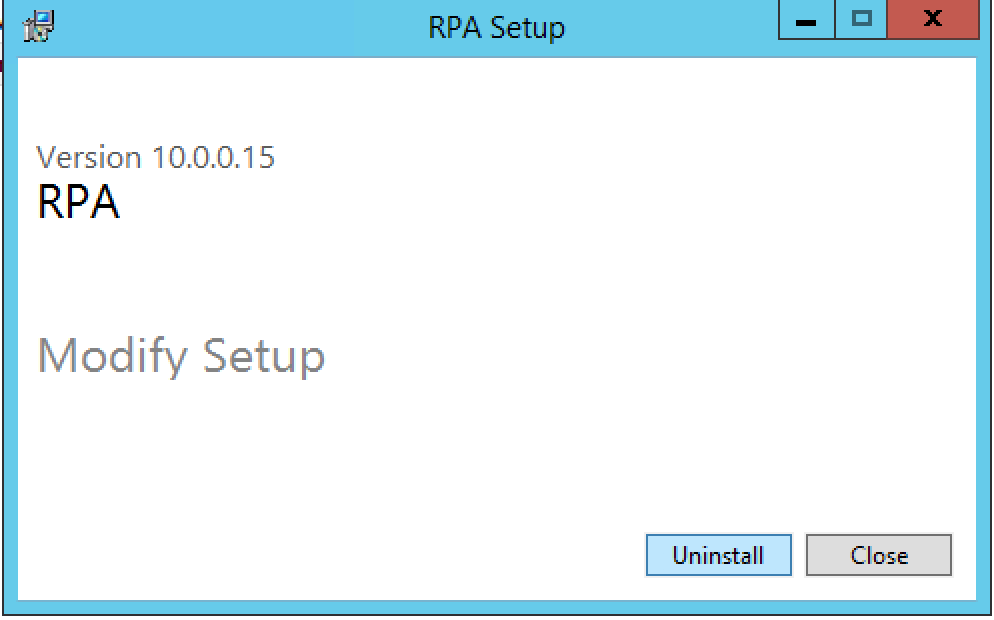
- After Uninstall is finished, click "Restart":
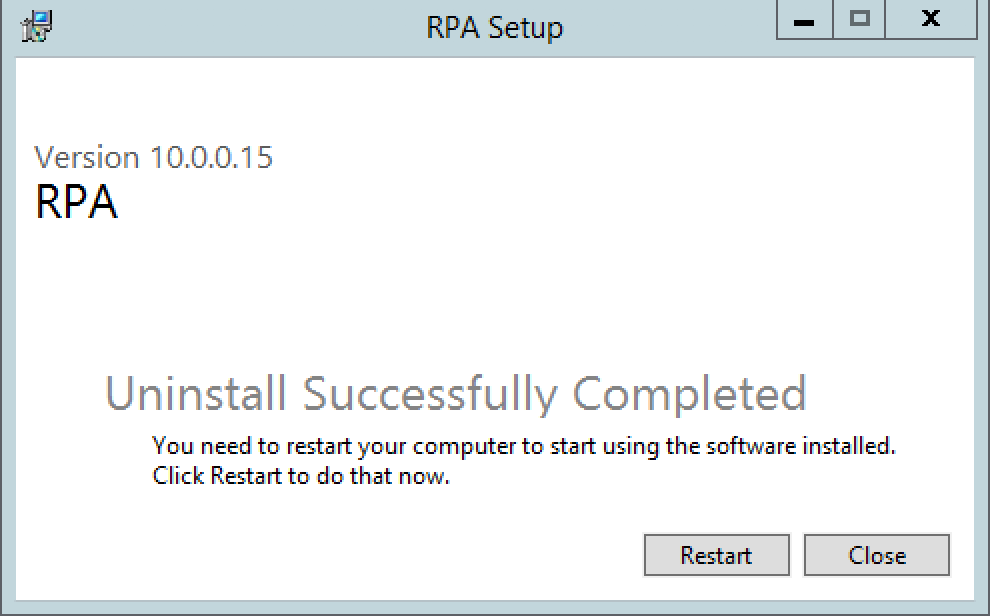
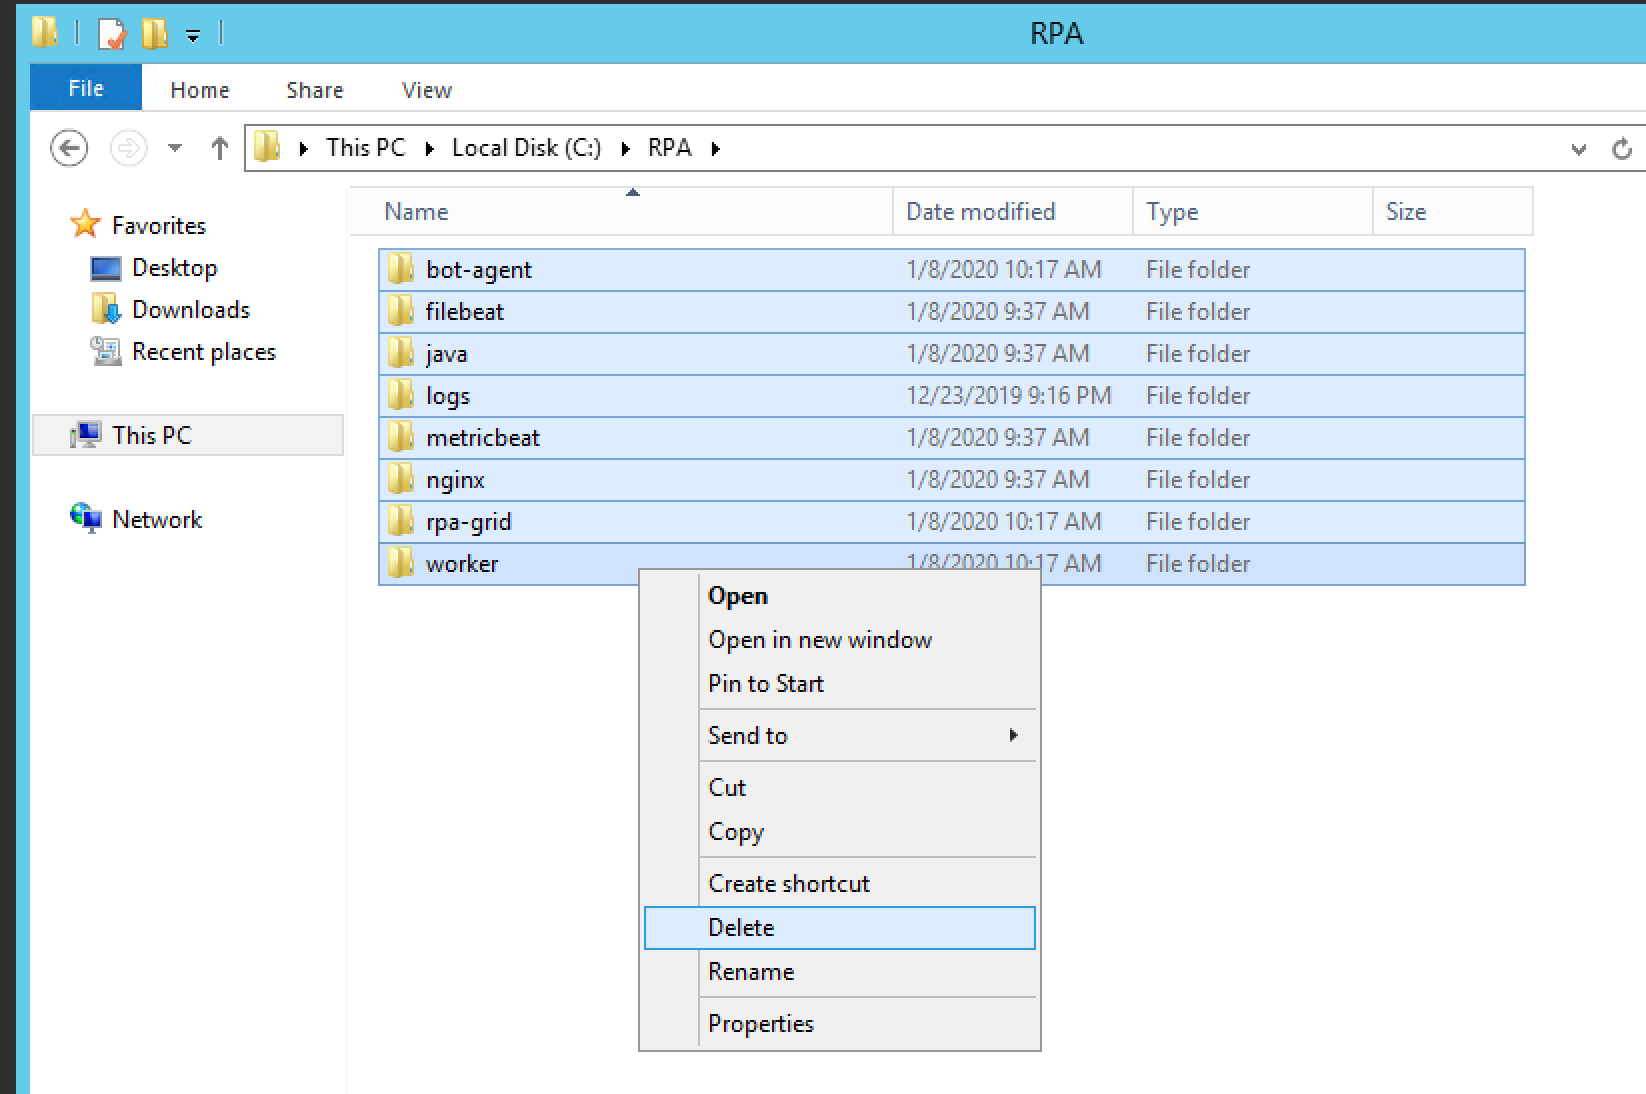
- After server reboot cleanup RPA directory:
Upload and extract 10.1.4 RPA installer to RPA server:
RPA installer is located inside the main Workfusion IA Cloud installer package. Let's upload it from APP server to RPA server. Login via SSH to APP server and execute:
cd /opt/workfusion/workfusion-full-package-10.1.4.0-8859/sources/      # Navigate to sources/ directory

python -m SimpleHTTPServer 991.    # Starting HTTP server in current directory (you may choose any FREE port on APP server). Ensure that port is not blocked by firewall from RPA server
On RPA server download installer from APP server. Open browser and put download link into the Address Bar:
http://rcm-3655-ct1.workfusion.com:9999/RPAInstaller-10.1.1.3.zip
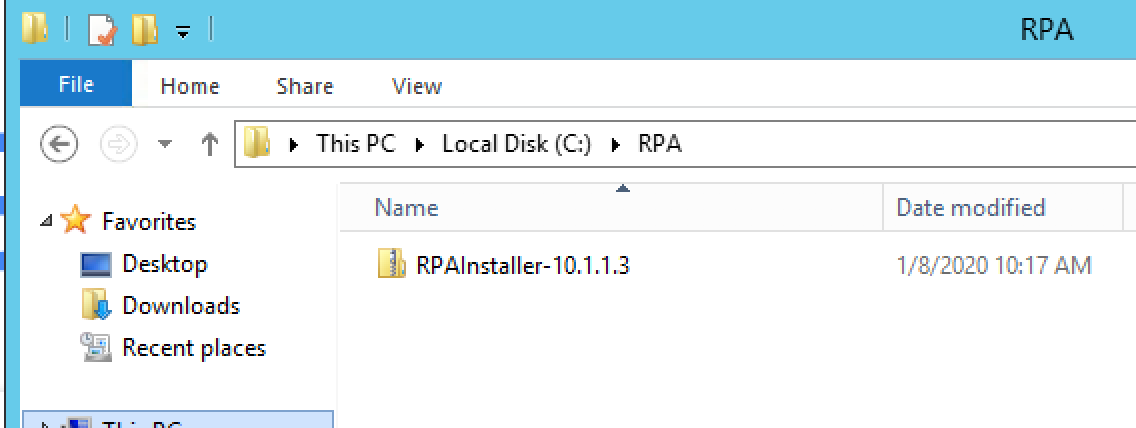
Download will start. After download navigate to directory where RPAInstaller was downloaded:
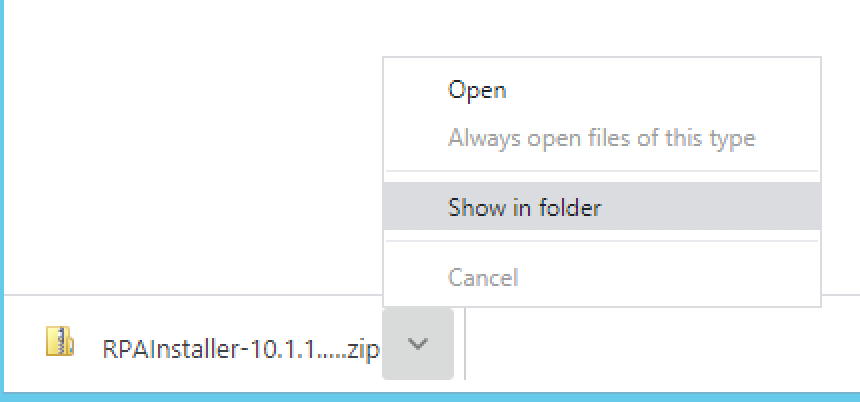
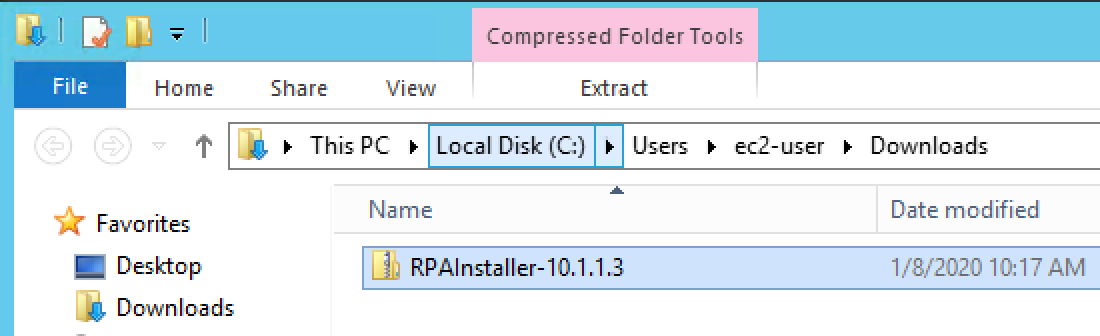
Copy RPA installer to RPA installation directory:
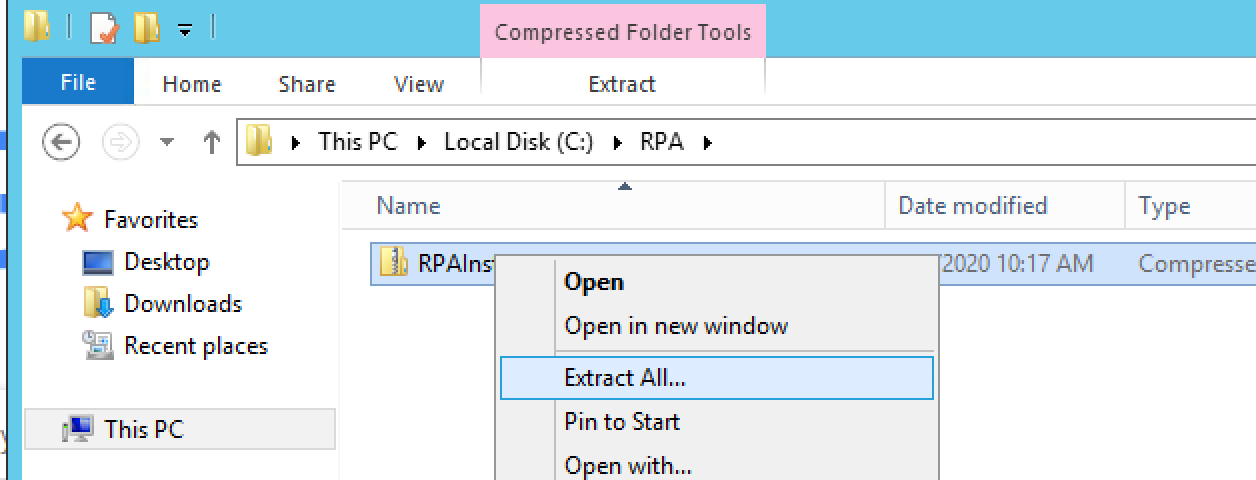
Extract RPA Installer. Right click → "Extract All...":
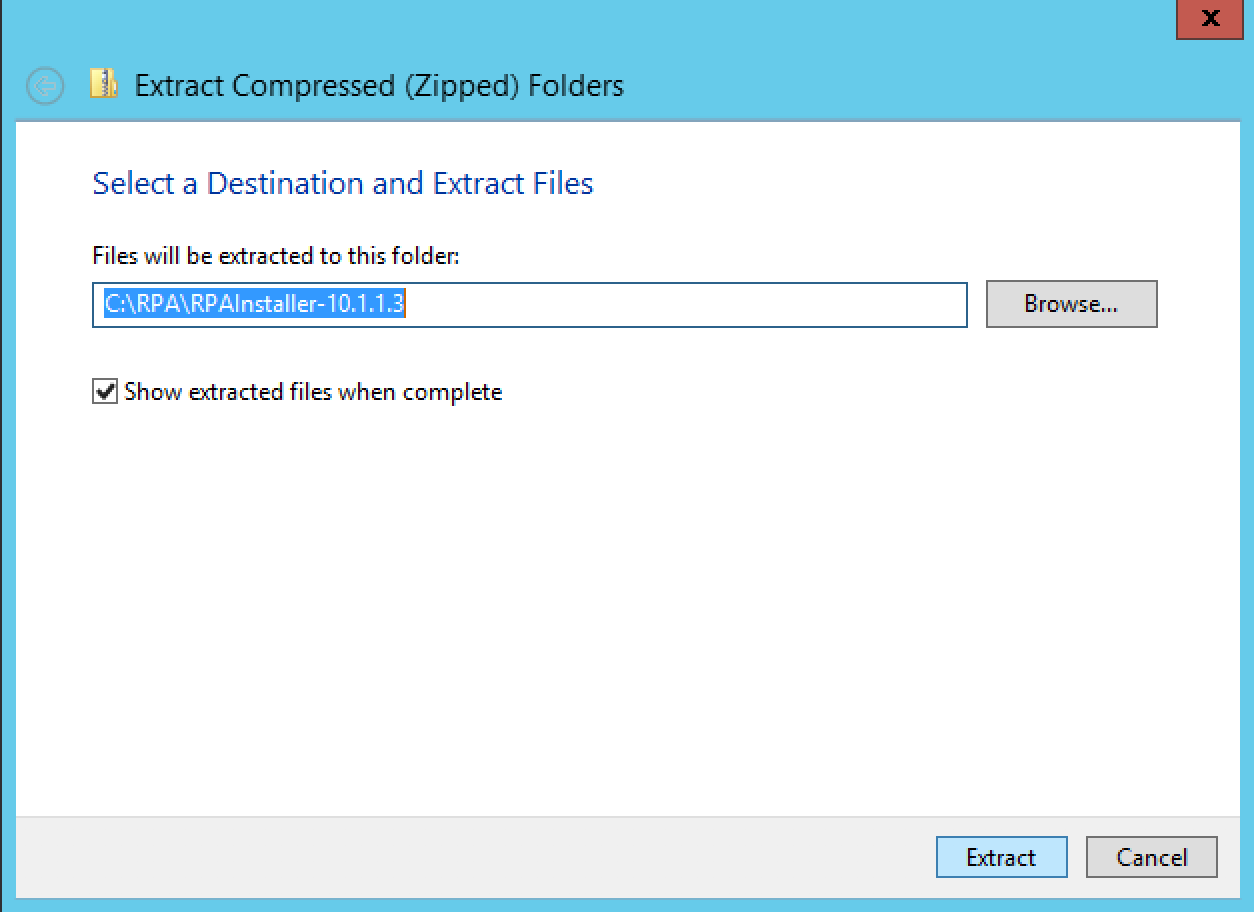
On APP server terminate HTTP server. Press "Ctrl+C".
Install new 10.1.4 RPA following RPA installation guide: 10.1.4 Install RPA Windows Server
Update Analytics Windows server
Connect via RDP to BI server.
Deactivate your current Tableau license. Open Powershell as Administrator and execute (adjust the username and password respectively):
tsm login --username .\ec2-user --password ********
tsm licenses list
tsm licenses deactivate -k <YOUR-LICENSE-KEY>
Uninstall Tableau. In Powershell as Administrator, execute the following:
# Uninstall filebeat
$service = Get-WmiObject -Class Win32_Service -Filter "name='filebeat'"
if ($service) {
  $service.StopService()
  Start-Sleep -s 1
  $service.delete()
}

# Uninstall metricbeat
$service = Get-WmiObject -Class Win32_Service -Filter "name='metricbeat'"
if ($service) {
  $service.StopService()
  Start-Sleep -s 1
  $service.delete()
}

# Stop postgress process
$proceses = "postgress"
Get-Process | Where-Object {$proceses.Contains($_.Name)} | Stop-Process -Force

# Uninstall Tableau
$path = Get-ChildItem -Path  C:\workfusion\WorkFusionAnalyticsServer\packages -Recurse tableau-server-obliterate.cmd
if ($path) {
  &$path.FullName -y -y -y
}

# Uninstall postgress
$app = Get-WmiObject -Class Win32_Product | Where-Object {$_.Name -match "psql"}
if ($app) {$app.Uninstall()}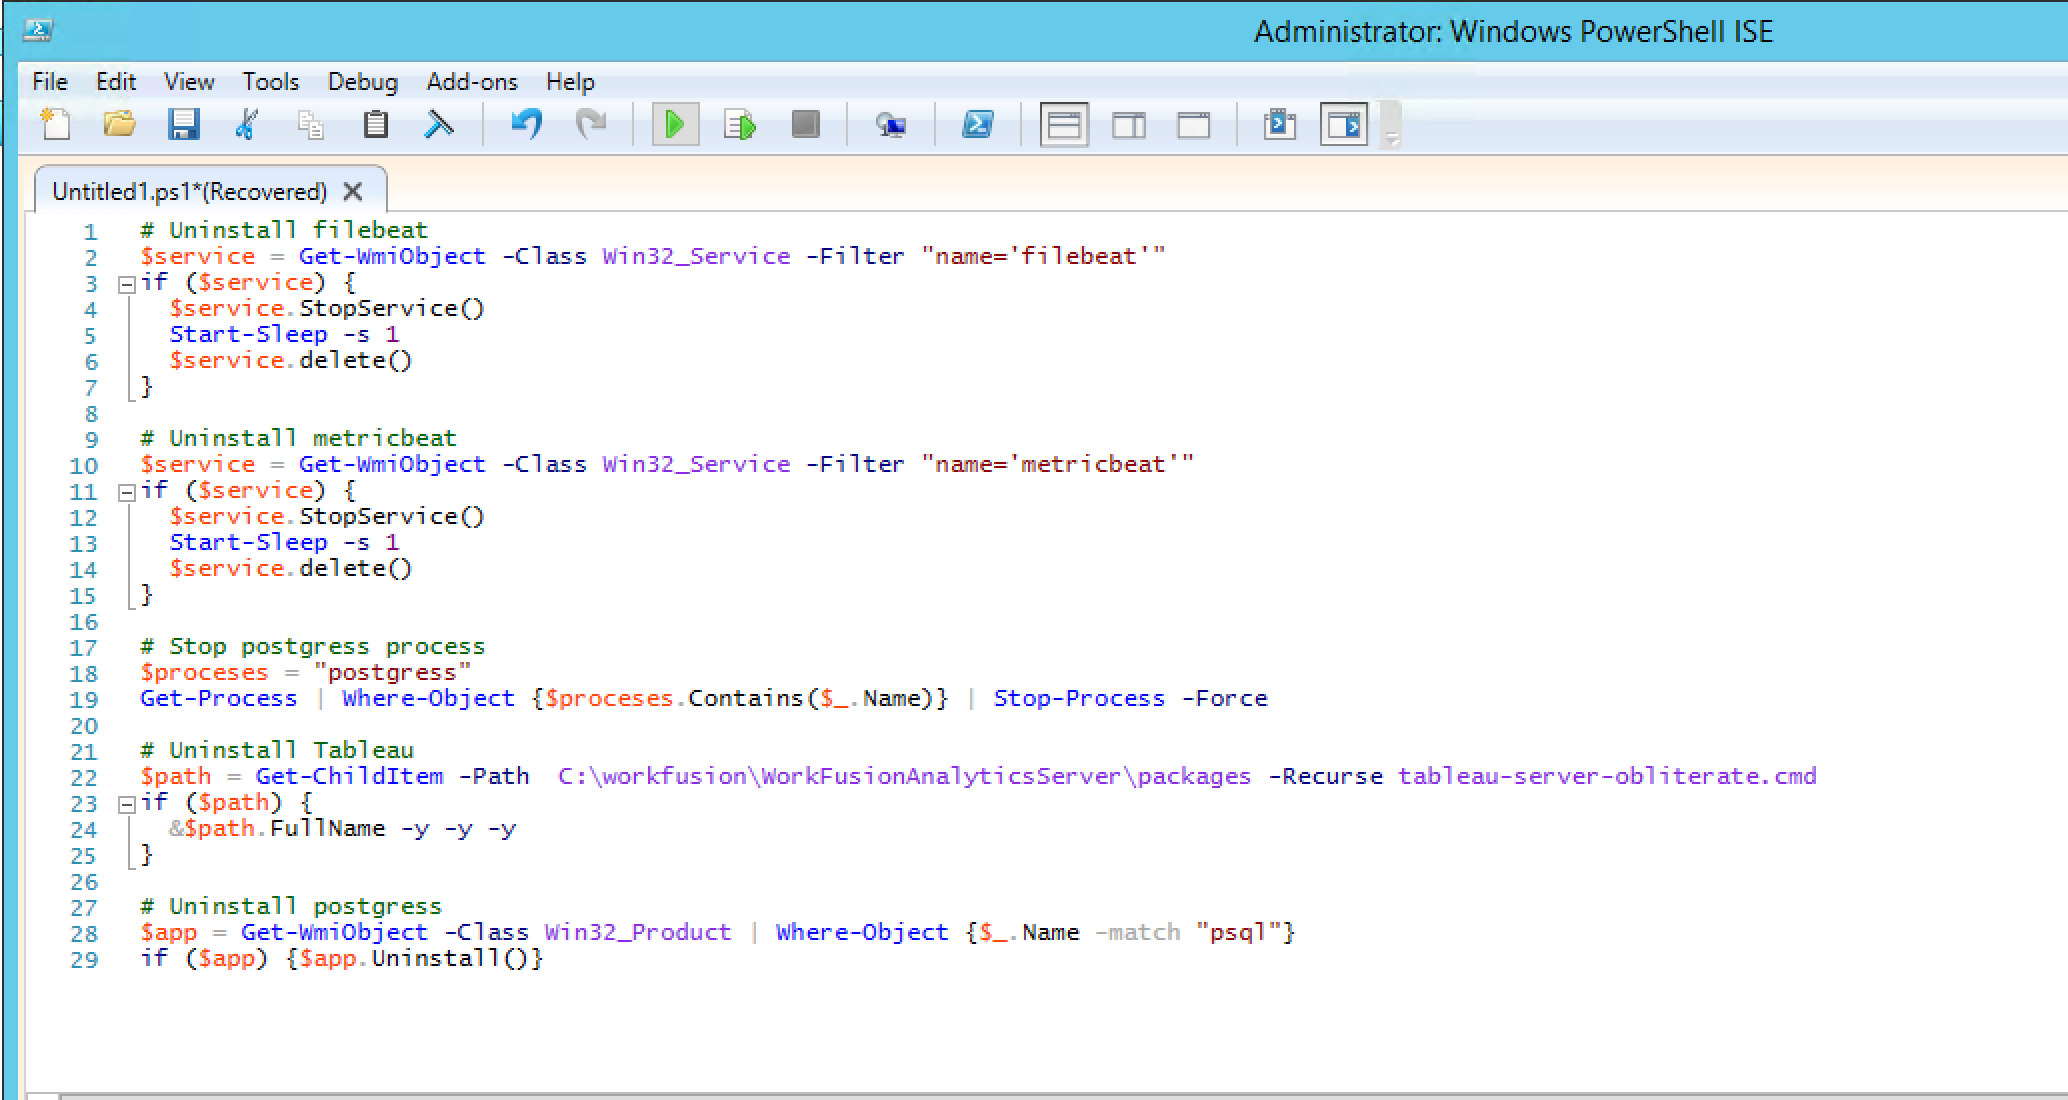
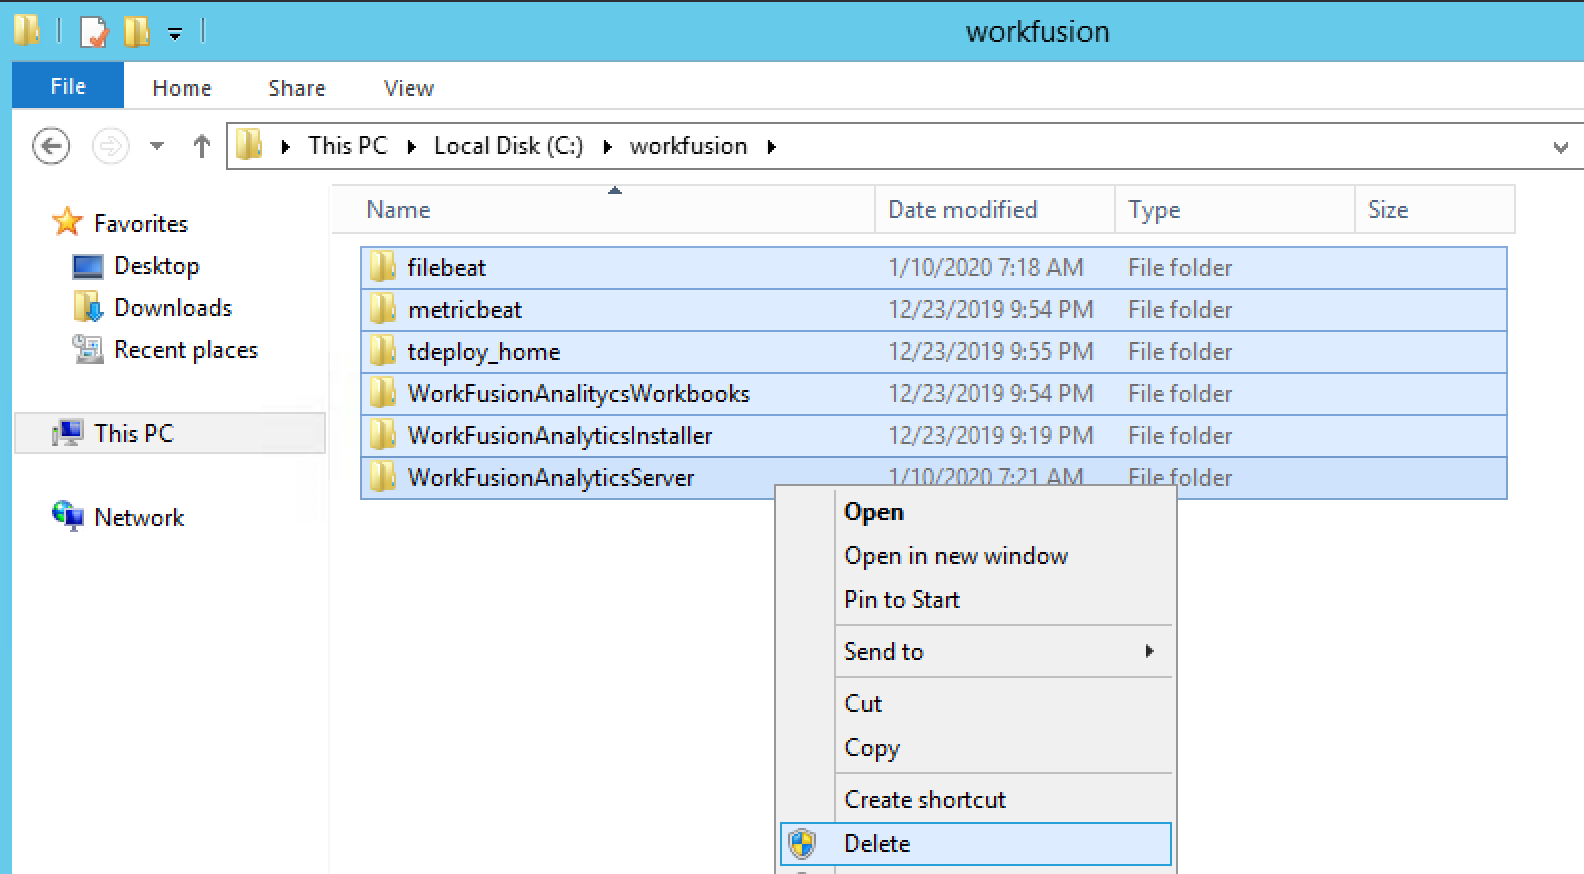
Reboot BI server.
Cleanup BI Installation directory:
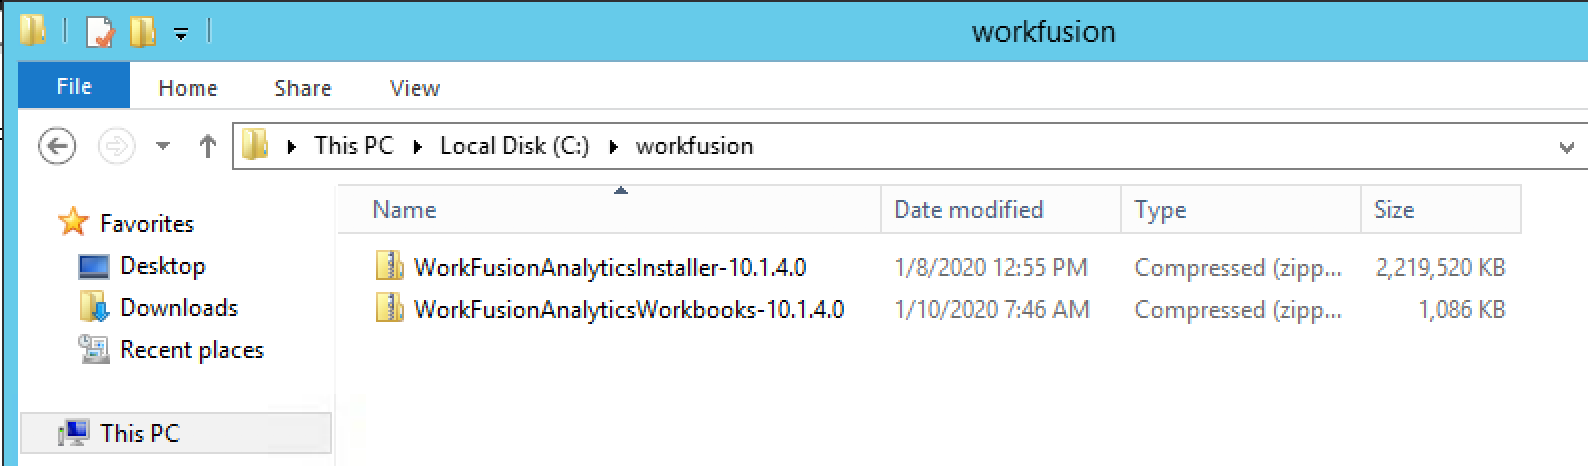
Upload BI Installer and Workbooks from APP server to BI server (you may use the same way to download files from APP host to BI host as we used on RPA server). The following files need to be copied (adjust installer path respectively):
/opt/workfusion/workfusion-full-package-10.1.4.0-8859/sources/WorkFusionAnalyticsInstaller-10.1.4.0.zip
/opt/workfusion/workfusion-full-package-10.1.4.0-8859/sources/WorkFusionAnalyticsWorkbooks-10.1.4.0.zip
After copying to BI server:
Install new 10.1.4 BI server following the guide: 10.1.4 BI Windows Server Installation
After installation, re-activate the license.