
Enable read-only access in Kibana
After the installation, you can create custom users in Kibana to assign specific permissions to them.
Create additional users
To create a user:
In the main menu, go to Management > Security > Users, and click Create user.
Specify the user's details and assign them to one or several existing roles.
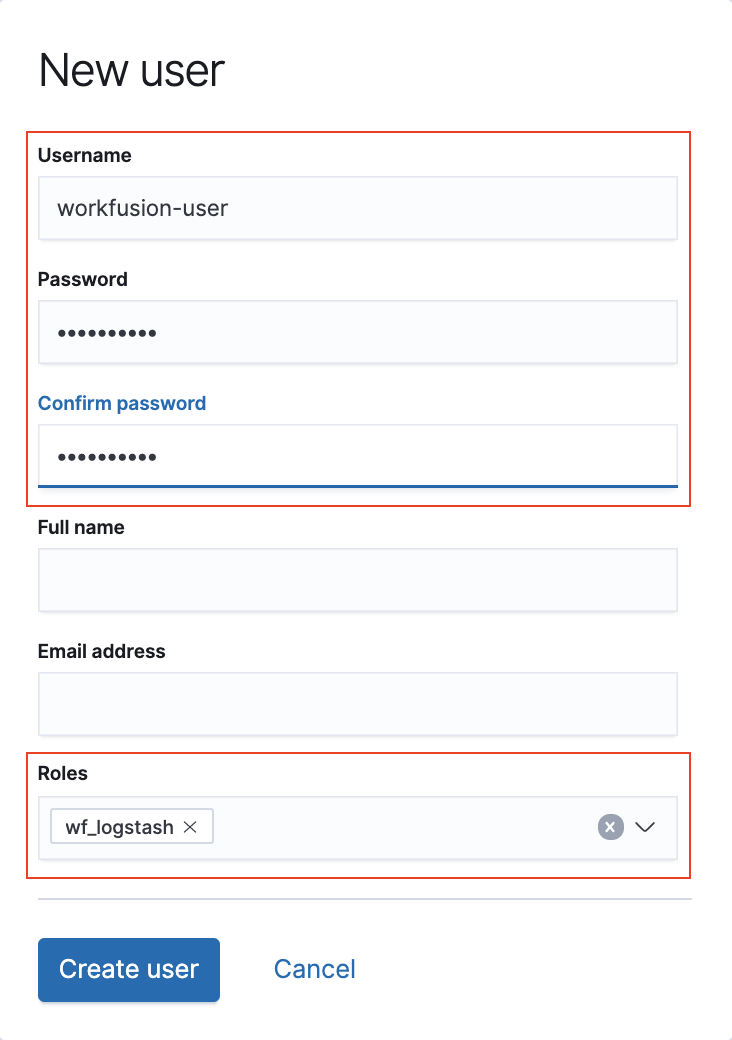
Click Create user.
Create read-only "dashboard viewer" user
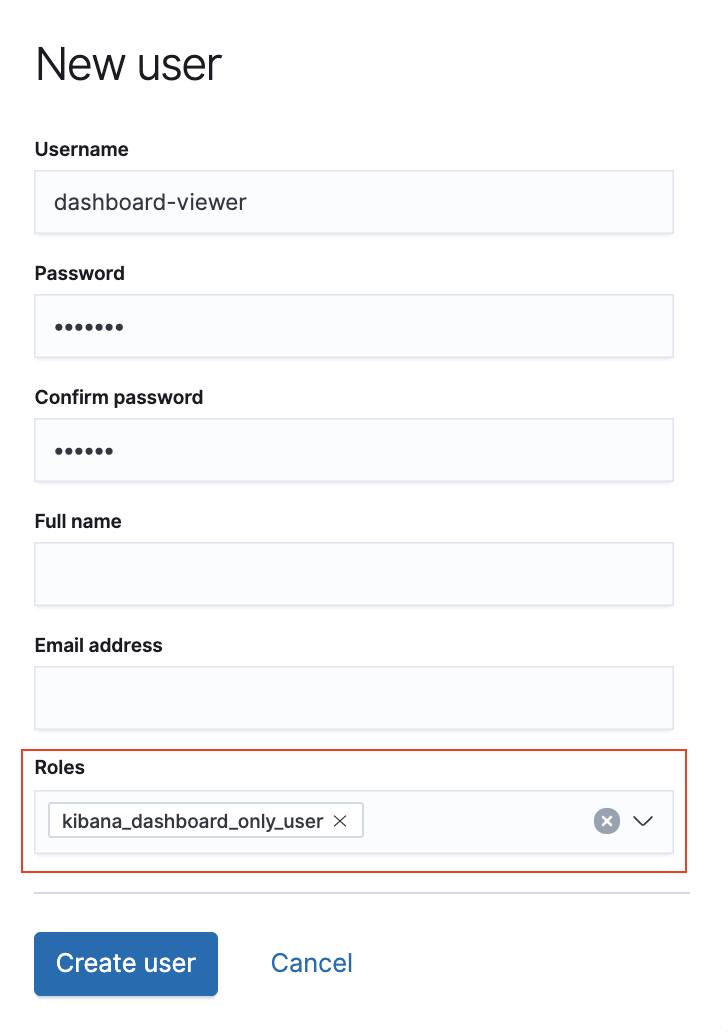
The kibana_dashboard_only_user role is available in Kibana by default and provides the Read permissions for dashboards.
If you don't have such a role in your Kibana instance, create it:
In the main menu, go to Management > Security > Roles, and click Create user.
Specify the new role's name, for example dashboard_viewer. In the Elasticsearch section, set the following parameters:
- Cluster privileges: monitor
- Index privileges > Indices: "*"
- Index privileges > Privileges: read
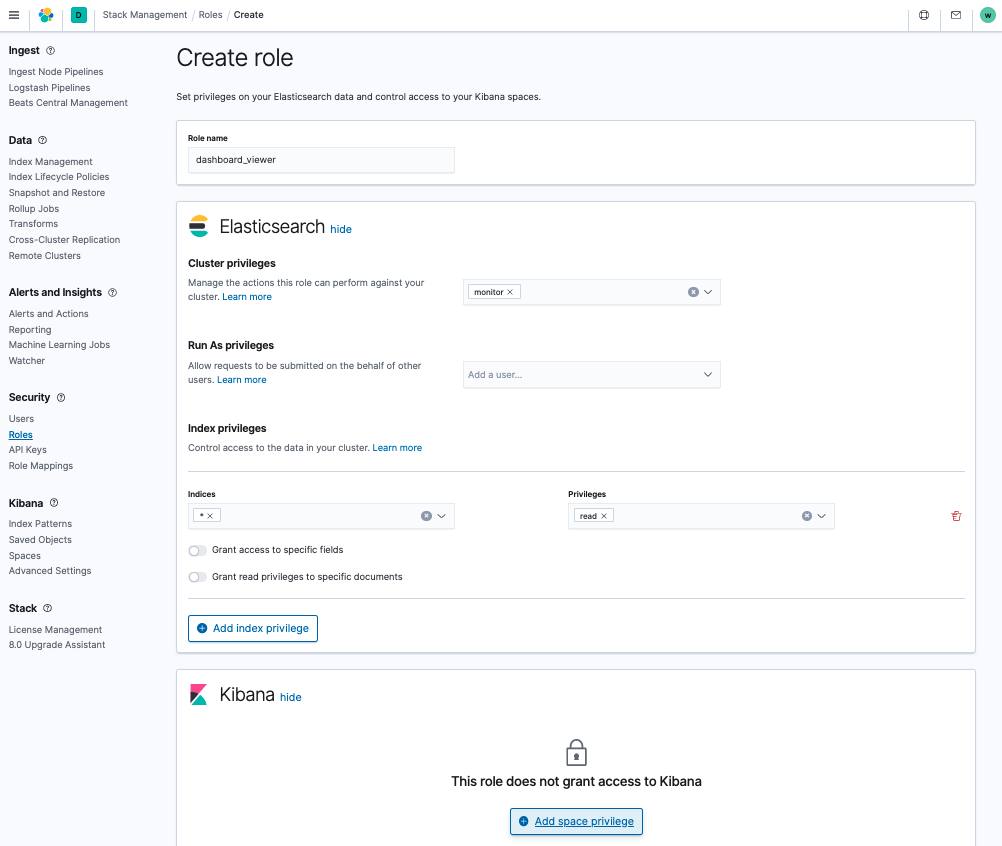
Click Create role.
To create a custom user that can only view dashboards, follow the instruction above. On Step 2, assign the new user to the kibana_dashboard_only_user or your custom dashboard_viewer role.
Add logs-viewing role
You can also add a custom role for viewing logs only. To do that:
In the main menu, go to Management > Security > Roles, and click Create role.
Enter Role name, and in the Kibana section, click Add space privilege.
In the Space privileges window, specify the following settings:
- Spaces: select Global to set permissions for all spaces or Default.
- Privilege: select Custom.
- Customize by feature: for the Logs feature, set the Read privilege.
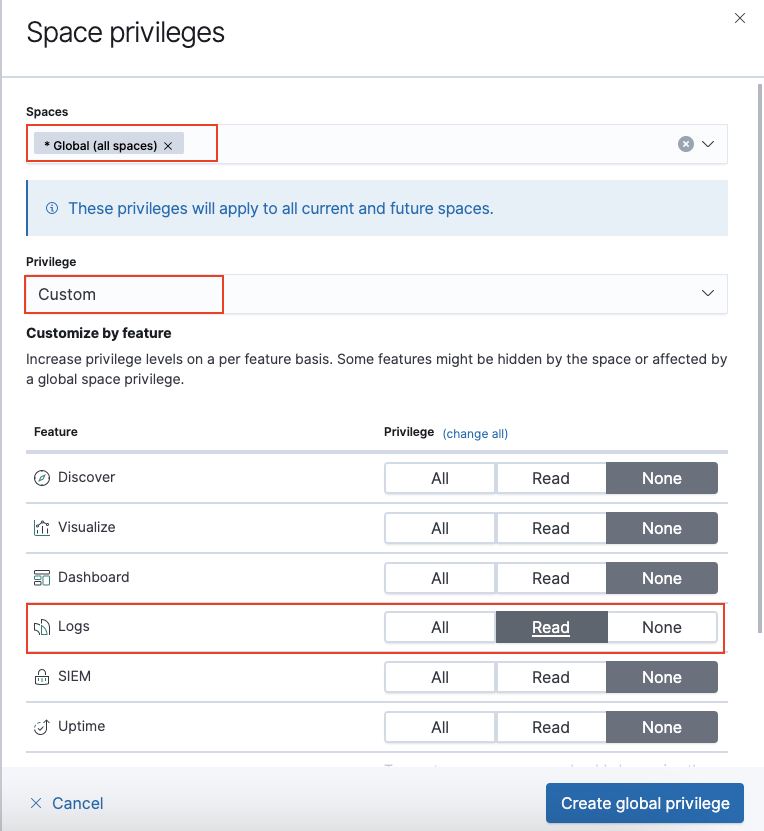
- Click Create space privilege and then click Create role.
To create a custom user that can only view logs, follow the instruction above. On Step 2, assign the new user to the role you have just created.
For additional information, refer to the Kibana role management documentation.