
How to upload files to Amazon AWS S3
The article describes how to upload files to Amazon AWS S3 used as the main file storage system by the Intelligent Automation Cloud components.
It is recommended to install and use one of the following third-party S3 clients:
- S3 Browser for managing files on the Amazon cloud
- DragonDisk for managing files on the on-premise S3 Emulator for macOS and Unix user
If DragonDisk doesn't work, you can use S3 Browser.
Set up training File Storage account
For all Training instances, all trainees use one S3 folder and a single account. It is bad practice to provide a single account in real projects, but for educational purposes, it is acceptable.
Mind the following policy:
- Do not share any personal, client, and other strict data in this PUBLIC bucket.
- Use your Academy ID as the name for your folder.
important
- If you are using training instances: watt | volt | ampere | ohm, your bots have WRITE permissions only on the wf-aa-students bucket.
- Do not use access-key or secret-key in s3-put on instances. Configuration is set on the application level!
- In case your company has an internal training instance, use your own S3 keys. No need to set credentials in the code as they are configured on the instance.
Download and install S3 Browser by following these steps:
Go to the S3 Browser site and download the latest software version.
Install S3 Browser on your Windows PC (.NET Framework 4.5 or higher is required).
Use the following settings for the trainee's account in S3 Browser:
- Account name: Use any name
- Account type: Amazon S3 Storage
- Access Key ID and Secret Access Key: Credentials for Amazon S3 Storage. The S3 access keys are provided on demand. To receive the credentials, click the Support button on any Automation Academy course page and request them from the AA team.
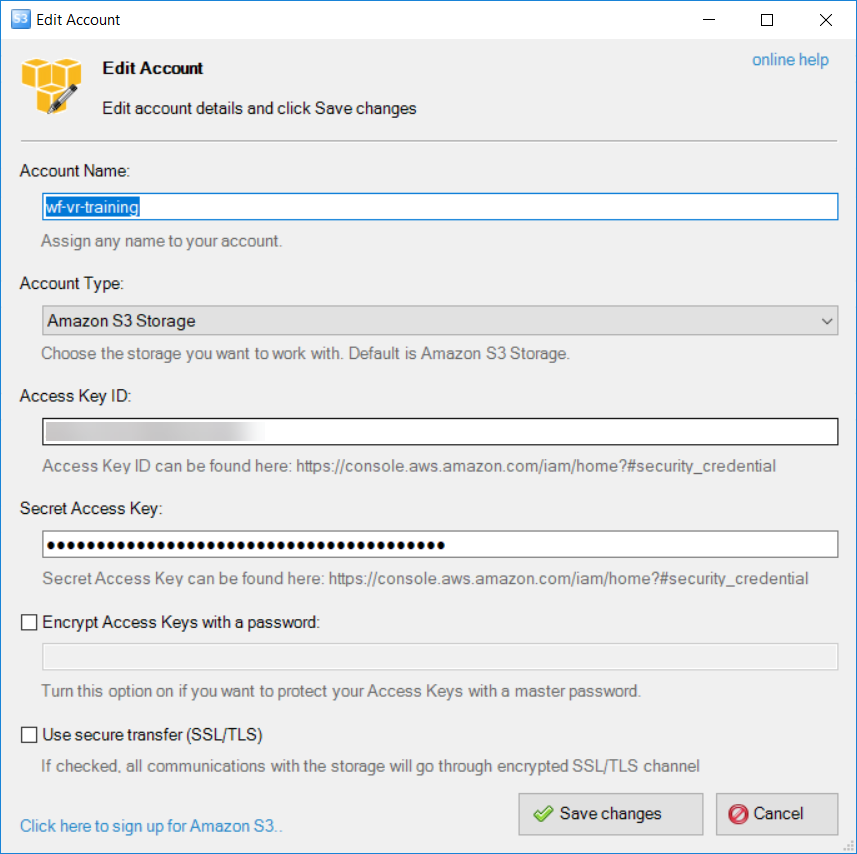
Click Save changes.
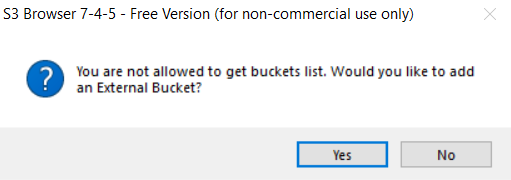
S3 Browser asks you to add an external bucket because your keys cannot list all buckets. Answer Yes.
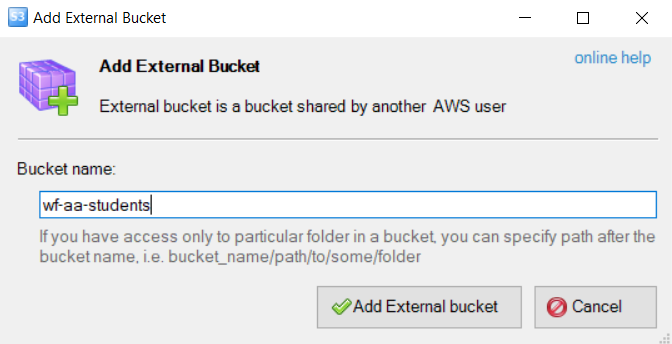
Provide an appropriate name for this bucket, for example, wf-aa-students.
Set up WorkFusion Studio
Go to Run > Run Configurations and type in the URL and keys you specified in S3 Browser.
Configure on-prem S3 Emulator
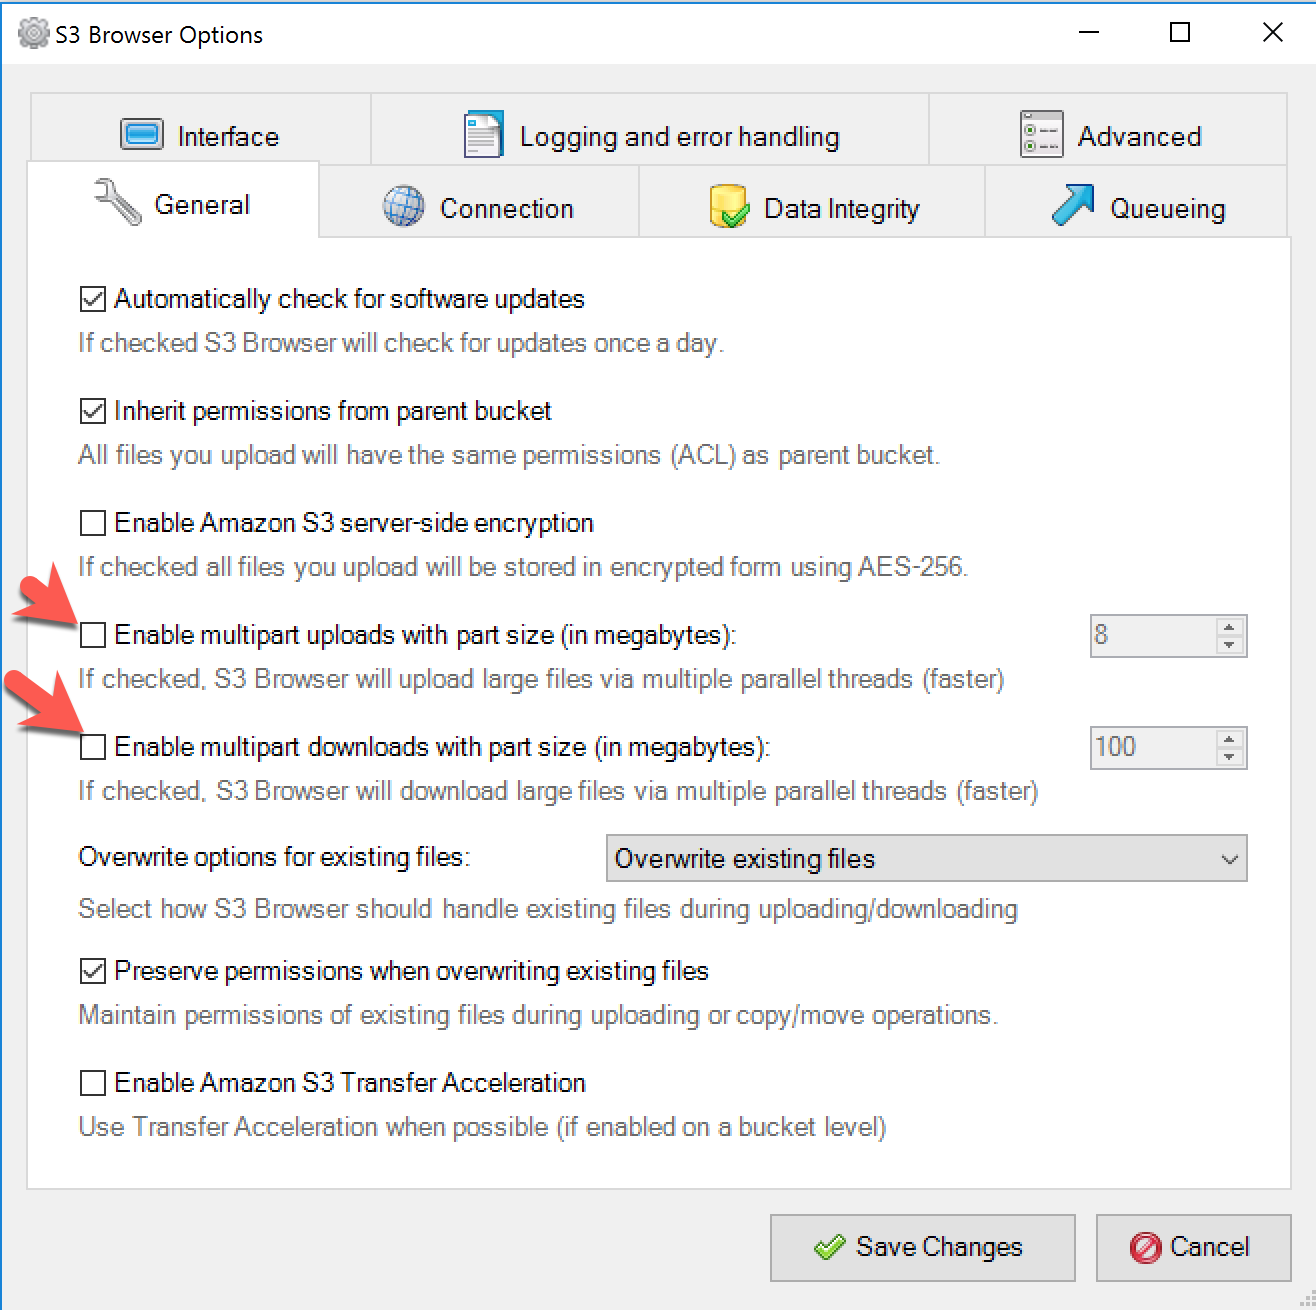
Disable multipart upload and download as it is not supported in S3 Emulator.
Configure external buckets
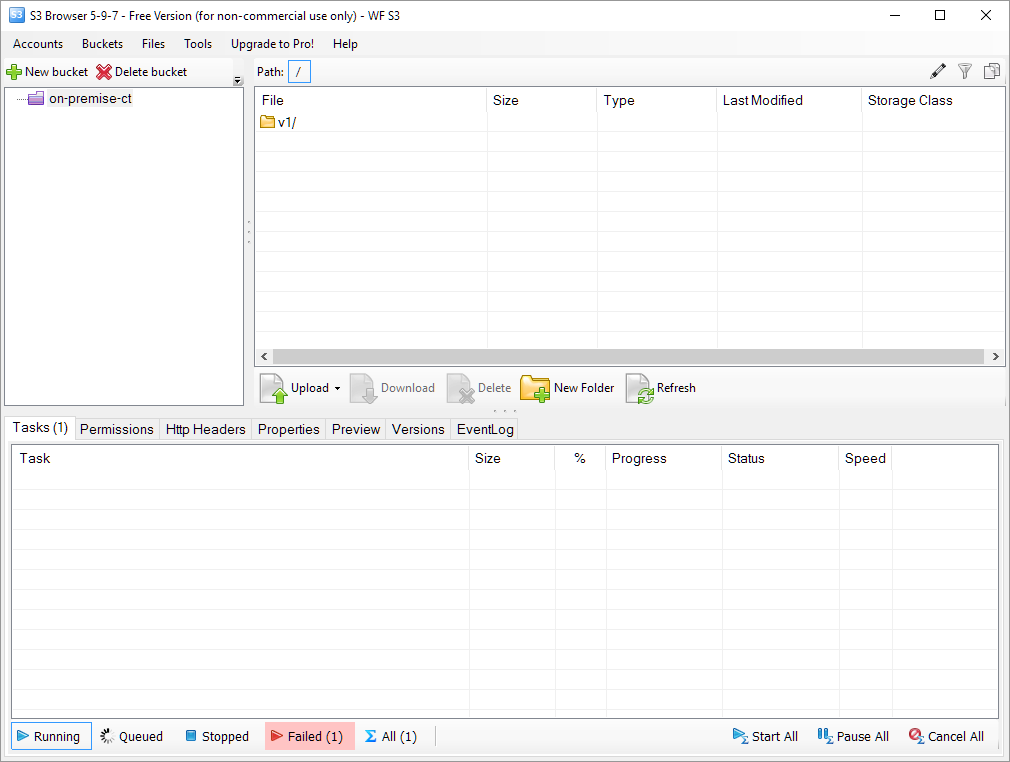
Go to Tools > Options > General.
Uncheck Enable multipart uploads with part size. After connection to the S3 bucket, you can browse the bucket and download or upload files.
Get WEB URL links
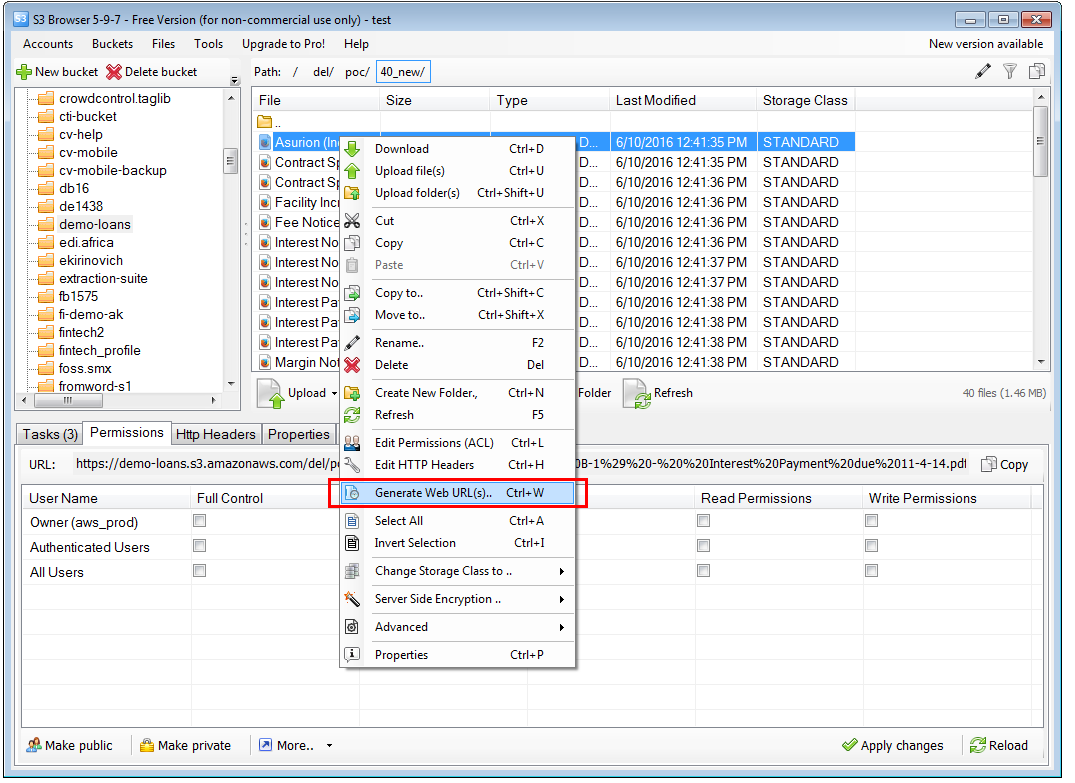
This chapter explains how to use the S3 Browser user interface to fetch a list of links pointing to files stored in the same folder. You can select any number of files and generate corresponding HTTP(S) links.
Right-click the target file and choose the Generate Web URL option.
In the Web URLs Generator window, click the Copy to clipboard button.
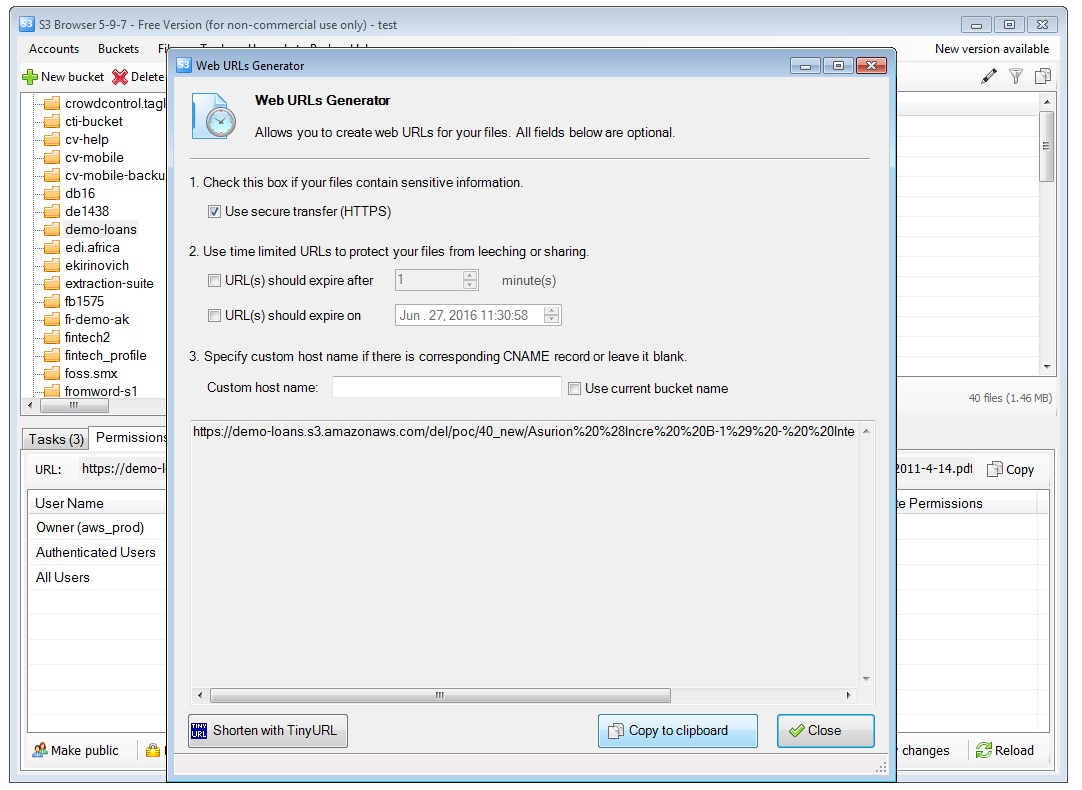
Paste the link where you need.
Sometimes, you may need to change the generated URL to correctly display the document in the browser and in the Information Extraction task, for example:
| Action | URL |
|---|---|
| Generated URL | https://bucket-name.s3-server-name/folder/...file.pdf |
| Change to | https://s3-server-name/bucket-name/folder/...file.pdf |
Configure public access to file or directory
Select a target file or directory.
Go to the Permissions tab.
Select the Read checkbox for All Users.
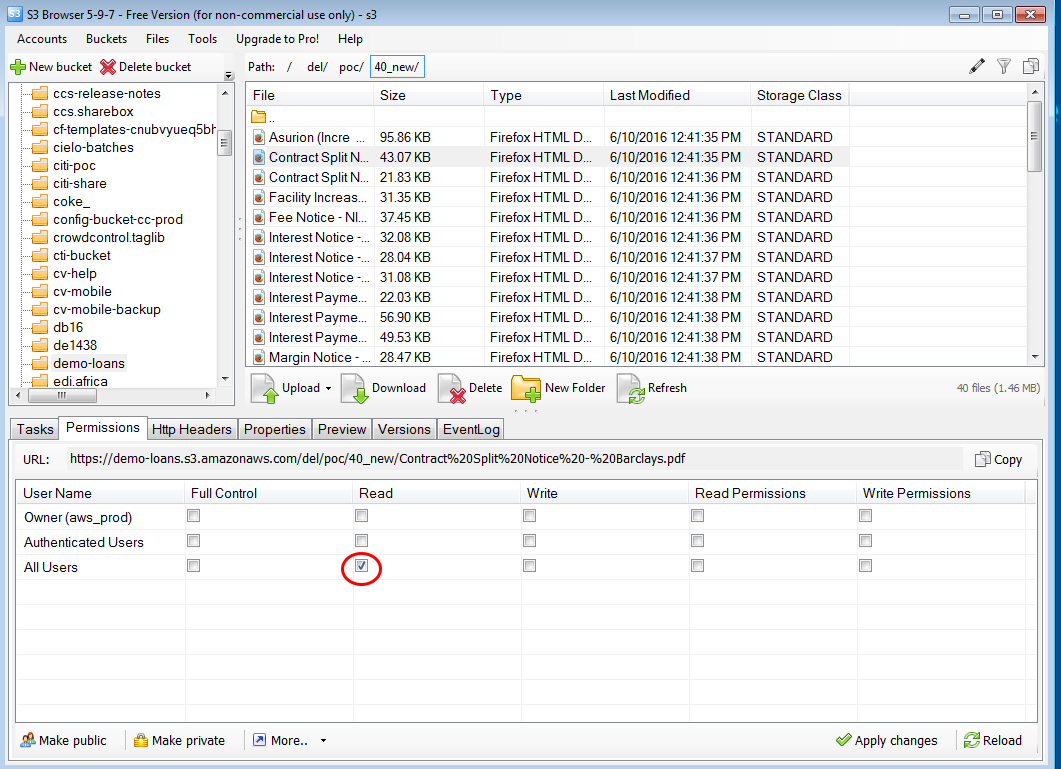
Copy the file public link as described below and open it in the browser to ensure that the file is available.
Set up account in DragonDisk client
DragonDisk is an alternative to S3 Browser. You can use one of those.
To download and install DragonDisk, go to the DragonDisk site and download the latest version.
- To create a new DragonDisk account, go to File > Accounts > New.
- Specify DragonDisk settings:
- Provider: <Amazon S3>
- Service Endpoint: <DNS name where S3 emulator is installed>
- Account name: <Any name you like>
- Comment: <Any comment you like>
- Access Key: <Provided by WF team>
- Secret Key: <Provided by WF team>
- HTTP Port: 80
- HTTPS Port: 443
- Select the Connect using SSL/HTTPS checkbox. You are now connected to the on-premise S3 emulator and can browse the bucket and download or upload files.
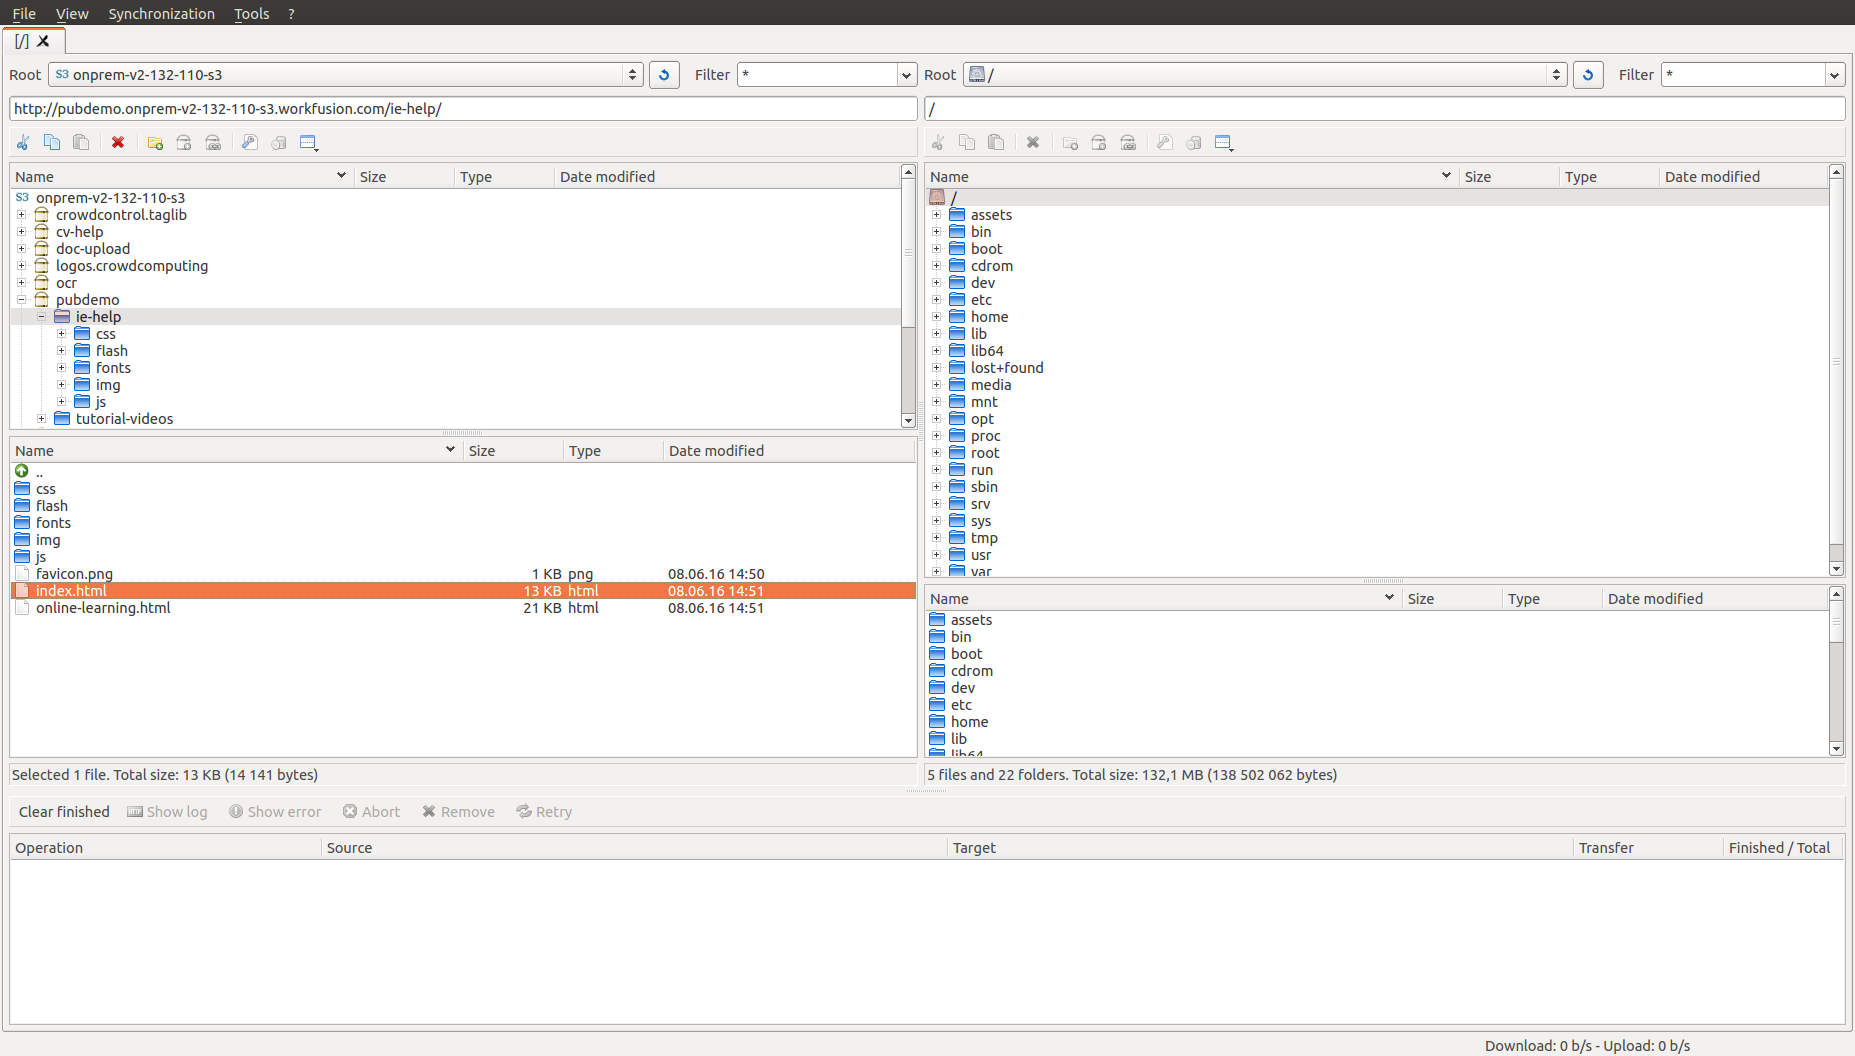
Get WEB URL links
Select the target file, right-click it, and choose Properties.
Go to the Web URL tab.
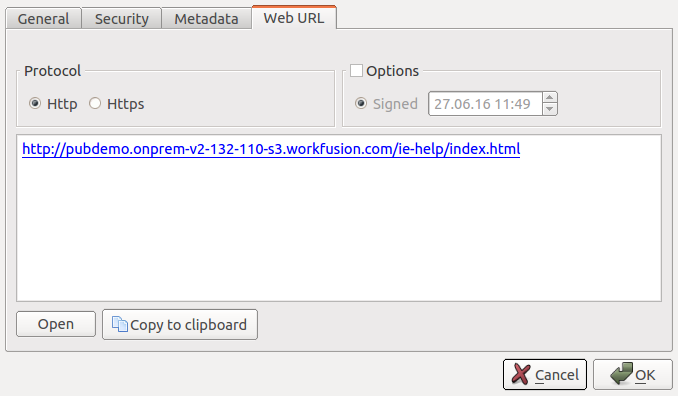
In the Protocol combo box, select the Http value, and click Copy clipboard.
Paste the link where needed.
Enable public access to file
Select the target file, right-click it, and choose Properties.
Go to the Security tab, click the Add button, choose All users, and select the Download checkbox for All Users.
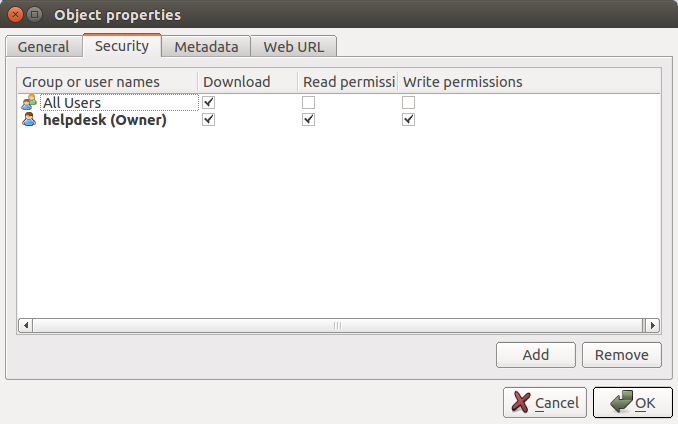
Copy the file public link as described above and open it in the browser to ensure that the file is available.
Enable public access to all files in folder
Select the target folder, right-click it, and choose Properties.
Open the Child objects tab. Select the Replace permissions checkbox.
Go to the Security tab, click the Add button, choose All users, and select the Download checkbox for All Users.
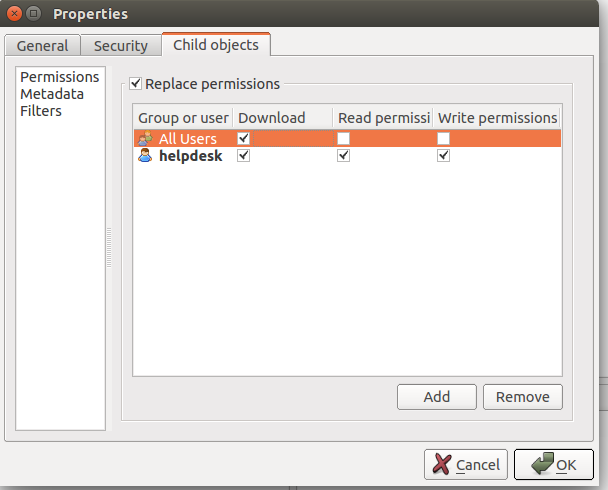
Copy the public link to the file as described above and open it in the browser to ensure that the file is available.