Integrate ADFS Identity Provider
The document describes the integration of ADFS SSO with WorkFusion services.
Configure WorkFusion User Management
Log in to the master admin console
https://<user-management-domain>/auth/admin/master/console/with the super admin credentials.Select WorkfusionRealm.
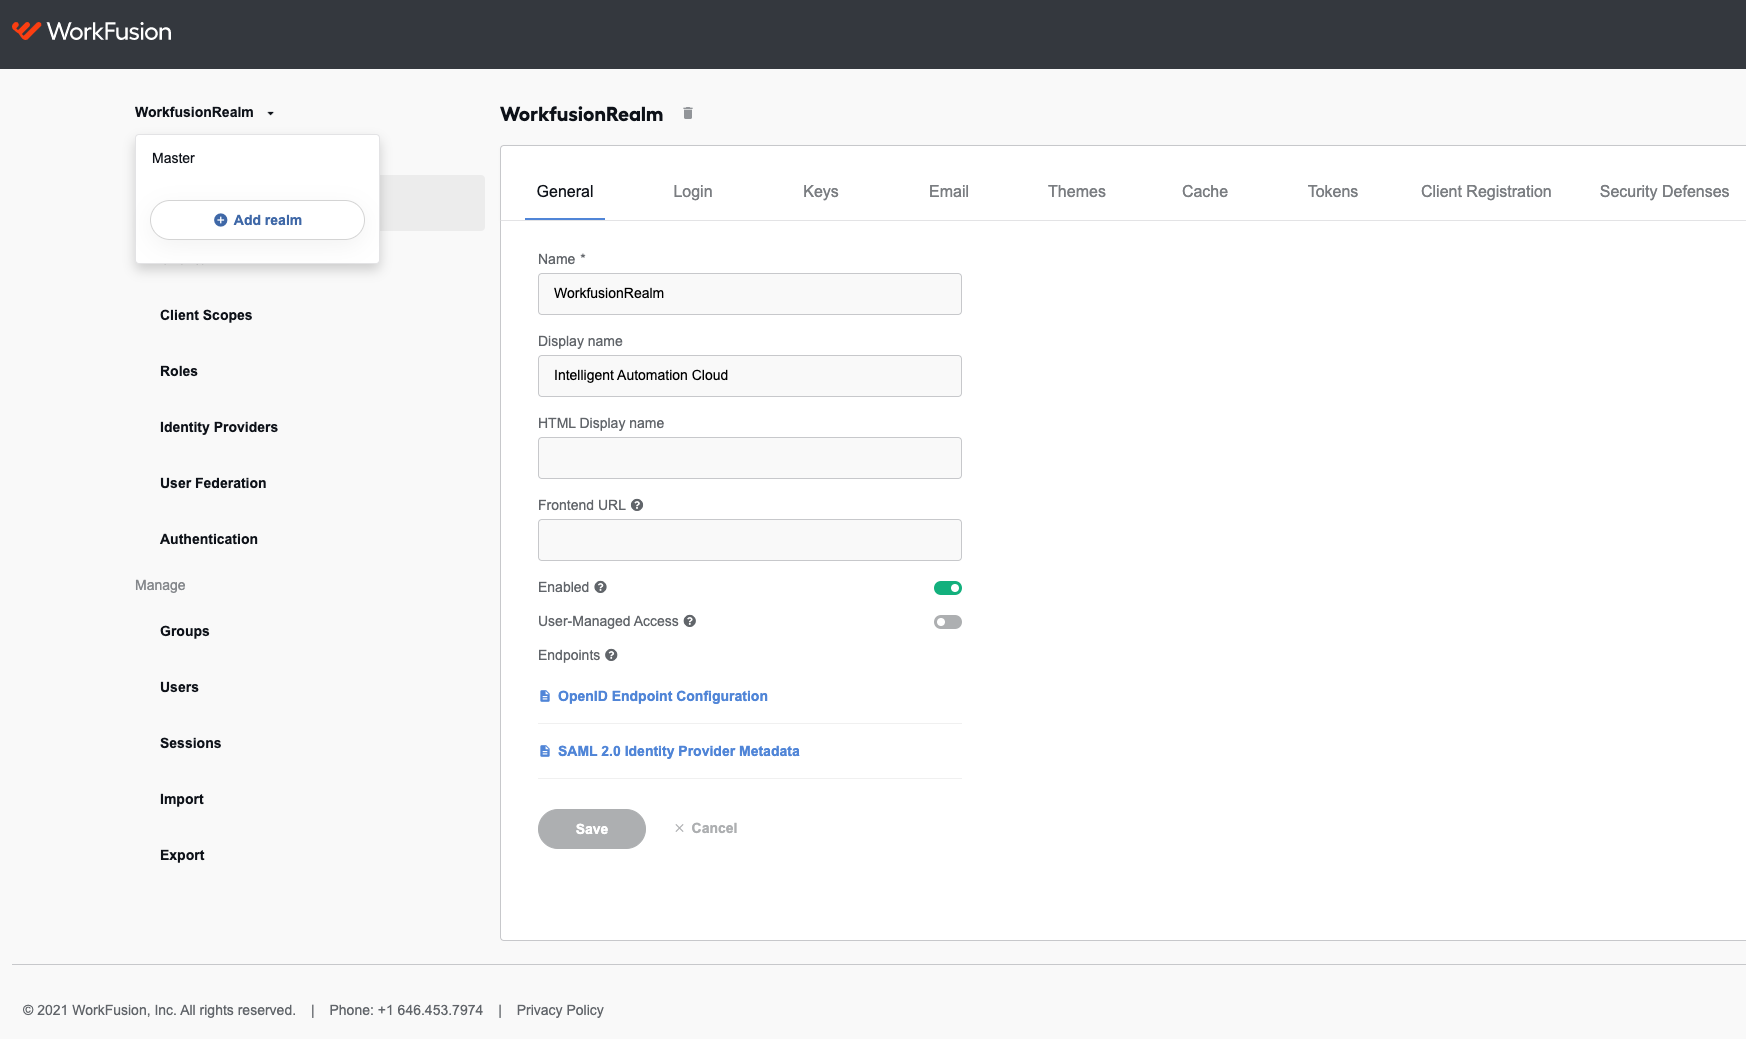
On the Identity Providers page, create the new SAML v2.0 IdP provider.
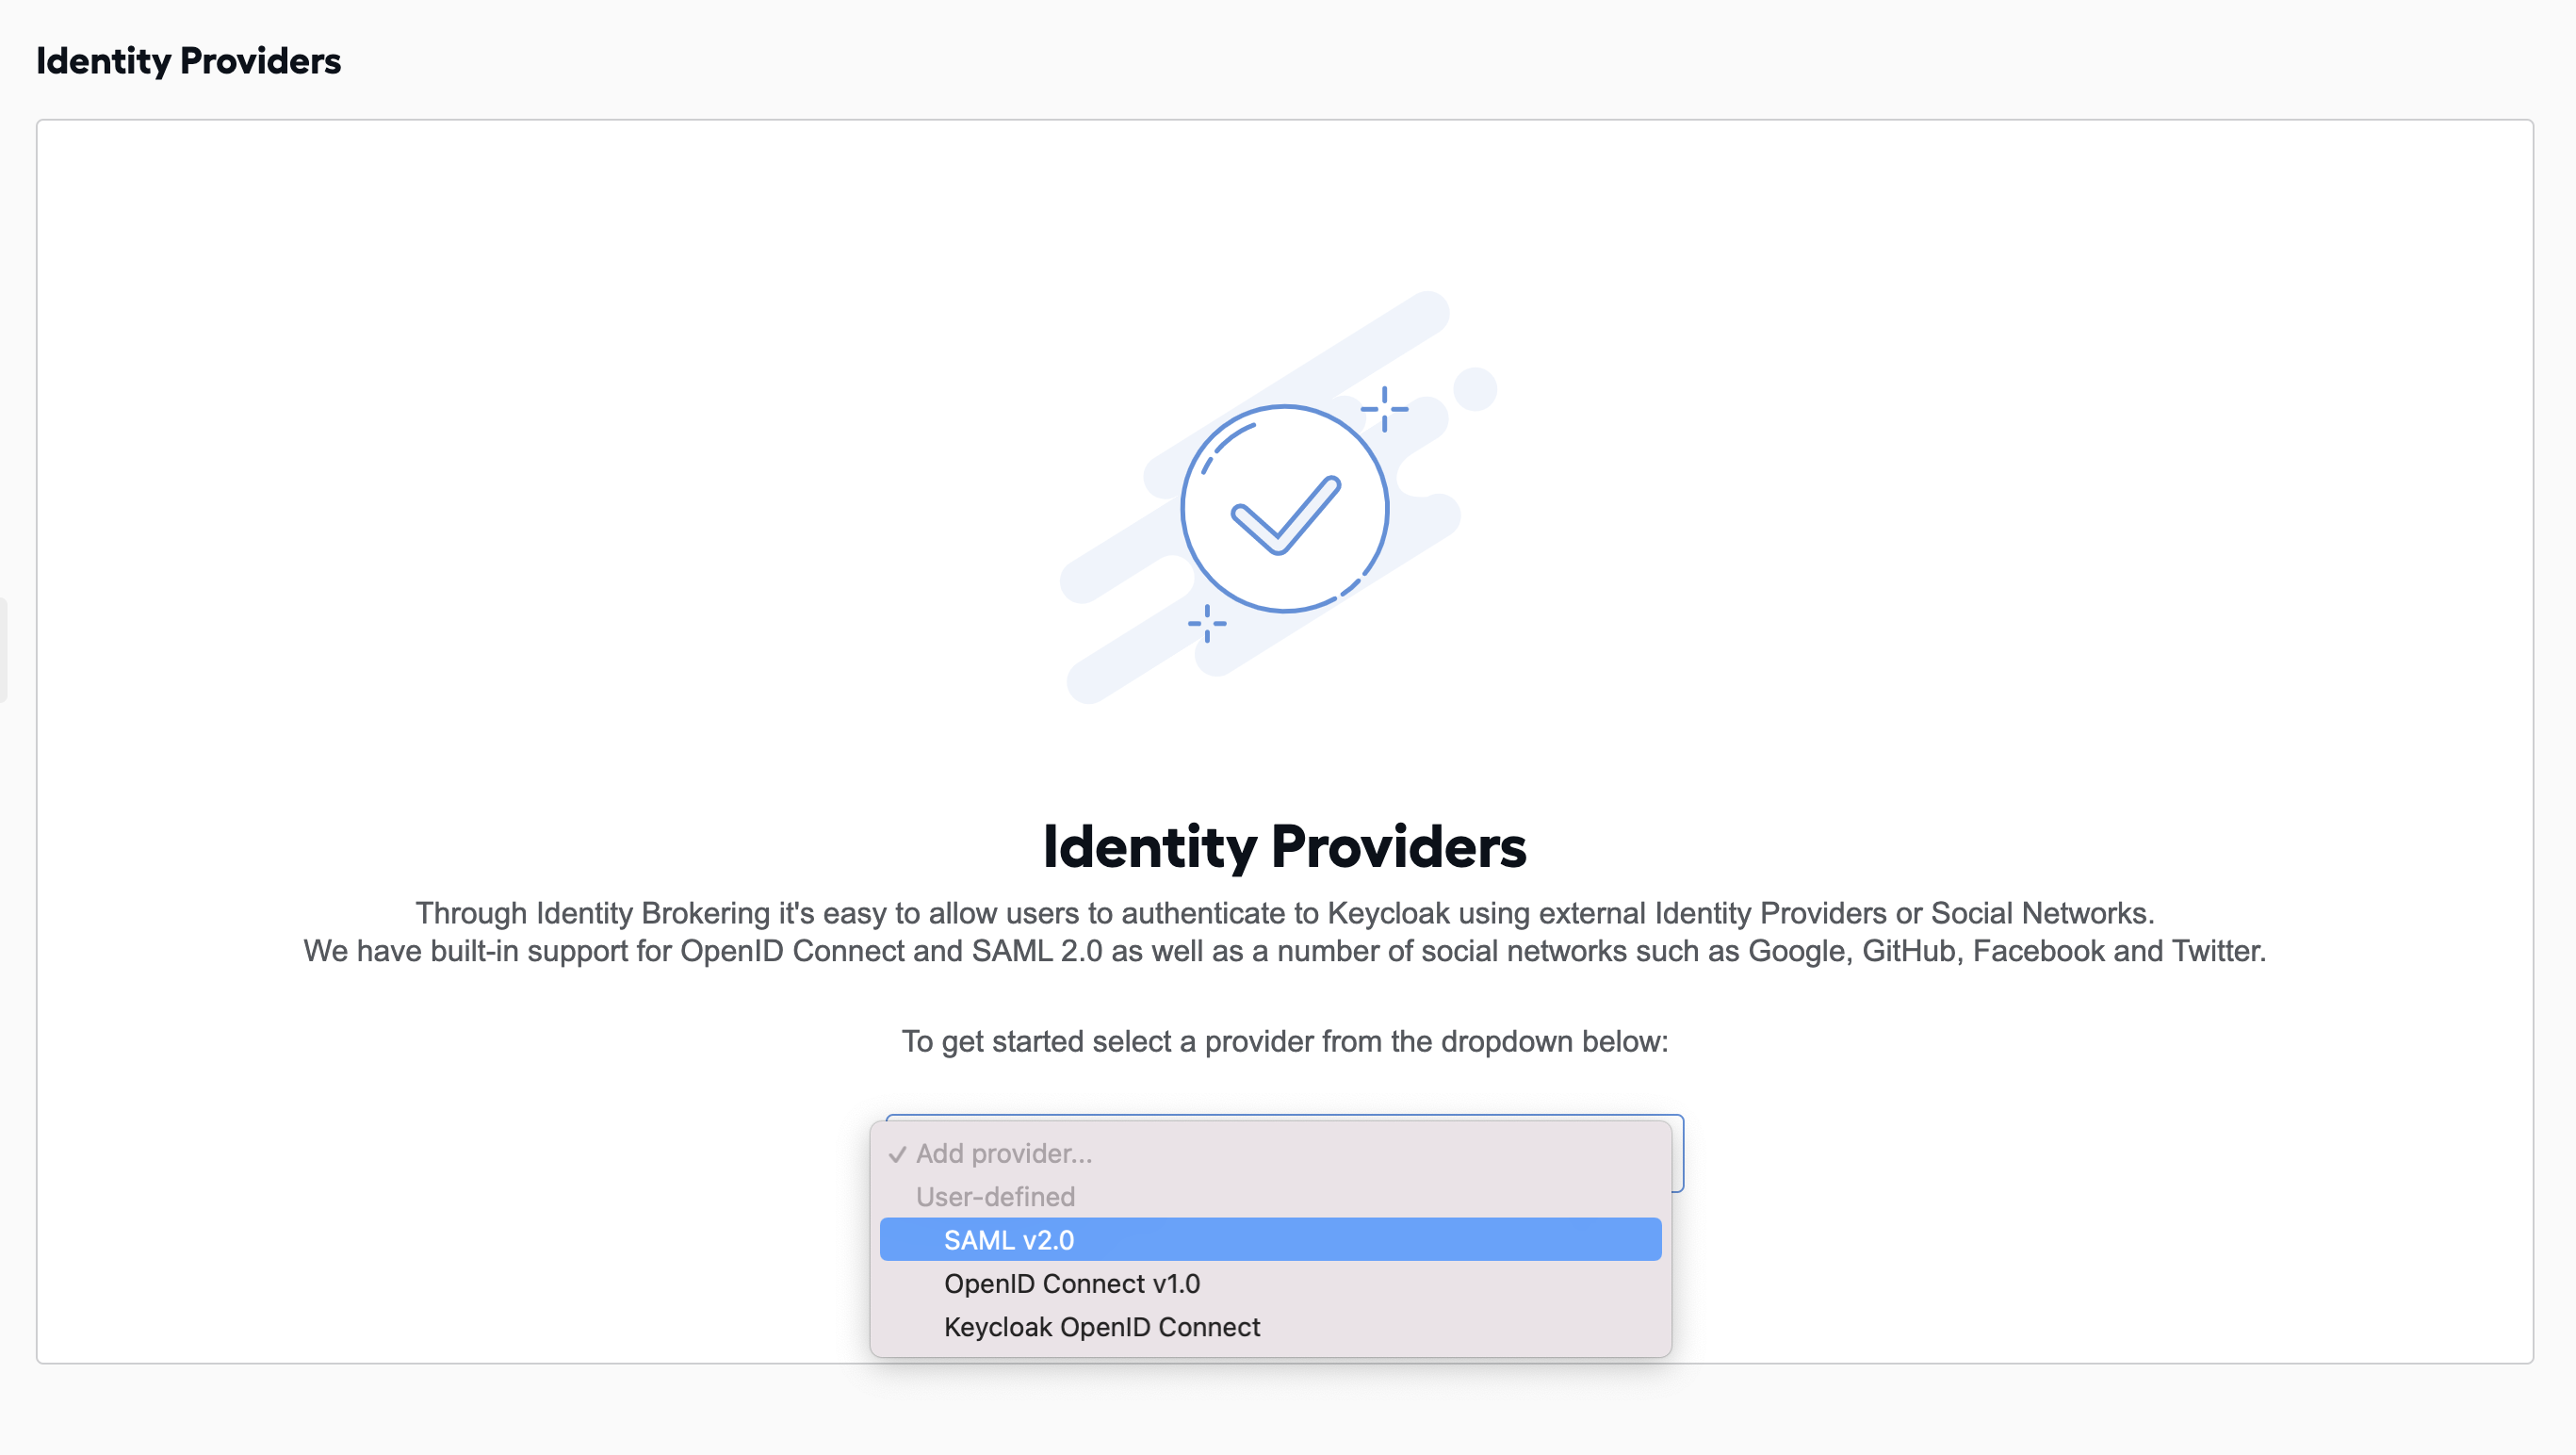
In the saml group, on the Settings tab, set the parameters:
- Alias: saml
- Display name: any meaningful name, for example, saml
- Enabled: true
- Store tokens: true
- Trust email: true
- First login flow: depending on the installation type, select:
- first broker login for migration from the version of the WorkFusion platform that didn't have Keycloak.
- Link trusted provider to skip the user verification step.
Navigate to the Import External IDP Config group. In the Import From URL box, paste the URL of the federation metadata config:
https://<your_domain>/FederationMetadata/2007-06/FederationMetadata.xml(for example,https://fs.wflab.io/FederationMetadata/2007-06/FederationMetadata.xml) and click Import.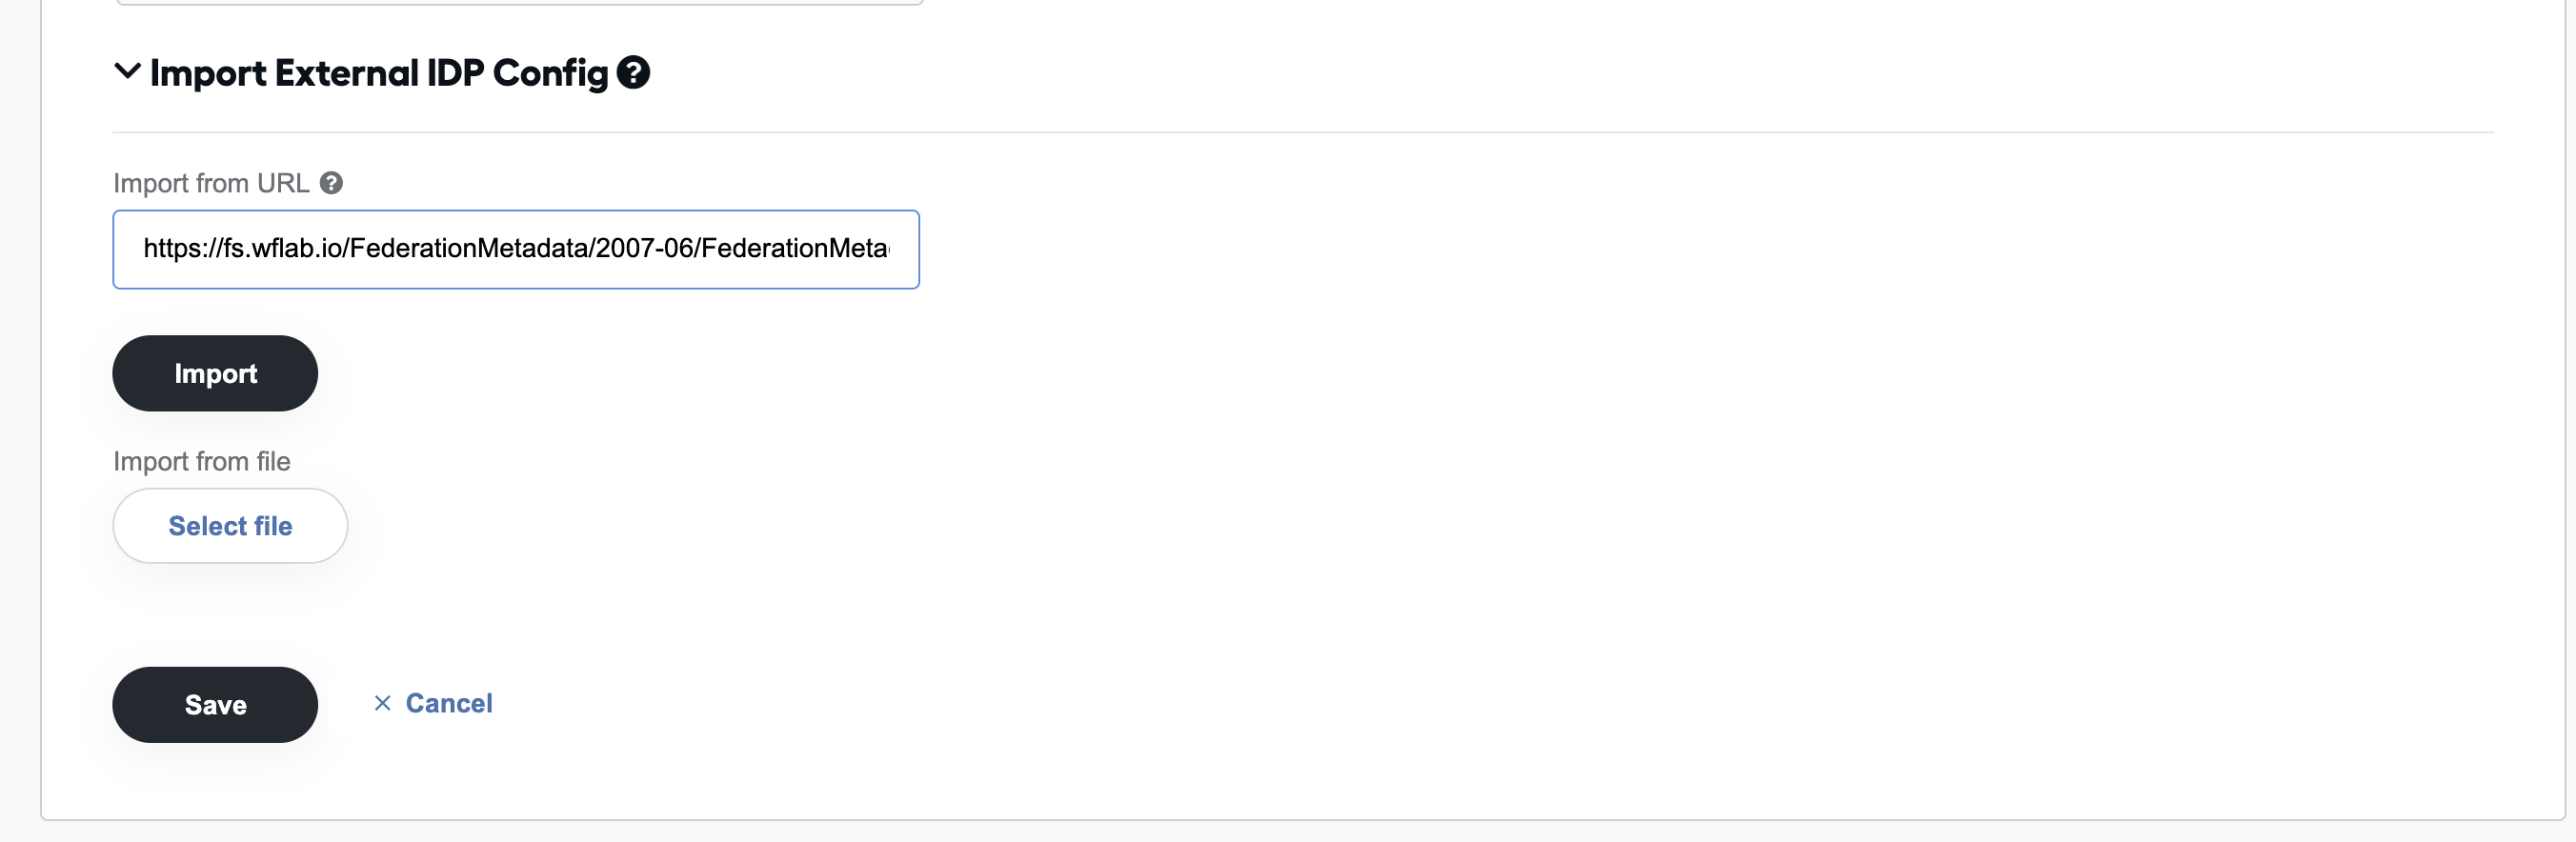
In the SAML config group, configure the SAML assertion signature:
- Want AuthnRequests Signed: enabled
- Want Assertions Signed: enabled
- Want Assertions Encrypted: enabled
- Signature Algorithm: RSA_SHA256
- SAML Signature Key Name: CERT_SUBJECT
- Force Authentication: enabled
- Validate Signature: enabled
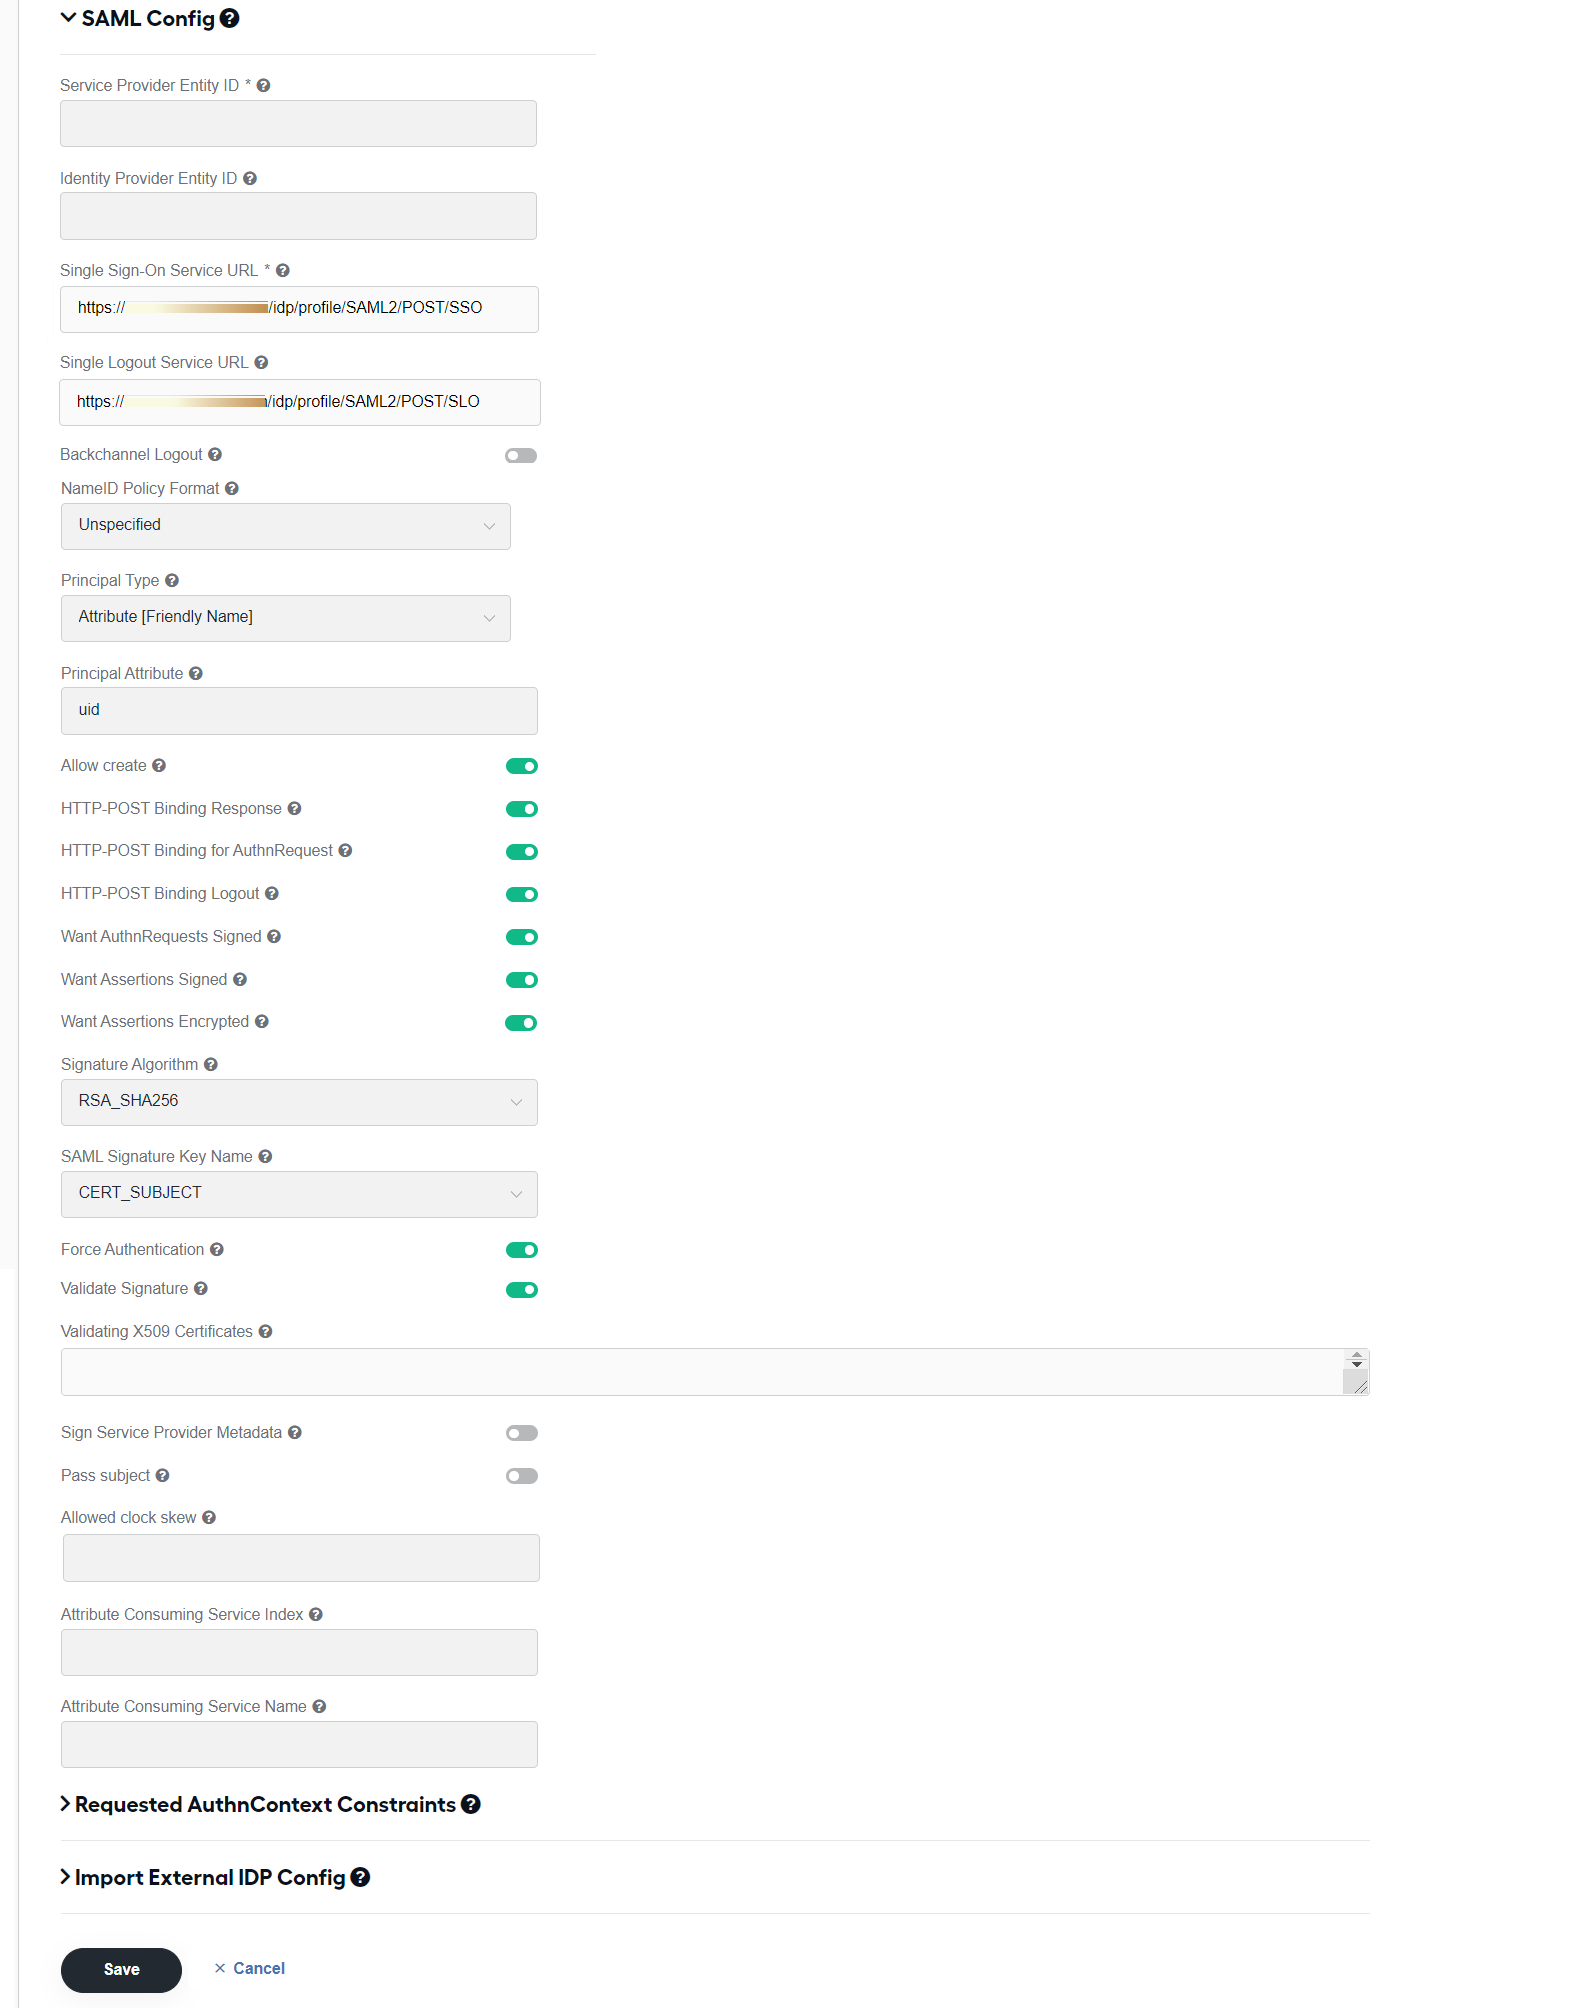
Save the IdP configuration.
Go to the Mappers tab and click Create.
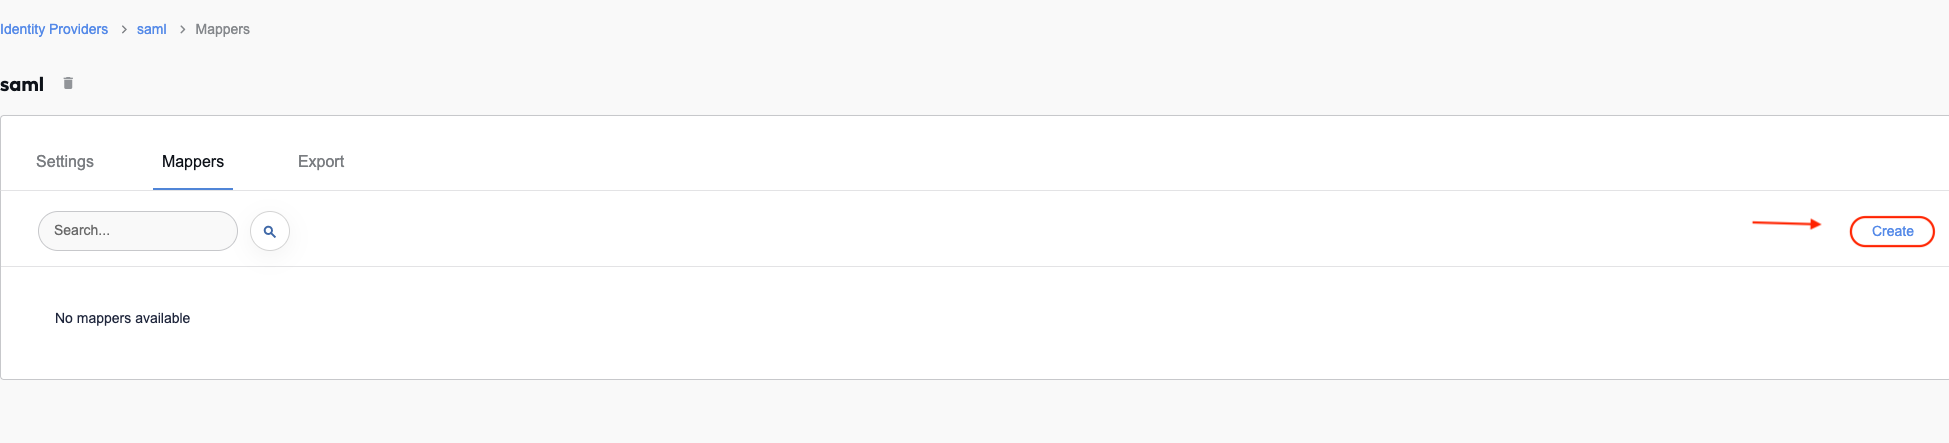
In the Identity Provider Mapper section, add the mappers with the following parameters:
Field Username mapper First name mapper Last name mapper Name username First Name Last Name Mapper Type Attribute importer Attribute importer Attribute importer Friendly Name uid firstName lastName User Attribute Name username firstName lastName 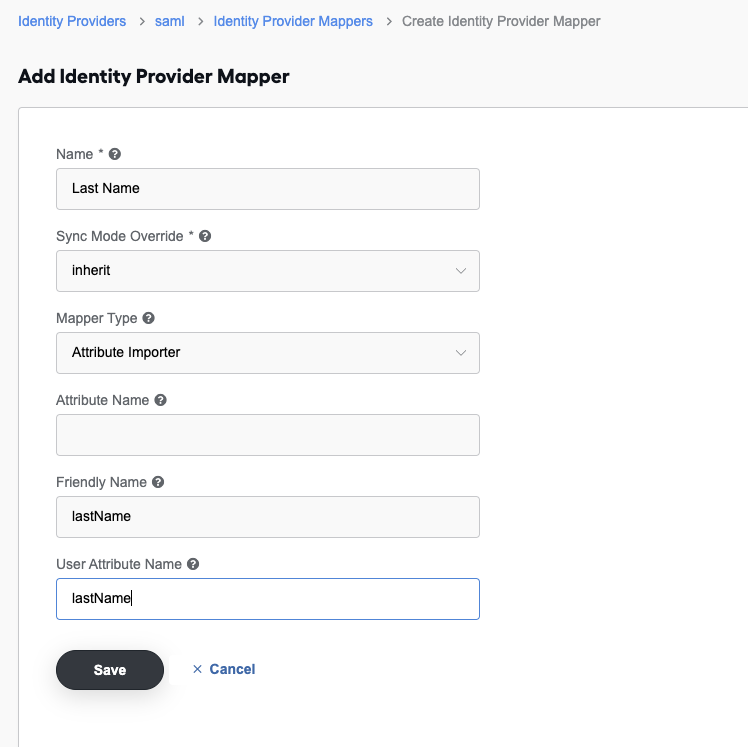
If needed, add other mappers, for example, attribute to role. Alternatively, configure User Federation with your Active Directory and set up group or role mapping here. For details, refer to Configure LDAP.
Configure group or role mapping for users.
You need to configure proper roles and groups for logged users to use the Work.AI services. Otherwise, users face a FORBIDDEN error after logging in, and you have to assign appropriate roles and groups manually for each of them.
You can configure group and role mapping in several ways, depending on users' existing attributes and hierarchy in Active Directory.
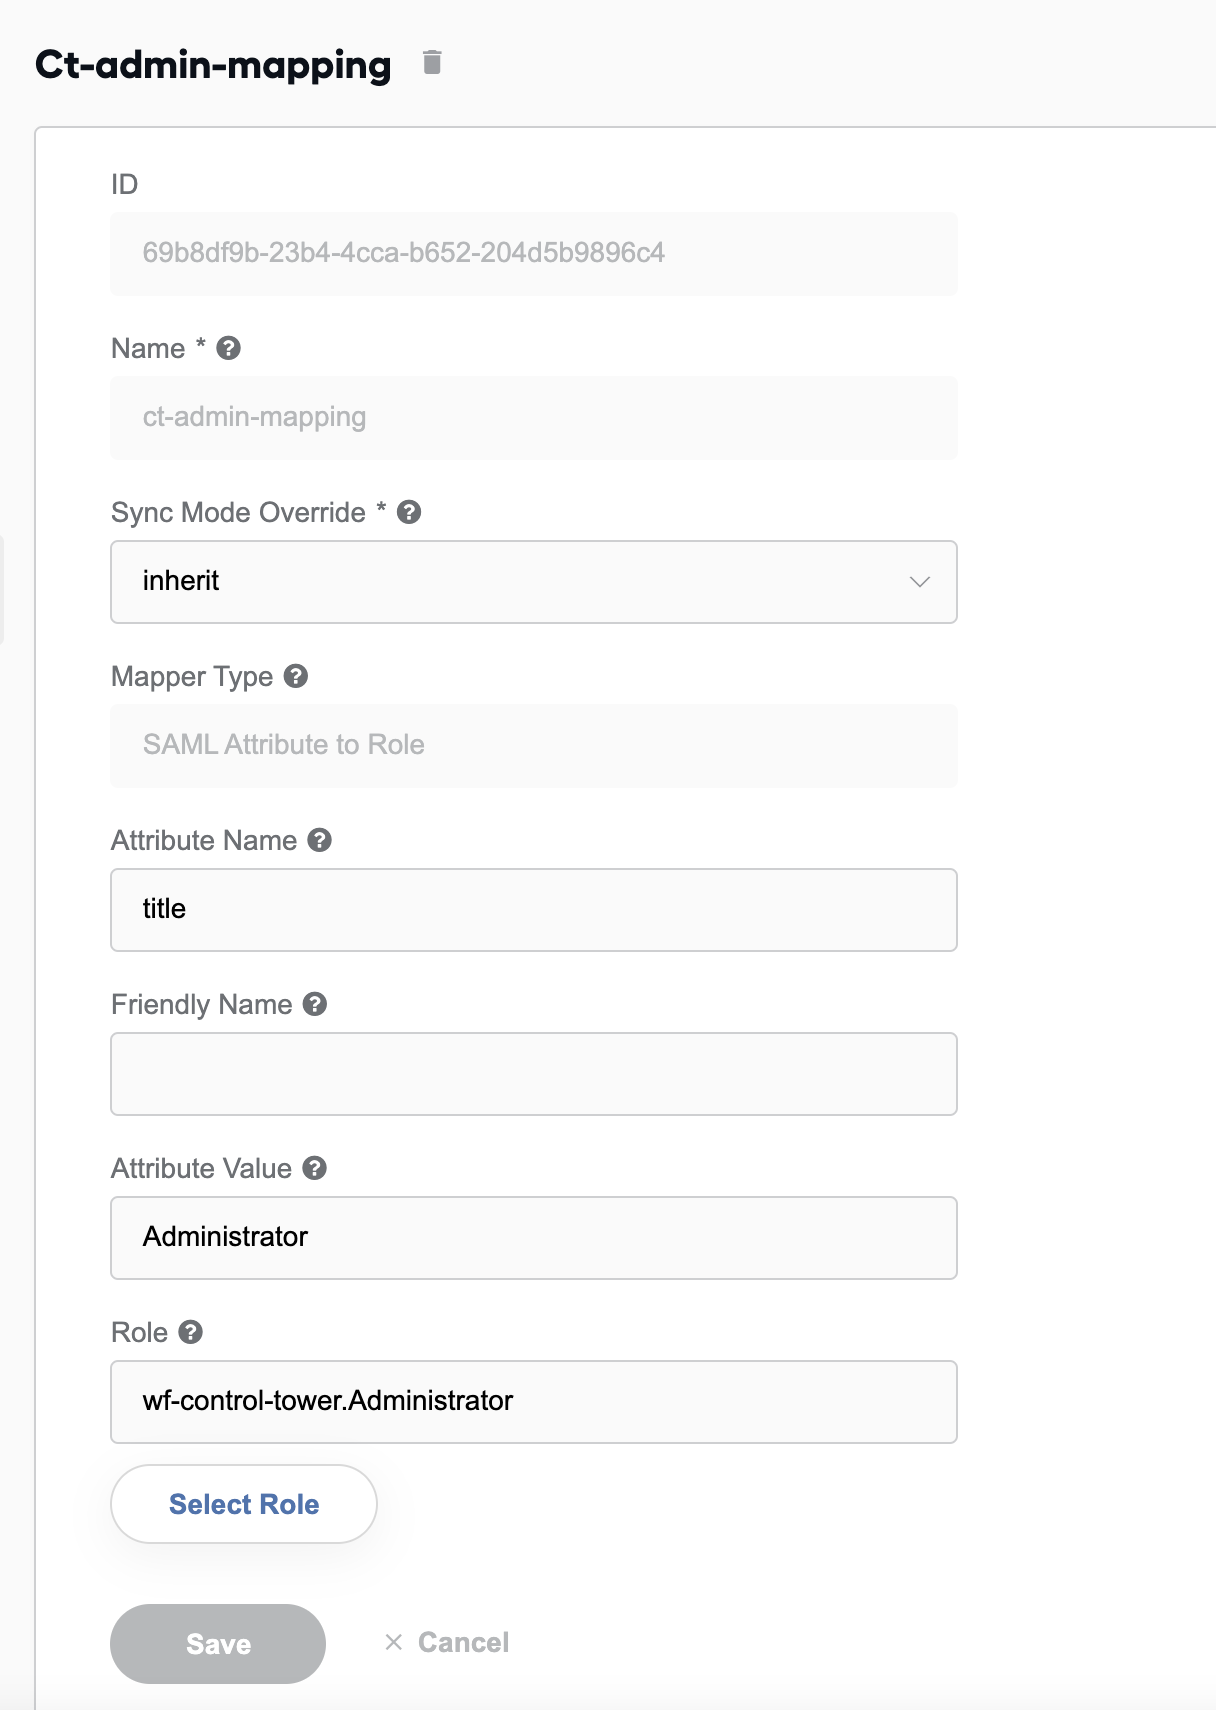
Suppose it's possible to map some LDAP attributes to user roles (for example, map specific values of Department, Organization Unit, or Job Title to Work.AI roles). In that case, you can configure it on the Mappers tab of the IdP provider.
Here is an example of a job title mapping to a Control Tower Administrator role. The users with an Administrator value in the Job Title get the Administrator role.
To receive Job Title as title attribute in SAML assertion, set it in the ADFS configuration:
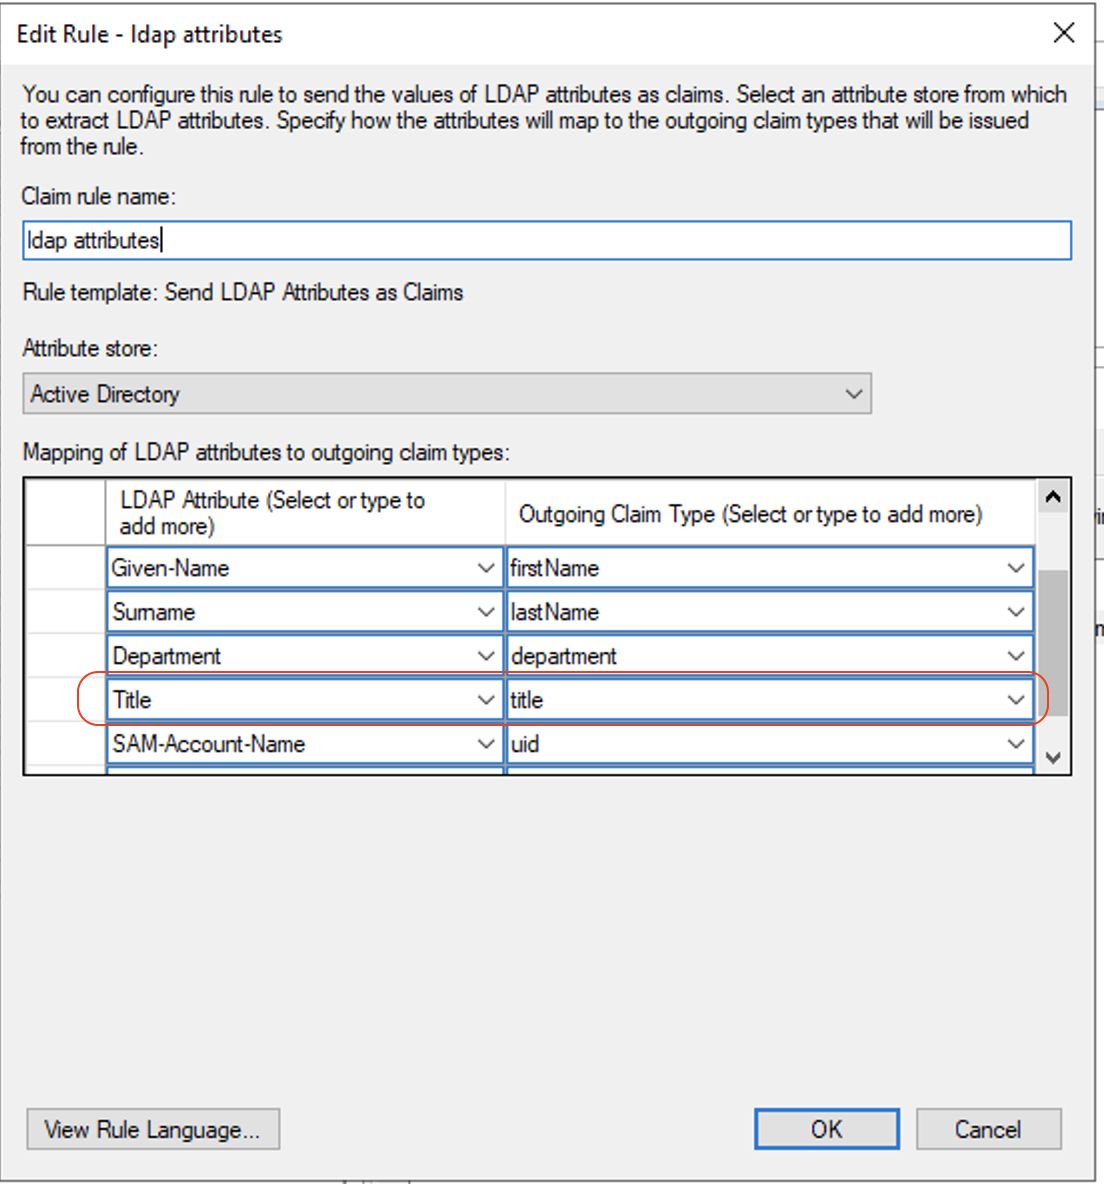
For more information on adding the configuration on the ADFS side, refer to Create claim rules.
If you need more fine-grained management of groups and roles, you can configure User Federation with your Active Directory and set groups and roles mapping here. For details, refer to Configure LDAP.
In this case, users are fetched into WorkFusion User Management from AD on the User Federation configuration step and linked to ADFS upon user login.
With this setup, on the Settings tab, in the First login flow drop-down box, select Link trusted provider. See Step 3 of the Configure WorkFusion User Management guide.
With selected Link trusted provider, the username applied for the ADFS login is linked automatically.
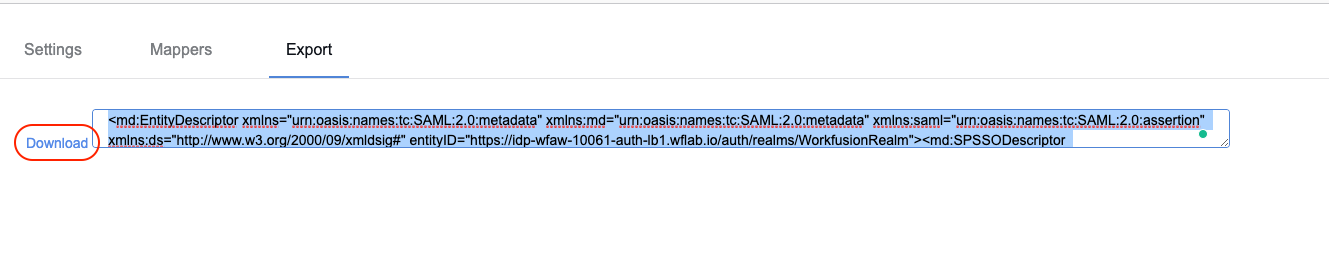
Go to the Export tab and click Download.
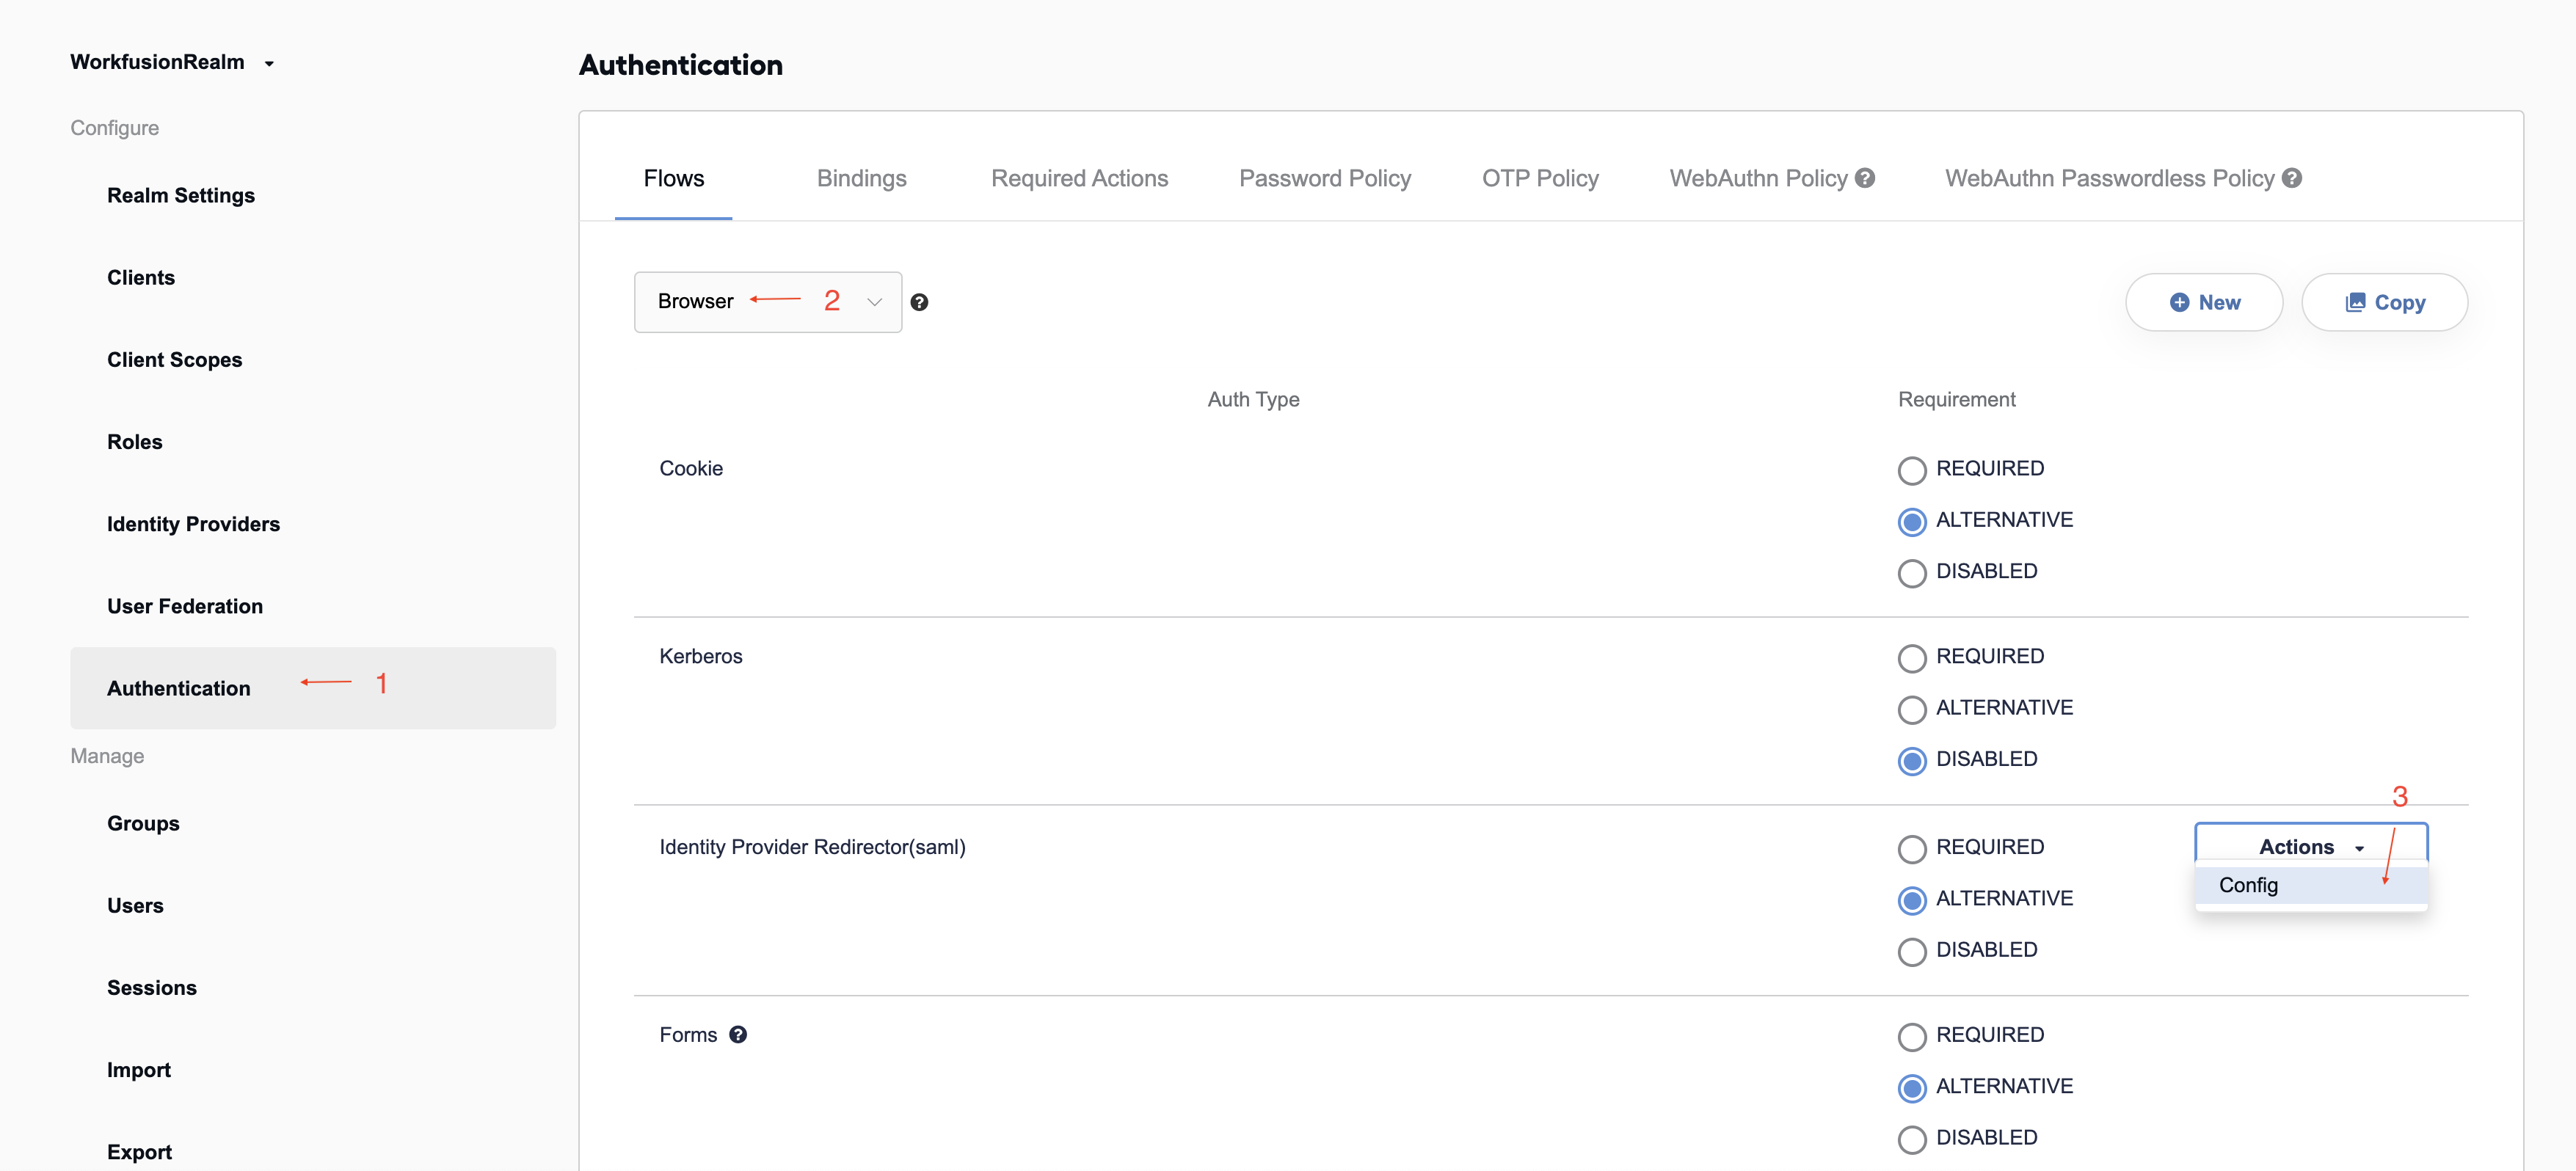
Go to Authentication > Browser > Identity Provider Redirector > Actions > Configure.
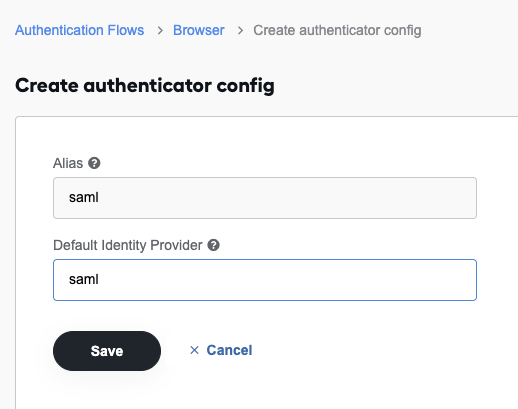
Set up an authenticator configuration with the created IdP provider as the default authenticator:
- Alias: saml
- Default Identity Provider: saml
Configure ADFS
Add new relying party trust
To add a new relying party trust:
Log in to the Windows server where ADFS is installed (for example, via remote desktop connection or any other applicable way).
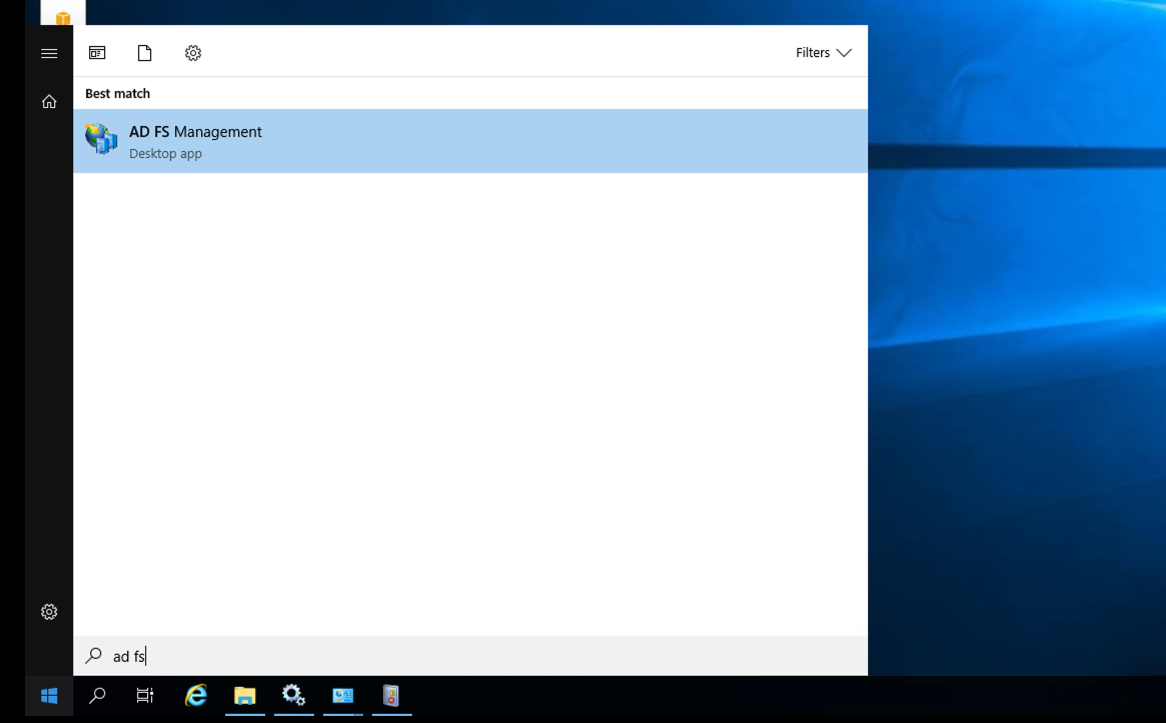
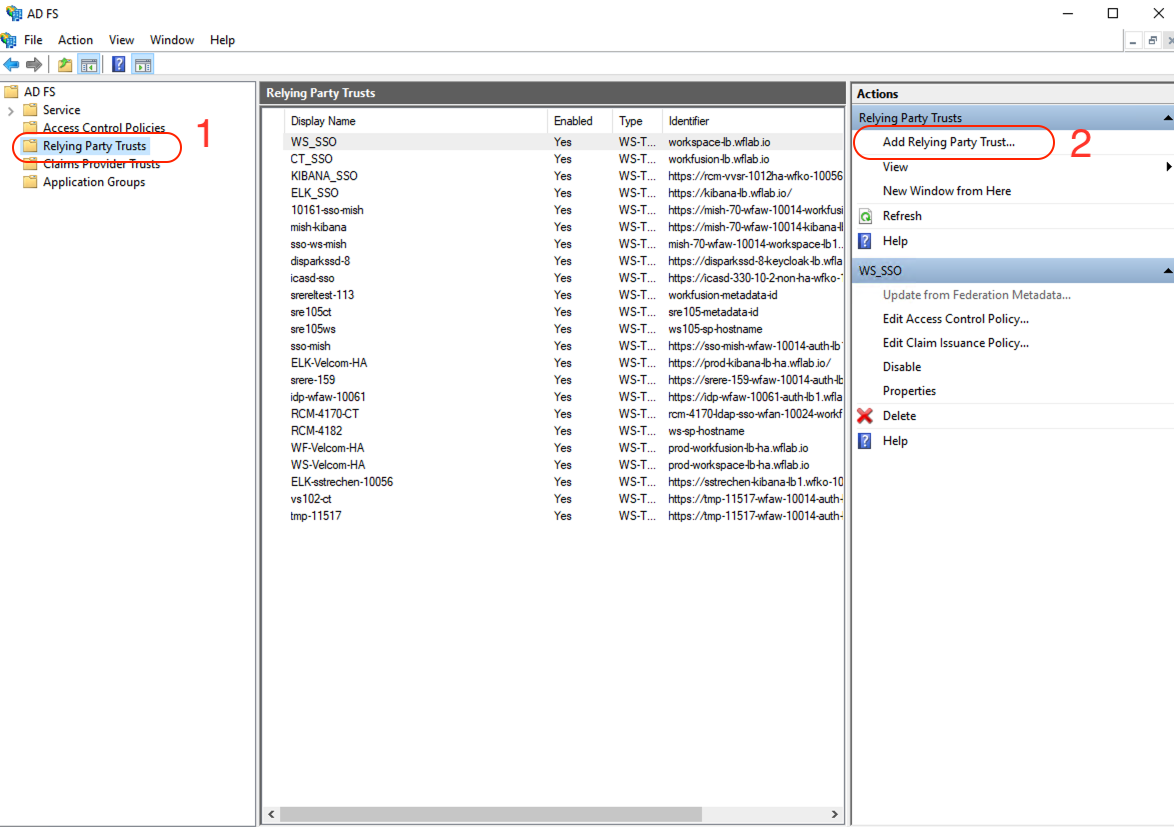
Launch the AD FS Management application by clicking Start > Administrative Tools > AD FS Management, and then select Trust Relationships > the Relying Party Trusts node.
In the Actions sidebar, click Add Relying Party Trust.
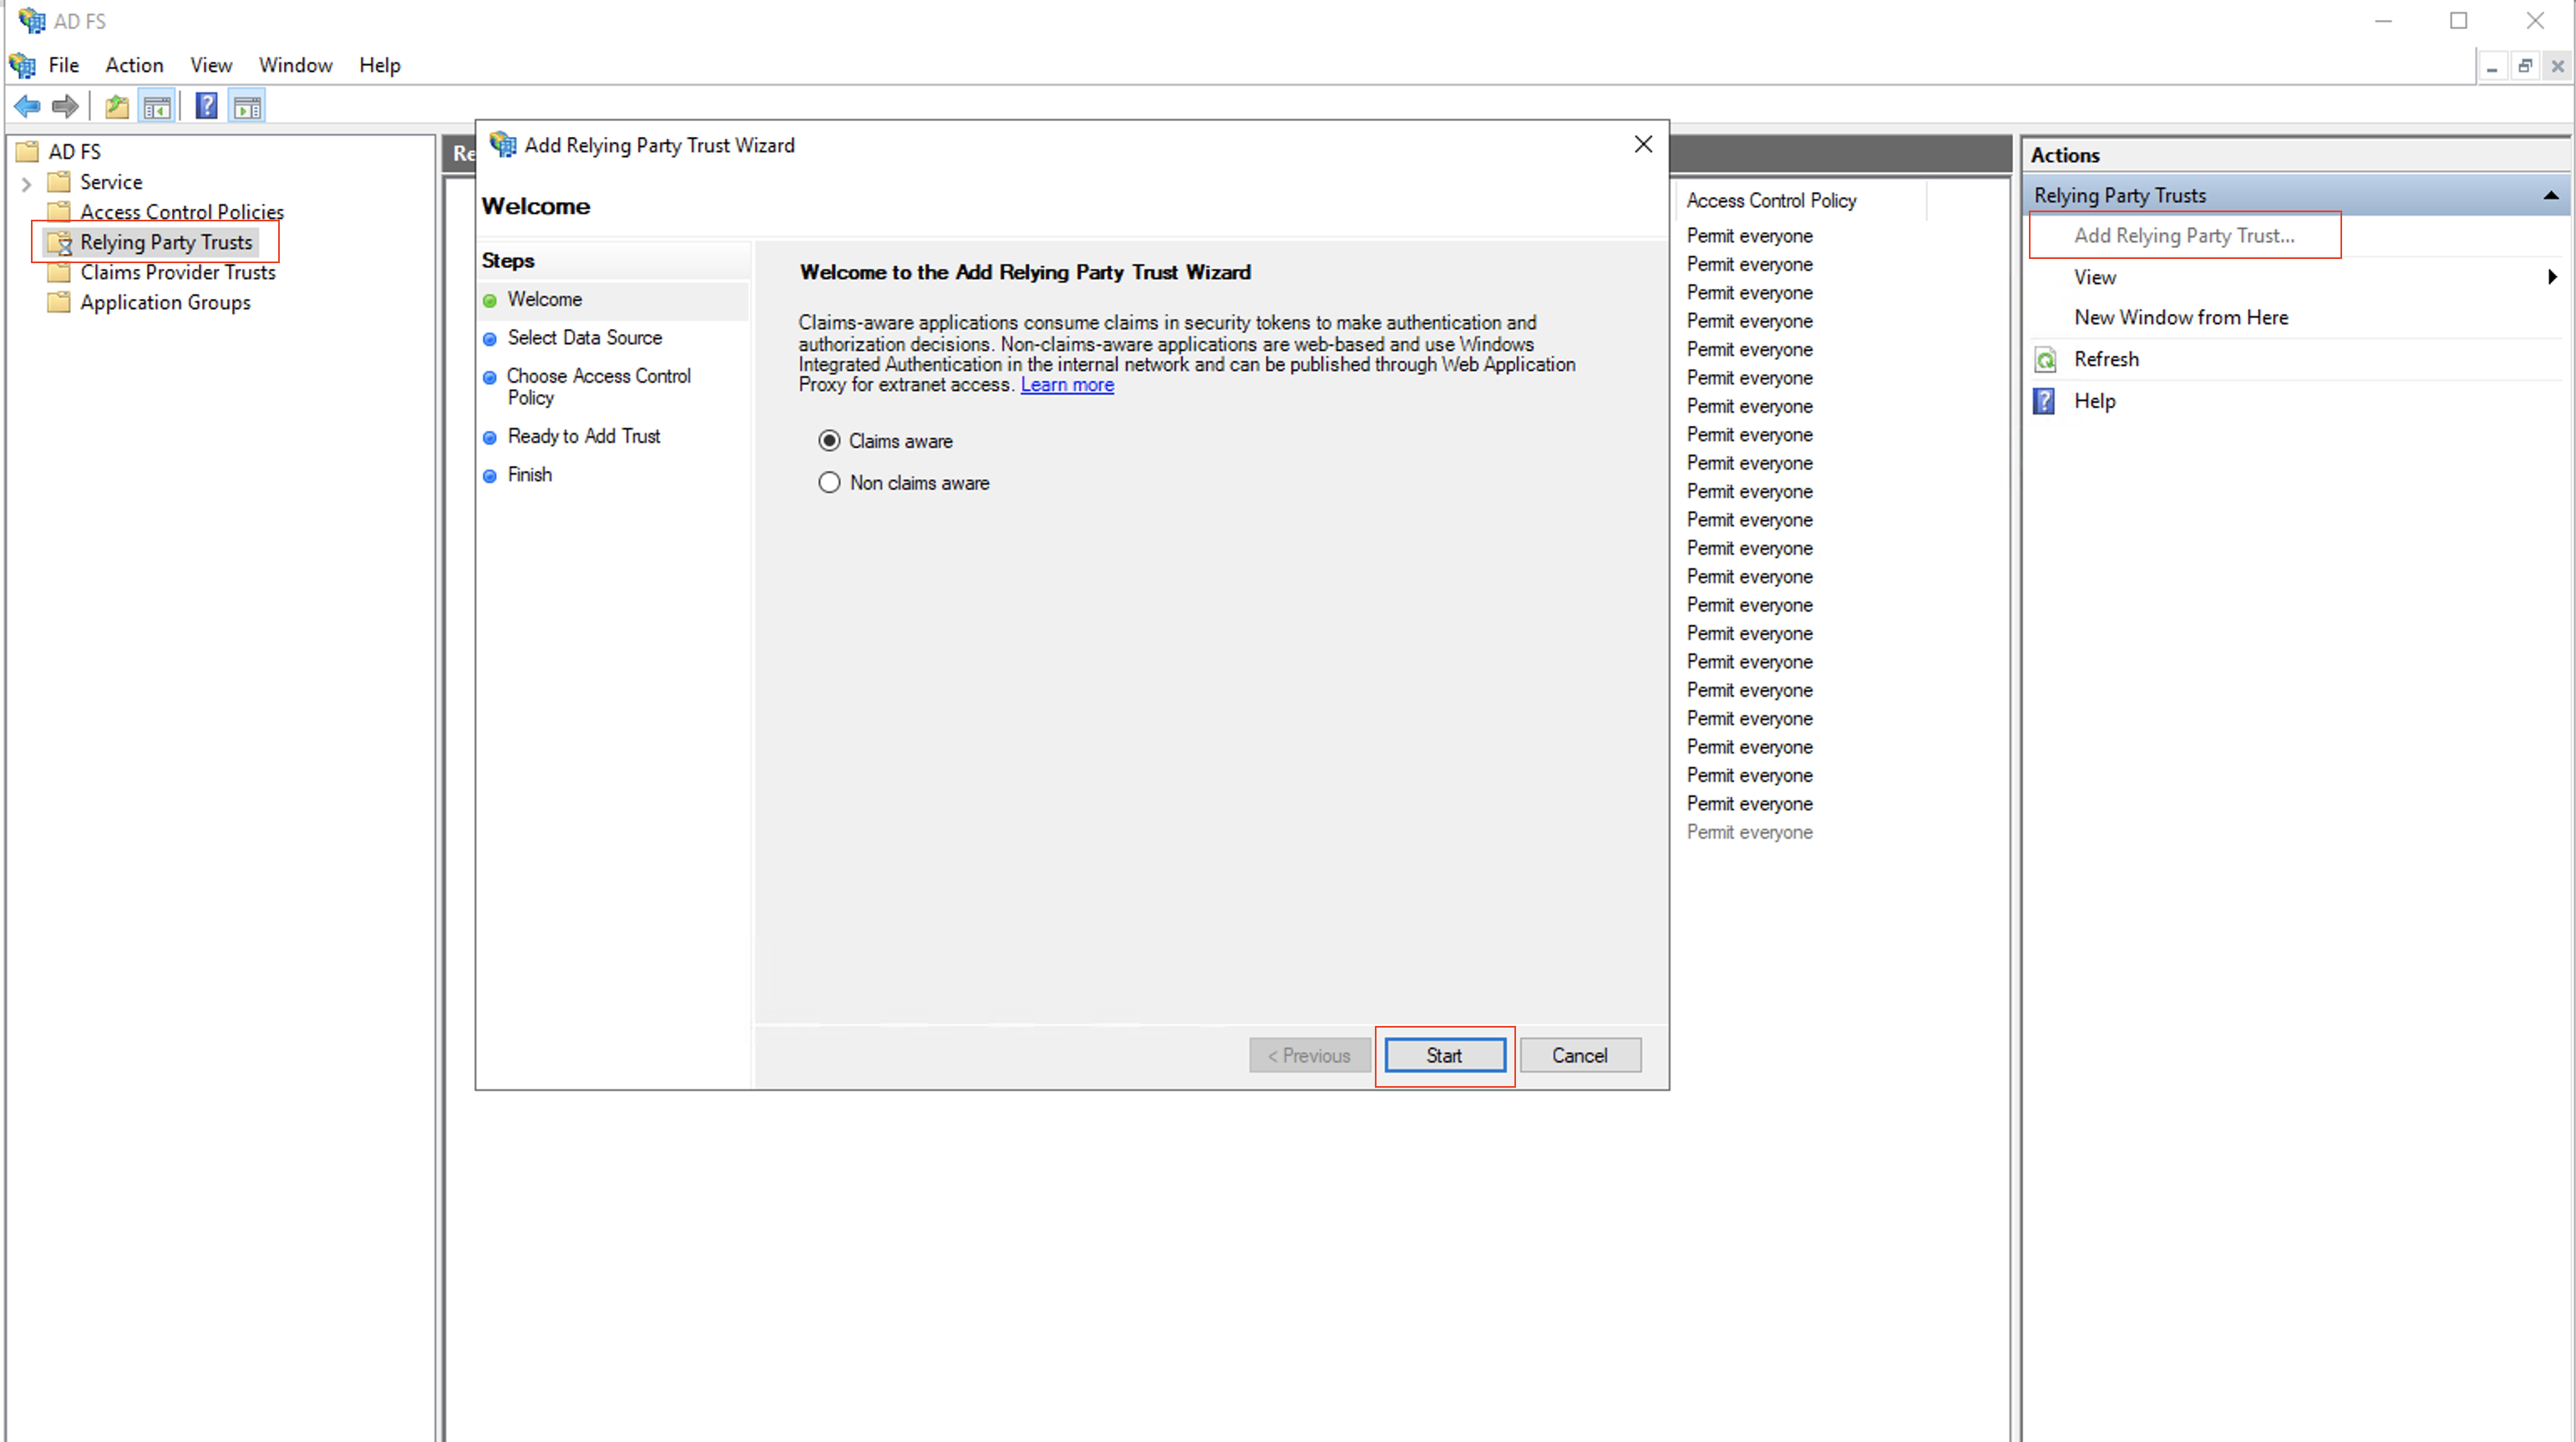
In the Add Relying Party Trust wizard, click Start.
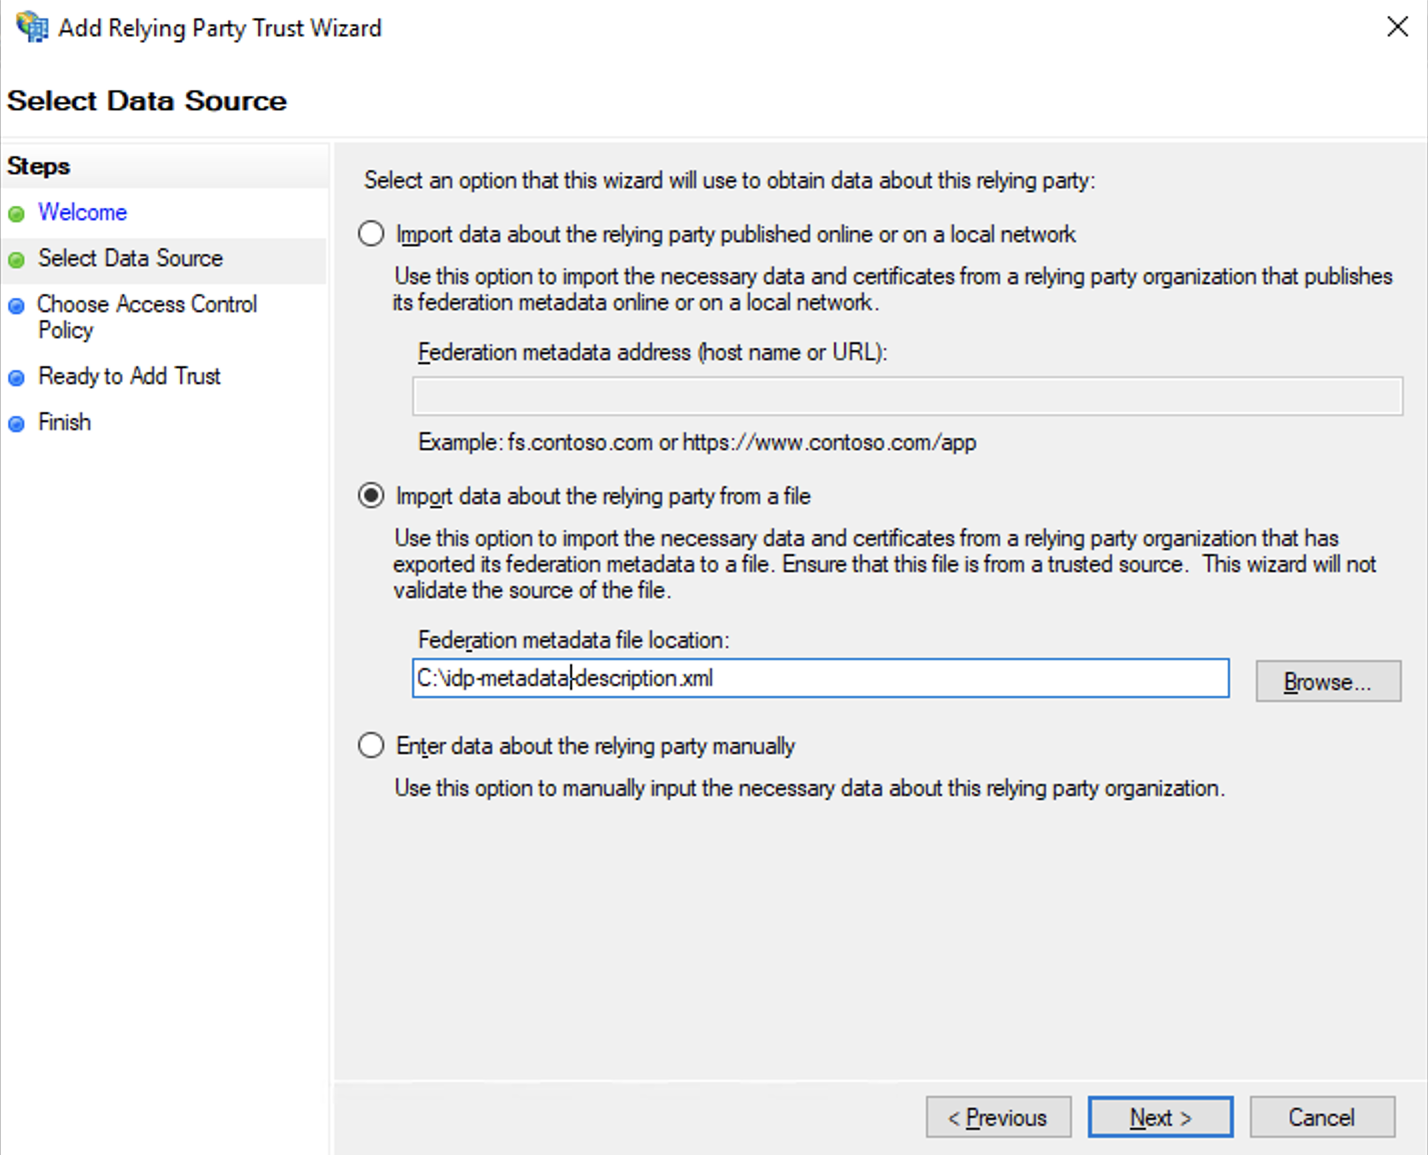
On the Select Data Source screen, click Import data about the relying party from a file and select All files in the file browser. Keycloak exports its metadata with the default TXT extension.
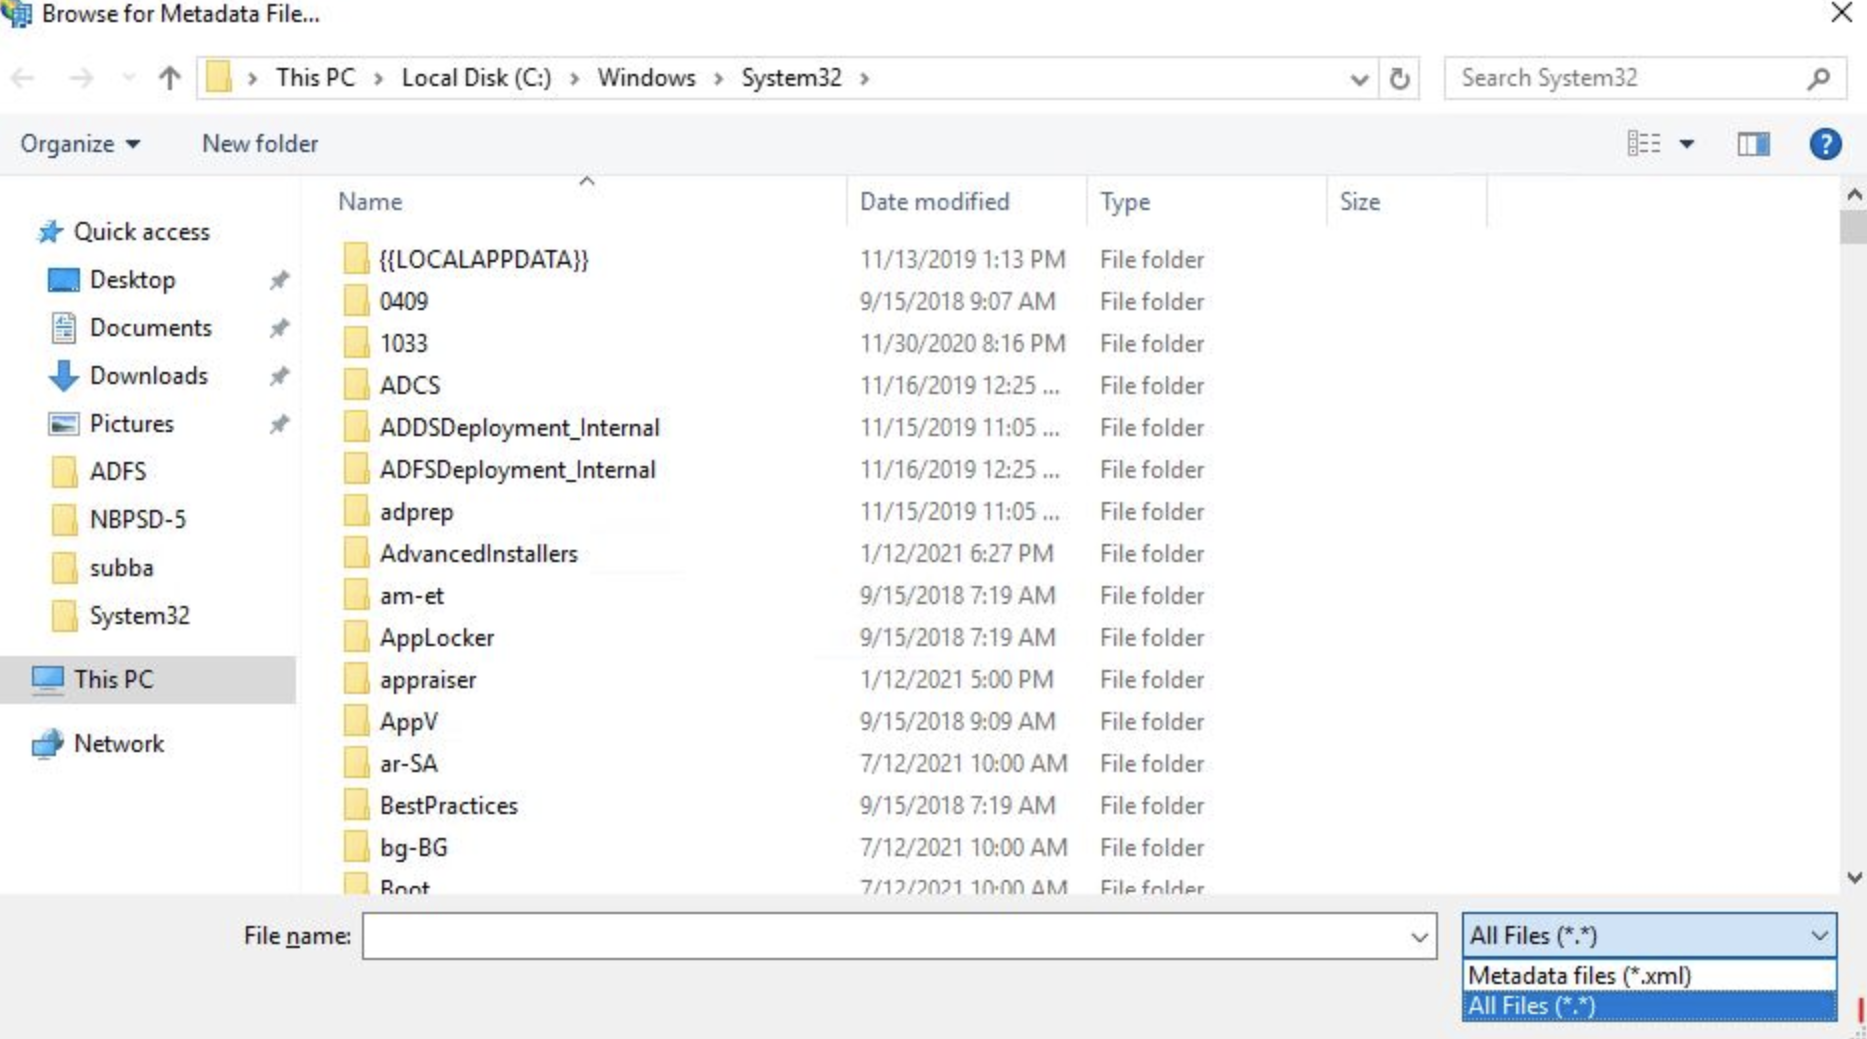
In the file browser, select the metadata file downloaded on the Go to export tab > download step, and click Next.
In the Add Relying Party Trust wizard, provide information for each screen:
- On the Specify Display Name screen, enter a Display name and any notes and click Next.
- Click Next to skip the Choose Access Control Policy screen.
On the Ready to Add Trust screen, review your settings and click Next.
Click Finish.
Create claim rules
After creating the relying party trust, add the claim rules:
In the Relying Party Trusts list, right-click the relying party object you created, click Edit Claim Insurance Policy.
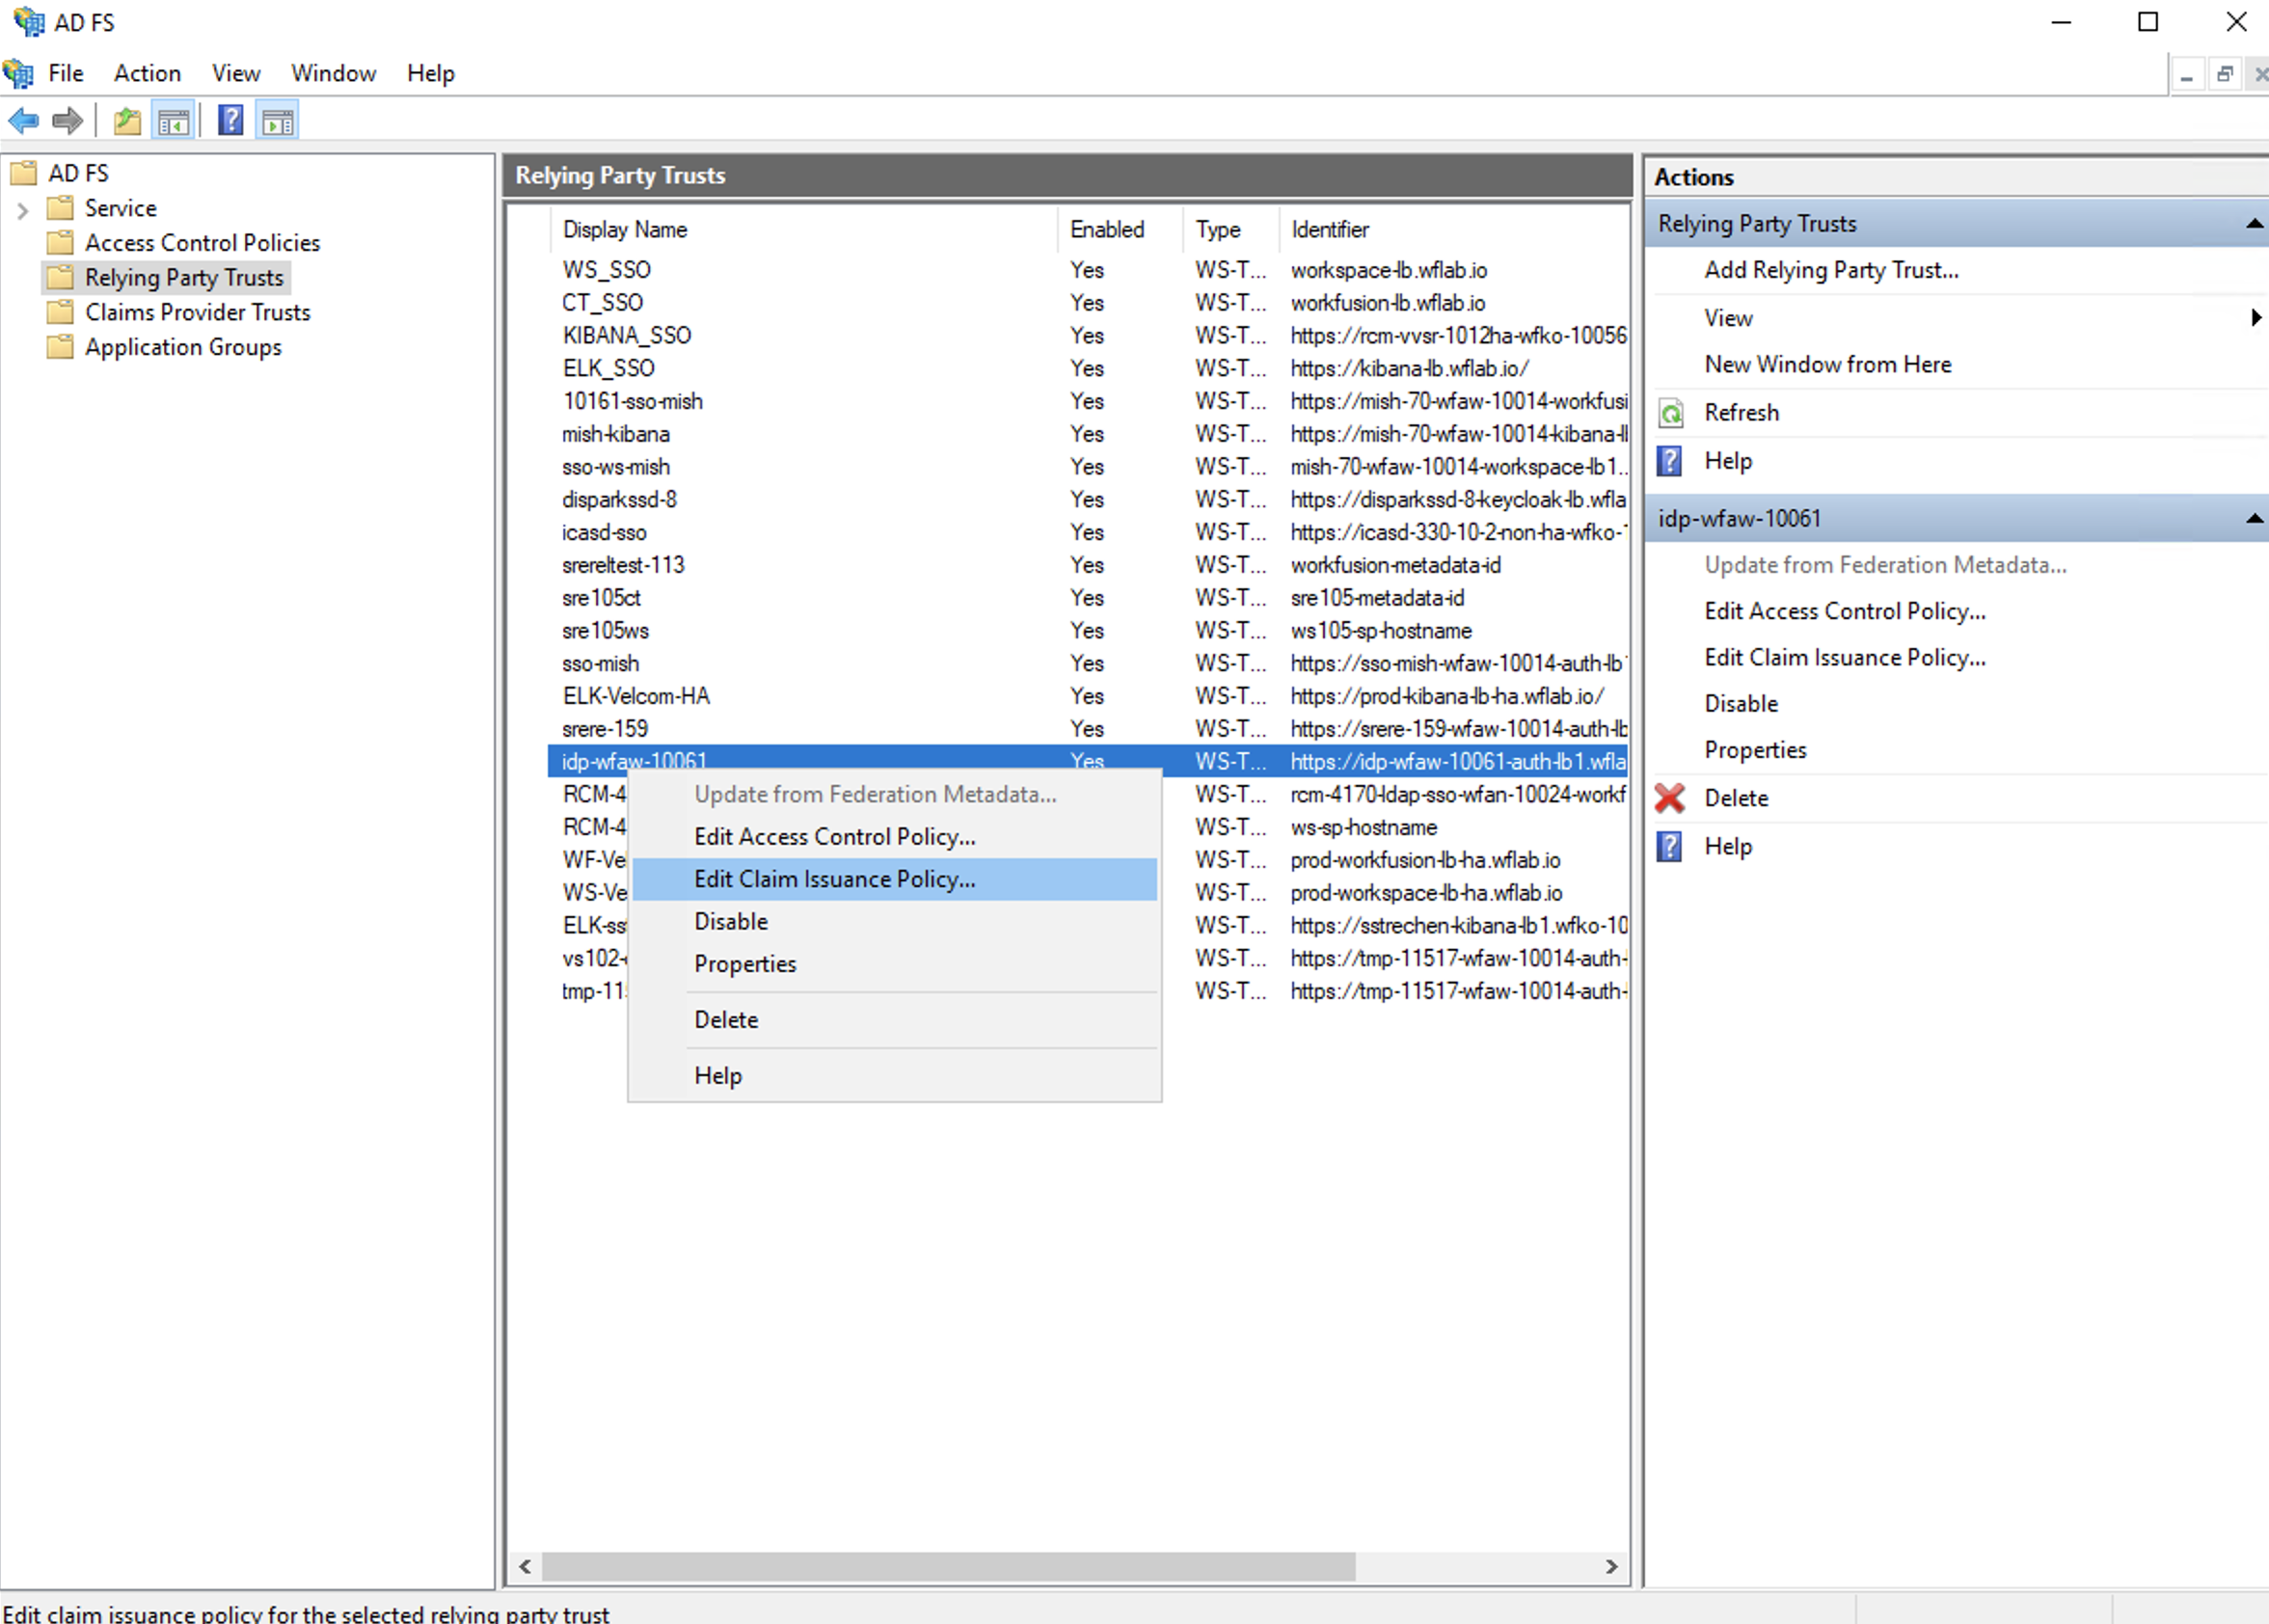
Click Add Rule.

In the Claim Rule Template list, select the Send LDAP Attributes as Claims template and click Next.
Create the following rule:
Claim rule name: descriptive rule name
Attribute store: active directory
Add the following mapping (LDAP Attribute-Outgoing Claim Type):
- User-Principal-Name: UPN
- E-Mail-Addresses: email
- SAM-Account-Name: uid
- Given-Name: firstName
- Surname: lastName
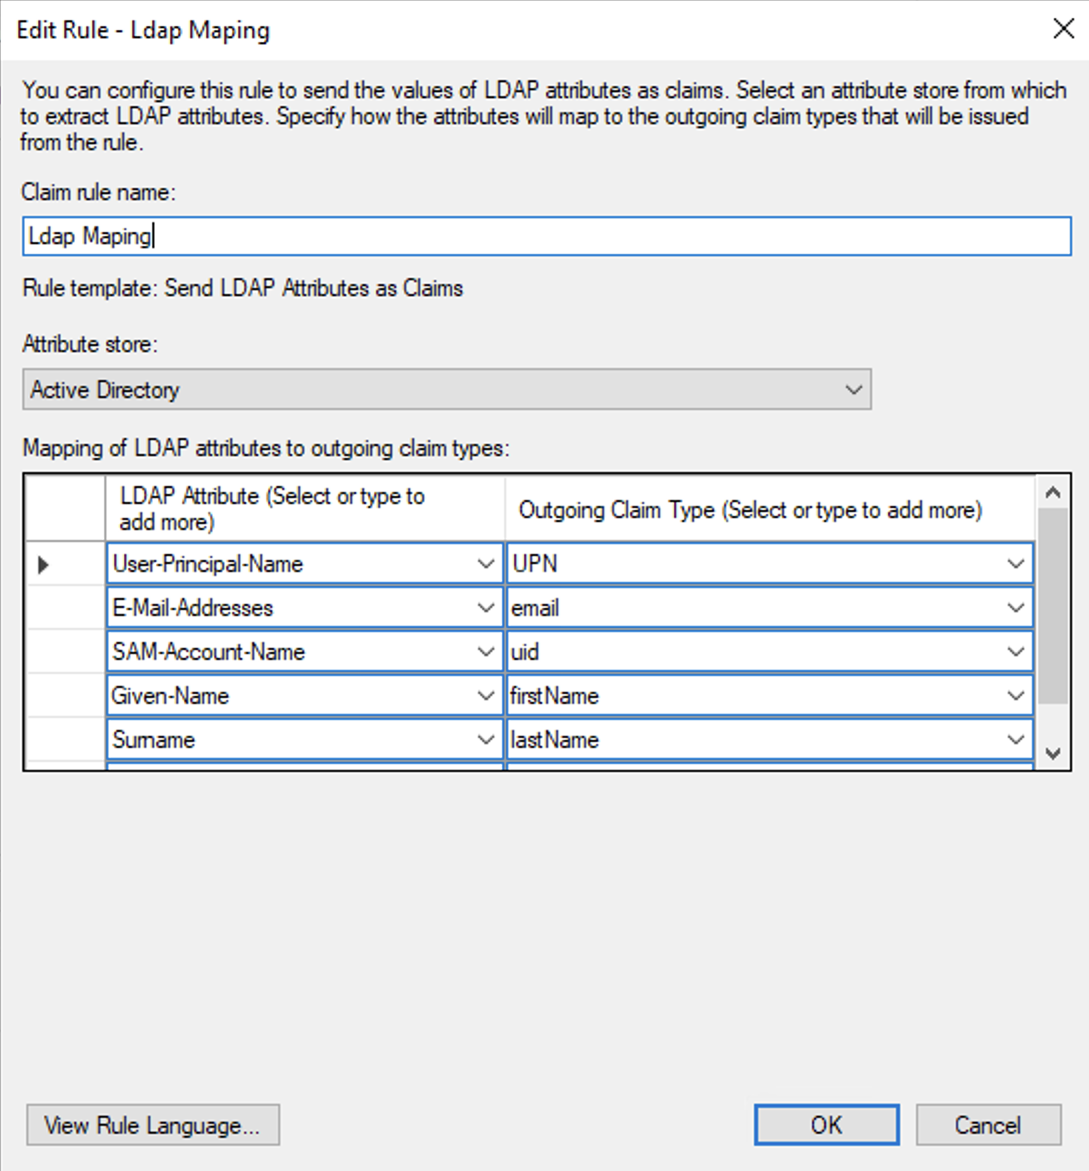
To add user groups membership as a claim, map LDAP Attribute Token-Groups - Unqualified Names to some outgoing claim type. In the example below, the claim type is groups.
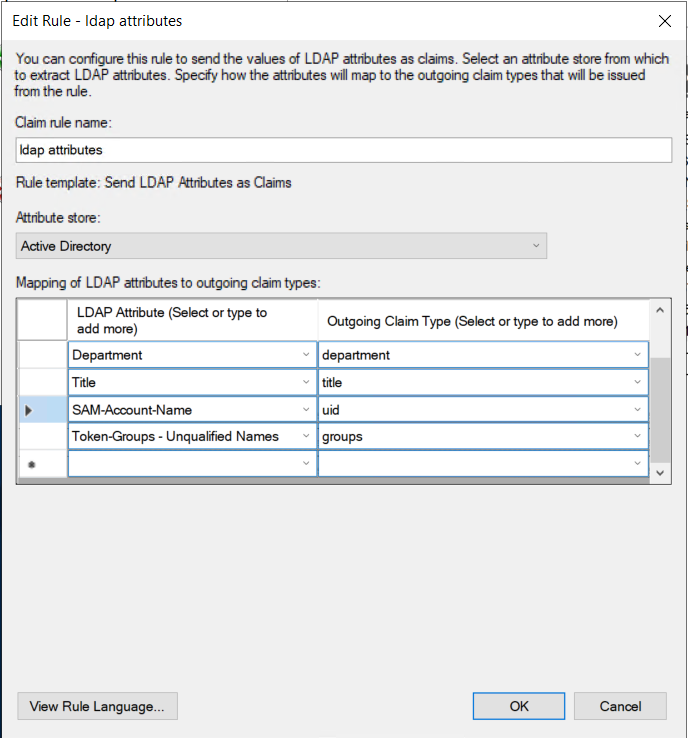
Also, you can create an individual rule for every group by adding a rule with the type Send Group Membership as a Claim. Still, note it is recommended to add mapping to one rule for all claims.
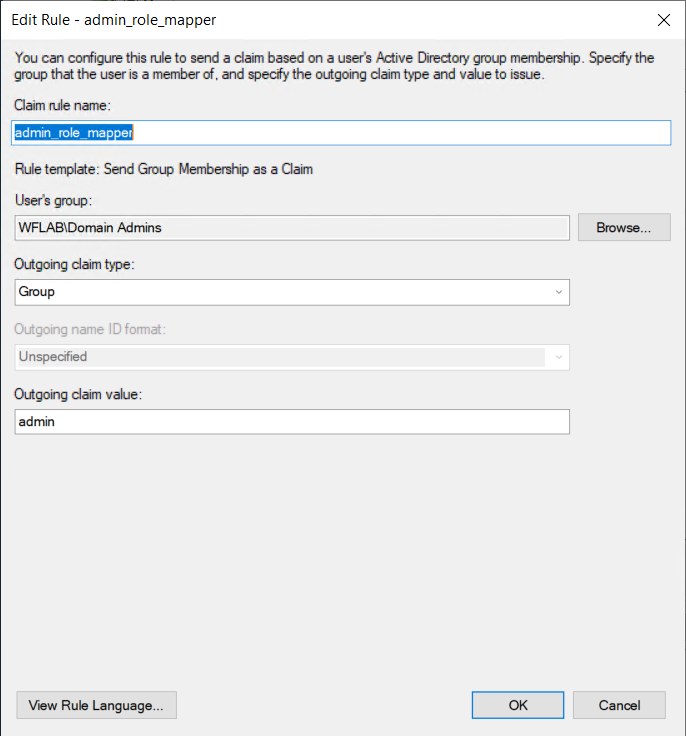
Click OK.
Create another rule by clicking Add Rule and select Transform an Incoming Claim as a template.
On the next screen, create the following rule:
- Claim rule name: descriptive rule name
- Incoming claim type: UPN
- Outgoing claim type: Name ID
- Outgoing name ID format: Email
- Pass through all claim values: default value
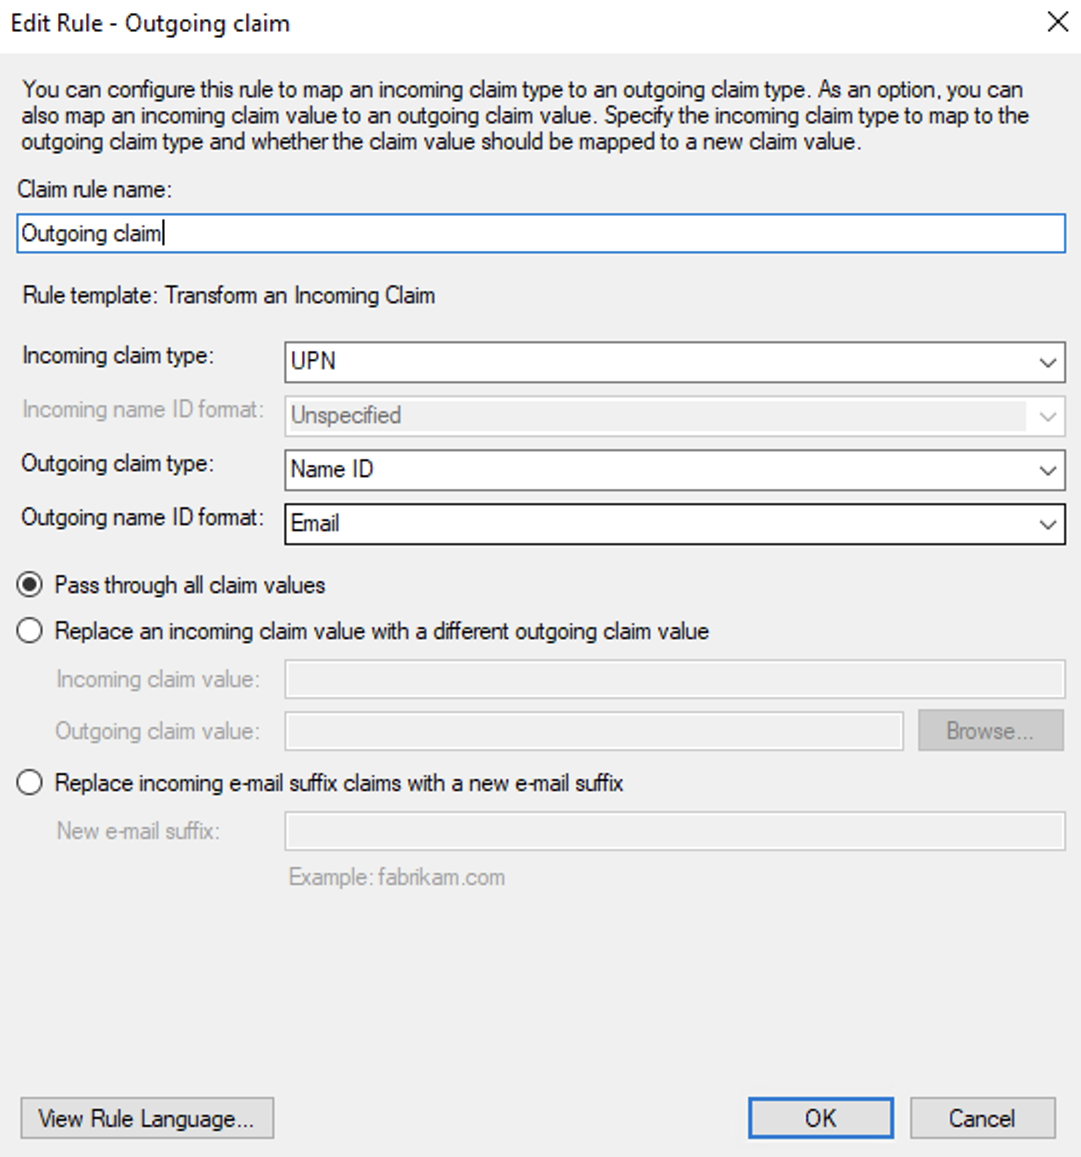
Click OK to create the claim rule, and then click OK again to finish creating rules.
Troubleshoot
Check ADFS logs
To view the issues that may arise on the ADFS side, check the ADFS logs:
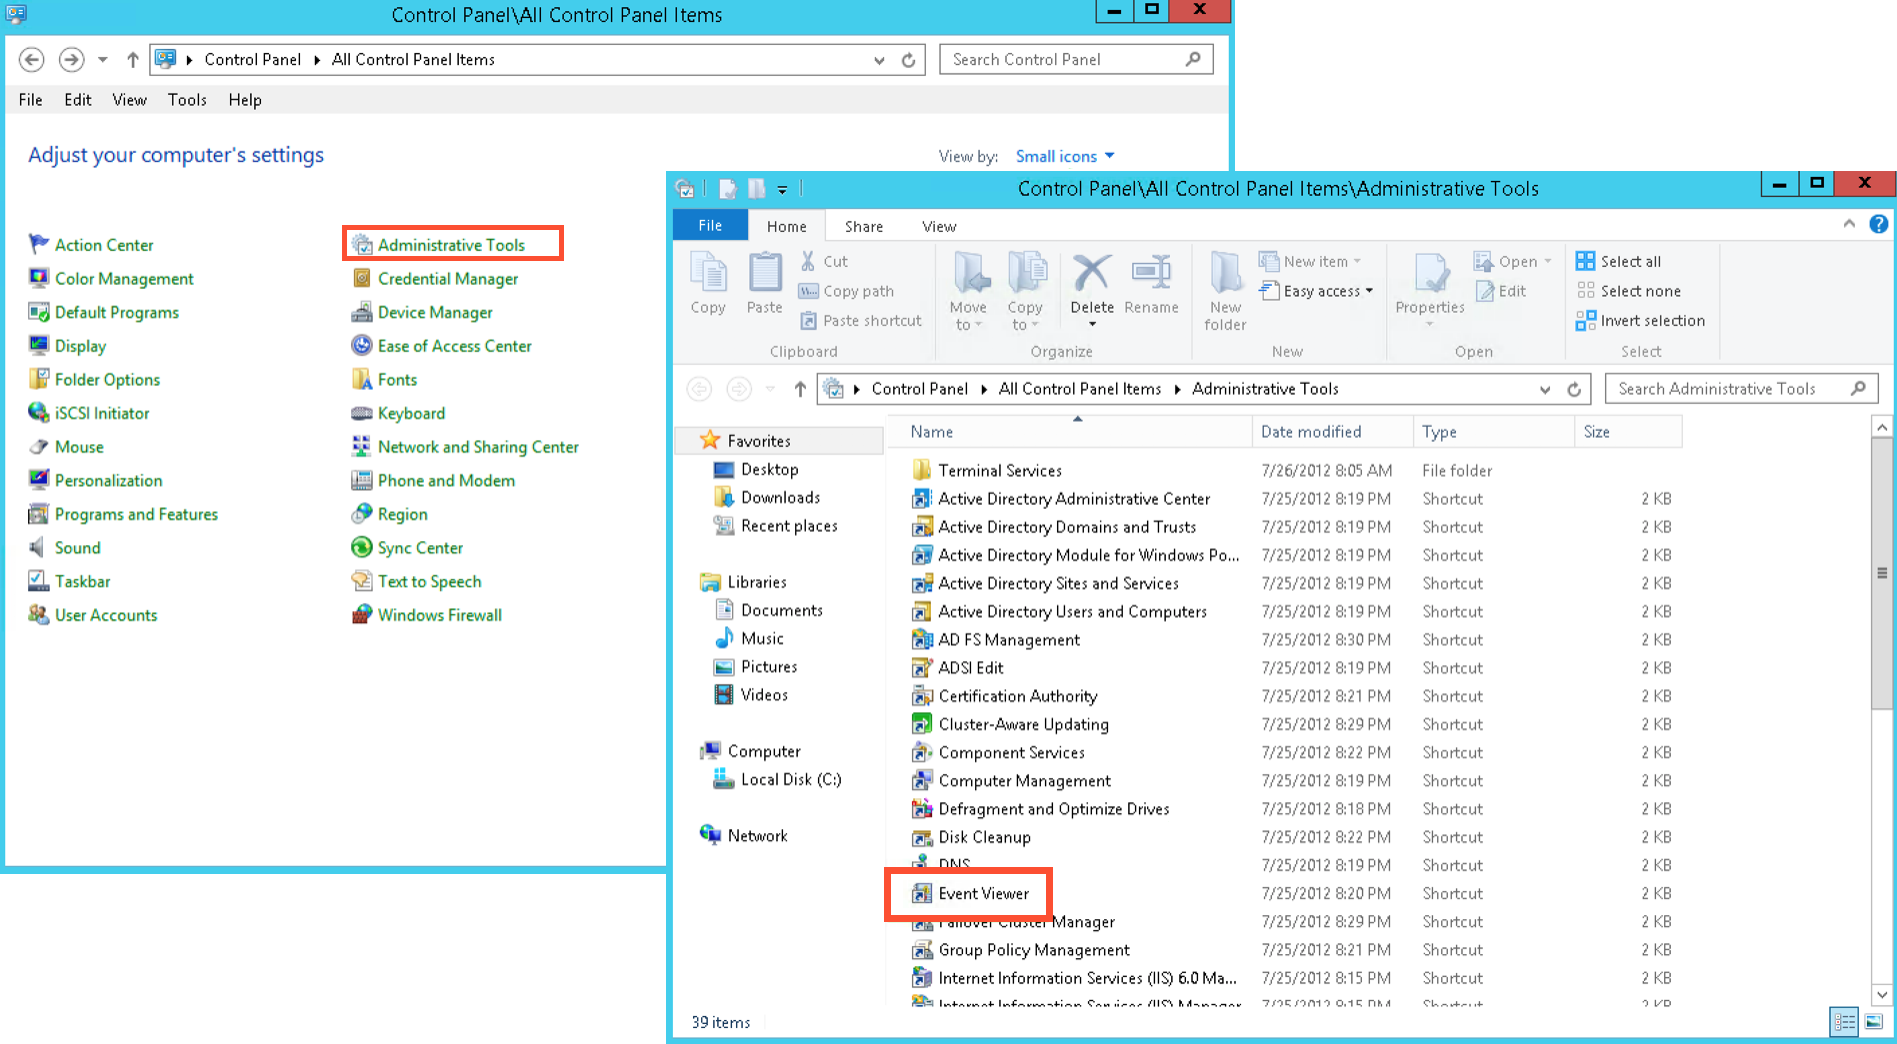
On the ADFS server, navigate to Control Panel > Administrative Tools > Event Viewer.
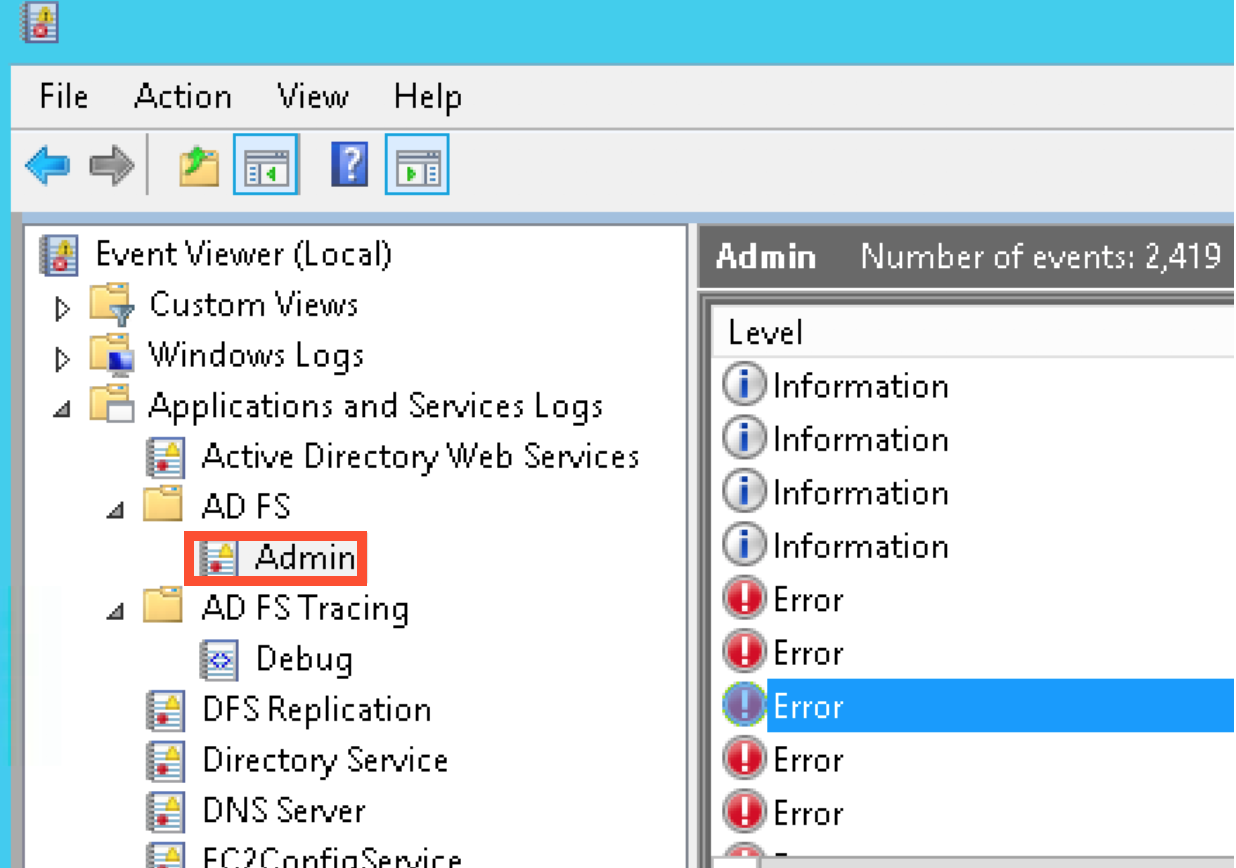
In Event Viewer in the left panel, navigate to Applications and Services Logs > ADFS > Admin and view ADFS logs.
For more details, see How to check ADFS logs for SAML logins.
Troubleshoot through debugging
For troubleshooting an issue, enable the debug mode in WorkFusion User Management:
Connect via SSH to the Master server where WorkFusion User Management (Keycloak) is running.
On the Master server, stop the
supervisordservice.systemctl stop supervisordIn
/opt/workfusion/keycloak/bin/standalone.sh, setDEBUG_MODEtotrue.DEBUG\_MODE="${DEBUG:-true}"
DEBUG\_PORT="${DEBUG\_PORT:-8787}"You can also edit
/opt/workfusion/supervisord/apps/keycloak.iniand add--debugto the startup line.command = bash -c '
source /opt/workfusion/environment.sh;
/opt/workfusion/keycloak/bin/standalone.sh --debug \\
--server-config=standalone-ha.xml \\
--properties=/opt/workfusion/keycloak/keycloak.properties \\
'Start the
supervisordservice again.systemctl start supervisord
After Keycloak starts, you can debug it remotely on a specified port.
Possible errors after debugging
Error type 1
You can face the following error after ADFS sends assertions back to Keycloak after login:
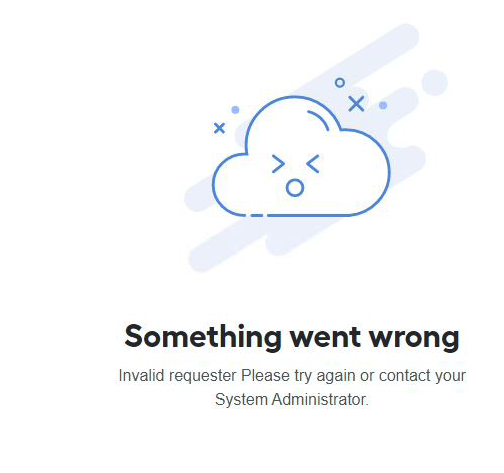
Keycloak logs contain the following error:
{"timestamp":"2021-02-03T14:06:43.462Z","sequence":156,"loggerClassName":"org.jboss.logging.Logger","loggerName":"org.keycloak.broker.saml.SAMLEndpoint","level":"ERROR","message":"no principal in assertion; expected: FRIENDLY_ATTRIBUTE(uid)","threadName":"default task-1","threadId":127,"mdc":{},"ndc":"","hostName":"sso-mish-wfaw-10014-master1.WORKFUSION-LB-HOSTNAME","processName":"jboss-modules.jar","processId":535}
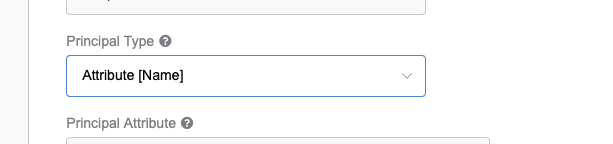
To fix the errors, go to the SAML Config section > Identity Providers and change the Keycloak Principal Type config from Attribute [Friendly Name] to Attribute [Name].
Error type 2
You can also face the following error after ADFS sends assertions back to Keycloak after login:
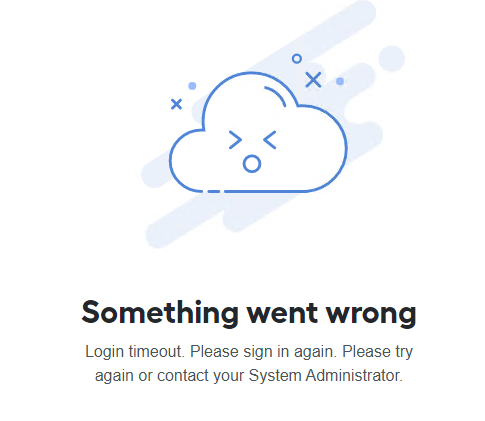
Keycloak logs contain the following error:
{"timestamp":"2021-02-05T11:51:57.483Z","sequence":405,"loggerClassName":"org.jboss.logging.Logger","loggerName":"org.keycloak.events","level":"WARN","message":"type=IDENTITY_PROVIDER_RESPONSE_ERROR, realmId=WorkfusionRealm, clientId=null, userId=null, ipAddress=172.20.243.193, error=invalid_saml_response","threadName":"default task-37","threadId":445,"mdc":{},"ndc":"","hostName":"ip-172-20-51-15.ec2.internal","processName":"jboss-modules.jar","processId":2021}
An invalid relying party trust identifier could cause these errors. Thus, ensure that the identifier does not contain a trailing slash. The identifier should be <keycloak_host>/auth/realms/WorkfusionRealm, (for example, https://sso-mish-wfaw-10014-auth-lb1.WORKFUSION-LB-HOSTNAME/auth/realms/WorkfusionRealm).
Error type 3
You can also face the following issue during the connection to Control Tower or WorkSpace using ADFS SSO:
"The authentication statement is too old to be used with value XXXX."
For security reasons, the system limits the time for processing SAML messages and assertions. You can customize the time parameters with the following settings.
The system allows users to perform single sign-on for up to 7,200 seconds (120 minutes) since their initial authentication with the IdP, based on the AuthInstance value of the Authentication statement. Some IdPs allow users to stay authenticated for longer periods than this, and you might need to change the default value by setting maxAuthenticationAge of the WebSSOProfileConsumerImpl bean.
Based on the default parameters from the advanced configuration, search by maxAuthenticationAge.
To fix the issue:
Use one of the solutions below:
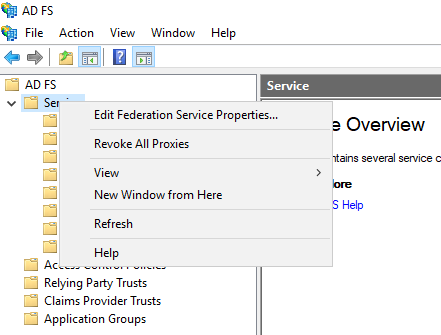
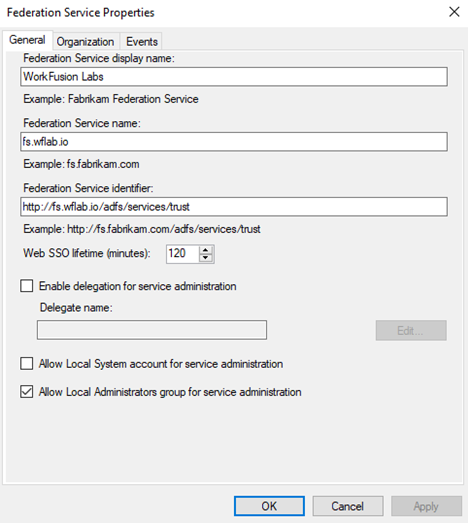
On the ADFS server, change the Web SSO lifetime(minutes) value from 480 to 120.
In the
/opt/workfusion/workfusion/webapps/workfusion/WEB-INF/classes/spring/saml-security.xmlfile, add the following parameter with the value of 28,800 seconds (480 minutes, which is the default for ADFS).before:
<bean id="webSSOprofileConsumer" class="org.springframework.security.saml.websso.WebSSOProfileConsumerImpl">
    <property name="responseSkew" value="#{samlProperties.responseSkew}"/>
</bean>after:
<bean id="webSSOprofileConsumer" class="org.springframework.security.saml.websso.WebSSOProfileConsumerImpl">
    <property name="responseSkew" value="#{samlProperties.responseSkew}"/>
    <property name="maxAuthenticationAge" value="28800"/>
</bean>
Restart the WorkFusion service.
wfmanager restart workfusion