Add Manual Task
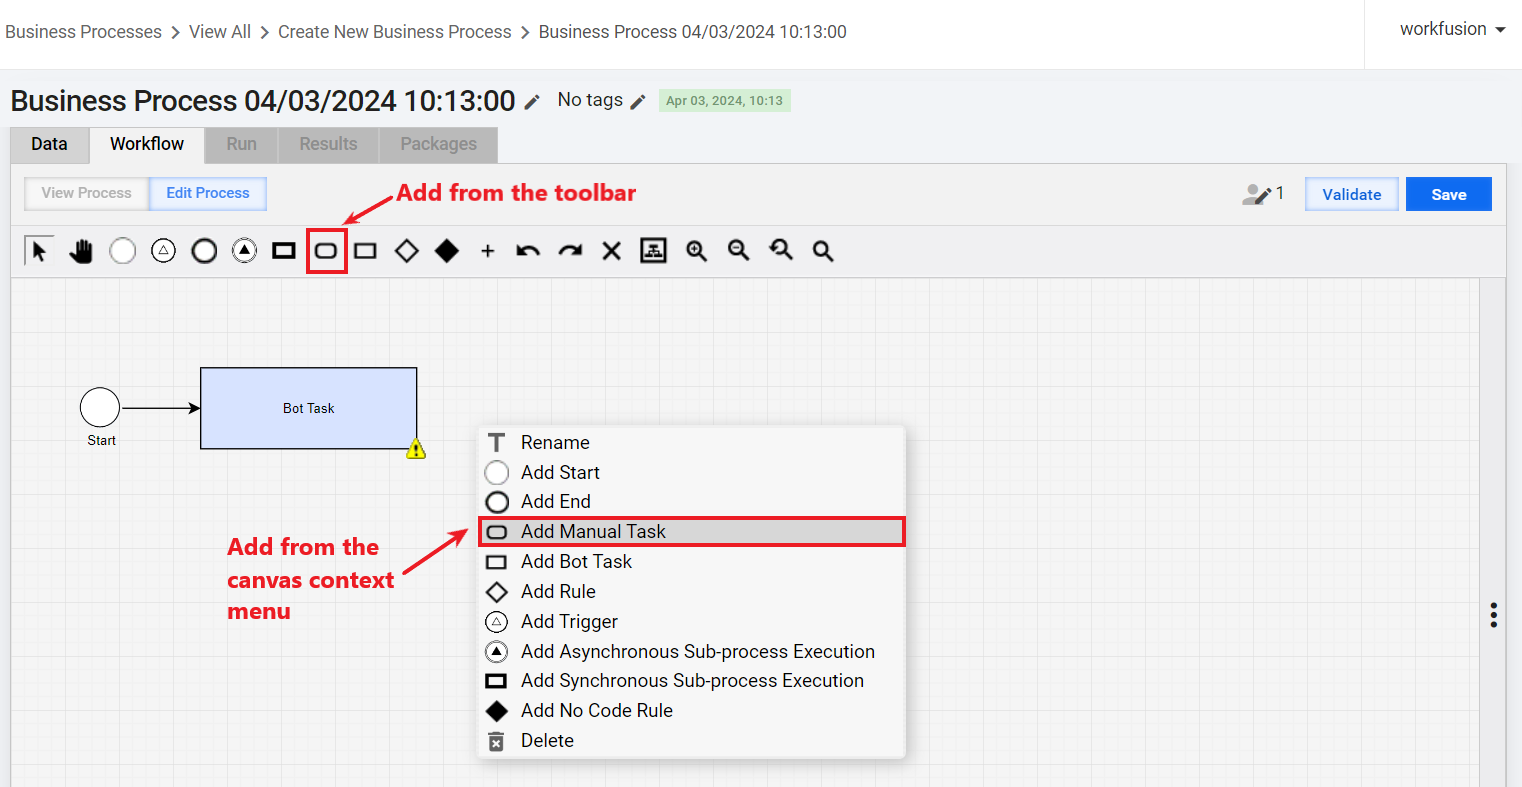
To add a Manual Task (MT) to a Business Process (BP), use one of the following methods:
Create from scratch: drag the MT element from the toolbar to the canvas, or click the canvas and, in the context menu, choose Add Manual Task. In this case, a blank task is created, and you will need to select an Operation and design a form layout from scratch.
Add a ready-to-use task: on the right panel, navigate to the Manual tab, drag an option to the canvas, and edit the task if needed. In this case, any changes you make to the task are propagated to all BPs where the task is used.
Alternatively, click the Copy button for the MT option you choose, in which case an independent task copy is added to the canvas. In this case, the changes you make are not propagated to the source task or other independent copies of the same task.
You can also click an MT element on the canvas or on the Manual tab and, in its context menu, choose Duplicate or Copy. In this case, the properties and design are copied from the source task. You can edit the task if needed.
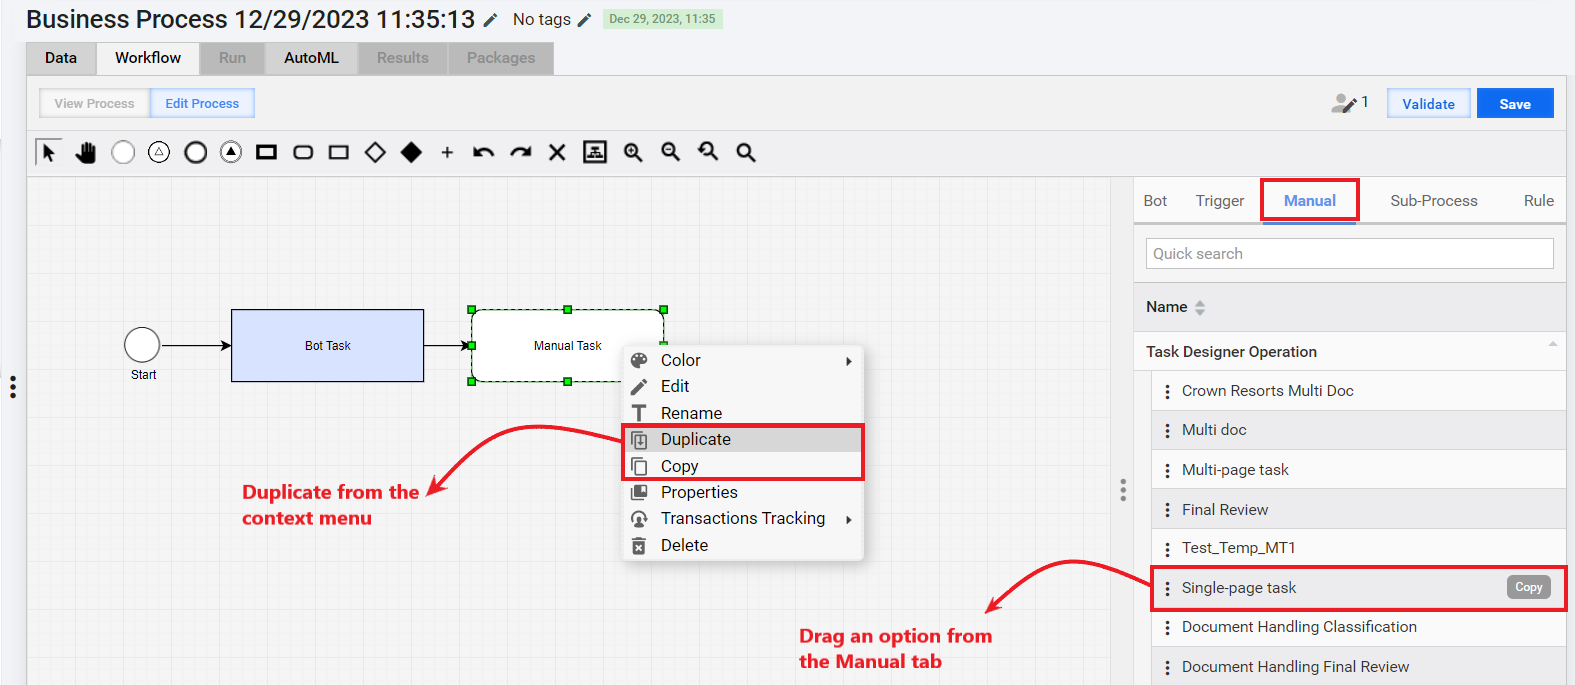
If you duplicate an MT, all subsequent changes in the source or duplicated task are synchronized.
If you copy an MT, you are prompted to edit its name, and there is no synchronization between the source and the copy.
Select Operation
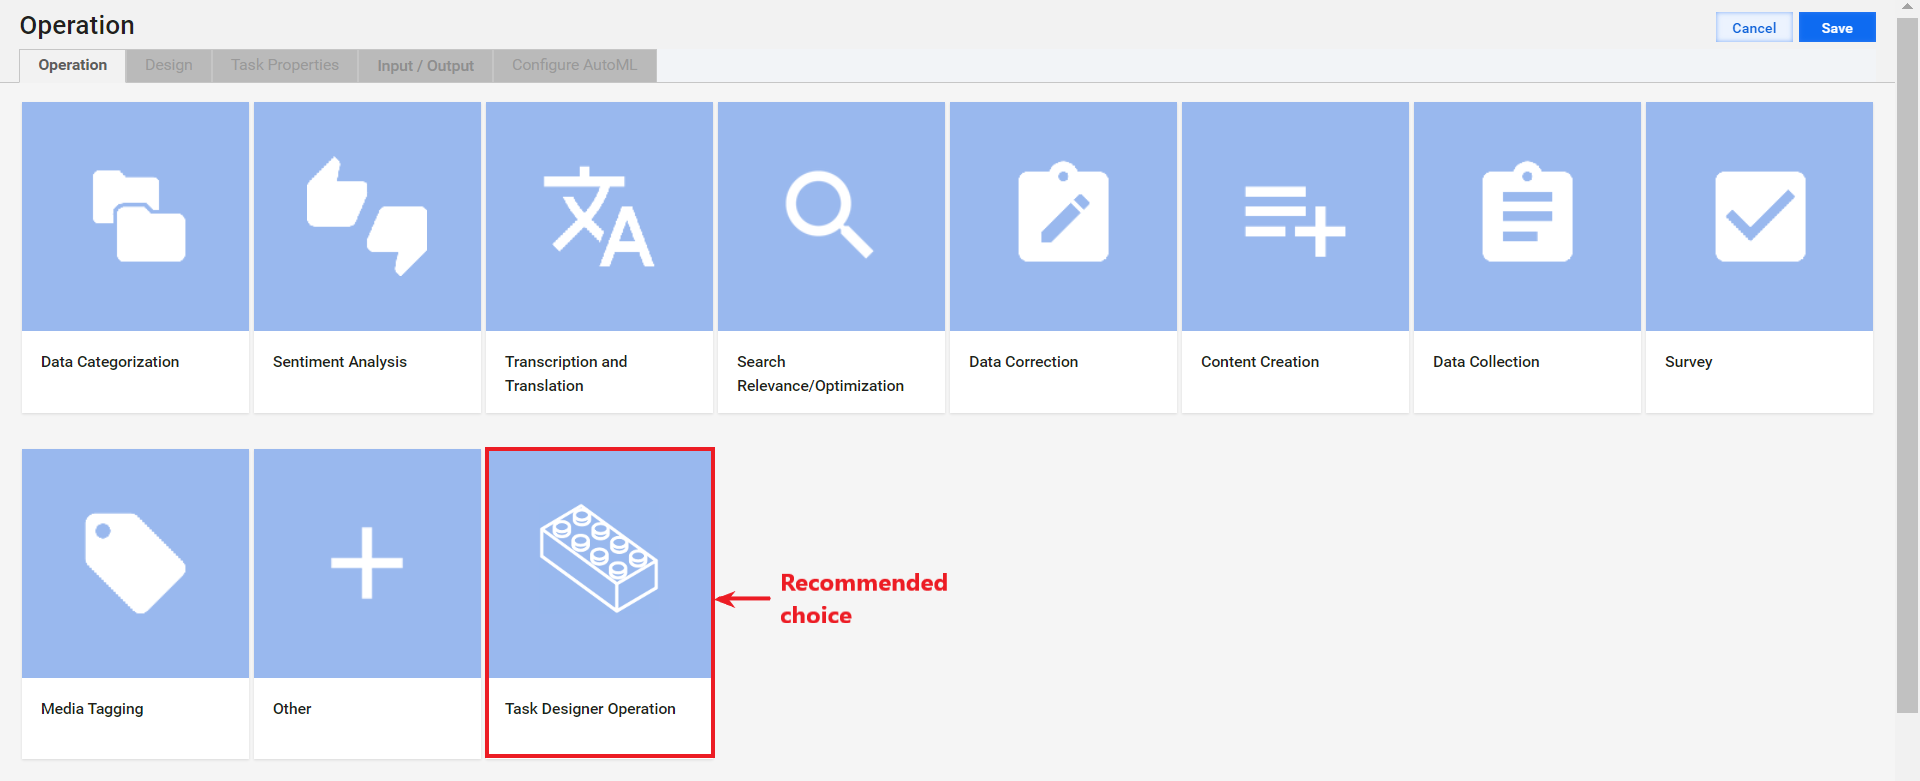
If you drag the MT element to the canvas from the toolbar or add it from the canvas context menu, a blank task is created, and you are redirected to the page where you can choose an Operation. For more details, see Create Manual Task | Create from Operation.
The recommended choice is the Task Designer Operation. The operation type provides a no-code way to implement Manual Task forms: to generate them from template or other models or to build manually in a drag-and-drop editor.
However, you can also choose any other Operation category and proceed with the legacy way to design tasks.
After choosing an Operation, your next steps are setting contracts and designing a form layout for the created task.
Set contracts
Input and output contracts facilitate MT integration into a BP and streamline data flows to and from the step. Contracts define what data comes to an MT as input and what data flows from the MT to the next step in a BP.
For an MT step, you need to set only input contracts. The output contracts are fetched automatically from previous steps based on the MT design. Typically, the output step variable is task_result.
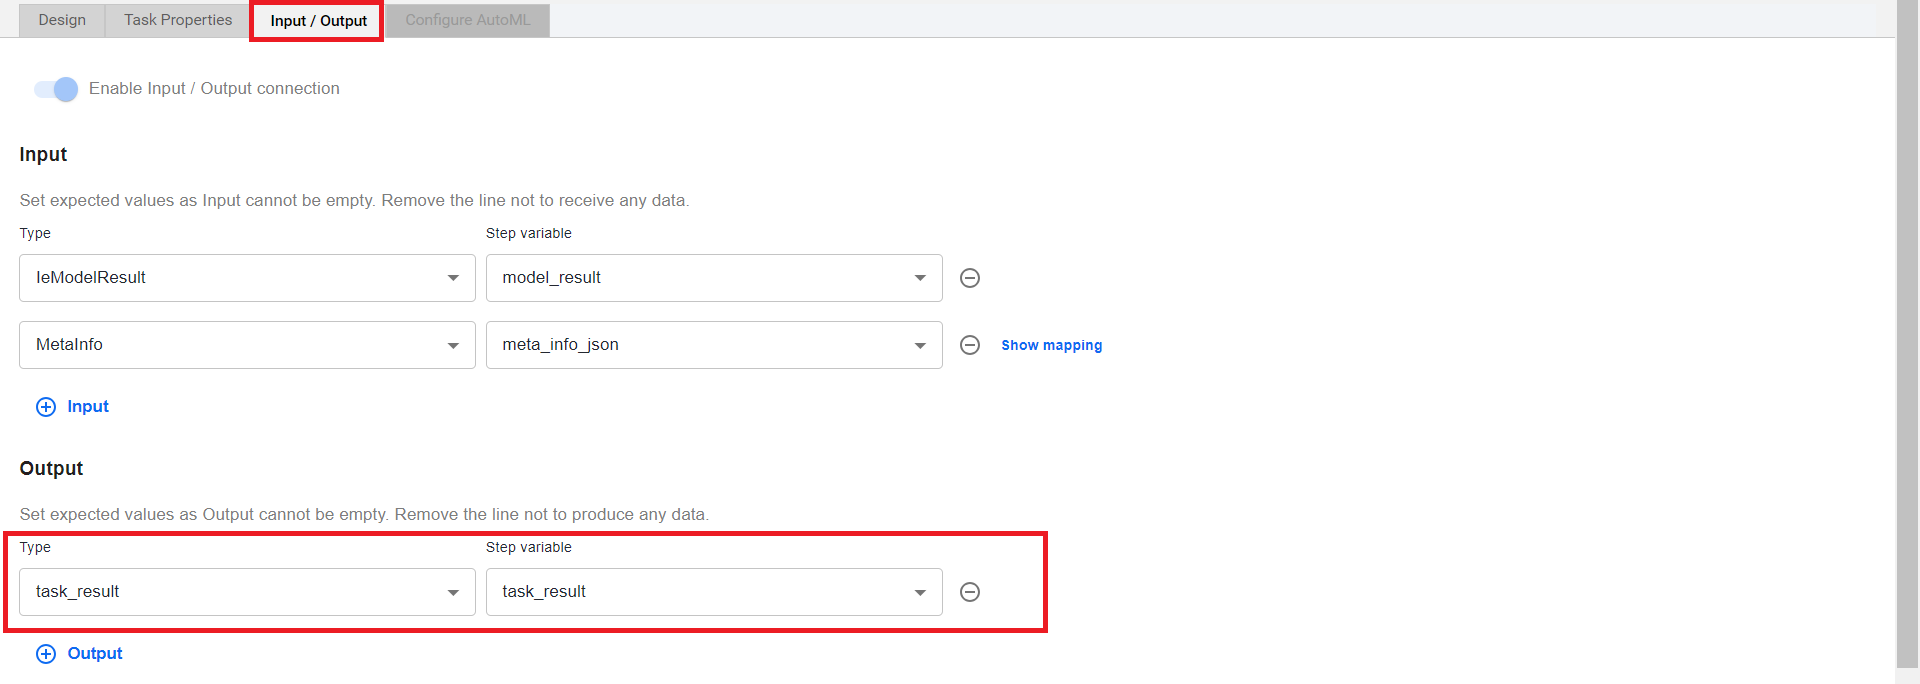
To set the input contracts, navigate to the Input / Output tab and follow the steps below:
Make sure the Enable Input / Output connection toggle is on.
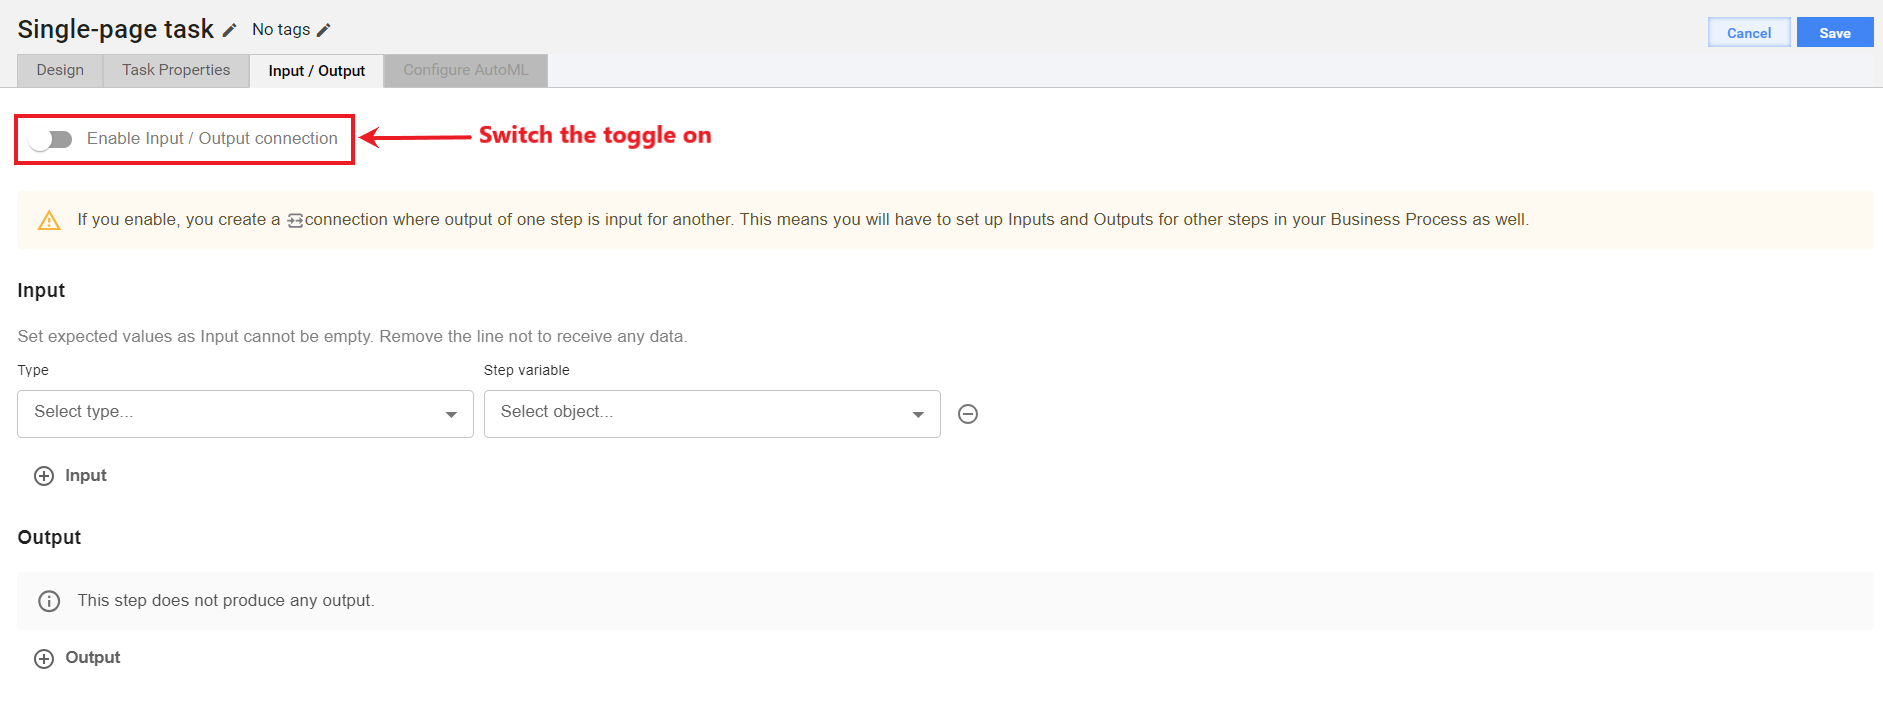
In the Input section, set the step's input variable types and names based on your knowledge of what data is going to be processed in your task.
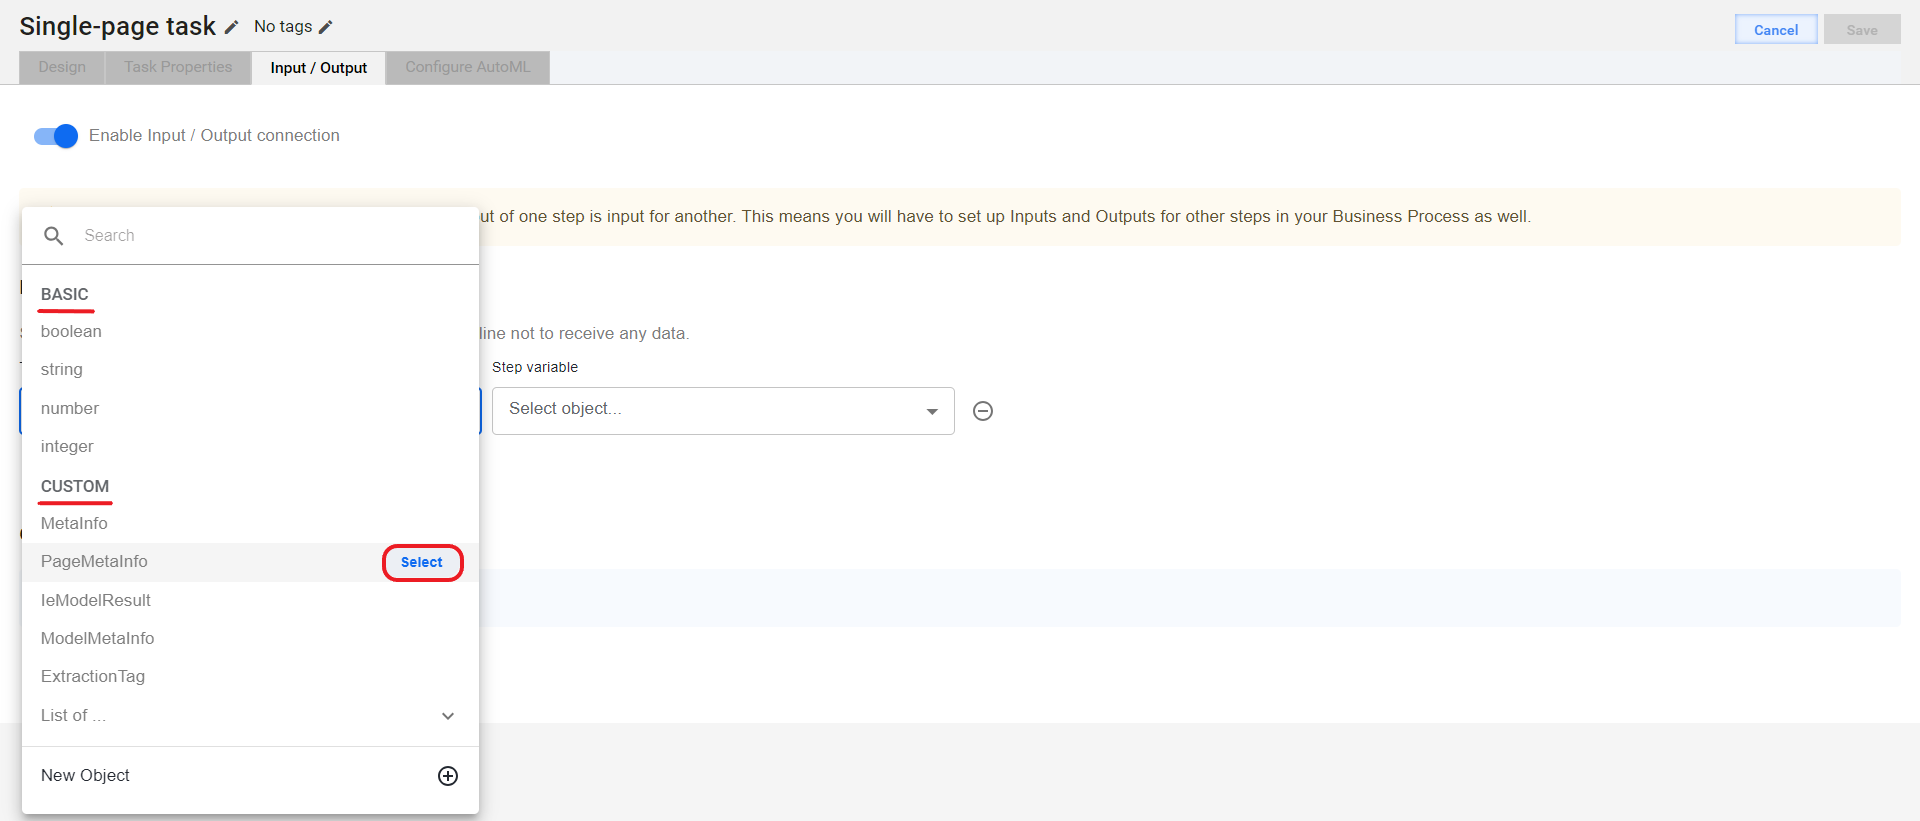
To select a BASIC variable type, click it in the Type list. For a CUSTOM type, move the pointer over a list item and click Select.
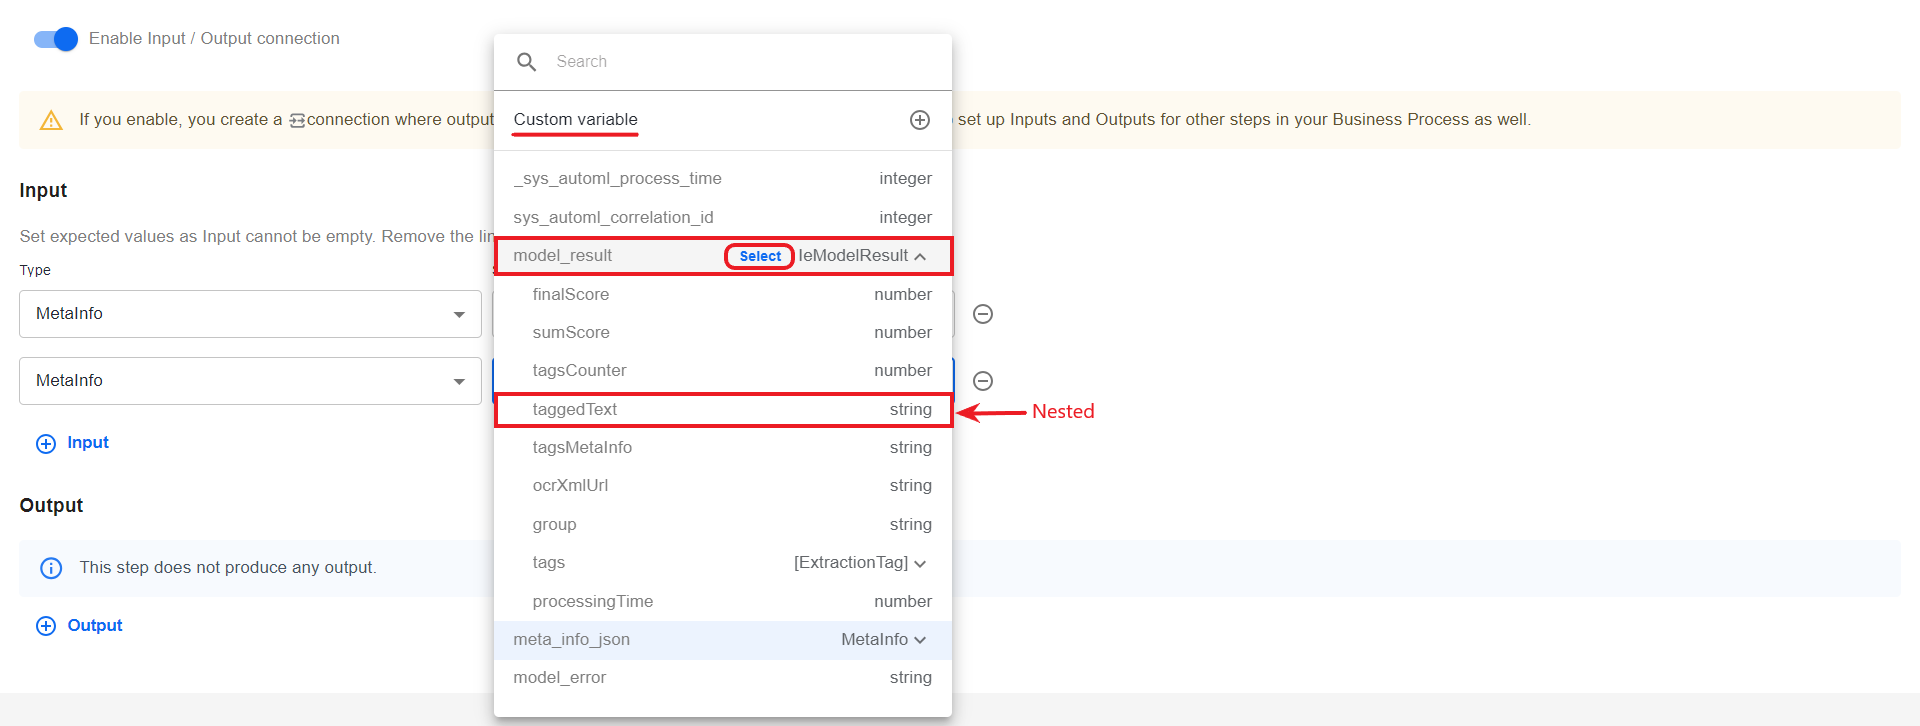
To set a variable name, click it in the Step variable list. To select a variable with nested values, move the pointer over it and click Select. To select a nested value within the variable, open the nesting list and click a required item.
If needed, you can also remap the step and process variables as described in the guide.

Alternatively, you can create custom input objects:
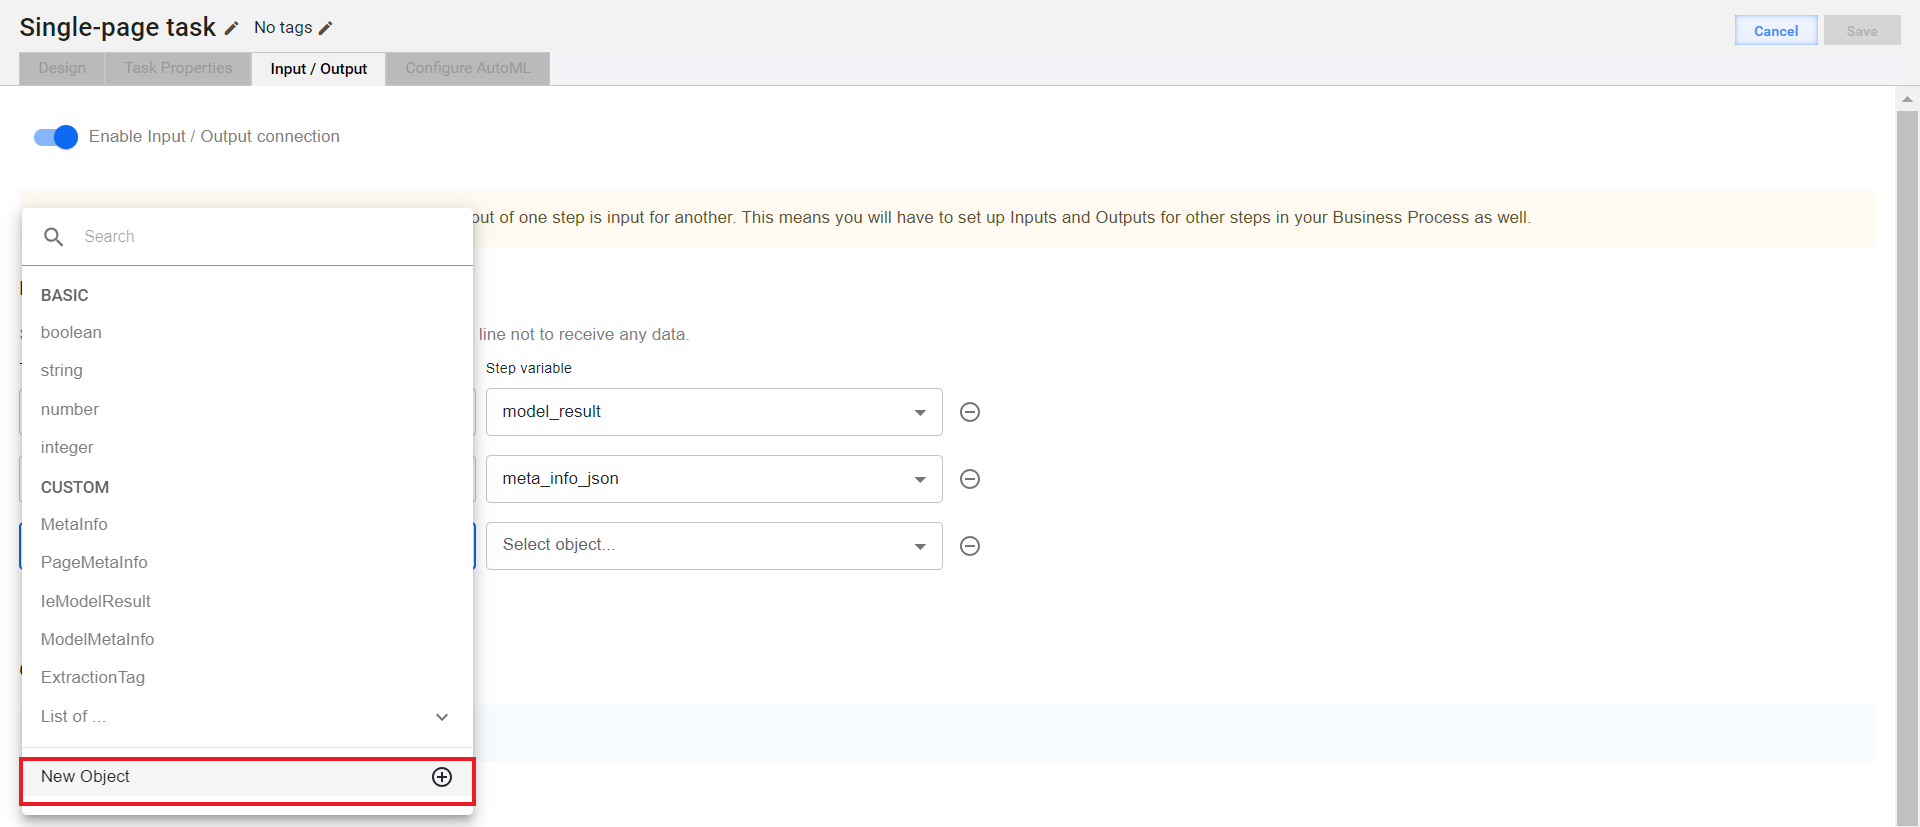
To create a custom type, open the Type drop-down list, click New Object, and follow the instructions in the guide.
To add a custom variable, open the Step variable drop-down list, click Custom varible and enter a required custom value.
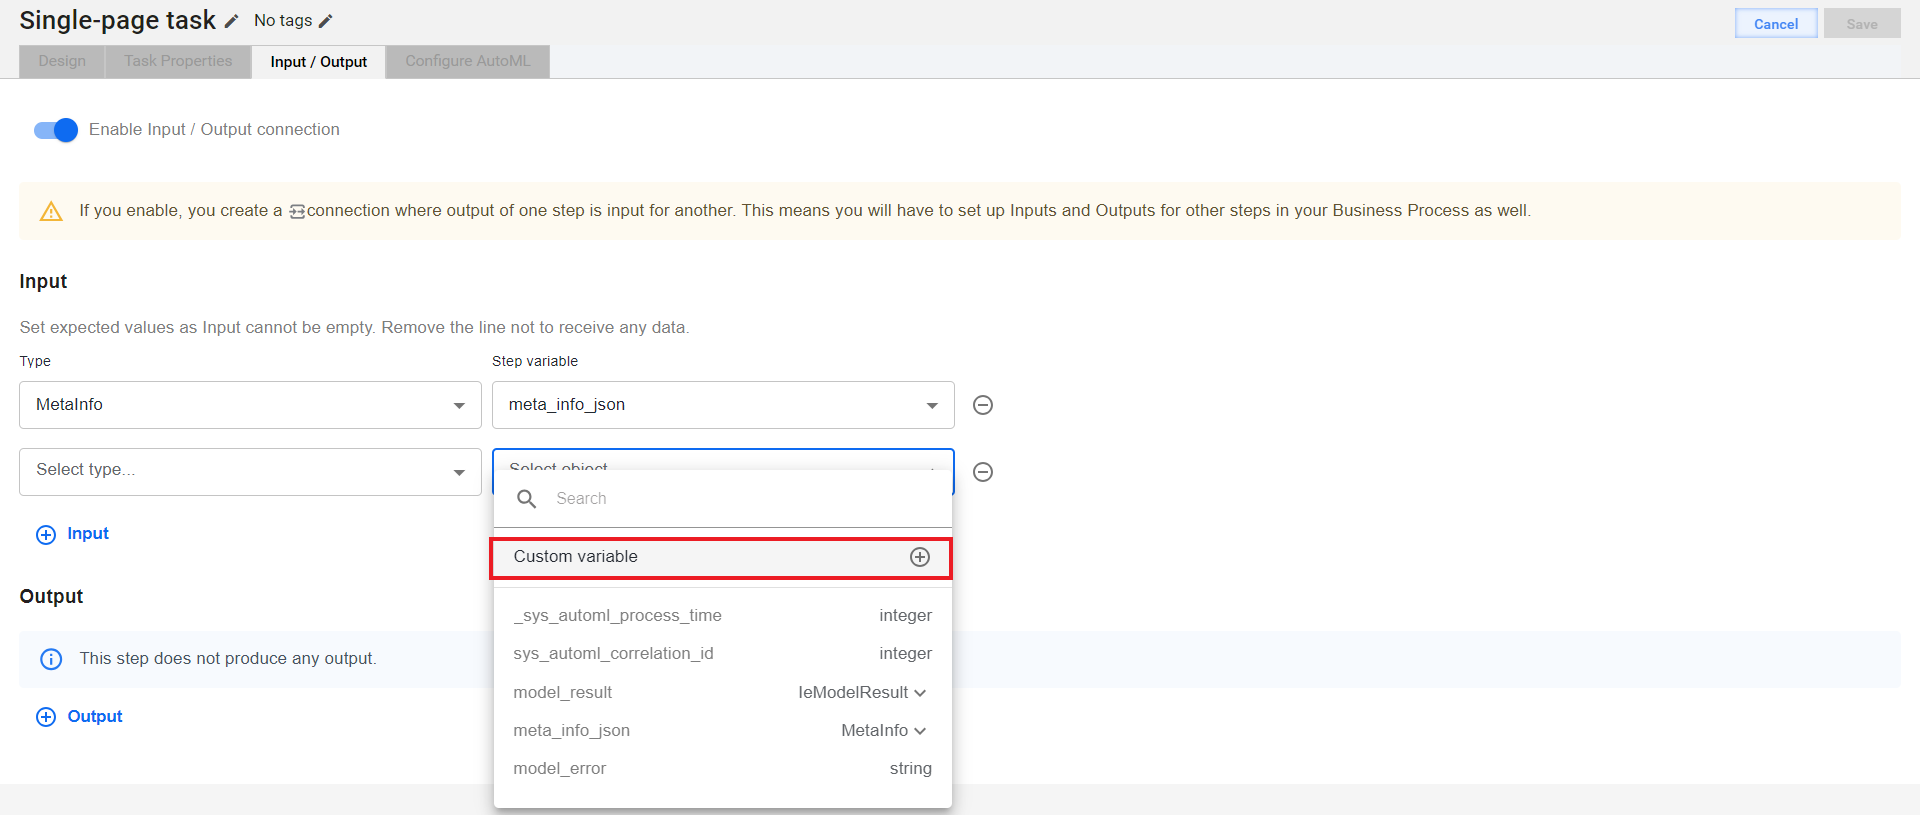
warningDefine contracts carefully to match the step logic. The WorkFusion platform can't verify if a step contract is correct from the perspective of the correspondent step logic.
Add as many input contracts as you need by clicking Input and setting the step variable type and names as described in step 2.
The contracts you set on the Input / Output tab become available for mapping in the Property name field on the API configuration pages for Task Designer components.
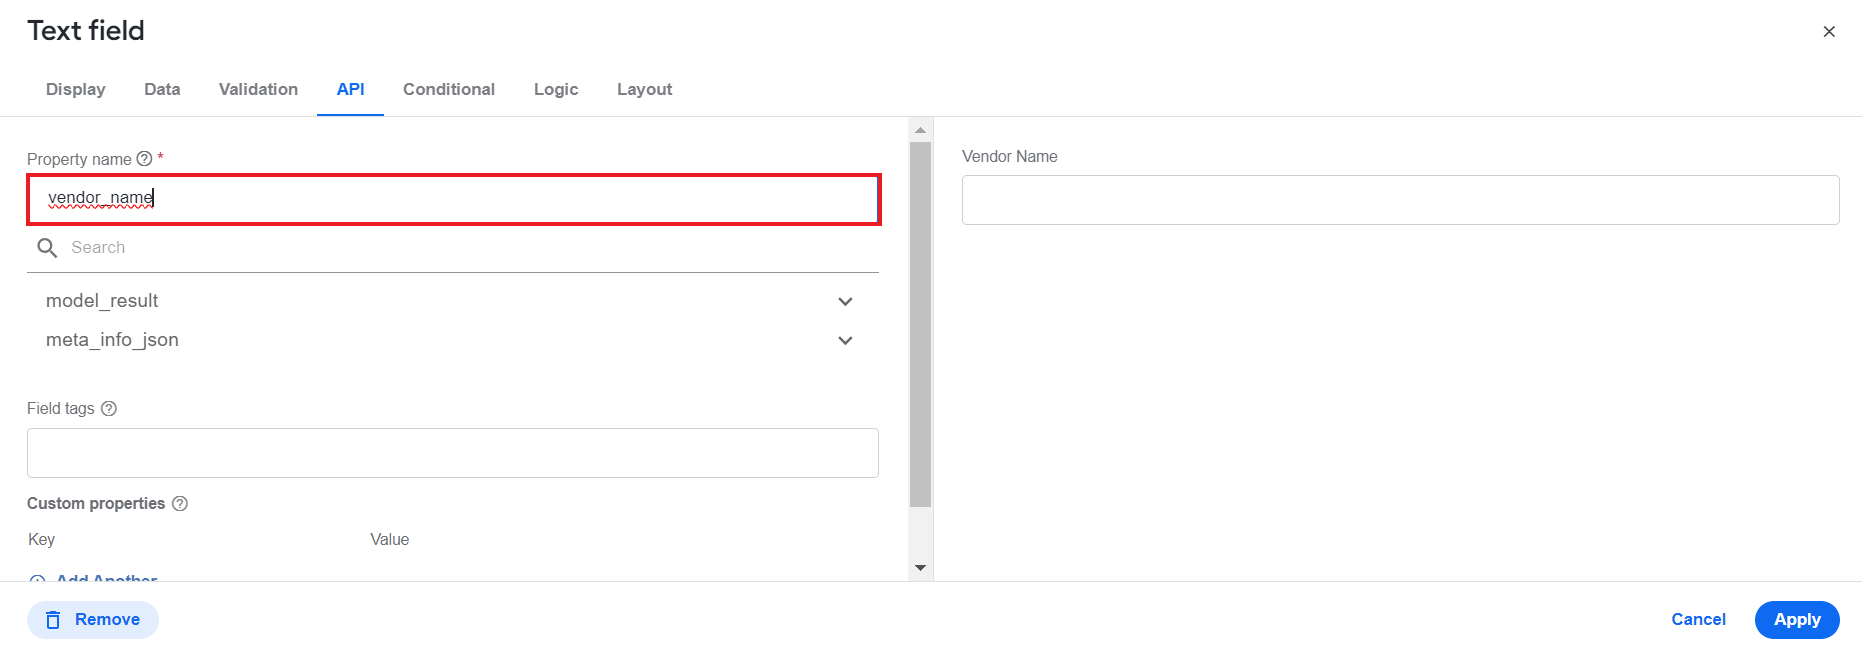
For more details on setting step contracts, see the Configure input and output contracts in Business Process steps topic.
Mapping Task Designer components to input data
The table below lists best-practice examples of how you can match the data types received by MTs from other BP steps and Task Designer components to obtain an optimal task design.
| Data type | Task Designer component |
|---|---|
Array of objects (for instance, [{...}, {...}]) | Data grid, Edit grid |
Array with primitives (for instance, ["one", 2, false]) | Keywords |
|
|
Design task form
To design a form layout for a created MT, navigate to the Design page. For further instructions, refer to the following guides:
For Task Designer Operation, follow the instructions in Design Manual Tasks via Task Designer Operation. This is the recommended way to design Manual Tasks.
For any other Operations, proceed in the legacy way to design MTs as detailed in Design Manual Task in legacy Task Designer mode.
Mind that the process of designing MTs from a BP flow differs from the one you follow when creating a standalone non-BP task.
Set task properties
To set the properties of the designed MT, navigate to the Task Properties tab and follow the instructions in the Configure and run Manual Task topic.
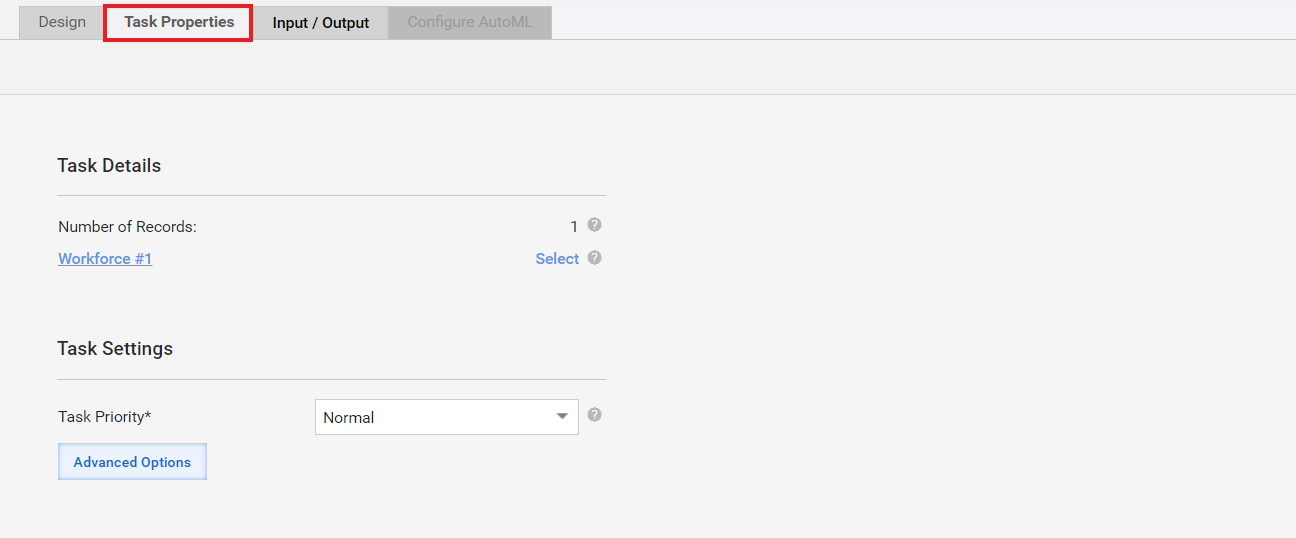
You cannot run a BP-associated Manual Task from the tab as the task runs are managed by the Business Process engine.
In case you have issues with Manual Task steps, look for troubleshooting tips in the following support guides: