Manage realm settings
Each realm comprises a set of clients and users with assigned roles. Realms are isolated from one another, allowing you to manage and authenticate only the users that belong to them.
The WorkFusion User Management features two preconfigured realms:
Master realm is the super admin console for configuring User Management and WorkFusionRealm settings, including clients, groups, and users.
WorkfusionRealm manages clients, users, roles, groups, and credentials linked to WorkFusion apps or external identity and storage providers.
The super admin can change settings in any realm. A realm admin can only change settings in their own realm. Use the super admin functionality for the initial User Management setup and emergencies (for example, when a realm admin forgets the password).
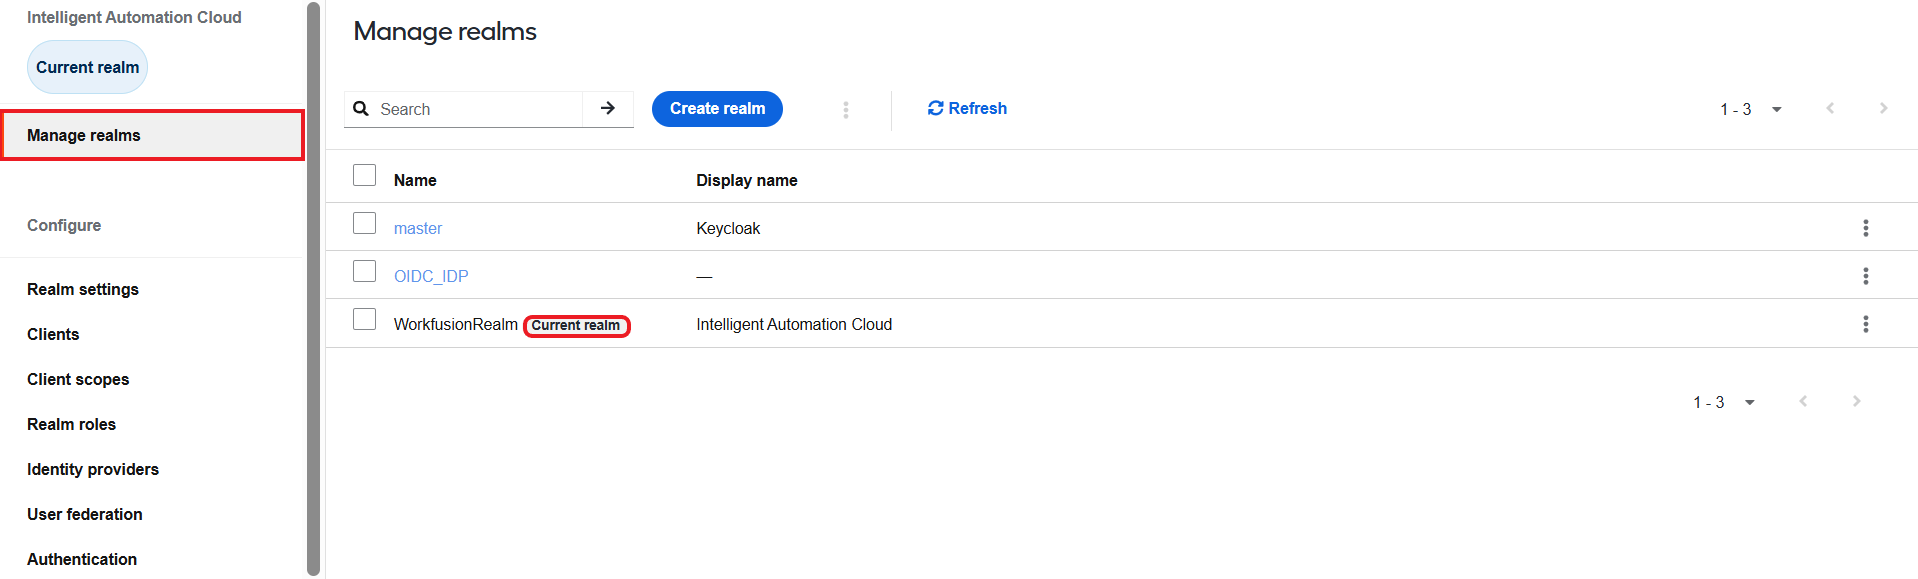
All realms are listed on the Manage realms page. To switch between realms, click their names.
Access realm settings
To access the settings of a realm, follow the instructions below:
On the Manage realms page, select the required realm.
On the left menu, select Realm settings. On the right, you will see the realm configuration page that features several tabs.
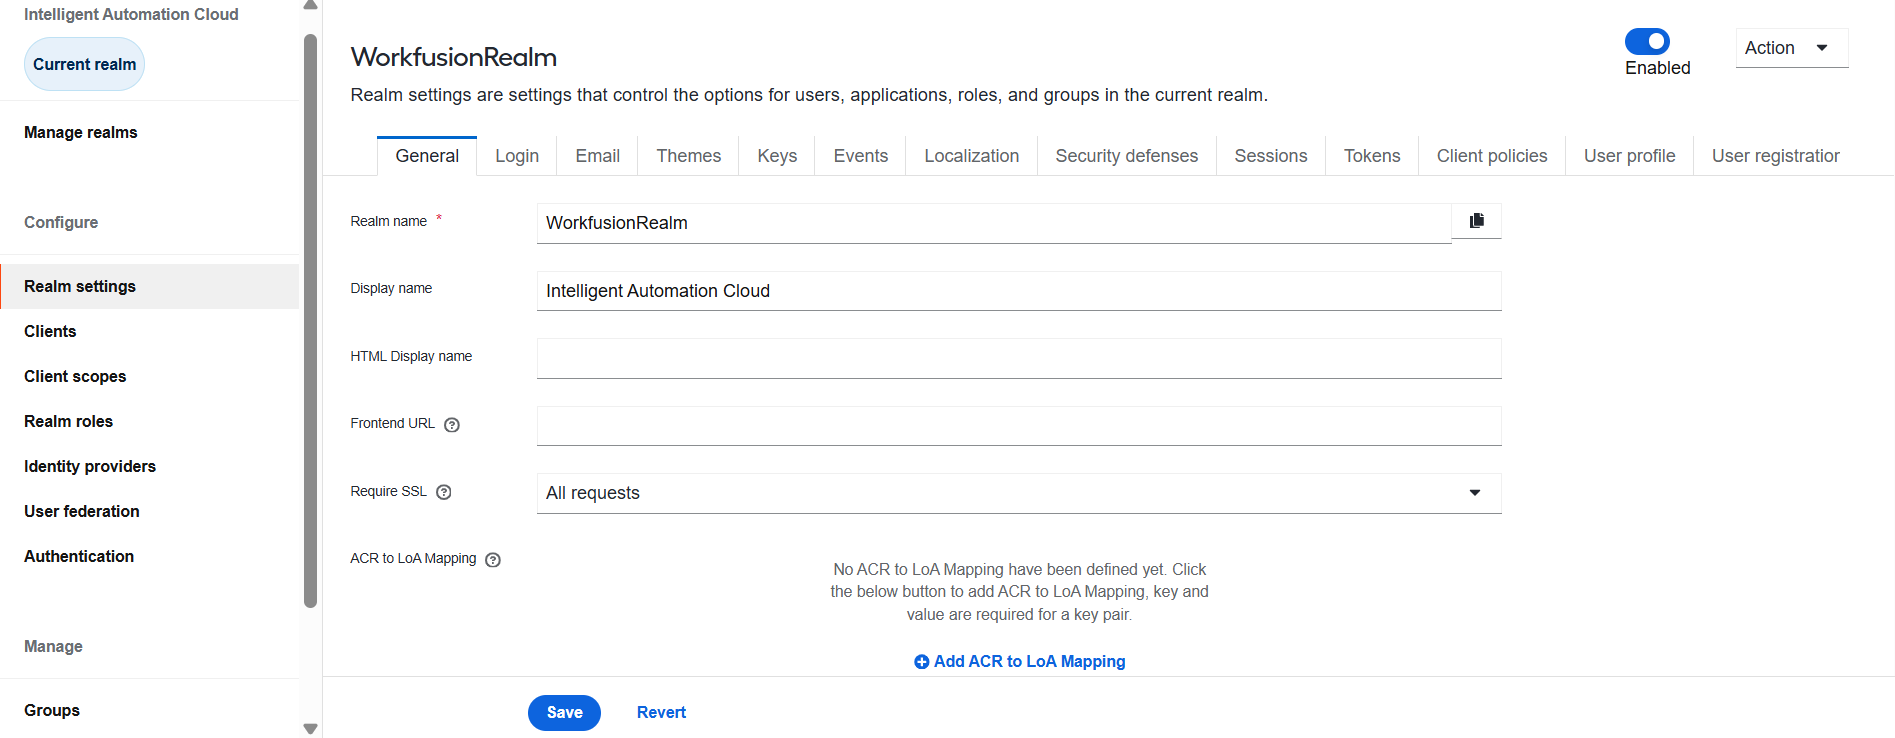
The realm settings are preconfigured for you. It is not recommended to change them, but for a few exceptions:
You can enable or disable the realm by turning on or off the Enabled toggle in the top right corner.

On the Email tab, configure the SMTP server to receive notifications about events (for example, a user locked out) or verification emails.
On the Security Defenses tab, configure user lockouts to prevent brute force attacks.
On the Localization tab, configure locale settings to support a language other than the default English.
Configure SMTP server
To configure an SMTP server, follow the steps below:
Make sure you are in the right realm.
On the left menu, select Realm settings and go to the Email tab.
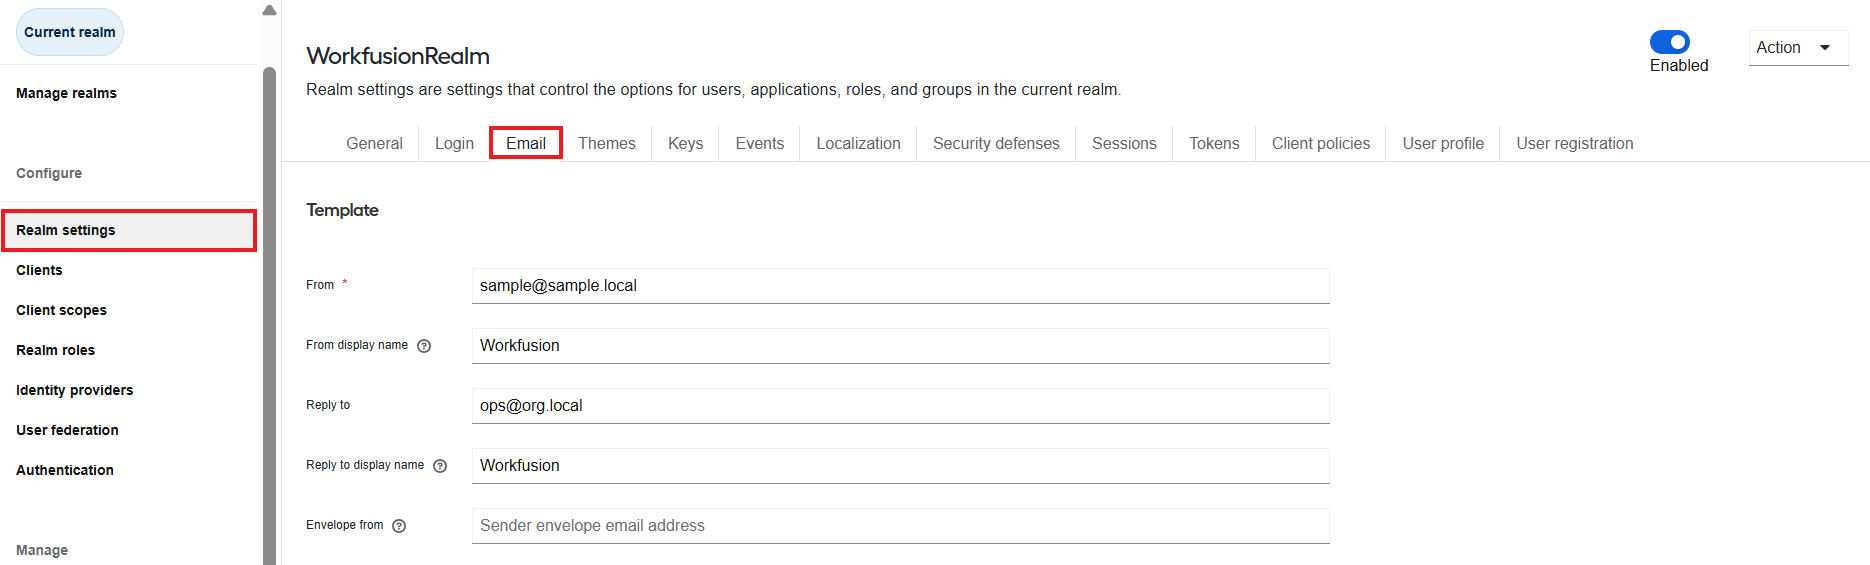
In the Template section, set an email template:
- From: enter the address to be used for the From SMTP Header for any emails sent.
- From Display Name (optional): specify user-friendly email address aliases. If not specified, email clients display the plain From <email_address> only.
- Reply To (optional): set the address used for the Reply-To SMTP Header for any emails sent. If not specified, email clients display the plain From email address only.
- Reply To Display Name (optional): set user-friendly email address aliases. If not specified, email clients will display the plain Reply To <email_address>.
- Envelope From (optional): specify the Bounce Address used for the Return-Path SMTP Header.
Scroll down to the Connection & Authentication section and configure the following settings:
Host: specify the SMTP server hostname for sending emails.
Port: specify the SMTP server port.
Since you can use emails to update or recover usernames and passwords, it's a safe practice to enable SSL or TLS, especially if the SMTP server is in an external network. To do this, turn on the Enable SSL or Enable StartTLS toggle accordingly. Most likely, you will also have to change the value in the Port field (the default port for SSL or TLS is 465).
If your SMTP server requires authentication, turn on the Enable Authentication toggle and set the following:
- Authentication type
- Username
- Password
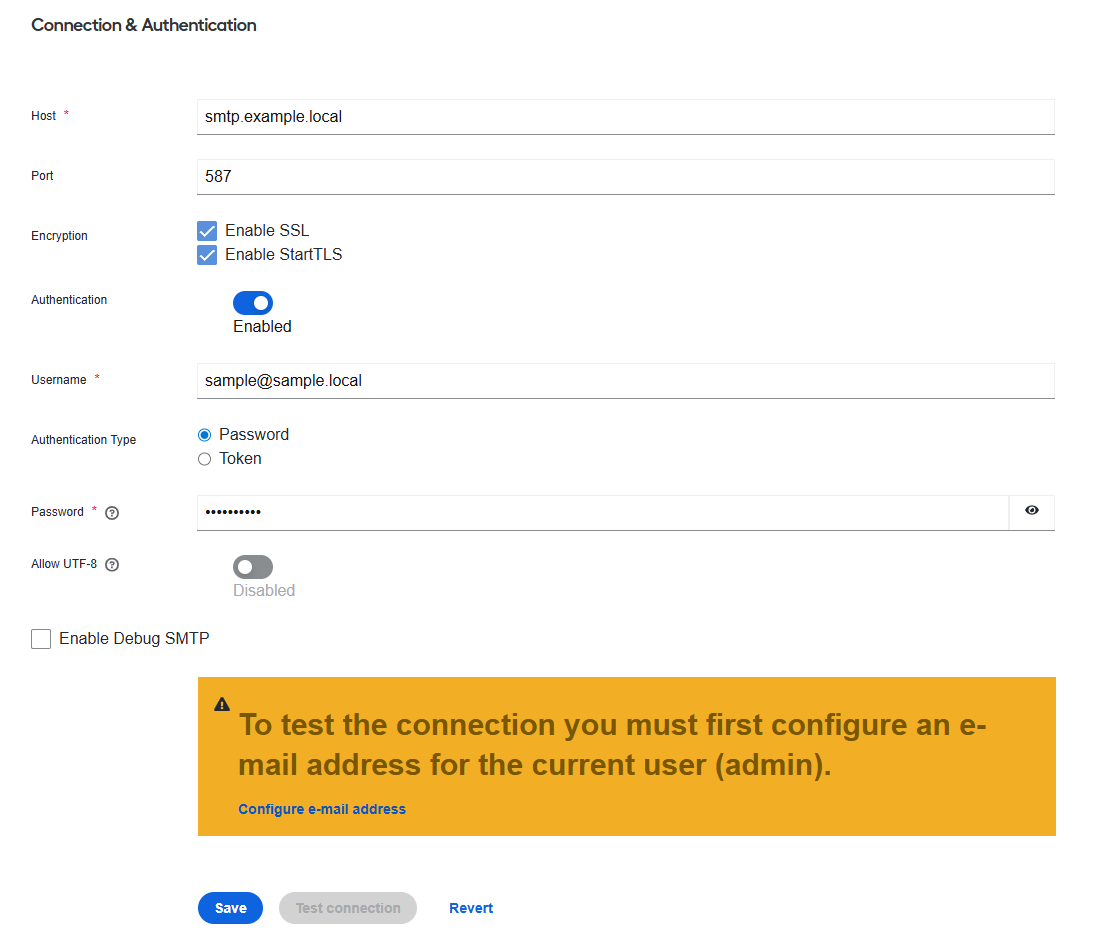
Click Save to apply the changes.
Configure locale settings
WorkFusion User Management supports internationalization. The default language is English, but you can choose another one from a collection of supported locales.
To enable the internationalization feature and set up a default locale, follow the steps below:
Make sure you are in the required realm.
On the left menu, select Realm settings and go to the Localization tab.
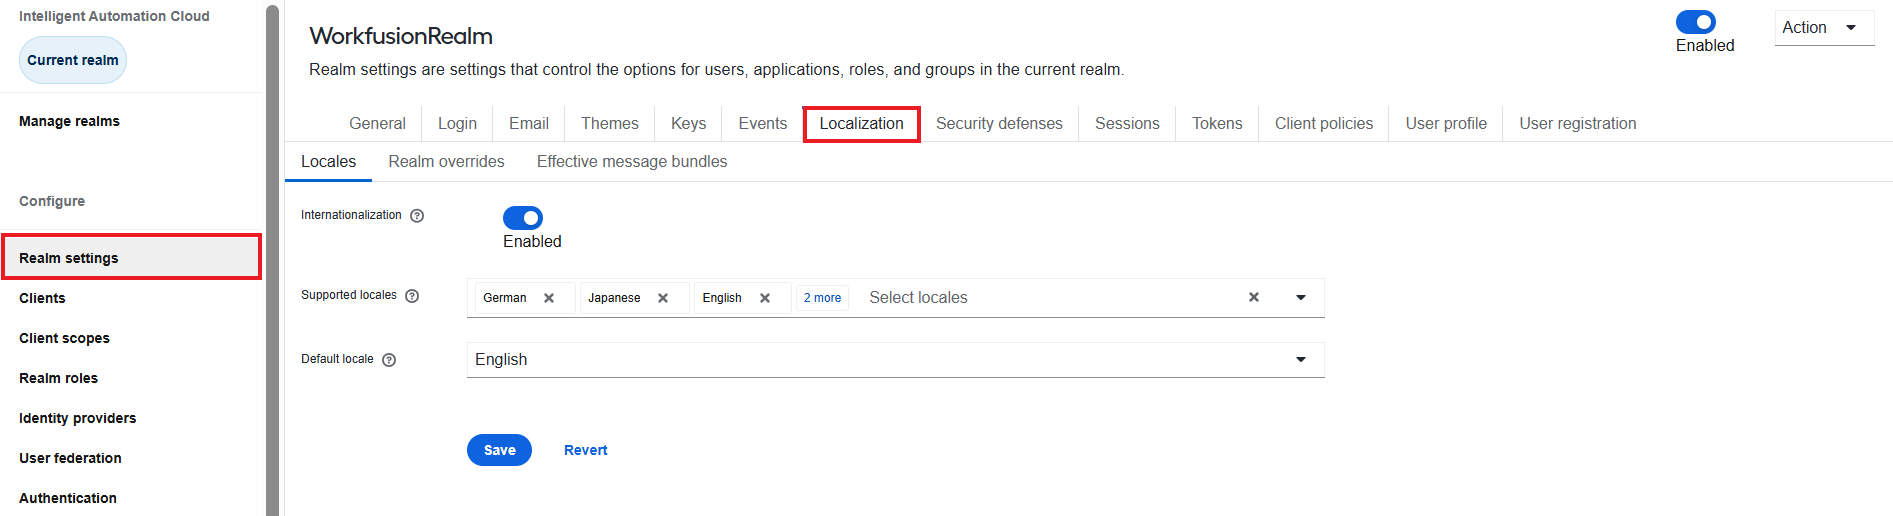
Turn on the Internationalization toggle.
In the Supported locales field, you will see the list of available locales.
In the Default locale drop-down box, select a locale and click Save.