Complete manual review
As part of the default workflow, WorkFusion creates an assignment (Manual Task) for exception handling in the Workspace application once Kayla has finished its automatic review. One assignment is created per each entity.
The step, also known as Human-in-the-loop, is optional, and you can enable or disable it per Kayla variation. If it is disabled, the batch summary report is sent instead. For more information, see Input and output data.
Find results in Workspace
Once the AI Agent where you enabled the human-in-the-loop step is ready with a review, its results become visible in the Workspace application.
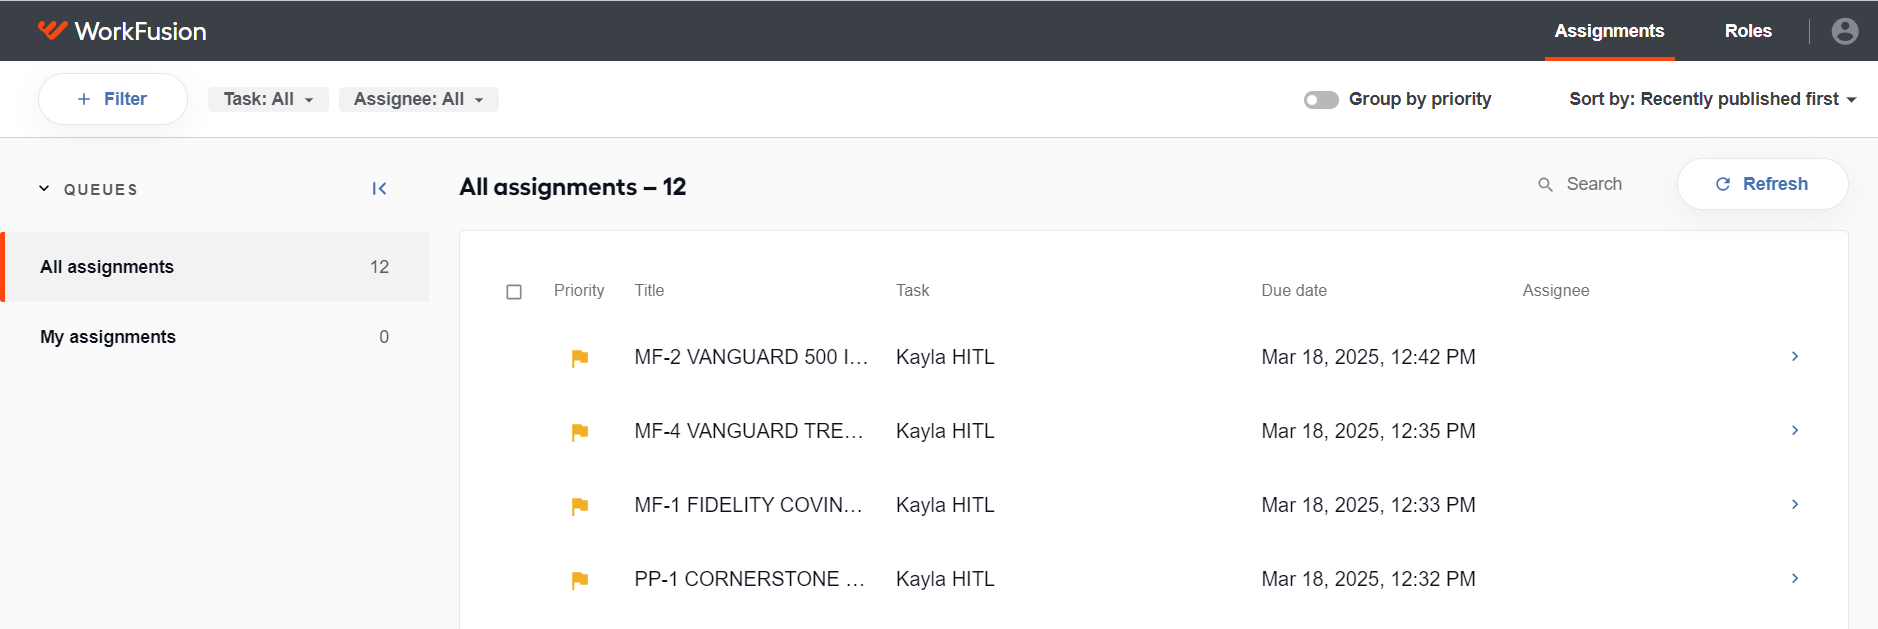
Just like with other assignments, you can add Kayla's human-in-the-loop tasks to the general queue or assign them to a specific user. For detailed instructions on managing queues and assignments in Workspace, see the following guides:
Review summary page
As you open an assignment from Kayla's flow in Workspace, you see the summary page similar to the one shown below:
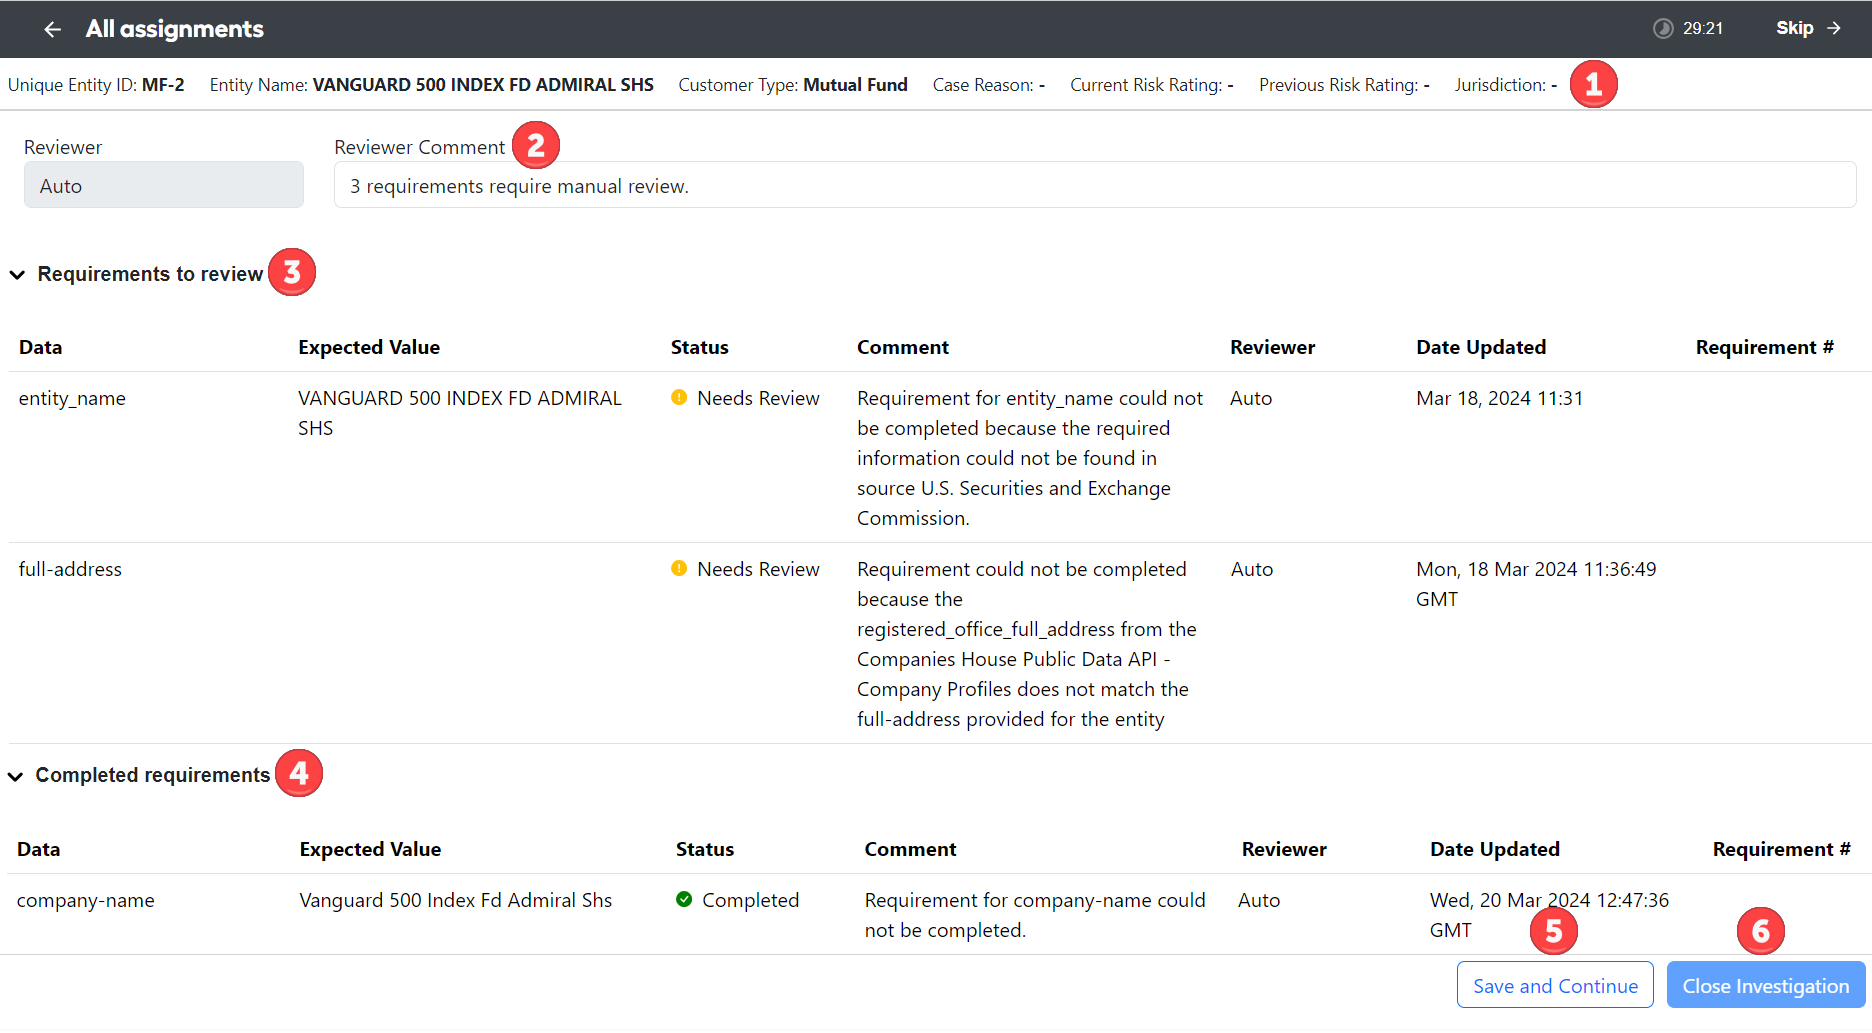
The following numbers correspond to those in the figure above:
Header information
- The Unique Entity ID, Entity Name, and Customer type data elements are mandatory.
- All other data elements are optional. You set them on the configuration screen for each variation.
Reviewer Comment
The data elements contain information about the reviewer and any comments from the review regarding the assignment. When the task is opened for the first time, the fields contain information generated automatically by Kayla.
Requirements to review
The section contains a list of requirements that need manual review or additional information. You can click each requirement to see more details on sourced data or documents.
For each requirement, you can see a summary of results. Such details as the status, comment, reviewer, and update date may change as you review and edit the information for the requirements.
Completed requirements
The section contains a list of requirements reviewed by the AI Agent and available for manual review. You can click each requirement to see more details on sourced data or documents.
For each requirement, you can see a summary of results. Such details as the status, comment, reviewer, and update date may change as you review and edit the information for the requirements.
Save & Continue: click the button to save your progress on the task and go to the next assignment in the queue. In the confirmation dialogue that appears after clicking, choose to keep the task assigned to yourself or unassign it.
Close Investigation: click the button to close the investigation and complete the task. After you select the option, you can add a status for the entire investigation and enter a comment.
Review details about each requirement
As you click a specific requirement on the summary page, you drill down to the page with details about the selected requirement.
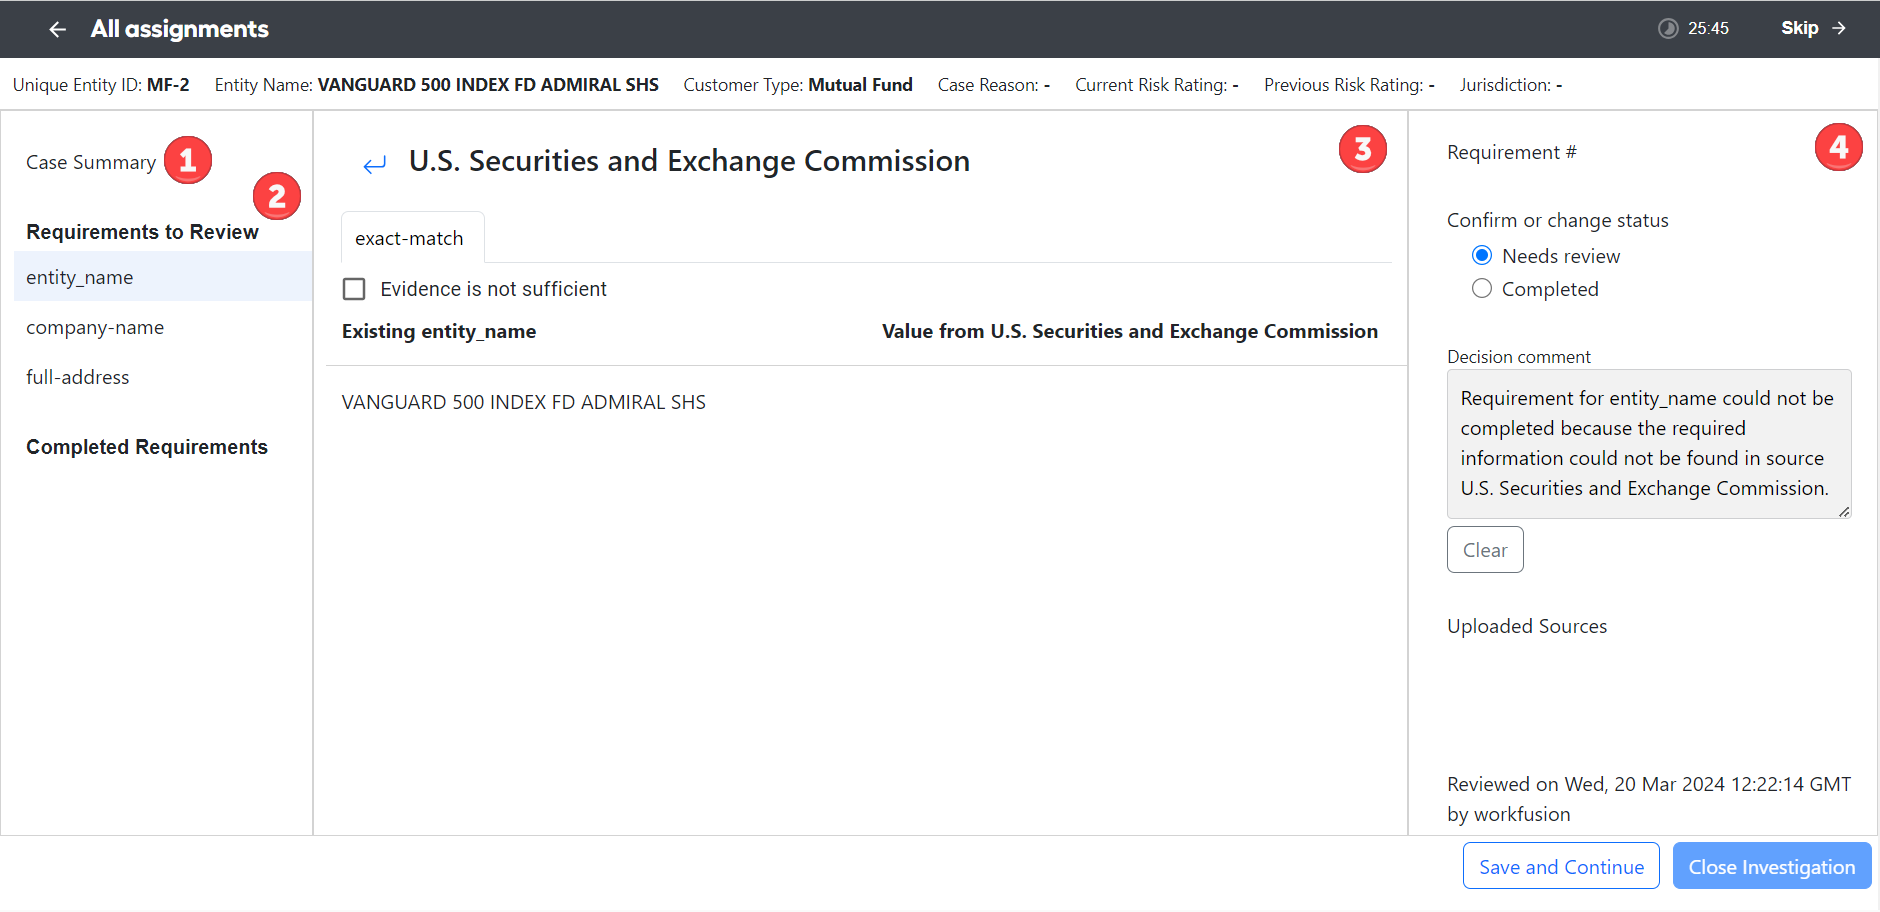
The following numbers correspond to those in the figure above:
Click Case Summary to navigate back to the summary page.
The left panel lists all requirements that need to be reviewed.
The central panel displays the data or documents returned for the requirement.
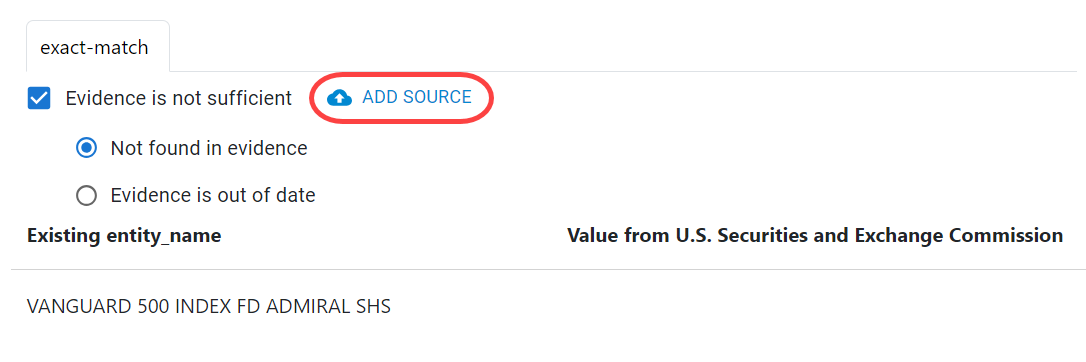
Select Evidence is not sufficient if the sourced evidence cannot be used for the requirement and then choose one of the reason codes to explain the decision:
Evidence is out of date
Not found in evidence
To upload more evidence data to the assignment, click Add source. You can upload up to five additional documents. Those documents are displayed in separate tabs.
The right panel displays the following:
The Status section defines the requirement's status as Completed or Needs review. You can update the status as you complete the review.
The Decision comment box contains a human-readable explanation of how the decision was reached. The comment is provided for each requirement the AI Agent reviews and adjudicates. The text in the box is editable. Click Clear to clear the box contents and enter a new comment.
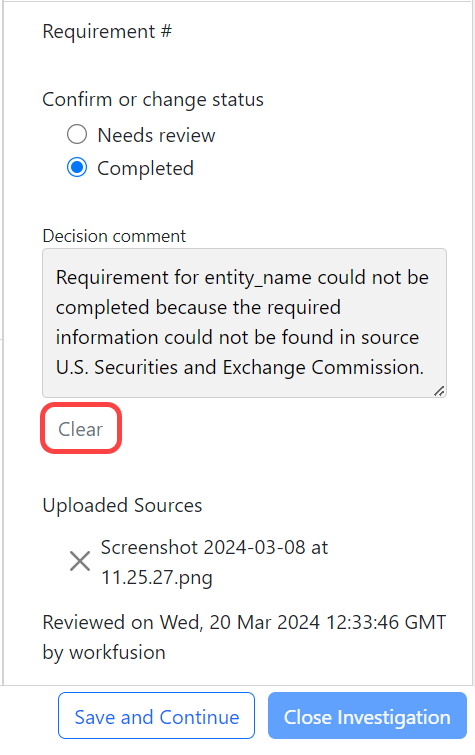
The Uploaded Sources section enumerates your uploaded documents.
The Reviewer and review date section shows who was the last to review the information and the time when it was updated.
From the screen, you can choose to skip, save and continue, or close the investigation (once all requirements are complete) on the task.
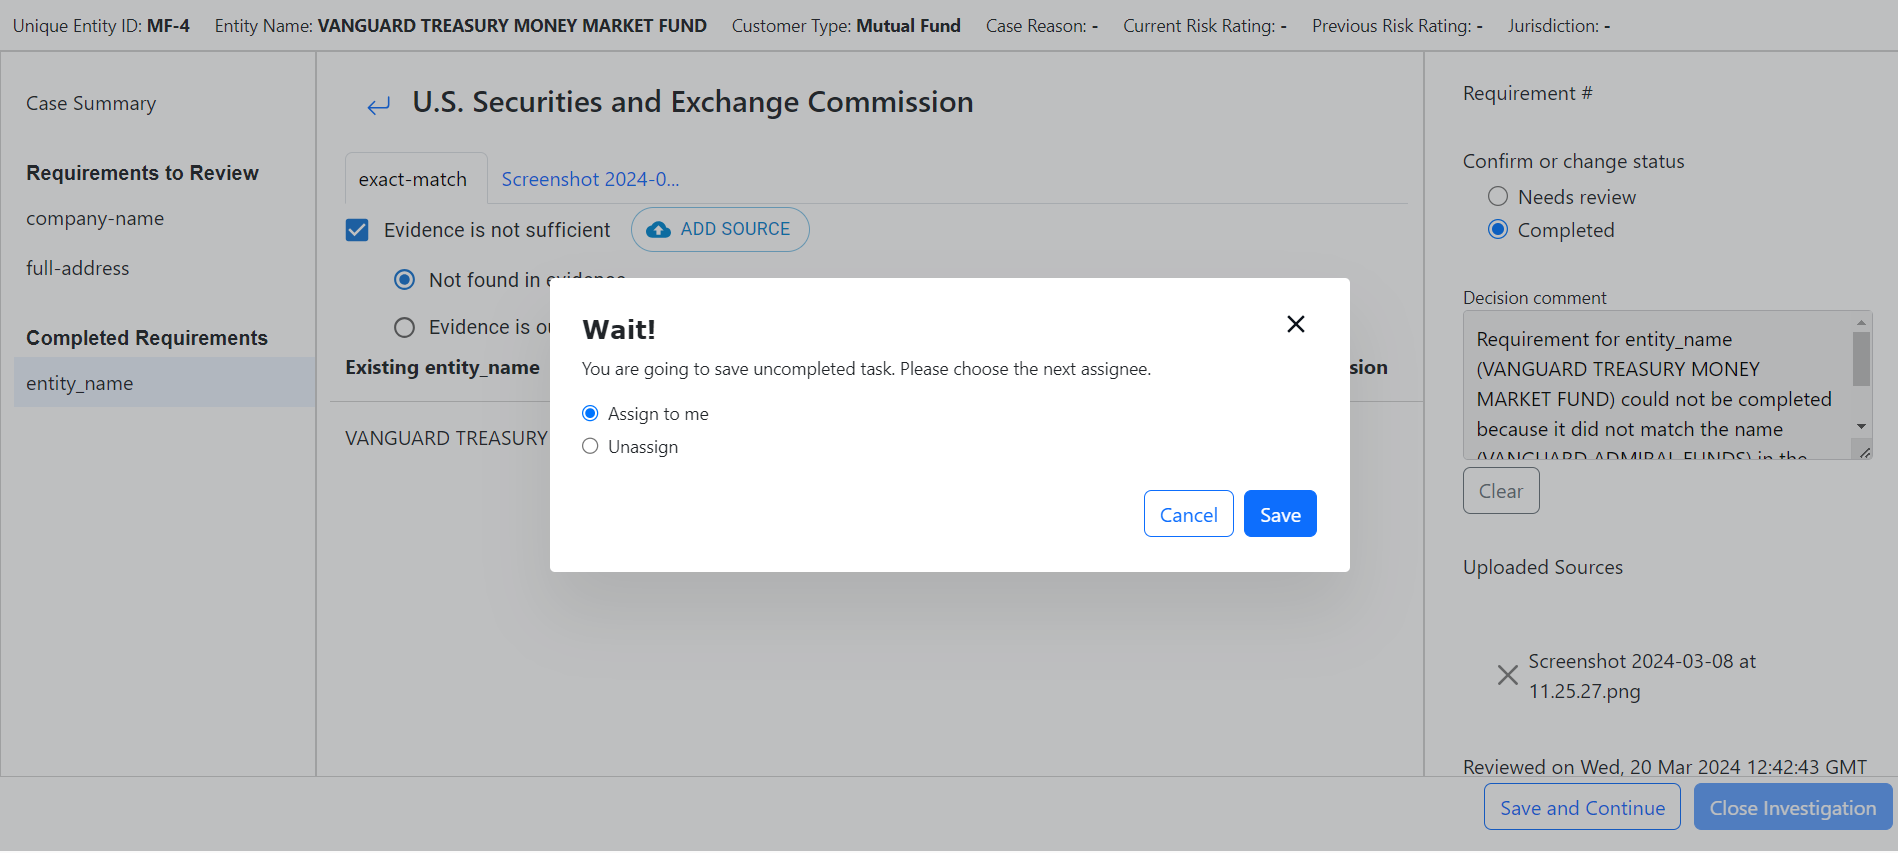
Click Save and Continue to save your progress on the task and go to the next assignment in the queue. There are several options to choose from:
- Assign to me
- Unassign
 info
infoWhen you click Save and Continue, your task is still not completed, though all your changes are saved. The task is recreated with the current creation date and added to the queue, either assigned or unassigned, based on the choice you previously made.
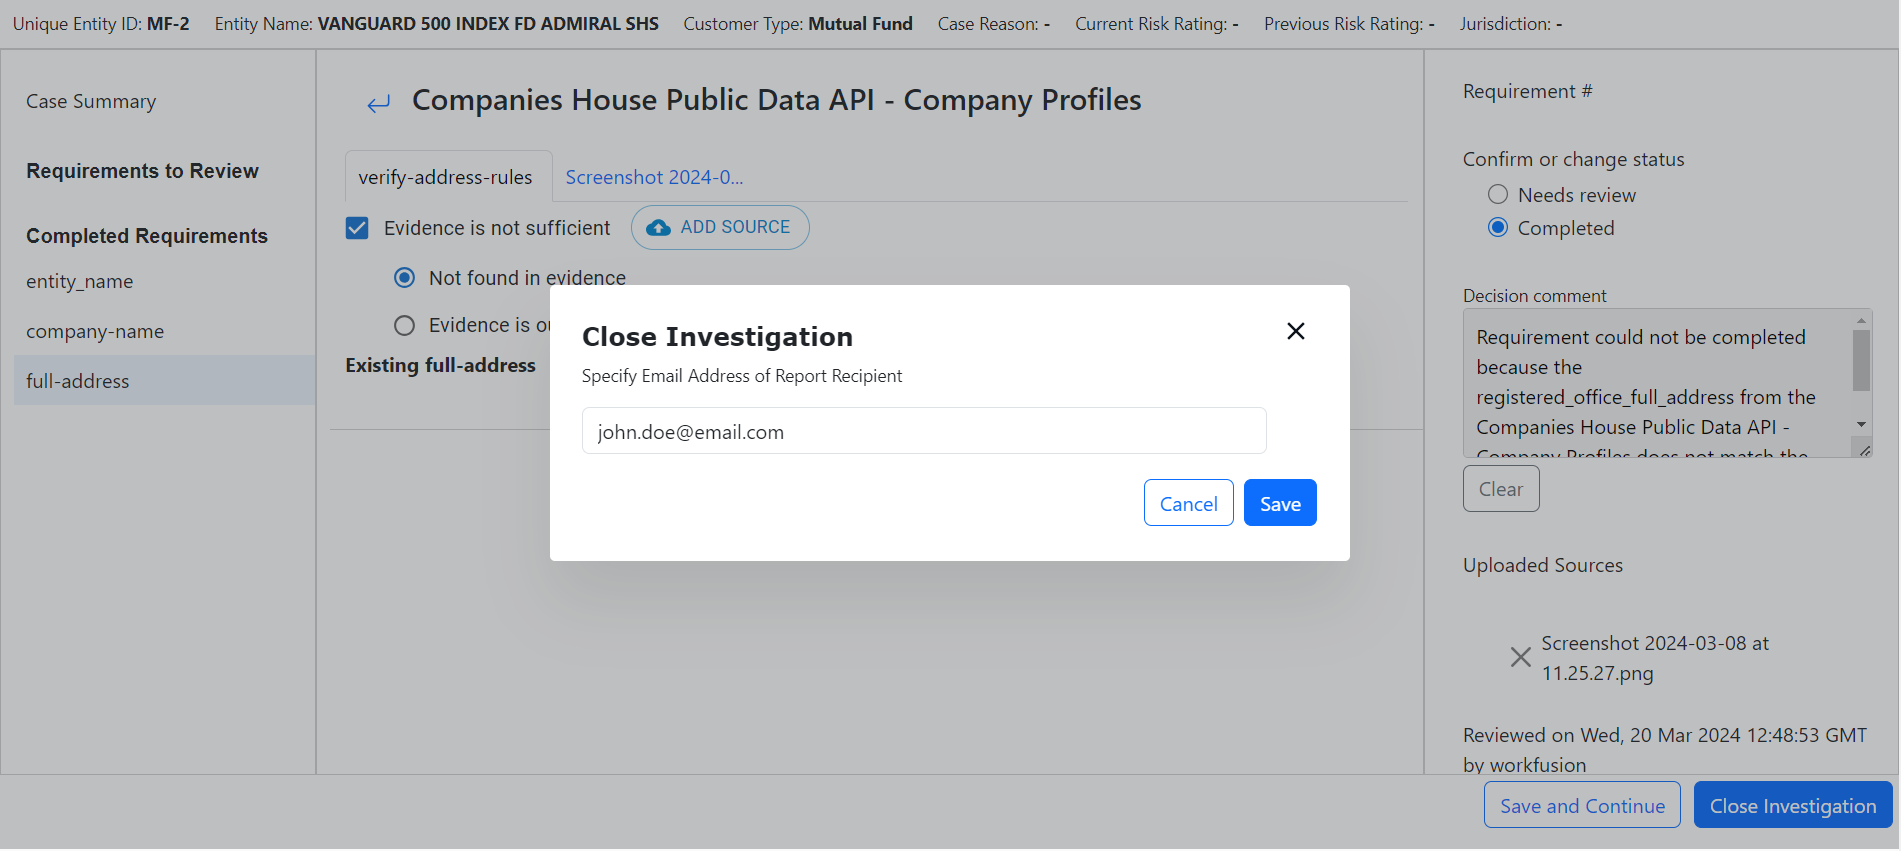
Click Close Investigation to close the investigation and complete the task. You are prompted to confirm the email address for receiving the final periodic review report. Specify the email address of the report recipient and click Save.
Complete investigation
Once you finish reviewing the requirements, click Close investigation to complete the task. Upon completion, a final periodic review report is generated and sent to the email you specified.
If you wish to escalate the investigation so that comments from another analyst can be included, select Save & continue to save your work and reassign it to another user in Workspace.
The Close Investigation button is disabled if not all requirements are completed.