Configure access control list
User management and access control based on user groups
Access control list (ACL) specifies which users are granted access to objects and what operations are allowed on given objects. For Workspace, ACL-based approach is used by providing an access control mechanism where each assignment has its owner and ACL.
Workspace limits access to assignments based on user groups and allows Business Processes and assignment data to be securely restricted only to users who are allowed to access the data and complete the assignment.
The interacting components are as follows.
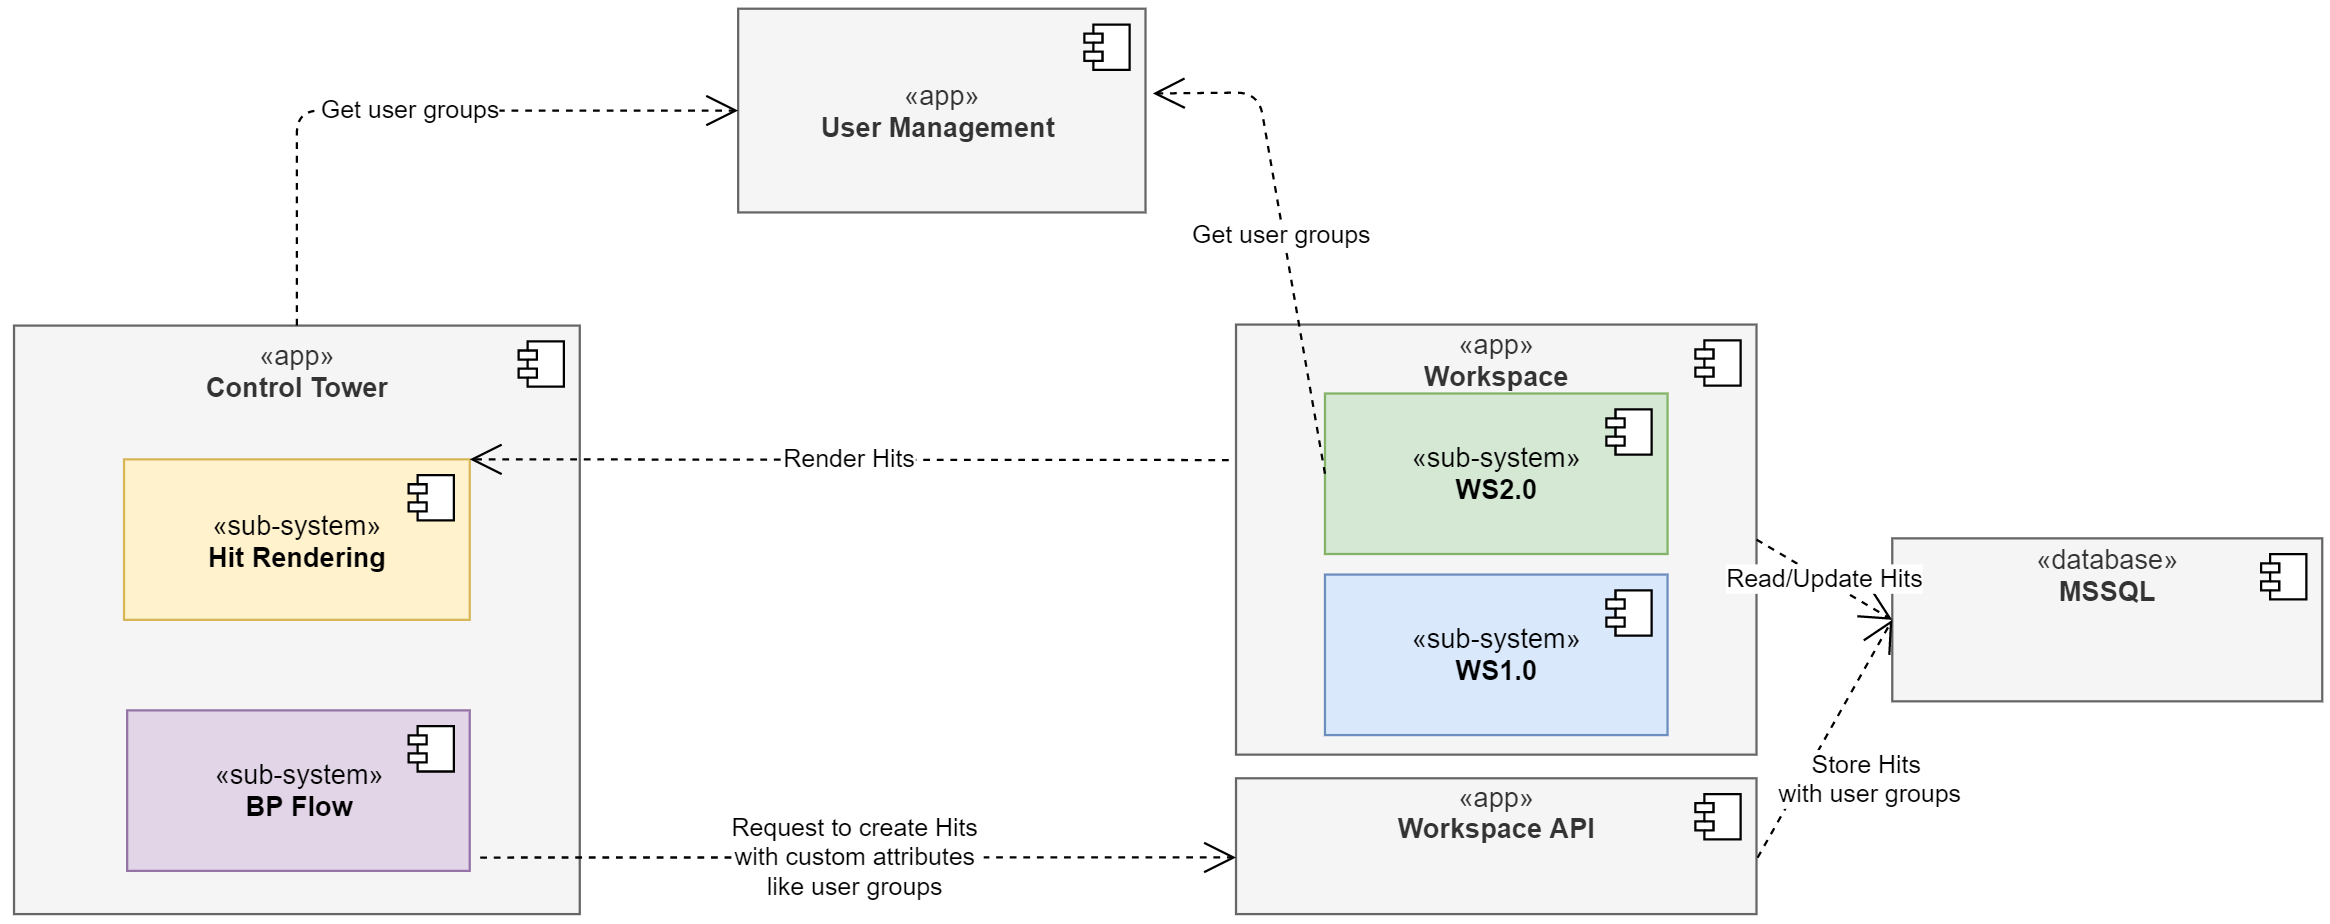
Dynamic user groups configuration is based on business attributes in input data or Data Store.
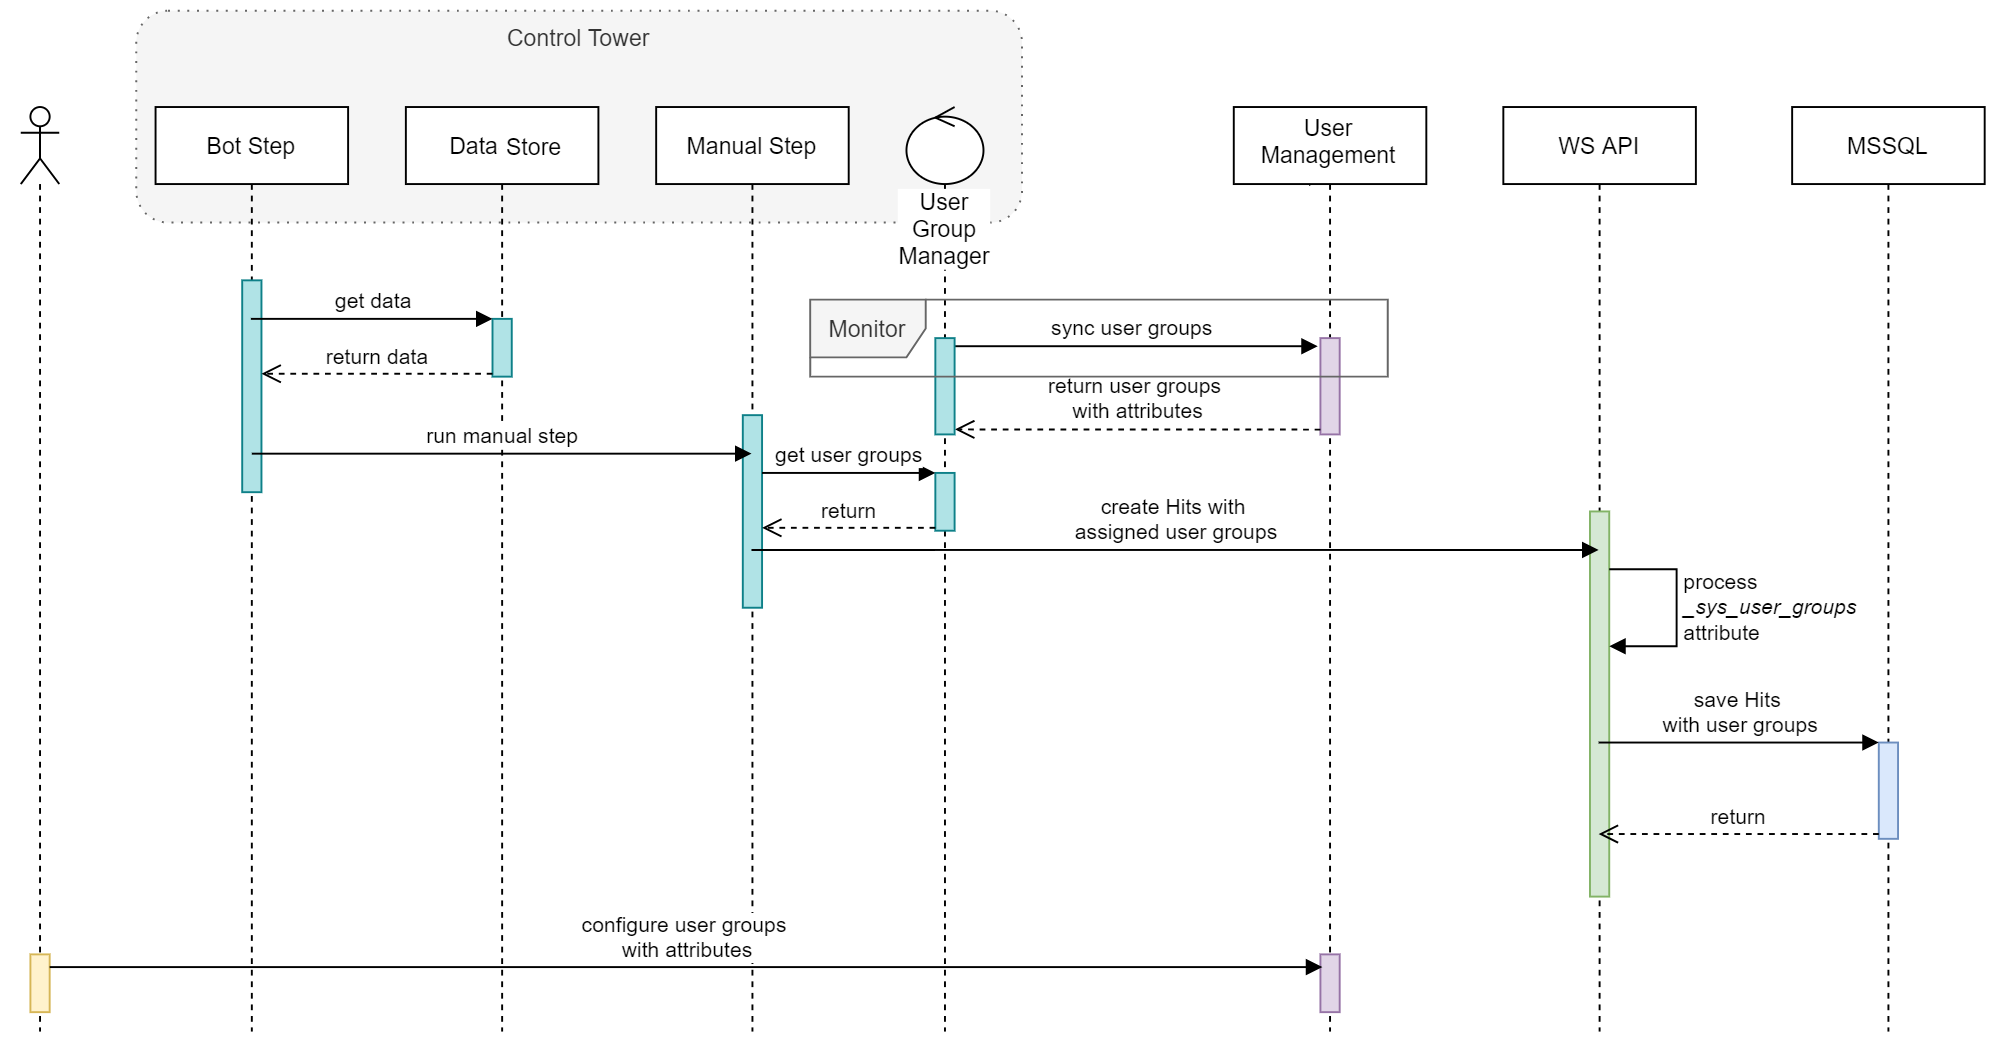
The procedure of getting the list of assignments looks like that.
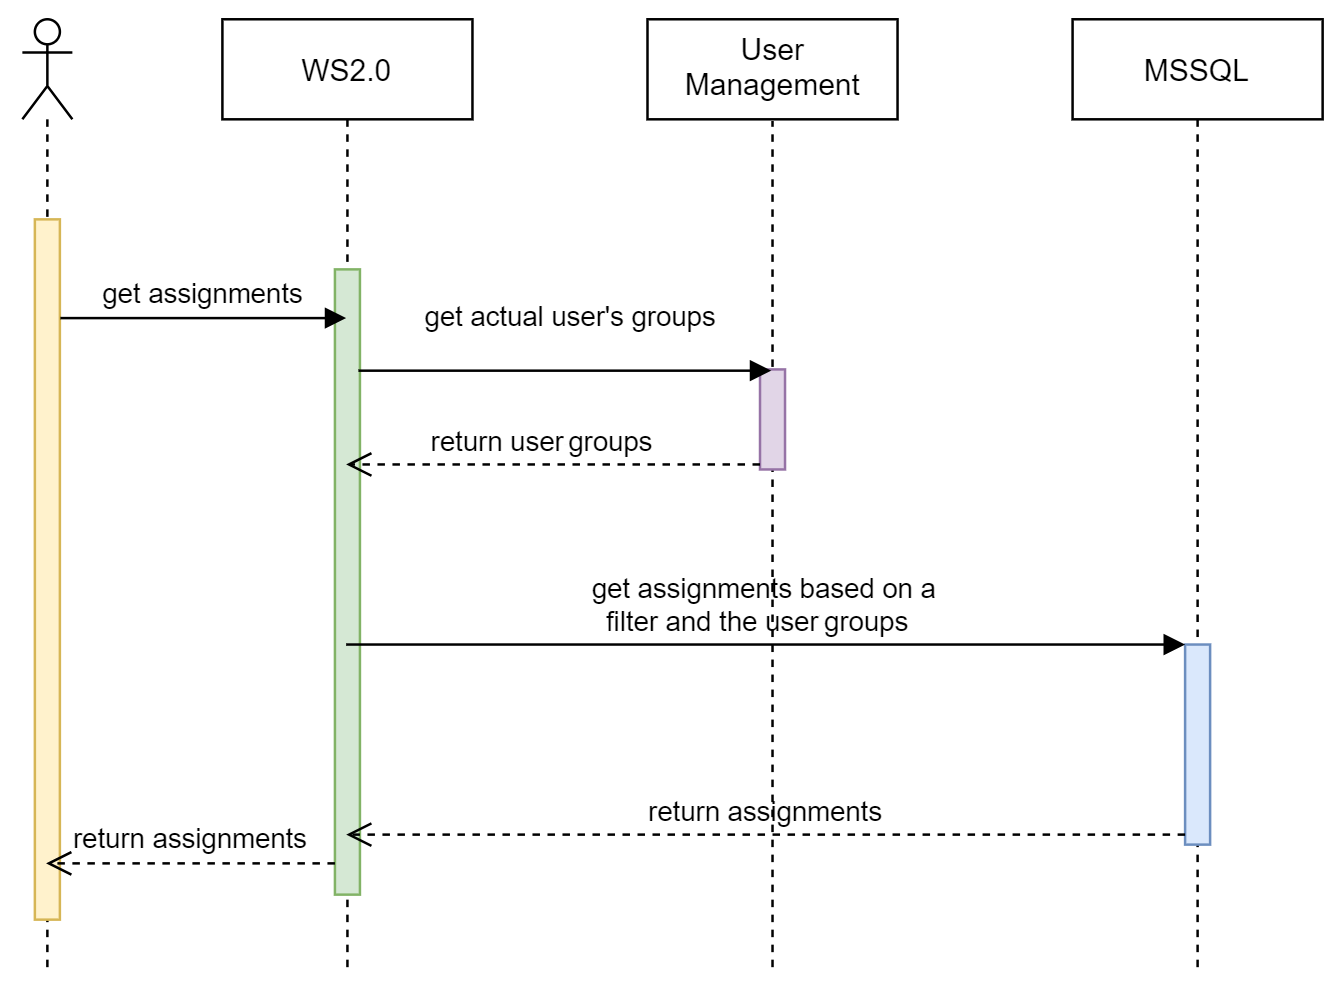
All other operations with assignments use similar logic.
Keycloak grouping
In Workspace, a mechanism based on Keycloak groups is implemented. Groups in Keycloak allow you to manage a common set of attributes and role mappings for a set of users. Thus, you restrict tasks to users who are allowed to access them to complete. These users can be members of zero or more groups.
In Control Tower, you can provide access for user groups for each manual task in input data. Tasks with no groups defined are available for all users.
Groups may contain subgroups. Tasks of children groups will be available for users from the parent group. Meanwhile, users from a child group are able to see tasks of the child group only.
Let's say we have the following groups hierarchy
- Portugal
- Finance
- France
- Marketing
- Finance
and three users:
- User 1 belongs to Portugal group and Marketing group in France
- User 2 belongs to France group and Finance group in Portugal
- User 3 does not belong to any group
For example, you create the following tasks in Control Tower:
- Task 1 for Finance group in Portugal
- Task 2 for Marketing group in France
- Task 3 for France group
- Task 4 for Finance group in both Portugal and France
- Task 5 with no group
In this case, availability matrix looks like this.
| User | Task 1 | Task 2 | Task 3 | Task 4 | Task 5 |
|---|---|---|---|---|---|
| User 1 | + | + | - | + | + |
| User 2 | + | + | + | + | + |
| User 3 | - | - | - | - | + |
Keycloak setup
Steps mentioned in the Setup section below are for local use only. The installer already sets it up.
General settings
Sign in to Keycloak by Administrator.
Go to the Clients tab and select "wf-workspace".
On the Settings tab, check the Service Account Enabled property. Do not forget to click Save.
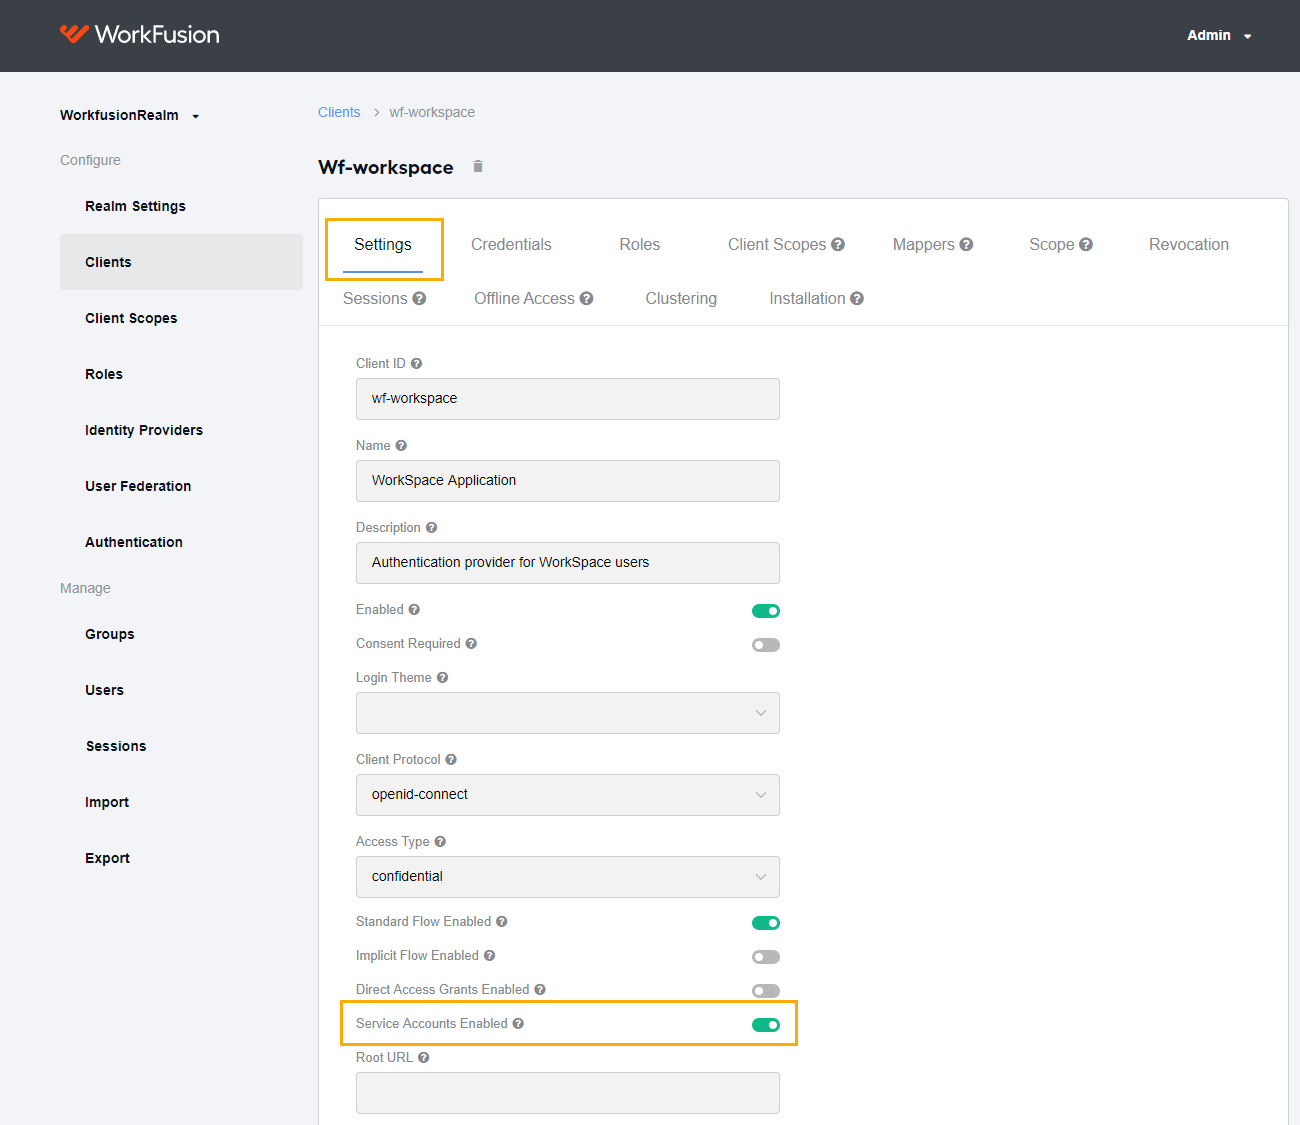
As soon as Service Account Enabled is on, the Service Account Roles tab becomes available. Go to Service Account Roles and start typing
realmin the Client Roles field until realm-management becomes visible.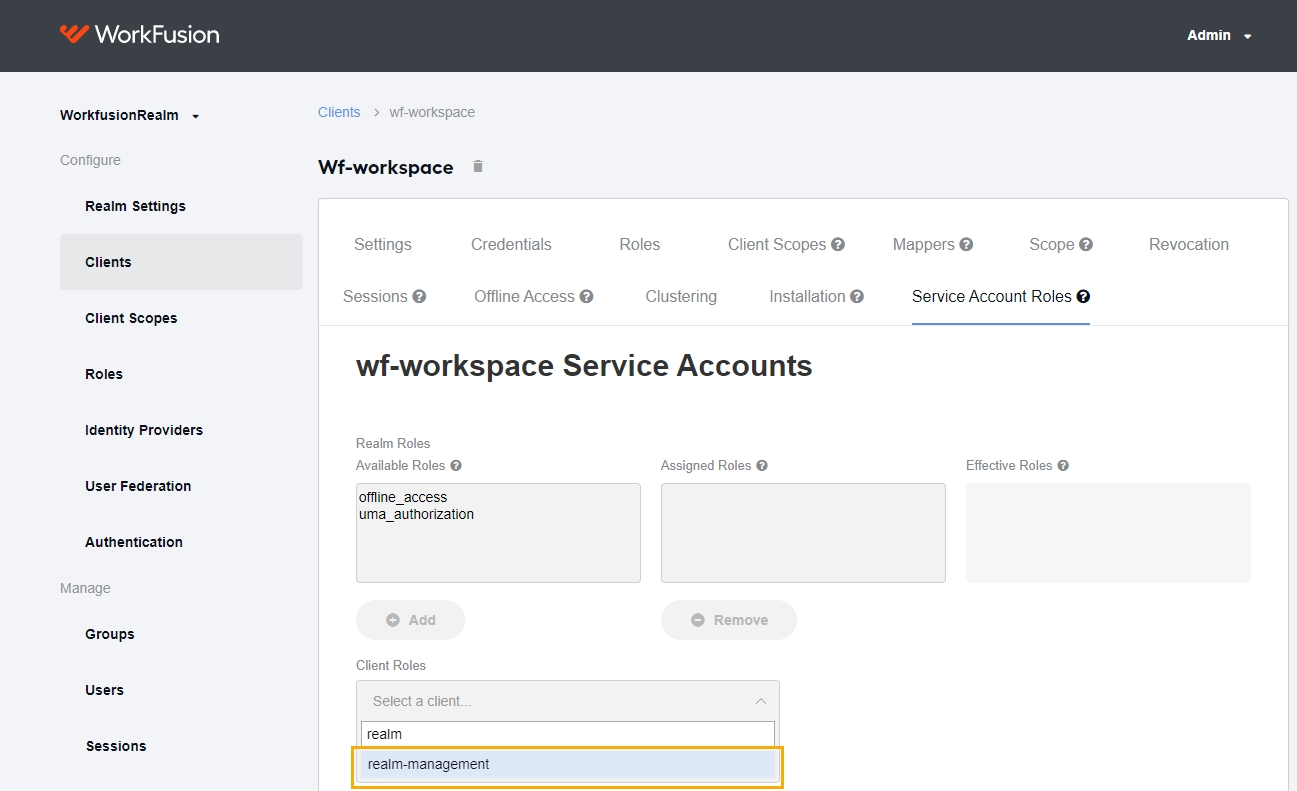
Select realm-management. A new section containing Available Roles appears.
Select the view-users role and click the Add button.
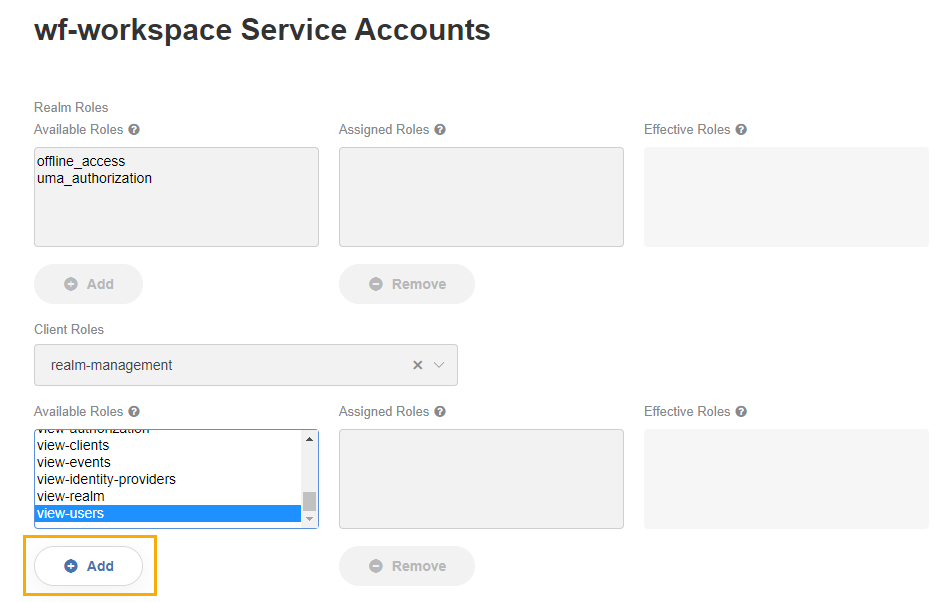
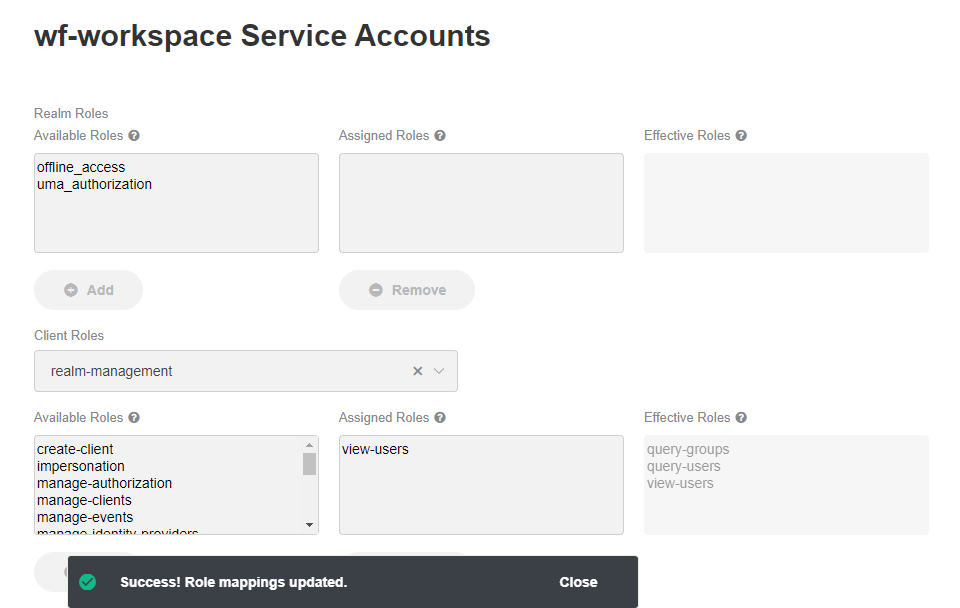
The role is moved to the Assigned Roles section and role mappings are updated.
Go to the Mappers tab and click Create.
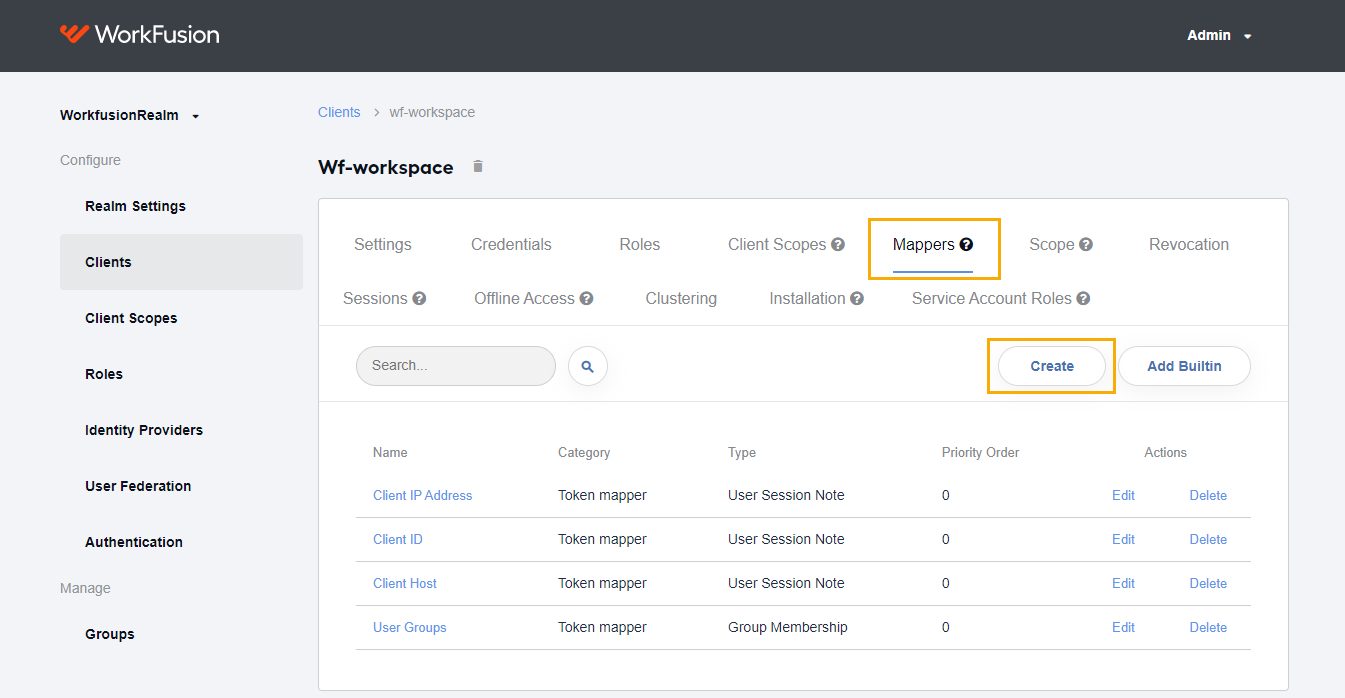
In the Create Protocol Mapper, create a mapper with the following values:
- Name: User Groups
- Mapper Type: Group Membership
- Token Claim Name: groups
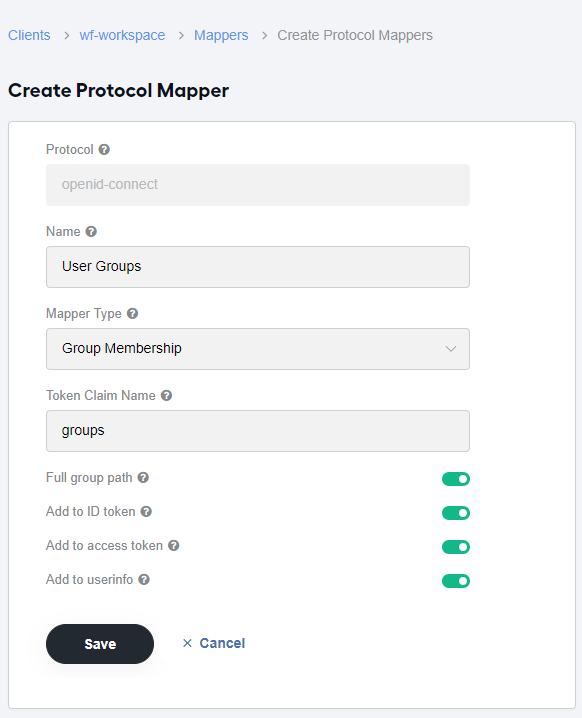
Enable all toggles and click Save.
Create groups
Sign in to Keycloak and select the Groups tab in the Manage section.
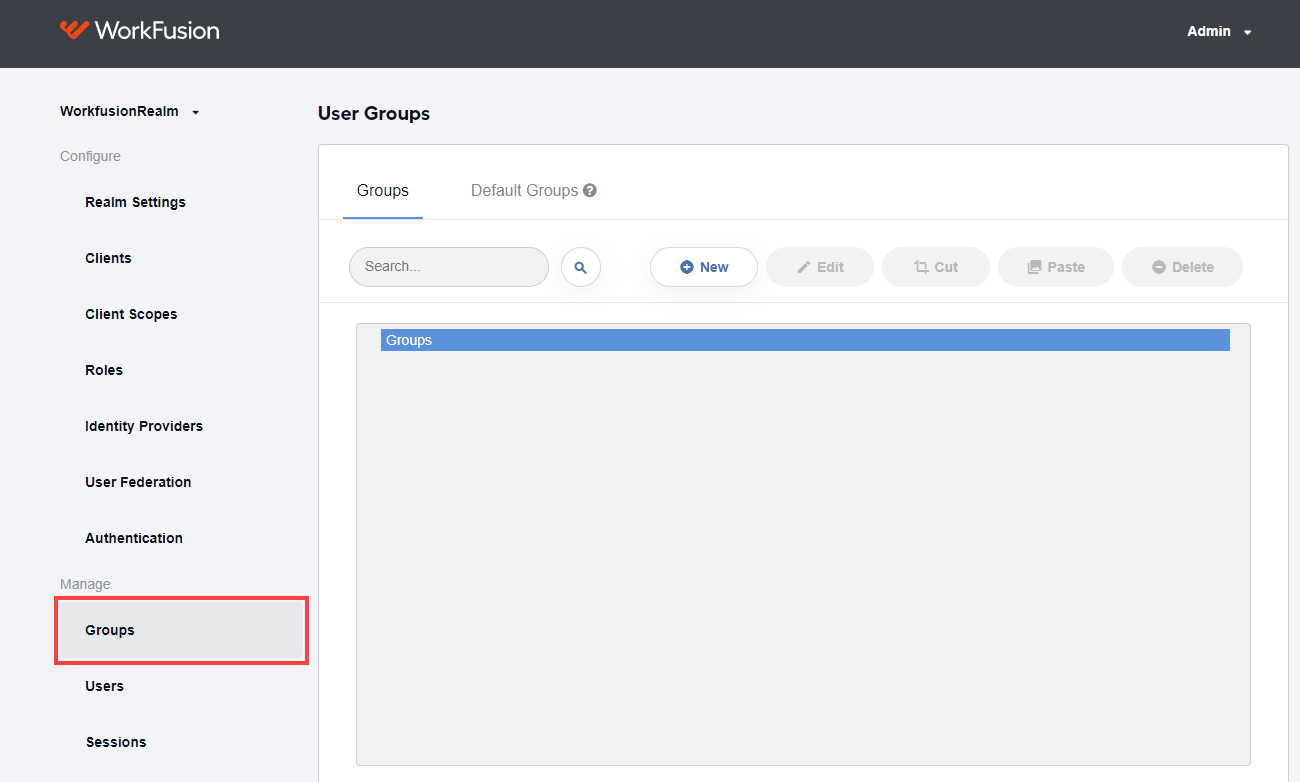
To create a group, click the New button. In the Create group dialog, enter a group name and click Save.

Groups have a hierarchical structure. You can add one group within another. If you want to add a child into a group, select a parent group and click New.
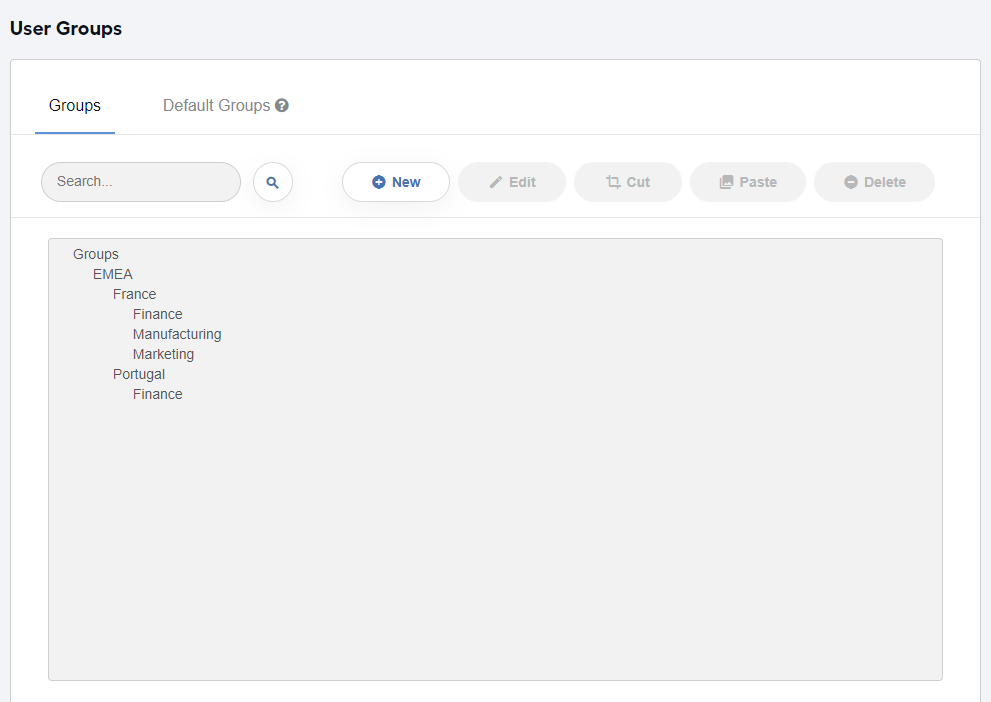
For more information on groups in Keycloak, refer to Keycloak | Create groups.
Add users to group
Log in to Keycloak, go to Users, find the user, and click Edit.
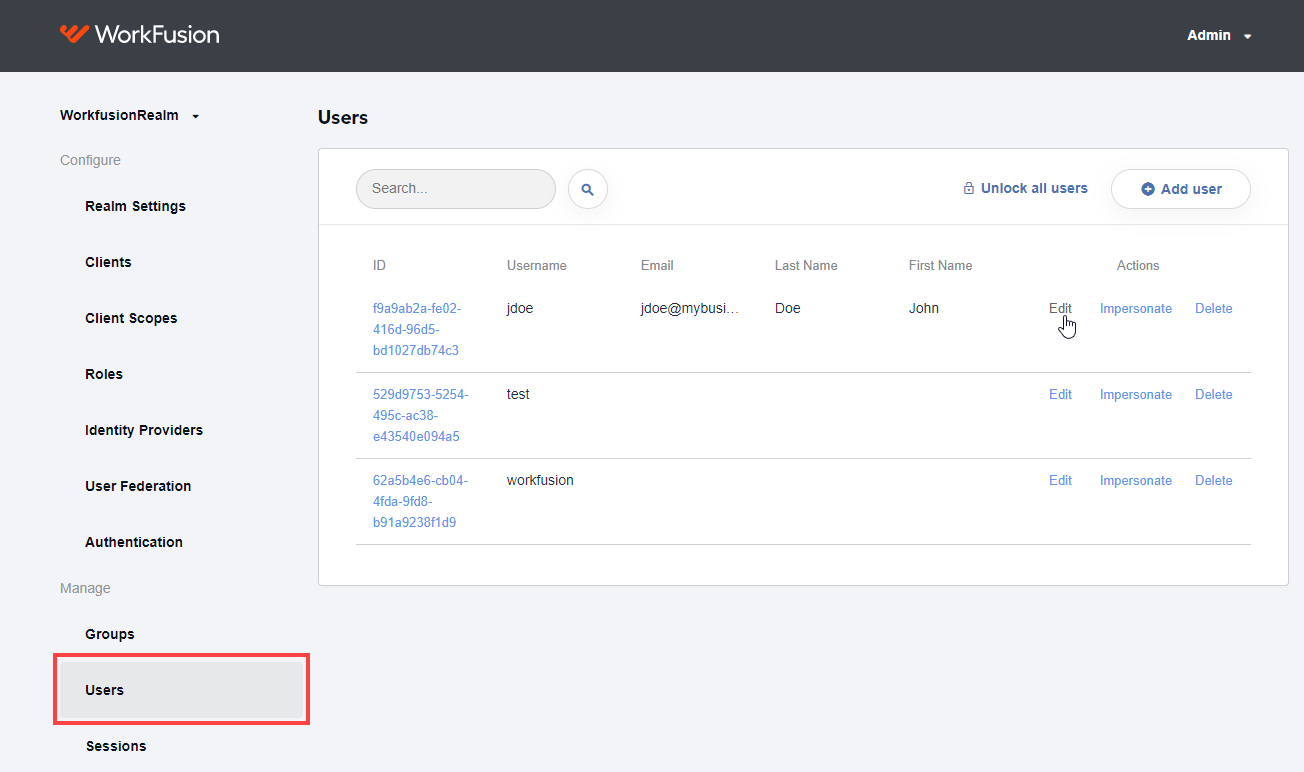
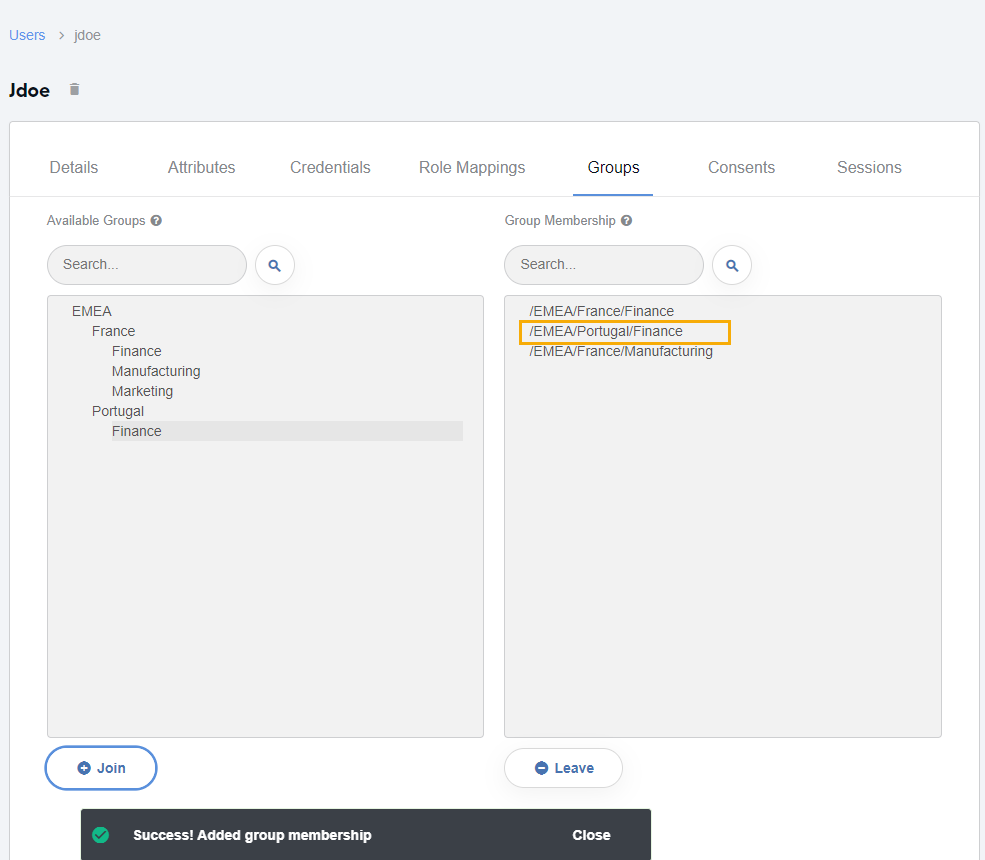
Go to the Groups tab > Available Groups. Select a group and click Join to add a user to the group.
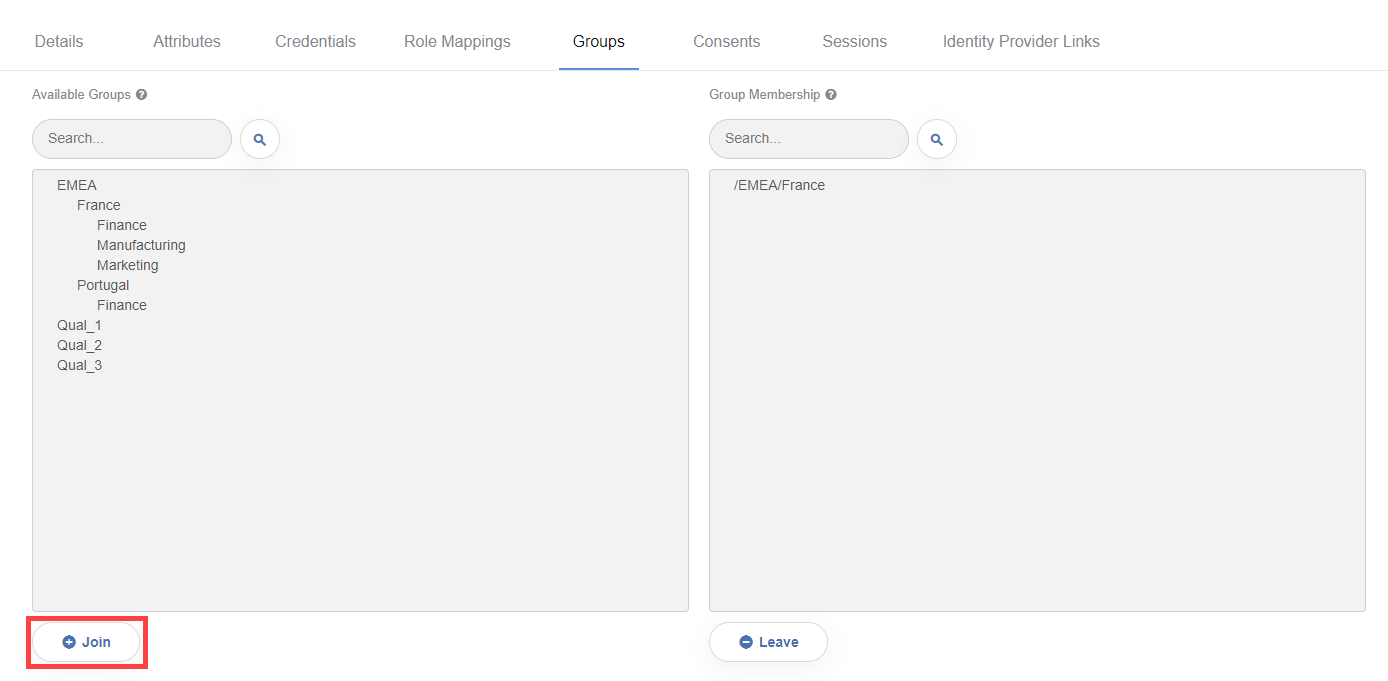
The Group Membership section updates accordingly.
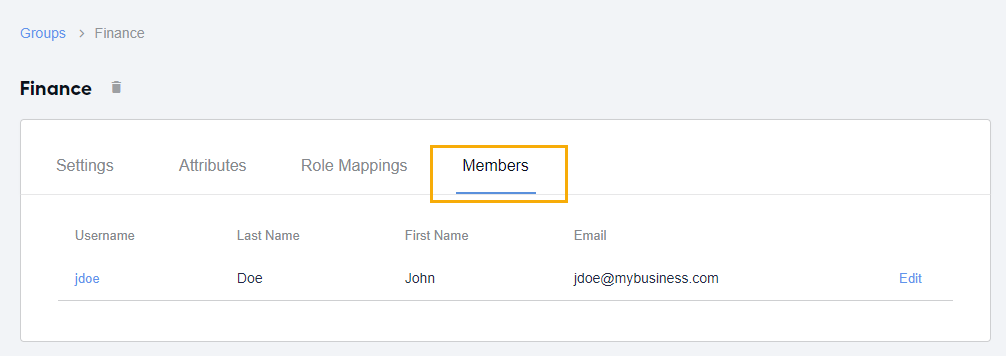
To view users in the group, go to Groups, select a group, and click Edit. On the Members tab, there is the list of group users.
For more details on user groups configuration, refer to Keycloak | Configure users.
Control Tower
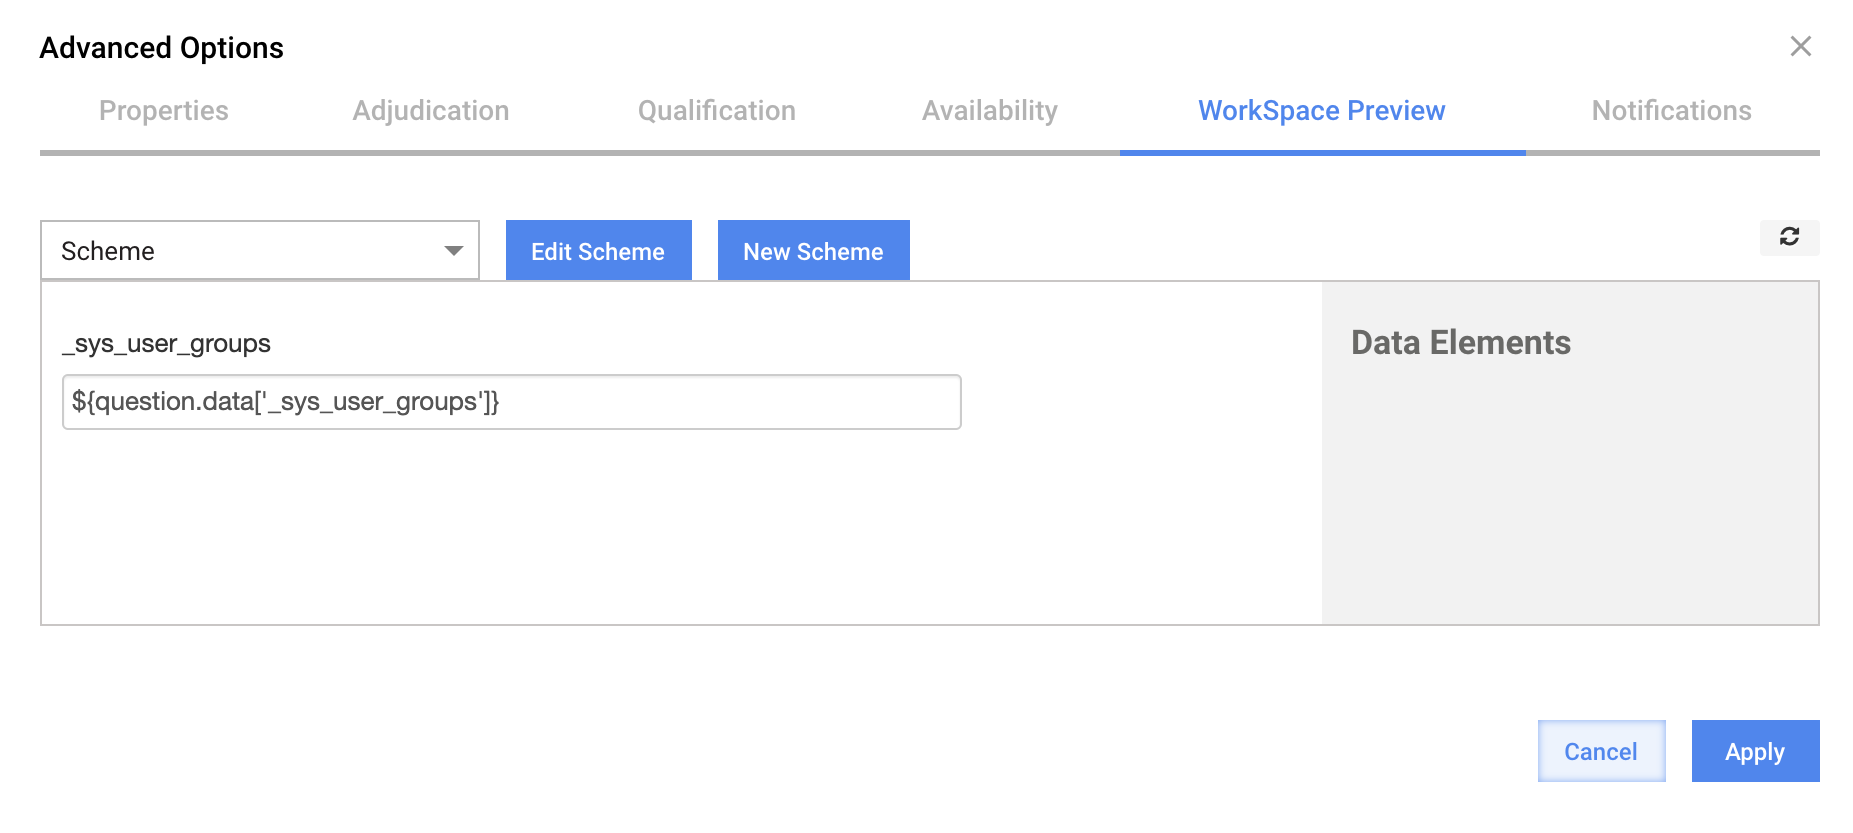
Control Tower uses WorkSpace API to set access to assignments via the WorkSpace Preview mechanism. It can be some system attribute, for example, _sys_user_groups.
There are several options to set _sys_user_groups in Control Tower:
- Сonfigure Manual Task in the WorkSpace Preview manually.
- Сonfigure user groups dynamically based on user group attributes from a source (input data or data source).
Mind that you can configure user groups dynamically based on business attributes from a source and user group attributes located in Keycloak. This can be either an input data file or a Data Store as the source for attributes. For more details, refer to the Keycloak guide | Create groups.
Create attribute
Information about user groups should be sent in the _sys_user_groups attribute in the input data.
To create an attribute, go to System settings > Field schemes.
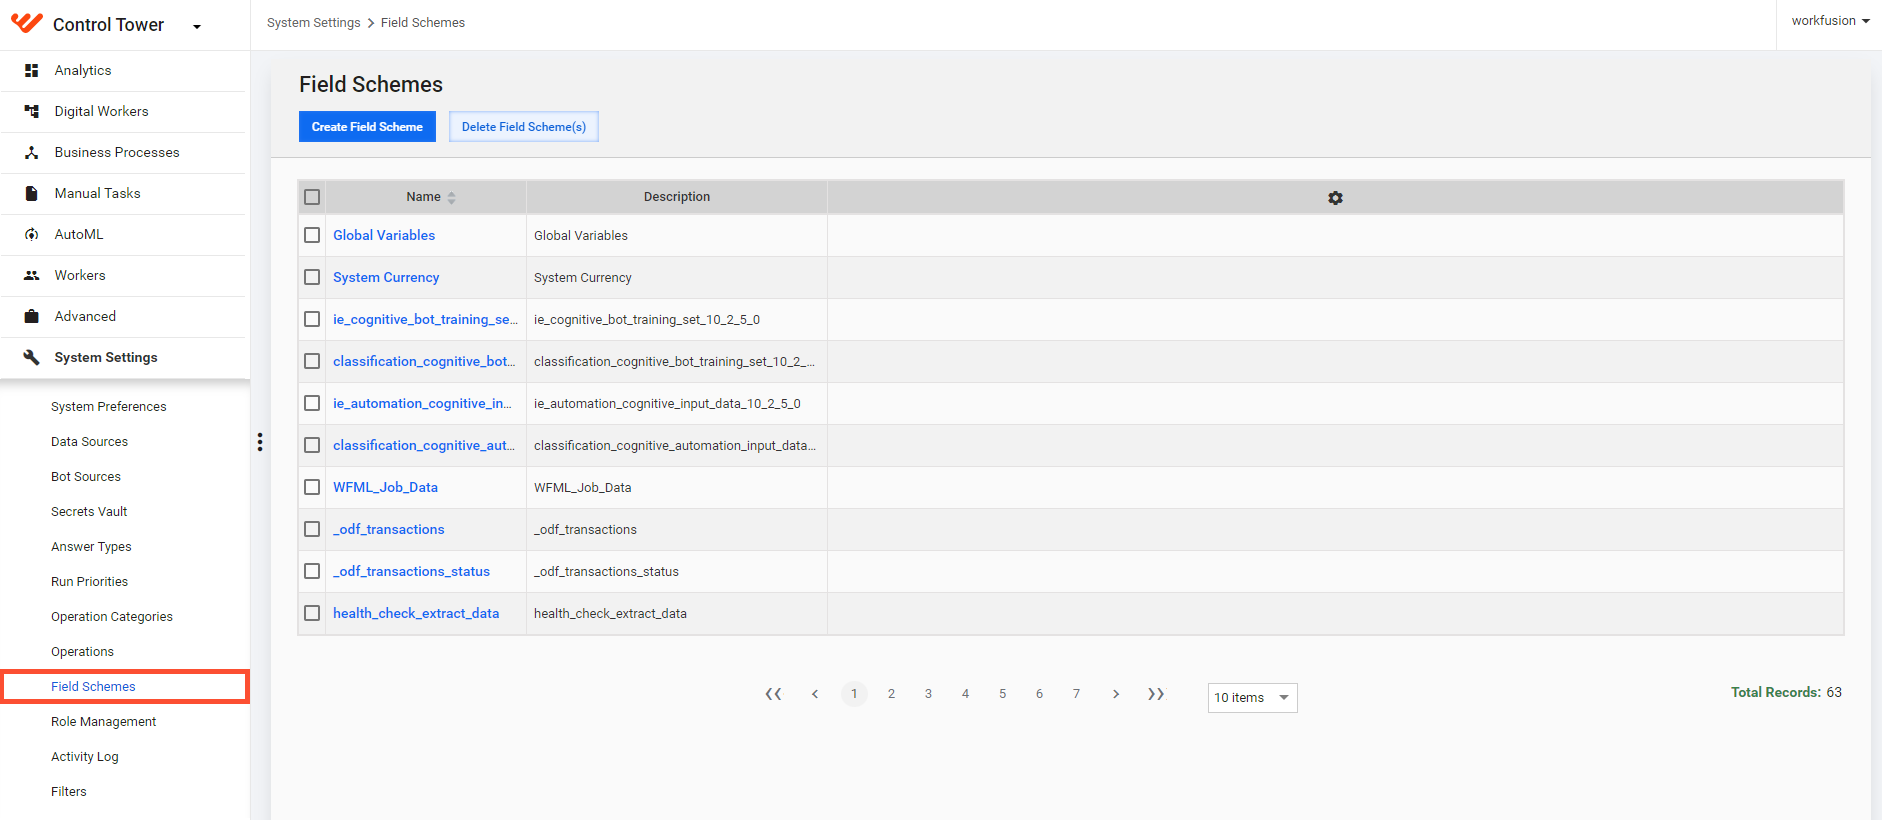
Click Create Field Scheme and enter the name of the scheme you are going to use.
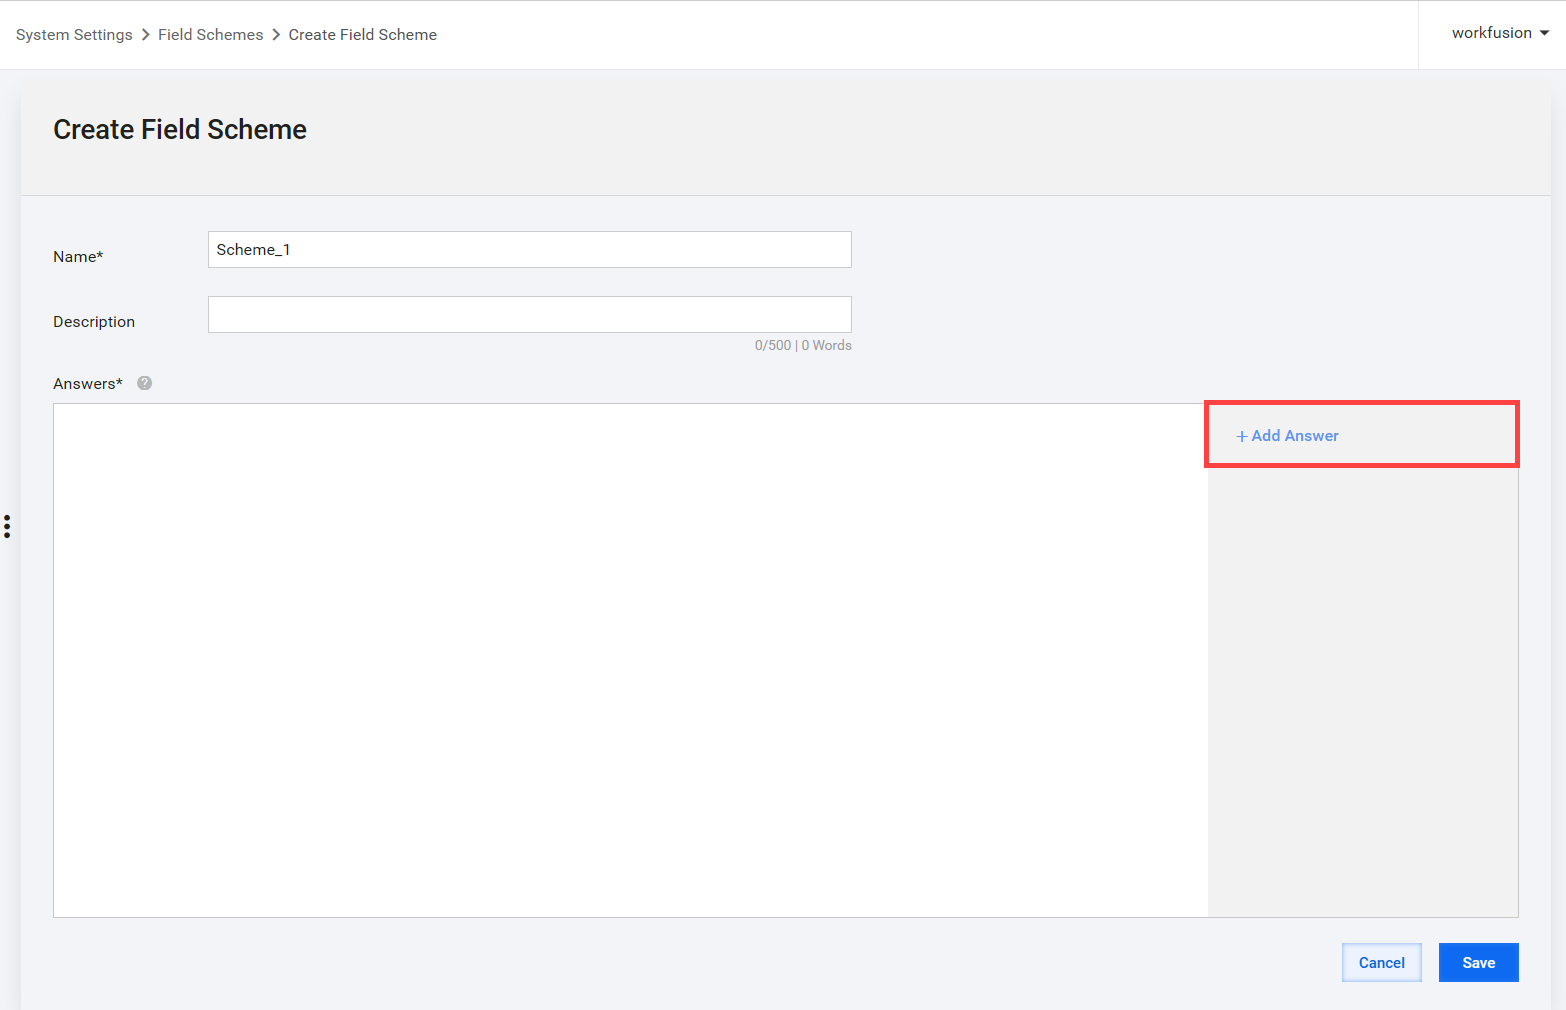
Add the answer of the Free Text type with
_sys_user_groupsname. Click Save.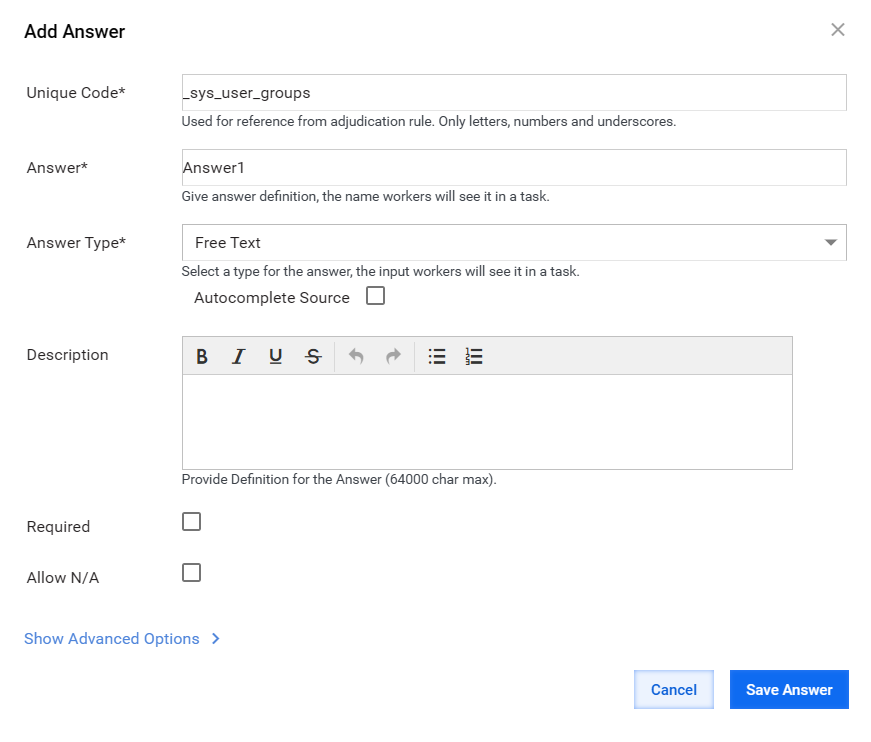 info
infoField schemes are also used for the attributes feature. If you already use the scheme for attributes, you need to update the scheme instead of creating a new one. See more information about attributes in Set up filter attribute.
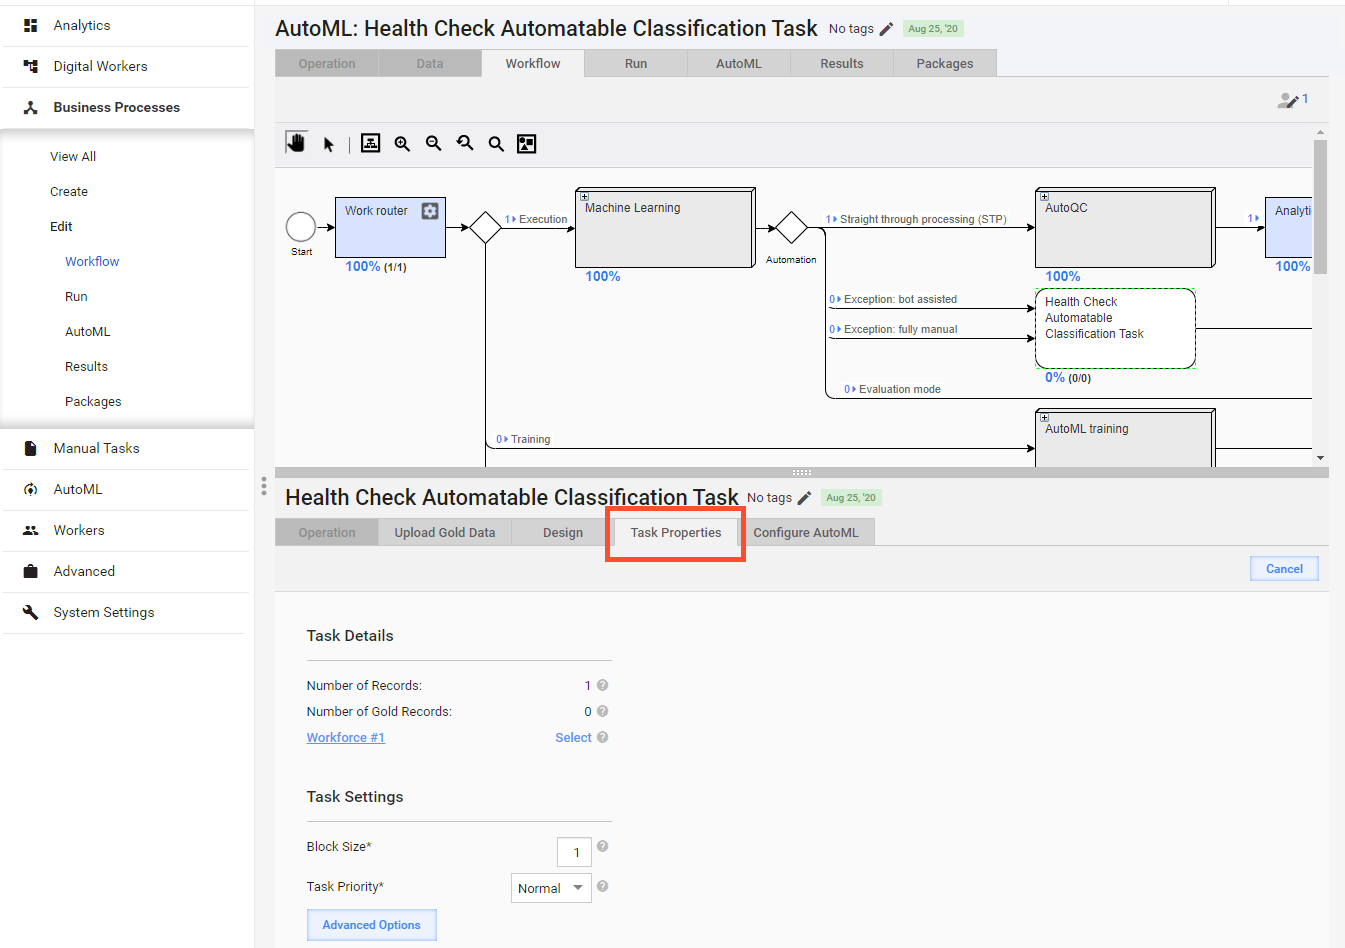
After creating a human task, double-click it in the Business Process Workflow. Go to the Task Properties tab and click Advanced properties.
Select the WorkSpace Preview tab, choose the scheme you created, and click the Apply button.
Syntax
A task can be available for multiple groups. To define it, use comma ( , ).
The group hierarchy is described with a slash ( / ). For the hierarchy shown above, it may look like this:
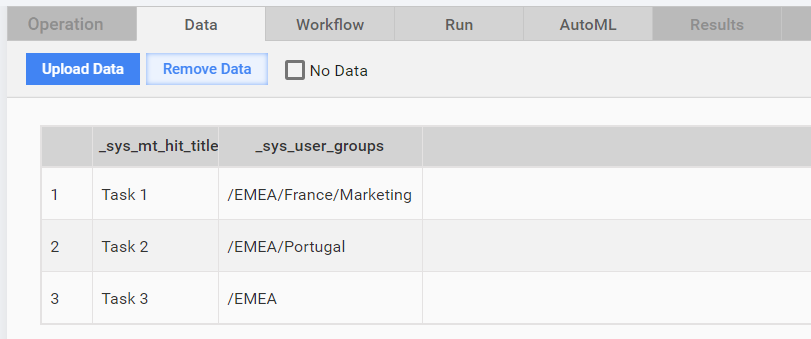
The group path must be set from root. If you want tasks to be available for Finance groups in France and Portugal, set /EMEA/France/Finance,/EMEA/Portugal/Finance.
For troubleshooting guides, refer to the following support guides: