Start labeling
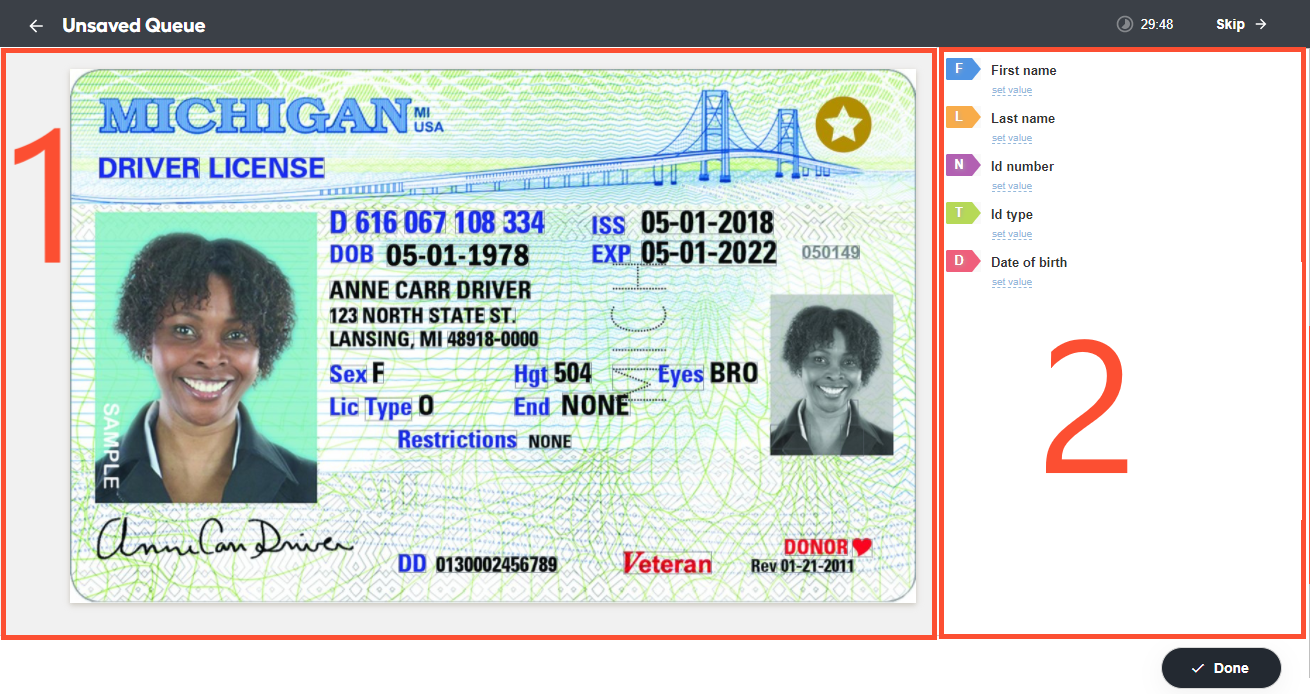
The figure below illustrates the Workspace interface when users start labeling. There are two main areas:
Area 1: a window where an HTML document is shown.
Area 2: the panel displaying fields for labeling.
In the table, you can find shortcut buttons for labeling-related manipulations.
| Tool | Description |
|---|---|
 | Use to correct OCR mistakes. |
 | Click to remove a label. |
Labeling flow
When labeling, it's highly recommended to stick to the following order of steps:
- In the Workspace task queue, select an assignment.
- On the right panel, review the list of fields.
- In the HTML document, find all available fields and label them.
- Review the labeled document to make sure no fields were omitted.
- Click the Done button.
Labeling process
To label a field, highlight the required value in the HTML document. On the right panel, assign a corresponding label to it.
When you find a text chunk that corresponds to one of the labels, act as follows:
- Select the text chunk.
- Click the corresponding colored label icon or press the corresponding keyboard letter (hotkey). The selection is highlighted in the label color.

To highlight a text chunk, use one of the following methods:
- To select a single word, double-click it.
- To select a long string, double-click in the beginning of the string, press Shift, and double-click at the end of the string.
- To select one or more cells, press Ctrl and click the mouse button. While you are holding the Ctrl key, mind the selection order. For example, to label HP Enterprise in the Enterprise LTD HP Custom care sequence, hold the Ctrl key and click or drag the pointer over HP and past Enterprise.
You can change the order of fields. If you are sure that a particular order can improve your labeling speed, let the DA know about it.
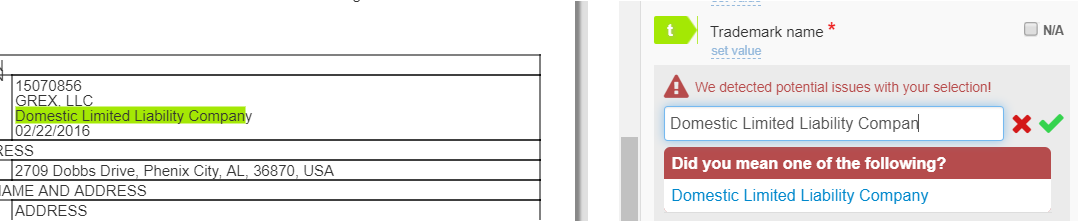
Workspace can sometimes show hits to prevent incorrect labeling without checking business rules. If the hint is correct, select the suggested value. However, if the tagged value does not require corrections, select the green checkmark.
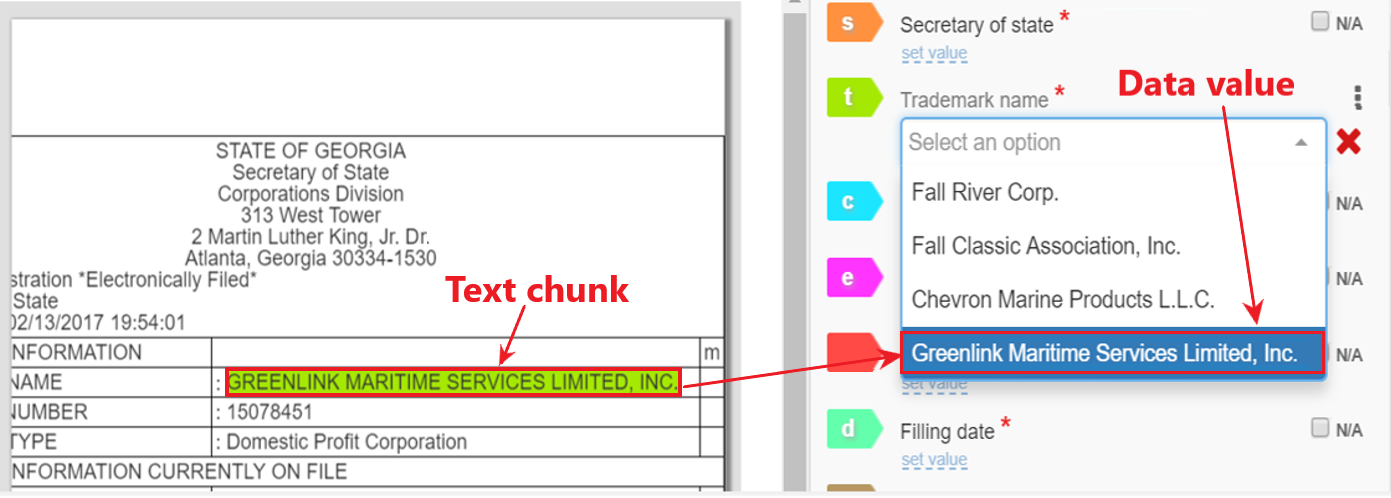
Once the first field is labeled, you'll see the highlighted text chunk in the HTML document and the corresponding value on the right panel.
The text chunk is what the model sees, and the data value is what the user receives as the output.
Working with labels
Delete and edit labels
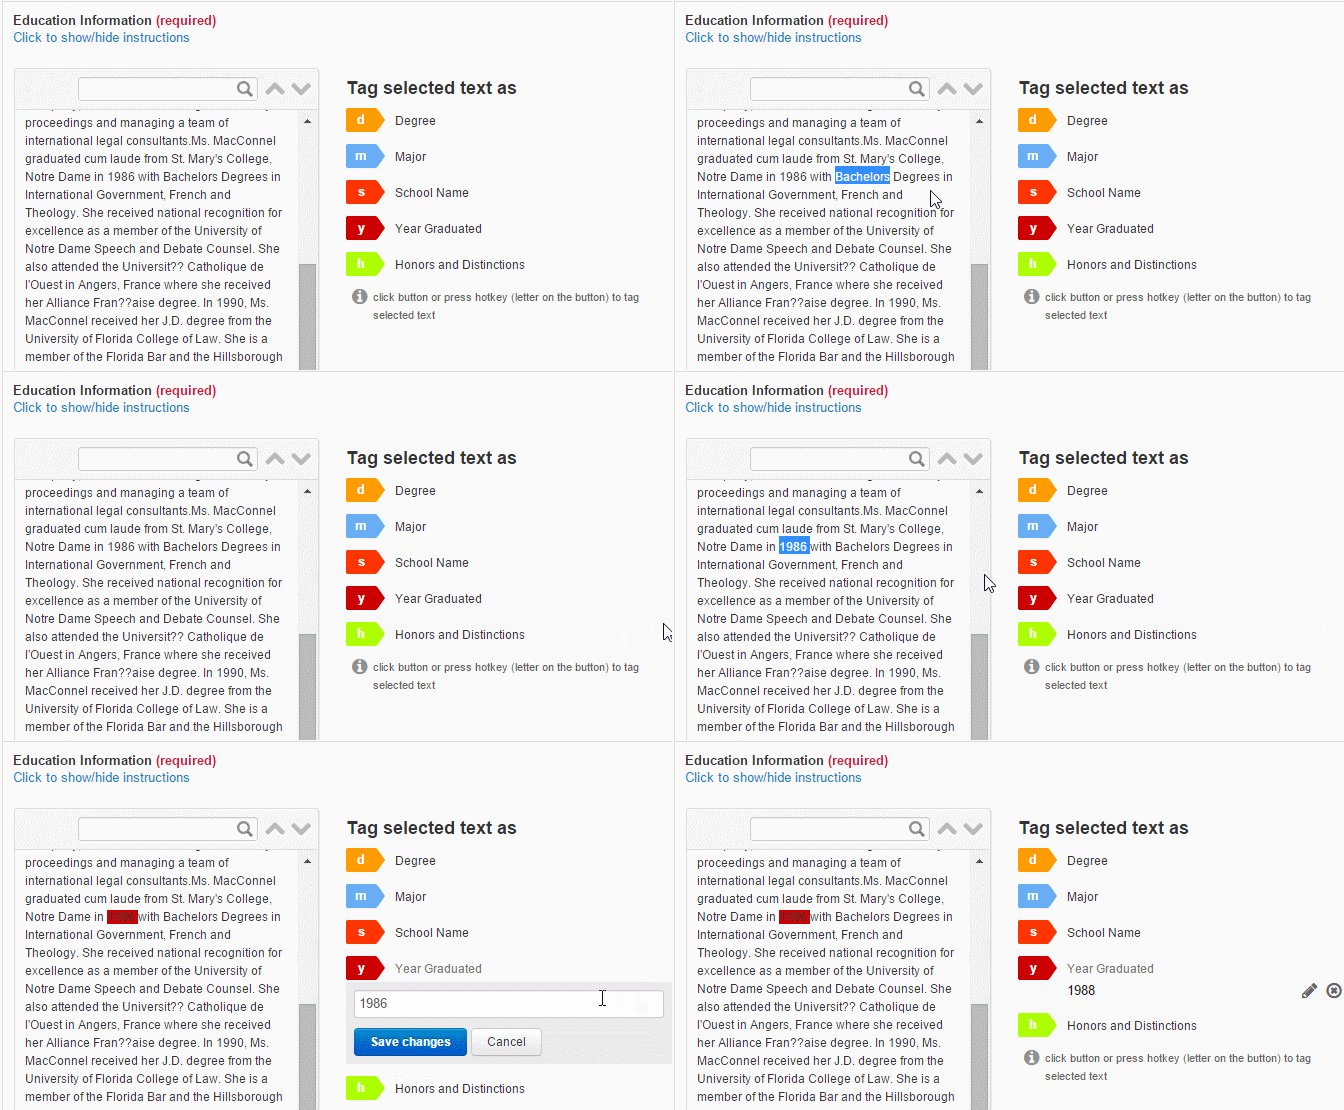
If you label a text chunk improperly, you can delete the label value and undo or redo the action.
If you find a misprint or incomplete info in the labeled text, you can edit the label value by clicking the pencil icon.
Label groups
Groups are intended to label repeatable information blocks with the same structure. Follow the steps below:
- Select a text chunk and label it.
- When all the labels for the first group are set, create a new tab (group) by clicking the (+) icon.
- Select a text and label it for one or more other groups.
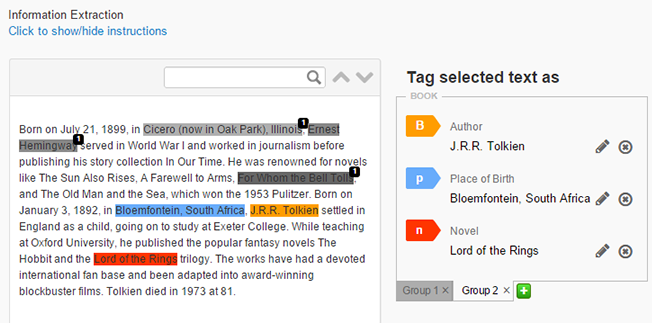
You can switch between groups or delete them. Also, you can undo the latest tab deletion using the Ctrl + Z key combination.
Advanced labeling
Reviewing labels
Sometimes, you can come across a label that could be better placed, or the text you labeled might contain mistakes. When this happens, you see a review screen in the right panel. Click any suggested value to make things right.
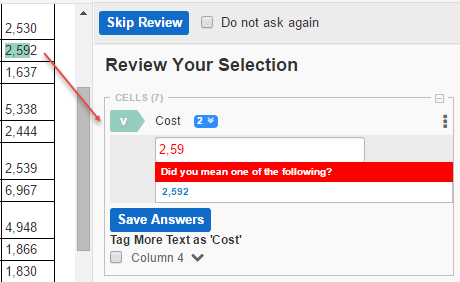
If the suggestions are incorrect, click Skip Review at the top or continue tagging. Your tags are saved without changes.
Labeling methods
Working with an assignment, you can apply the following labeling methods:
- To append a text to a selected label, hold SHIFT while labeling.
- To select or deselect a single table cell, apply Ctrl + click to the cell.
- To select or deselect multiple table cells, use Ctrl + drag.
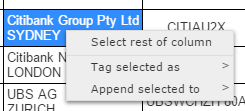
To open the context menu, right-click the target cell. Then, you can use the Select rest of column, Tag selected as, or Append selected to functions.
For instructions on labeling Line Item elements in Manual Tasks based on the Task Designer Operation, see the guide.
Selecting labels
Selecting a label makes it appear in the right panel so that you can quickly edit or remove it. You can select a label in one of these ways:
- Click: clicking a label on the left selects that label. Clicking a label in the right panel also selects it on the left.
- Ctrl + click: if you hold Ctrl (or Cmd on a Mac) and click the left panel, you can select multiple labels. Holding Ctrl or Cmd and clicking a selected label deselects it.
- Ctrl + drag: if you hold Ctrl (or Cmd on a Mac), click the left panel, and drag, you can quickly select multiple labels.
Once you select one or more labels, they appear on the right. All other labels disappear. You can click anywhere in the document or click the Clear Selection (1) button to deselect the labels and show the entire list of labels again.
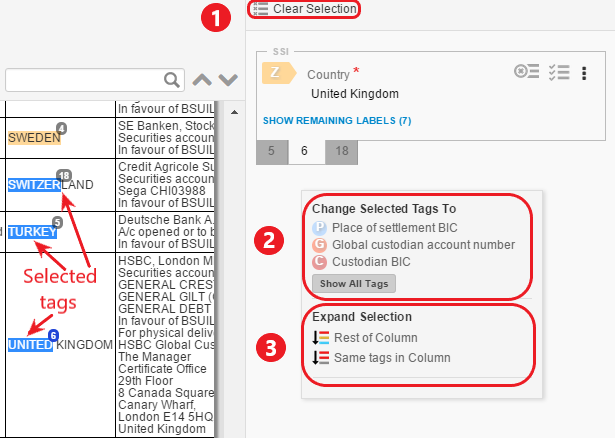
Underneath selected labels, a menu appears that allows you to change them. In addition to editing or removing labels, you can apply the following options:
- Change Selected Tags To (2): clicking an option in the section relabels all your selected labels with a label of your choice. Click Show All Tags to see the entire list of available labels.
- Expand Selection (3): you can quickly select related labels by clicking one of these options. The Rest of Column option selects all labels below the selected one. Same Tag in Column selects all labels of the same type below the selected one.
Collapsing and expanding sections
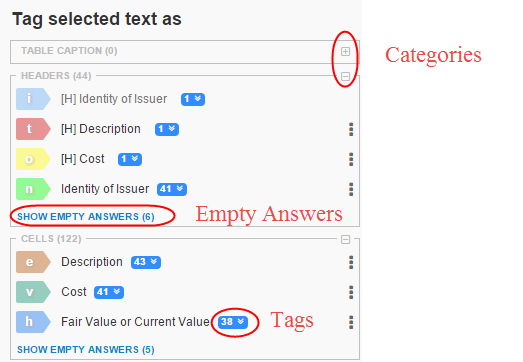
You can collapse or expand the sections in the right panel to hide or display specific information:
- Categories: to collapse or expand answer categories, click the gray icon to the top right of the category. When reviewing an existing extraction, categories with no labels collapse automatically.
- Tags: all labels (tags) belonging to an answer are hidden under the blue button to the right of the answer title. The number on the button shows how many labels are there. Click the button to show all labels inside.
- Empty Answers: when reviewing an existing extraction, all answers with no labels are automatically hidden. Click Show Empty Answers to display them.
Multi-value answer options
Each answer that contains multiple labels has an option menu. To open the menu, move the pointer over the ellipses (three dots) icon to the right of each answer's title and blue label counter. This menu contains the following options:
- N/A: if an answer can be marked as not applicable to the document you are labeling, the option is available here.
 Select All: clicking the button selects every label pertaining to the answer. Use the button if you quickly want to change all labels of one type into another.
 Remove All: clicking the button deletes every label belonging to the answer.
Field formats
A field can have different formats depending on the values used in it: amount, date, company name, and so on. Those are displayed accordingly in the right panel.
See some examples below:
Date: there are various date formats. Sometimes, a particular format is needed, and it is specified by the Data Analyst in a Manual Task. Here, you can see that the same date, labeled in two different fields with different answer types, is displayed differently in the right panel.

Number: some fields require particular values with numbers only. Usually, these are amounts, invoice numbers, and so on. Such fields won't let you submit a value containing something apart from numbers. In case the labeled string is not correct, the value needs to be formatted manually.


Checkbox: sometimes, data has to be specified, and it is organized as a number of checkbox items. In this case, no data needs to be labeled, and only a checkbox should be selected.

Next step
In the next step, let's consider labeling rules.