Install and configure
This page provides instructions on installing and configuring the Isaac AI Agent to investigate and evaluate suspicious transaction alerts generated from surveillance monitoring systems.
Check requirements
WorkFusion offers the following options to install and run Isaac:
- On your premise
- In your cloud
- In a private cloud hosted by WorkFusion
System requirements
The server requirements for Isaac, the Transaction Monitoring Investigator, are the same as for the Work.AI platform. For details, read the Hardware and OS article.
Hardware
RPA bots are not required unless you use the AI Agent as part of a custom solution.
High-availability environments require PROXY.
No AutoML Workers are used.
Analytics is not used.
Software
- Work.AI version must be 10.2.9 or later.
Install Isaac
To install Isaac, obtain an Asset Bundle (zip archive) with the required release version from the appropriate S3 bucket. Then, upload it manually in the Control Tower interface in accordance with the guide.
Once the installation is complete, you can proceed to configure Isaac's settings.
Configure Isaac
Once Isaac's bundle is installed, you need to configure the AI Agent prior to running it for the first time. On the Digital Workers page, find the installed AI Agent and click Prepare next to it to start.
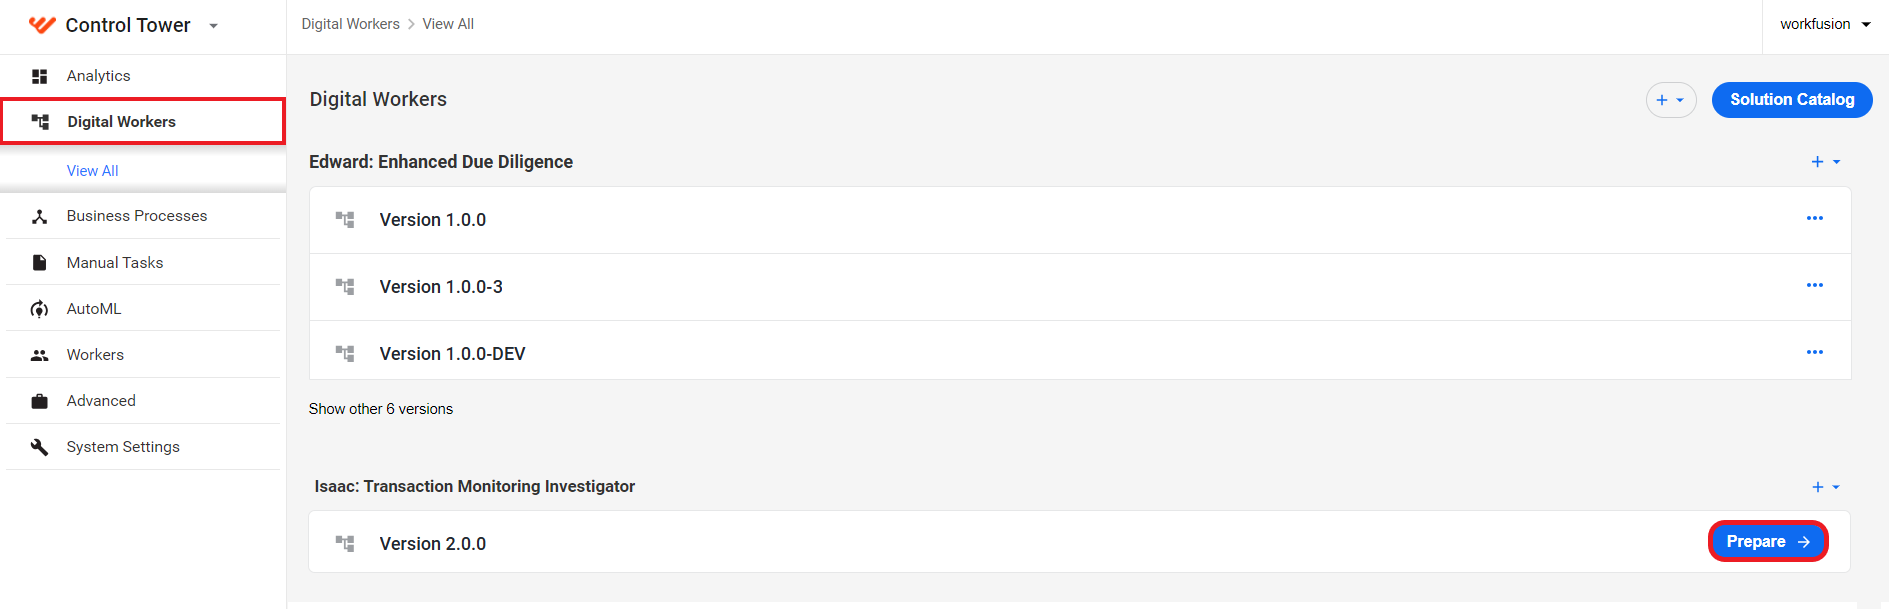
You can configure multiple variations, or sets of parameters, for a single AI Agent. For example, different departments can set up and manage different requirements or input methods per variation. For details, read Manage AI Agent variations.
The configuration process comprises the following steps:
Set the input method Isaac is to use.
Configure the deferral list processing settings.
Set up the human-in-the-loop component (optional).
Configure the output handling settings.
- When you configure an AI Agent variation for the first time, you must complete the steps one by one. Once you are in the last step, you can go back and make changes to any previous steps.
- If, for some reason, you cannot finish the configuration, click Save & continue later. This way, the entries you made are saved, and you can go back and complete the process later.
- In Work.AI versions starting from 10.2.9.2, for a variation that already has configured versions, you can import a configuration from a previous version instead of setting it from scratch. For that, click the Import version button at the bottom of the configuration screen and follow the instructions in the guide.
Input
Isaac supports two input methods:
API
This is the default input method. The input data is fetched automatically straight from the customer's alert system using the dedicated API.
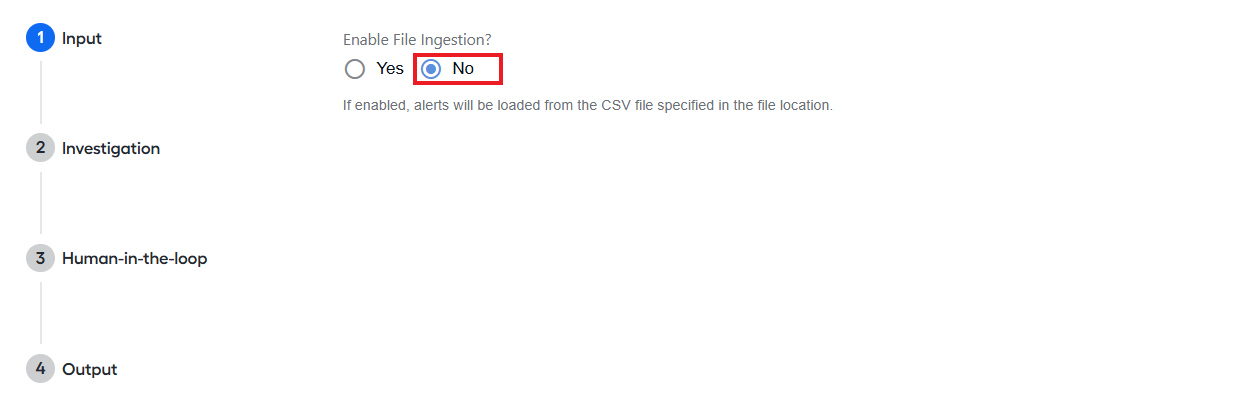
To stream Isaac's input data through API, make sure the Enable File Ingestion? option is set to No.
File ingestion
The method is mainly intended for historical data evaluation and enables ingesting input as a CSV file using the separate Transaction Monitoring File Ingestion Business Process.
Multiple files for different alert types are supported but not required unless the header information in each file varies. For example, if you have both manual tips and automatically created alerts, your options are as follows:
Option 1: combine them manually prior to sending them to Isaac.
Option 2: create the required mapping on the configuration screen so that the AI Agent can automatically combine them for you.
To use the file ingestion as the input method for Isaac, specify the following configuration settings:
Set Enable File Ingestion? to Yes.
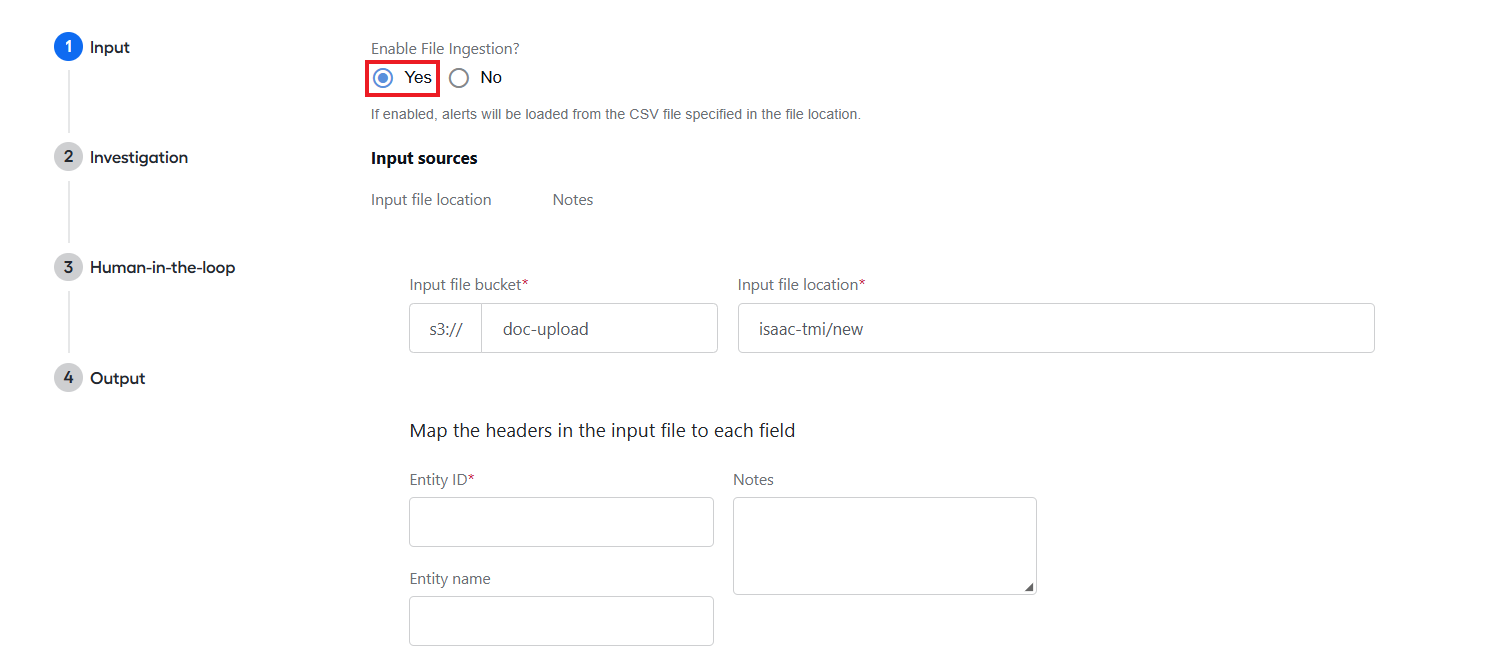
In the Input sources section, specify the S3 bucket and folder for one or more input CSV files with exported alerts.
Map the headers in the input CSV files to the configuration fields. Each CSV file should have a header row and subsequent rows, each representing a single alert to be reviewed:
Entity ID stands for the unique identifier of the reviewed entity or customer.
Entity name stands for the name of the entity to review.
Account ID represents the account number or unique identifier for the alert from the source system.
Alert ID stands for the unique identifier for a generated alert.
Alert scenario is the scenario or scheme that indicates why the alert was generated (for example, structuring, high-risk jurisdiction, or smurf).
Alert scope of review is the date or range of the alert activity that needs to be reviewed.
Alert Case ID is a unique identifier for the alert case in a customer system.
Alert Review Period is a specific time range within which alert activities are to be reviewed.
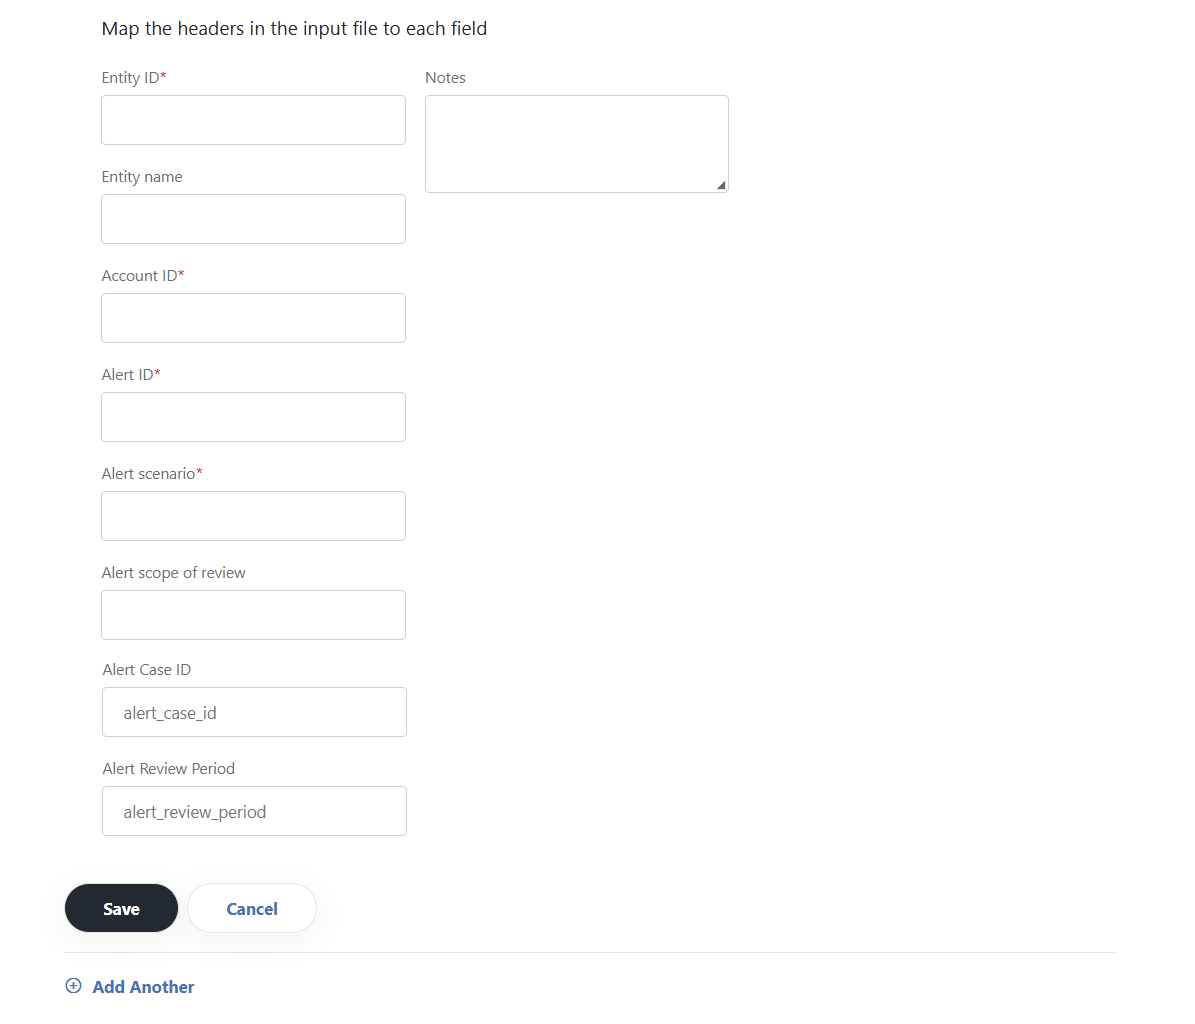
Add notes to describe the input source in more detail (if needed) and click the Save button to save the created configuration. The path to the configured source appears in the Input sources list. You can change the path and mappings by clicking the Edit button next to the displayed file path.
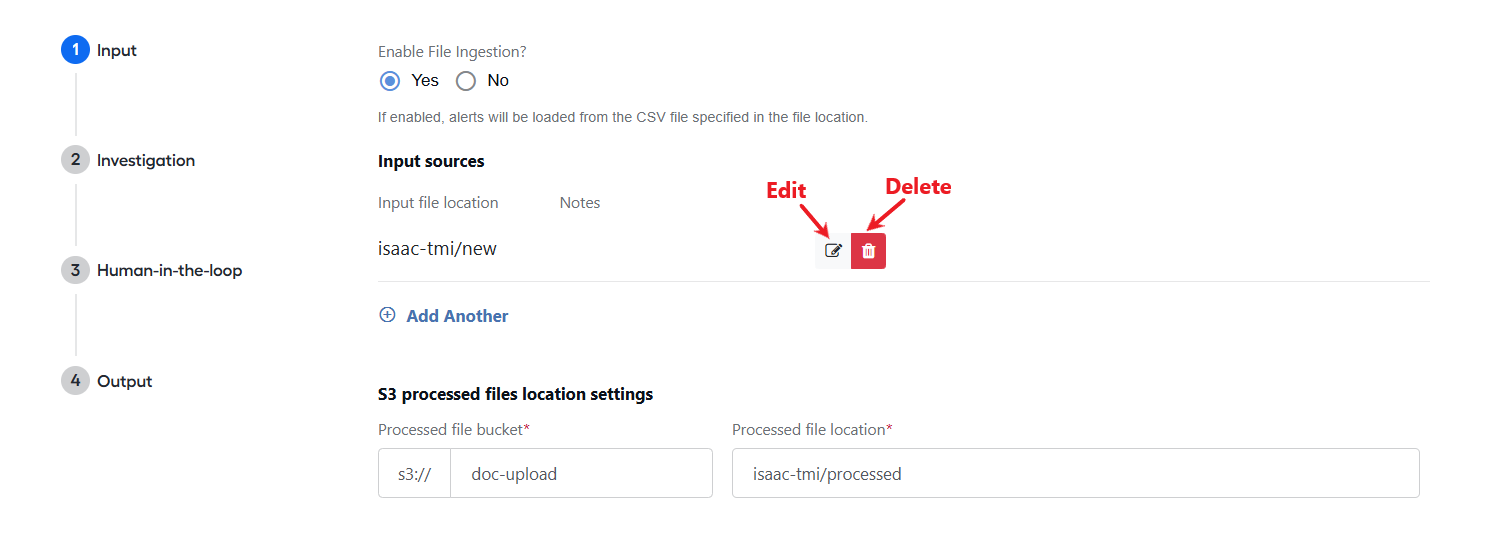
To delete an input source, click the Delete button next to it. To add more input sources, click Add Another and repeat steps 1 to 4.
In the S3 processed files location settings section, add the bucket and location to save processed files.
Investigation settings
As part of the default workflow, Isaac can automatically check new alerts to see if they are eligible to be deferred to an open investigation. The check is optional. To enable it, set Check if new alerts can be deferred to an open investigation to Yes and make sure to complete the following:
Set the S3 bucket and folder for storing the flat file (CSV) covering all open cases and make sure to upload the file to the location.
Map the headers from the file to the following required fields:
Entity ID
Deferral case ID
The Deferral case scope of review setting is recommended but not required.
Specify the deferral list file bucket and location in MinIO (S3).
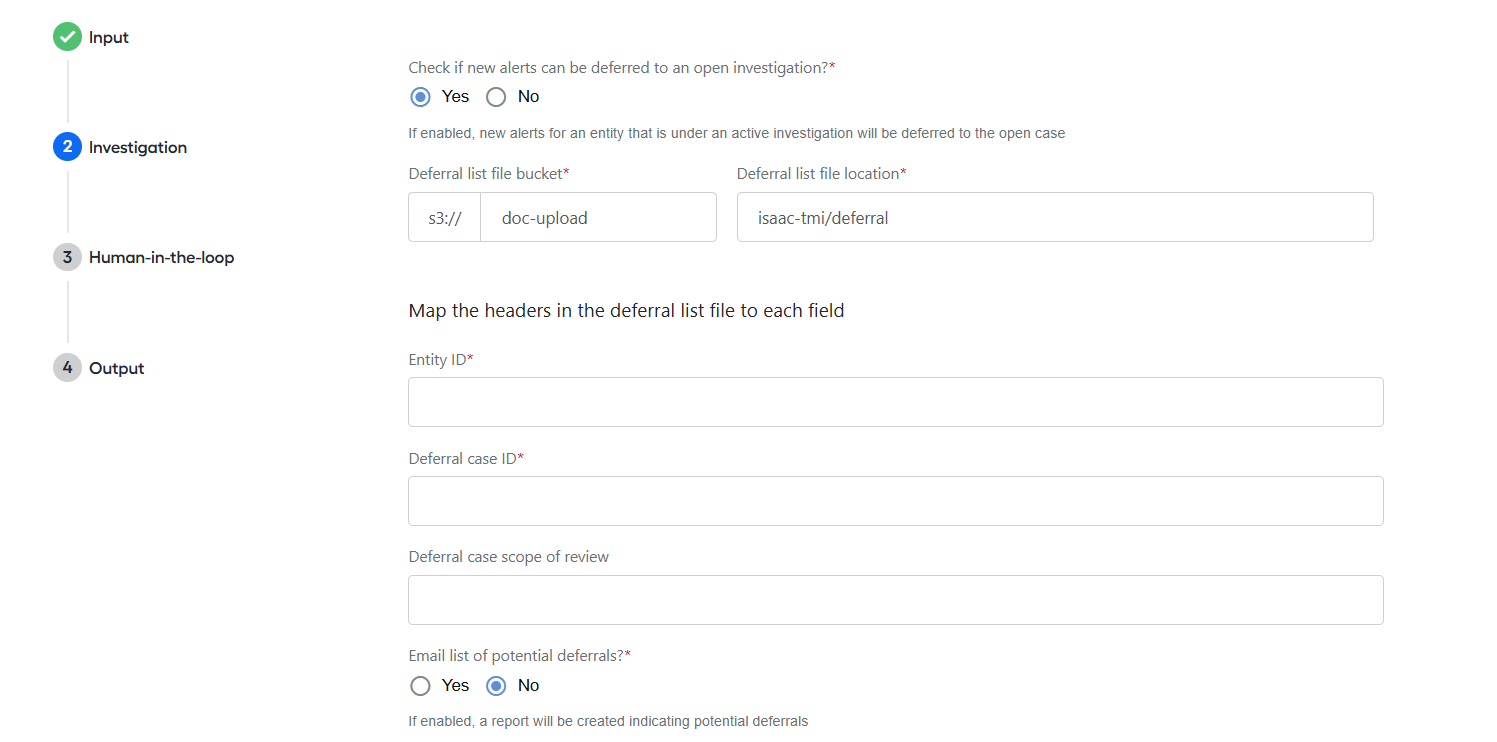
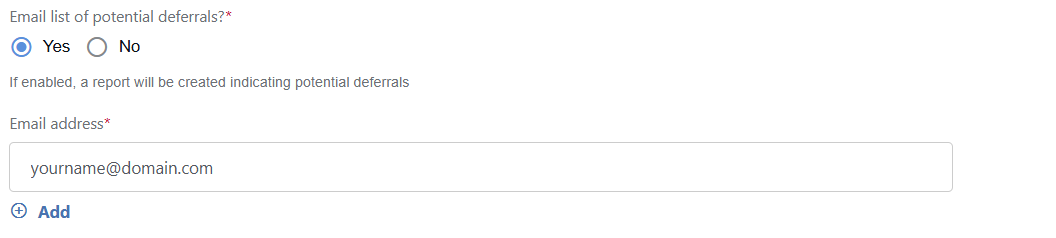
Set Email list of potential deferrals to Yes if you want Isaac to create a report listing potential deferrals. If the setting is enabled, the Transaction Monitoring Core Business Process will create the report and send it to the specified email as soon as its execution reaches the respective step.
Click the link to download a sample potential deferral report.
Configure the following additional investigation settings:
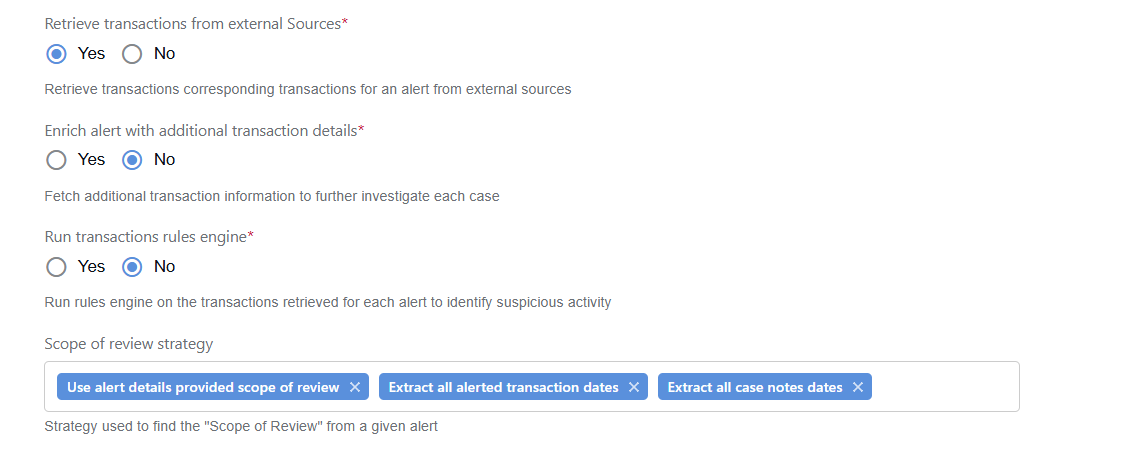
Set Retrieve transactions from external sources to Yes to enrich Isaac's input data with alert-specific transaction details from external systems (for instance, customer internal systems).
Set Enrich alert with additional transaction details to Yes to fetch additional transaction details to use them in further investigations associated with a specific case. For instance, these could be details extracted from cheques or Automated Clearing House (ACH) data.
Set Run transactions rules engine to Yes to run the rules engine on the transactions retrieved for each alert.
A rule engine is one or more no-code Decision Rules steps allowing to evaluate transactions against configured criteria and make a decision, for instance, label them as high- or low-risk or as requiring further investigation. For details, read Overview | Transaction Monitoring Alert Investigation.
In the Scope of review strategy field, choose one or more options to set how Isaac is to define the review scope for a given alert in a fraud investigation. Available options are as follows:
Use alert details provided scope of review: Isaac identifies the earliest fraud date from the alert details (
alertDetailsListobject in the input data) and uses it as the start date for review.Extract all alerted transaction dates: Isaac identifies the earliest fraud date from the alerted transaction details (
alertedTransactionsobject in the input data) and uses it as the start date for review.Extract all case notes dates: Isaac identifies the earliest fraud date from the case notes (
caseNotesobject in the input data) and uses it as the start date for review.
When a combination of the options is used, Isaac takes the earliest date extracted to define the scope of review.
Depending on your Isaac implementation, you might need to set up custom Business Process for fetching data from external sources and additional transaction details and integrate the BPs in the Transaction Monitoring Alert Investigation Business Process. For details, read Overview | Transaction Monitoring Alert Investigation.
Human-in-the-loop settings
Human-in-the-loop is an optional step that enables investigators or Quality Assurance specialists to review Isaac's output in Workspace before closing an alert or a deferral request and updating downstream systems. Currently, only deferral human-in-the-loop tasks are supported.
To configure the human-in-the-loop settings, do as follows:
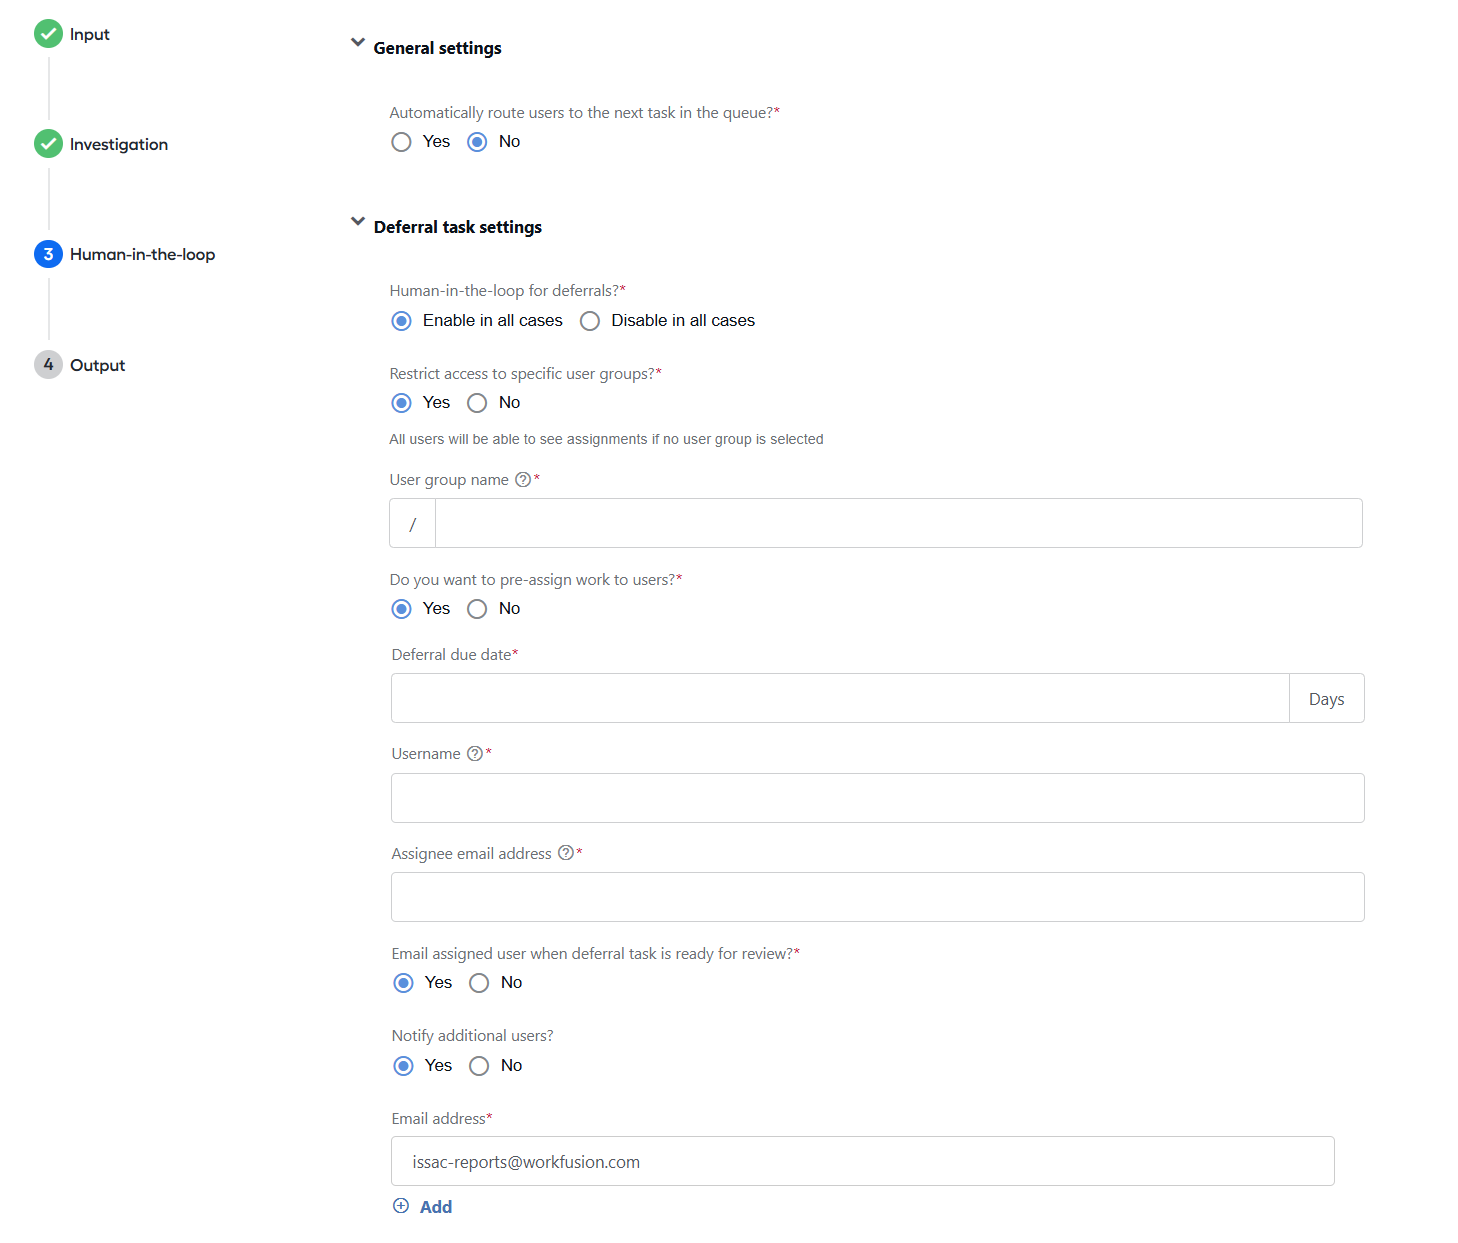
Set Automatically route users to the next task in the queue? to route users in Workspace to the next task that is not actively being processed, regardless of who it is assigned to.
In the Deferral task settings section, enable or disable the creation of deferral manual review assignments in Workspace:
Choose Enable in all cases if you want Isaac to create assignments for reviewing deferral requests in Workspace. Additionally, if the option is enabled, you can configure the following deferral review settings:
Restrict access to specific user groups?: if set to Yes, specify the field name in the deferral file containing the name of the user group that you want to access the deferral task in Workspace. In case you specified no group, all users will see the assignment in Workspace.
Do you want to pre-assign work to users: if set to yes, specify the field from the deferral input data file that contains the username of the individual user who will be assigned to review deferrals in Workspace.
Username: the username for the individual user to be assigned to the results in Workspace.
Assignee email address: the email address of the user to whom the task is to be assigned.
Email assigned user when deferral task is ready for review? Select Yes to send an email to the assigned user or No to decline the action.
Notify additional users? The setting is available only if you set Email assigned user when deferral task is ready for review? to Yes. Select Yes to notify additional users and specify one or more email addresses for the purposes. Select No to decline the action.
Deferral due date: the due date (in business days) for the assignment to be completed in Workspace.
Choose Disable in all cases if you do not want Isaac to create assignments for manual review of deferrals in Workspace.
Output
As part of the default workflow, Isaac records all transaction decisions to Data Stores asynchronously. If required, you can set Isaac to generate the following report types:
Transaction report
Fraud summary report
Final alert summary report
To enable the emailing of the final summary report, follow the steps below:
Set Do you want to email a summary of all alerts after each batch completes? to Yes and add email addresses where you want the summary and fraud summary reports to be sent.
If you want Isaac to send the same report to more than one email address, click the Add button and specify another email.
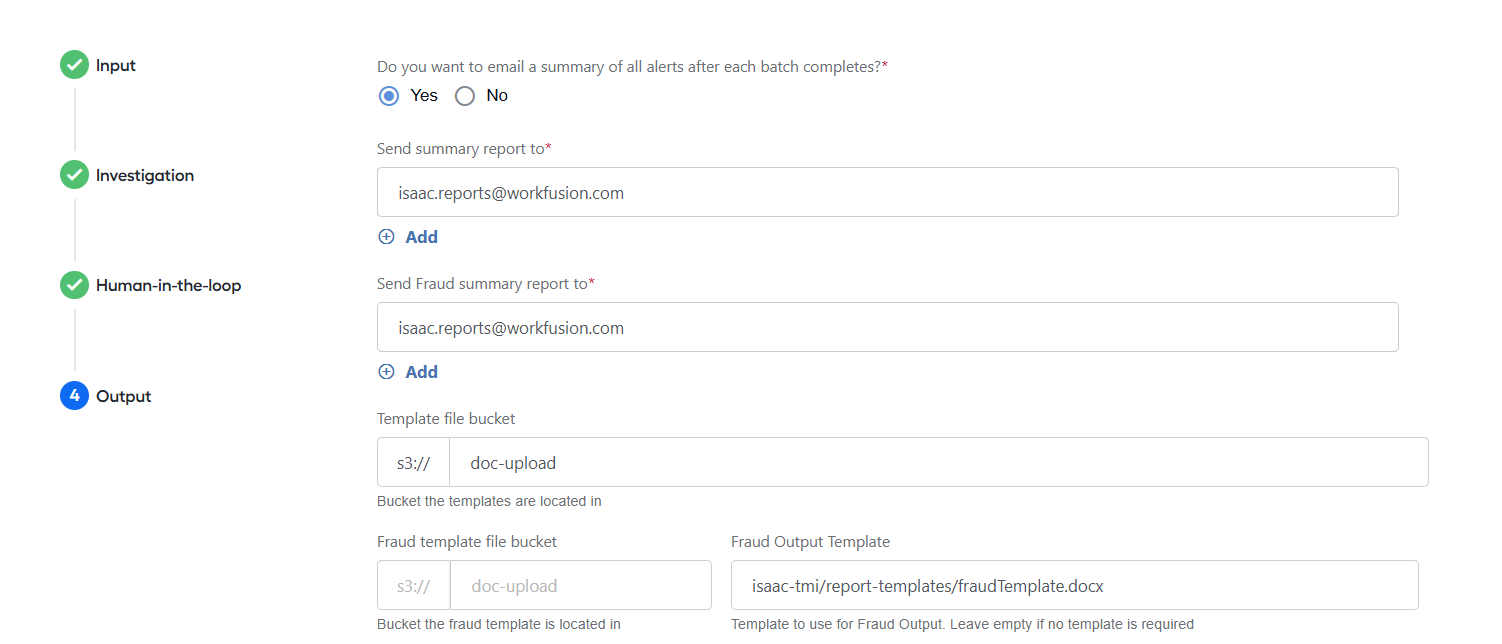
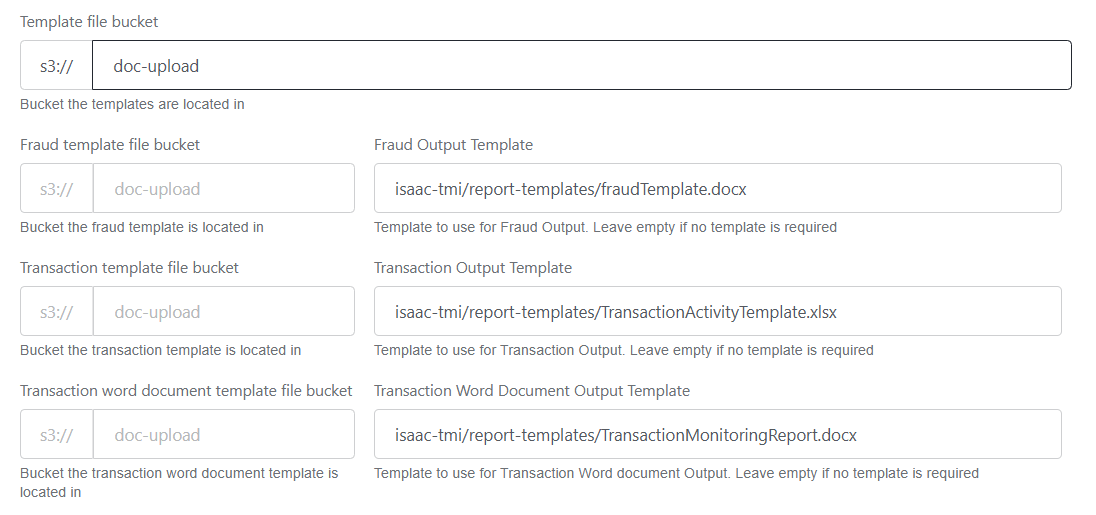
Set the file buckets and output templates for the fraud summary and transaction reports if you want to get them.
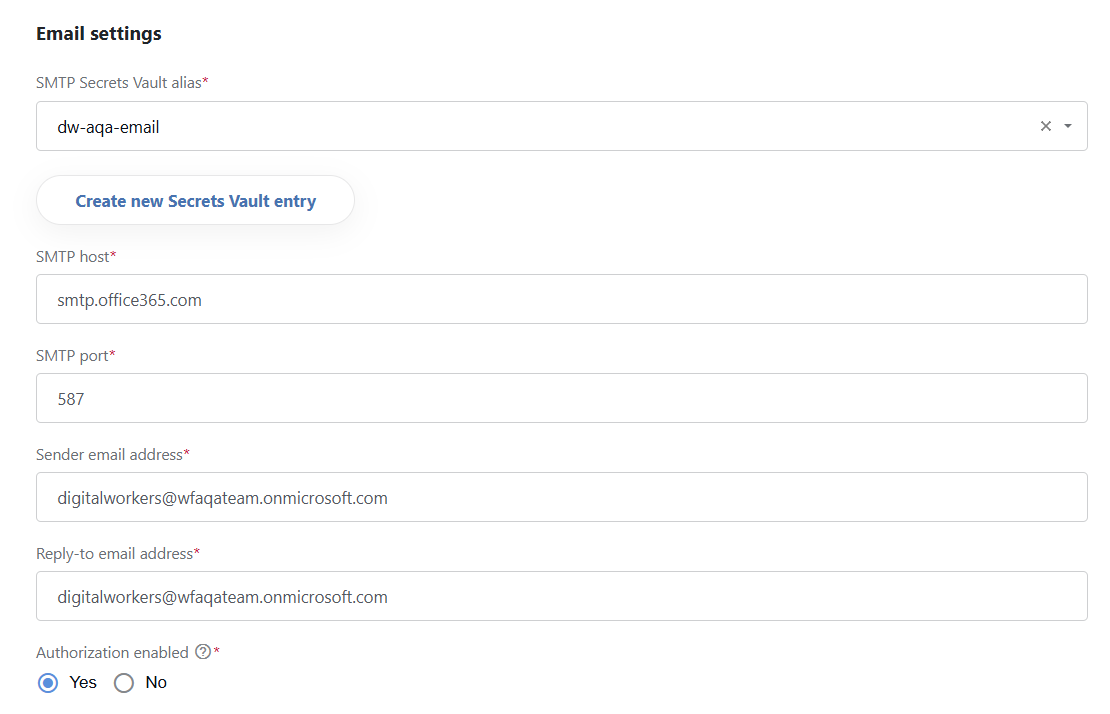
In the Email settings section, configure the SMTP settings: port, host, email addresses to send and reply to, and authorization.
To set SMTP Secrets Vault alias, you can select an existing Secret Vault alias containing the credentials for the specified service email account or create a new one as described in the Set up secret entries in Secrets Vault.