Manage AI Agent variations
You can create AI Agent configuration variations and run them simultaneously in the same environment. Thus, you can design a solution that you install into an environment only once but configure multiple times for separate groups of end users.
In Control Tower, you can create variations, edit existing ones, and export or import them from one platform environment to another, for example, from DEV to PROD.
To view the list of AI Agent configurations and their variations (if any), follow the instructions below depending on the Work.AI version you are using:
For Work.AI up to v10.2.9, go to Digital Workers > View all.
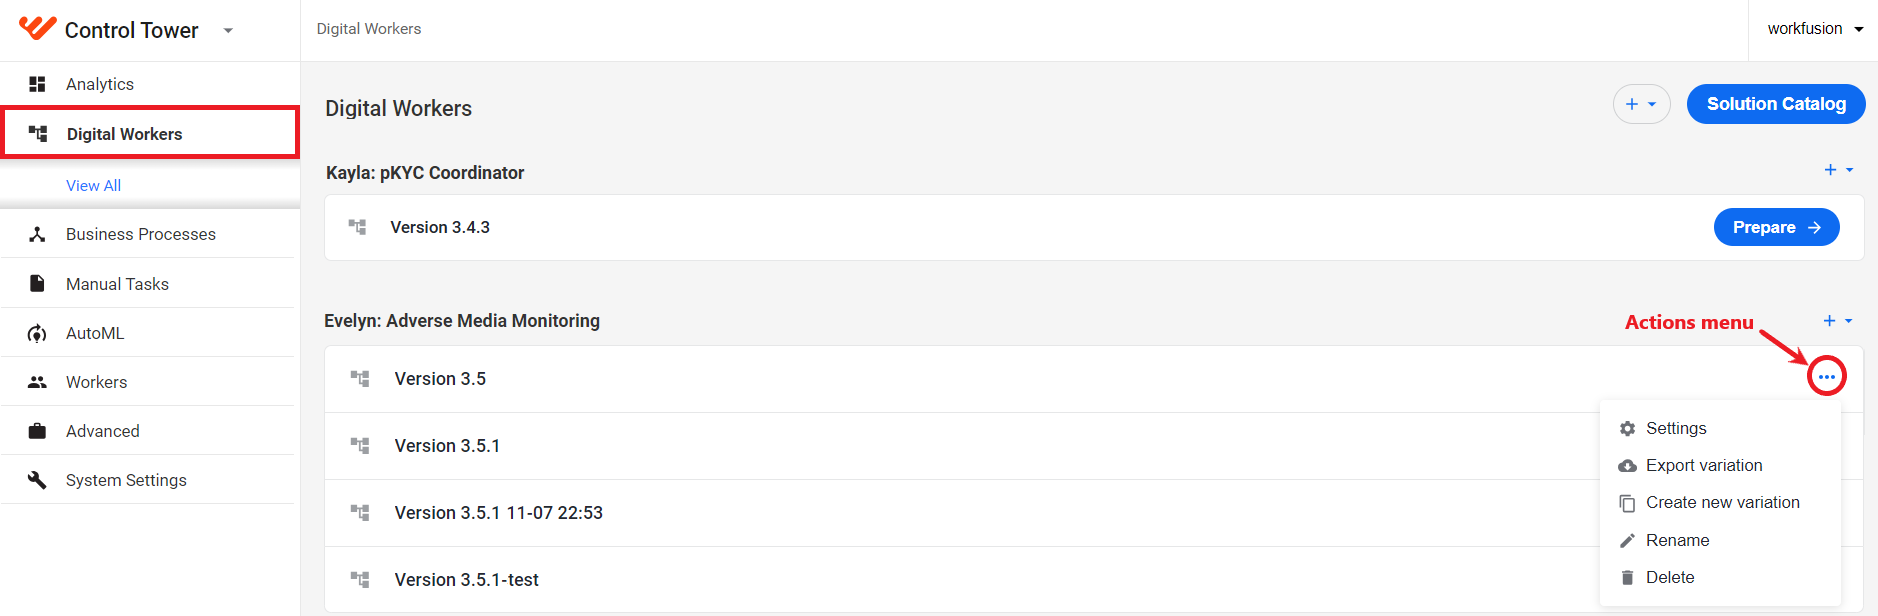
For Work.AI in v10.3+, go to AI Agents > View all.
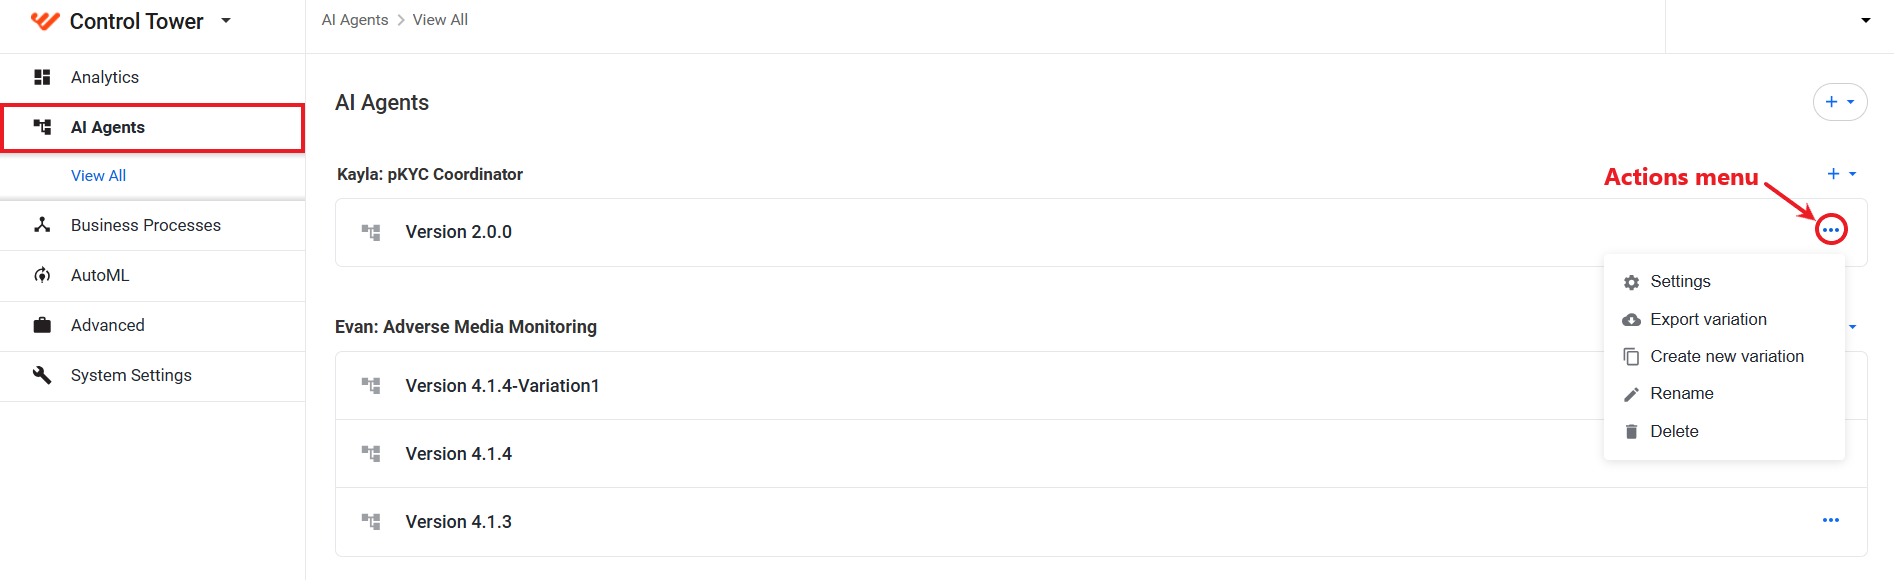
To manage a variation, open its Actions menu and select a needed action.
You can access the same settings from a variation page. Click a selected variation to view its Business Process (BP) instances. In the top right corner, click the Actions button and choose one of the available options.
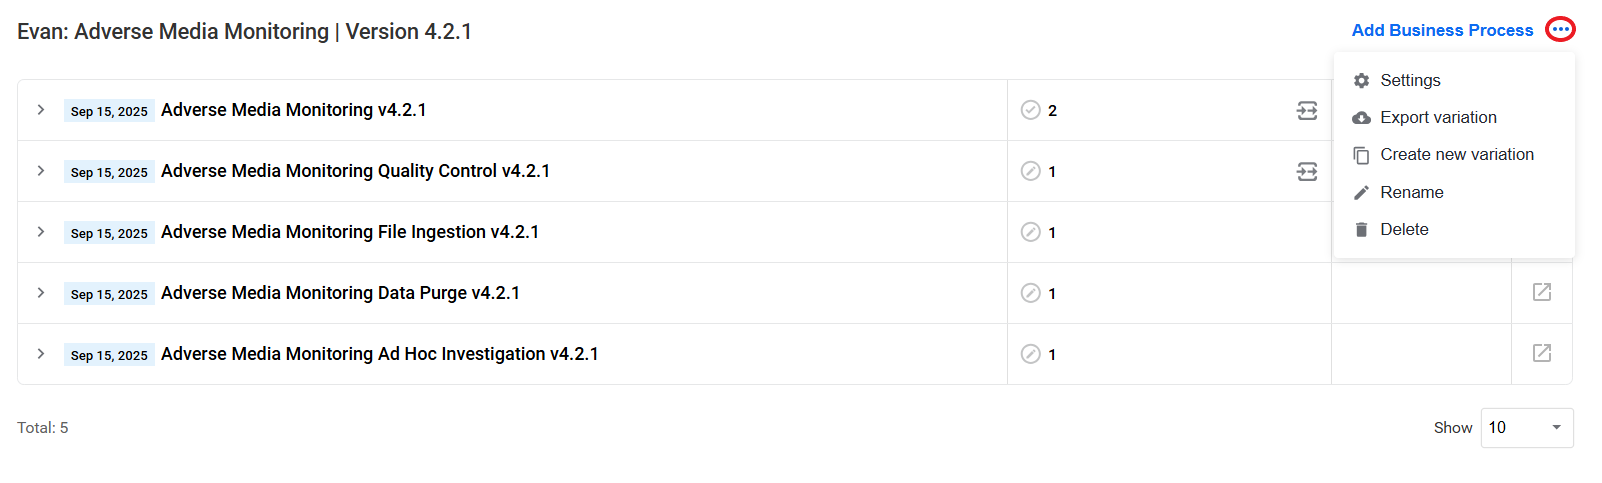
You can perform the following actions with your variation:
Create variation
To create a variation based on an already existing one, follow the instructions below depending on the Work.AI version you are using.
- Up to v10.2.9
- v10.3
In the Digital Workers list, select an AI Agent variation from which you want to create a new one. Open the Actions menu and select Create new variation.
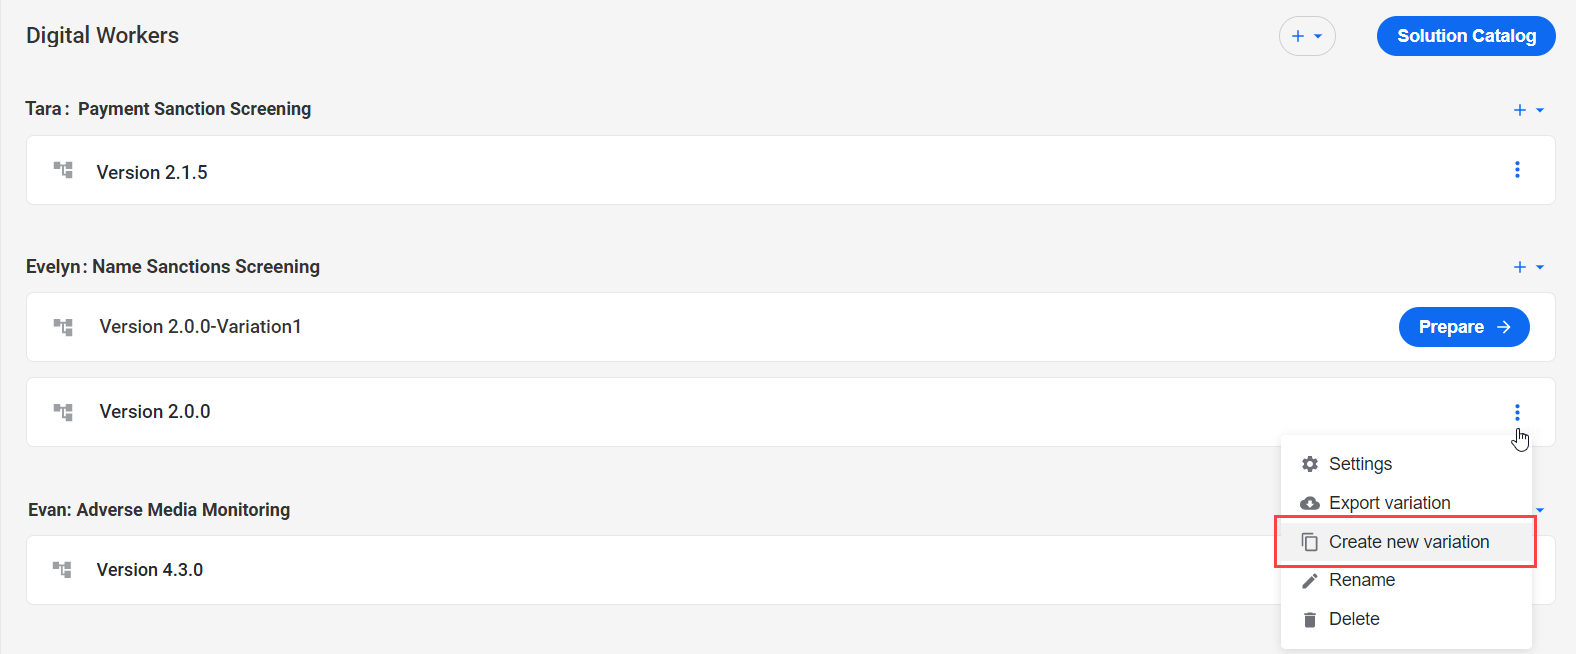
A variation is created, containing a copy of the same BPs and configuration data as in the original one. The new variation appears in the list of variations in the respective AI Agent group, and you see the Variation created message on the screen.
 note
noteThe original and newly created variation are both associated with the same BPs and configuration settings. When you modify any assets in a newly created variation, its configuration differs from the original one.
To set up a new variation, click the Prepare button.
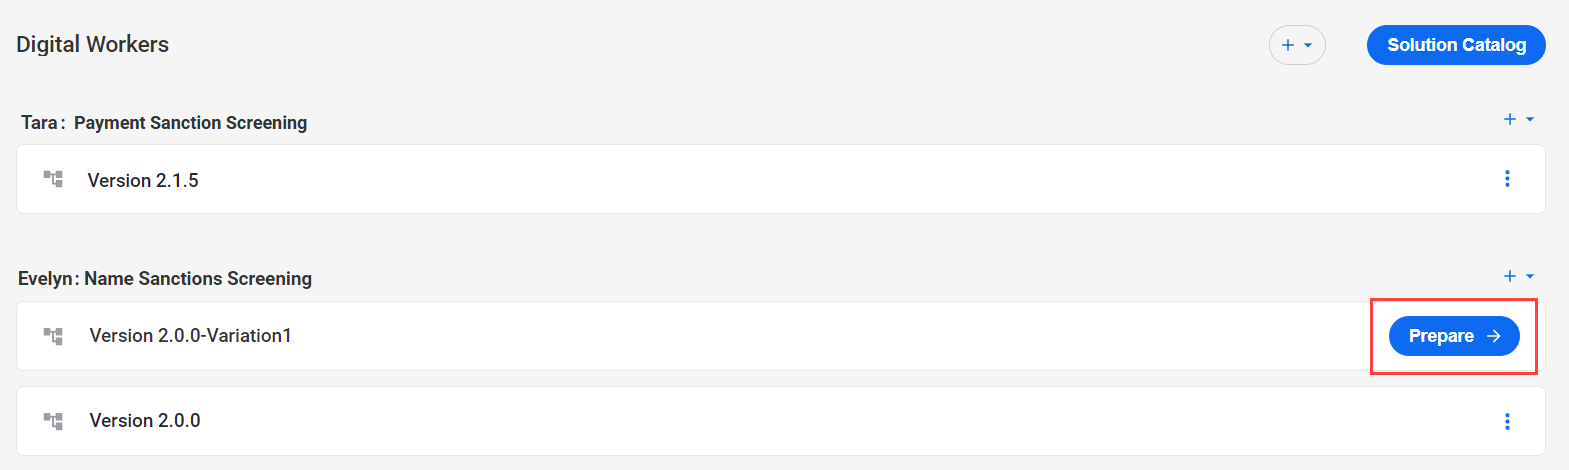
In the Prepare your digital worker window, edit the settings and click Finish. The New settings applied message confirms that the changes are saved.

In the AI Agents list, select an AI Agent variation from which you want to create a new one. Open the Actions menu and select Create new variation.
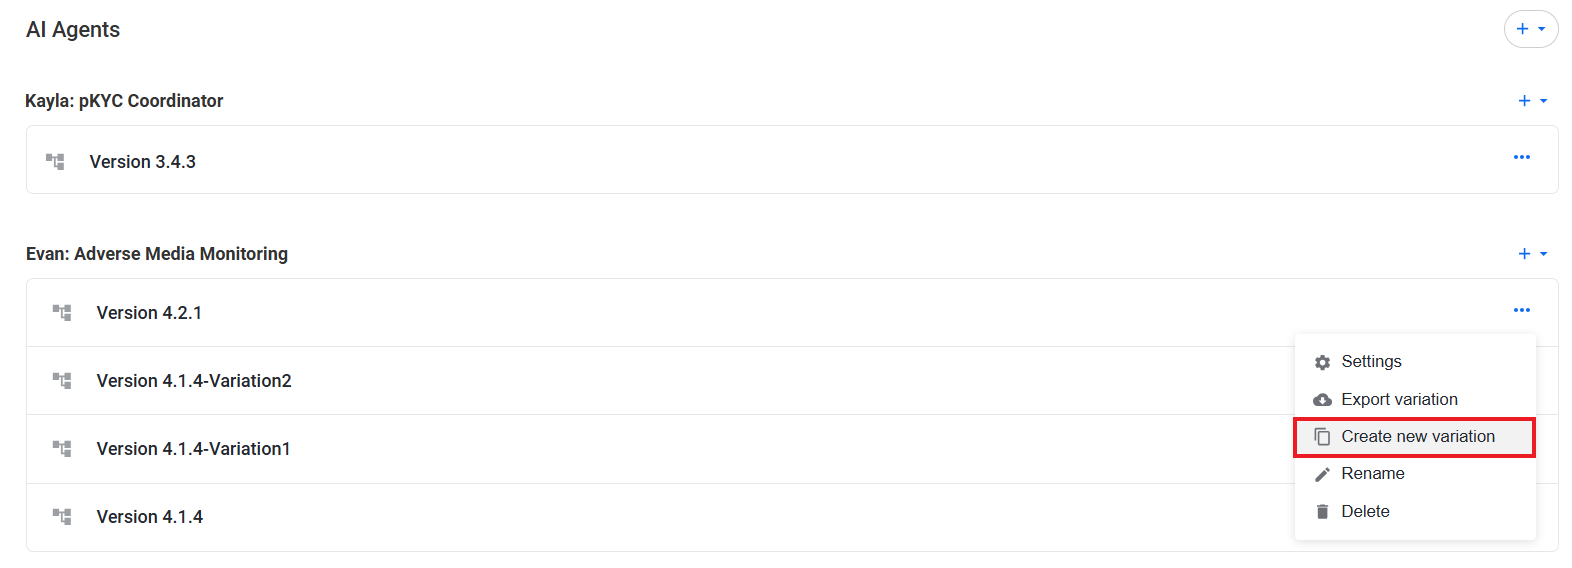
A variation is created, containing a copy of the same BPs and configuration data as in the original one. The new variation appears in the list of variations in the respective AI Agent group, and you see the Variation created message on the screen.
noteThe original and newly created variation are both associated with the same BPs and configuration settings. When you modify any assets in a newly created variation, its configuration differs from the original one.
To set up a new variation, click the Prepare button.
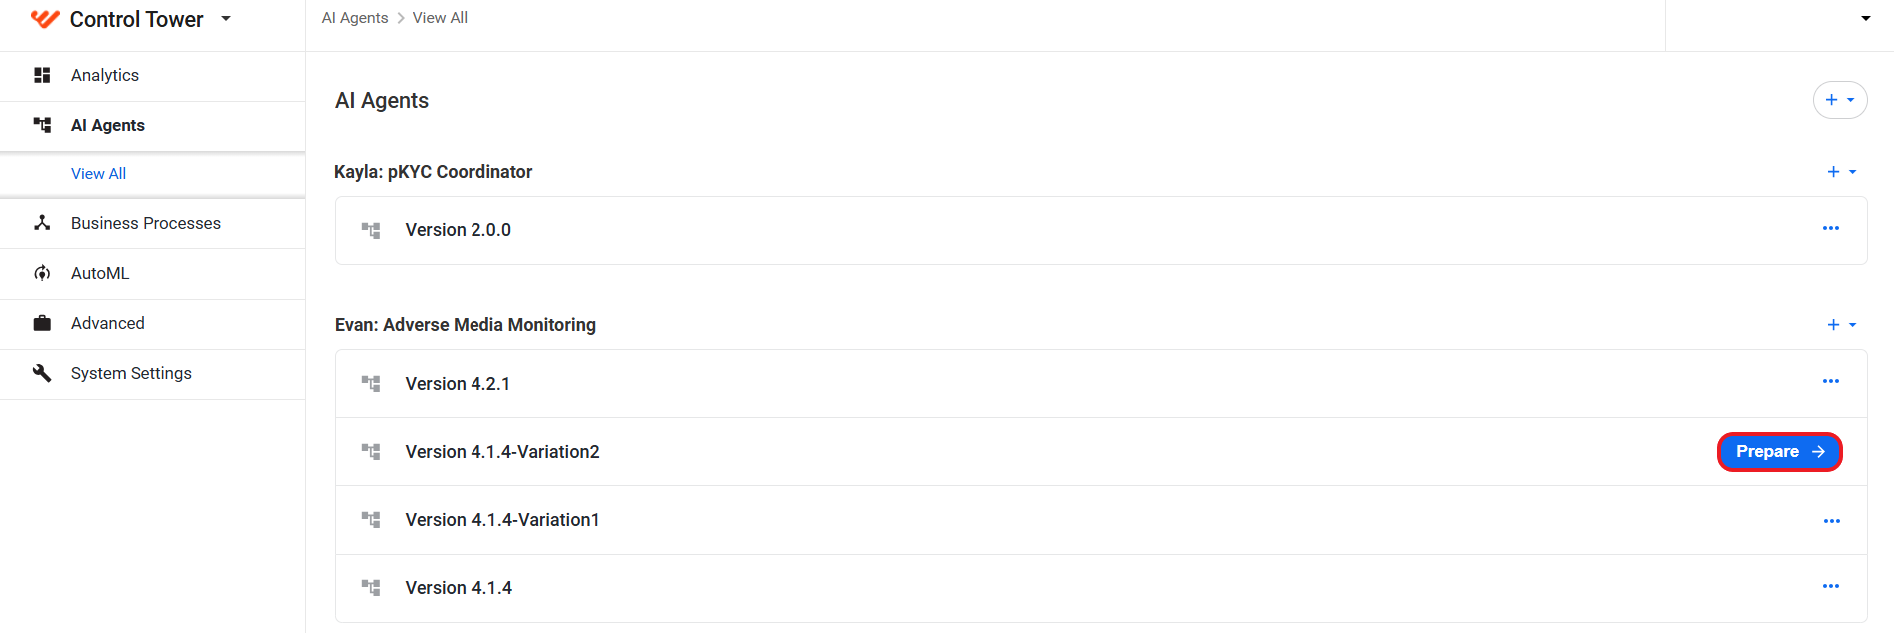
In the Prepare your digital worker window, edit the settings and click Finish. The New settings applied message confirms that the changes are saved.
Import variation
To import a variation, follow the instructions below depending on the Work.AI version you are using.
- Up to v10.2.9
- v10.3
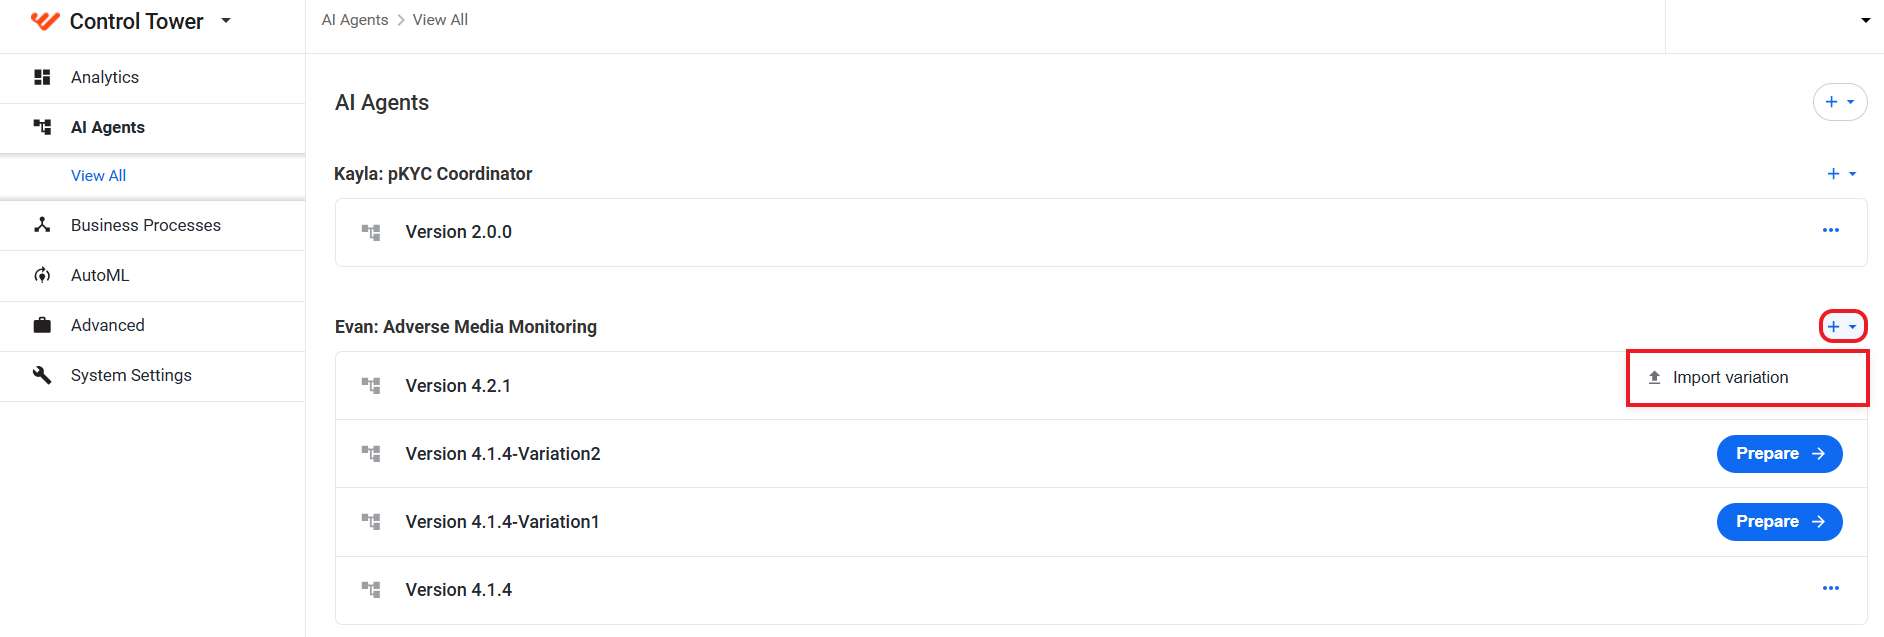
On the Digital Workers page, click the + button above the AI Agents group where you want to import a variation and then click Import variation. The imported variation is displayed in the list of variations.
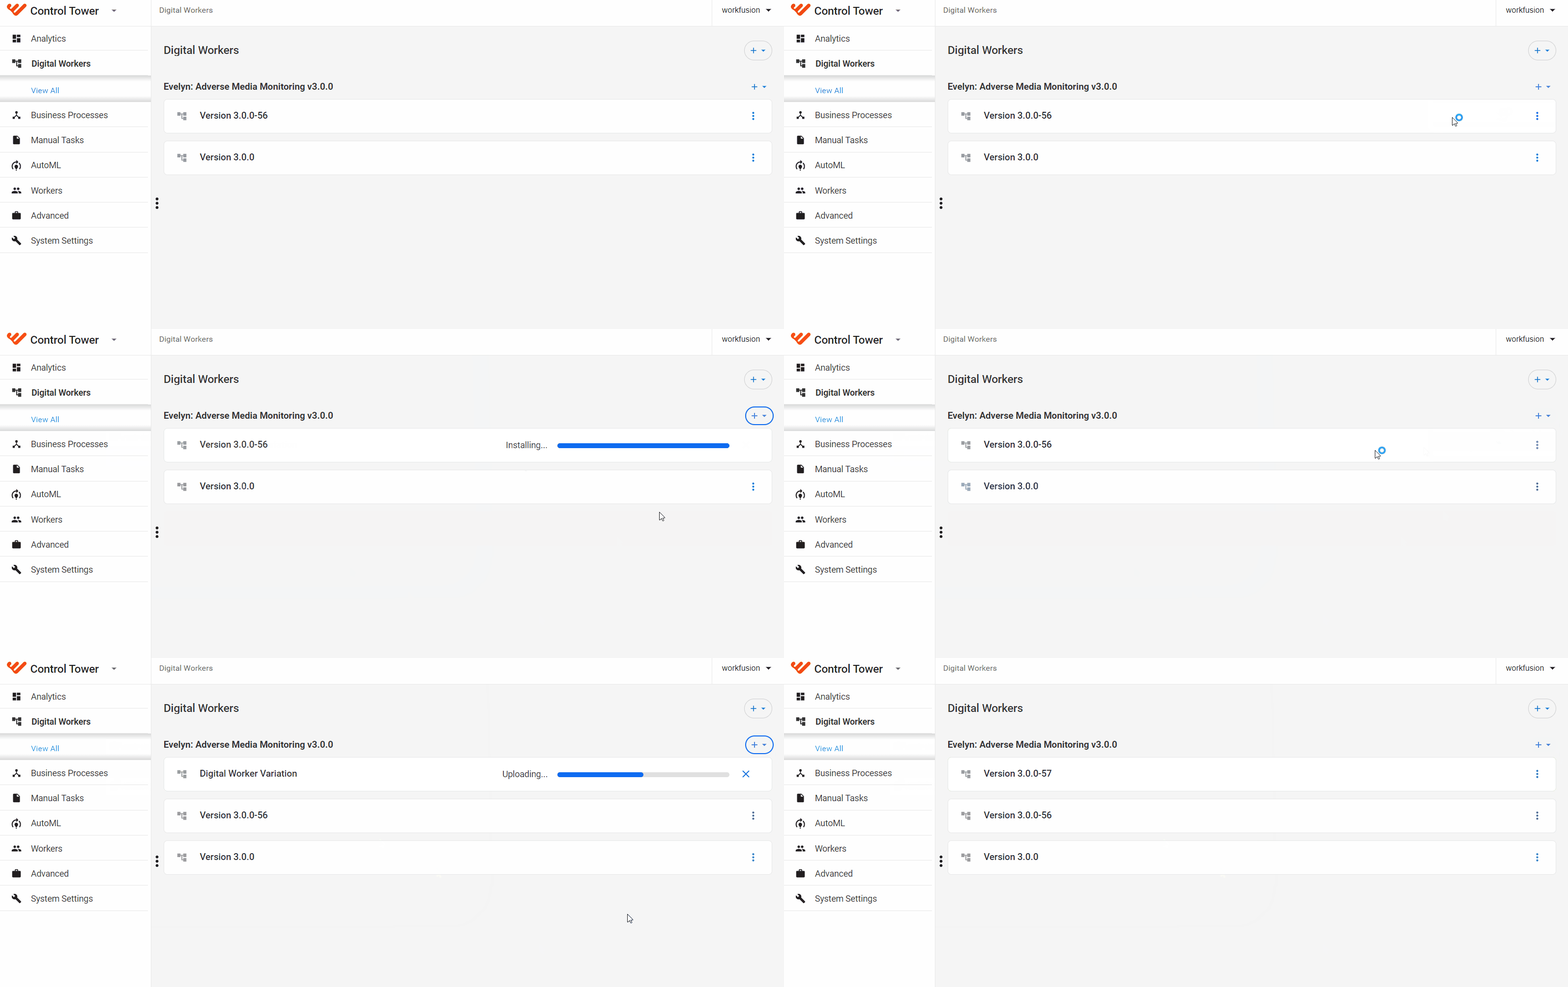
On the AI Agents page, click the + button above the AI Agents group where you want to import a variation and then click Import variation. The imported variation is displayed in the list of variations.
Import configuration from another version
The AI Agent configuration import feature is only available from Work.AI v10.2.9.2.
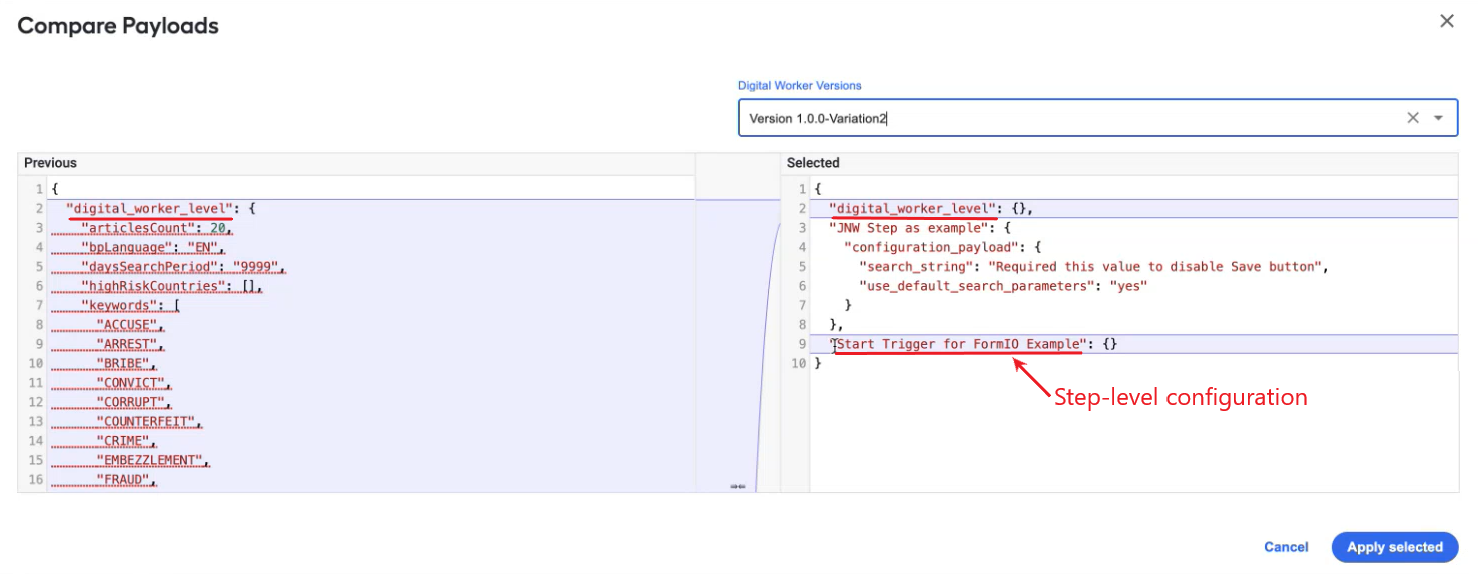
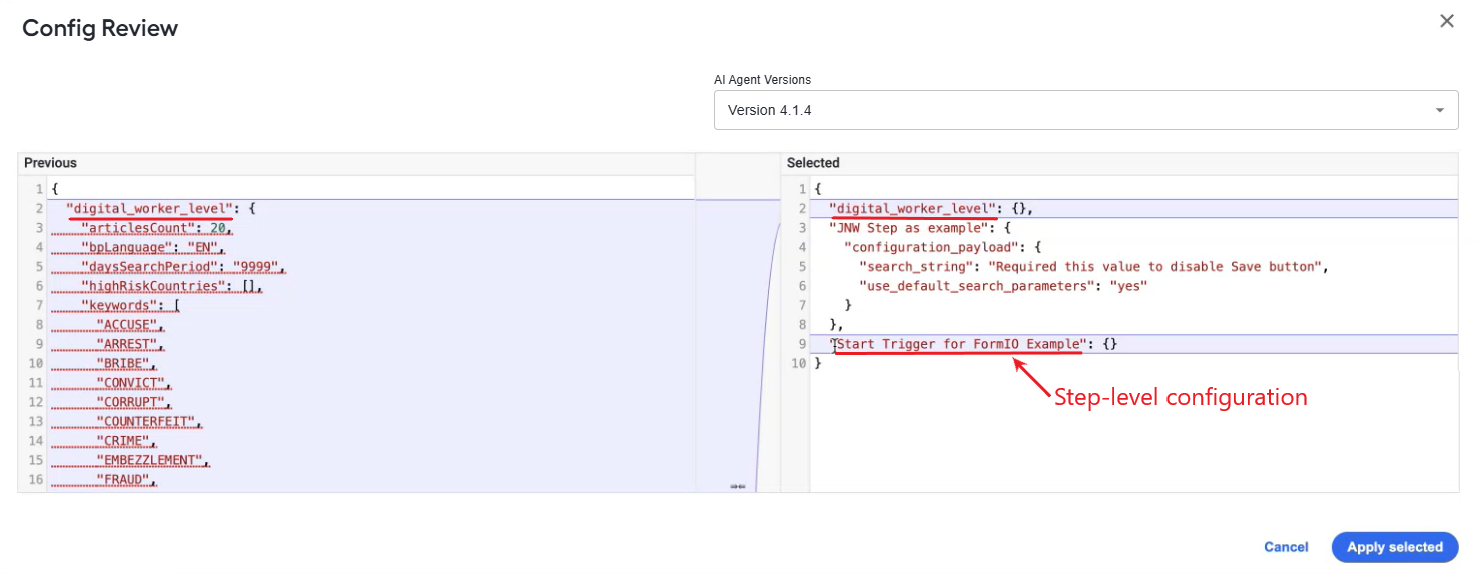
Instead of manually changing a configuration of an AI Agent variation, you can import it from a previously configured version. As you initiate the import, the payloads of the current version and the one selected for import are compared against each other, and the differences are highlighted so that you can knowingly choose to apply the selected payload or otherwise.
The import feature allows updating the configuration on the following levels:
Global AI Agent level corresponding to the
digital_worker_levelkey in the compared payloadsStep level corresponding to the respective step name key in the compared payloads
The same configuration can include both global and step-level settings.
Sample for version 10.2.9.2:
Sample for versions from 10.3:
Configuration sequence
To import an AI Agent configuration from another version, follow the instructions below, depending on the Work.AI version you are using.
- v10.2.9.2
- v10.3
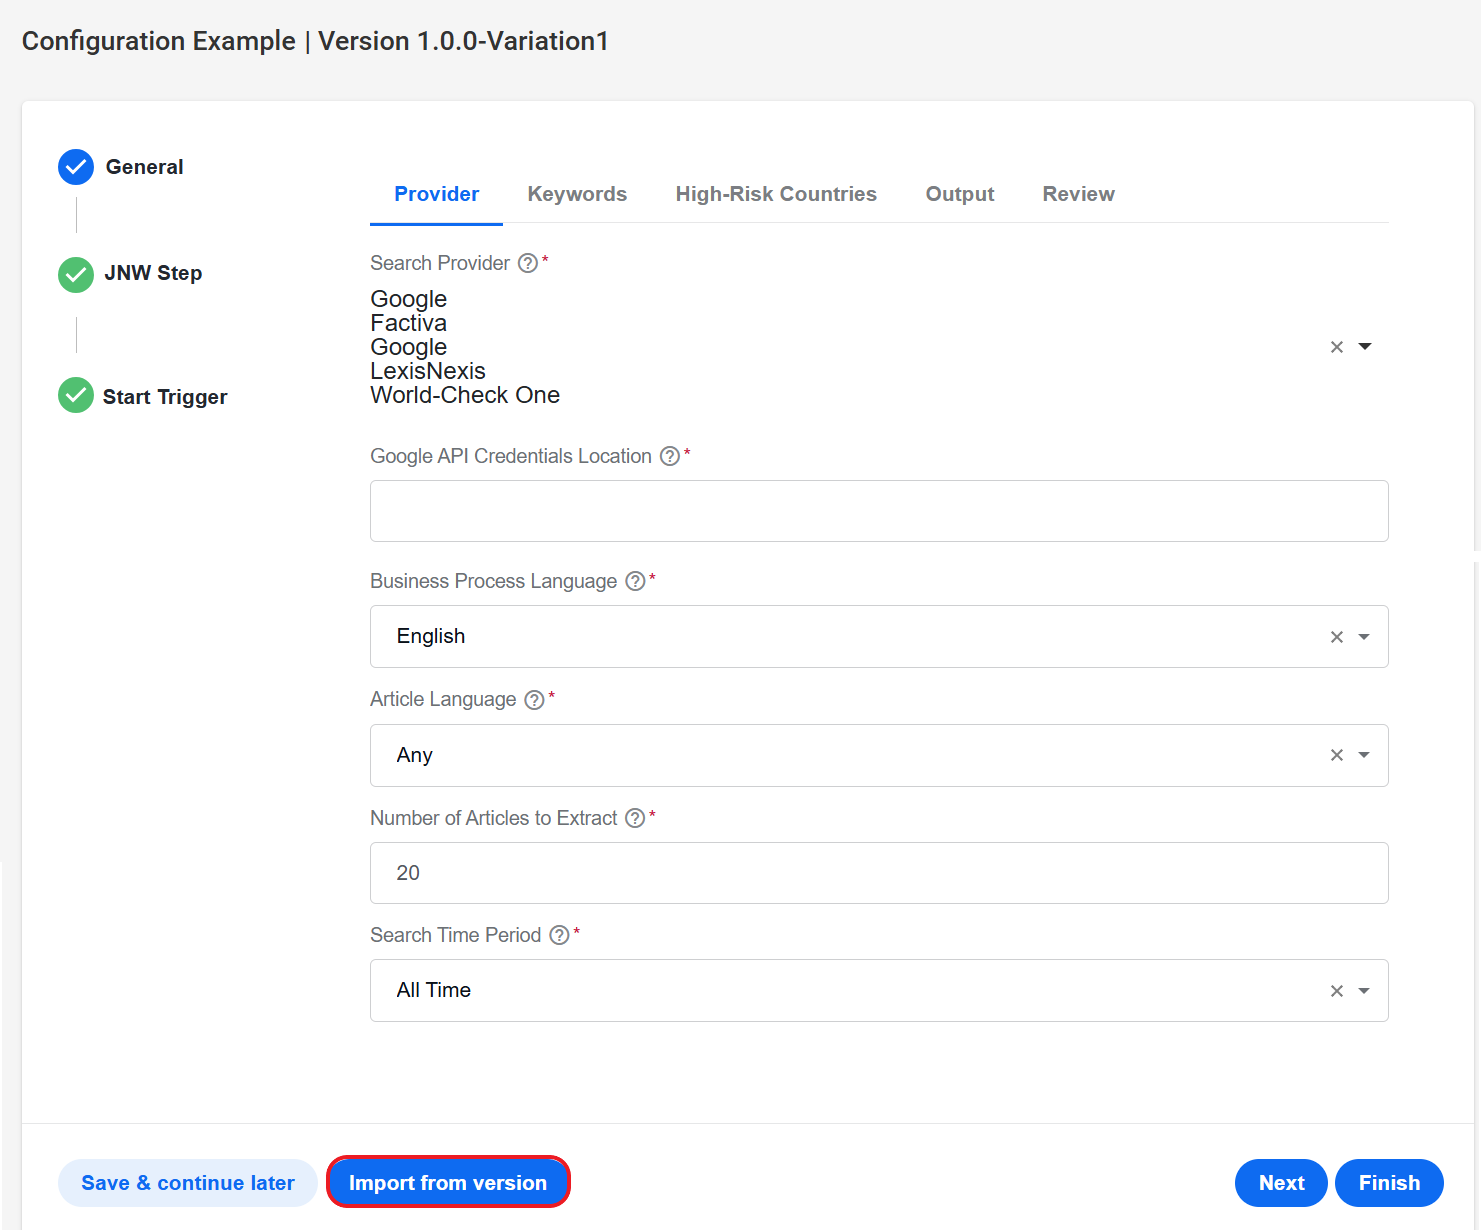
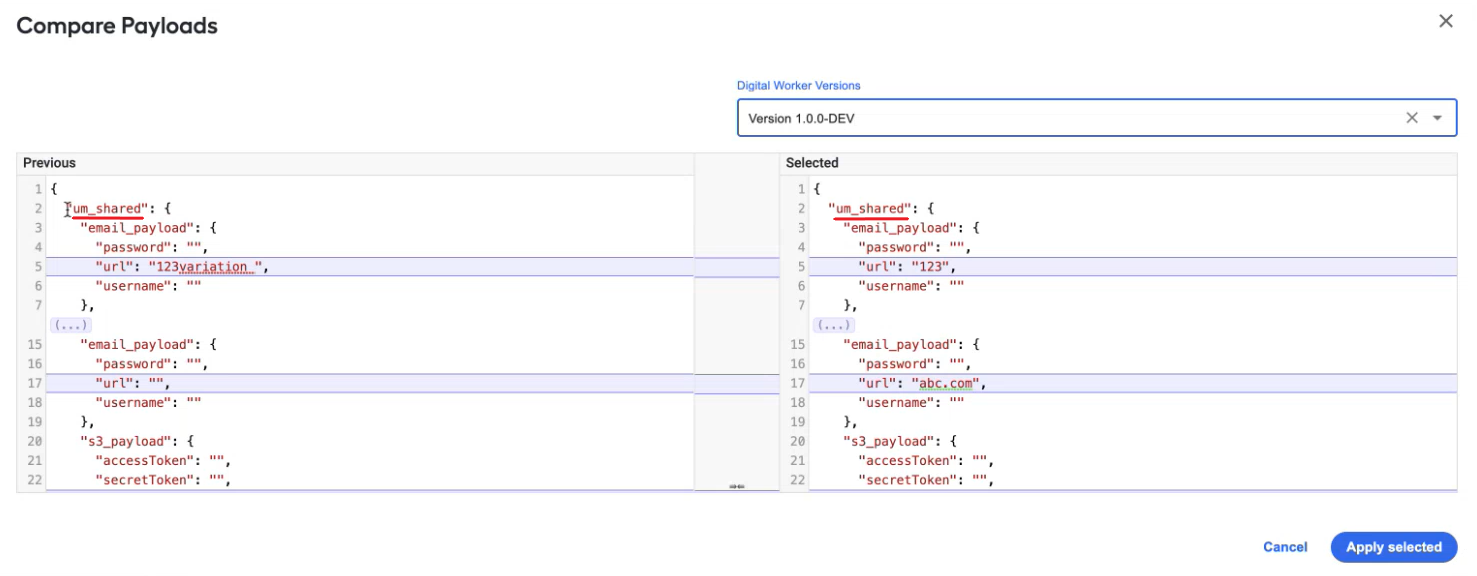
On the Digital Workers page, click the Prepare button or open the Actions menu for a variation and click Settings.
On the displayed configuration page, click Import from version. The button is available only if the environment has other configured versions of the same AI Agent installed.
On the Compare Payloads screen, choose the AI Agent version from where you want to import the configuration. Mind that only configured versions of the same AI Agent are available for selection.

The chosen version is displayed in the Selected box, and the current version is visible in the Previous one. Any discrepancies between the two versions are highlighted.
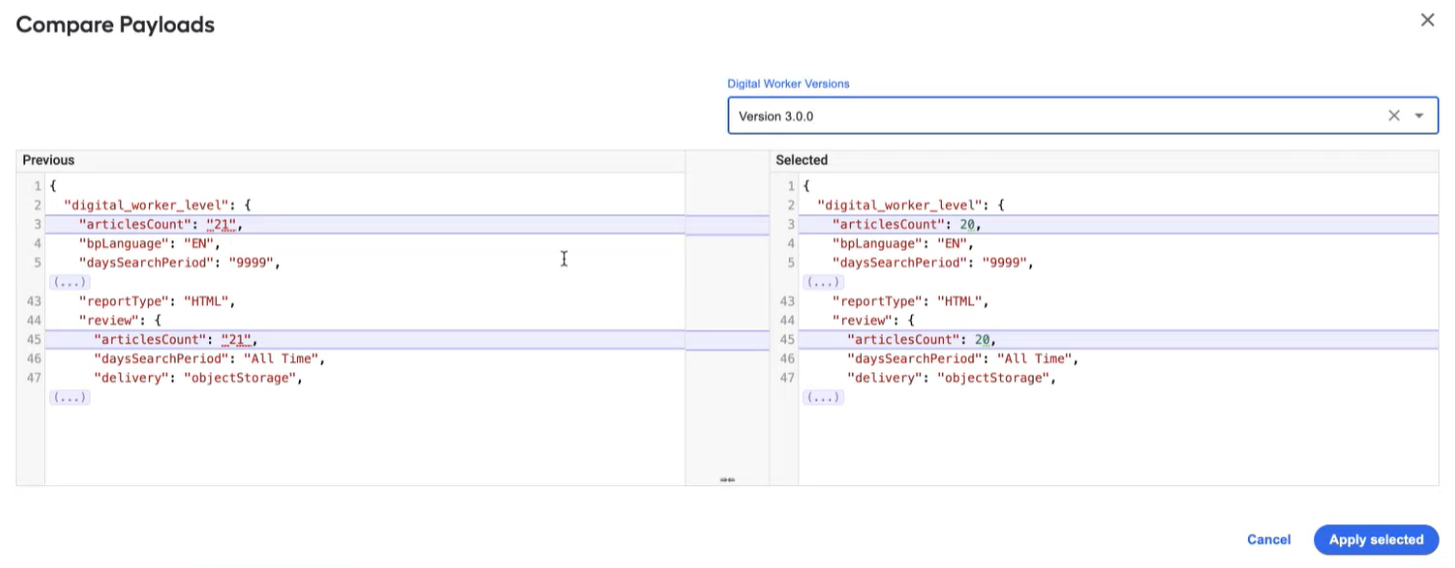
Click the Apply selected button to apply, and the configuration version selected in step 3 is applied.
If you apply a configuration where some value is absent, the already existing default value is used.
In case the selected version has both the global configuration panel (the
digital_worker_levelkey) and step panels (step name keys), the configuration is applied to the step panels in the following order: first, by the matching namespace and then by the step names from the selected version.
On the AI Agents page, click the Prepare button or open the Actions menu for a variation and click Settings.
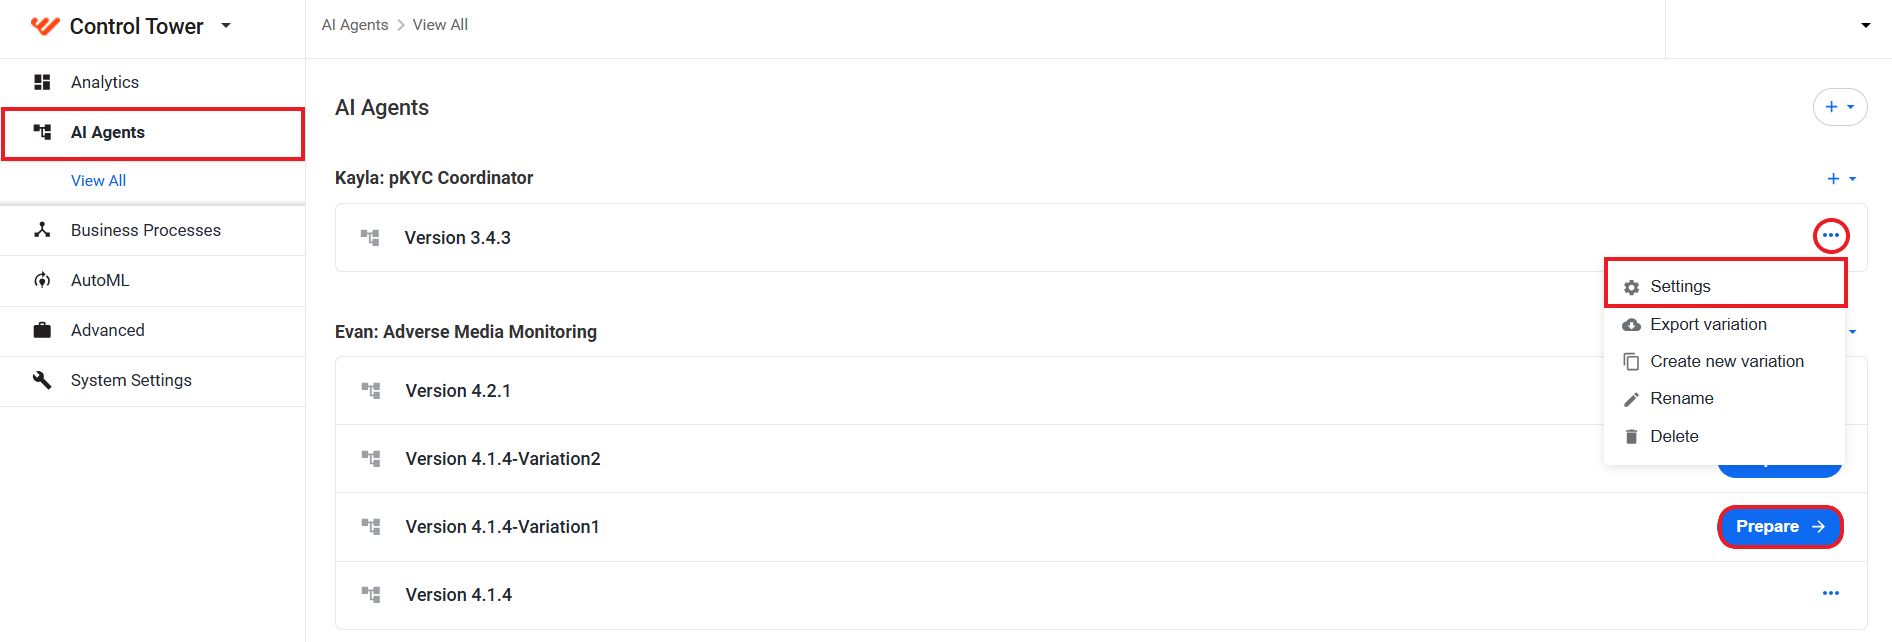
On the displayed configuration page, click Import from version. The button is available only if the environment has other configured versions of the same AI Agent installed.
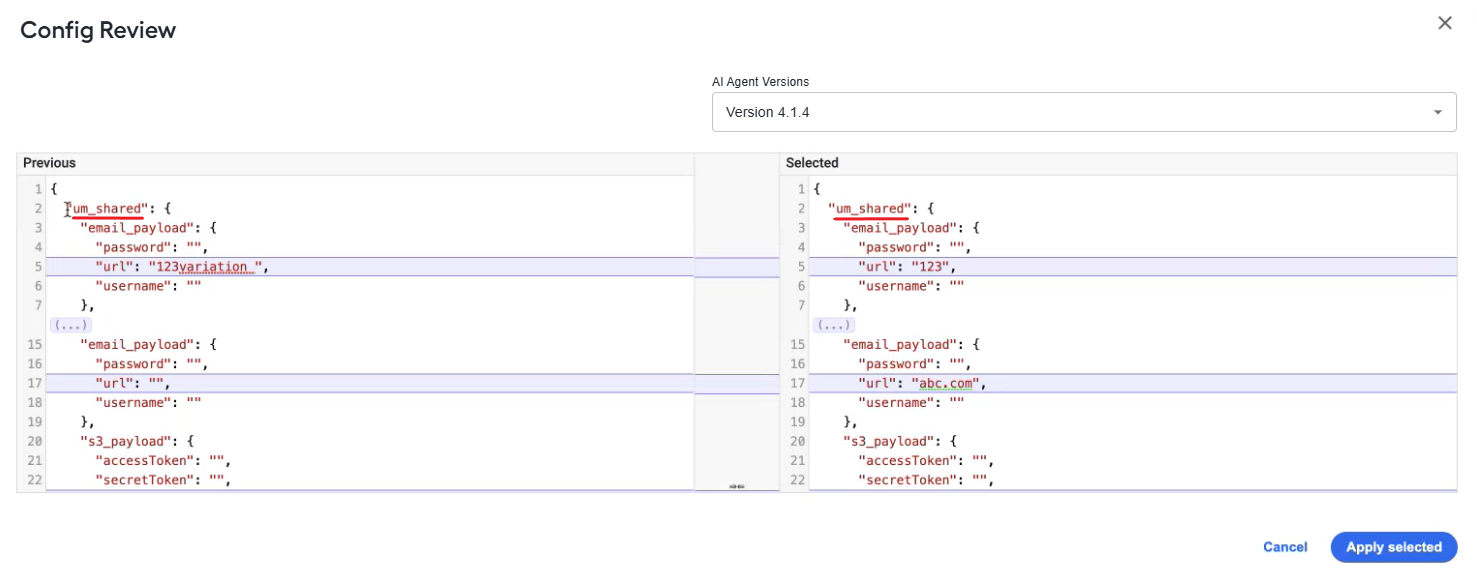
On the Config Review screen, choose the AI Agent version from where you want to import the configuration. Mind that only configured versions of the same AI Agent are available for selection.

The payload of the chosen version is displayed in the Selected box, and that of the current one is visible in the Previous box. Any discrepancies between the two versions are highlighted.
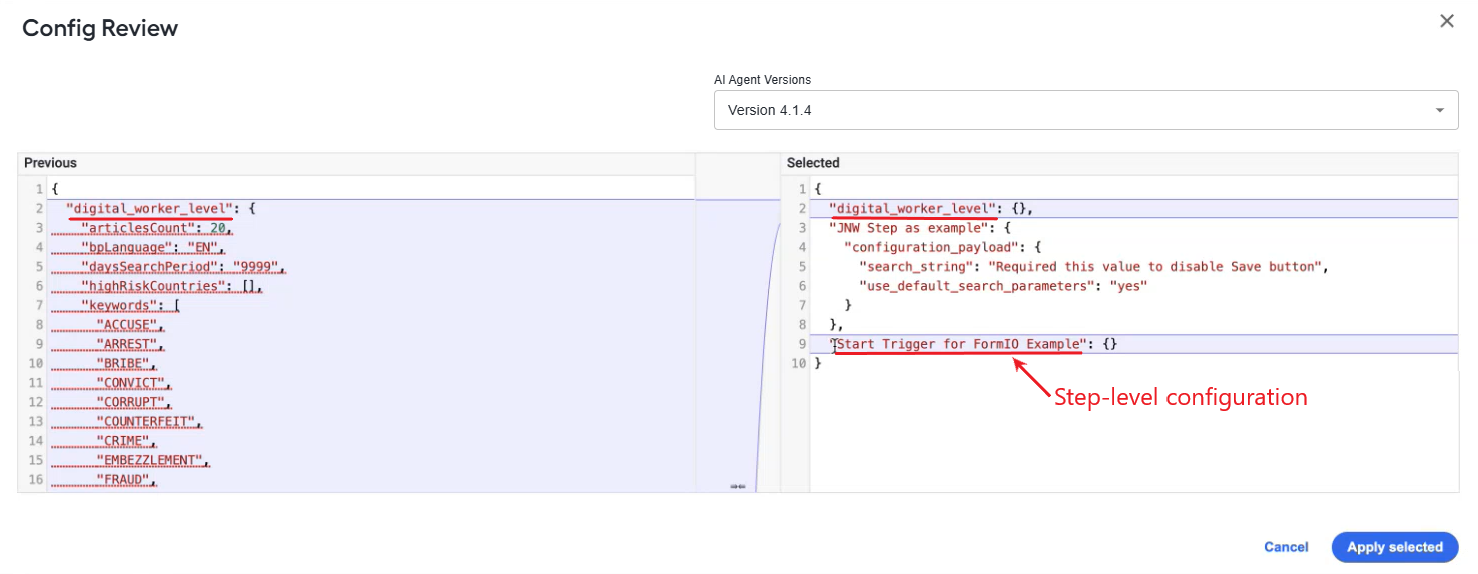
Click the Apply selected button to apply, and the configuration version selected in step 3 is applied.
If you apply a configuration where some value is absent, the already existing default value is used.
In case the selected version has both the global configuration panel (the
digital_worker_levelkey) and step panels (step name keys), the configuration is applied to the step panels in the following order: first, by the matching namespace and then by the step names from the selected version.
Shared payload
AI Agent steps can be configured to share the payload so that if you change a value in one step, the rest are updated accordingly. For that, on the Bot step configuration screen for the steps with which you want to share the payload, set the same Step Configuration Sharing Namespace identifier.
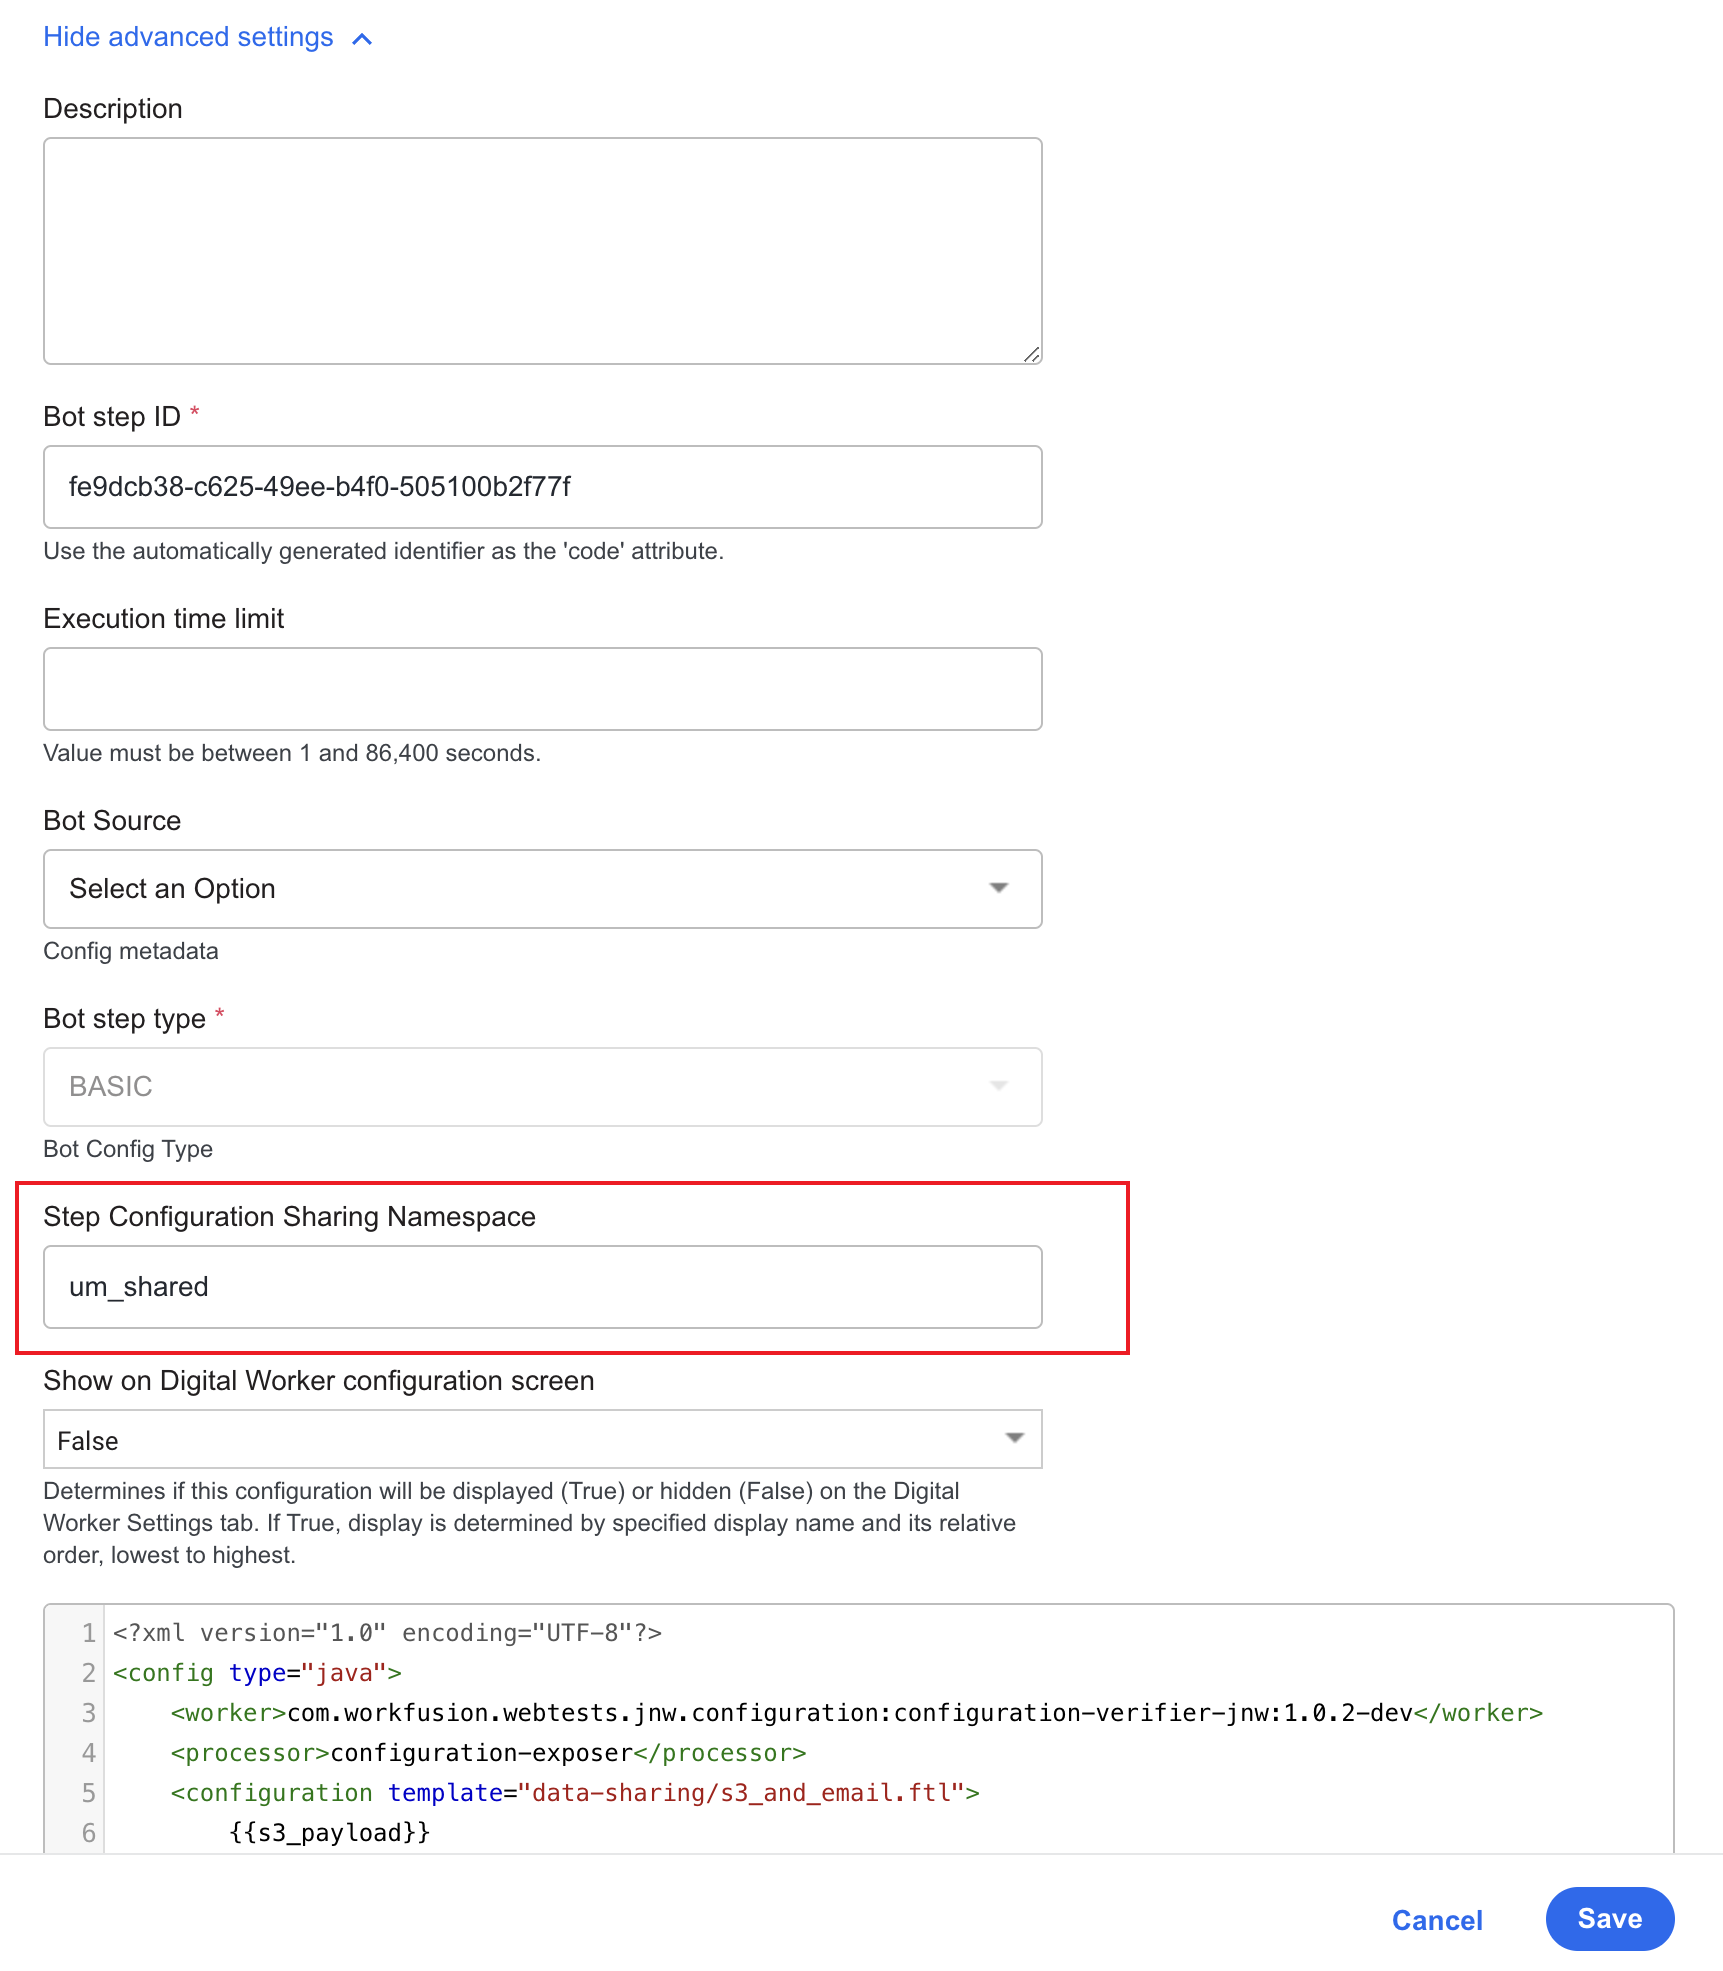
An AI Agent configuration can comprise both steps sharing the payload and isolated steps. In the sample configuration below, the three top steps share the same payload, while the bottom one is isolated.
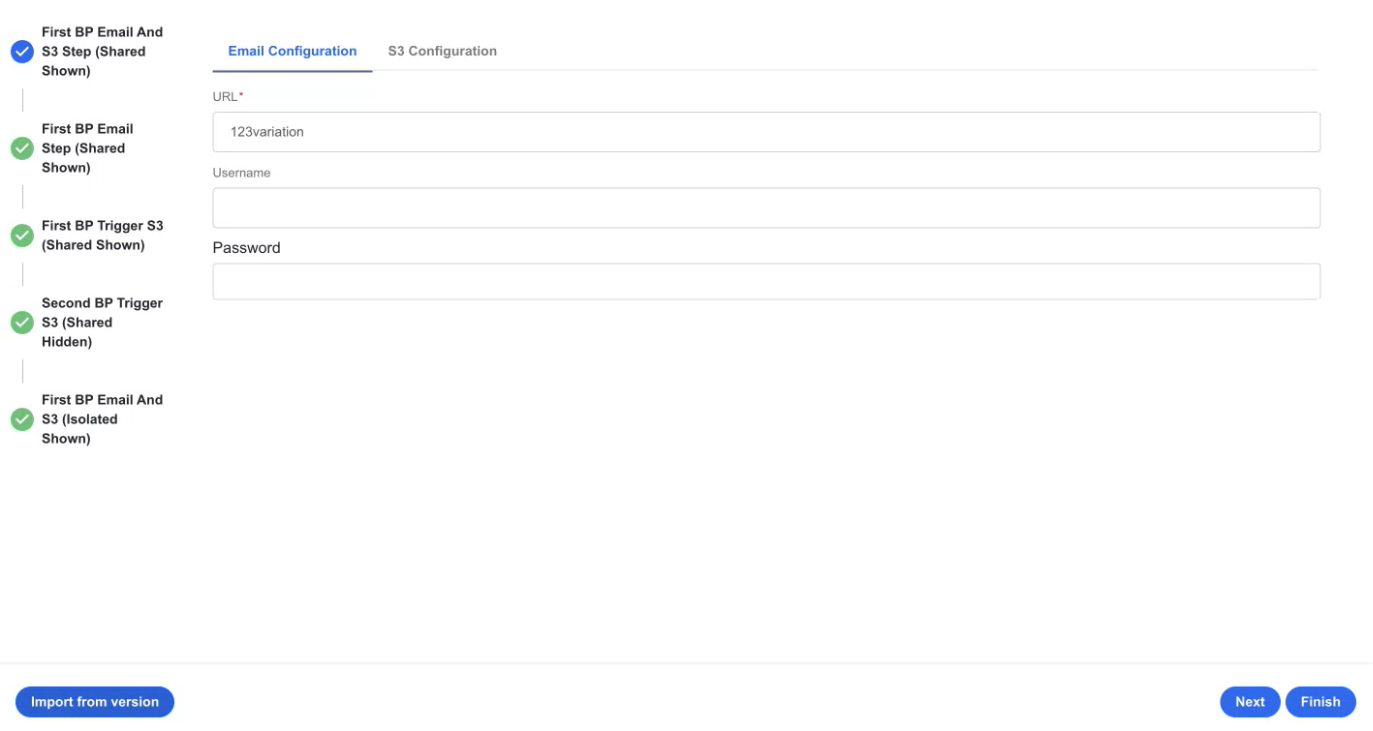
Since the first three bot steps have the same configuration (the same Step Configuration Sharing Namespace identifier), they are grouped by the key specified in the Step Configuration Sharing Namespace field (here, um_shared).
Example for v10.2.9.2:
Example for v10.3+:
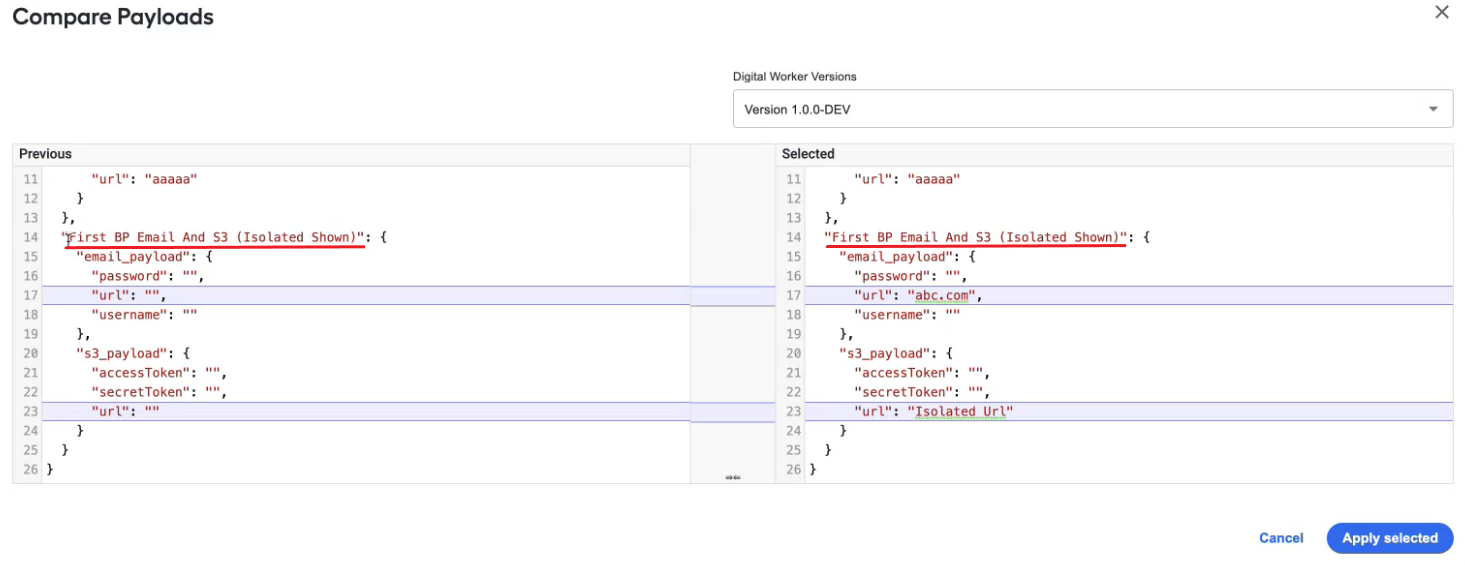
Isolated steps have their own step key.
Example for v10.2.9.2:
Example for v10.3+:
Export variation
You can use an already existing AI Agent configuration to create another variation whenever you want to try a new configuration. To export a variation, follow the instructions below, depending on the Work.AI version you are using.
- Up to v10.2.9
- v10.3
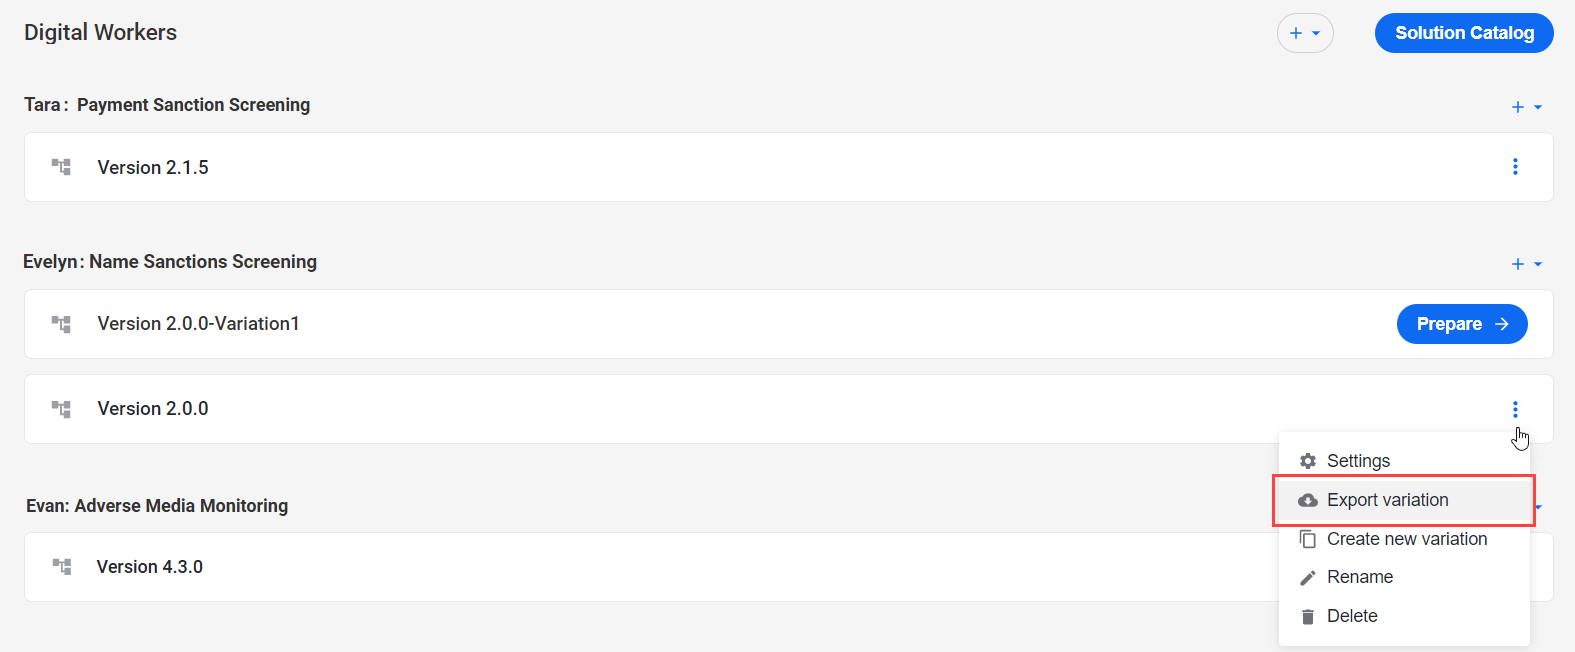
On the Digital Workers page, select a variation in an AI Agent group, open its Actions menu, and click Export variation.
On the AI Agents page, select a variation in an AI Agent group, open its Actions menu, and click Export variation.
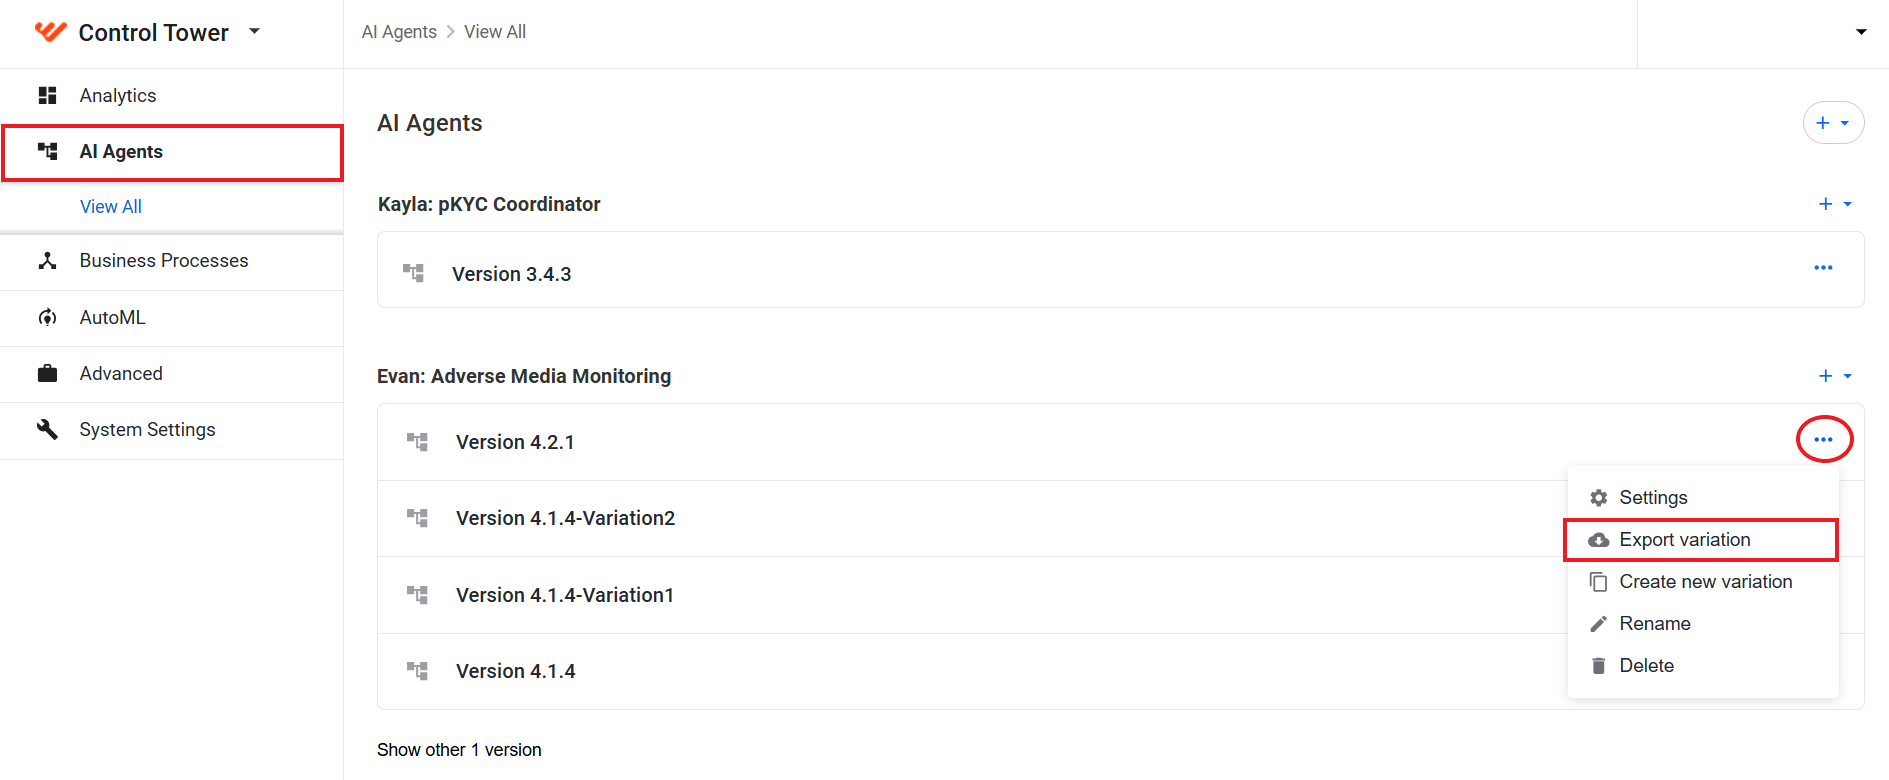
Control Tower starts generating a ZIP bundle asynchronously, and the Generating bundle for export message appears in the bottom right corner.

A variation Asset Bundle is downloaded as a ZIP file to your computer. To view the bundle structure, see Package assets into AI Agent variation Asset Bundle.
Edit variation
To modify the configuration of an existing variation, follow the instructions below, depending on the Work.AI version you are using.
- Up to v10.2.9
- v10.3
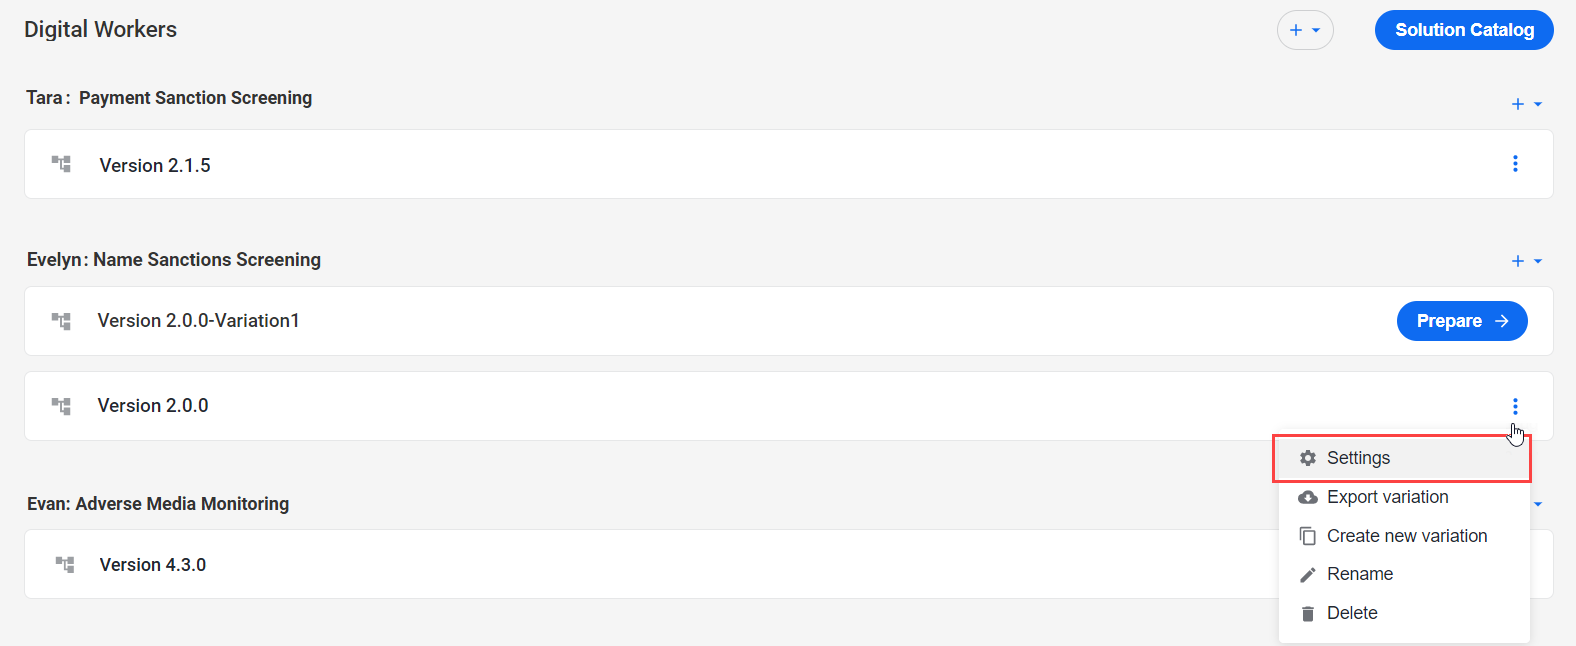
On the Digital Workers page, select a variation in an AI Agent group, open its Actions menu, and click Settings.
On the AI Agents page, select a variation in an AI Agent group, open its Actions menu, and click Export variation.
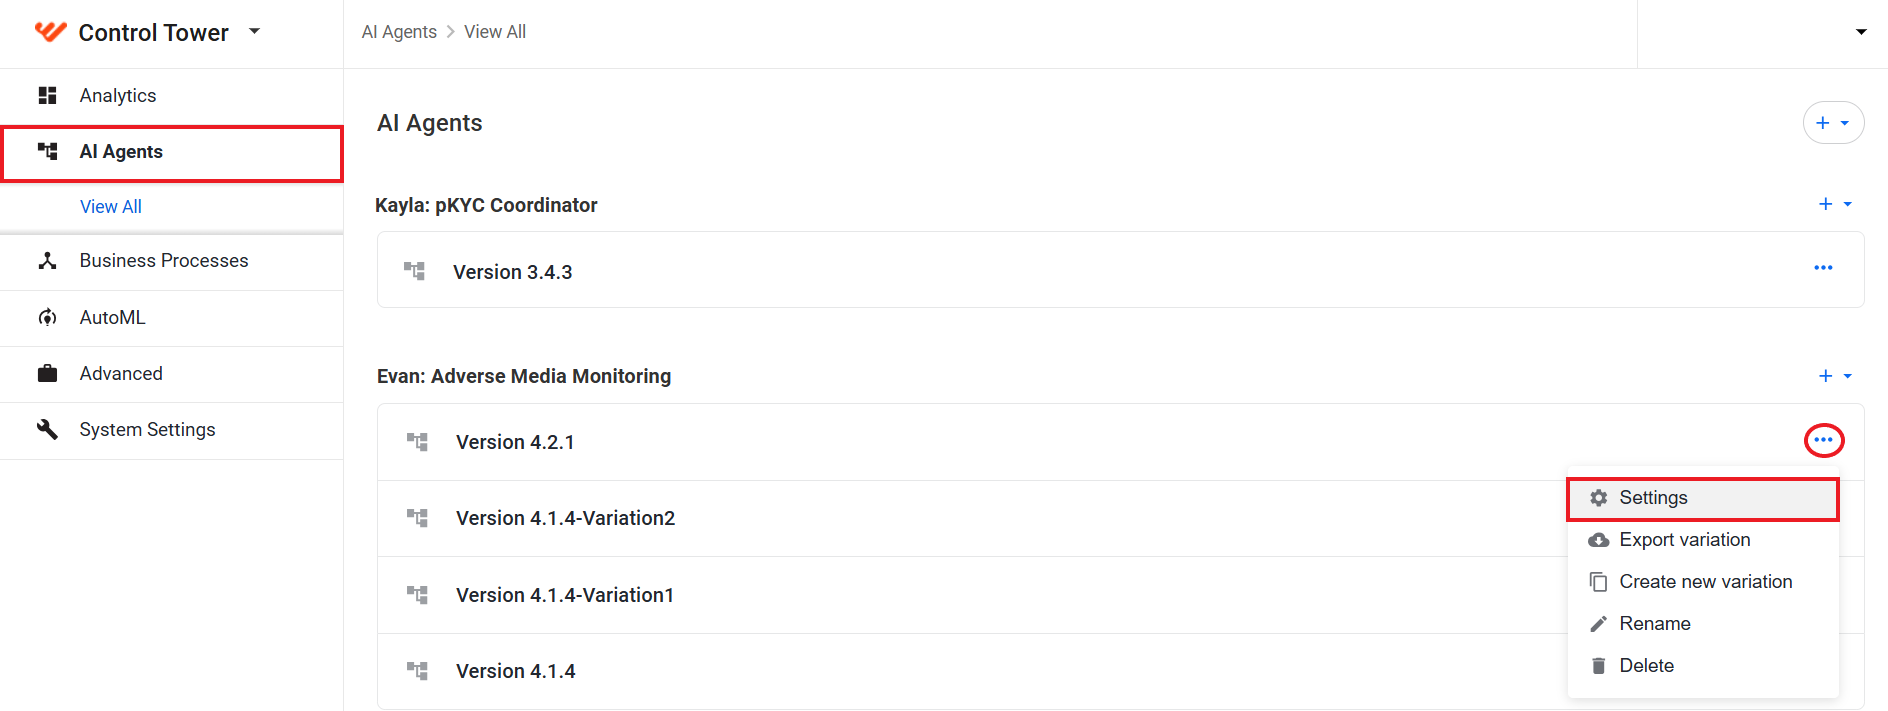
A configuration window opens, where you can edit parameters.
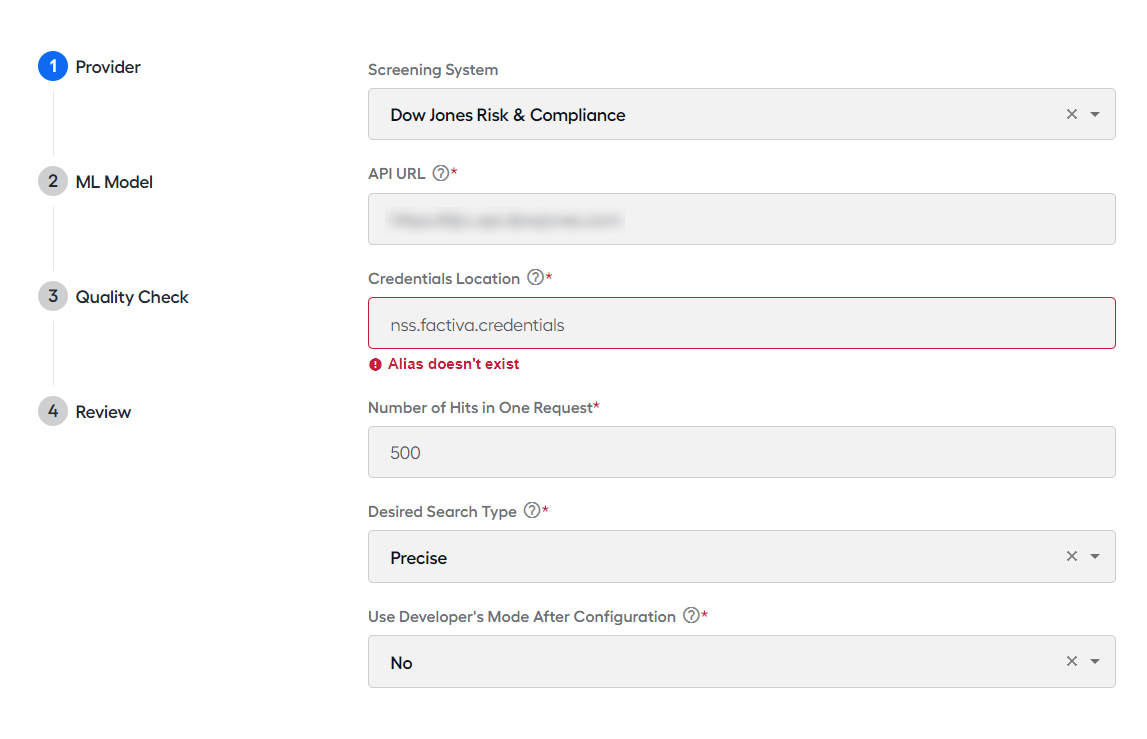
Rename variation
To rename a variation, follow the instructions below, depending on the Work.AI version you are using.
- Up to v10.2.9
- v10.3
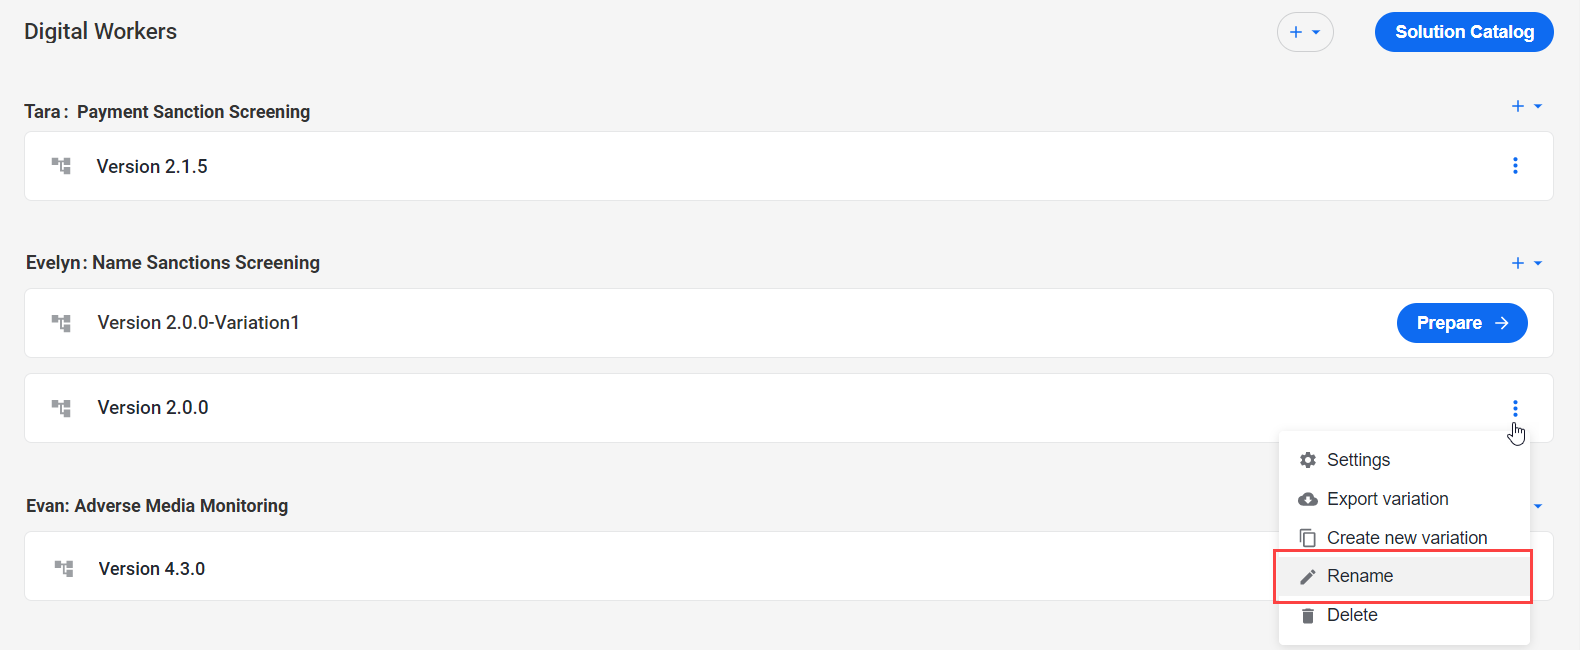
On the Digital Workers page, open the Actions menu for a variation that you want to rename, and select Rename.
In the window that follows, specify a new name and click Submit.
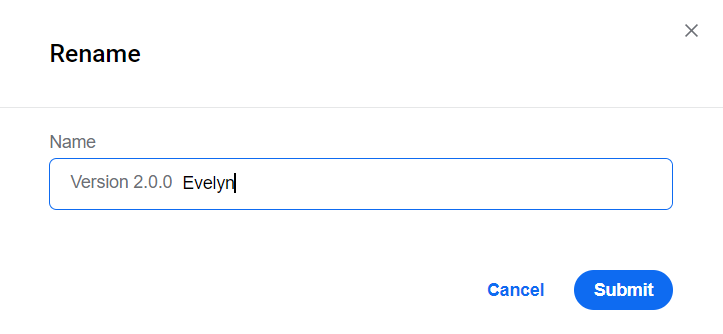
The variation is renamed, and the Renamed successfully message appears.

On the AI Agents page, open the Actions menu for a variation that you want to rename, and select Rename.
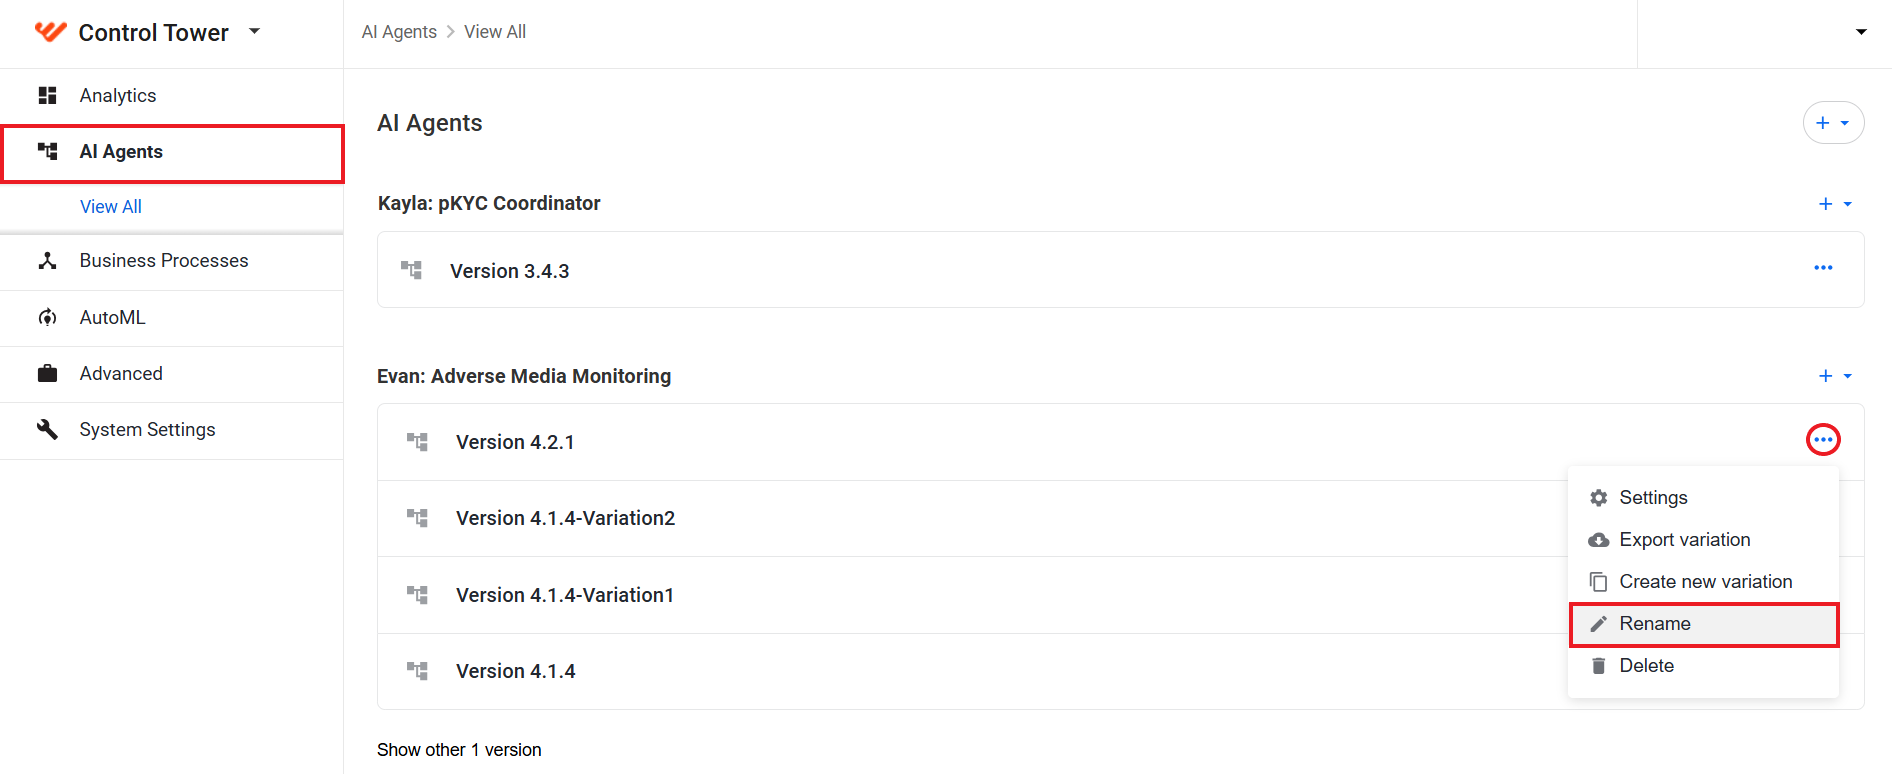
In the window that follows, specify a new name and click Submit.
The variation is renamed, and the Renamed successfully message appears.
Delete variation
Before deleting a variation, do as follows:
Make sure all running and paused BP instances are stopped. Otherwise, you cannot perform the deletion operation.
Check that you have the Delete Digital Worker Variations permission.
To remove a variation, follow the instructions below, depending on the Work.AI version you are using.
- Up to v10.2.9
- v10.3
On the Digital Workers page, open the Actions menu for a variation that you want to remove and select Delete.
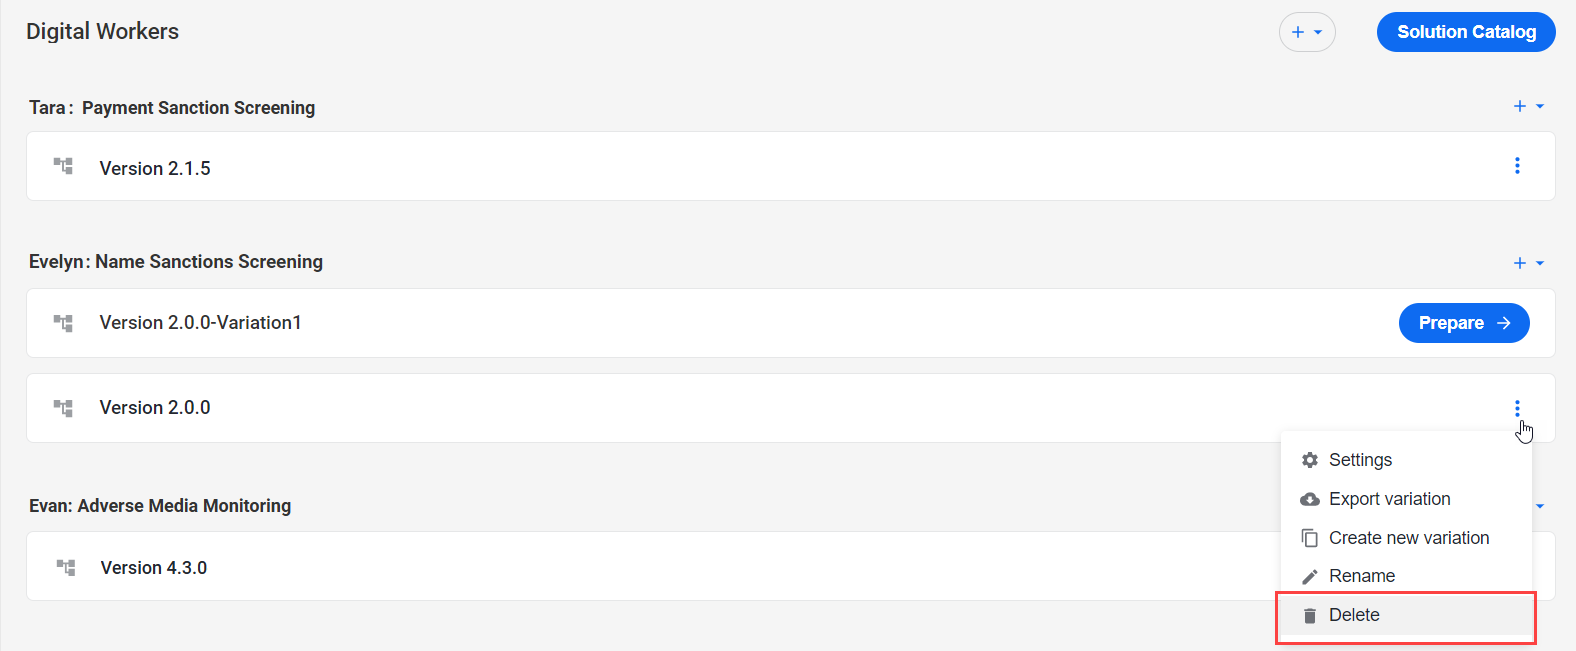
In the window that follows, click Delete.

The variation is deleted from the list, and the Deleted successfully message appears.

On the AI Agents page, open the Actions menu for a variation that you want to remove and select Delete.
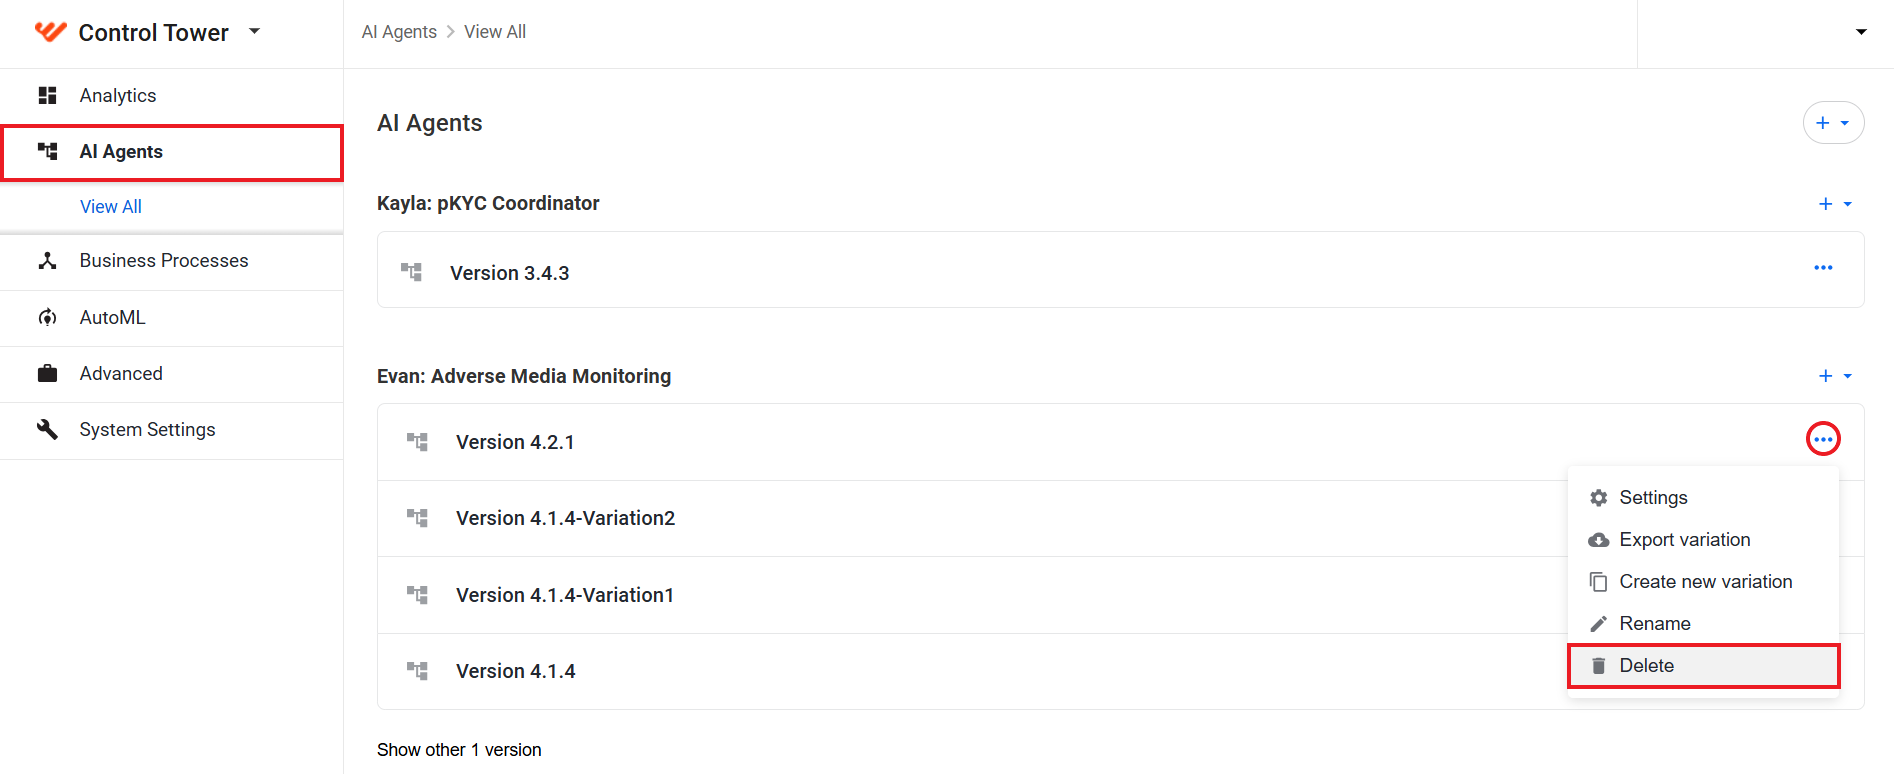
In the window that follows, click Delete.
The variation is deleted from the list, and the Deleted successfully message appears.