Build and integrate custom Business Processes
In addition to out-of-the-box Business Processes (BP), you can build custom ones and set those to be called from the Requirements validator BP instead of the Custom connector one. It might be necessary if the out-of-the-box Custom connector Business Process is not fit for your business goals or in case you need to set up Kayla to work with multiple custom providers.
Create custom Business Process
To build a custom BP for Kayla, follow the steps below:
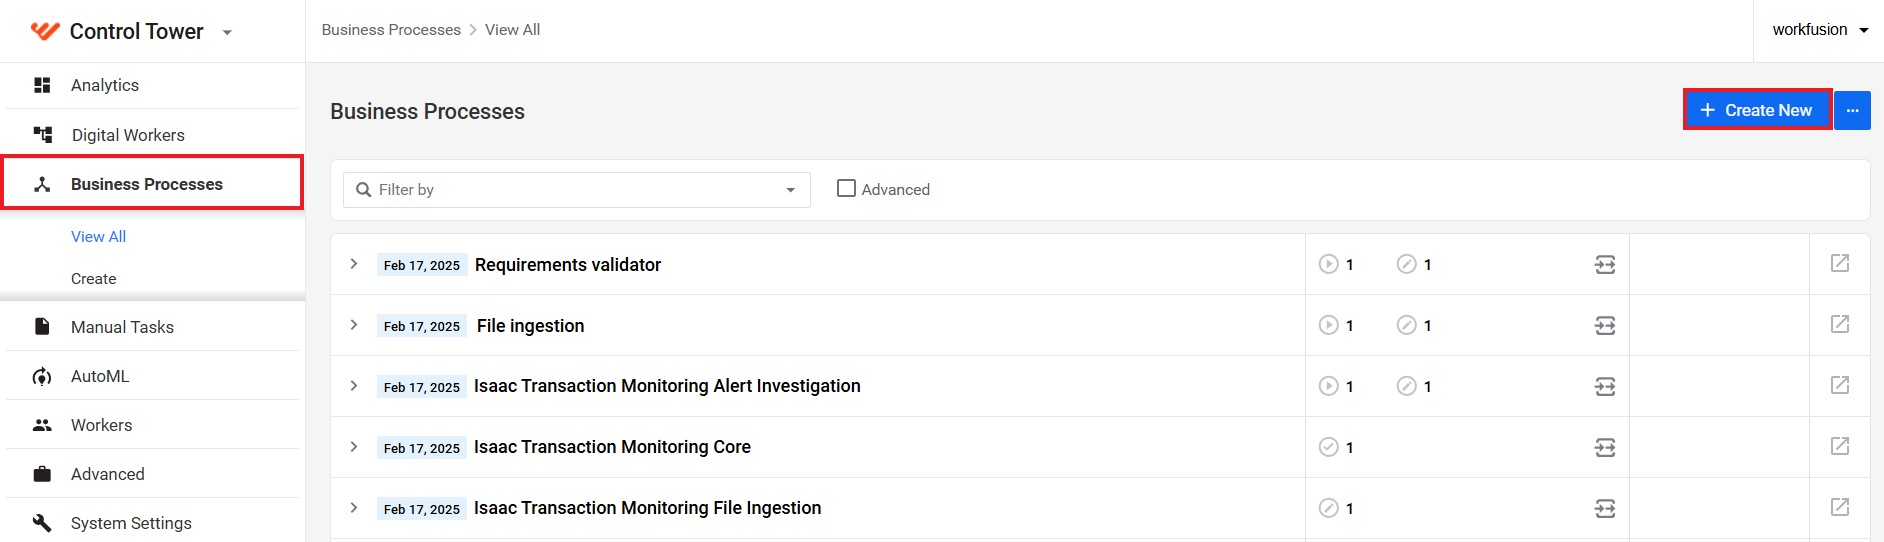
Go to Business Processes and click the Create New button.
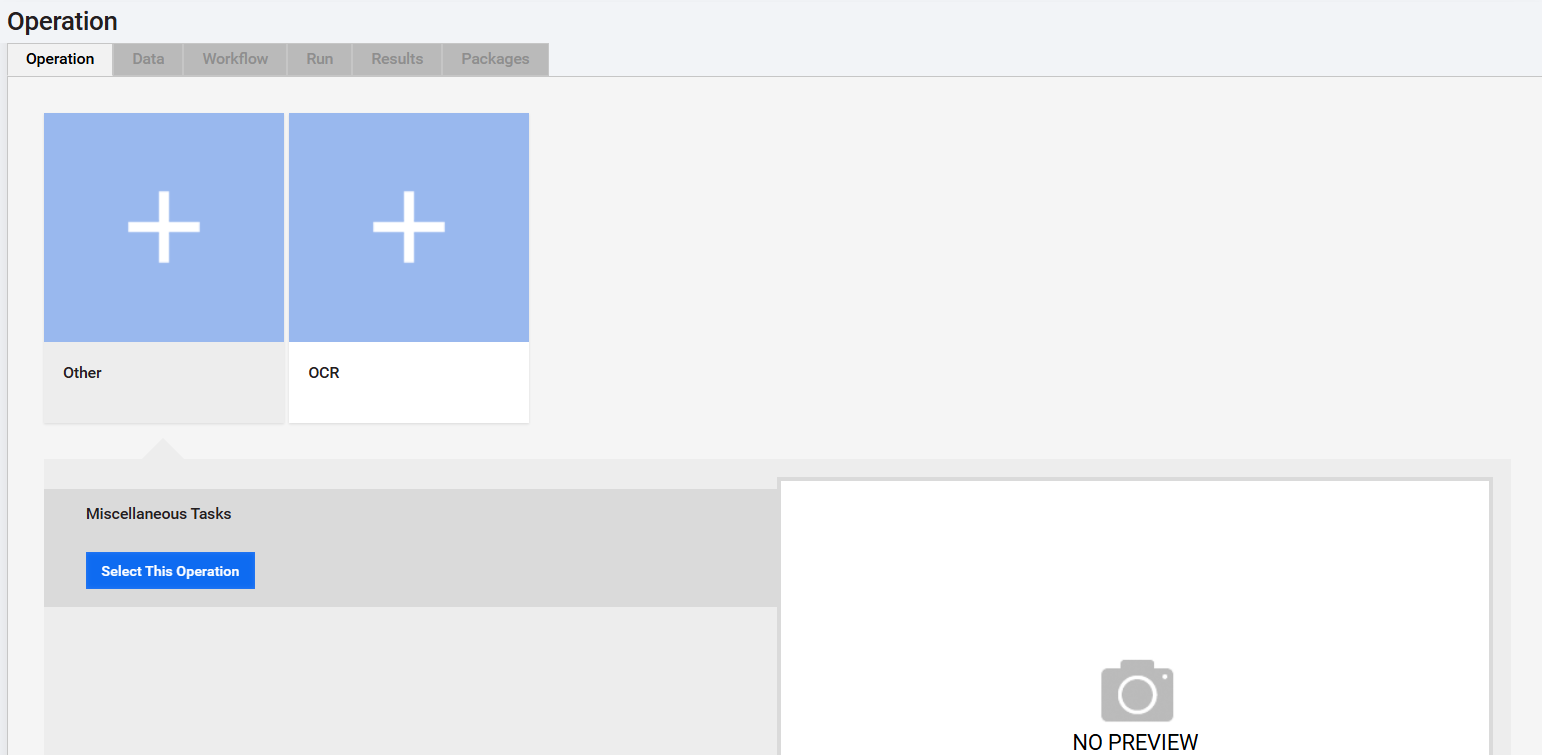
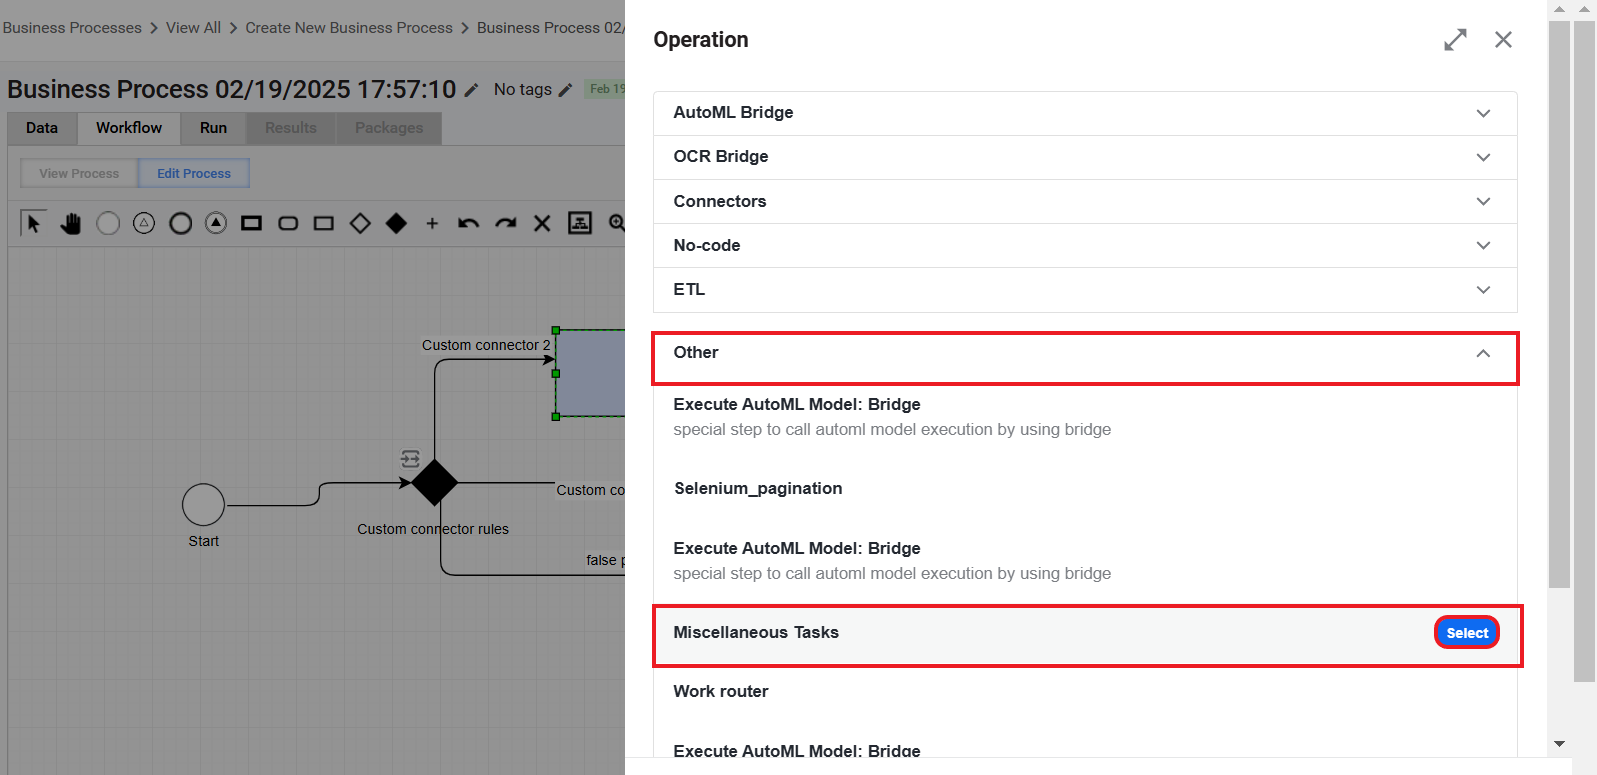
On the Operation tab, click Other > Select This Operation.
On the Data tab, select Streaming Records from External Sources. Next to the checkbox, you will see the Signal ID for the Business Process. You can leave it as is or change it to any custom one.
You will need the Signal ID to integrate the custom BP as a synchronous sub-process in the Requirements validator one.

Name the Business Process and design its workflow as required for your purposes. When designing a BP flow, mind the following considerations:
As Kayla works with schema-based Business Processes, you need to set up the inputs and outputs for each step within the BP.
The output of the custom BP must match that of the Custom connector step in the Requirements validator BP. Otherwise, the integration will not work. For details on setting the output, read the Set custom BP output section.
To design a flow for handling data from multiple custom providers, see the instructions.
On the Workflow tab, click Save to save the created Business Process.
For more information on designing schema-based BPs, read the following:
Design flow to handle multiple custom providers
Once a custom Business Process is created, follow the steps below to design a flow to ingest data from multiple custom data providers:
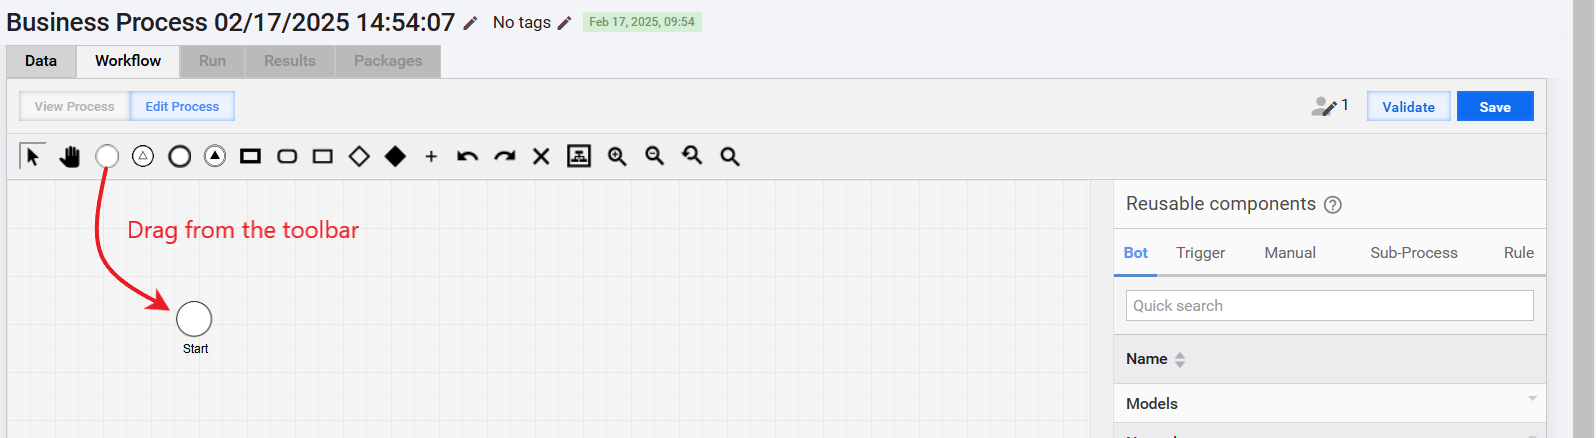
On the Workflow tab, add a Start element by dragging it from the toolbar.
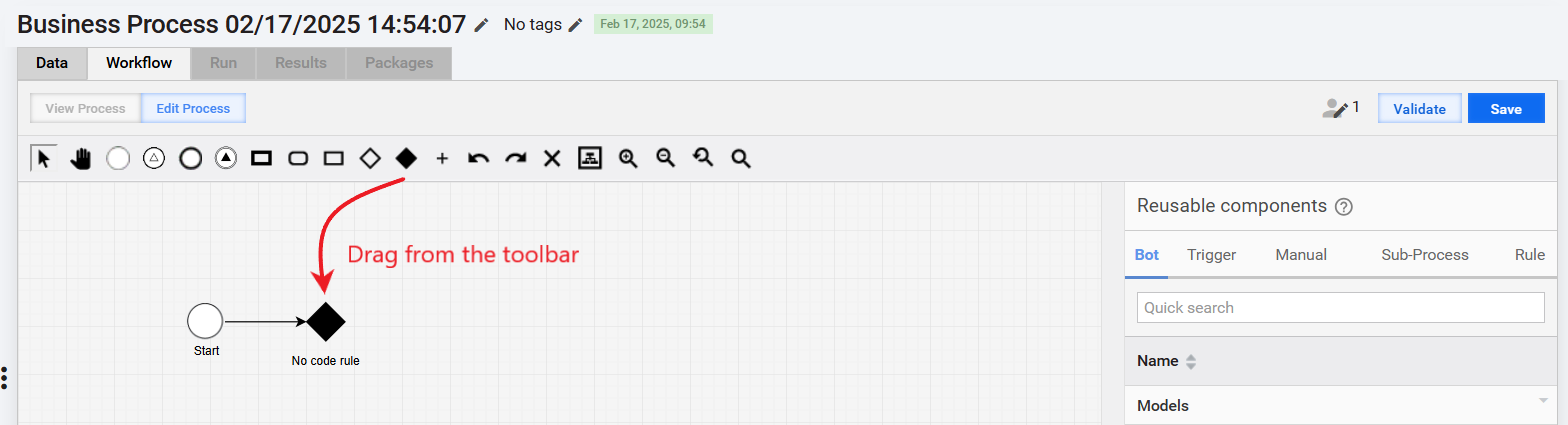
Add a No code rule step to the canvas and connect the Start element to it.
Using the Search box in the Reusable components panel, find the split-entities-by-source-processor step for the Kayla's variation you are using.
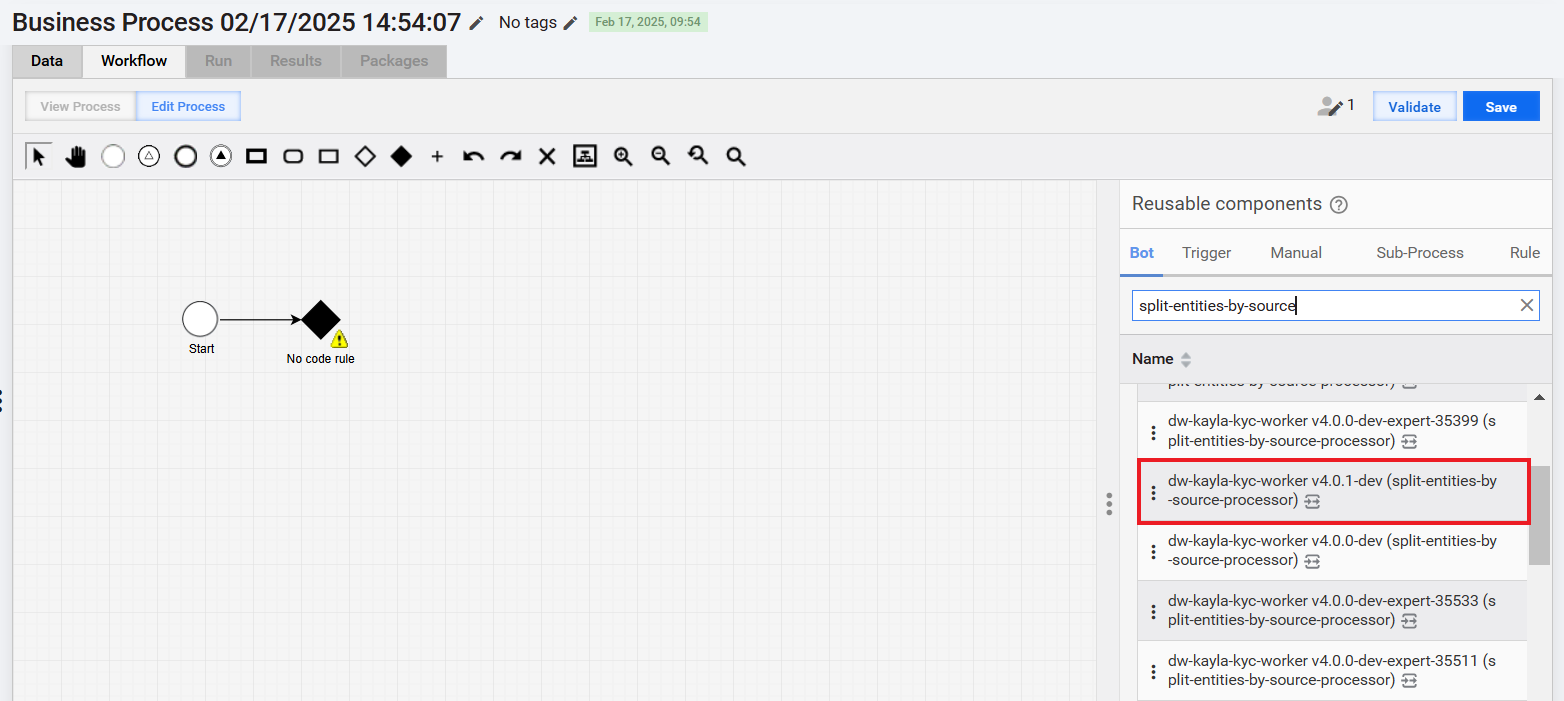
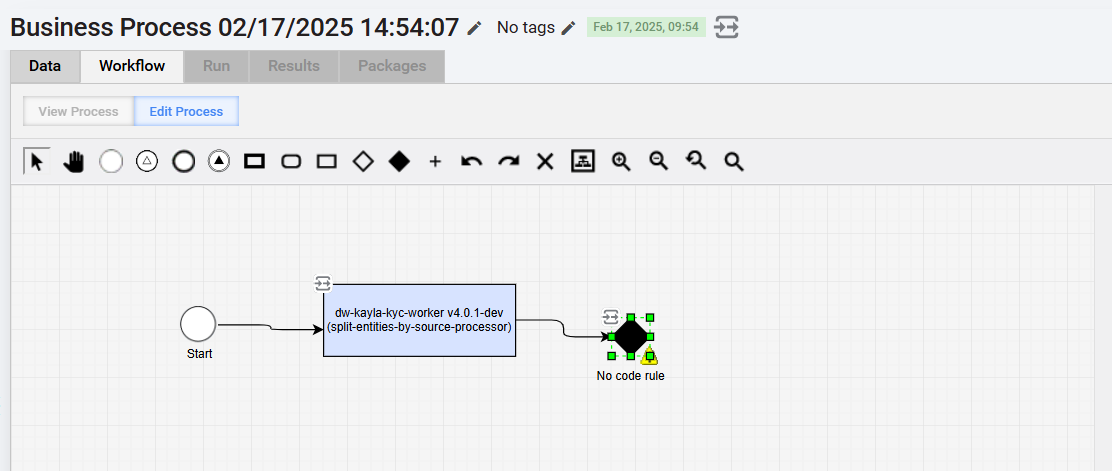
Drag the step to the canvas, placing it between the Start and the No code rule elements. Add necessary connections between the steps.
Adding the split-entities-by-source-processor step is a workaround to let you access necessary data objects for setting the rules in the Decision rules step.
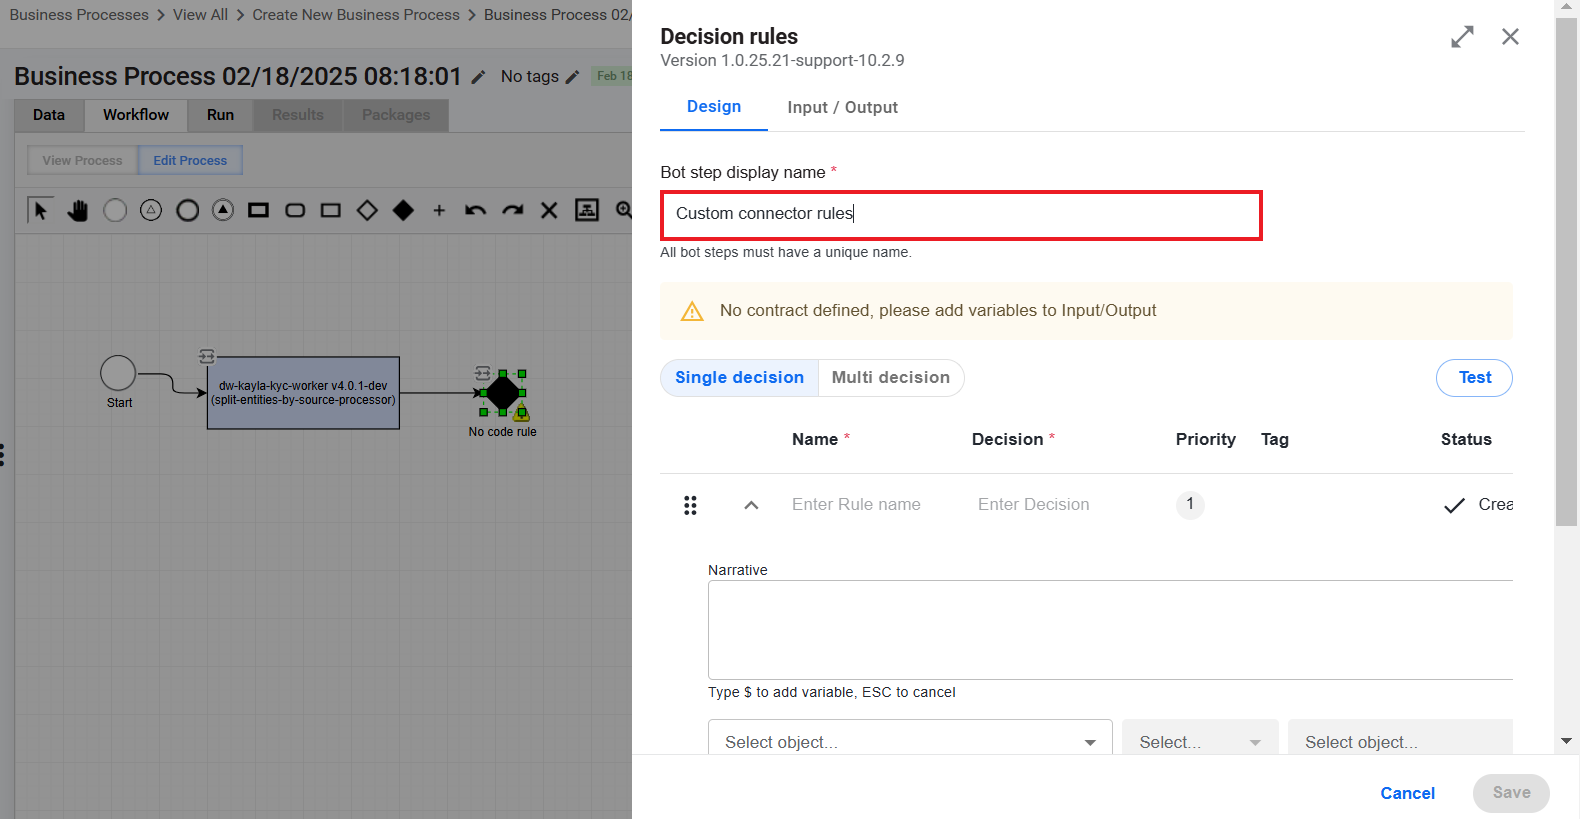
Double-click the No code rule element to open the configuration window. On the Design tab, in the Bot step display name field, specify a unique name for the step.
Switch to the Input / Output tab and click Input to add an input contract. In the Step variable drop-down box, find the
connector_configvariable and click Select.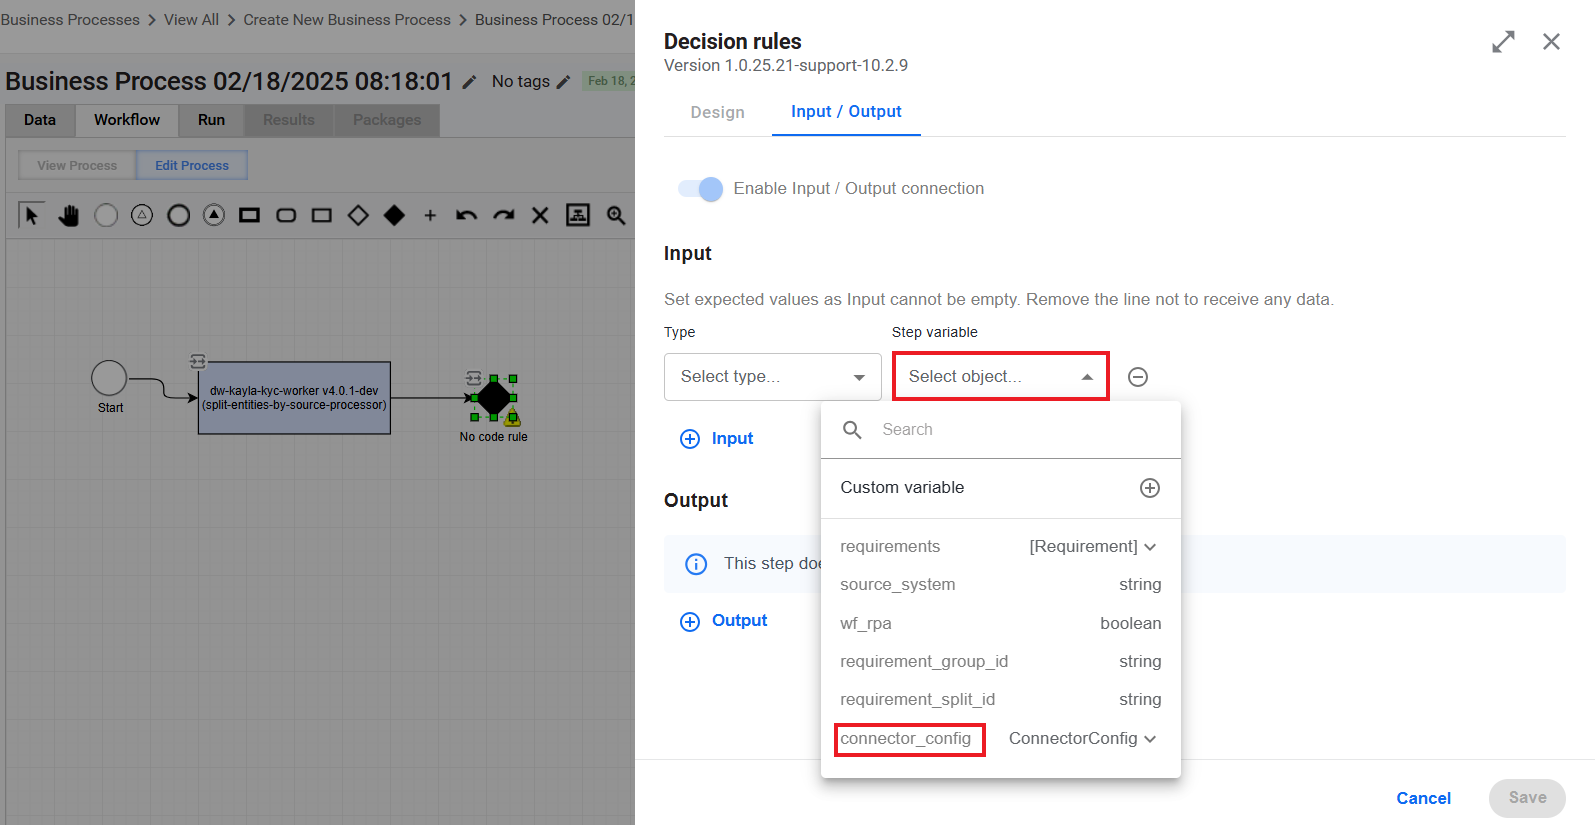
Switch back to the Design tab and add rules to match the number of custom providers you want to use. For each rule, configure the following:
Set a rule name and an expected decision in respective fields.
As a data object, select the
connector.config_codevariable.Set the operator to
equals.When setting a value, select Custom > Value and type in the code you set when configured the custom data provider in the Data providers step.
Leave the Otherwise rule as is or set up your own rule.
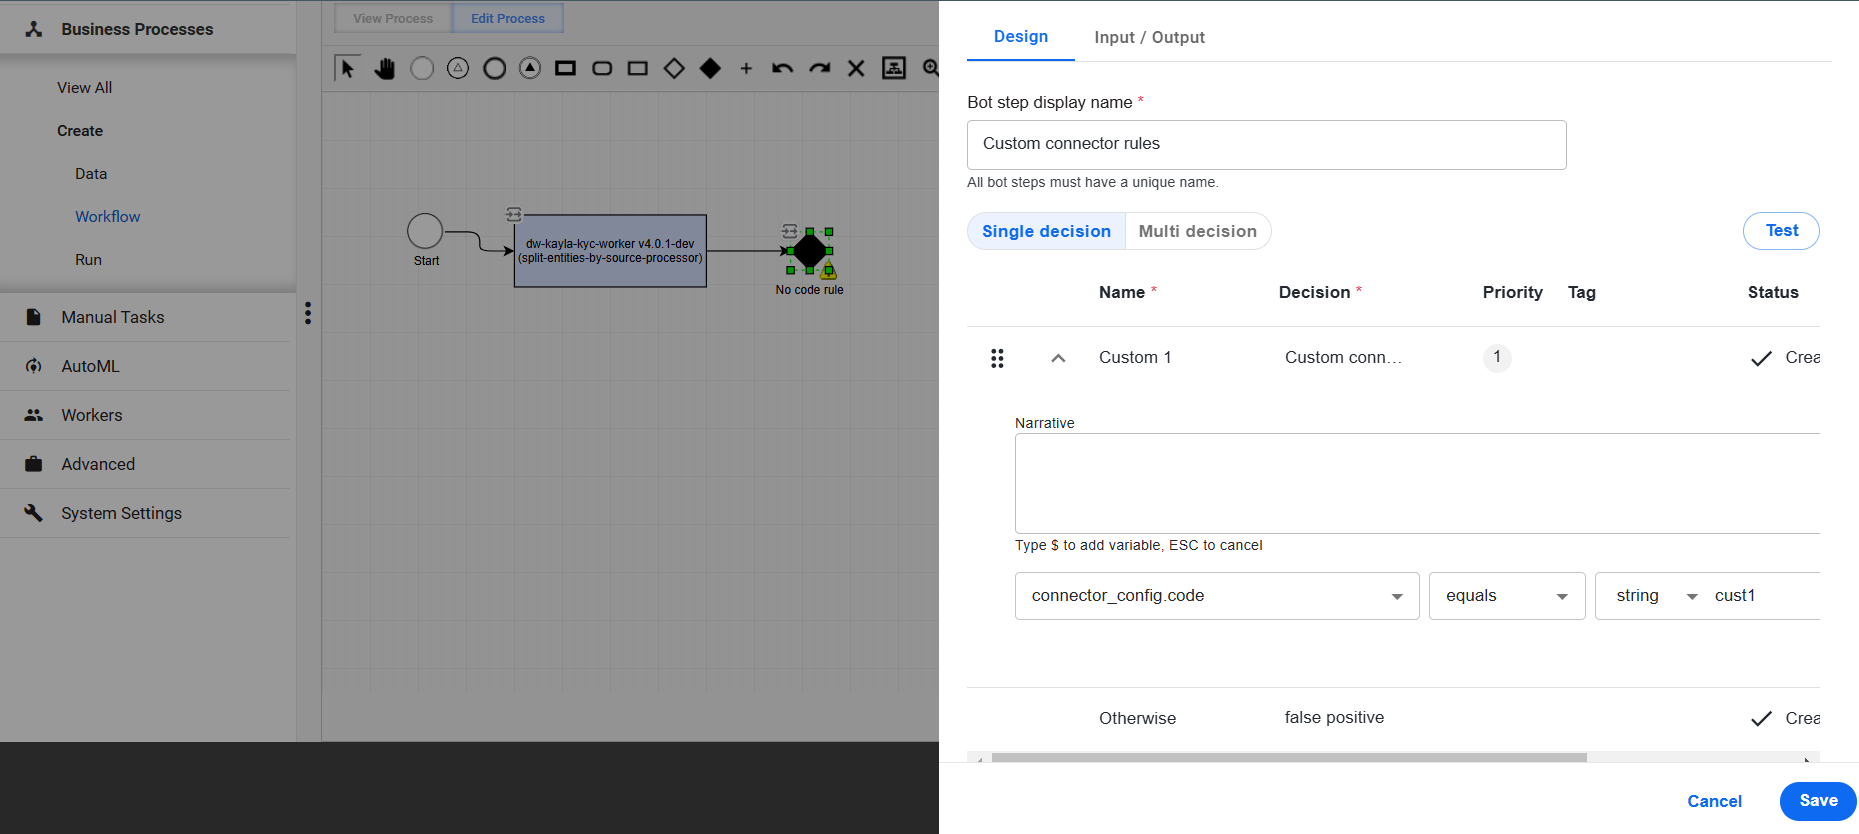
Click the Save button to save the step configuration.
On the Workflow tab, add the End element by dragging it from the toolbar and attach the outgoing connections of the No code rule step to it.
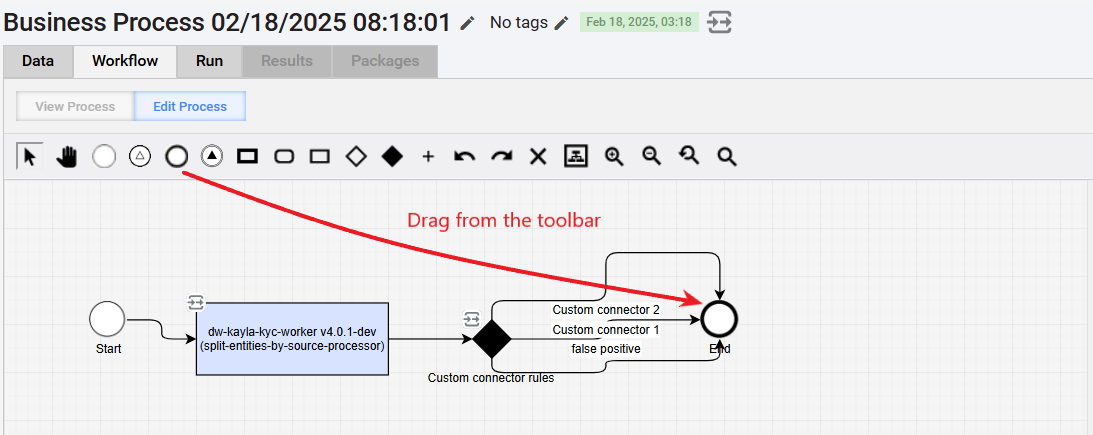
Right-click the split-entities-by-source-processor step and select Delete to remove the step from the BP flow. Delete any unnecessary connections, too.
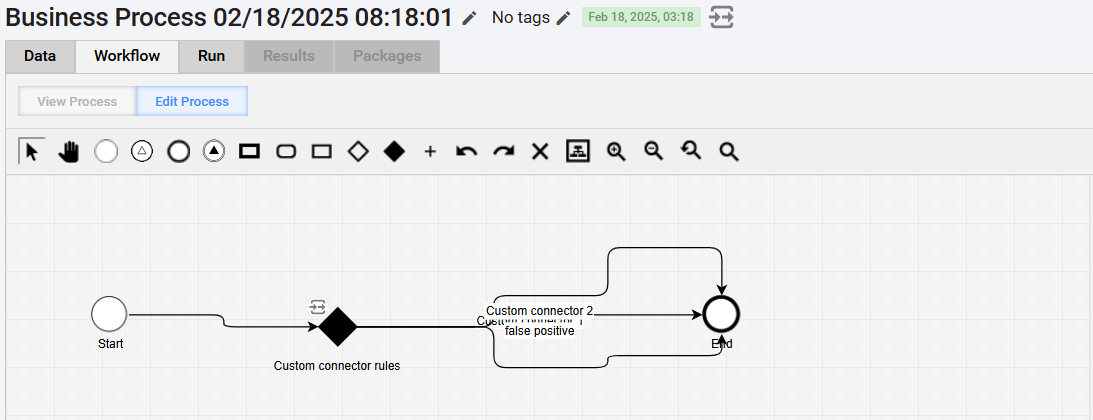
After the No code rule element, add a Bot Task element to each of its outgoing connections and configure the steps as described in the Set custom BP output section. Adding and configuring the step is essential to set the output of the BP to match that of the Custom connector step in the Requirements validator BP.
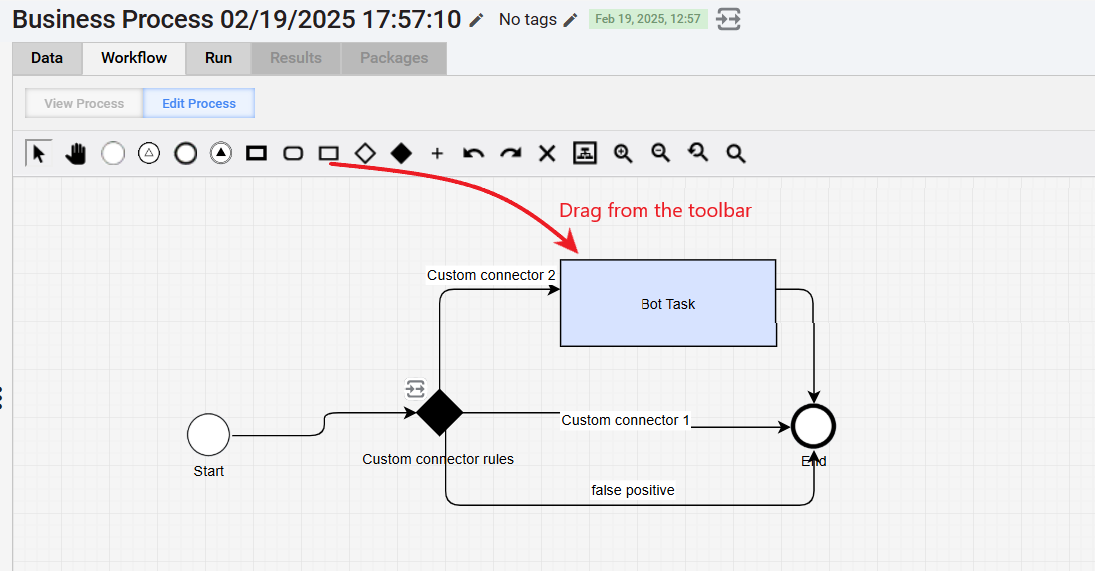
After all necessary configuration is completed, click the Save button to save the custom BP flow.
For more information on setting rules, read Configure Decision rules step.
Set custom BP output
For the integration with the Requirements validator BP to work properly, the output of the custom BP you created must match the variables expected of the Custom connector step in the Requirements validator BP. To ensure that, follow the steps below:
In your custom BP workflow, before the End element, add the Bot Task element by dragging it from the toolbar and connect it to the preceding element and the End one.
If you have multiple incoming flows to the End element, add and configure the Bot Task element for each of them.
Double-click the Bot Task element in the flow and choose Other > Miscellaneous Tasks.
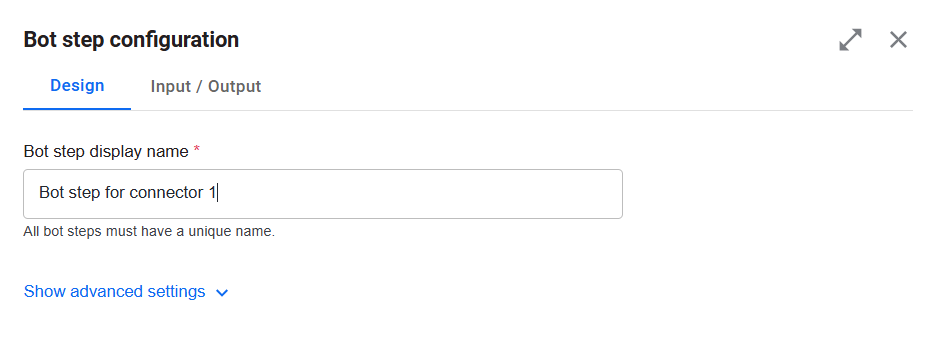
Set a unique name for the step and switch to the Input / Output tab.
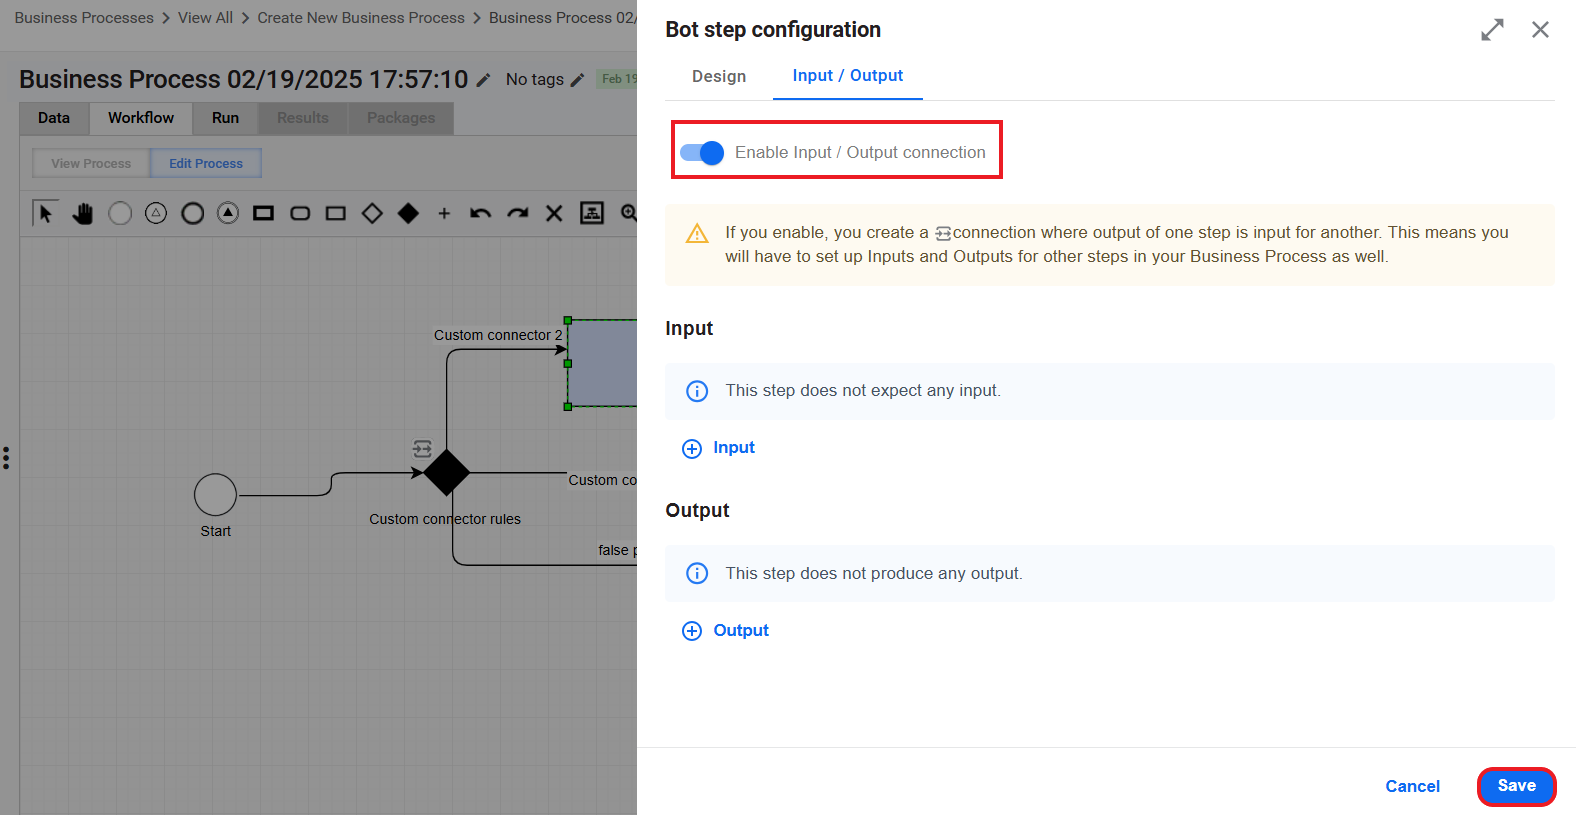
On the Input / Output tab, switch the Enable Input / Output connection toggle, set the input and output variables using the data from respective tables, and click Save. For detailed instructions on setting inputs and outputs, read the guide.
Input variables
| Input data object / array | Properties |
|---|---|
| InputFields object |
|
| ConnectorConfig object |
|
| Requirement array |
|
Output variables
| Variable | Type | Description |
|---|---|---|
results | String | A JSON string containing an array of objects with the fields set during Kayla's configuration, for example: "[{"field1":"value1", "fields2":"value2"},{"field3":"value3"}]". |
error | String | An error message the custom connector wants to pass along to Kayla. Possible values: "connector_api_error", "field_error", or a custom error message. |
failed | Boolean | A Boolean value to indicate whether the connector succeeded or failed in gathering the information. |
connector_input | String | This value is stored in the audit table to indicate what query or input fields were used to gather information. |
missing_field | String | If the value for the error variable is returned as field_error, this variable can be utilized to send the names of the missing fields. |
Integrate custom BP
To integrate the custom BP as a synchronous sub-process in the Requirements validator one, follow the steps below:
On the Data tab of your custom BP, copy the Signal ID displayed next to the Streaming Records from External Sources checkbox.

Open the Requirements validator Business Process, go to the Workflow tab, and make sure the Edit mode is on (the Edit Process button is active).
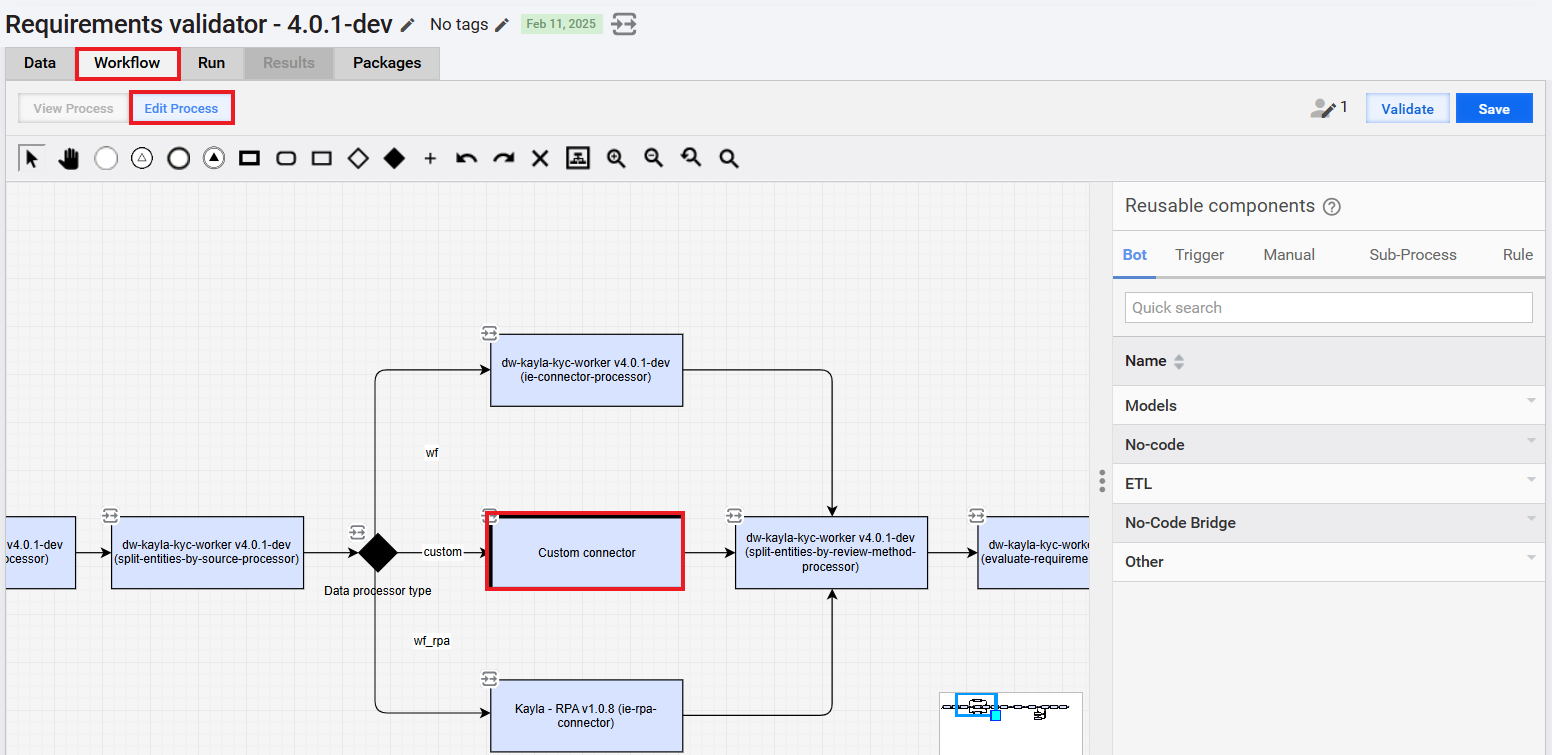
Double-click the Custom connector synchronous sub-process step. In the configuration window, find the Signal ID field and paste the ID you copied in your custom BP.
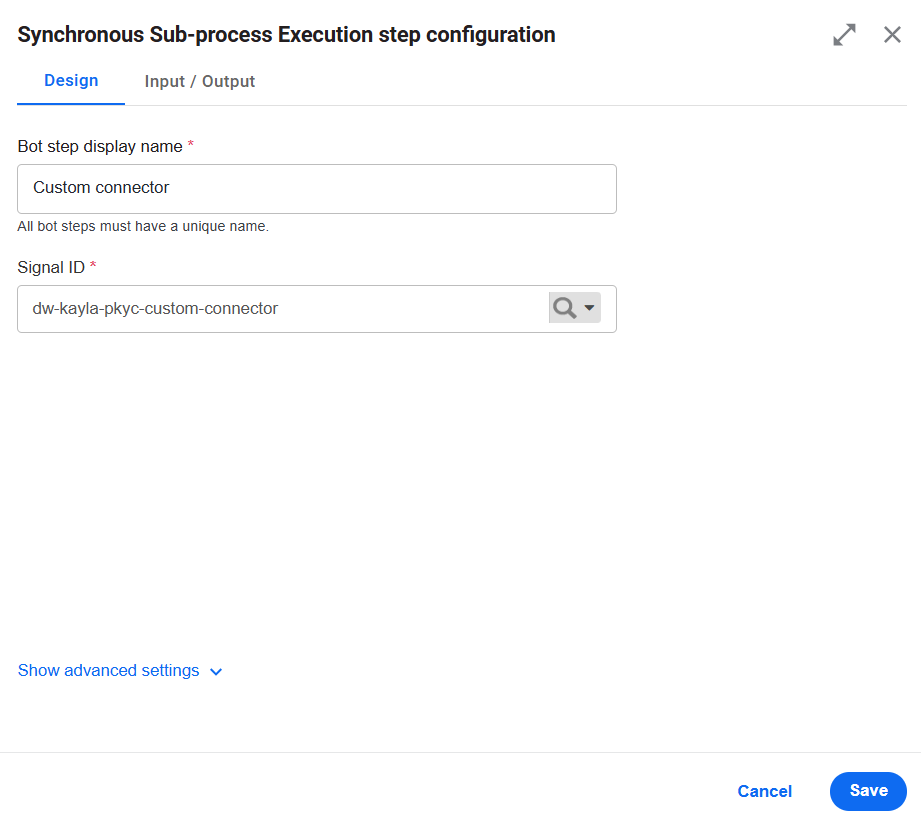
Click the Save button to save the changes in the step configuration.
On the Workflow tab, click the Save button to save the modified Requirements validator Business Process.