
Configure preferences
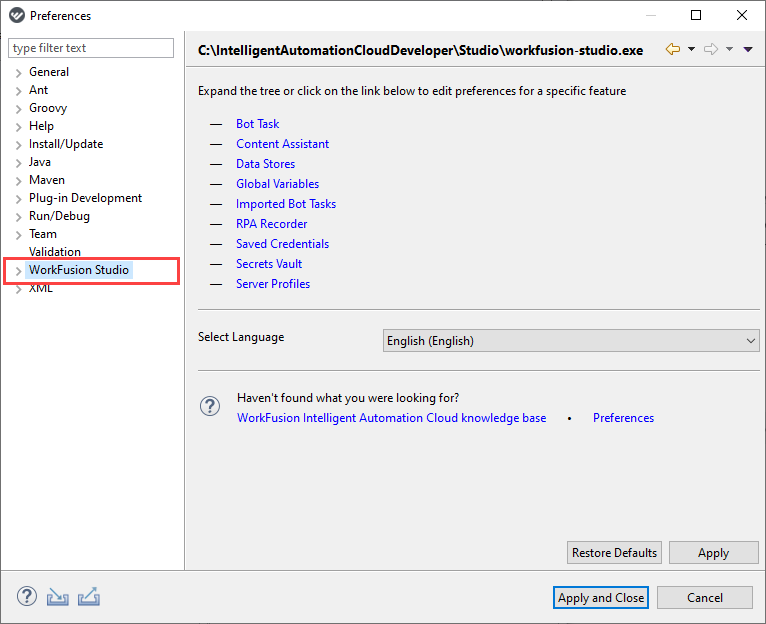
There are some global parameters for WorkFusion Studio to define component settings, their general behavior, and so on. The most widely used setup refers to the Studio settings. Go to Window > Preferences > WorkFusion Studio.
Language settings
You can change the display language to your preferred language at any time. The list of languages includes English (default), Spanish, and Japanese.
To set up your language preferences, do as follows:
Go to Window > Preferences > WorkFusion Studio.
Select the language you need in the Select Language dropdown.
To save, click Apply and Close.
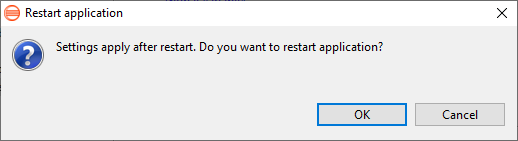
The settings apply after restart. Click OK to confirm the changes.
note
Tab names are translated only when you select a tab and make it active. That is an Eclipse-related issue. To learn more, see here.
Bot Task
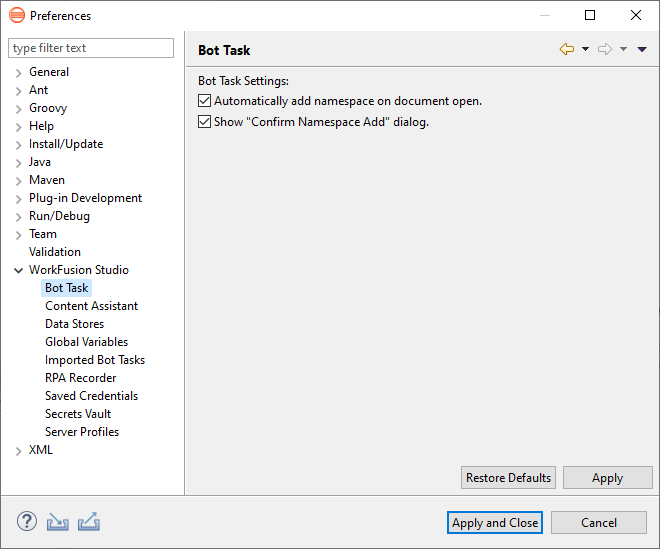
Bot Task settings refer to working with Bot Tasks. Here, you can enable or disable the following options:
- Automatically add namespace on document open
- Show the "Confirm Namespace Add" dialog
Content Assistant
In WorkFusion Studio, you can adjust Content Assistant to the purposes of your development tasks. Go to Windows > Preferences > WorkFusion Studio > Content Assistant to fine-tune the function.
note
To make scripting faster, do not enable Content Assistant if you use the Code perspective.
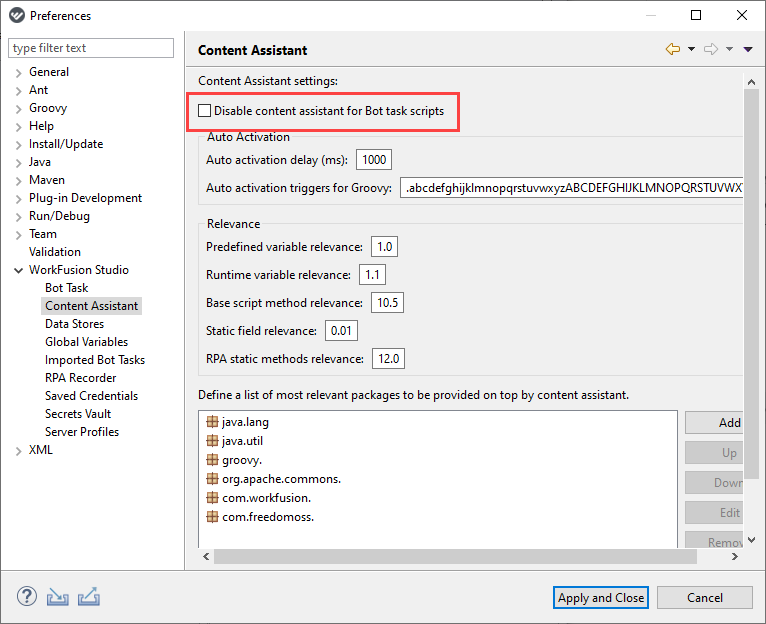
You can adjust the following options:
- Auto activation. Define how fast Content Assistant prompts the suggestions (in milliseconds) and keyboard keys to activate it in Groovy:
- Auto activation delay (ms)
- Auto activation triggers for Groovy
- Relevance. Rank the constructs according to their importance for your programming preferences. The higher the relevance, the higher the place of a construct in the list. The available options are as follows:
- Predefined variable relevance
- Runtime variable relevance
- Base script method relevance
- Static field relevance
- RPA static methods relevance
- Packages. Define packages to be used as a source for Content Assistant and their ranking order.
Data Stores
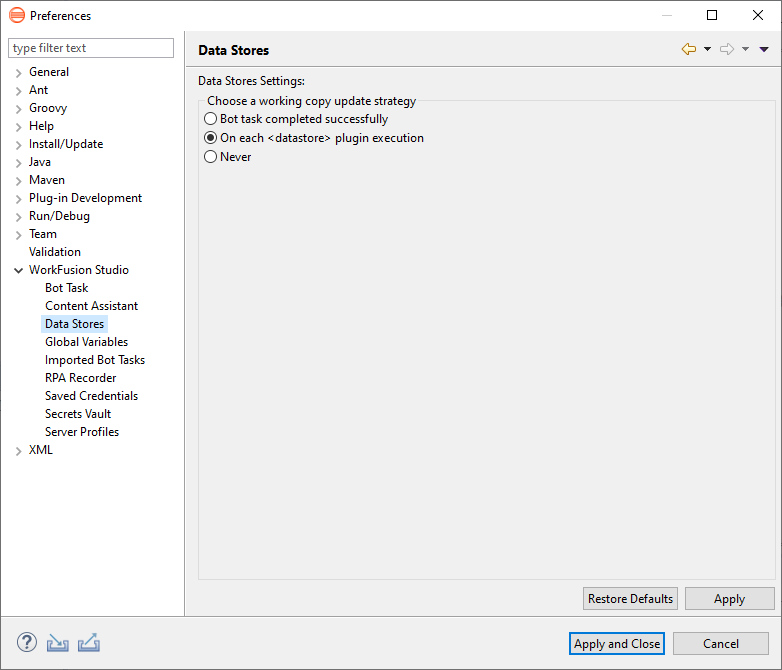
Data Stores settings allow selecting a working copy update strategy. The available options are as follows:
- Bot task completed successfully
- On each Data Store plugin execution
- Never
RPA Recorder
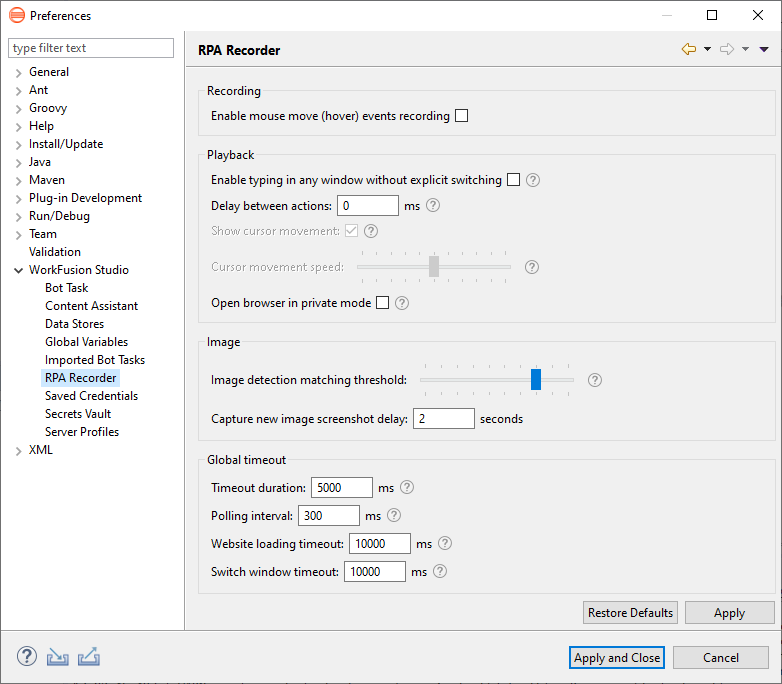
To open RPA Recorder preferences, go to Window > Preferences > WorkFusion Studio > RPA Recorder.
- Recording:
- Enable mouse move (hover) events recording. Enable or disable capturing of mouse actions while a recording is made.
- Playback:
- Enable typing in any window without explicit switching. Enable for old scripts with typing on the screen to work smoothly. The parameter is applied on playback or while exporting to a Bot Task, a Groovy script, or Control Tower. By default, the option is disabled. Mind that enabling it makes your automation less stable if some popup windows appear.
- Delay between actions. Wait for the specified time before performing the next action in the script.
- Open browser in private mode. When selected, browser tabs are opened in the private mode.
- Image:
- Image detection matching threshold. When looking for an image on the screen, choose how similar it needs to be to the recorded one.
- Capture new image screenshot delay. Specify a default delay for the Capture new image function.
- Global timeout settings:
- Timeout duration. If an action fails, specify how long to wait for it to complete before stopping the script.
- Polling interval. If an action fails, specify how often to retry it. The action retries until the timeout expires.
- Website loading timeout. Define the default maximum time to wait for a website to load. This setting can be configured for each Open Website action separately.
- Switch window timeout. Specify the maximum time to switch to a window. The default value is 6,000 ms.
Secrets Vault
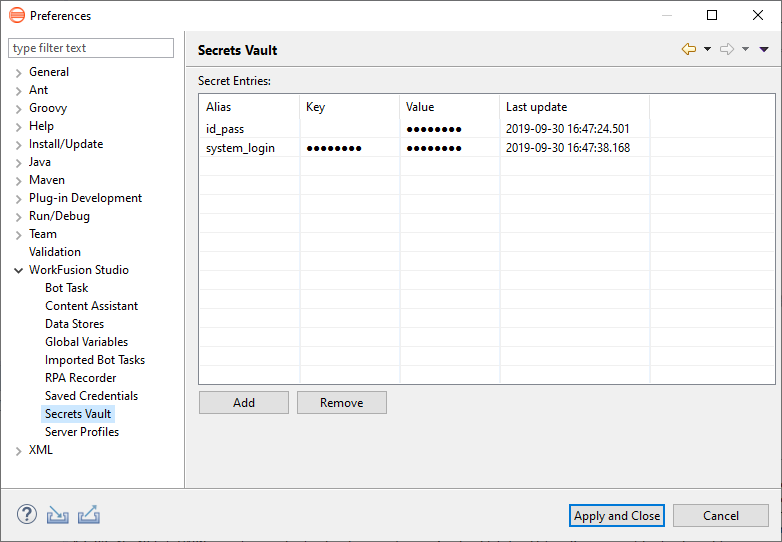
The data stored in Secrets Vault is not shown in recordings, logs, system files, or bot configs. It allows sharing scripts with other users without exposing confidential data.
To use Secrets Vault, go to Window > Preferences > WorkFusion Studio > Secrets Vault.
Add secret entry
To add an entry to the Secrets Vault, do as follows.
- Press Add.
- Insert Alias, Key, and Value. The changes are saved automatically.
- Alias serves to distinguish secret entries and must be unique to be used in recordings.
- Key and Value are designed to save the login and password information, respectively.
tip
To have only one secure data record, save it in either the Key or Value field of your choice and leave the other field empty.
caution
The data in the Key and Value fields is encrypted. Thus, you cannot view it when opening Secrets Vault or editing the entry.
Edit secret entry
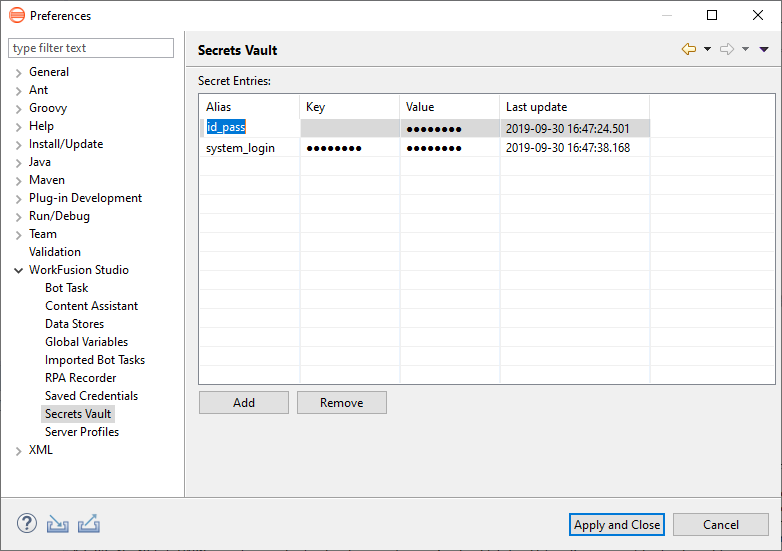
To edit an entry, click the field you want to edit and insert the new data. The changes are saved automatically.
Delete secret entry
To delete an existing entry, click on it and press Remove.
caution
The changes made to secret entries are not automatically reflected for RPA Recorder variables. You have to update these values manually.
Server Profiles
The Server Profiles tab contains the settings required for the correct work of all server components.
note
If you work with different environments (development, production) and need to publish your scripts to different Control Towers, use several Server Profiles in Studio and switch between them when required.
To open Server Profiles, go to Window > Preferences > WorkFusion Studio > Server Profiles.
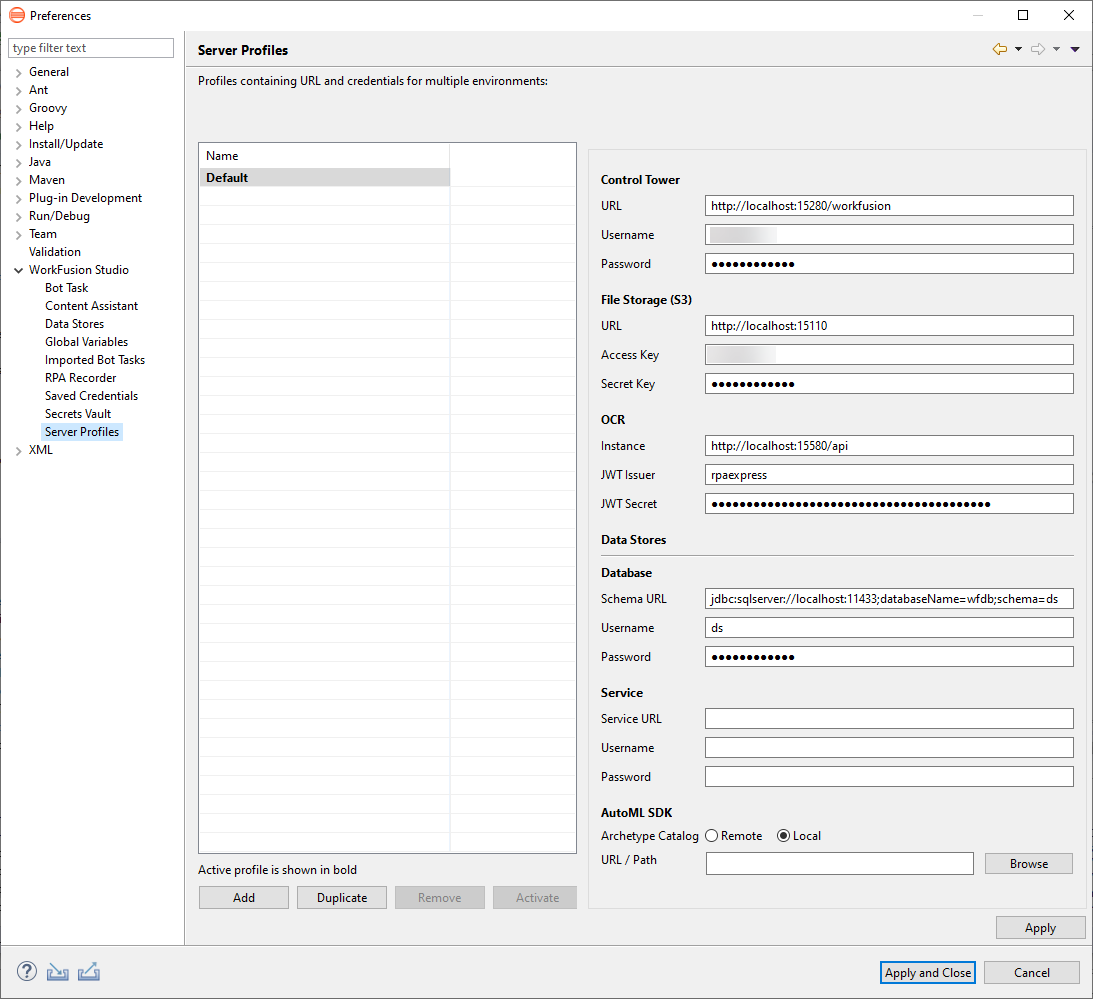
For each server profile, you can specify the following preferences:
- Control Tower:
- URL: URL to Control Tower using the server hostname or IP address
- Username: username to access Control Tower defined during the installation in the Administrator account
- Password: password to access Control Tower defined during the installation in the Administrator account
- File Storage (S3):
- URL: URL to S3 File Storage defined during the installation using the server hostname or IP address
- Access Key: username to access File Storage defined during the installation in the Administrator account
- Secret Key: password to access File Storage defined during the installation in the Administrator account
- OCR:
- Instance: URL to OCR defined during the installation using the server hostname or IP address
- JWT Issuer: username to use OCR created during the installation
- JWT Secret: password to use OCR created during the installation
- Data Stores > Database:
- Schema URL: URL to PostgreSQL scheme
- Username: PostgreSQL username
- Password: PostgreSQL password
- Data Stores > Service:
- Service URL: URL to the Control Tower application
- Username: username to access Control Tower
- Password: password to access Control Tower
- Data Stores > AutoML SDK:
- Archetype Catalog > Local
- URL/Path: URL or path to a local catalog file or the directory containing the catalog file
- Archetype Catalog > Remote:
- URL/Path: URL or path to a remote catalog file or the directory containing the catalog file
- Username
- Password
- Archetype Catalog > Local
- Data Stores > Agent:
- URL: URL to Agent responsible for work of server components
Add profile
You can have several server profiles configured for working with different servers. To create a new profile, click Add, enter the required parameters, and click Apply and Close to save the server profile.
Activate profile
To make a server profile active, select it in the list of Server Profiles and click Activate.
Edit profile
To edit server profile settings, select the server profile you need in the list of Server Profiles, enter the changes, and click Apply and Close.
warning
On making any changes to the selected server profile, click Apply and Close, close Studio, and open it again to check whether everything is in place.
Remove profile
To delete a server profile that is no longer in use, select it in the list of Server Profiles and click Remove.