View normalizer setup example
The article illustrates how you can set up normalizers via AutoML UI to achieve a better-quality model output for a dataset.
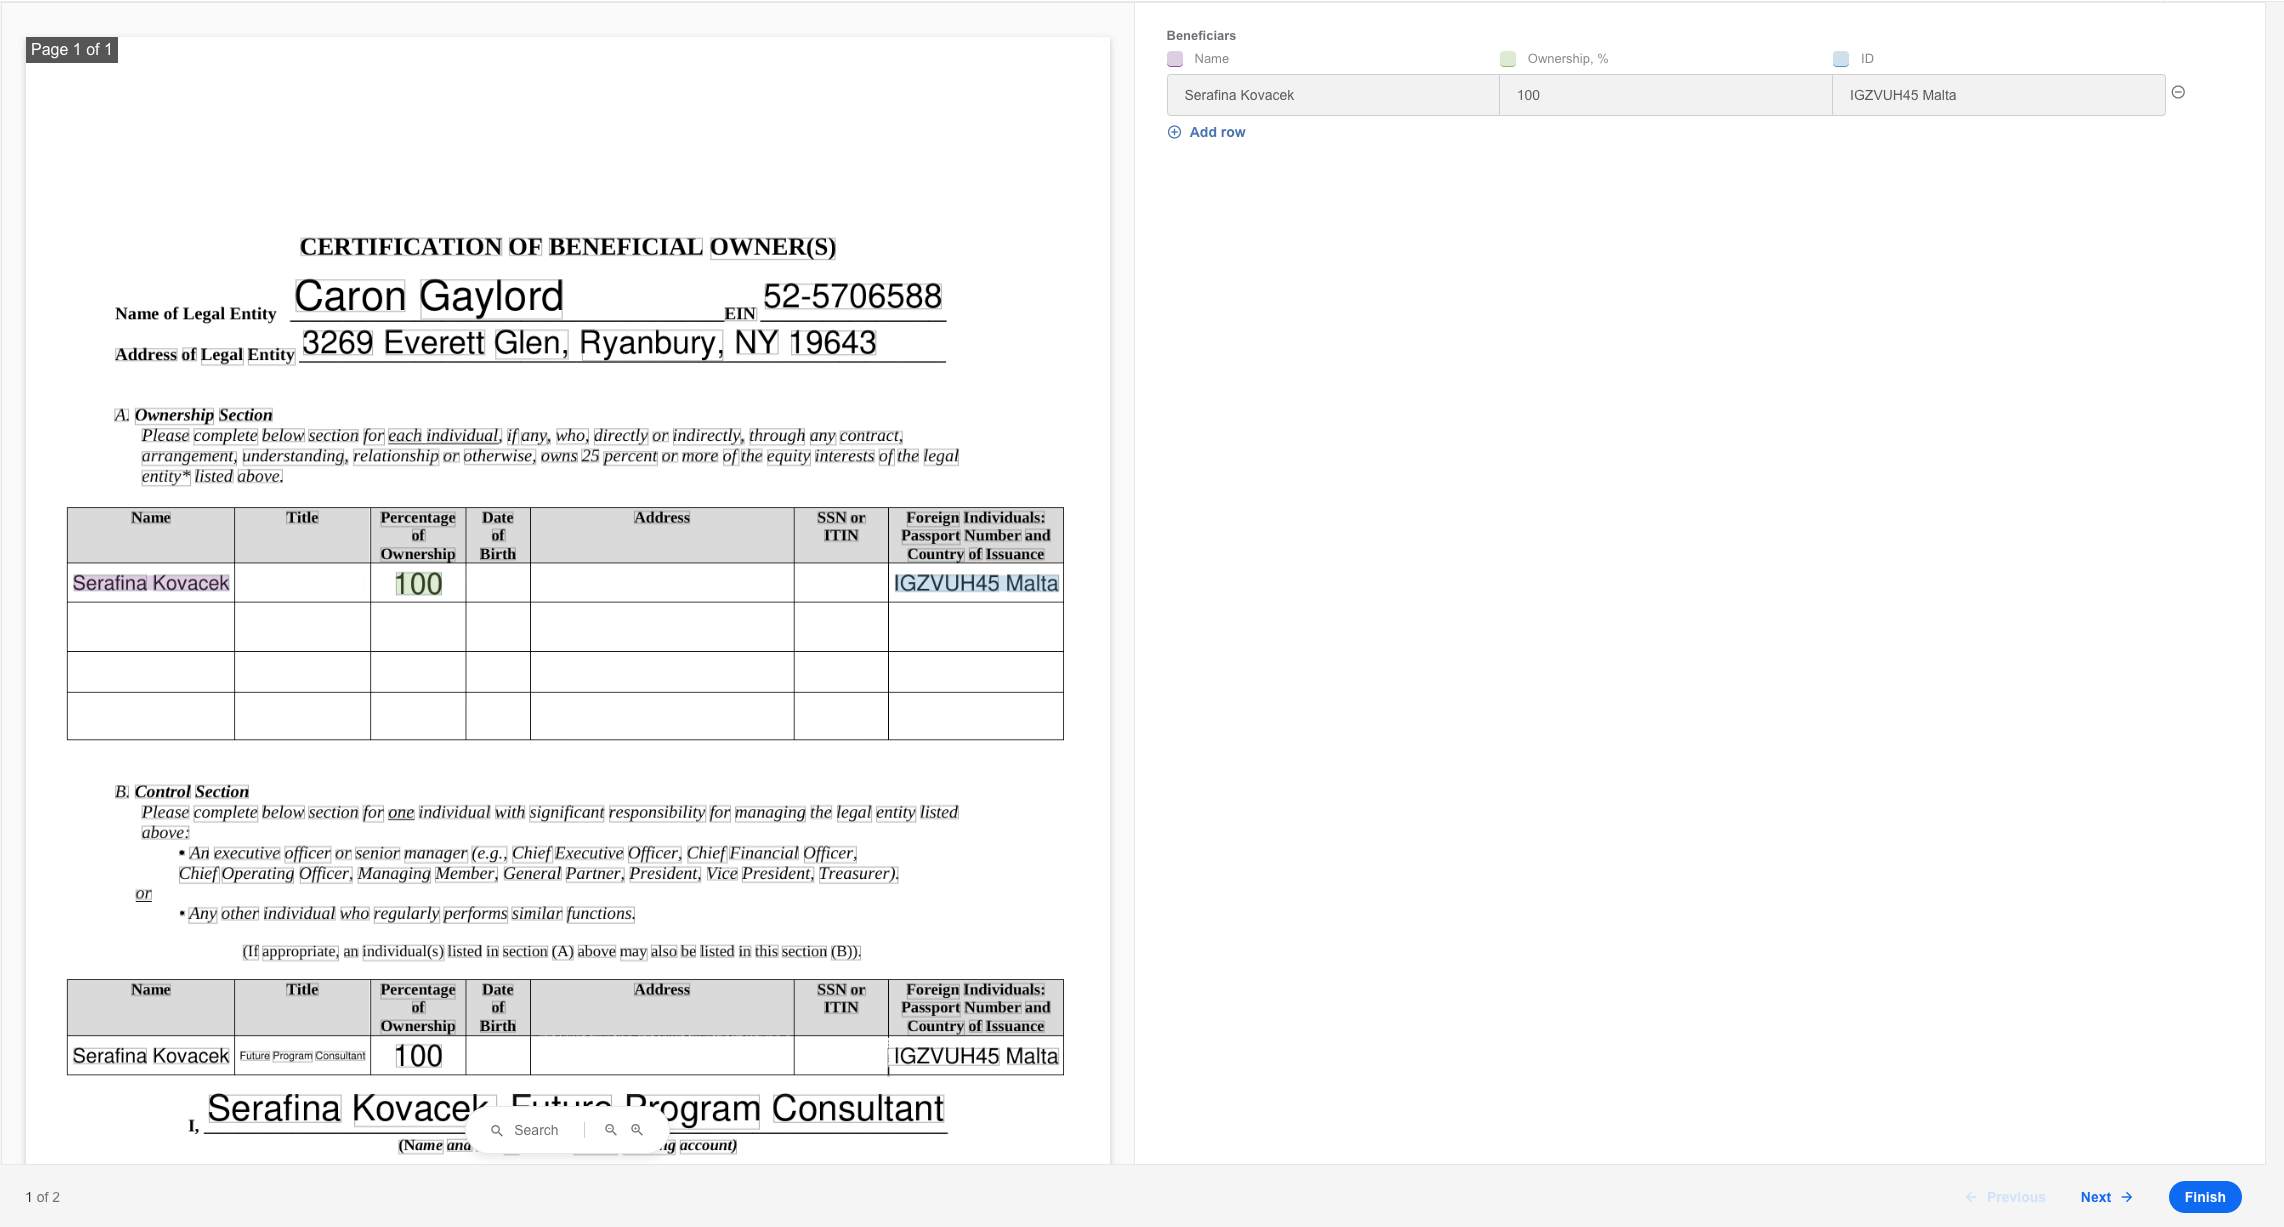
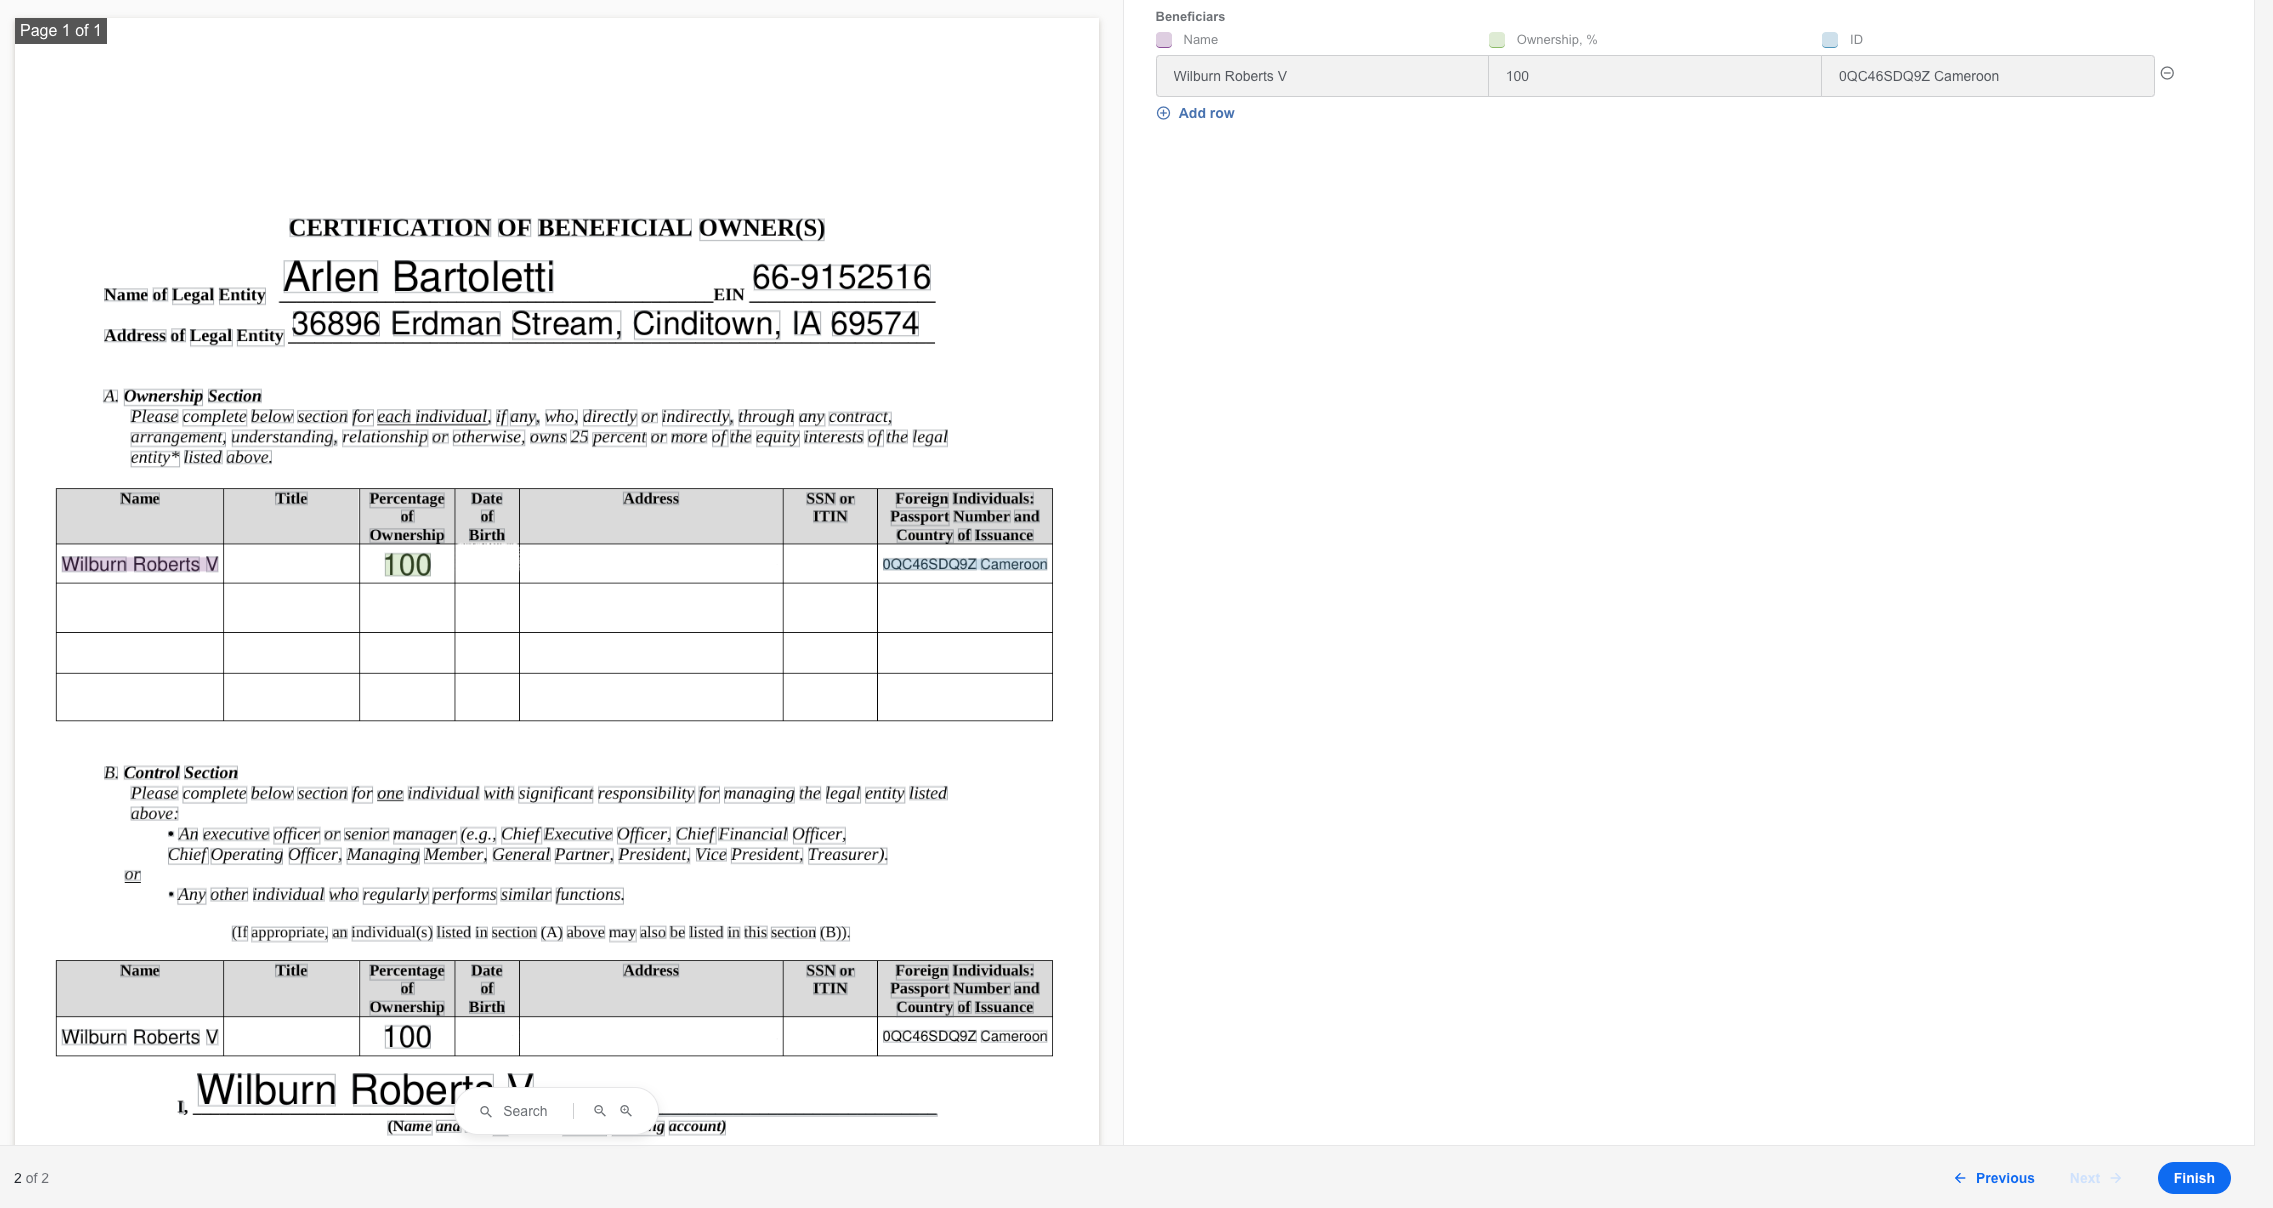
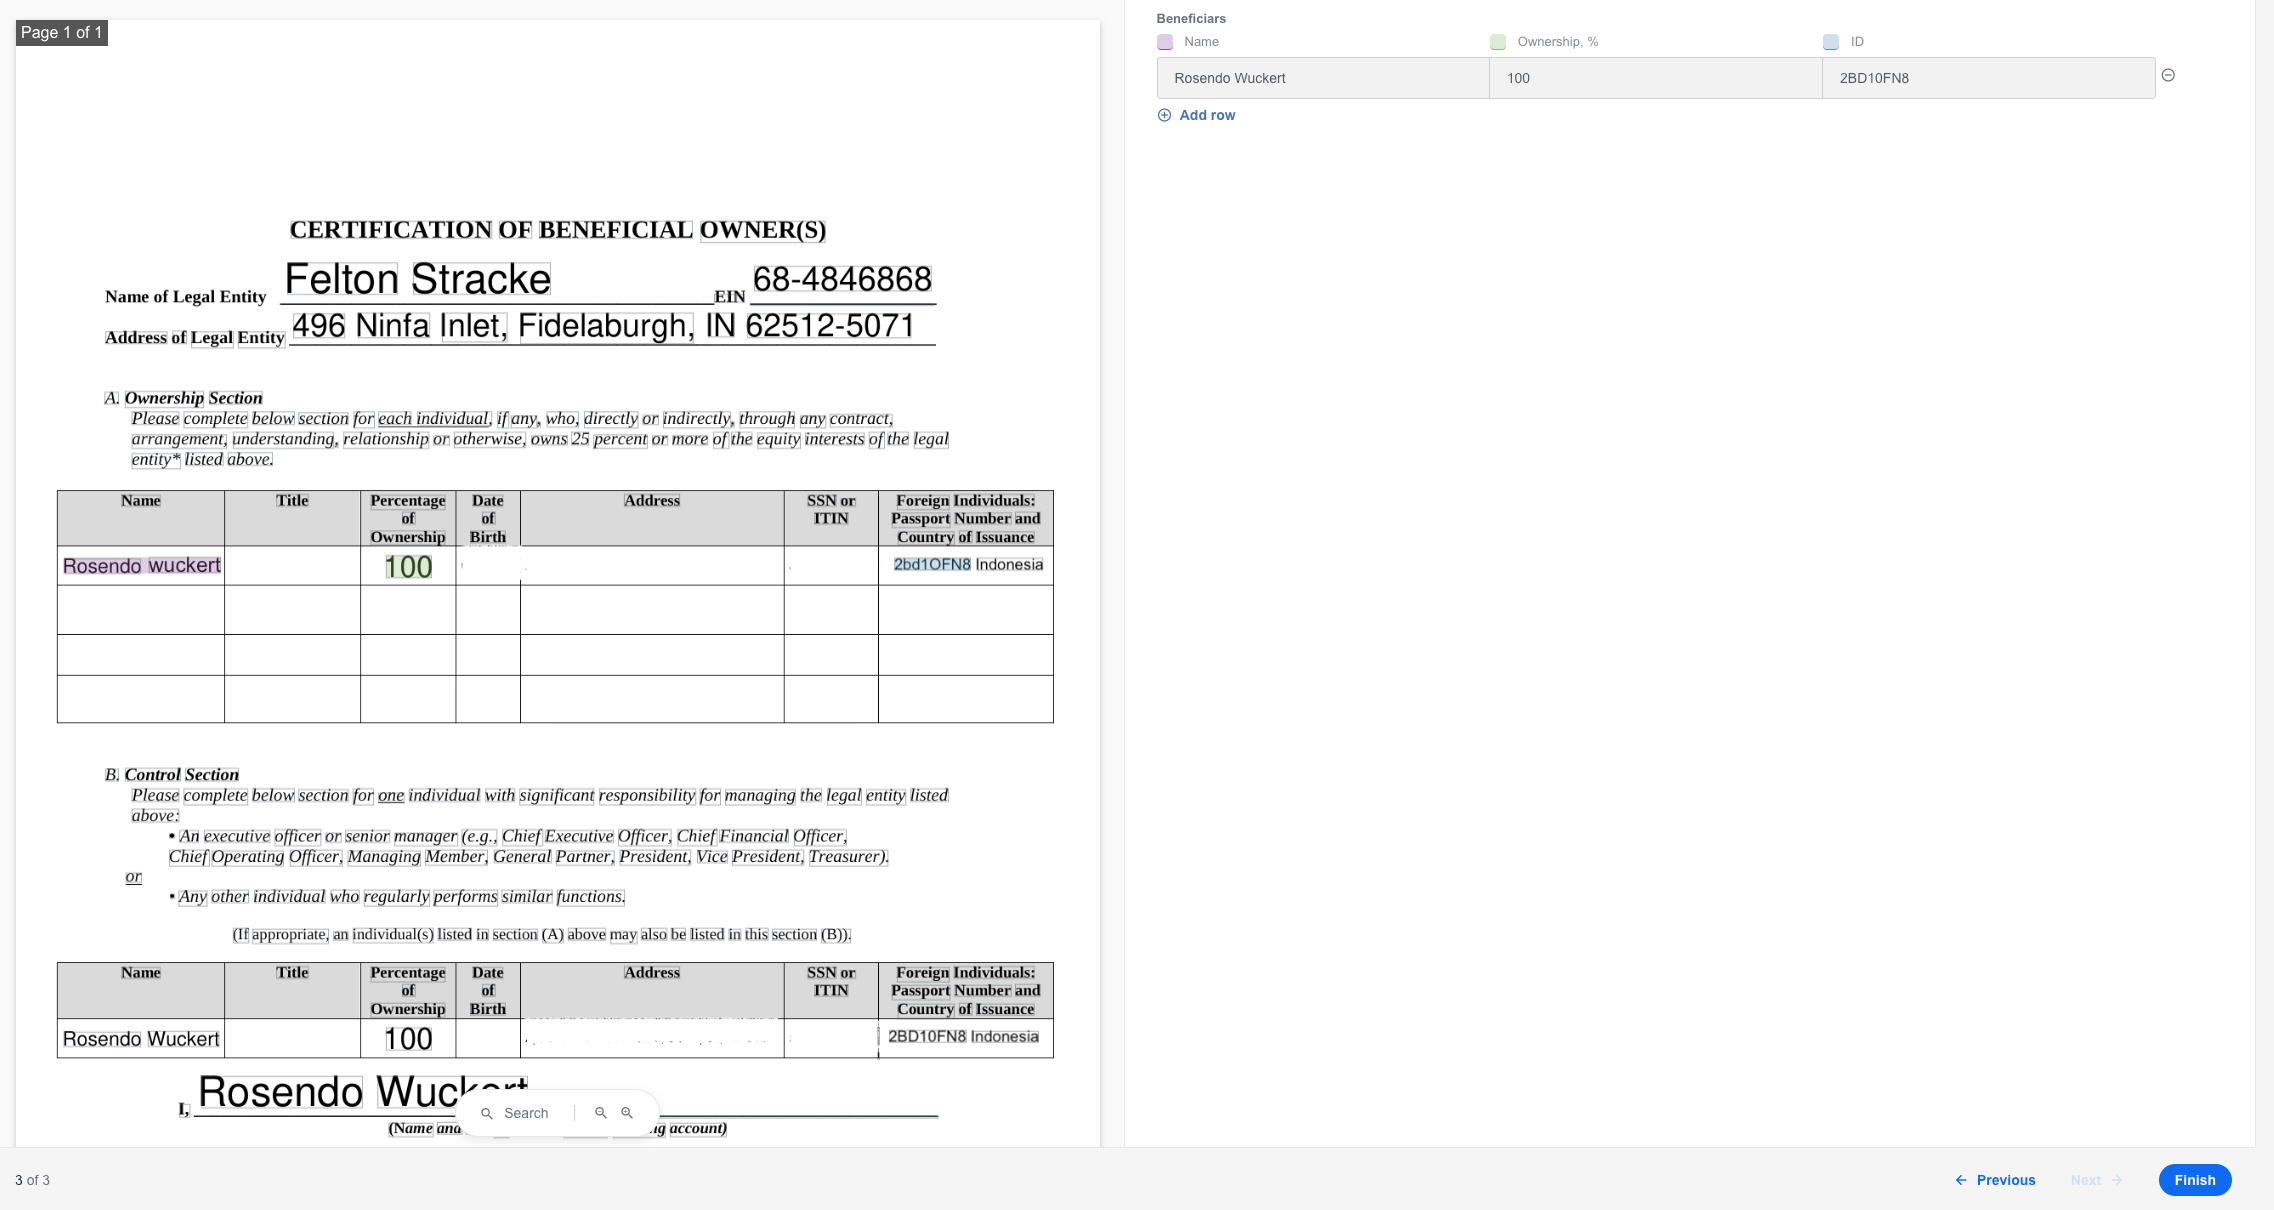
In the sample use case detailed below, a model is trained to extract three fields from an Ultimate Beneficial Owner (UBO) form:
Name of beneficiary (person's name): the first and last names in the camel case
Ownership (%, number)
ID (ID and Country, text): ID cannot contain the "O" letter, and letters are in lowercase.
Prepare training set
To prepare a training set means to label it. The sample training set utilized in this use case includes two documents:
Document 1
Document 2
To download the labeled sample training set for the described use case, click the link.
Prepare test set
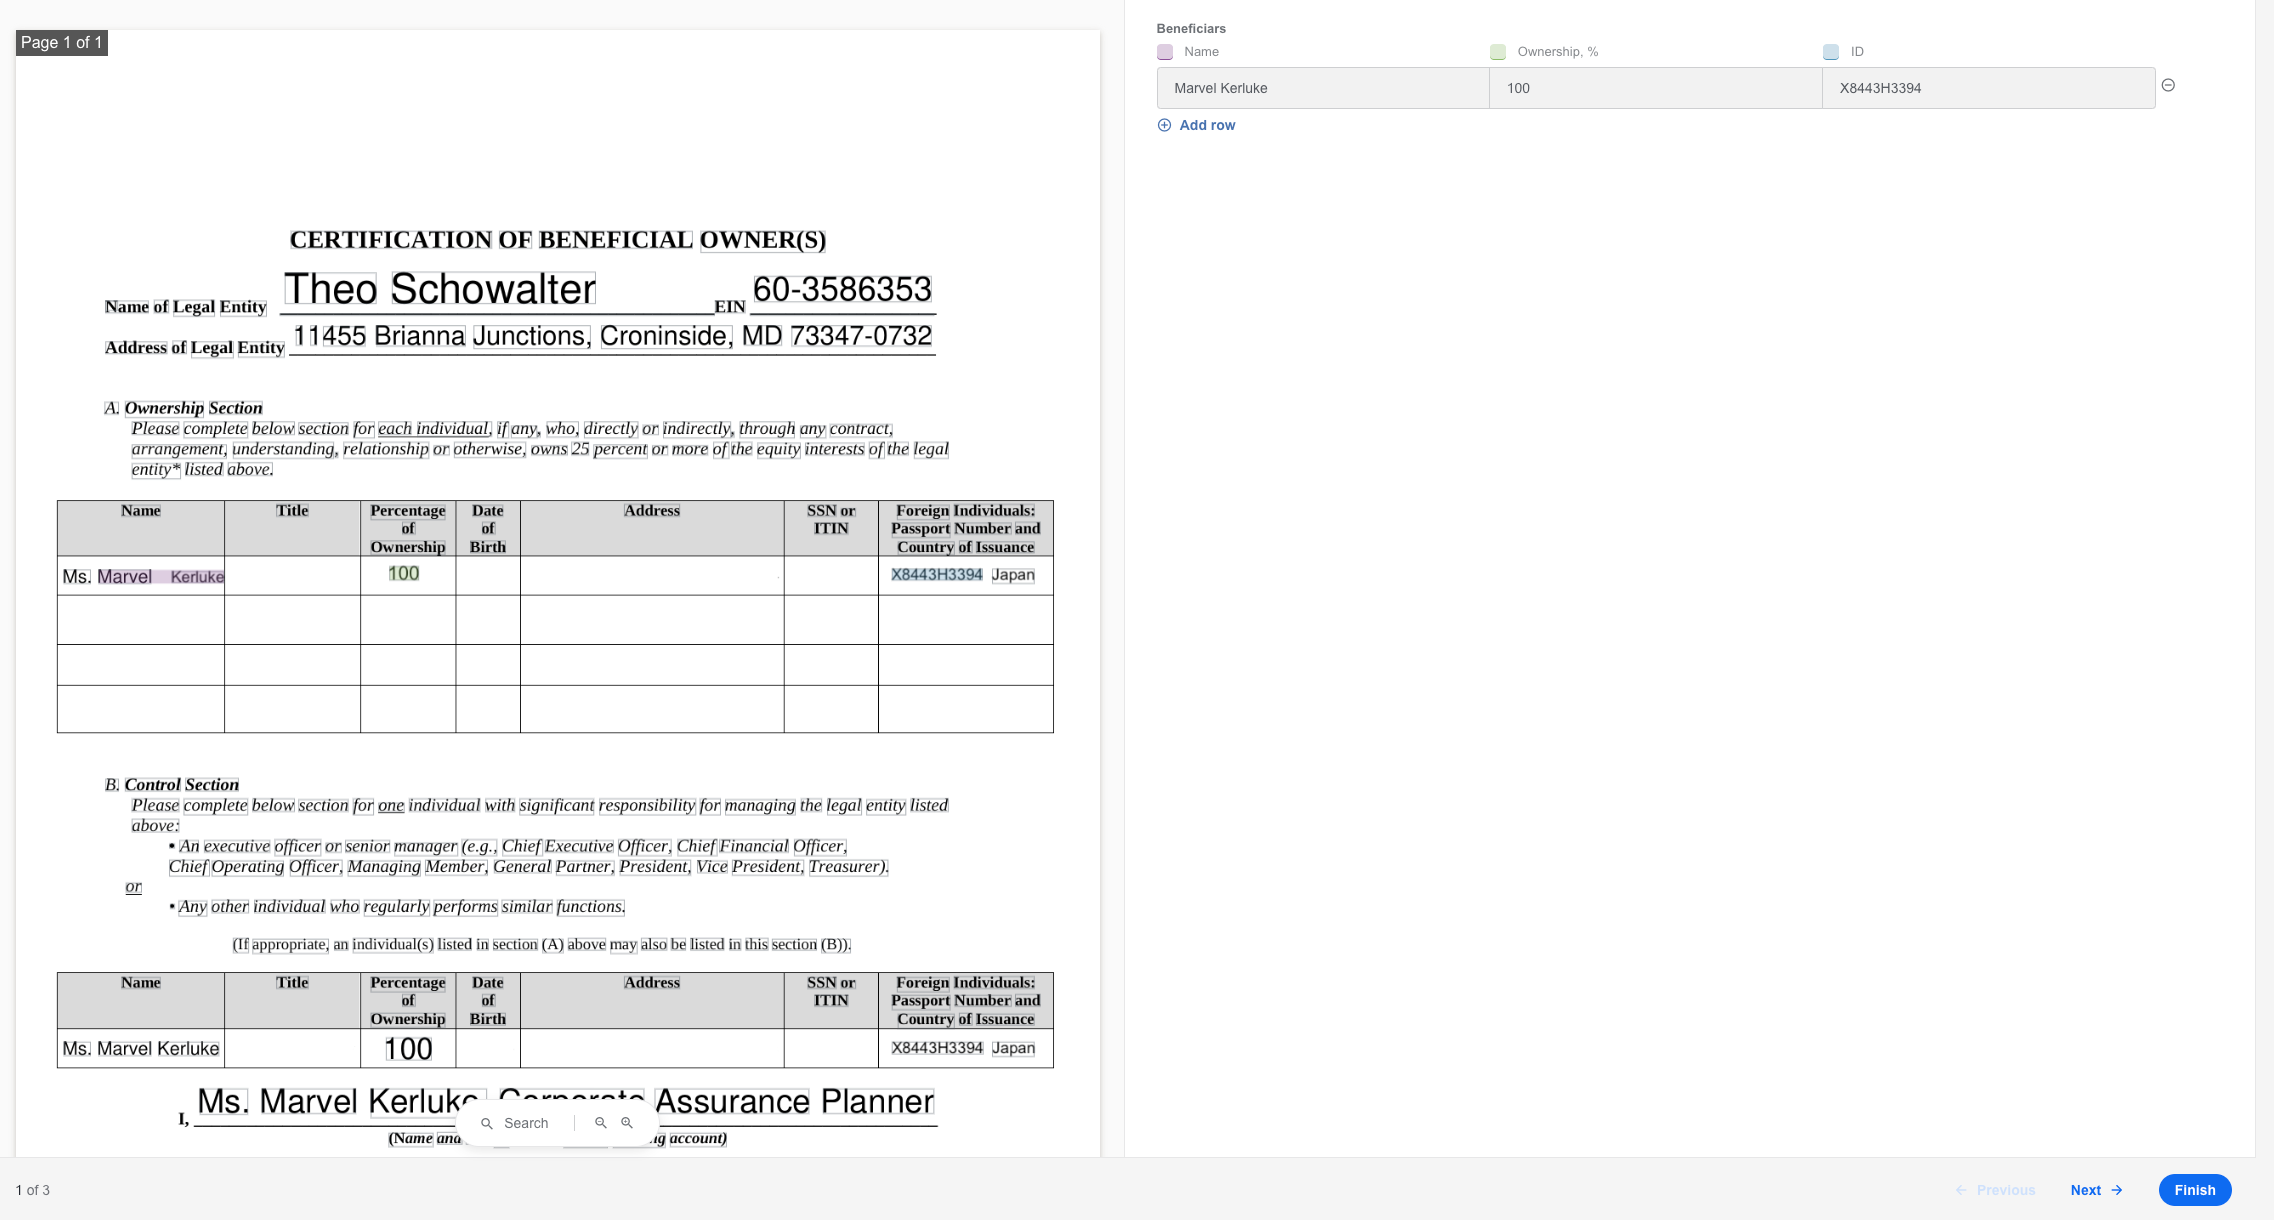
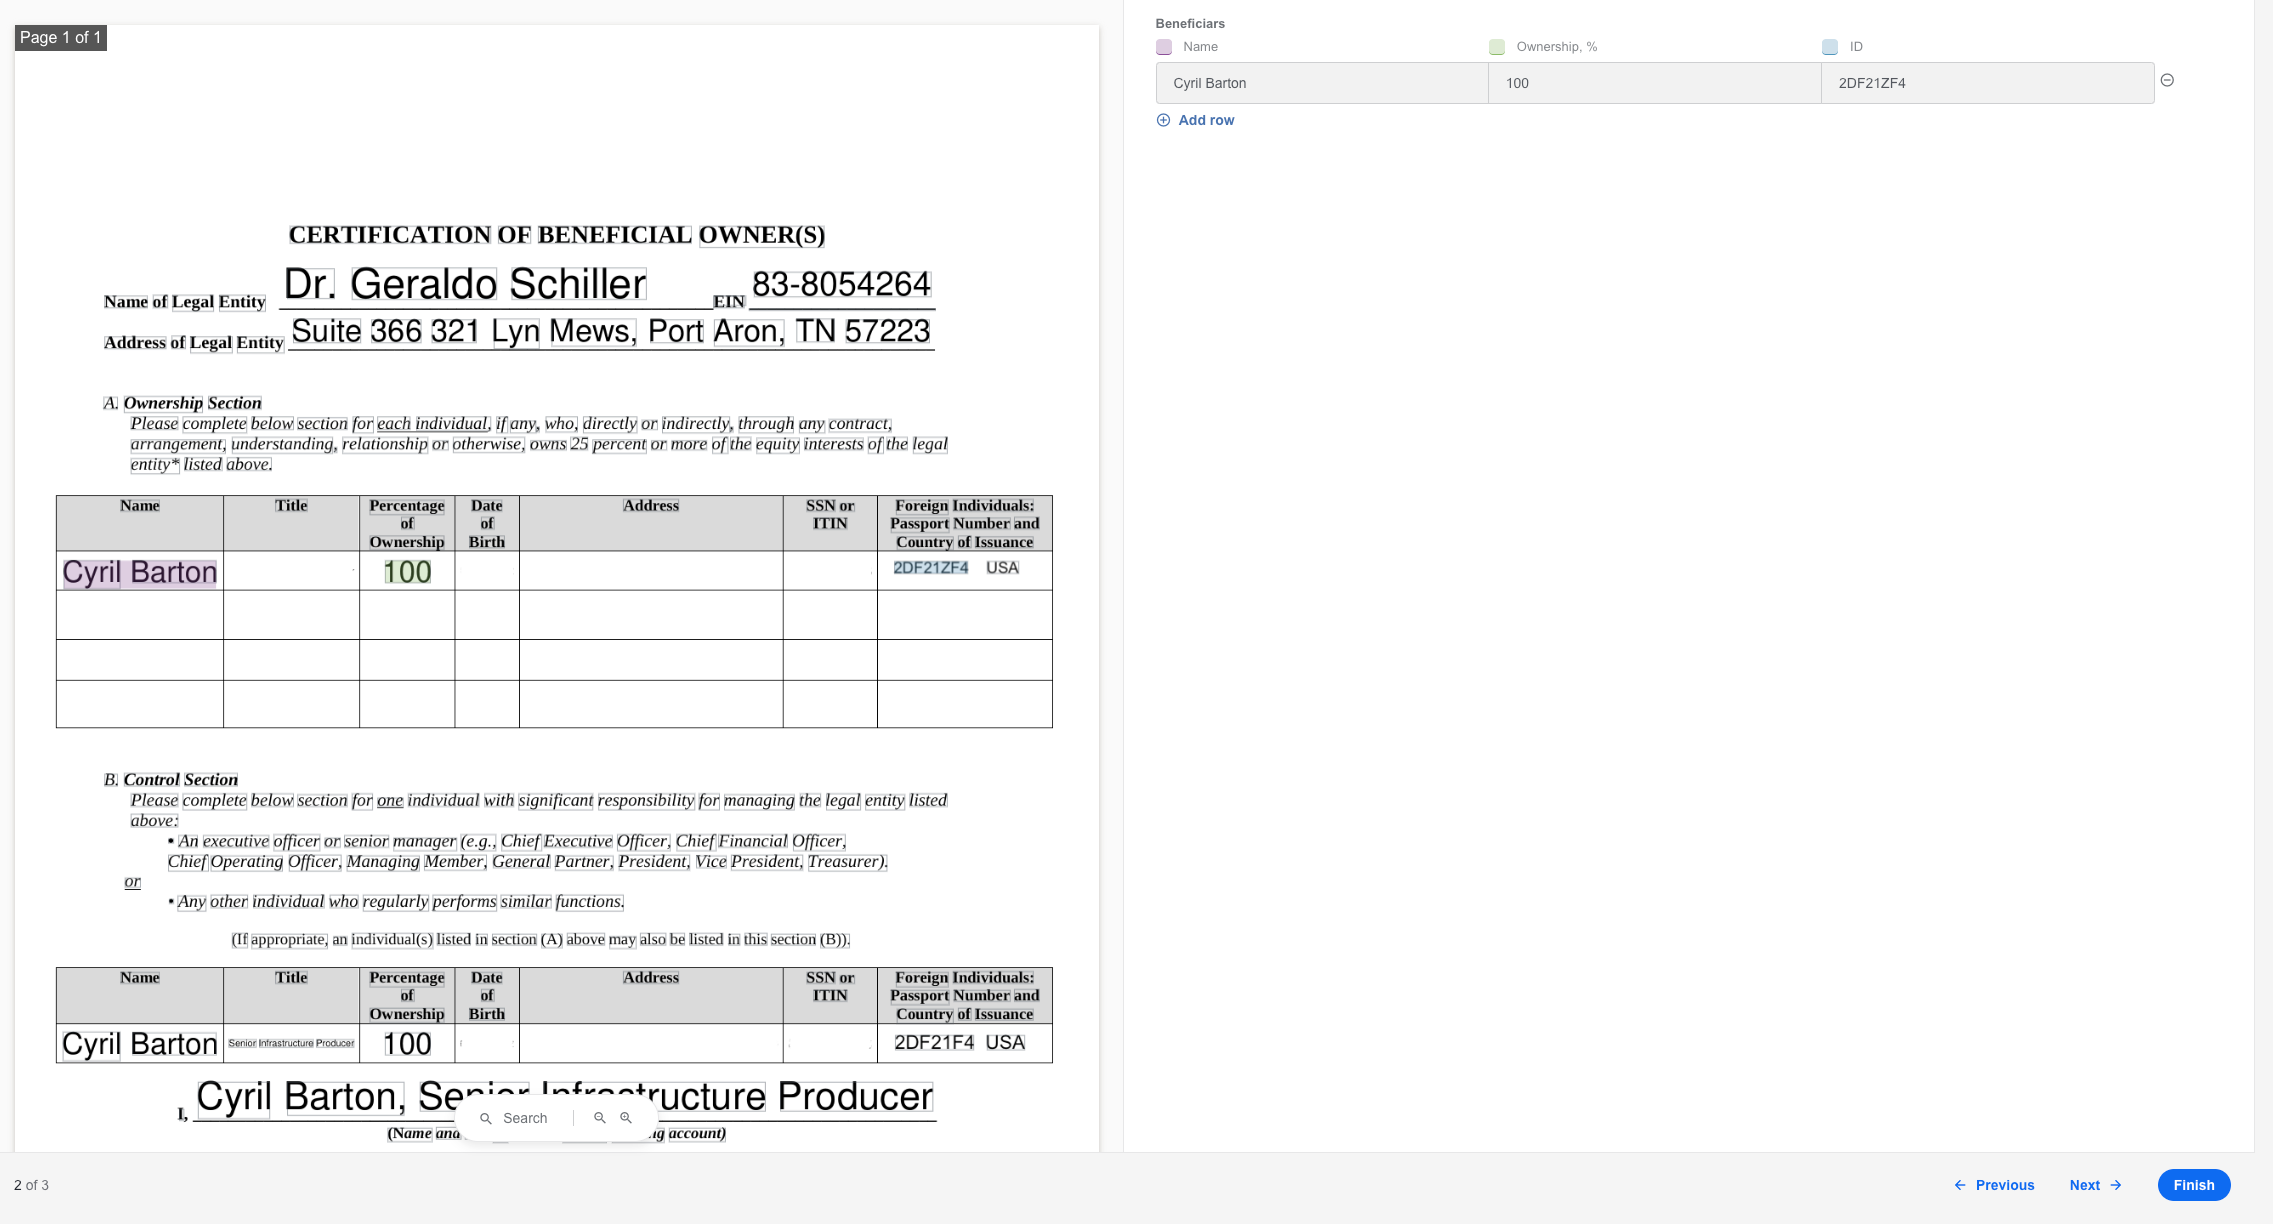
Preparing a test set, assume that the model needs to extract IDs as IDs without Country and label the documents accounting for the assumption.
The test set is needed because the training set includes only two documents, which is not enough to use the cross-validation technique for testing.
The sample test set used for the described use case includes three documents:
Document 1
Document 2
Document 3
To download the labeled sample test set for the described use case, click the link.
Train model
Take a generic pipeline for an information extraction (IE) problem and train the model with the prepared training set and test set with default settings.
Below is a step-by-step illustration of the sample training flow:
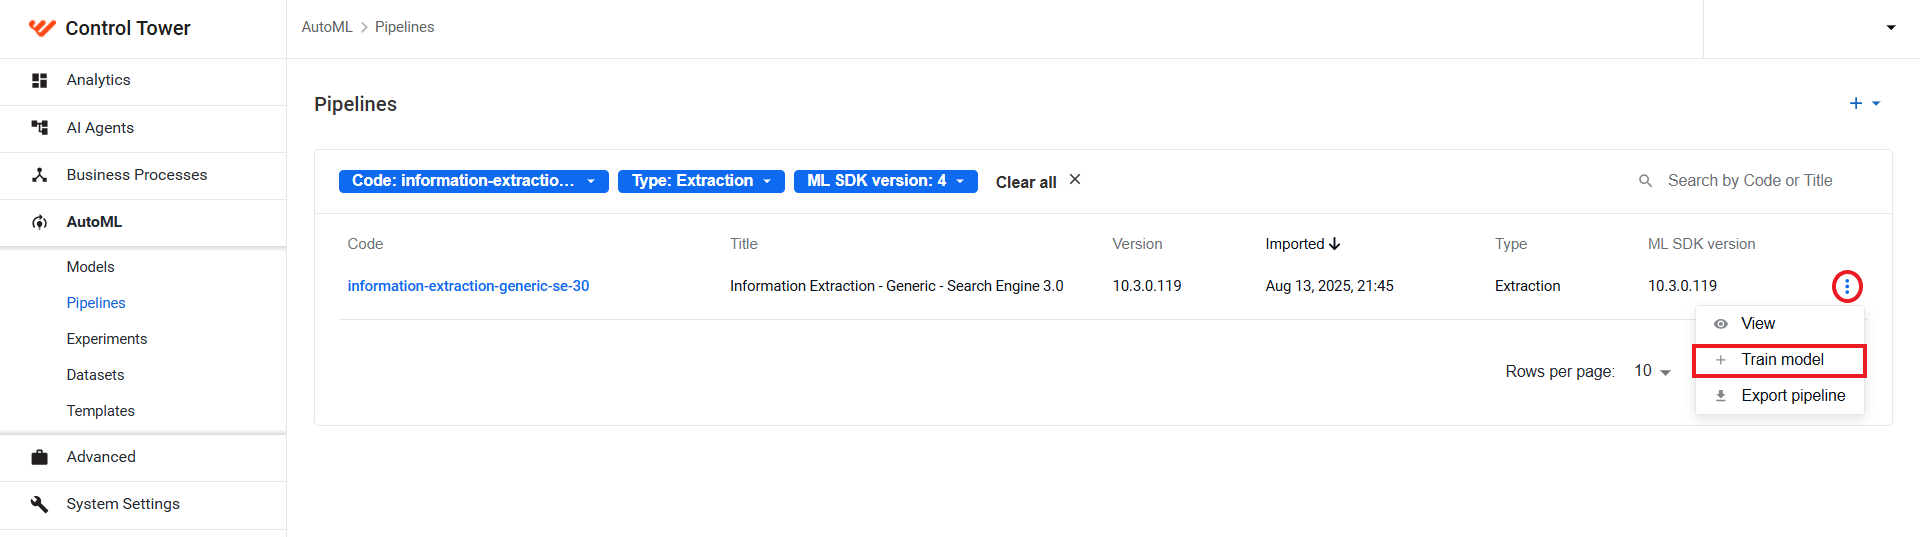
Choose a pipeline and click Train model to start a training flow.
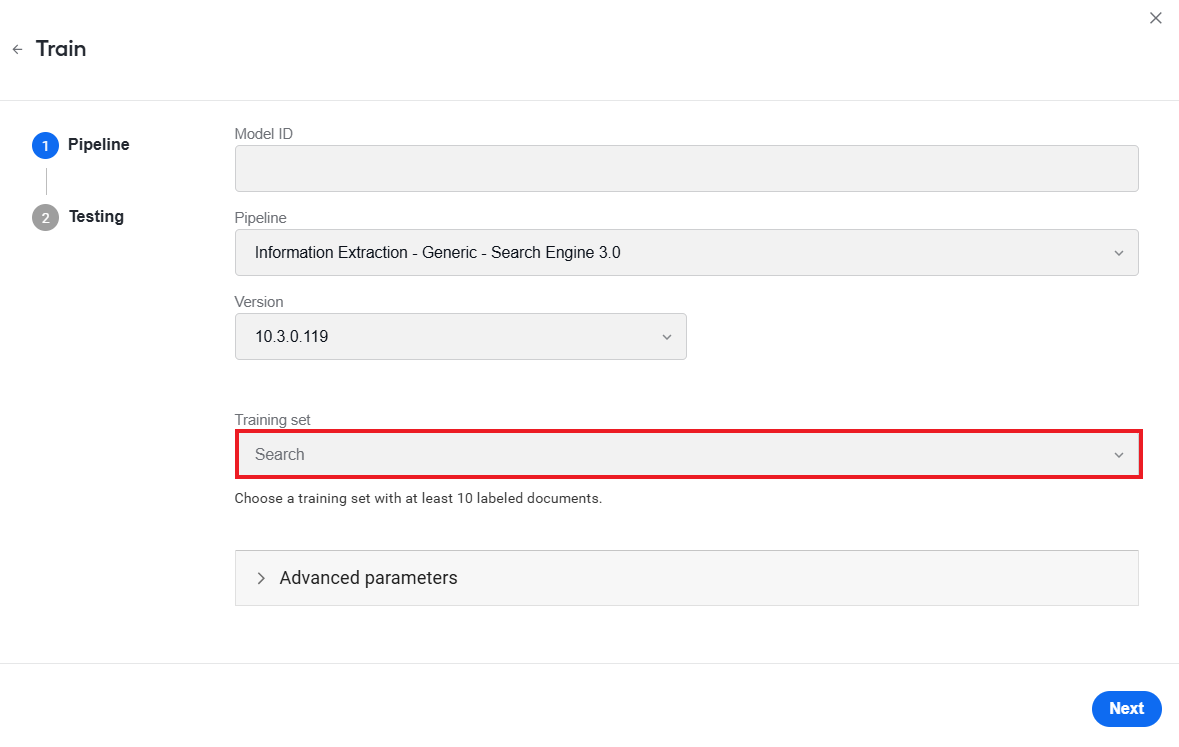
Add the prepared training set:
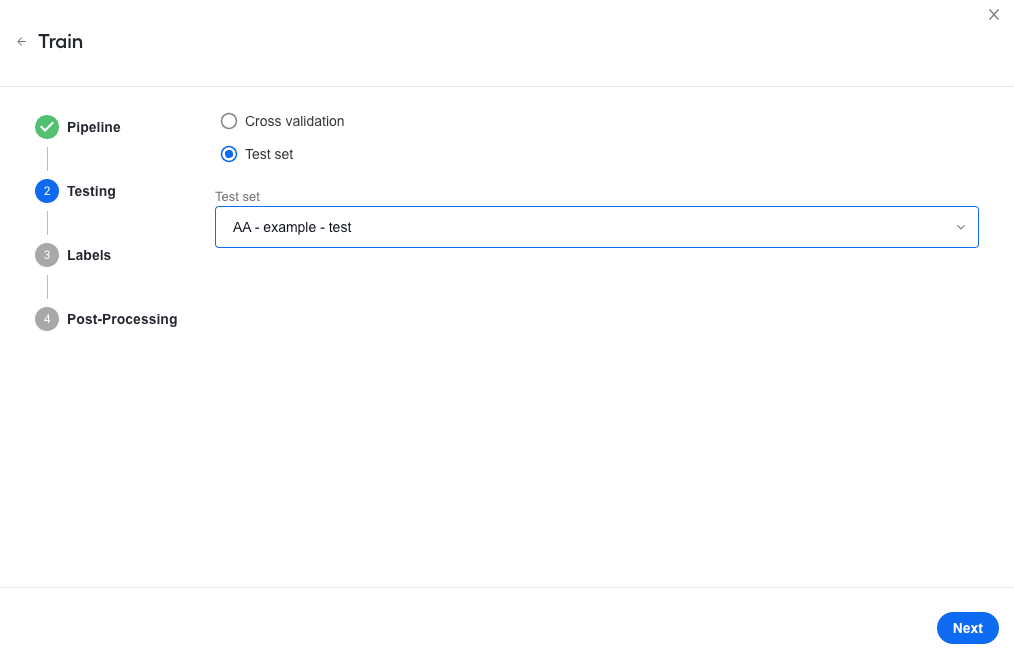
Add the prepared test set:
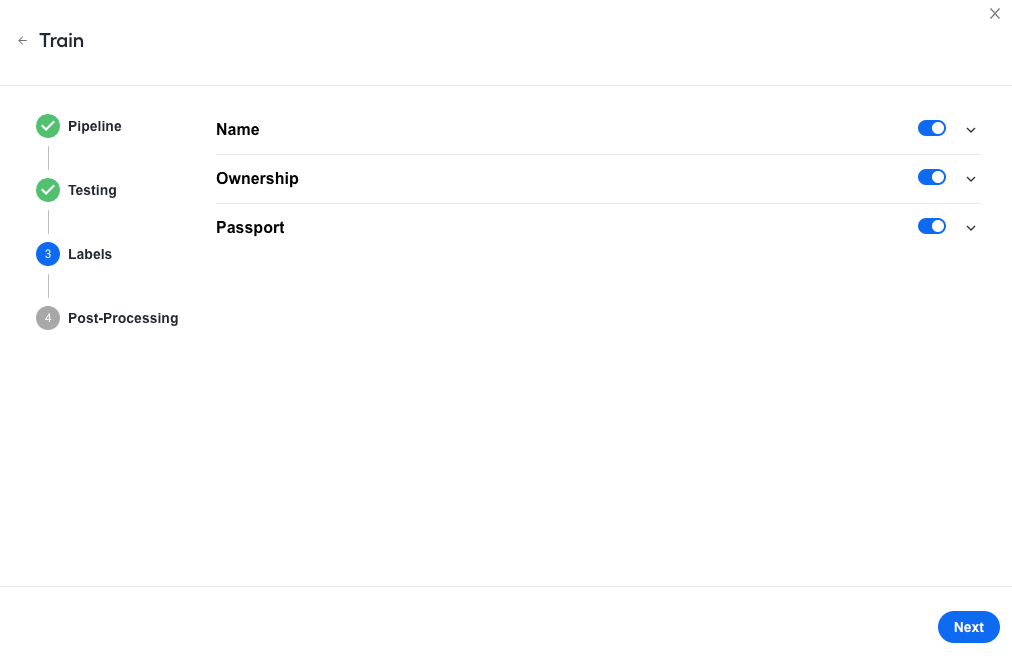
Leave labels with default settings:
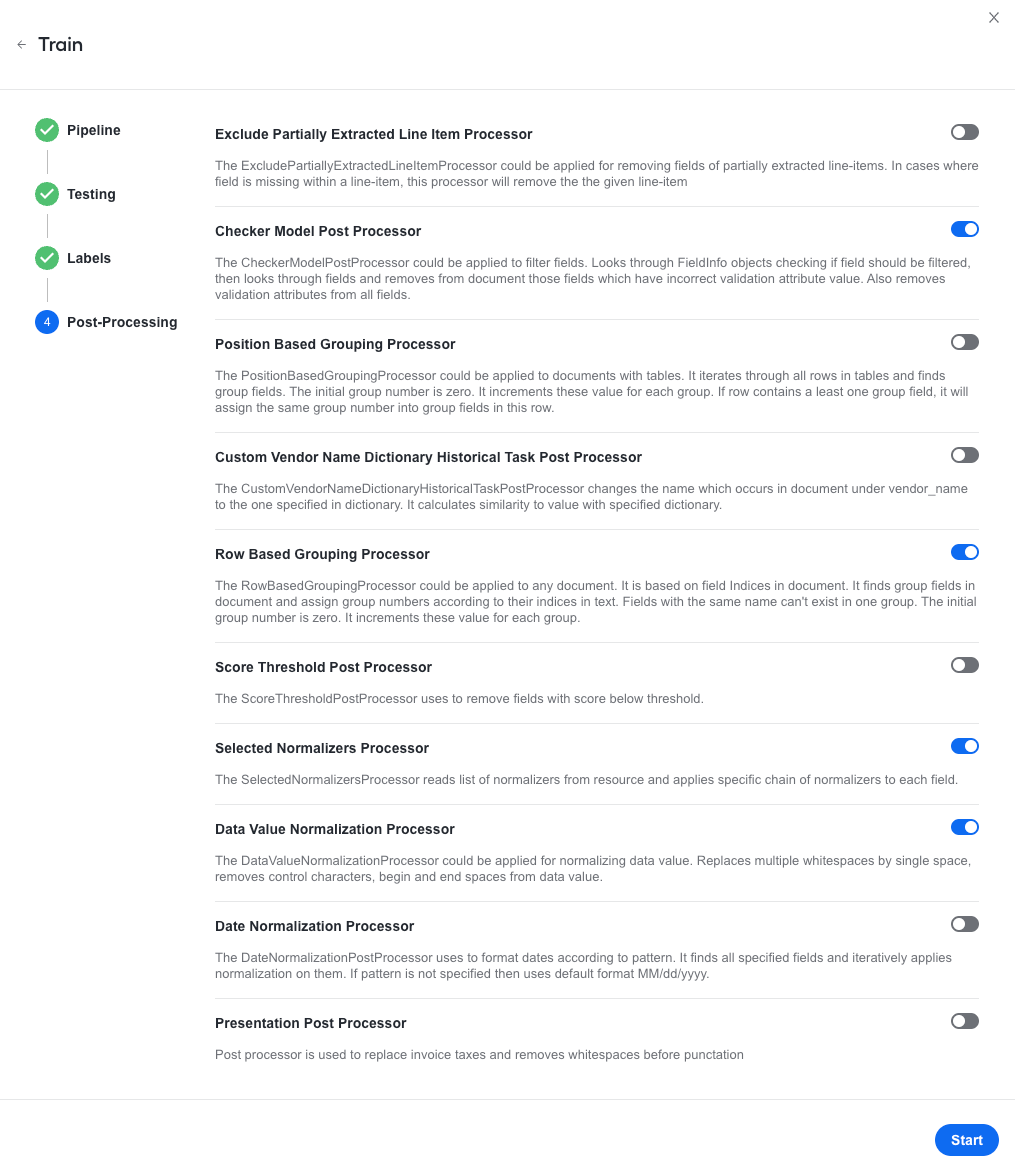
Leave post-processors with default settings:
On the Training tab, watch the training progress:

To download the sample trained model for the described use case, click the link.
Analyze results
Once the training is completed, you can find the trained model on the Models list. Click it to review the resulting model statistics.
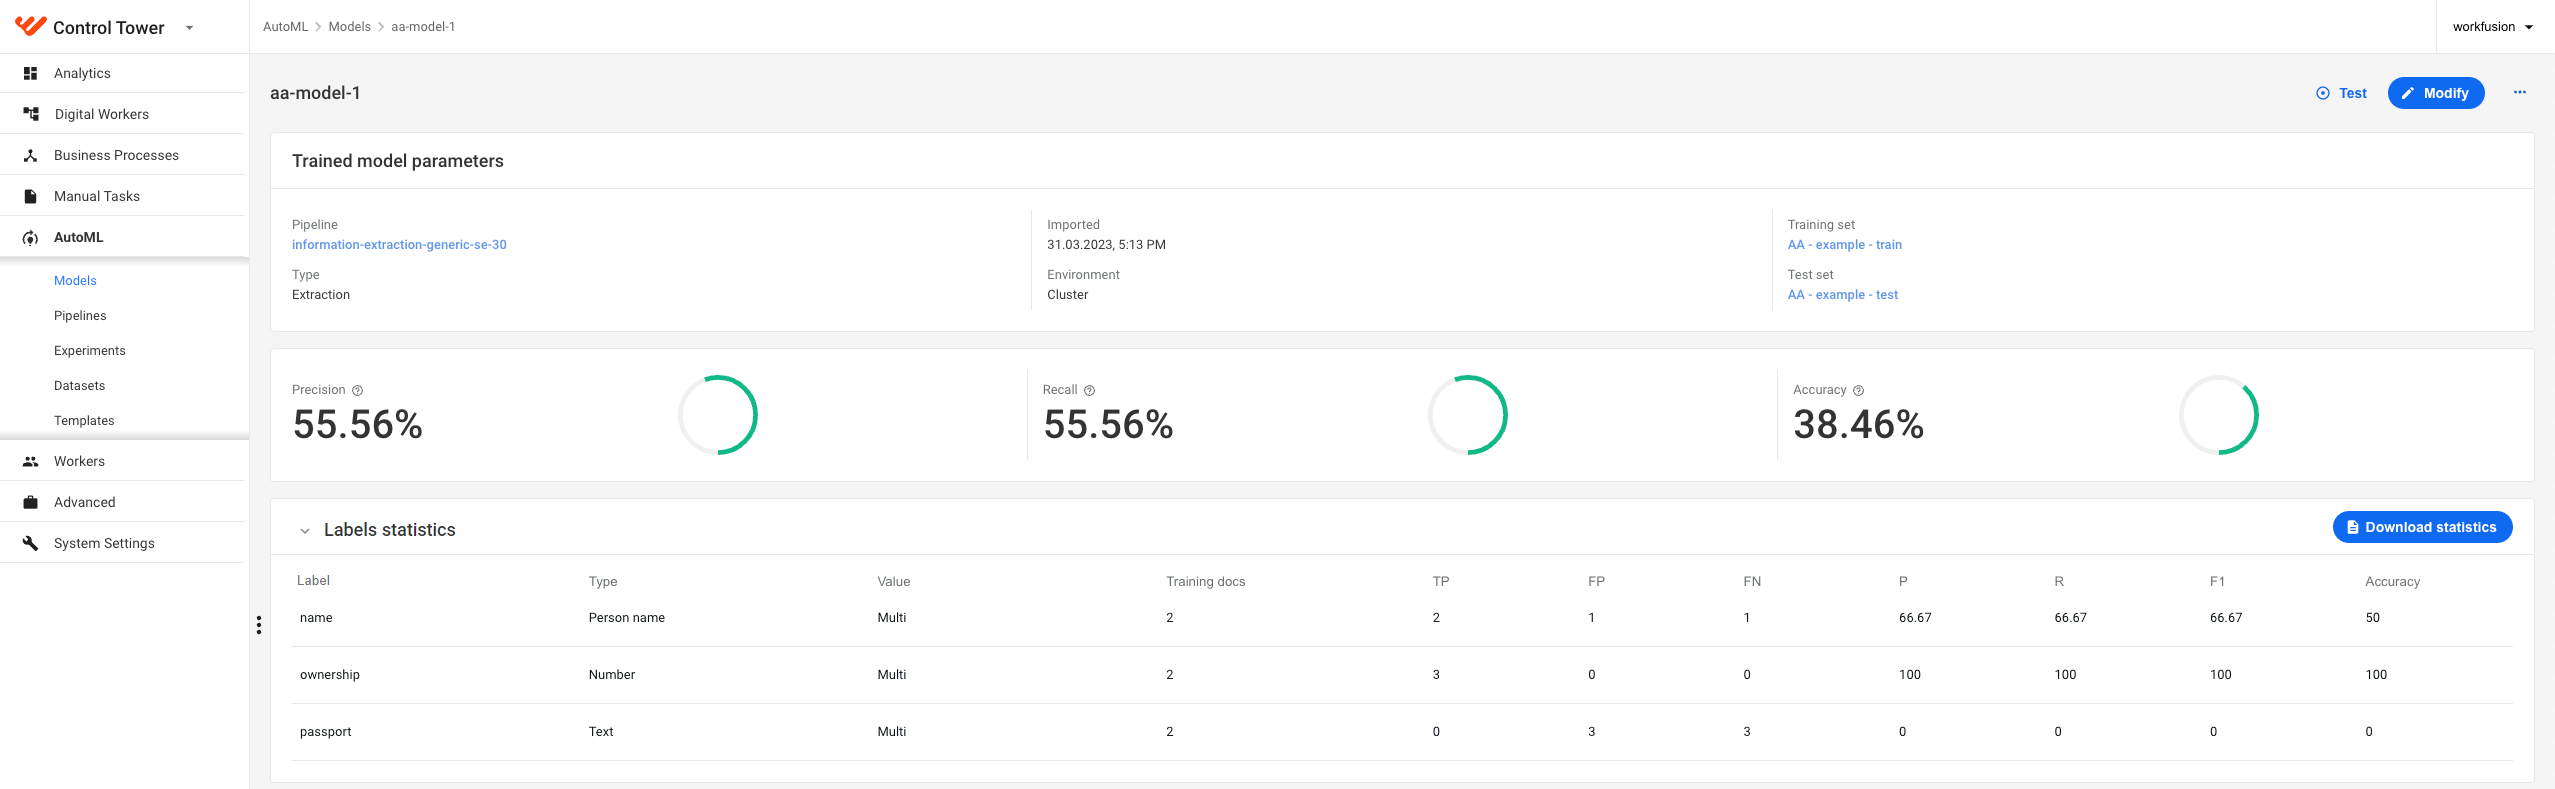
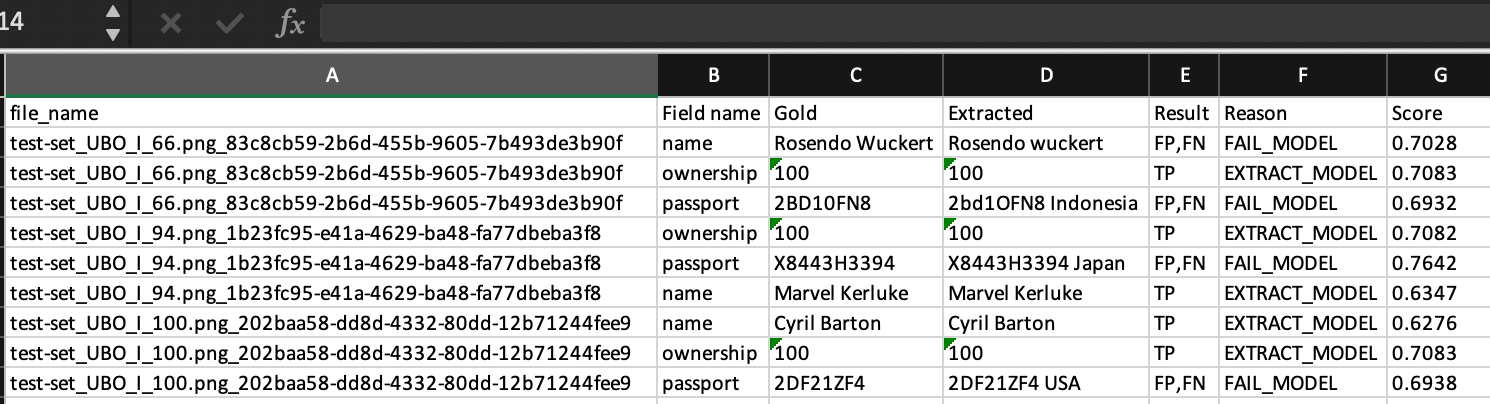
Click Download statistics to get detailed model statistics in an Excel file. This is what the file looks like:
To download the resulting statistics file for the described use case, click the link.
Once you have the statistics file, check it for errors:
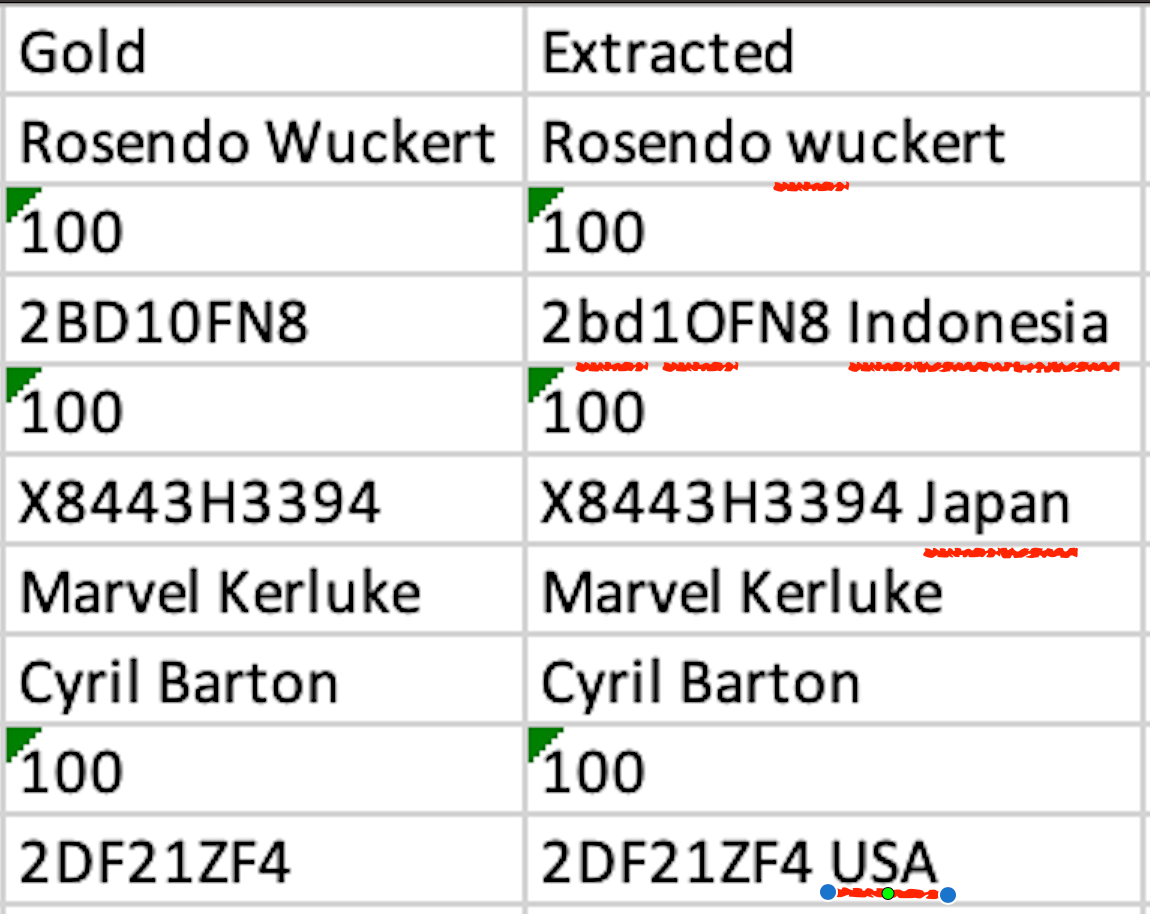
The table below lists the errors, solutions, and recommended normalizer settings for the described use case (see the screenshot above):
| Label | Error | Description | Solution | Normalizer |
|---|---|---|---|---|
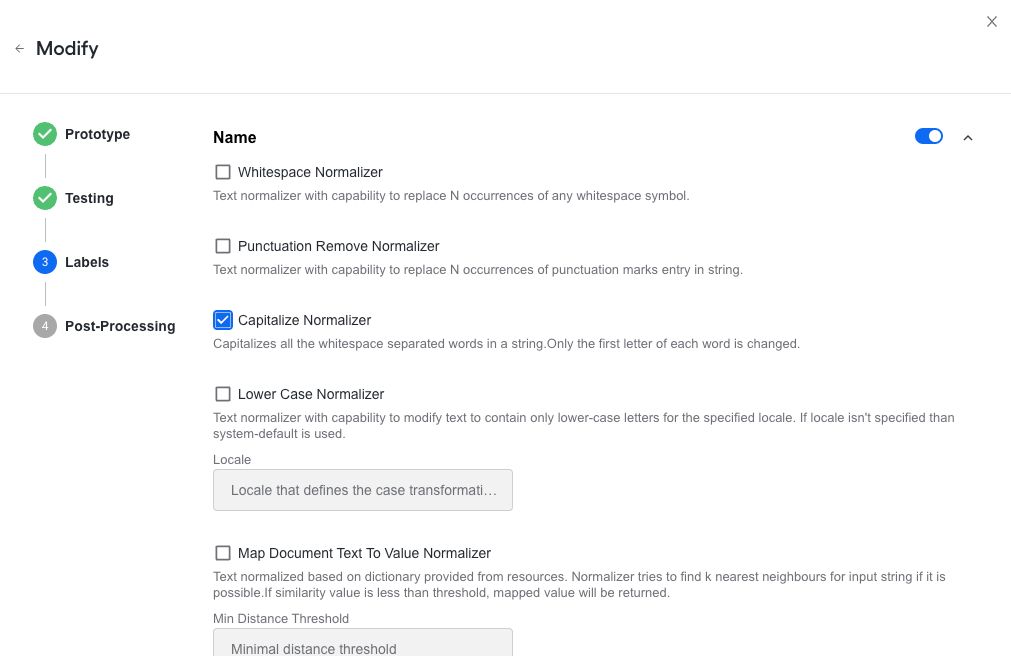
| name |  | Last name is in lowercase. | Capitalize words. | Capitalize Normalizer |
| ID(passport) |  |
|
|
|
| ID(passport) |  | Country in the output is not needed. | Keep only the first part of the string. | Pattern Replacer Normalizer |
| ID(passport) |  | Country in the output is not needed. | Keep only the first part of the string. | Pattern Replacer Normalizer |
Modify model
Your next step is to modify the model to account for the solutions and normalizer changes from the table above. Below is a step-by-step illustration of the modification flow:
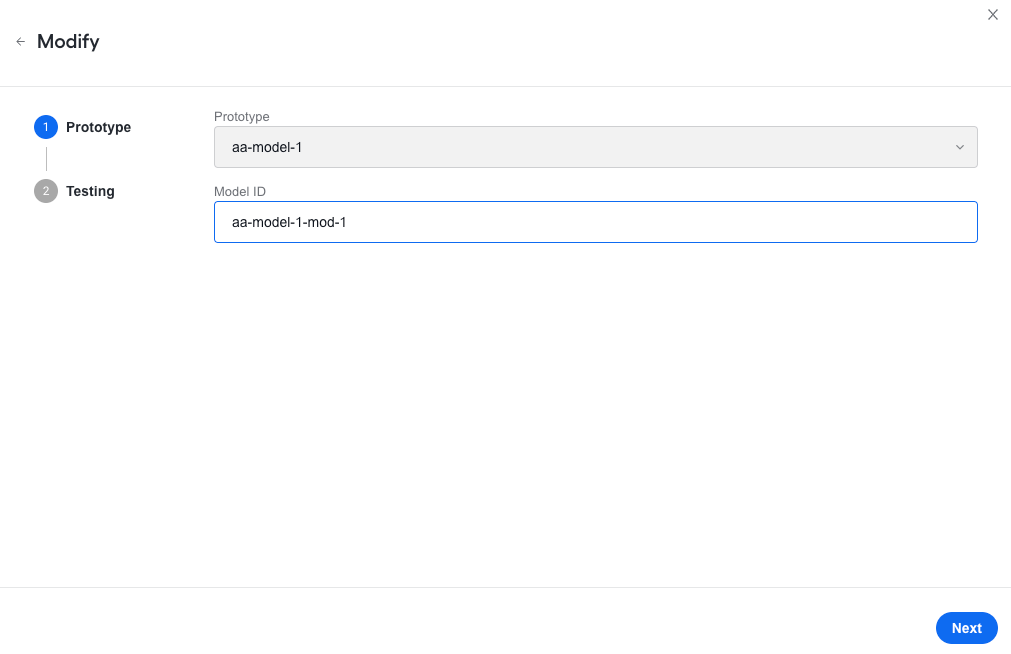
Start the modification flow and choose a prototype:
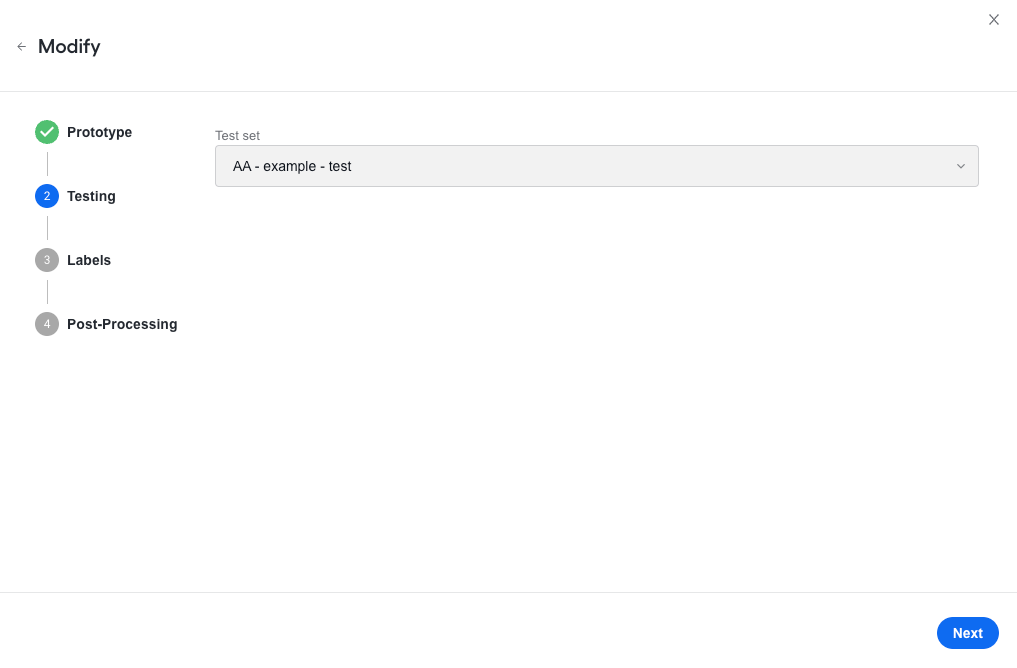
Add the prepared test set:
Set normalizers for the Name label as shown below:
Set normalizers for the Passport label as shown below:
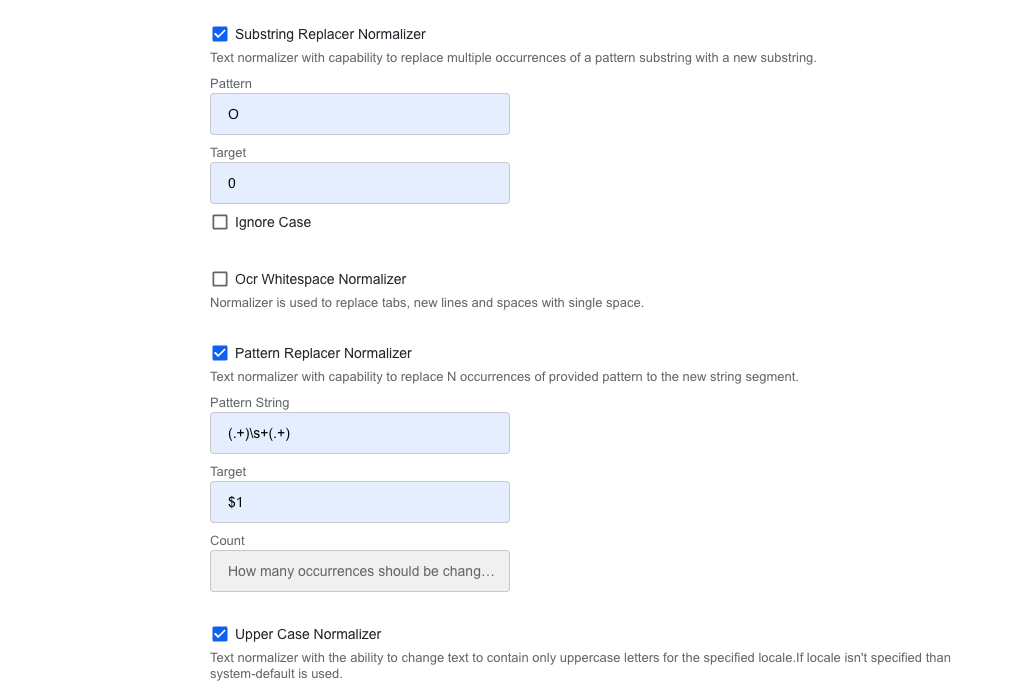
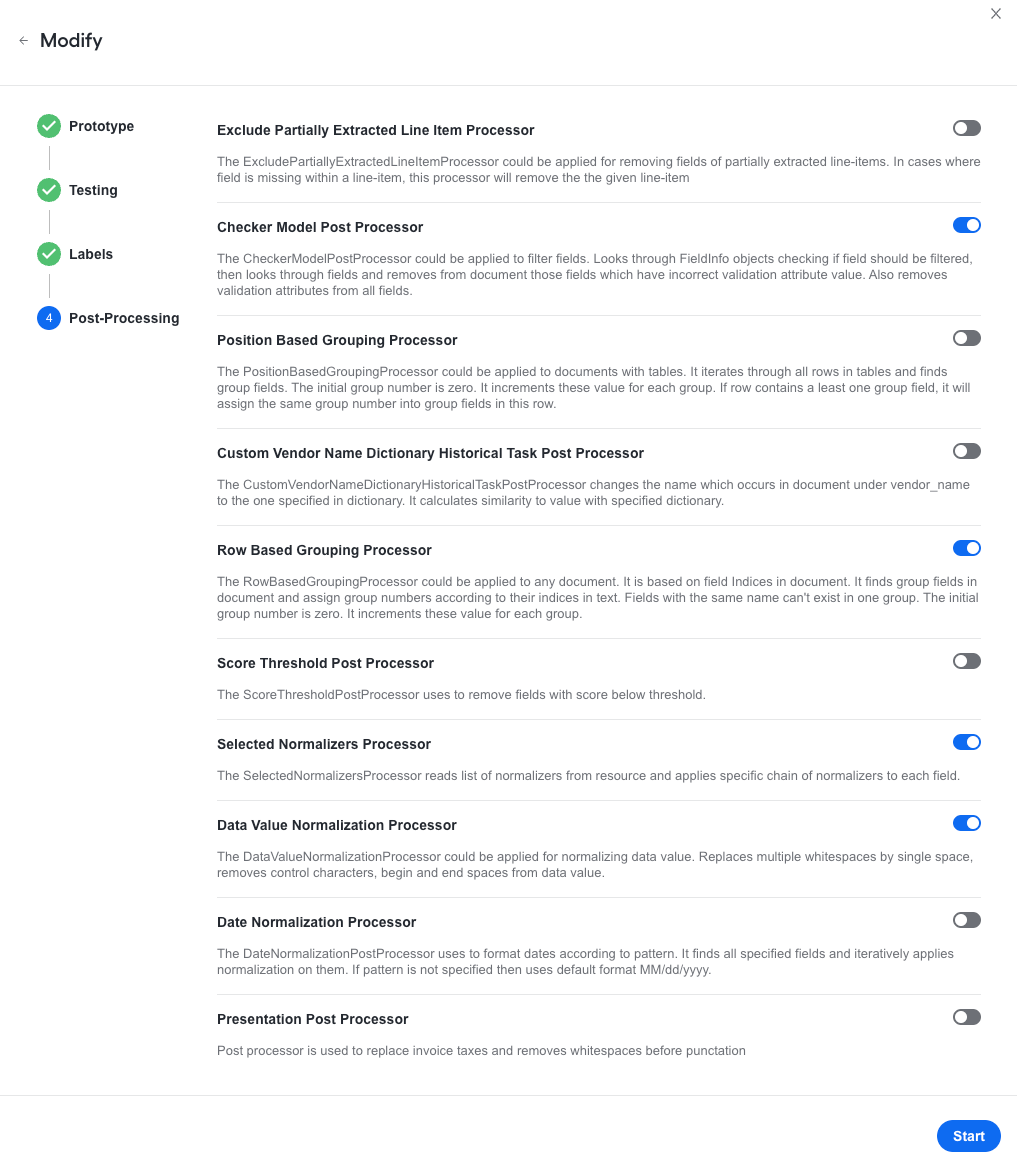
Configure post-processors as shown below:
Go to Experiments > Tests to watch the progress.

Wait till the status for the test becomes Completed:
To download the sample modified model for the described use case, click the link.
View post-modification results
Once the test is completed, you can find the results on the model's details page.
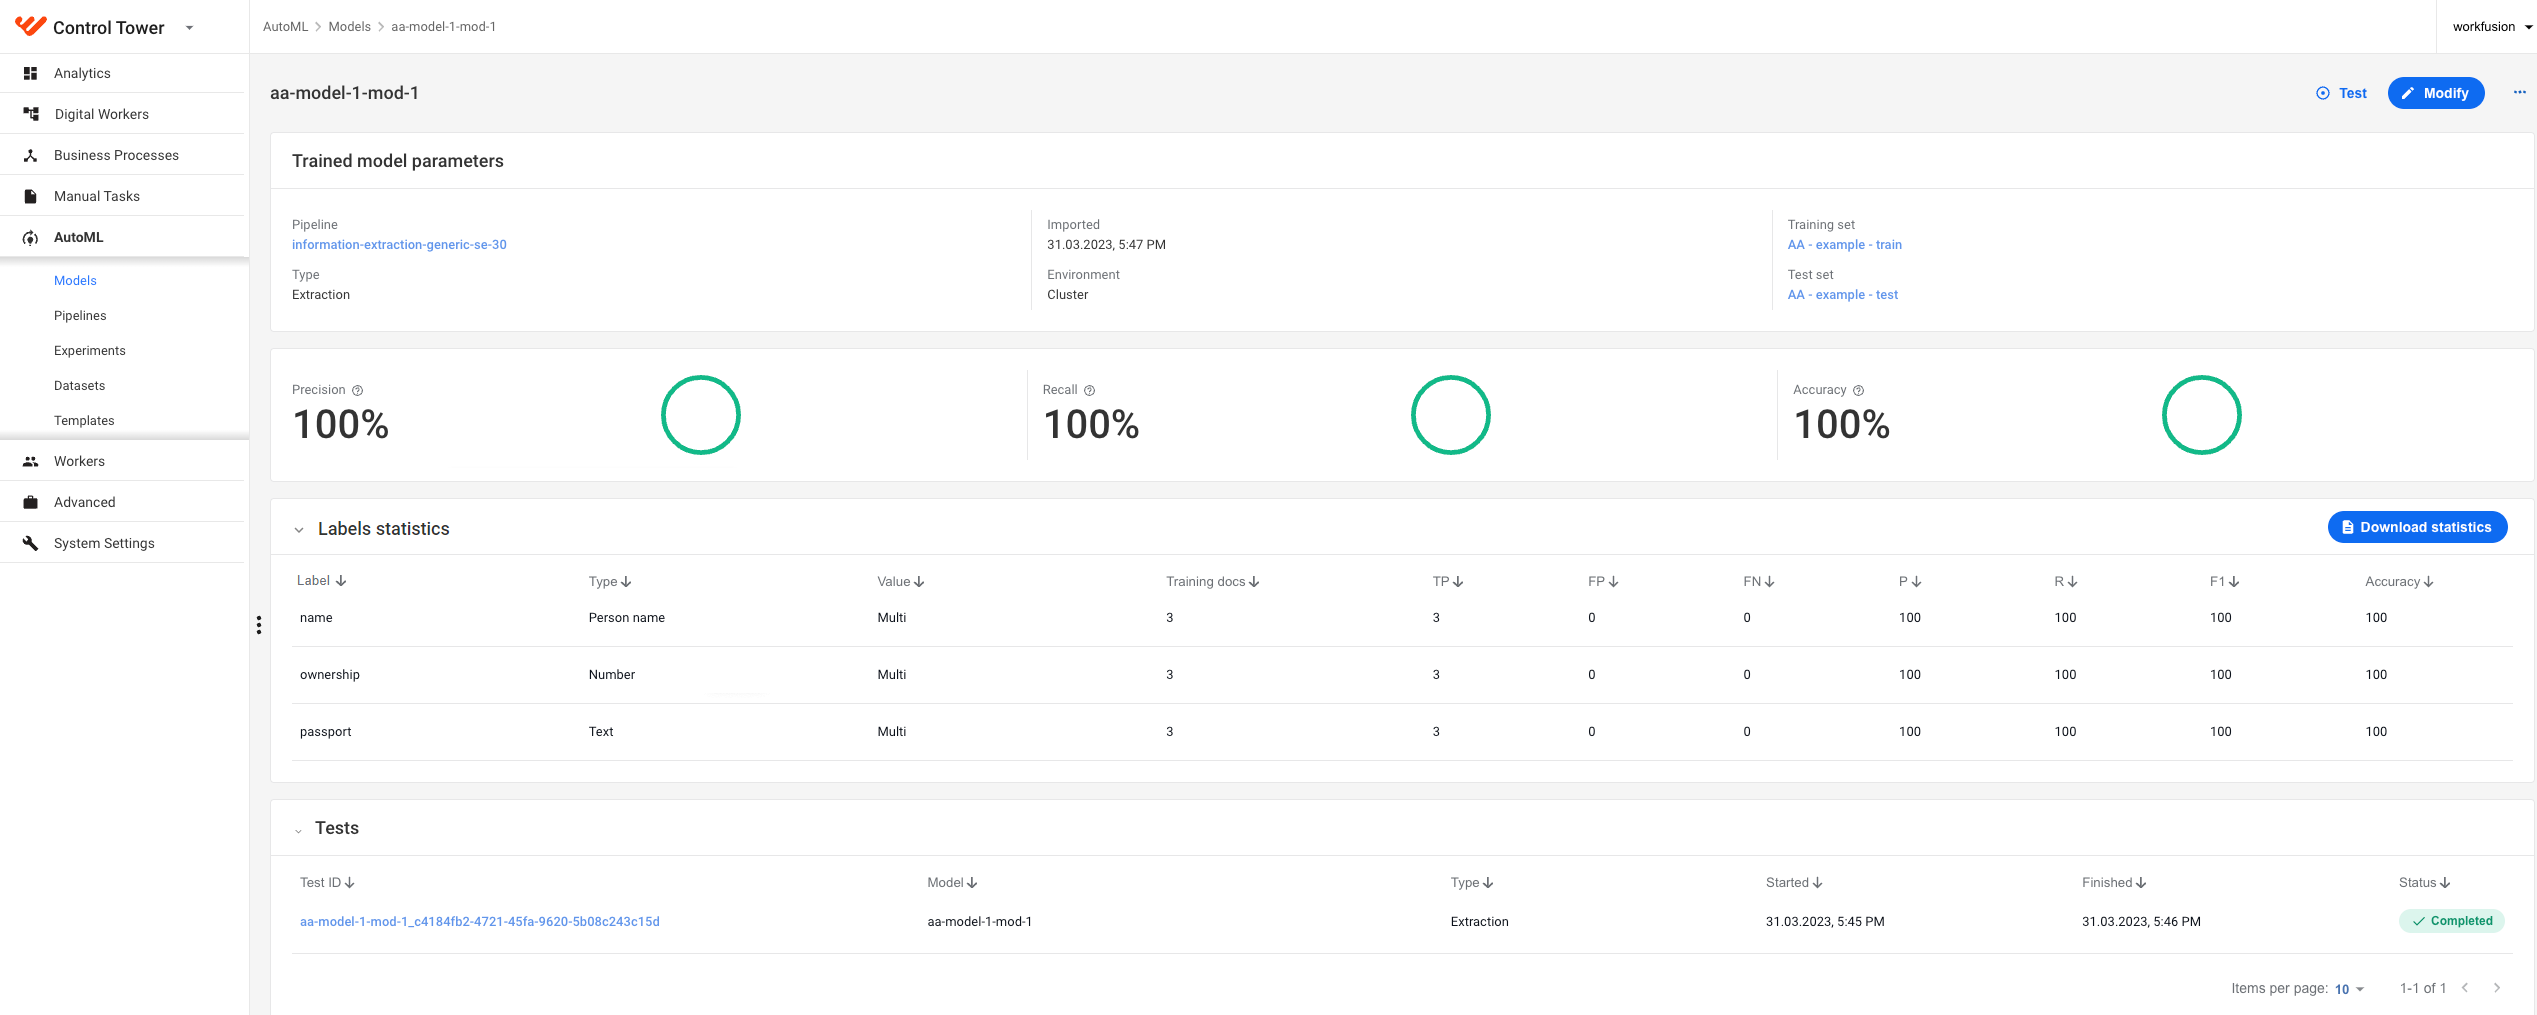
Click Download statistics to get detailed model statistics in an Excel file. This is what the file looks like:
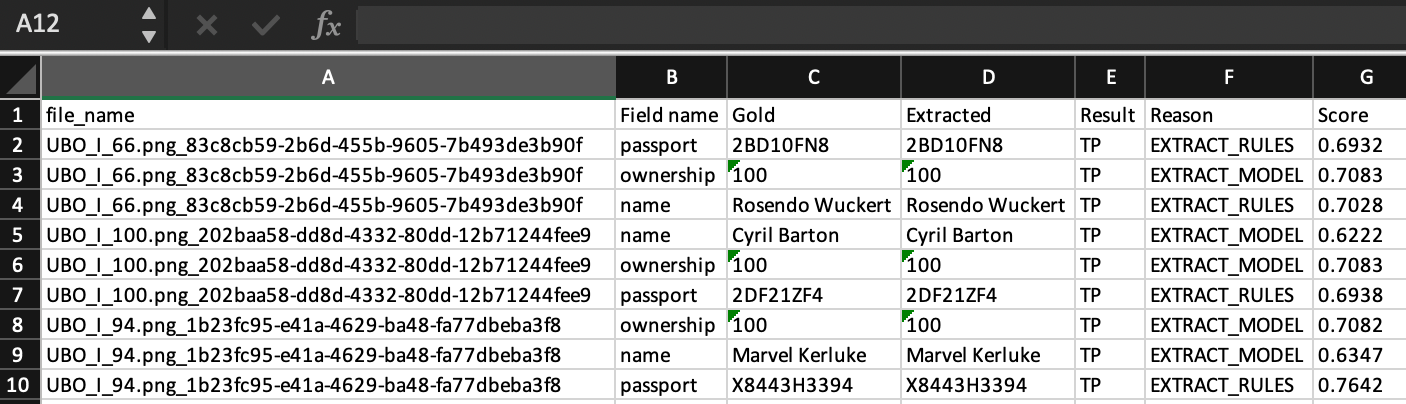
To download the resulting statistics file for the described use case, click the link.