Add and execute AutoML bridge step
The AutoML Bridge step enables the AutoML model execution with the Bridge Framework.

Implementation details
Mind the following implementation details about the AutoML Bridge step:
- The step is implemented over ETL Bot Config type, and it is not recommended to change it.
- The step processes one document by one model.
- After correct data is prepared, it is sent to the "bridge", and then you get a result—this is the internal Control Tower (CT) logic. You cannot influence the logic.
- Bot Sources are not supported.
- Stateless execution is supported.
Step input
| Parameter in the interface | Code | Description |
|---|---|---|
| AutoML-Model ID to process | model_id | The value is required. Specify the unique identifier of the AutoML model you want to use for processing. You can set the value in the current ETL configuration or use the value coming from the preceding step. The input coming from the preceding step has the priority. |
| Document for processing by model | document | Specify a document for processing by the model. You can set the value only as the input coming from the preceding step. |
| Go forward on failure | go_forward_on_failure | Specify what to be done if the failure result is received. If you set the value to Yes and the failure answer is received, the step is completed, and an error message is sent to the next step. You can set the value in the current ETL configuration or use the value coming from the preceding step. The input coming from the preceding step has the priority. |
| AutoML-Model parameters to tune model execute | model_parameters | The parameter is not required. Specify the parameters to fine-tune the model's execution. You can set the value in the current ETL configuration or use the value coming from the preceding step. The input coming from the preceding step has the priority. |
Step output
The step output includes the data for the specified step input as well as the data for the following parameters:
| Parameter | Description |
|---|---|
_sys_automl_process_time | The step processing time counted as the sum of the time to create the input + time to send the task to processing + time it took a Worker to process the task + the time to get the result in CT. |
sys_automl_correlation_id | The correlation ID for tracing a task. |
model_result | The raw model answer if the task process is successful. |
model_error | Error information if the task process is failed, and the step shouldn't fail on such task result. |
You can use the step output as input for subsequent steps.
Add no-code AutoML Bridge step to Business Process
In addition to a conventional AutoML Bridge step, Work.AI offers three types of no-code AutoML Bridge steps:
No-code AutoML Classification Bridge allowing the execution of classification models
No-code AutoML Image Processing Bridge enabling the model to work with images
No-code AutoML IE Bridge supporting the execution of information classification models
You can find available no-code AutoML step steps in Worflow Designer on the Bot panel under the No-Code Bridge category.
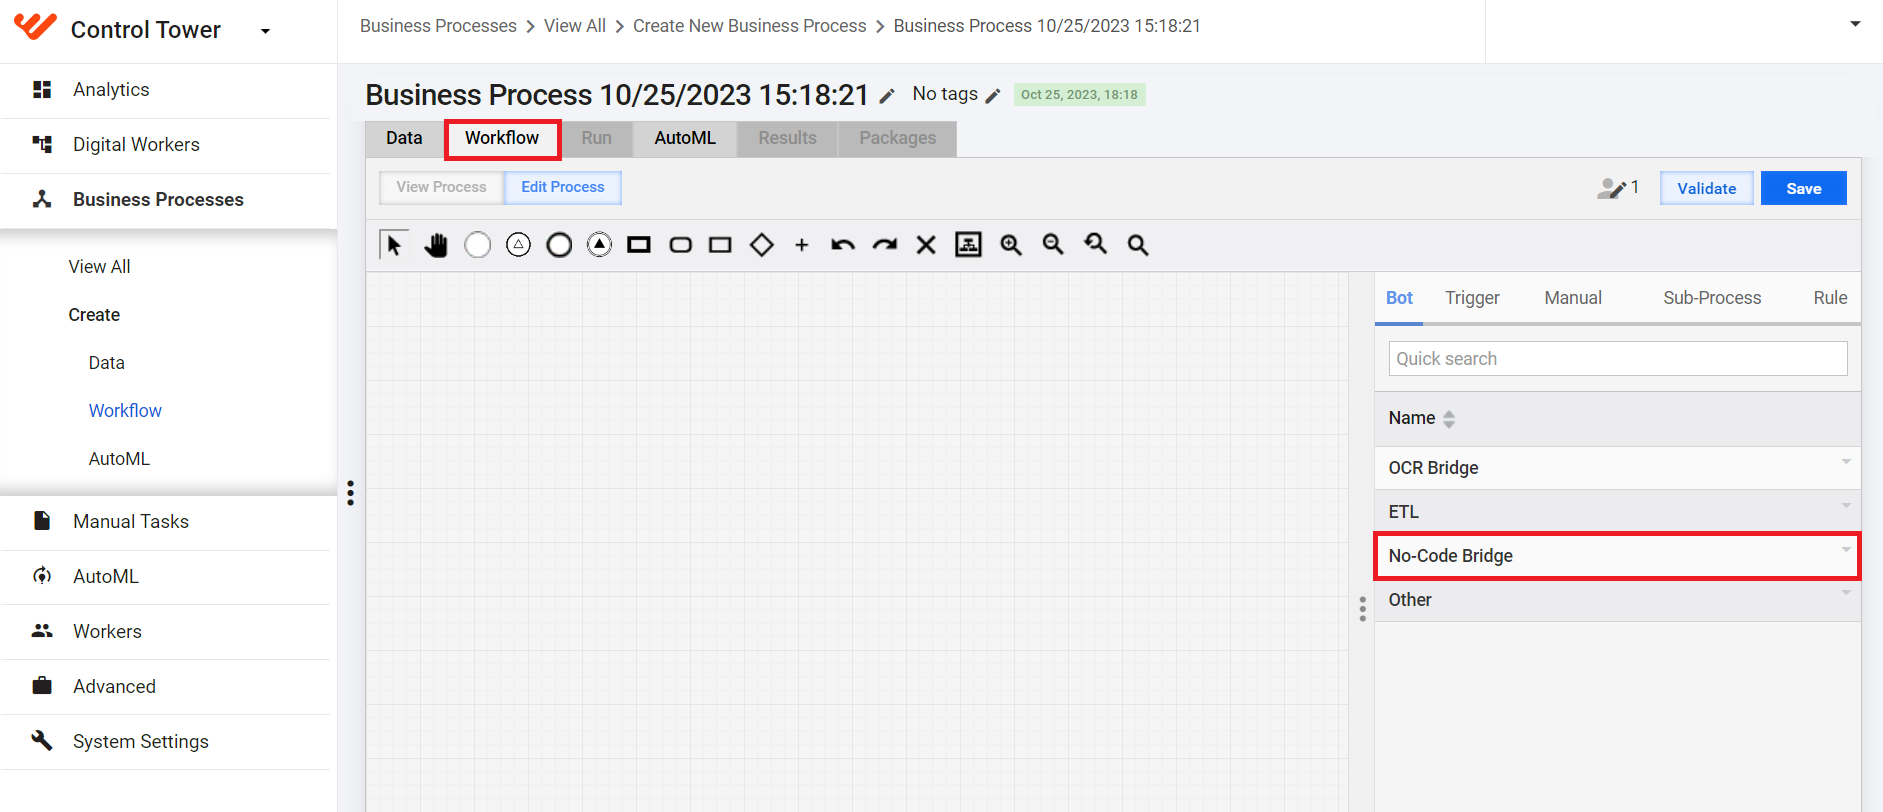
To integrate a no-code AutoML step into a BP, do as follows:
Add a required step to the workflow canvas. You can do it in one of the following ways:
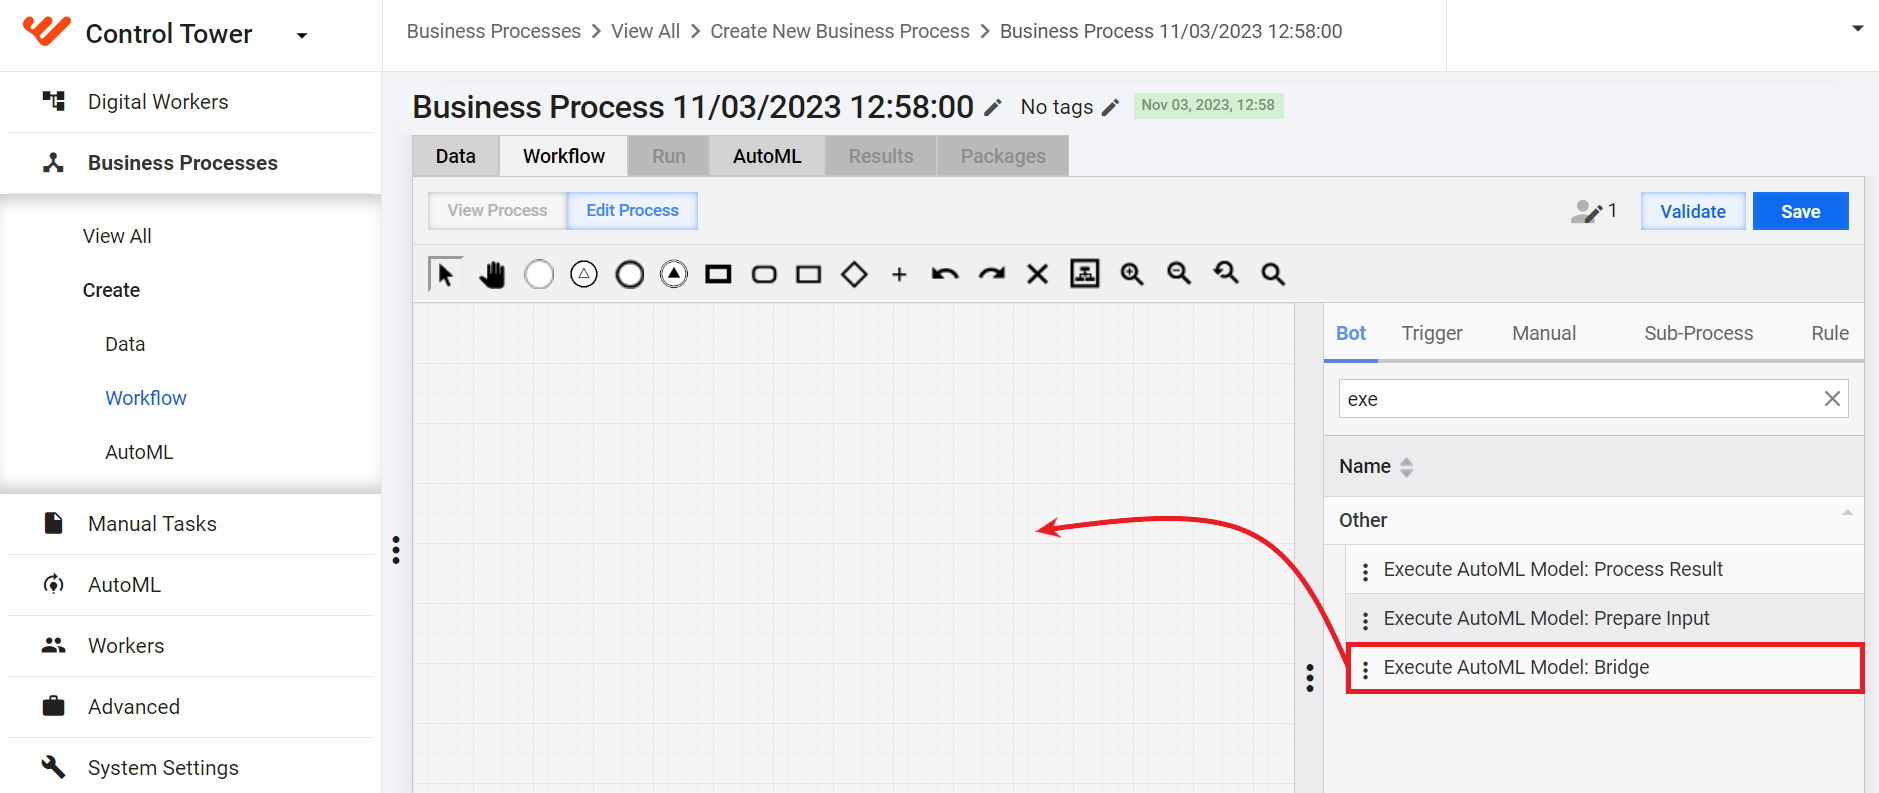
Drag a step from the Bot panel on the right to the canvas:
No-code AutoML Classification Bridge
No-code AutoML Image Processing Bridge
No-code AutoML IE Bridge
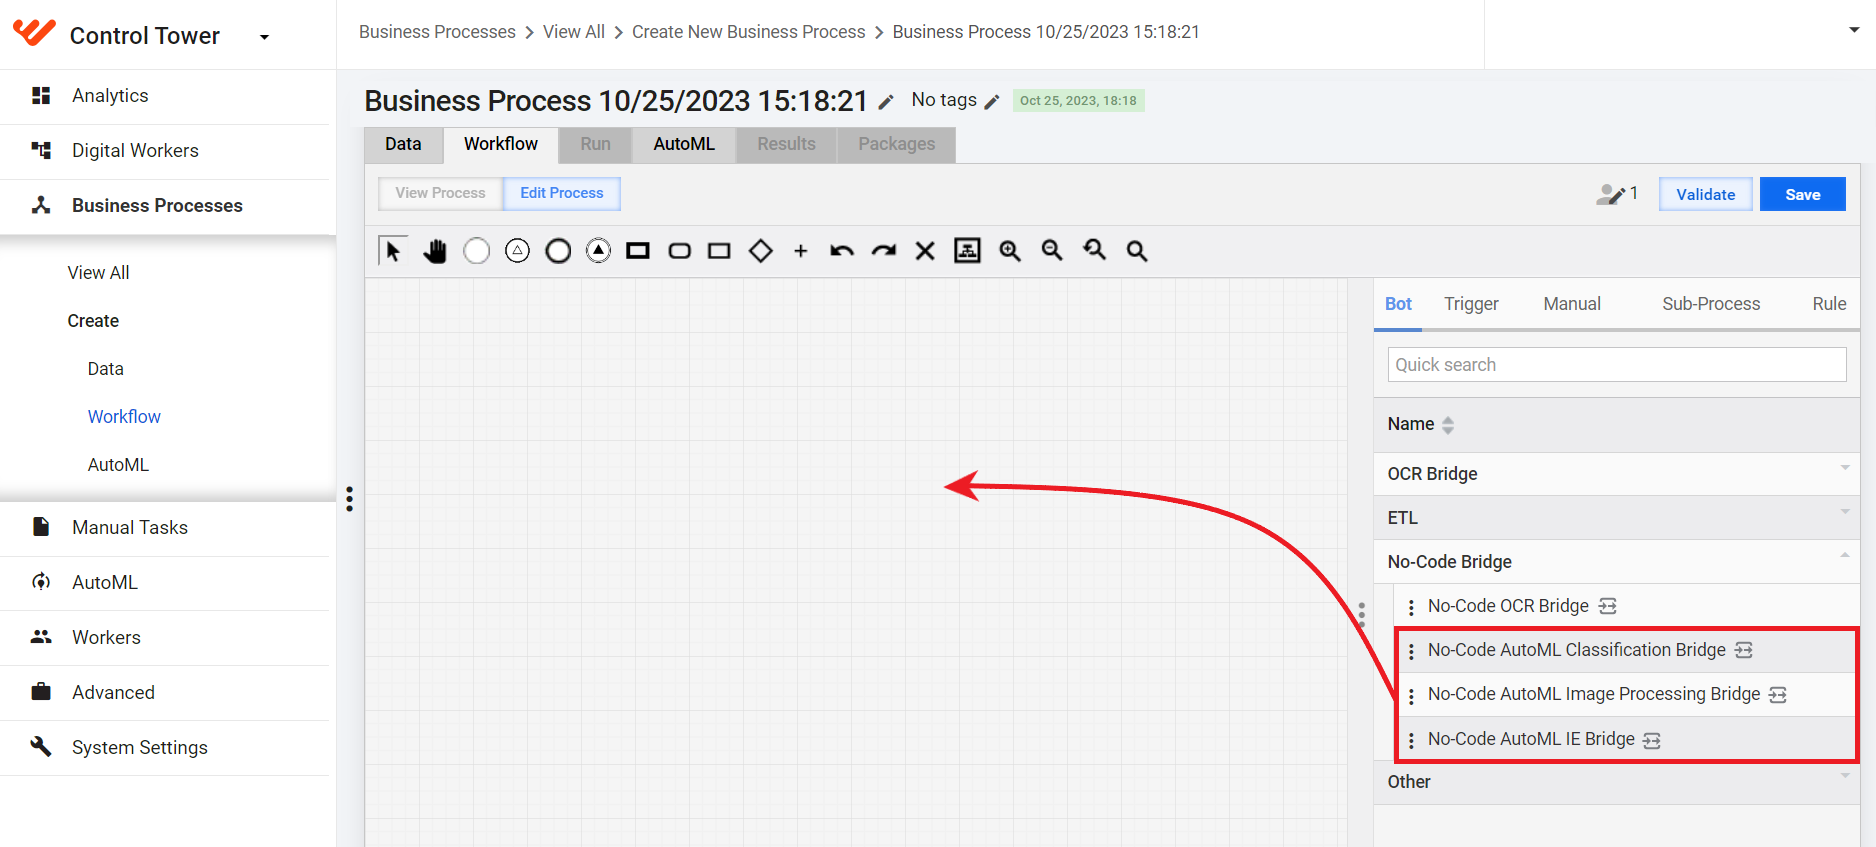
warningIf you drag the step directly to the canvas, any changes you make to it are applied across all Business Processes where the step is included.
Copy an existing step. For that, double-click it in the flow and select Copy from the context menu or hover over it on the right panel and click Copy.
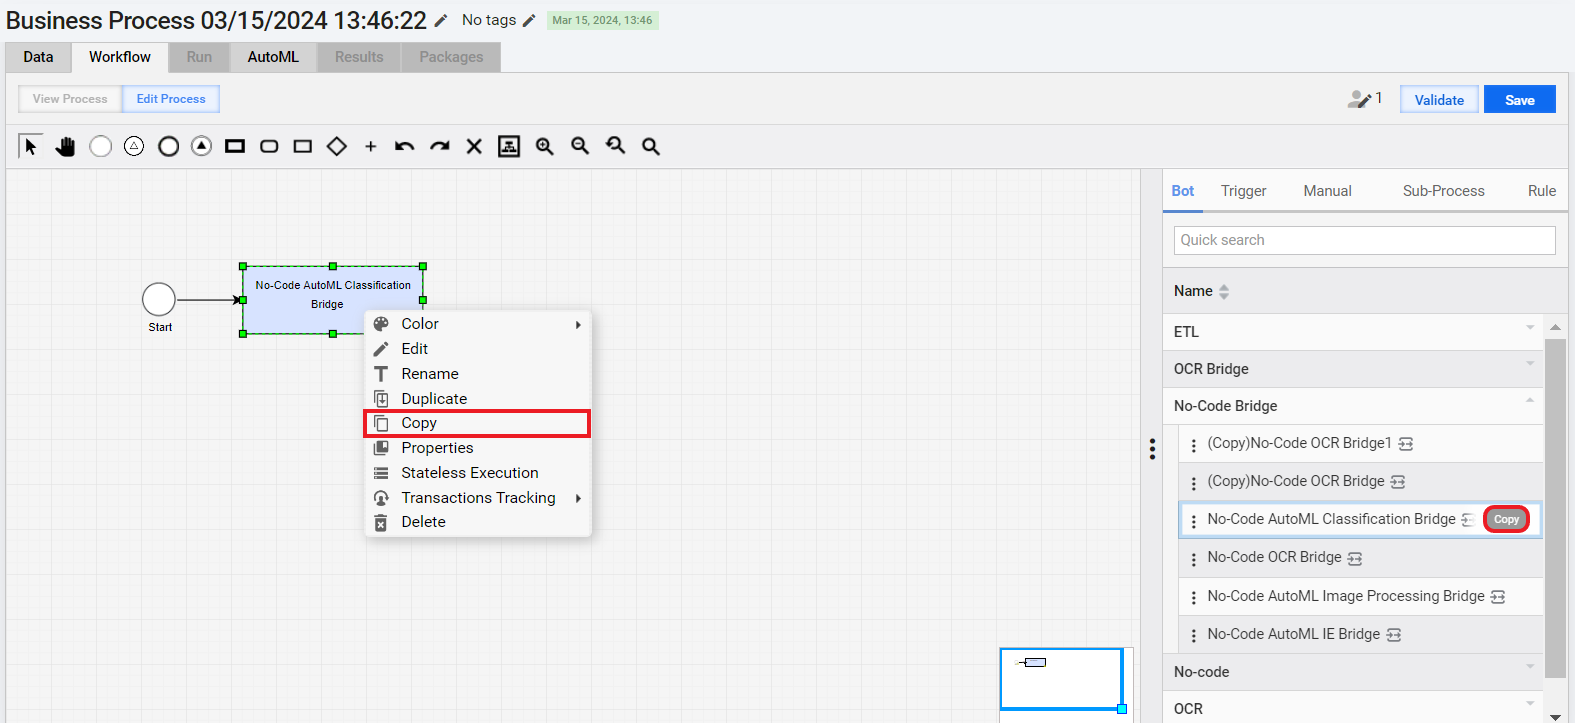
If you copy a Model step, you are prompted to edit its name. The copy and the source are not synchronized.
If you Duplicate a step from its context menu, any changes in the duplicate are synchronized with the source.
Drag a Bot Task element from the toolbar to the canvas, double-click it, open the No-code operation caterogy, and select the required AutoML step type.
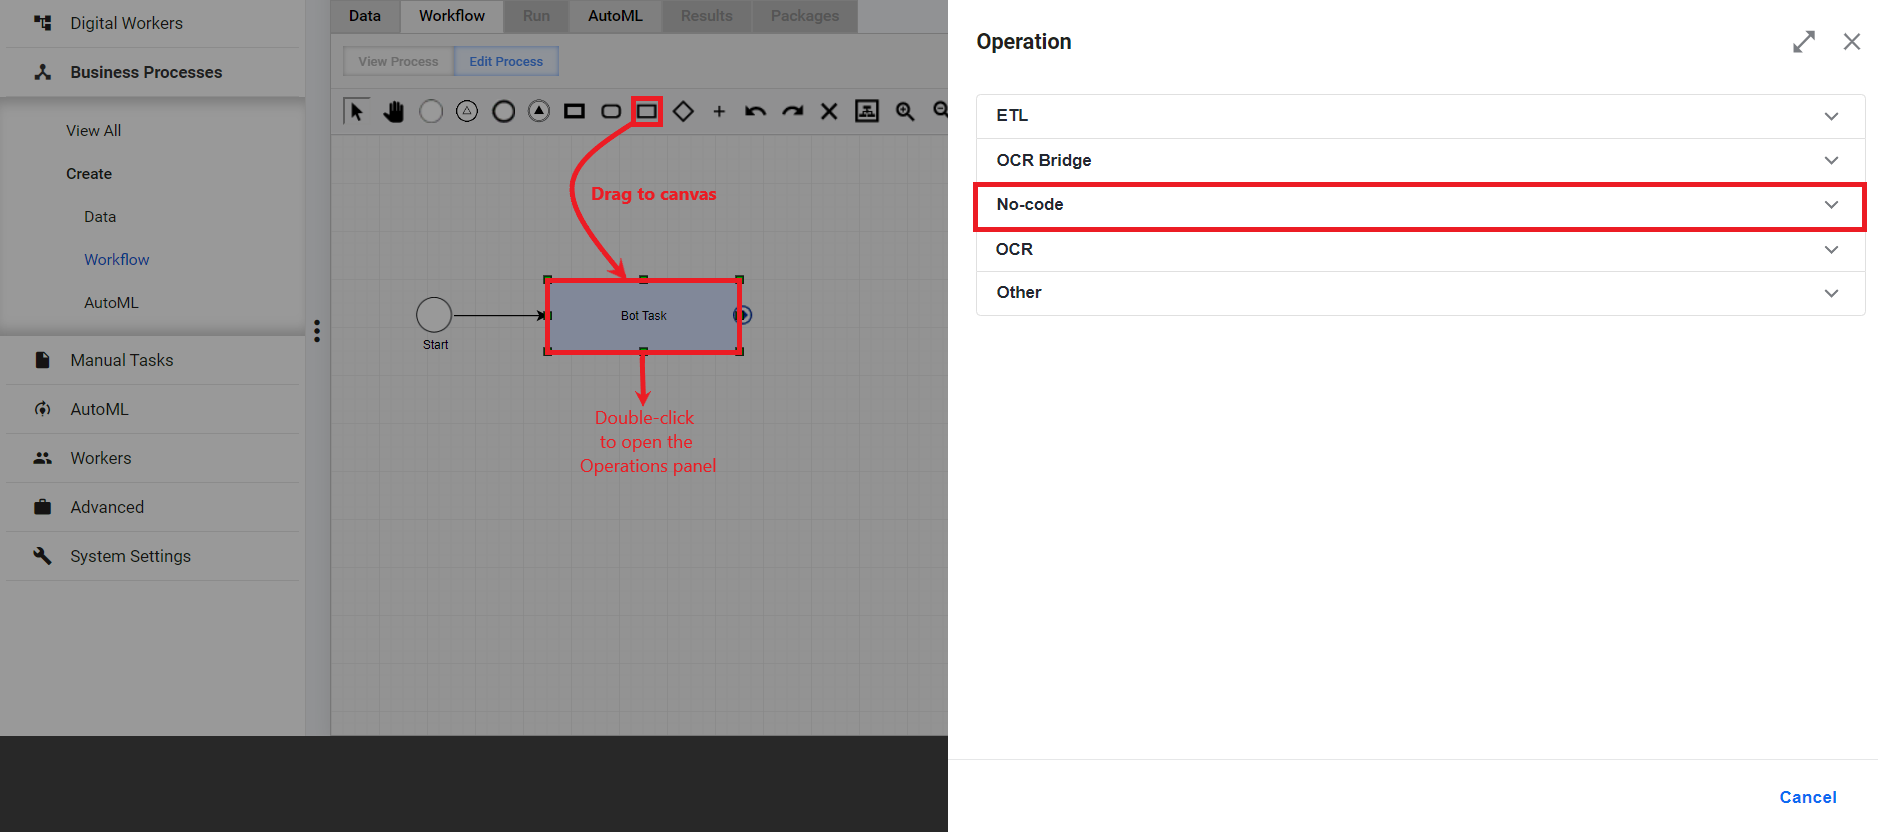
To open the step's configuration panel (if needed), double-click it. On the Design tab of the Bot step configuration panel, set up the step's configuration. For parameter details, see Step input.
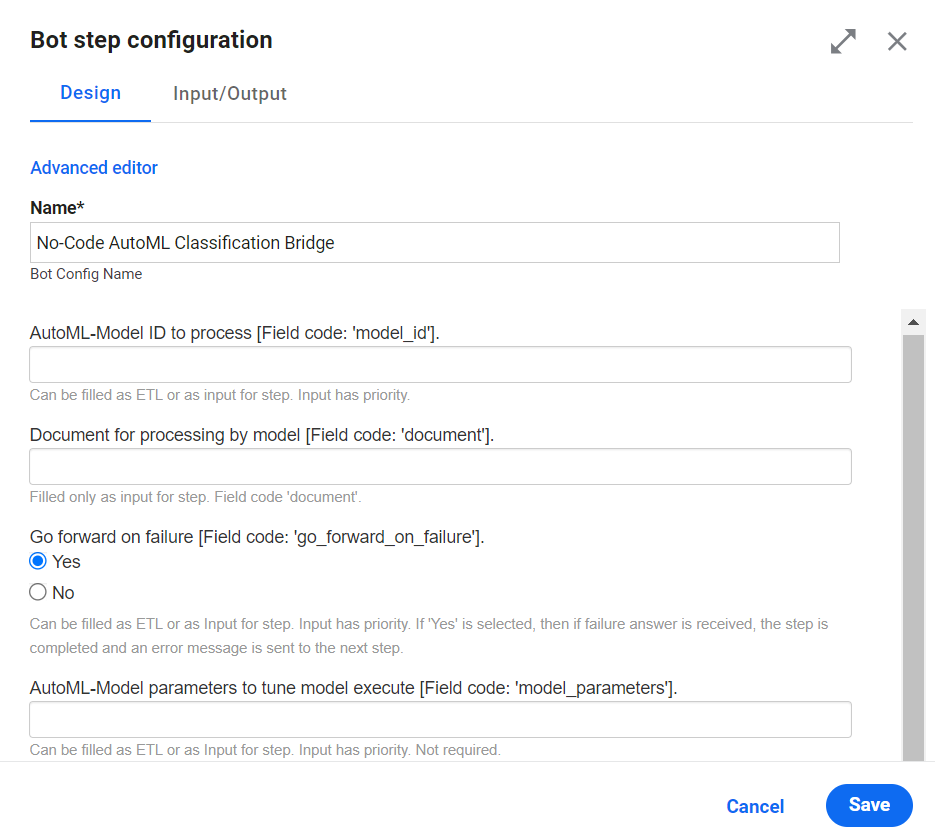
For a schema-based BP, set up input and output contracts on the Input / Output tab as described in the guide. Then, click Save.
noteOnce you have set up the inputs and outputs, the whole BP becomes a schema-based one, and you will have to configure inputs and outputs for the rest of the steps in the same BP.
As you go back to the Design tab, click Save again.
Alternatively, you can create the same BP using a regular Execute AutoML Model: Bridge step. The setup sequence for the step is similar to the one described below.
To set your Java Native Worker to work with AutoML Bridge step data, it is recommended to use the respective dependency from the WorkFusion's repository:
<groupId>com.workfusion.spa</groupId>
<artifactId>bridge-step-contracts</artifactId>
Using the library facilitates the implementation and reduces the time to production for such solutions.
Set up multi-model step
The AutoML Model Bridge step does not support the multi-model flow. If you plan to process a document by several models, create a BP where a document is processed by several steps (in parallel or one by one).
To address the issues related to Model steps in a Business Process, read the following support guides:
Investigate Business Process performance degradation if you notice the BP has become slower
Investigate non-operational Business Process if the BP will not work
Investigate non-operational platform if the issues are associated with a malfunction of some platform component