Create groups
Instead of mapping attributes and roles to individual users, you can create groups of users sharing common attributes and role mappings.
- Groups are hierarchical: a group can have many child groups but only a single parent one.
- Child groups inherit the attributes and role mappings from the parent group.
- Each user can belong to one or more groups and inherits the attributes and roles assigned to each of these groups.
To access the functionality for managing groups, make sure you are in the right realm and, on the left menu, select Groups.
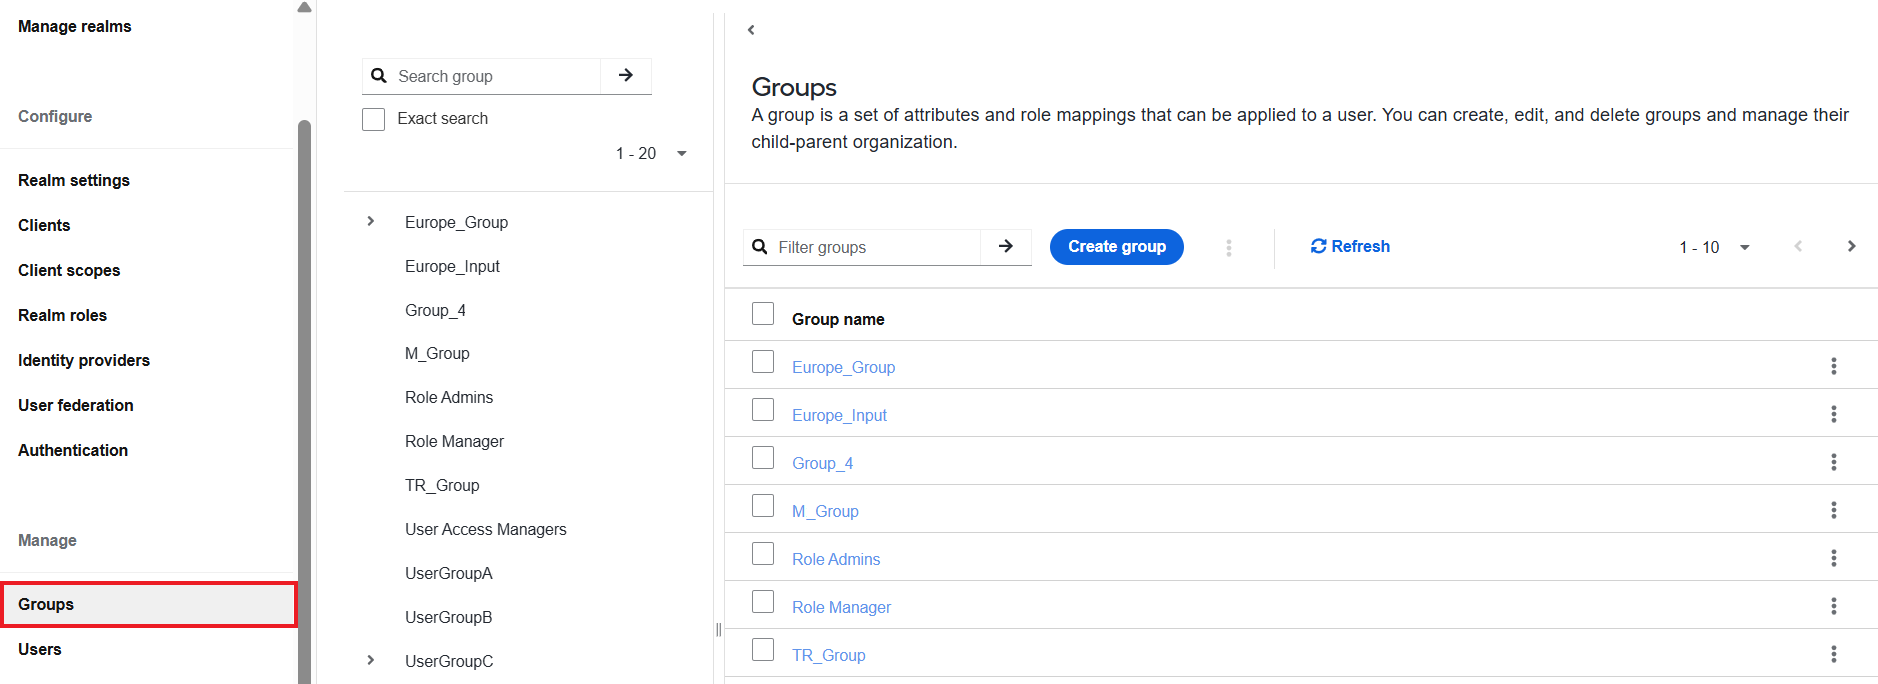
On the right, you will see a panel for managing groups together with a list of available groups.
Create group
To create a group, follow the steps below:
On the Groups page, click the Create group button.
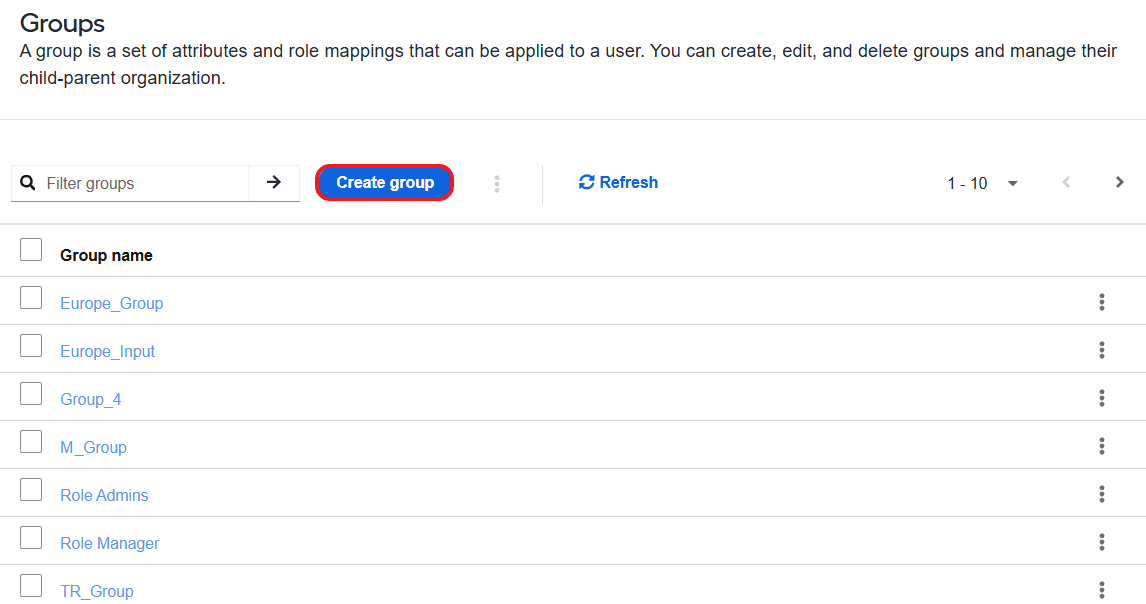
On the Create group screen, specify a group name and click Save. The group appears in the list.

Click the newly created group and go to the Attributes tab. To add attributes, click the Add attributes button.
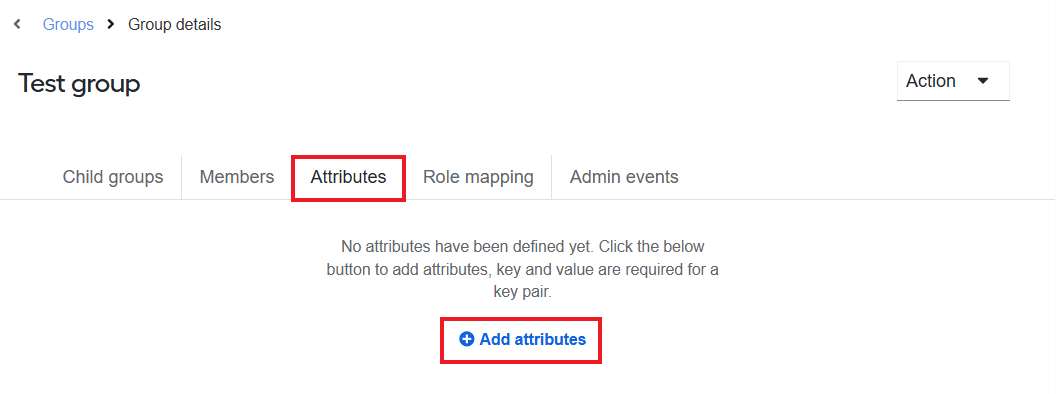
In the Key field, set the attribute name. In the Value field, specify the attribute value. If needed, click Add attributes to set more attributes.
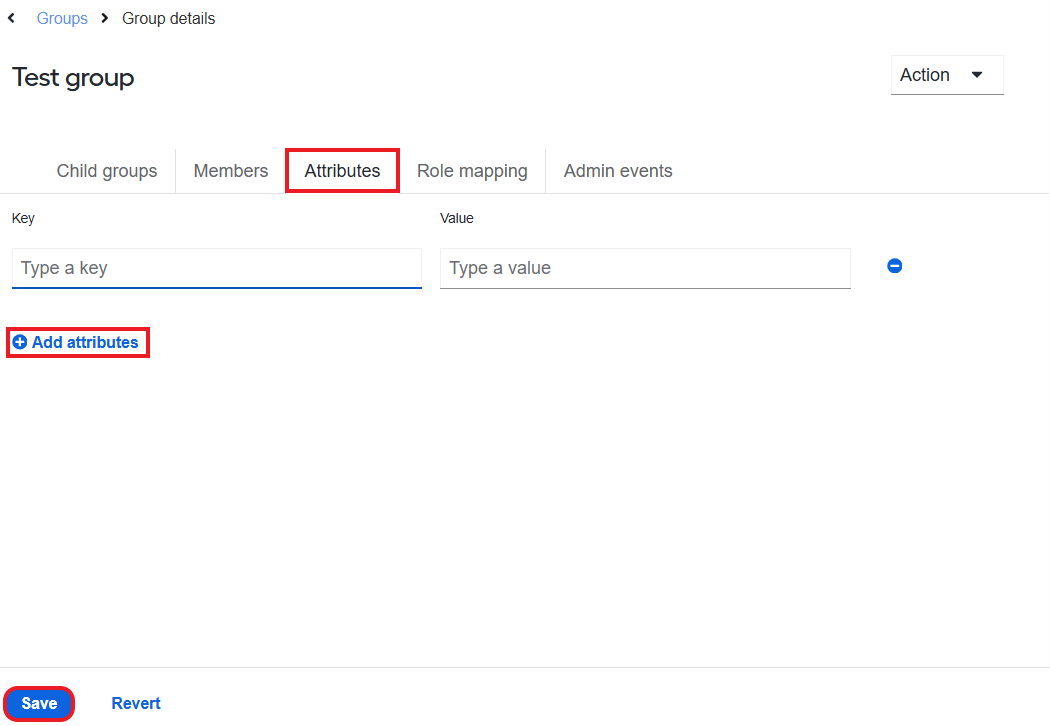
Click Save to save the specified attributes.
Go to the Role mapping tab to map roles to the newly created group.
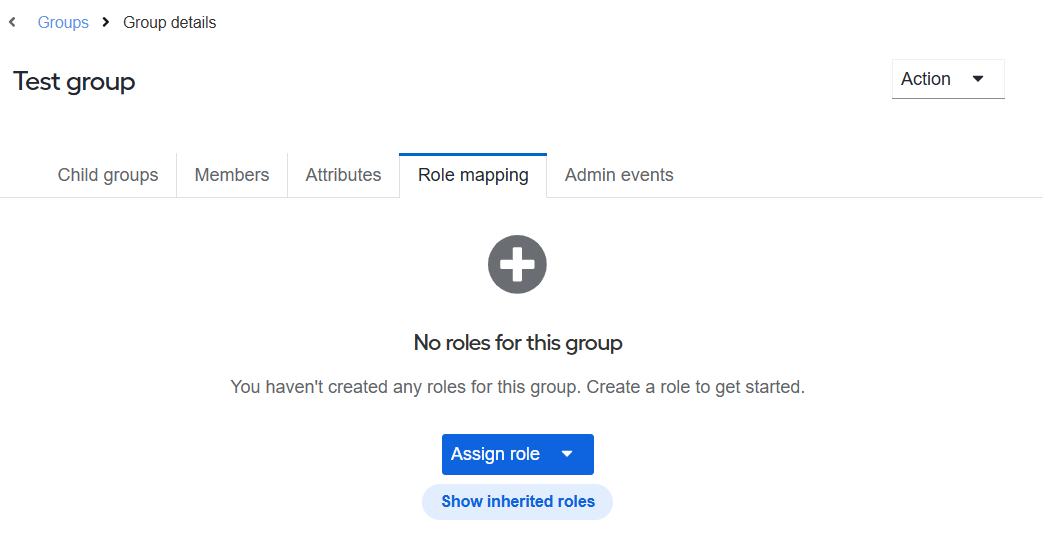
Create child group
To create a child group, follow the steps below:
Select a parent group in the list of groups.
Go to the Child groups tab and click Create group.
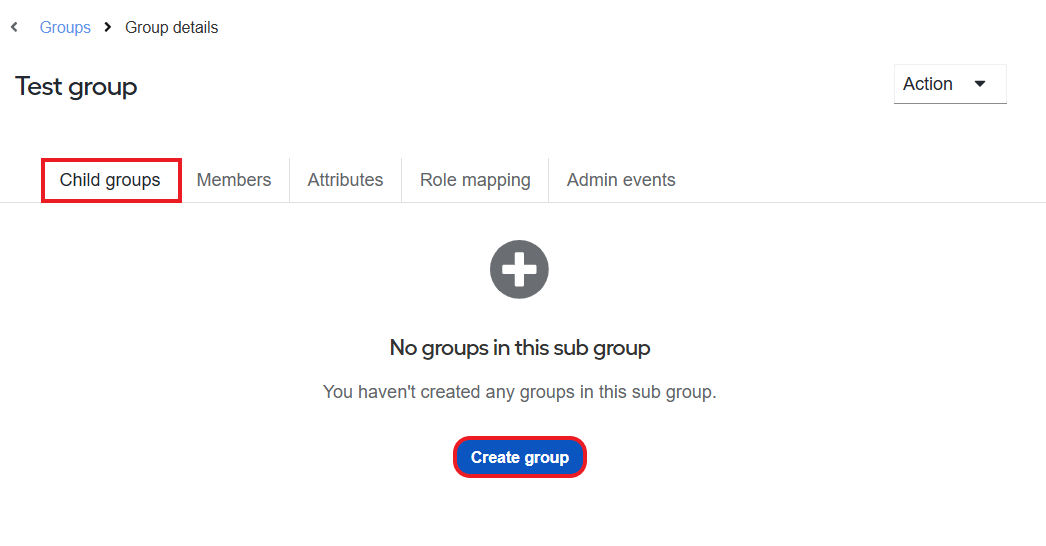
Specify the name and, if needed, a description for the group and click Create to save the group.

The group appears in the list on the Child groups tab.
View group members
To view users belonging to a particular group, open the Groups tab, select a specific group in the list, and go to the Members tab. You will see a list of users belonging to the selected group together with their attributes.
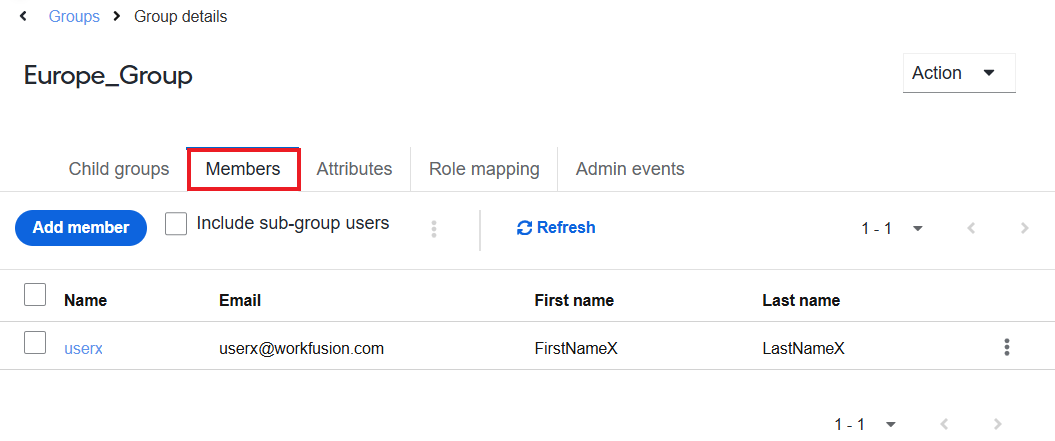
From the Members tab, you can also edit the user's details. To do that, click a user's name. This will bring you to the Details tabs. For more information, see the Manage users topic.
Add user to group
To add a user to a group, use one of the following paths:
From Groups page
The sequence of actions for the path is as follows:
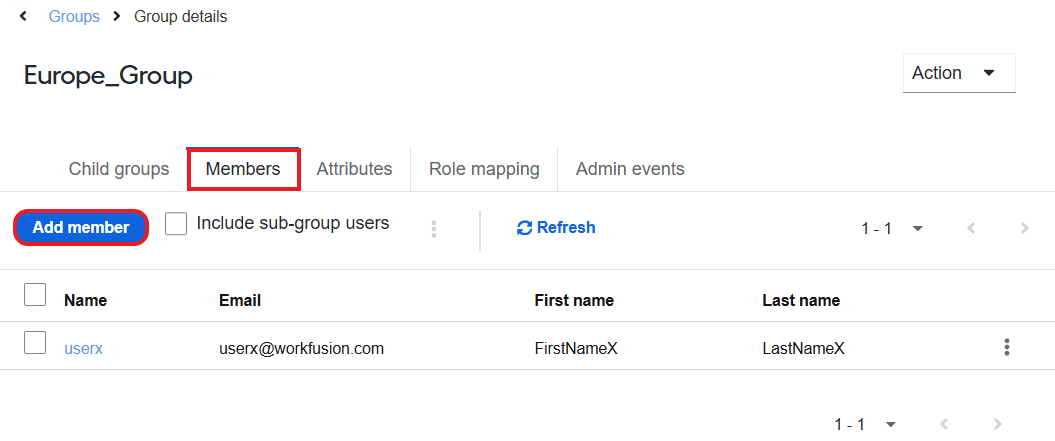
On the Groups page, click a group name to open it and navigate to the Members tab.
Click the Add member button. You can also add sub-group members to the group by selecting the Include sub-group users checkbox.
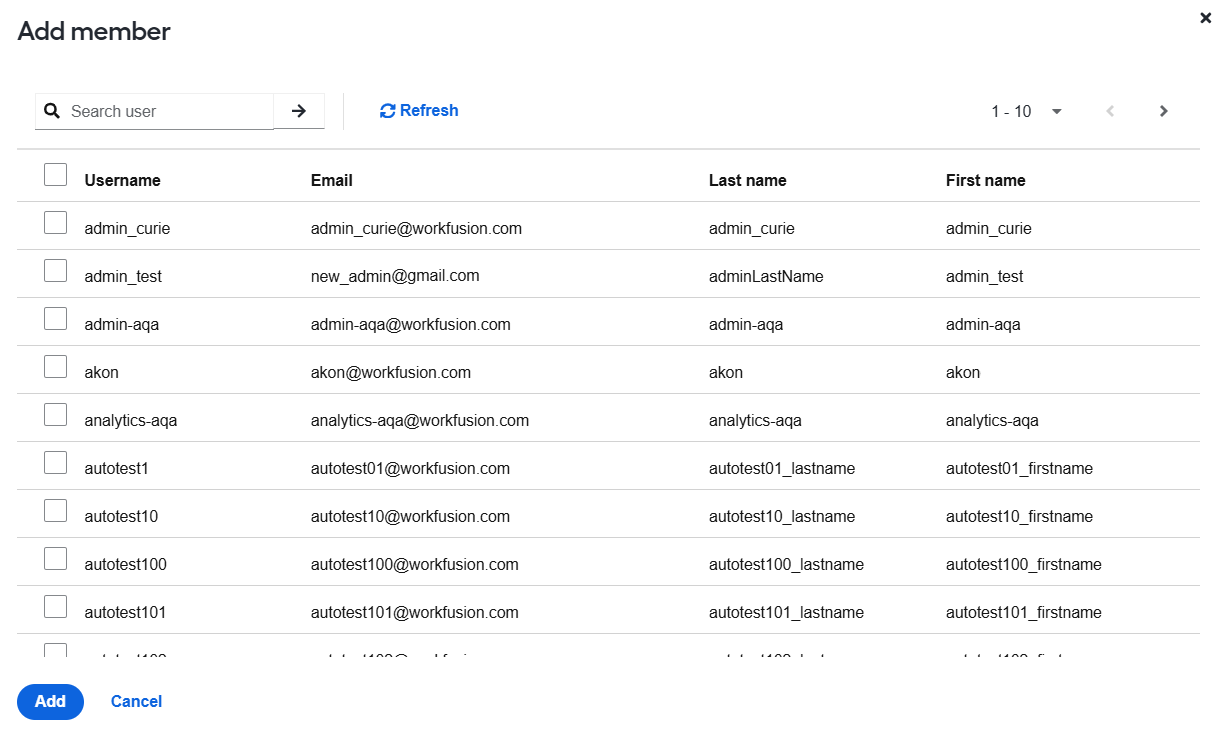
On the Add member screen, select one or more checkboxes to add respective users to the group and click Add. The selected users are added to the group.
From Users page
The sequence of actions for the path is as follows:
On the left menu, choose the Users tab to open the list of available users.
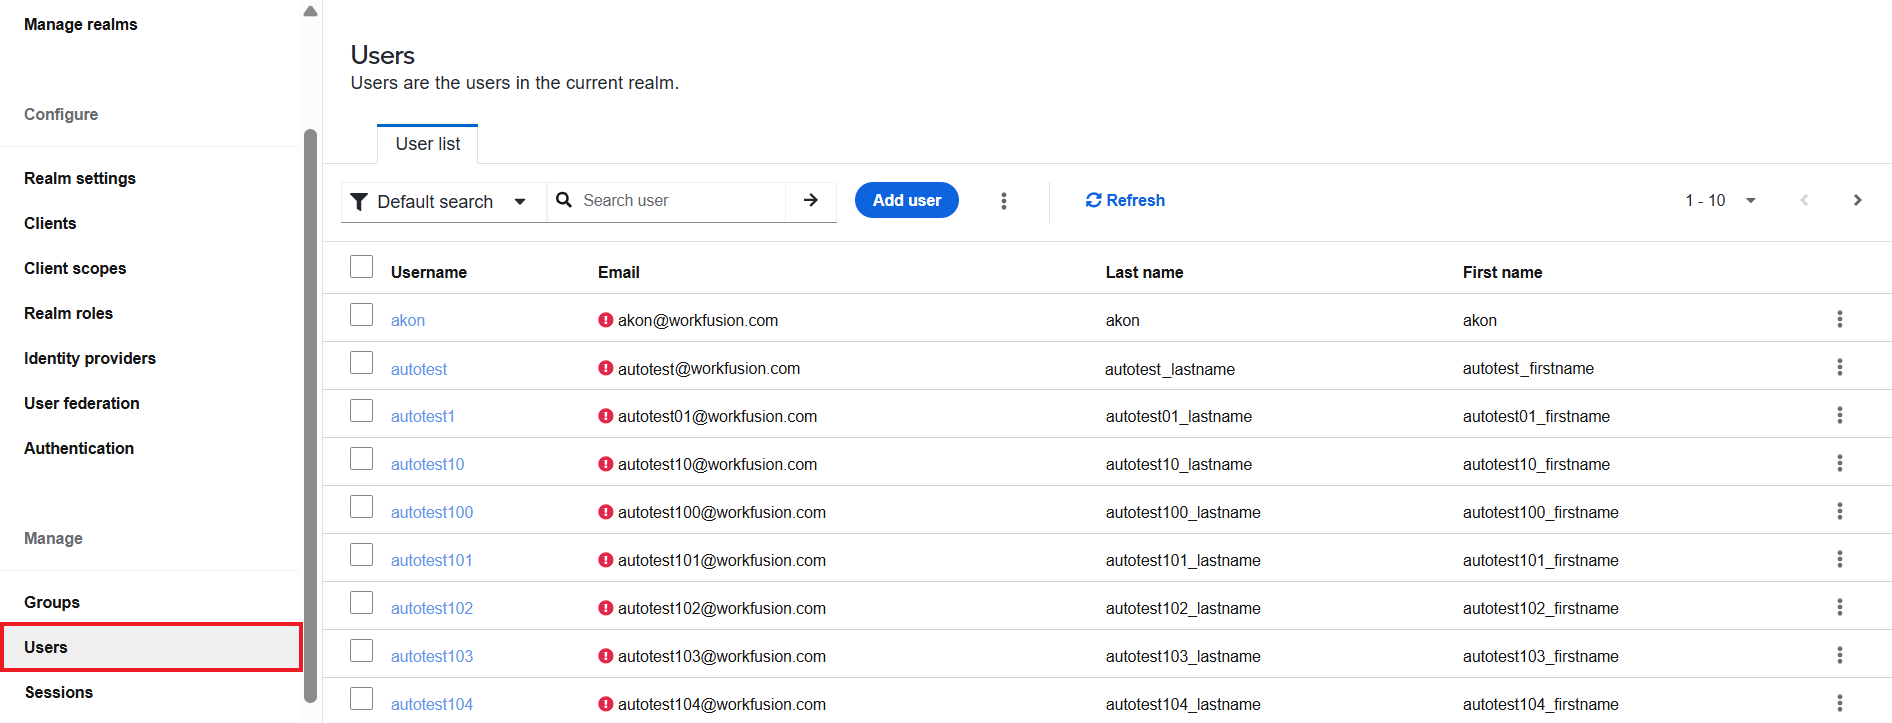
In the list, click a user's name to open its details page and navigate to the Groups tab. The tab lists all groups where the user belongs.
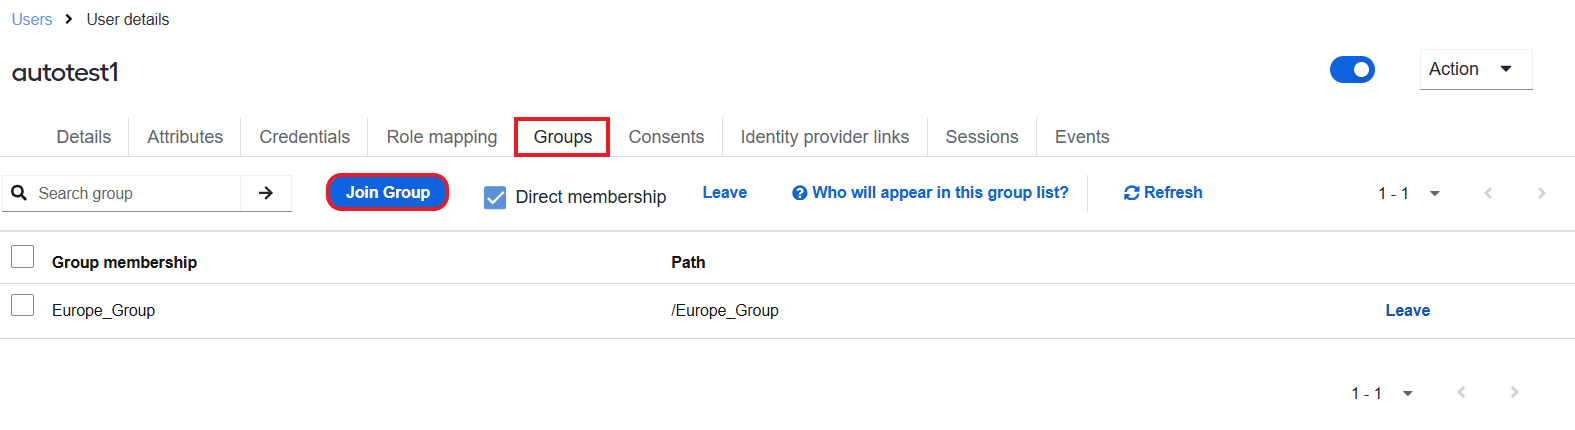
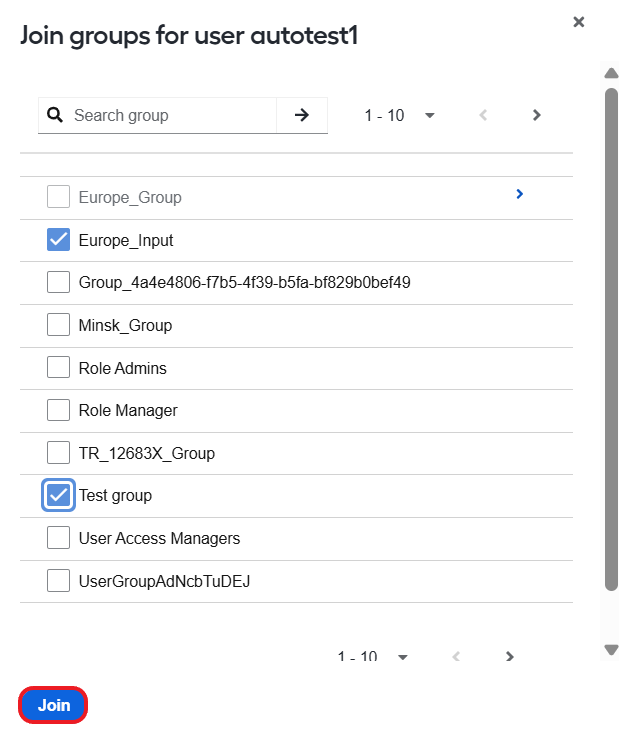
Click Join Group and choose one or more groups where you want to add the user. Click Join to confirm the choice. The user is added to the selected groups, and the groups are listed on the Groups tab.