Segregate Administrator permissions
By default, after Work.AI is installed, the Administrator Role possesses full permissions for User Management and Control Tower. It is very convenient to give all permissions to a person who sets up the environment to the organization's needs. However, after the initial environment setup, your organization may want to involve more people in administration while limiting their responsibilities and the platform capabilities with which they can interact.
Some routine administration operations include establishing new roles in the organization and onboarding users. It's not rare that different people perform these two functions to prevent administrators from getting enough permissions to be technically able to grant themselves even more authorizations and potentially harm the system. In the guide below, this case is used to illustrate how you can segregate administrator permissions in Work.AI.
By default, assuming all users are local, all actions are performed by the user holding the Administrator Role in WorkFusionRealm. However, the approach can be easily adapted for users from an external federations or Identity Providers. If required, local user records should be explicitly linked to external Identity Provider records. Local role management remains the only requirement.
Set role that can only define other roles
For simplicity, let's call it the Role Manager. Within Work.AI, the Role Manager is responsible for the following:
- Defining roles or groups mapped to client-specific roles
- Specifying the permissions of the client-specific roles under particular clients (if applicable)
You can use roles and groups interchangeably. In this document, groups are used because they offer the optional benefit of a structured hierarchy. So, for every organizational role, a new group is created.
To set the Role Manager role, follow the steps below:
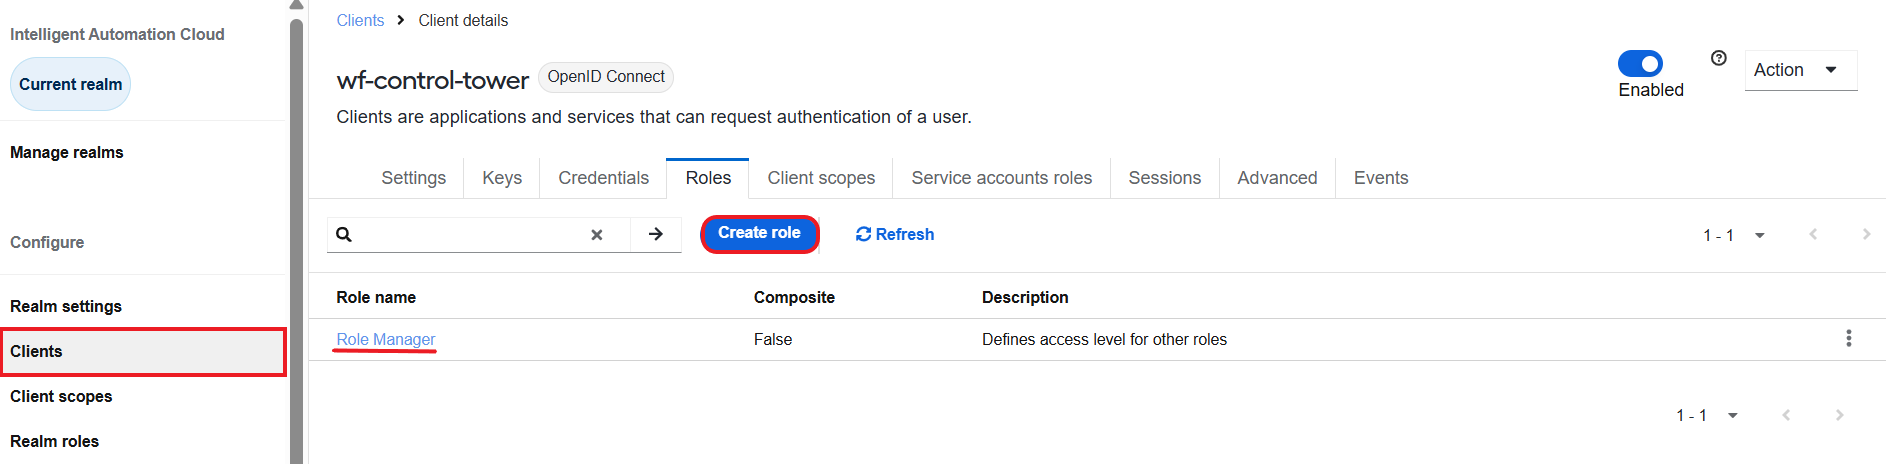
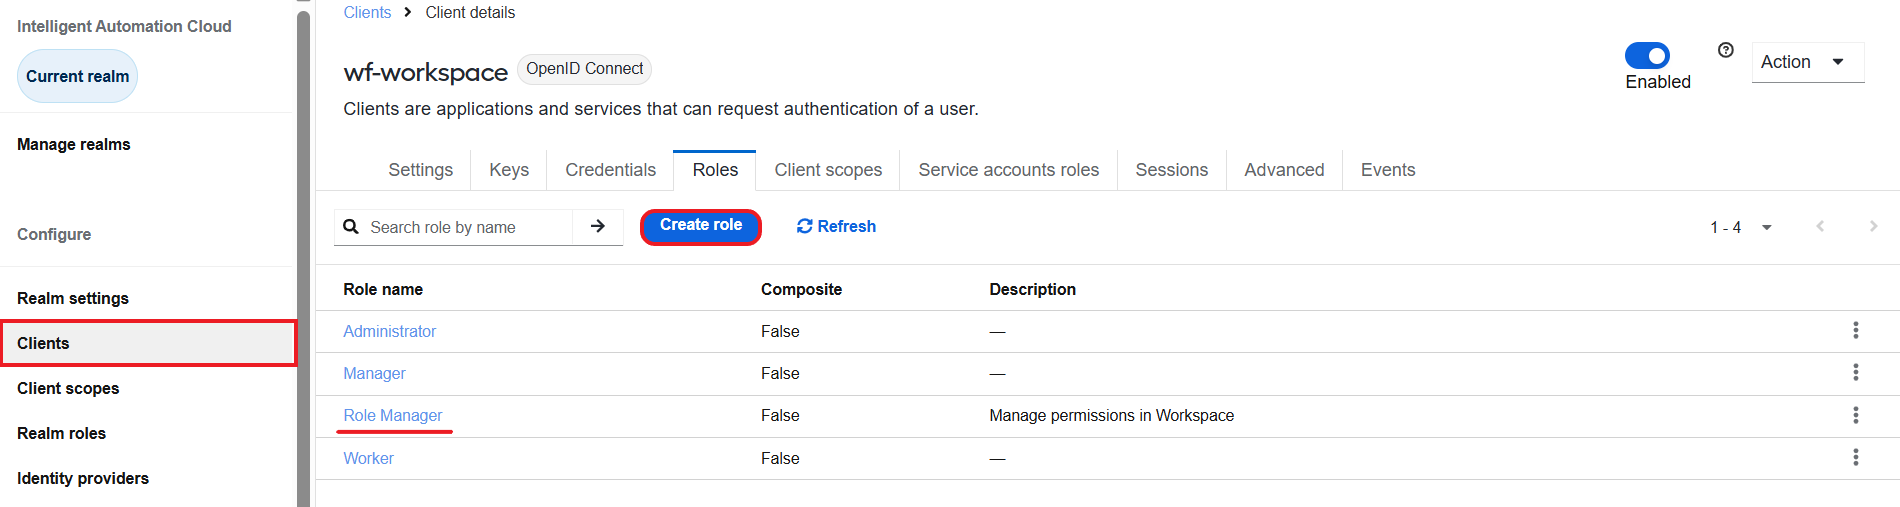
Log in to the User Management and create the Role Manager role for the two clients:
wf-control-tower (Control Tower)
wf-workspace (Workspace)
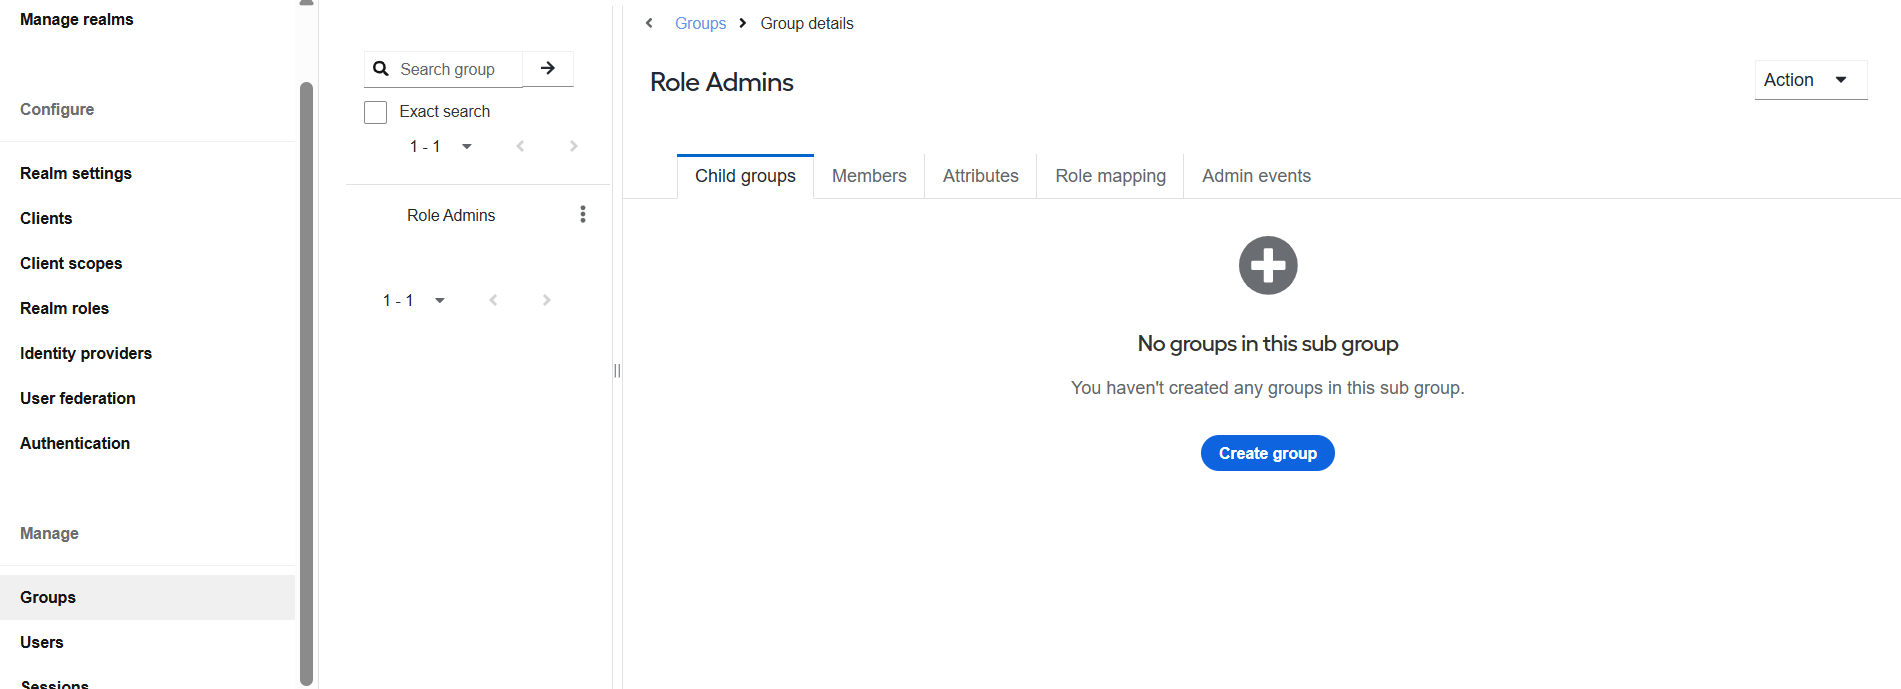
Create a group and name it Role Admins:
For the members of the new Role Admins group, specify the client-level roles in the Role Mapping tab:
For the wf-control-tower client, assign the newly created Role Manager role.
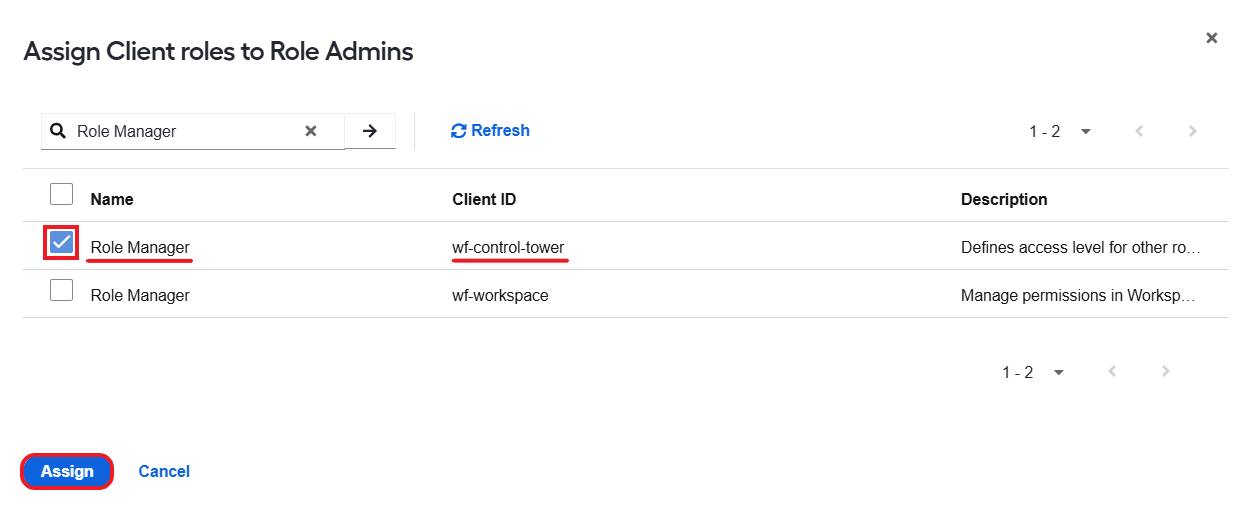
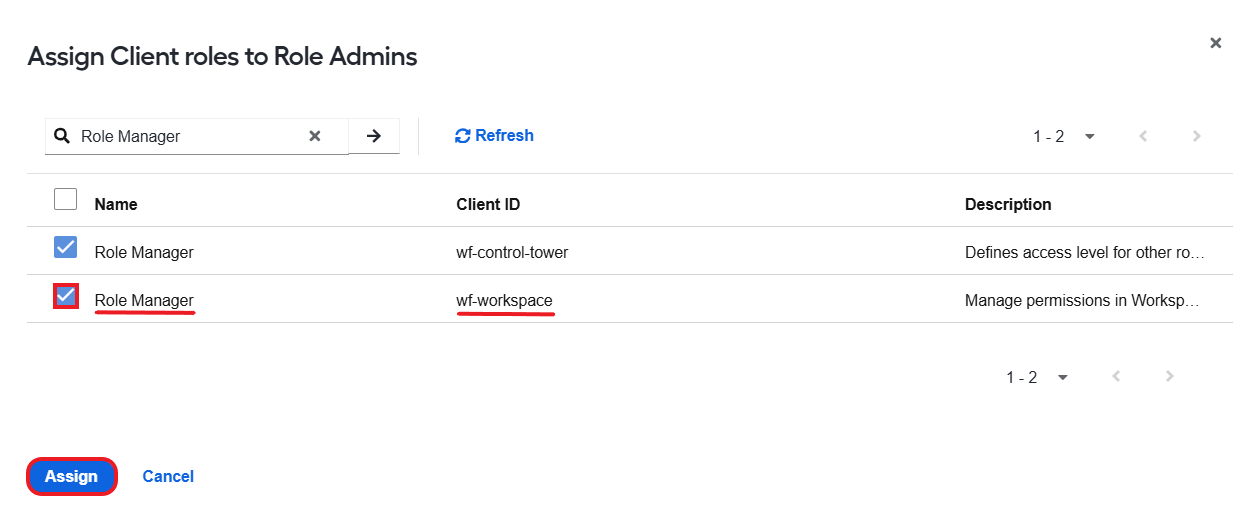
For wf-workspace client, assign the newly created Role Manager role.
For realm-management client (User Management UI), assign the following roles:
- query-groups
- wf-manage-groups-only
- wf-manage-client-roles-only
- query-clients
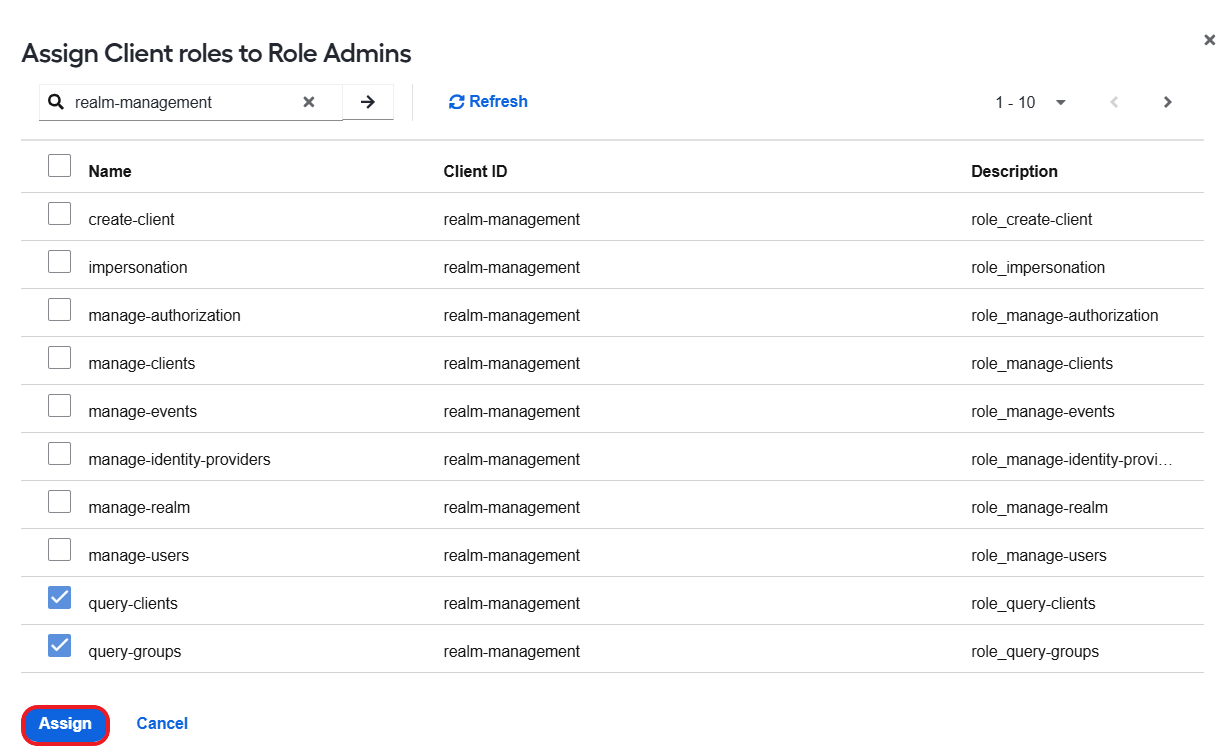
noteTo utilize realm-level roles instead of groups, the realm-management client roles must also include wf-manage-realm-roles-only and query-clients. For other clients, don't specify any groups.
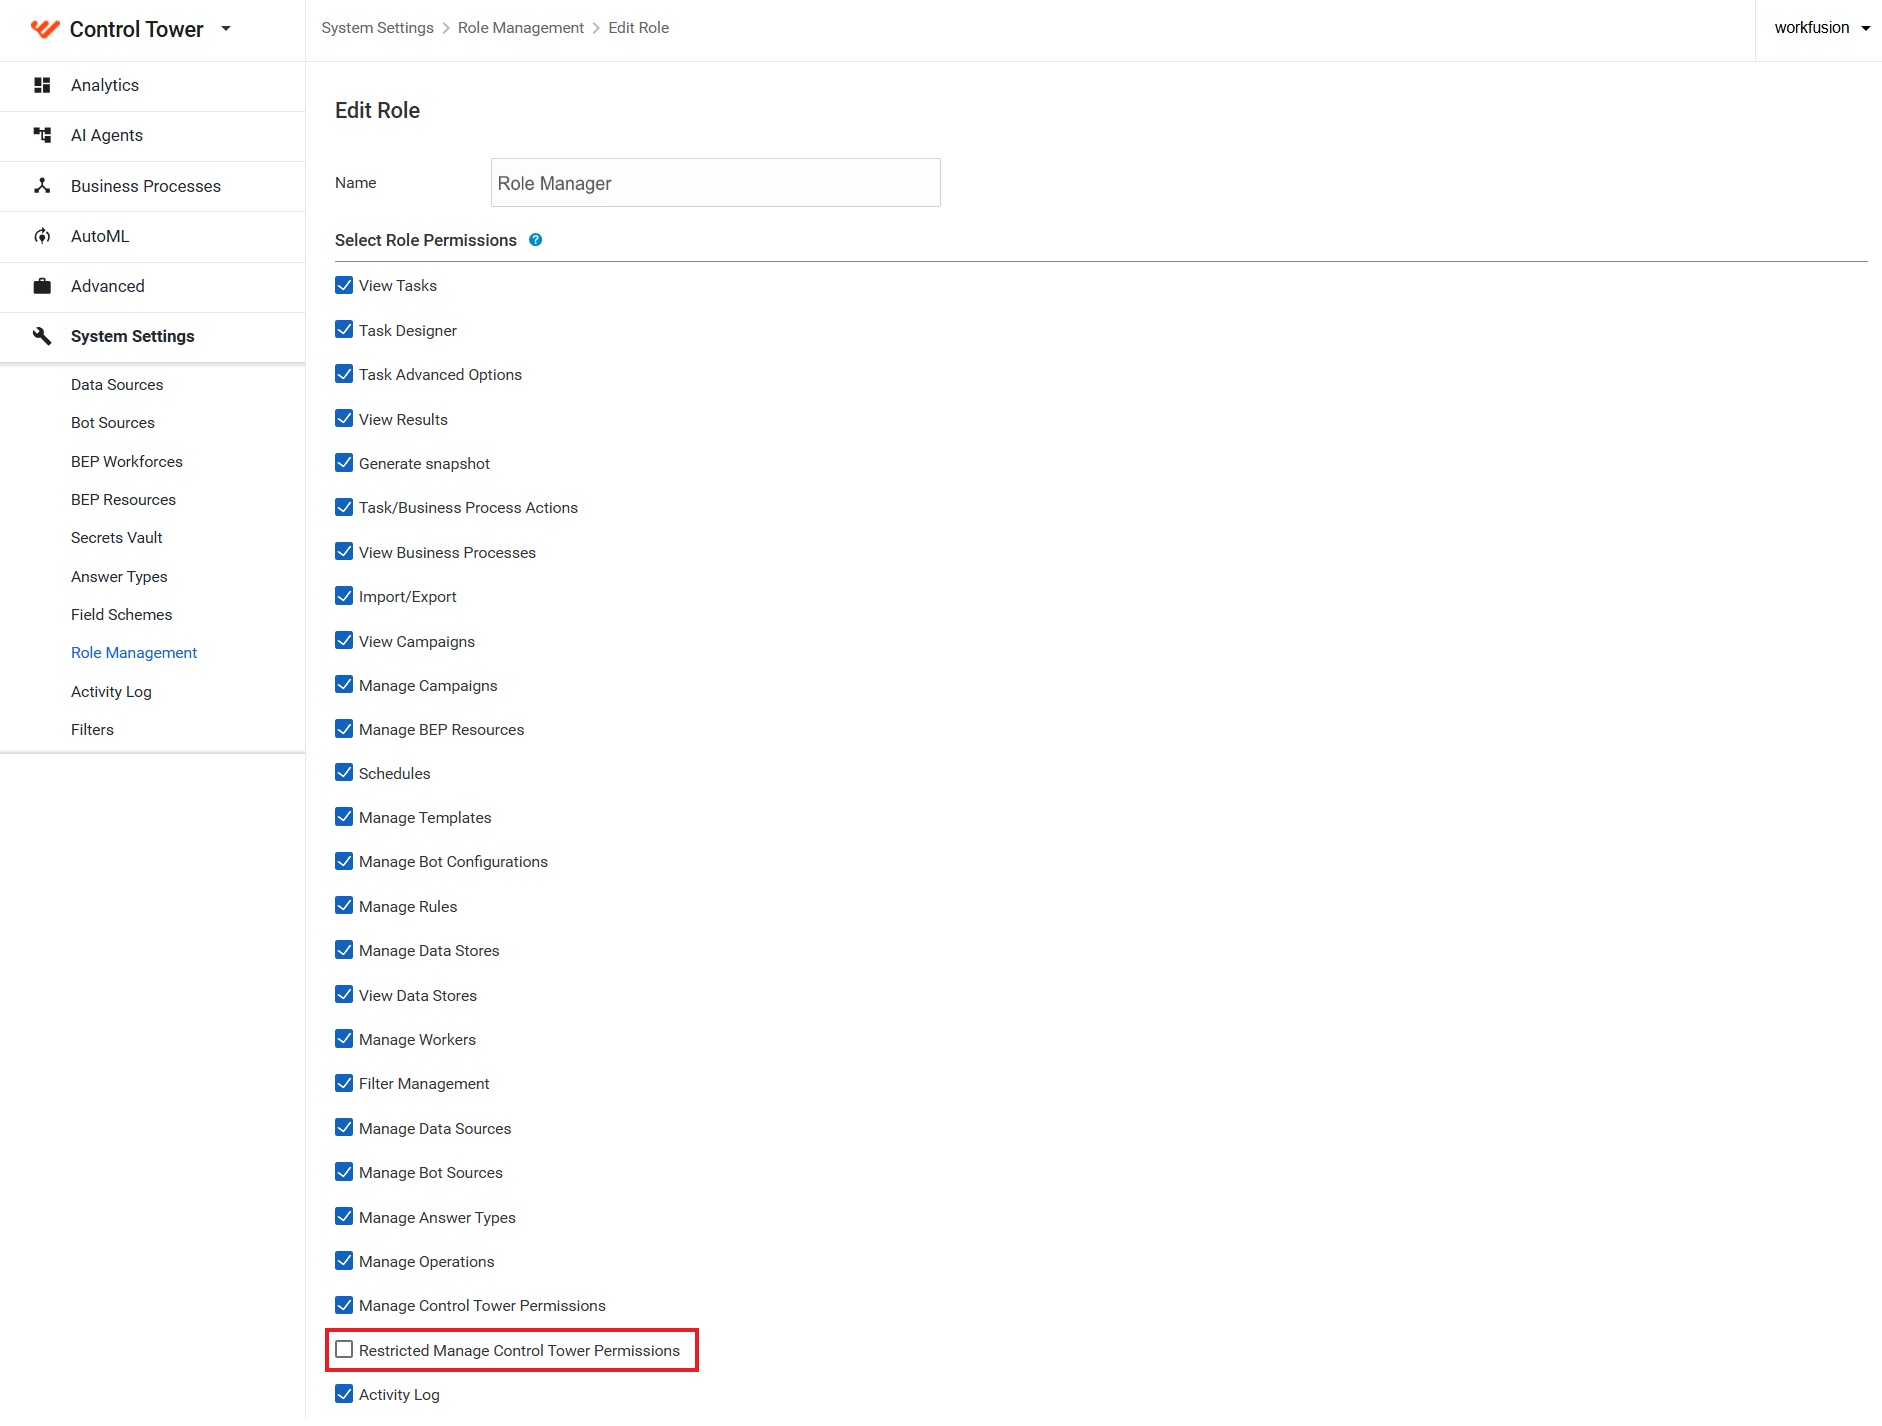
Switch to Control Tower and go to System Settings > Role management. Find the Role Manager role and click it to navigate to its permissions.
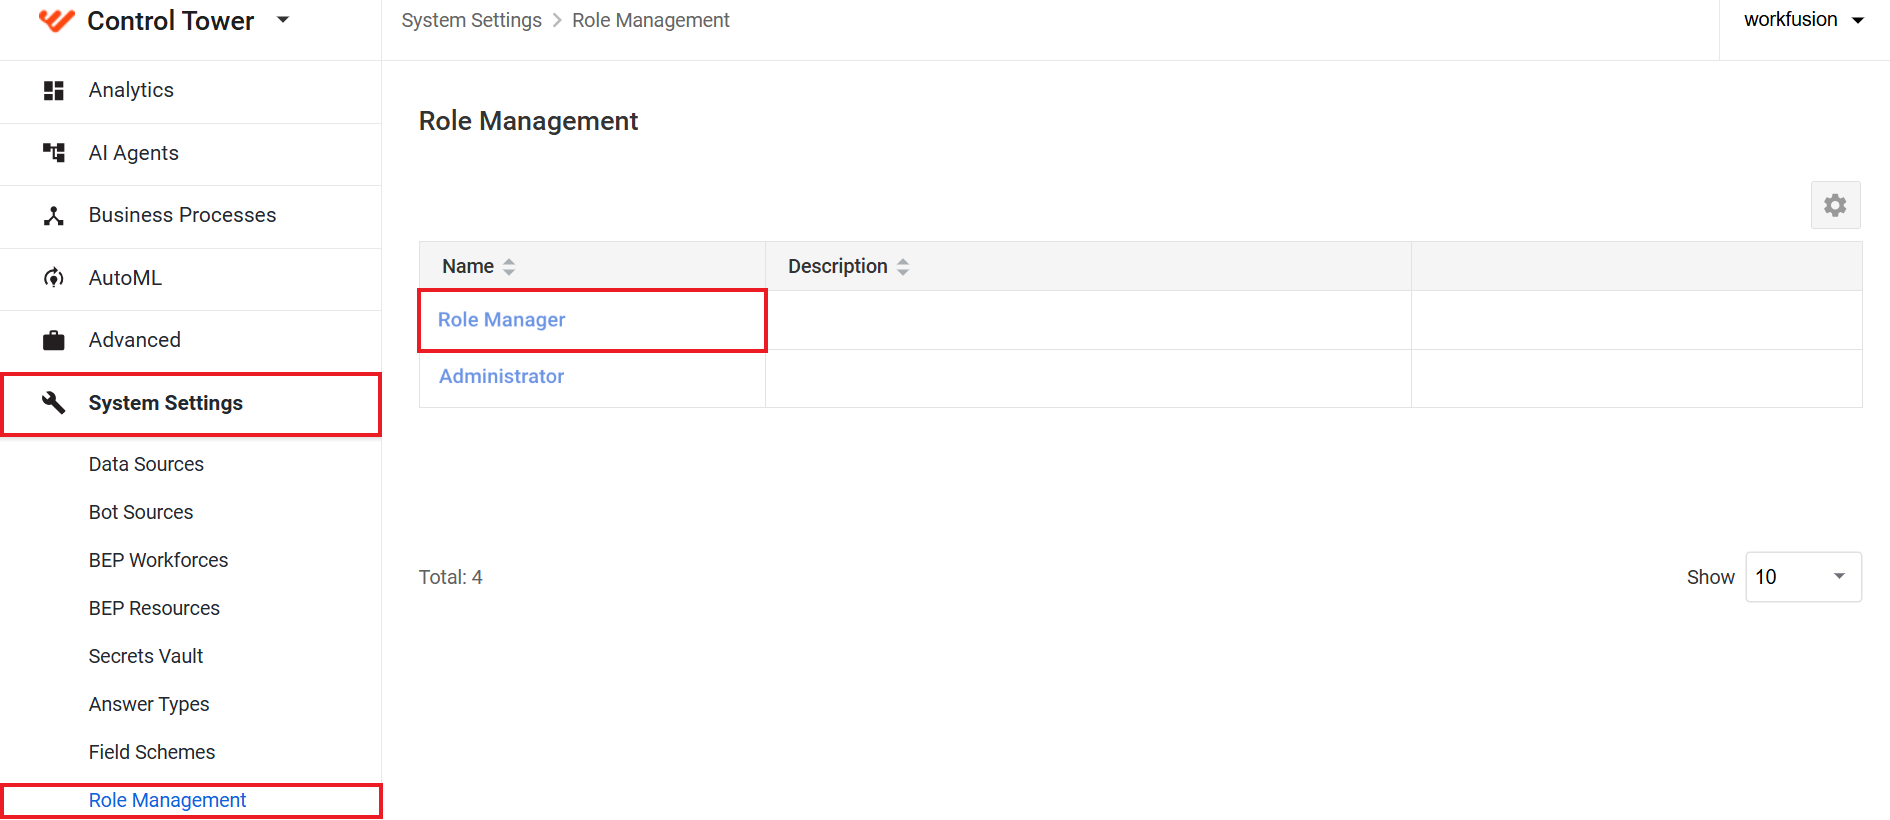
In the permission list, select Restricted Manage Control Tower Permissions. This authorizes the Role Admins group members for the Control Tower client to manage the permissions of all roles, except for Role Manager.
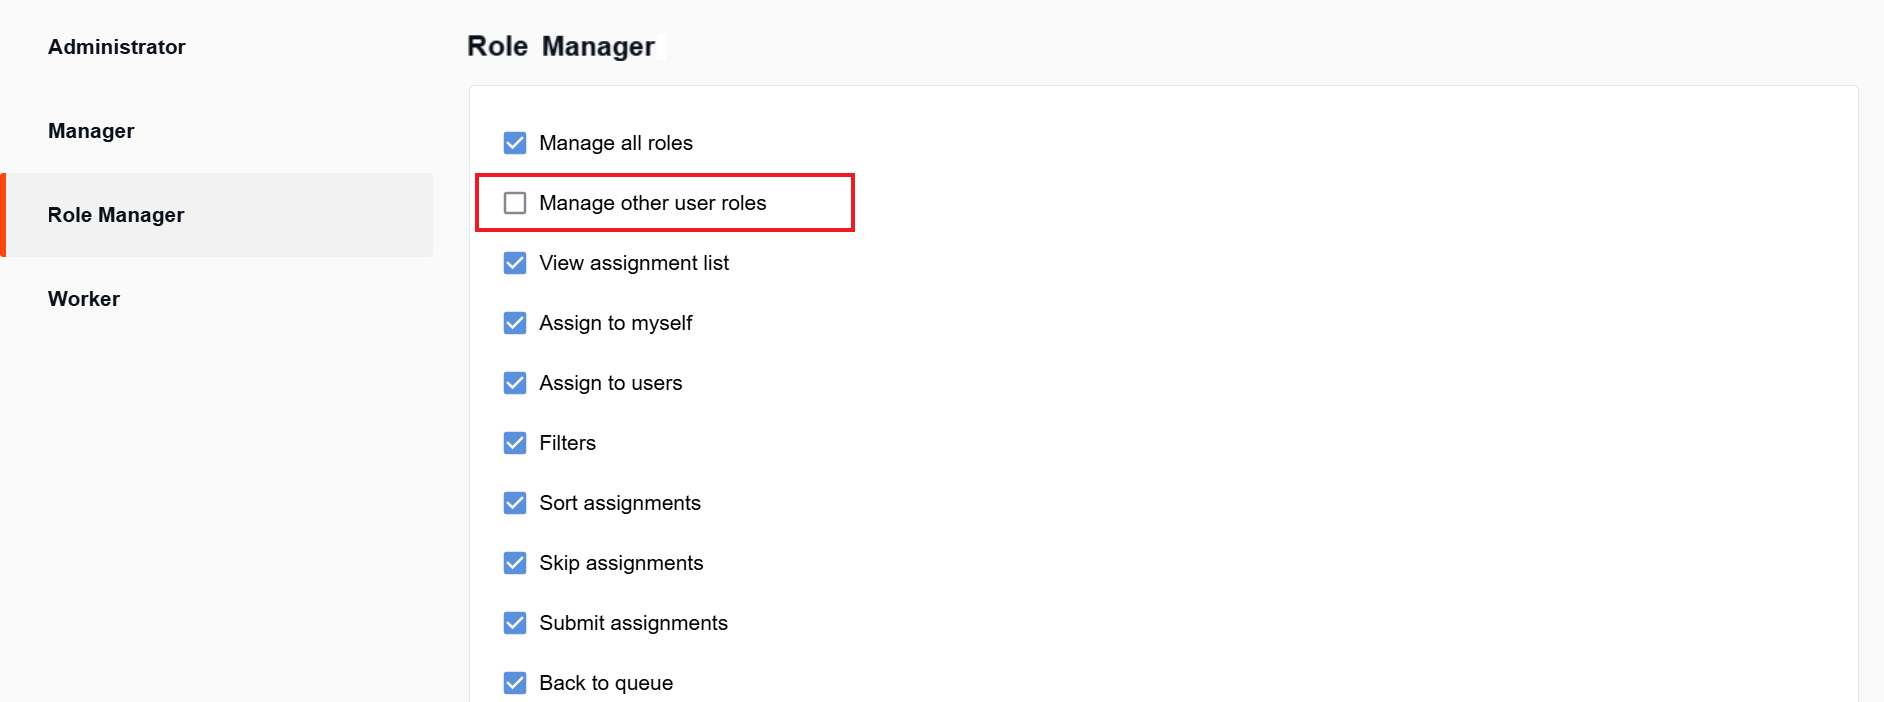
Switch to Workspace and go to the Roles tab.
- Find the Role Manager role and go to its permissions.
- Select Manage other user roles. This allows the members of the Role Admins group for Workspace to manage the permissions of all roles, except for Role Manager.
As a result, the members of the Role Admins group have the following capabilities:
| Component | Role Admins capabilities |
|---|---|
| User Management UI |
|
| Control Tower |
|
| Workspace |
|
Set role that can only create users
For simplicity, let's call the role User Access Manager.
To set the role, follow the steps below:
Create a group and name it User Access Managers.
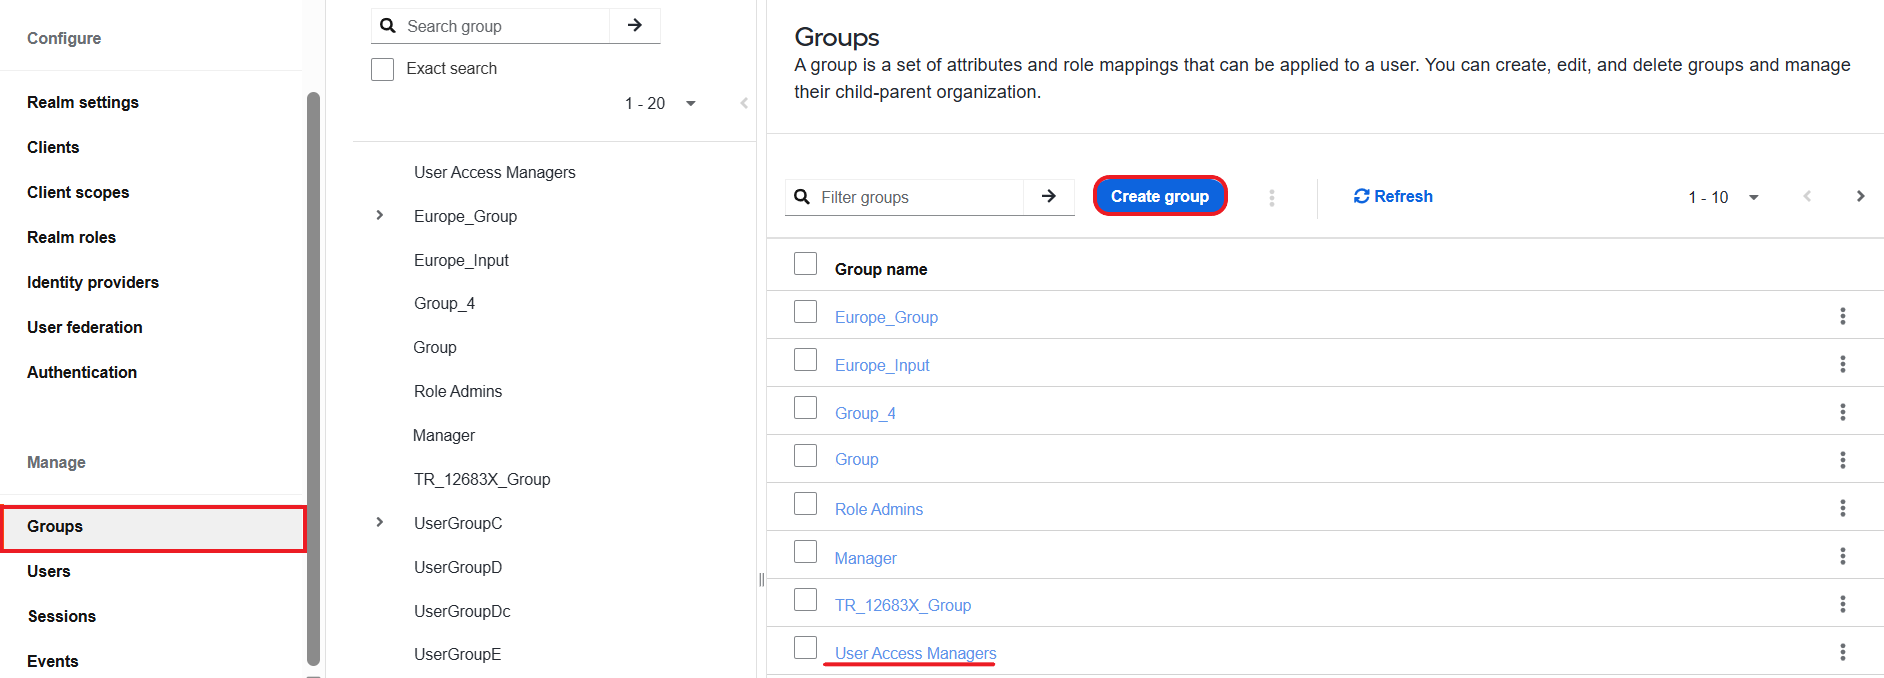
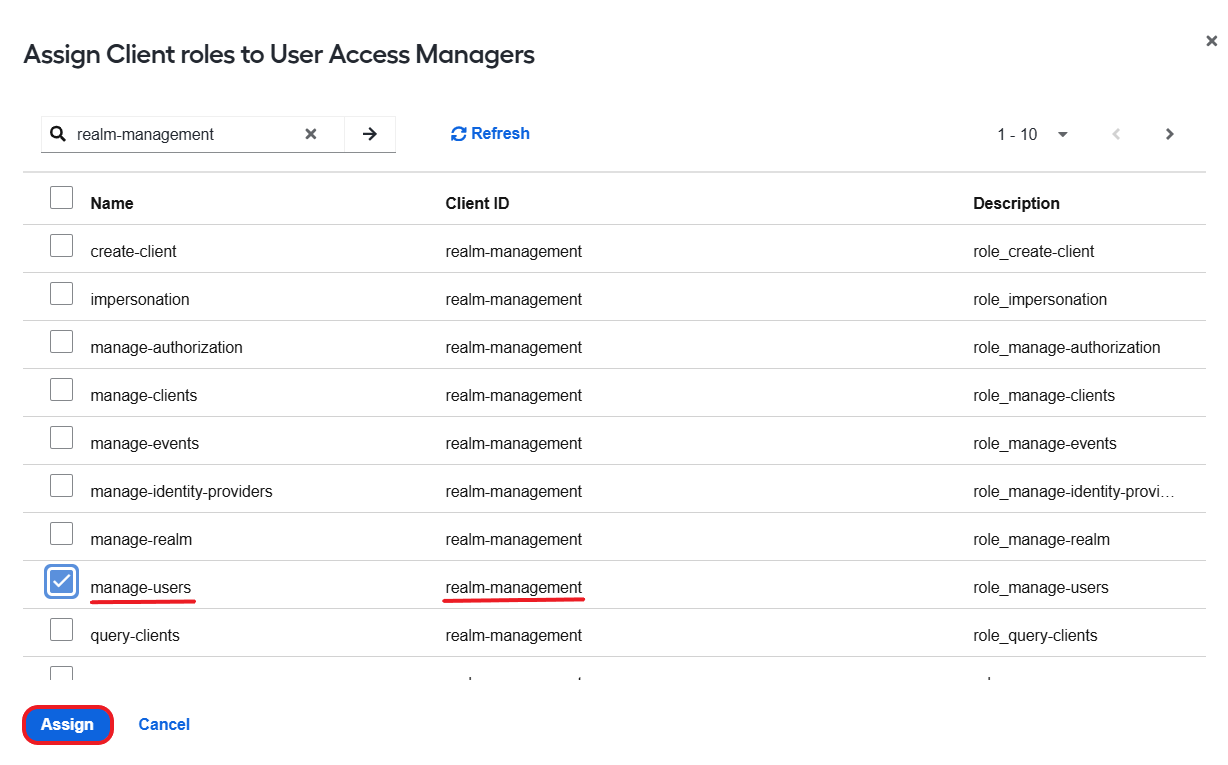
For the members of the new User Access Managers group, specify the client-level roles. In particular, for the realm-management (User Management UI) client, assign the manage-users and view-users roles.
 note
noteIf you have to link local user records to external Identity Provider records manually, you also need to add the view-identity-providers role for the realm-management client.
As a result, every member of the User Access Managers group can access only the User Management UI by the direct link: <https://<dns_name>-uath-lb1.<domain>/auth/admin/<realm>/console/#/>.
Allow User Access Managers to access User Management UI via redirect from Control Tower
This setup is optional.
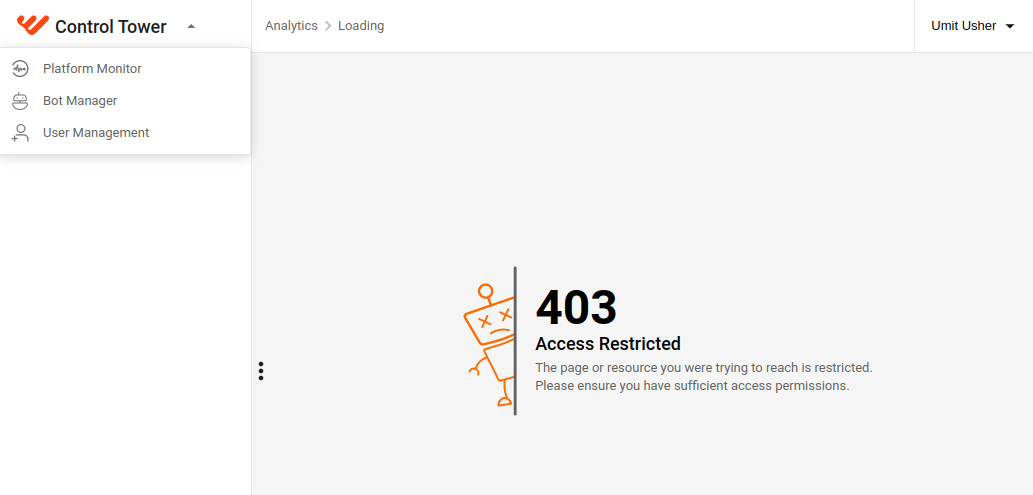
The option to access the User Management UI from the left menu of Control Tower is unavailable since the group doesn't have any Control Tower role mappings. If you still want your User Access Managers group members to access Control Tower, you can do the following:
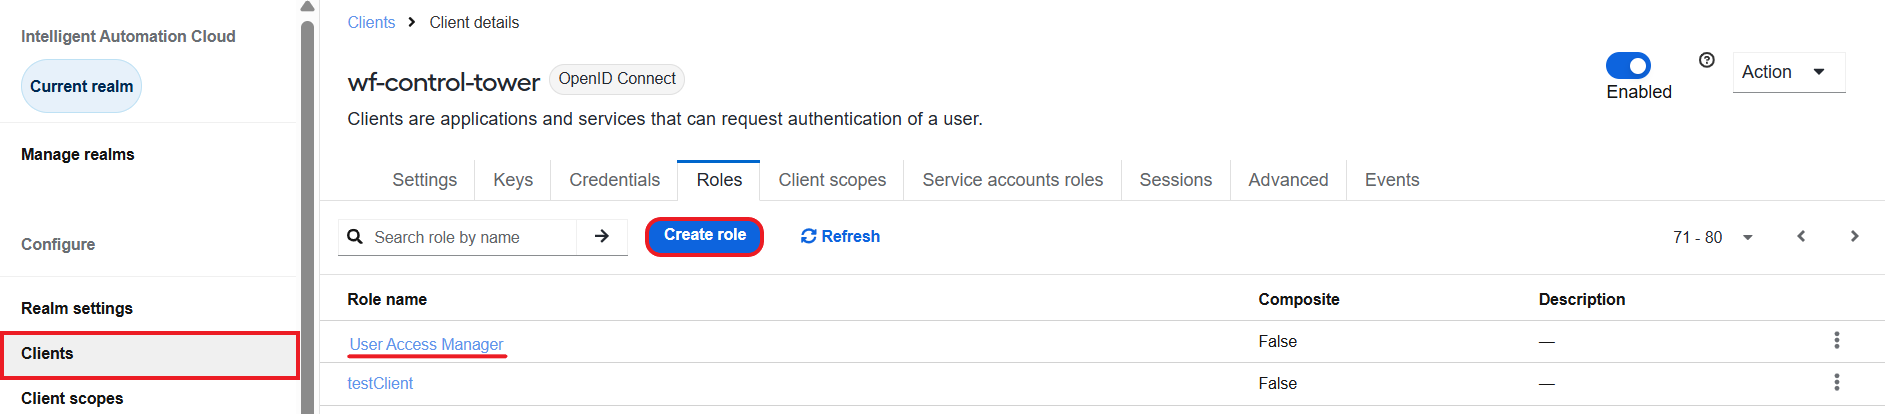
Go to the User Management UI. For the wf-control-tower client, create a role and name it User Access Manager.
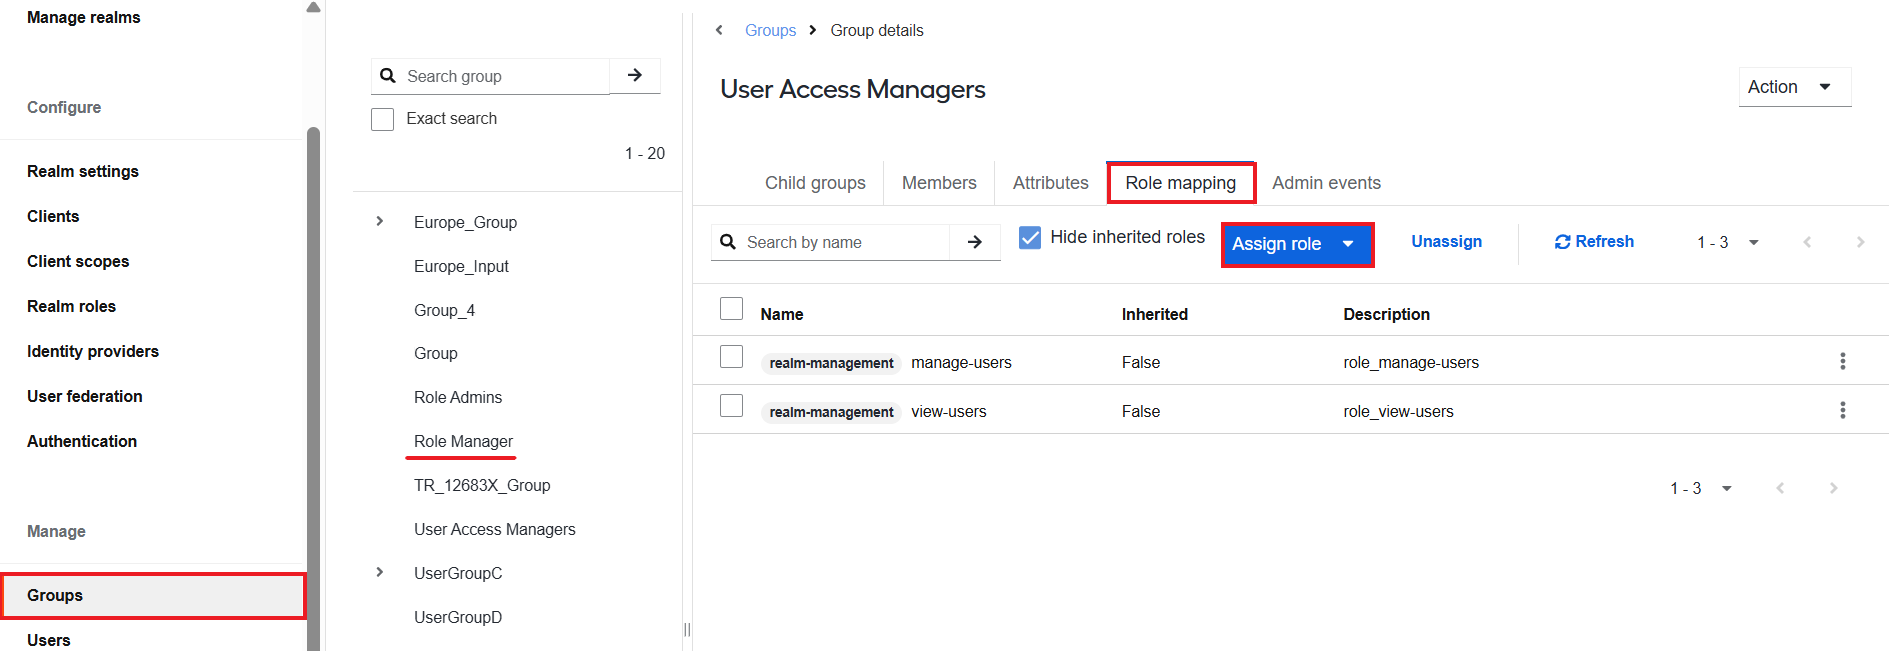
Go to the Groups tab and find the User Access Managers group. Open it, go to the Role Mappings tab, click Assign role, and choose Client roles.
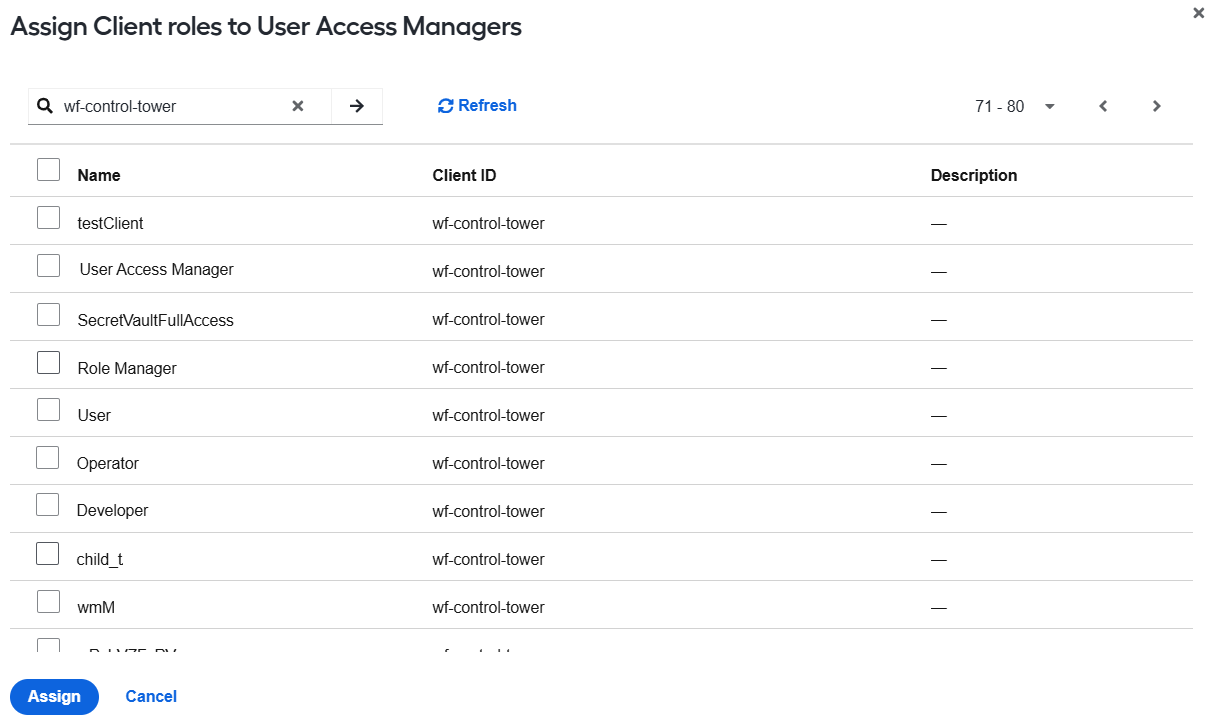
Select the wf-control-tower client and add the User Access Manager role mapping to the group.
Switch to Control Tower and go to System Settings > Role management. Find the User Access Manager role and go to its permissions.
In the permission list, select at least one checkbox corresponding to a menu element.
The most restrictive option is to select Platform Monitor only. If you choose the option, the members of the User Access Managers Group cannot access Platform Monitor without configuration in the User Management. However, they can log in to Control Tower and access User Management from the top menu.
After logging in to Control Tower, User Access Managers group members will see the following: