View tutorial on using no-code Model steps
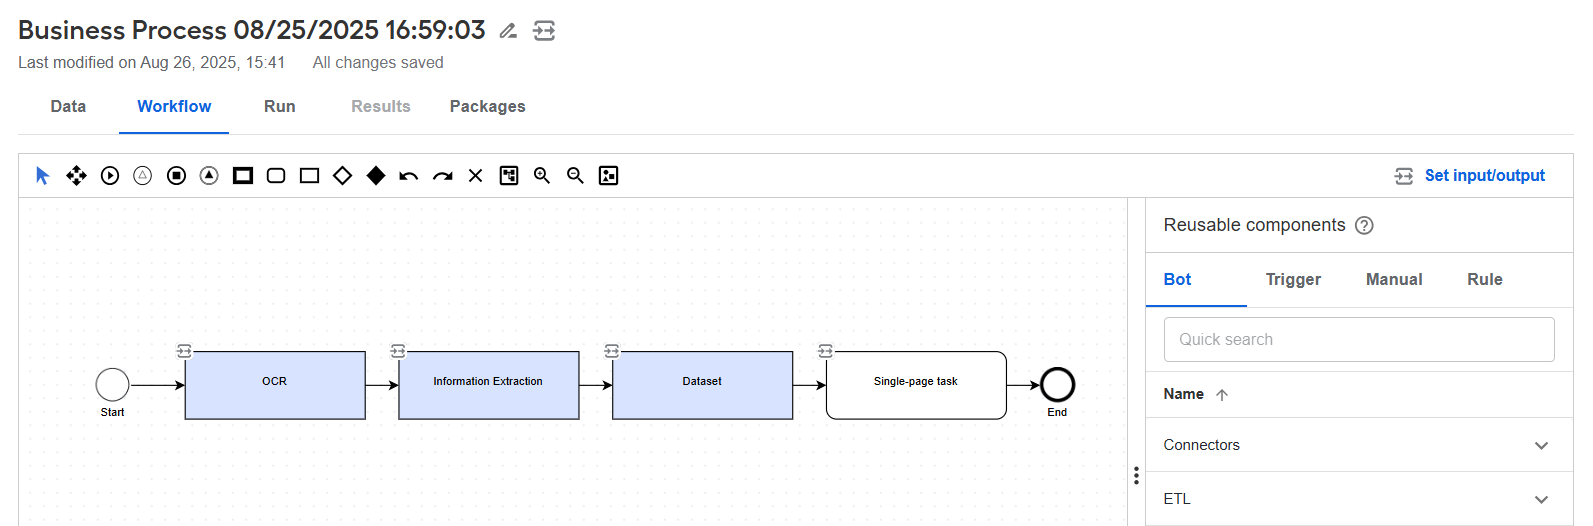
The article is a tutorial on how to create an end-to-end Business Process (BP) for information extraction (IE), comprising the following steps:
OCR (optional)
Model
Dataset (optional)
Manual Task
Prepare dataset and model
To prepare for automating an information extraction sequence, follow the steps below:
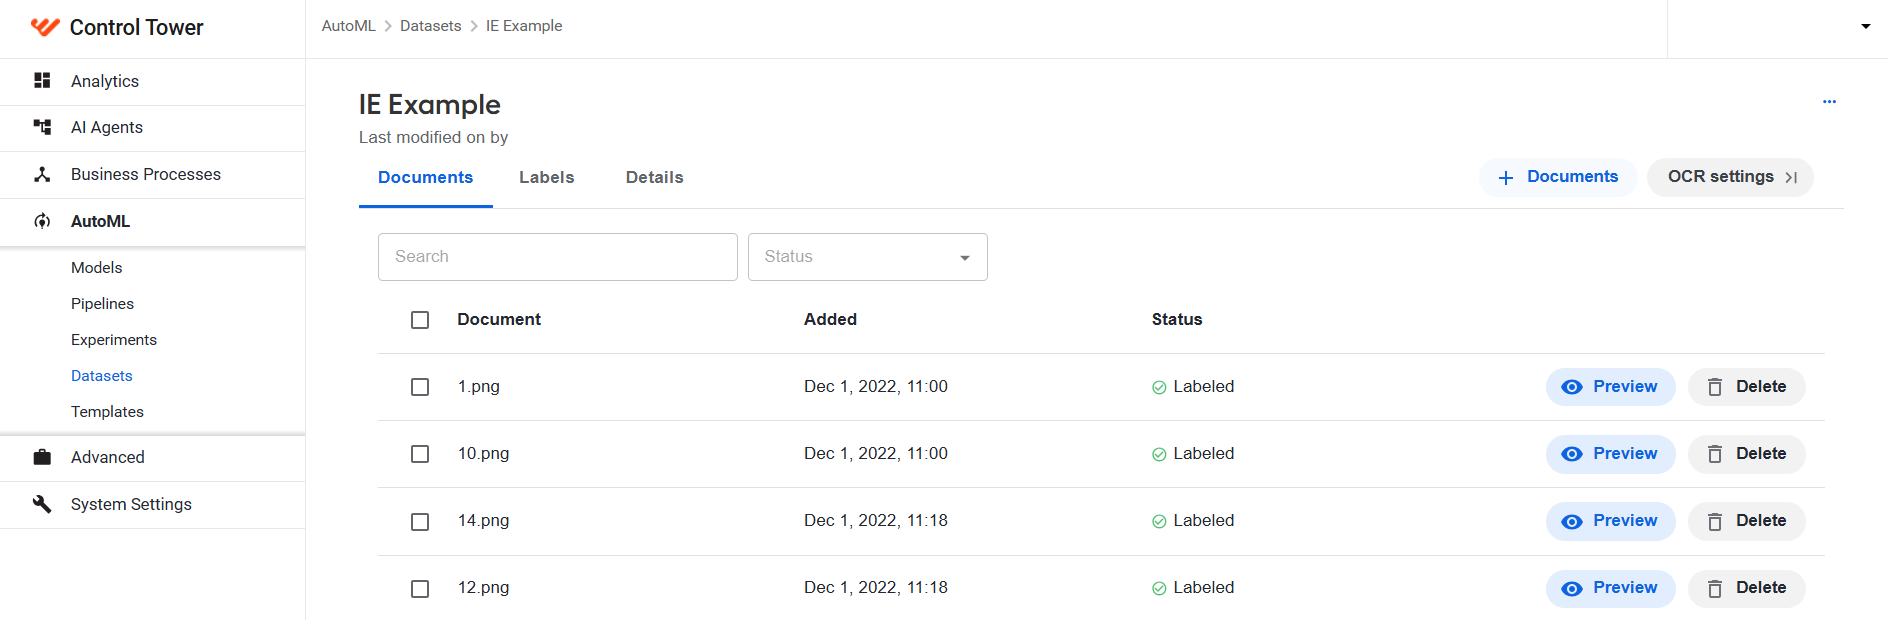
Navigate to AutoML > Datasets. Create a document dataset for training a model and label all the documents in it as detailed in the guide.
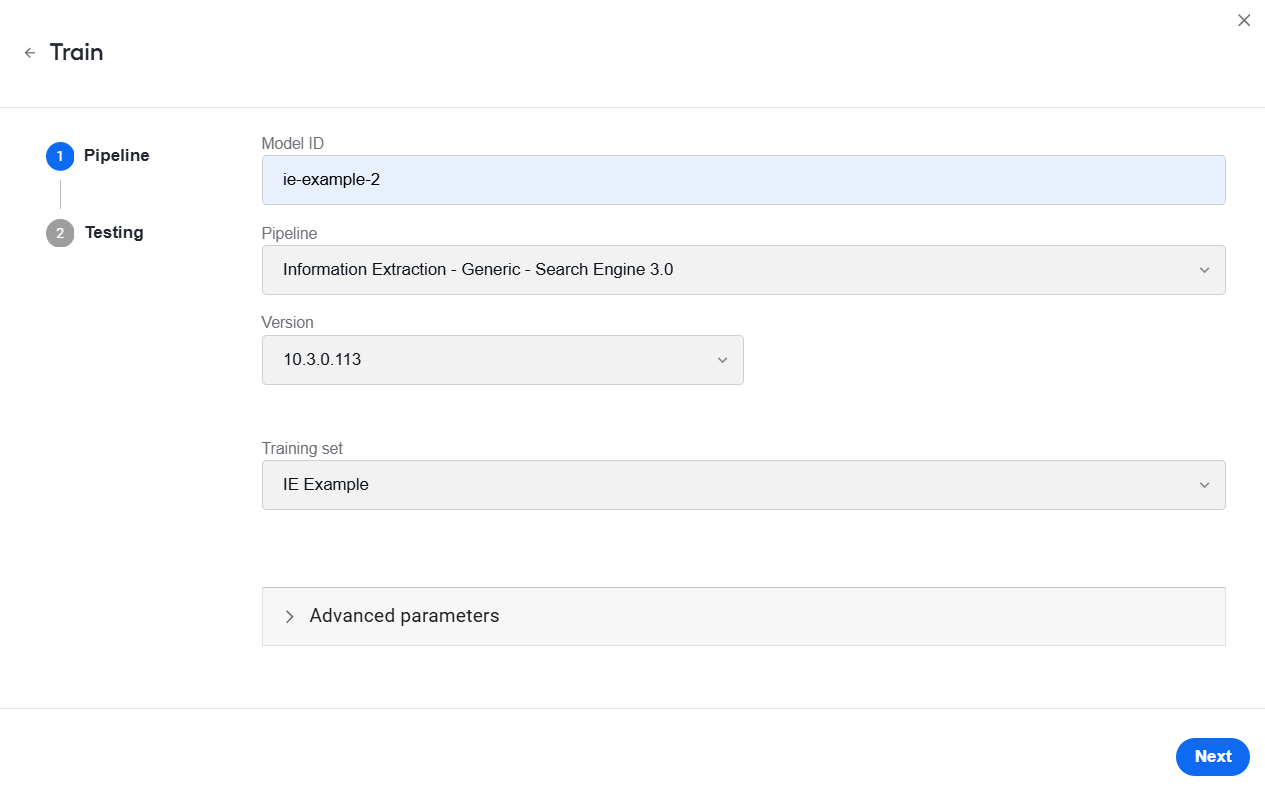
Navigate to Models and train an information extraction model from scratch:
Set a unique ID for the model (in this case, ie-example-2).
Choose an information extraction pipeline and its version.
In the Training set field, choose the dataset you created in Step 1 (in this example, IE Example).
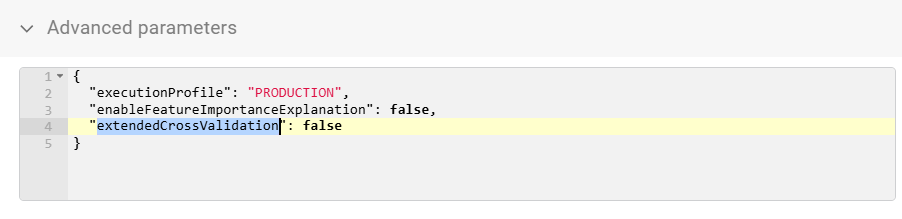
Optionally, set advanced model training and execution parameters. For details, read the Perform advanced model tuning in AutoML UI topic.
On the Testing step, choose cross-validation as the testing method.
On the Labels and Post-Processing steps, leave the default settings and click Start.
You can monitor the model's training progress on the Models > Experiments page.
Create Business Process
To create a BP comprising no-code Model steps and a Manual Task, follow the instructions below:
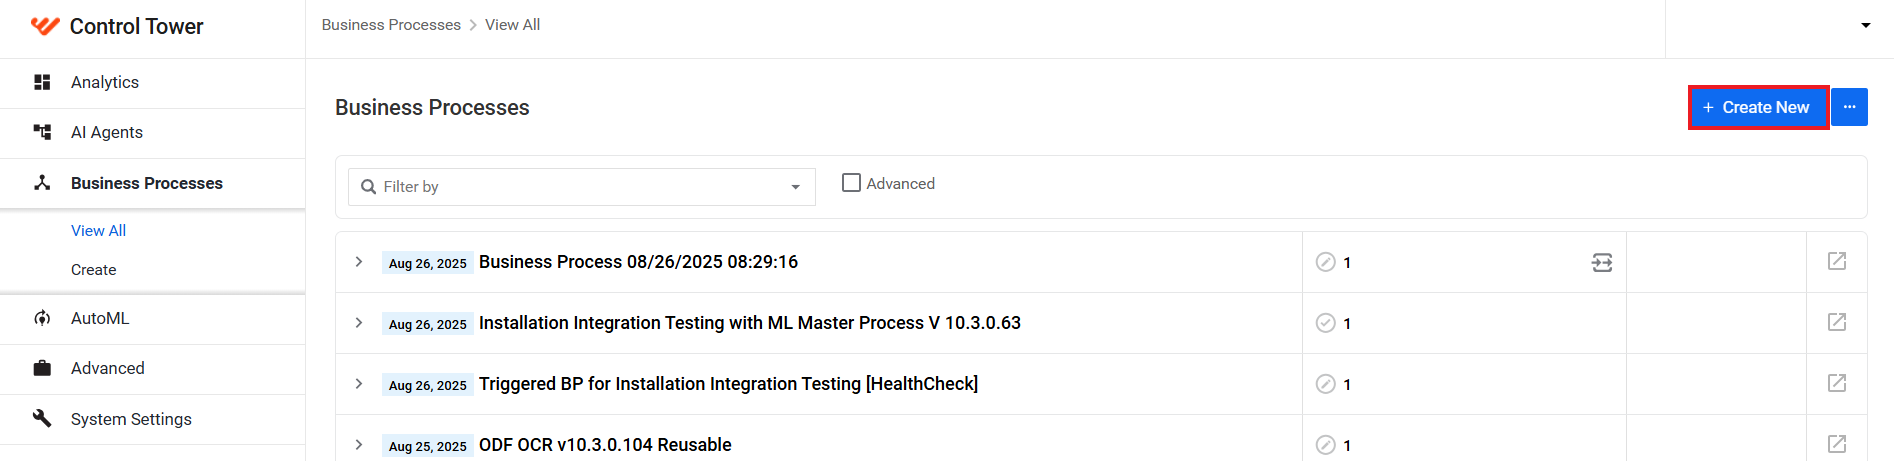
Go to Business Processes and click Create new. For more information, see Create Business Process.
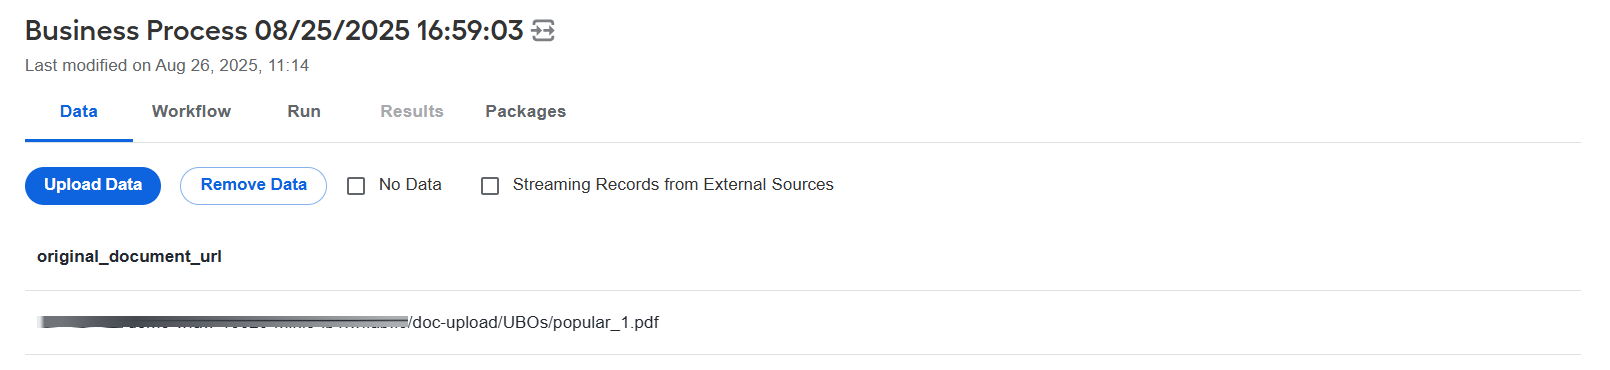
On the Data tab, upload an input data file. In this sample tutorial, the data file includes a URL to the original document in an S3 folder.
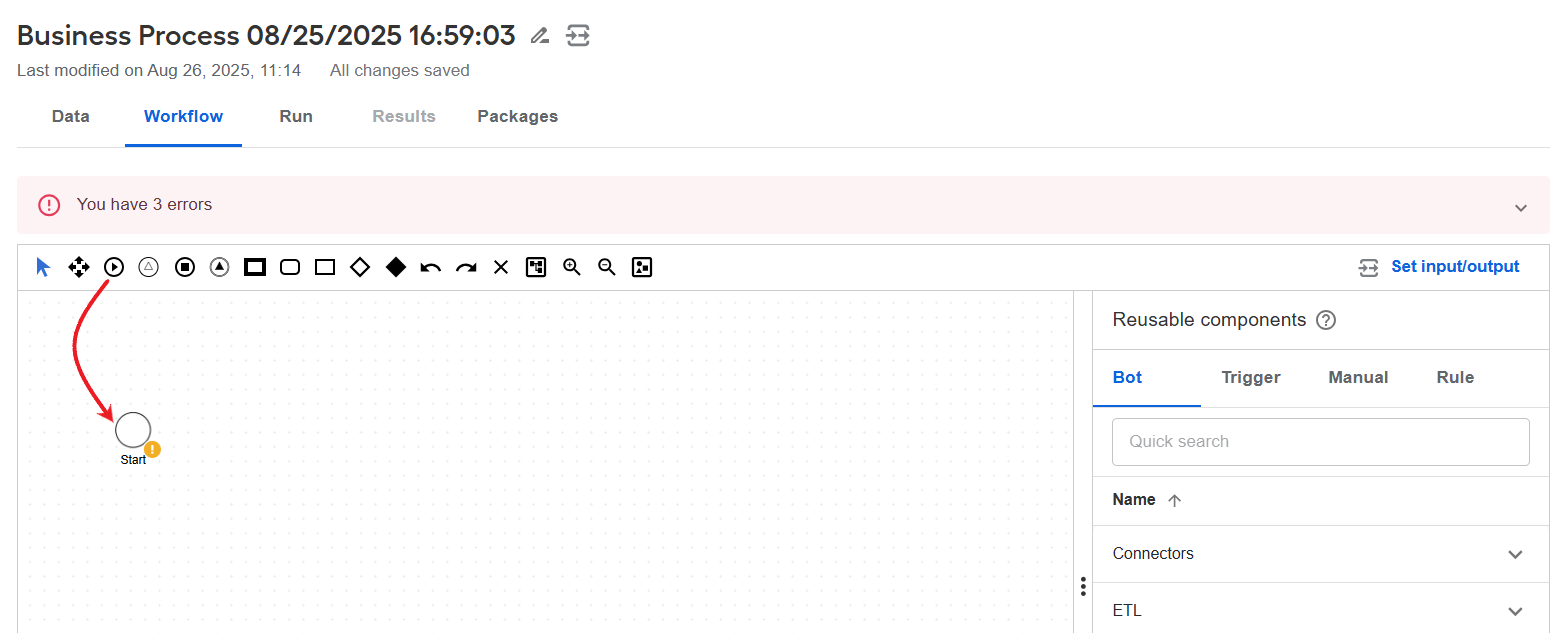
Navigate to the Workflow tab and add a Start element to the canvas.
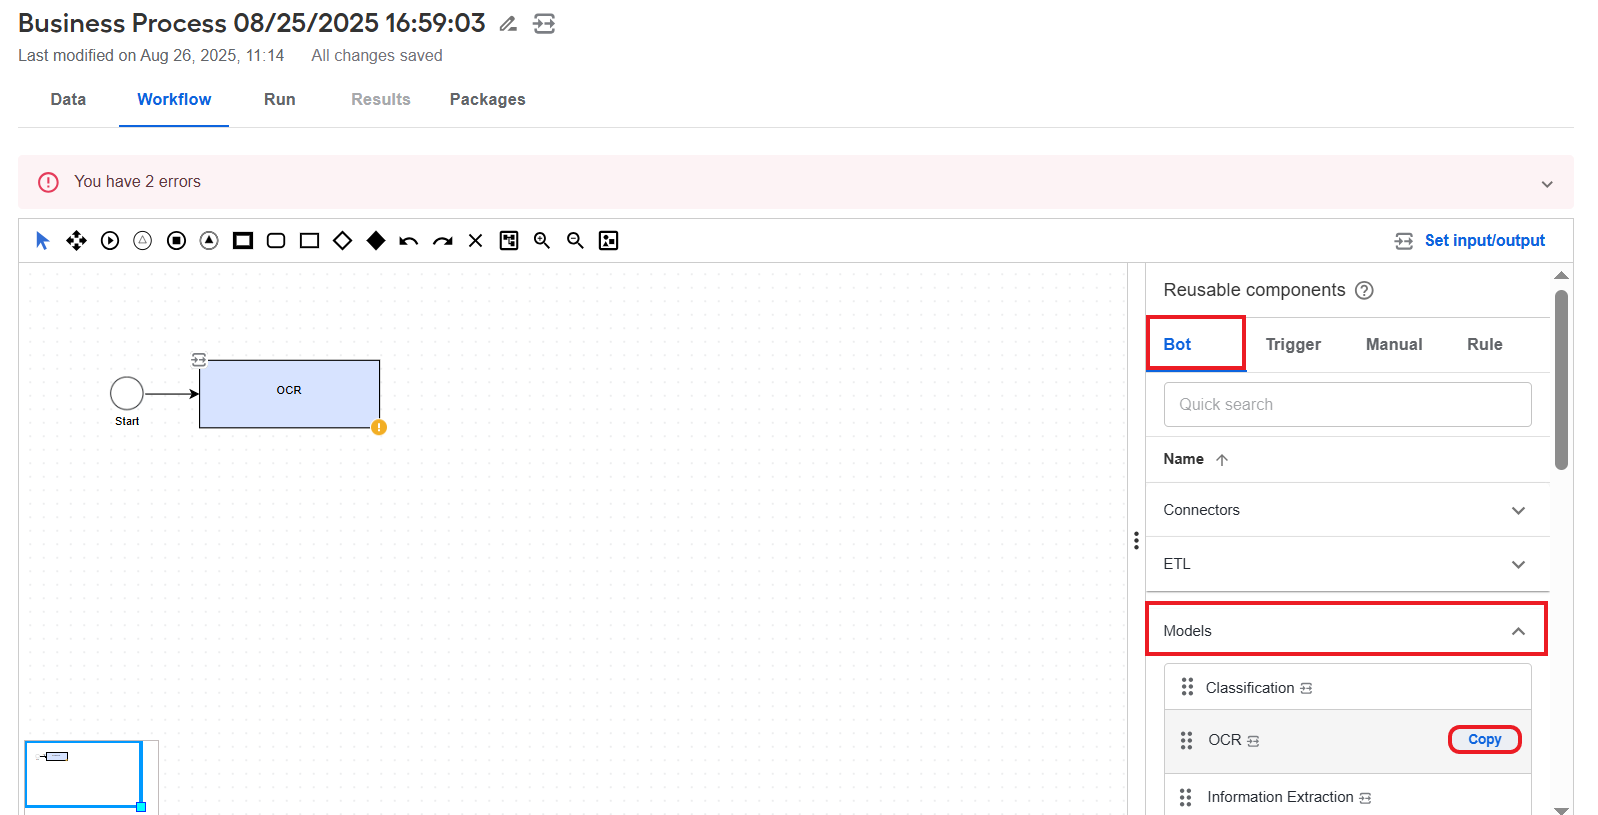
Add and configure an OCR step (optional). Typically, the Model step has its own OCR settings. Add the step if you need to apply OCR settings that are different from the ones configured in the Model step. Otherwise, skip the step and move on to add and configure a model (step 5).
On the Bot tab in the right panel, open the Models category, hover over the OCR step, and click Copy. Then, drag the copied step to the canvas.
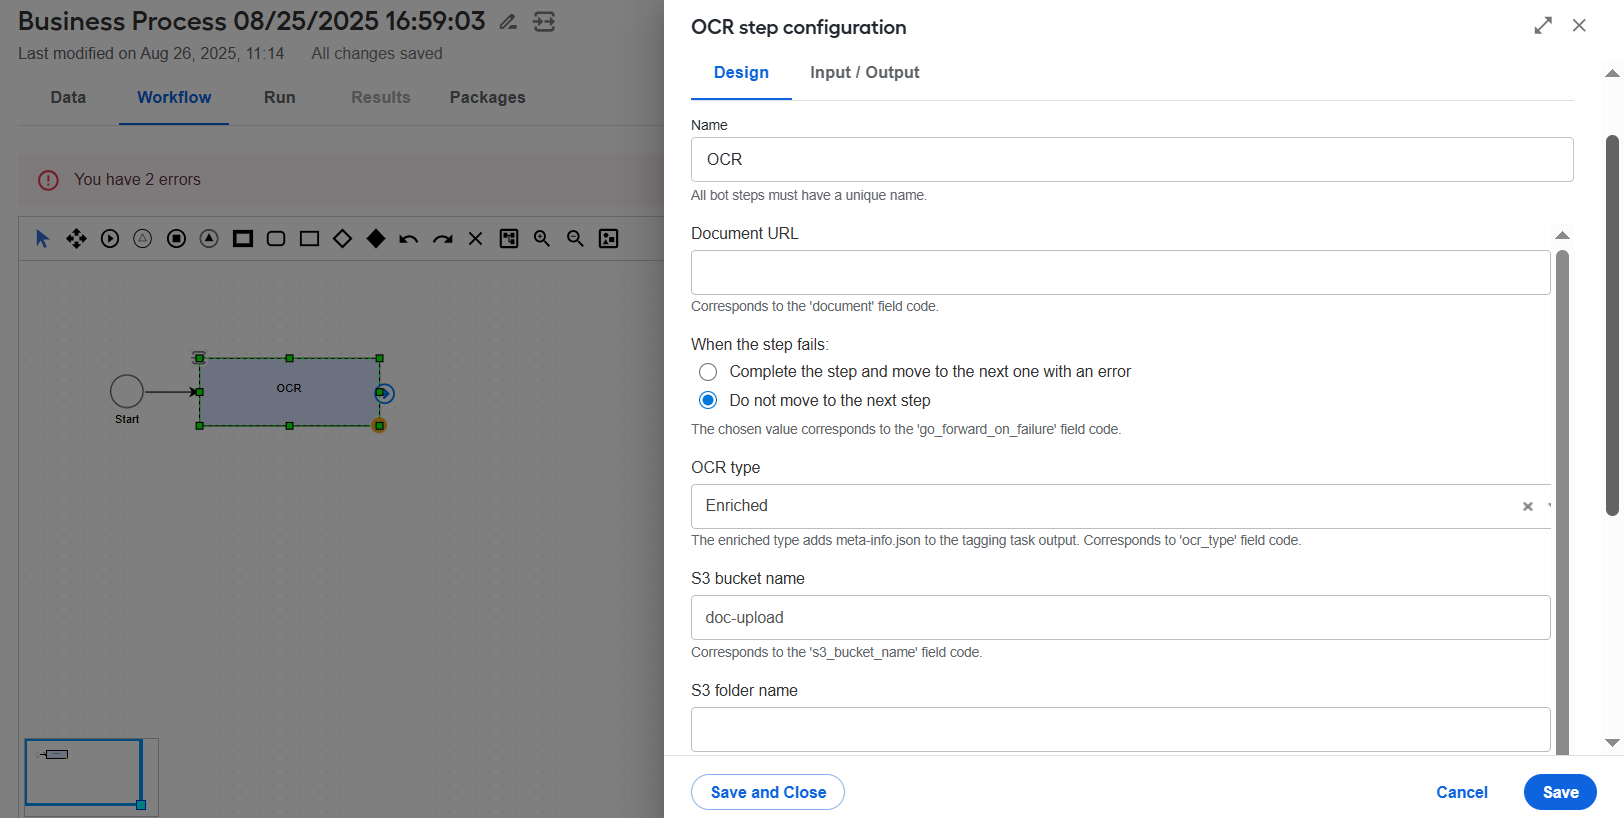
Double-click the added OCR step and change the configuration as required. For more details, refer to Configure OCR step and OCR providers.
On the Input/ Output tab, leave the preconfigured contracts. For more information on OCR contracts, see the guide.
Add and configure a Model step:
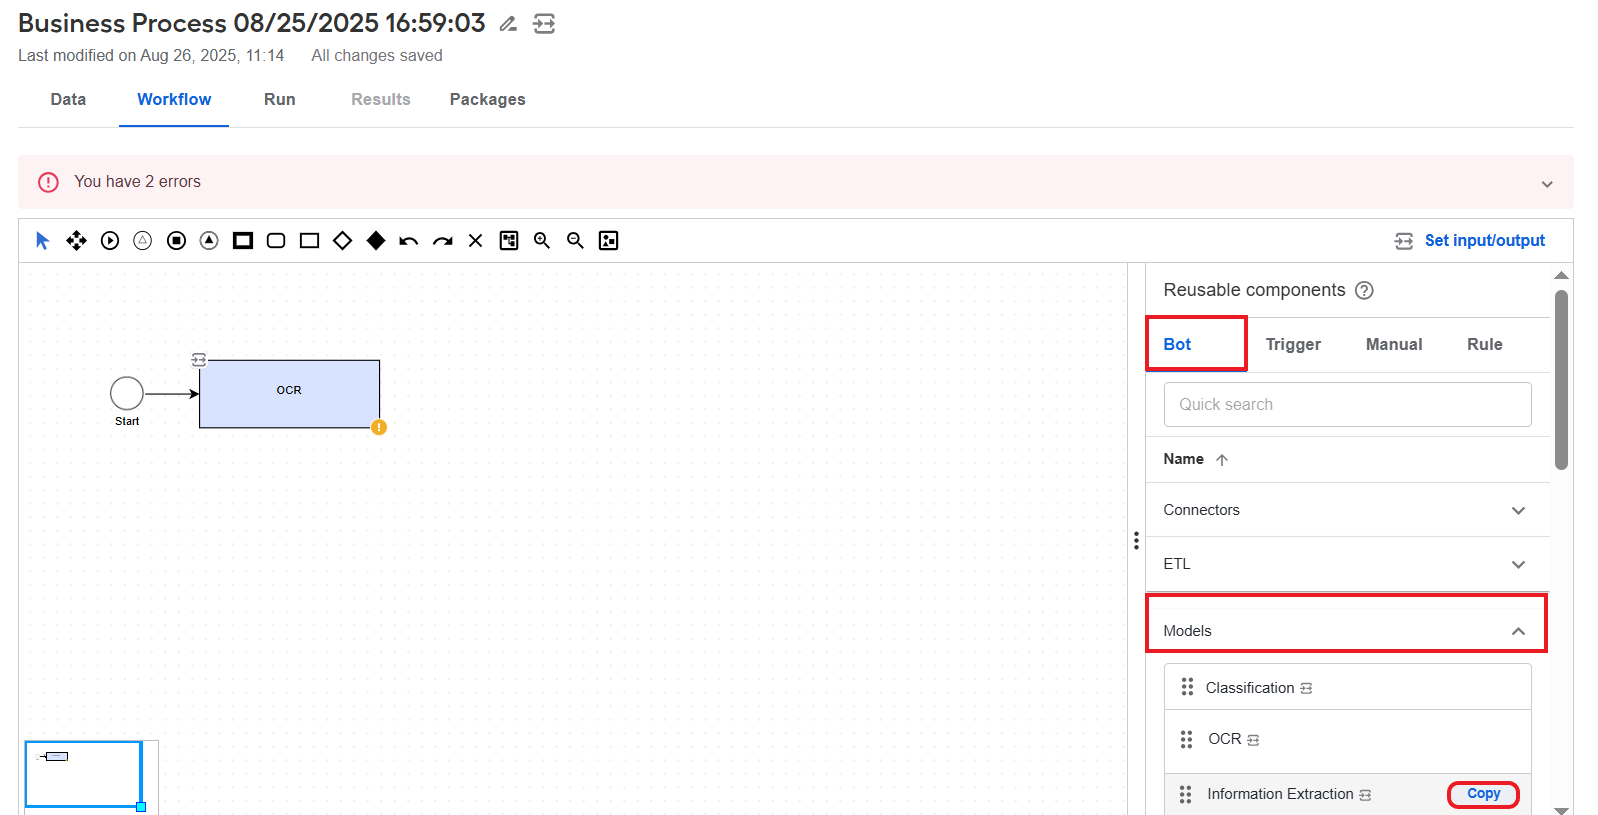
On the Bot tab in the Reusable components panel, click the Models category, hover over the Information Extraction step, and click Copy. Then, drag the copied step to the canvas.
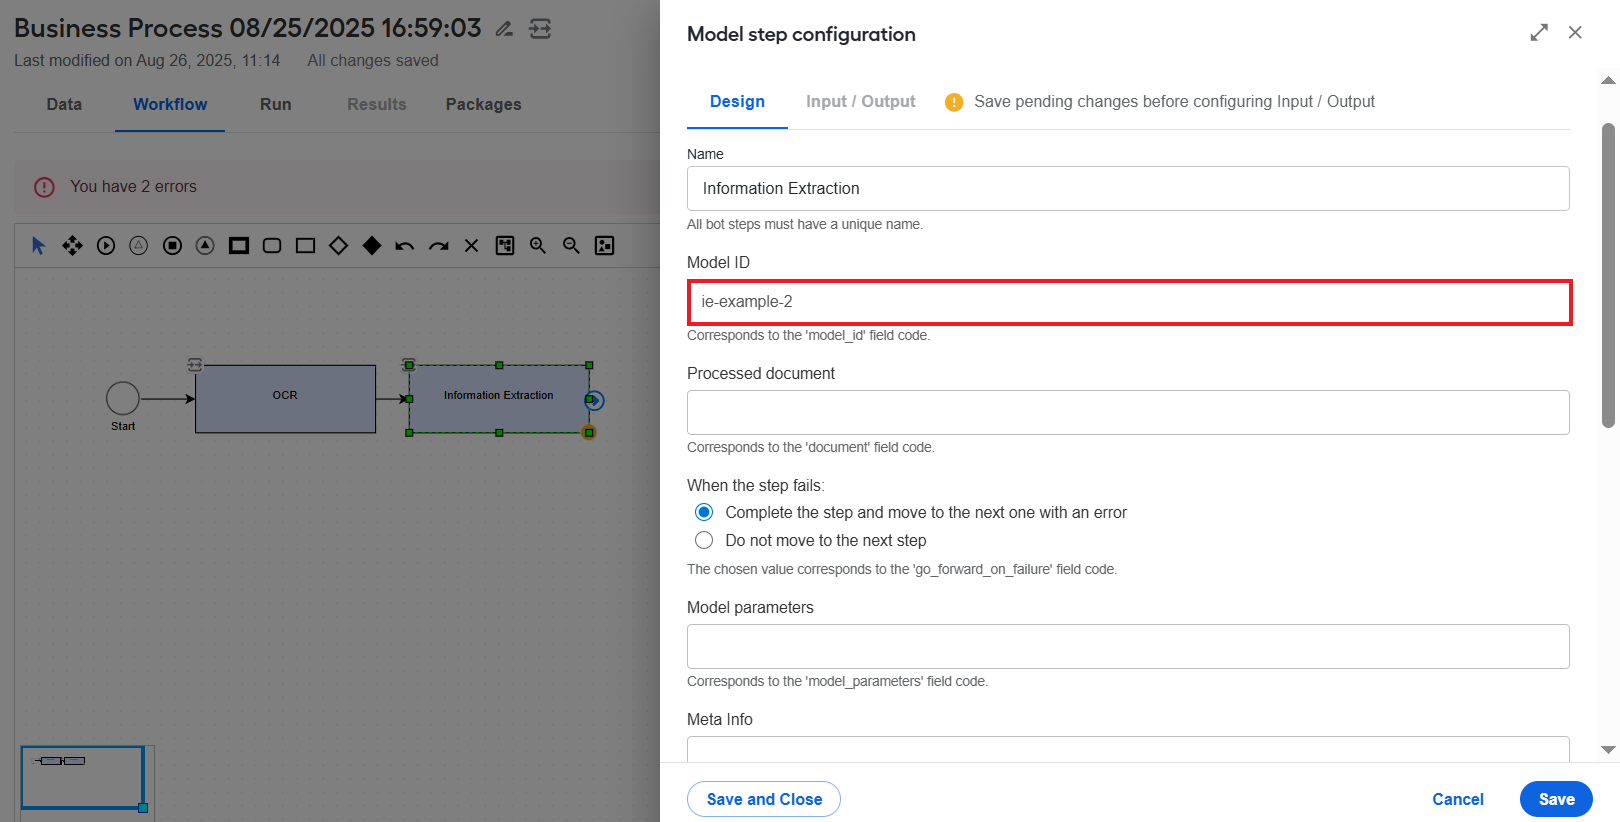
Double-click the added step on the canvas. On the Design tab, in the Model ID field, choose the model you trained and click Save to save the settings. For more details on configuring Model steps, refer to the guide.
On the Input/ Output tab, leave the preconfigured contracts.
Add and configure a Dataset step (optional). Add the step only if you need to save the model processing results to a dataset. Otherwise, skip the step and move on to configure a Manual Task (step 7).
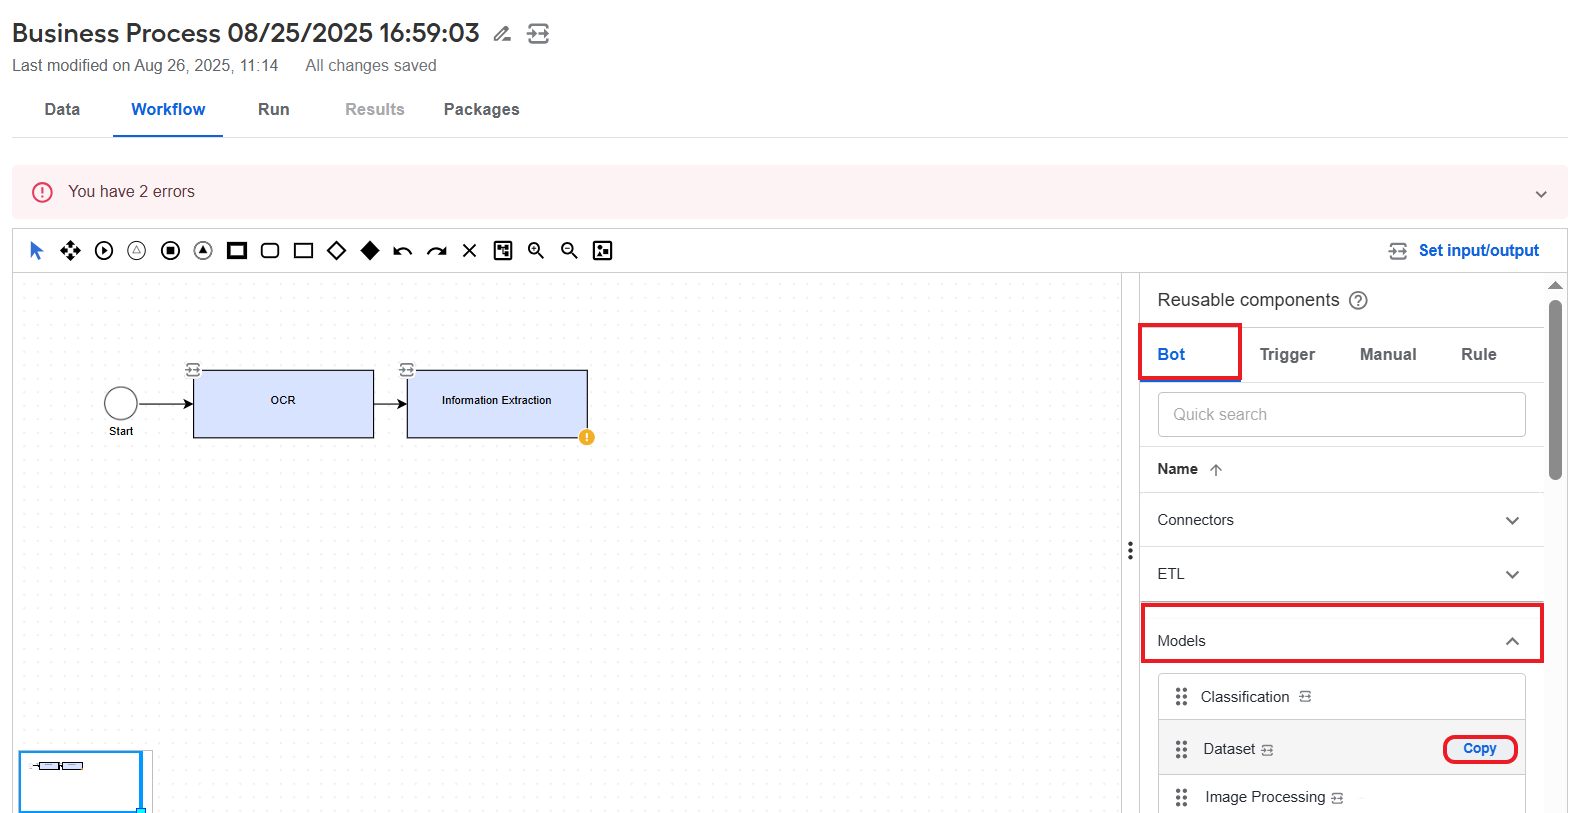
On the Bot tab in the right panel, in the Models category, hover over the Dataset step, and click Copy. Then, drag the copied step to the canvas.
Double-click the added step on the canvas. On the Design tab, in the Dataset ID field, choose the dataset you created and click Save to save the settings. For more details on the Dataset step configuration, refer to the guide.
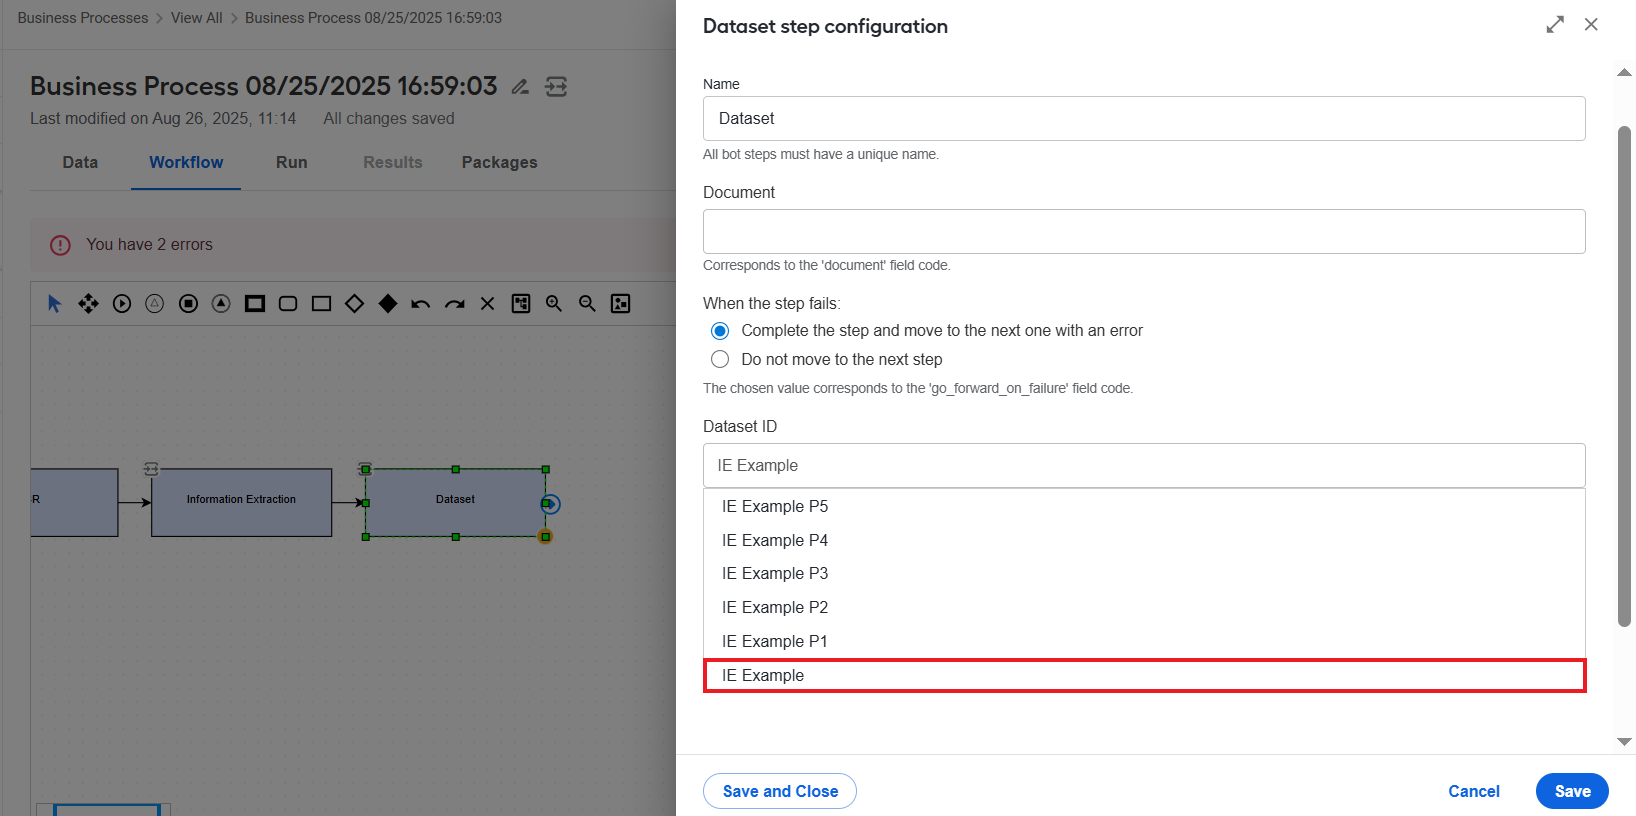
Once you choose a dataset name, the field content changes to the unique identifier.

On the Input/ Output tab, leave the preconfigured contracts.
Add and configure a Manual Task step:
Drag a Manual Task element to the canvas from the toolbar:
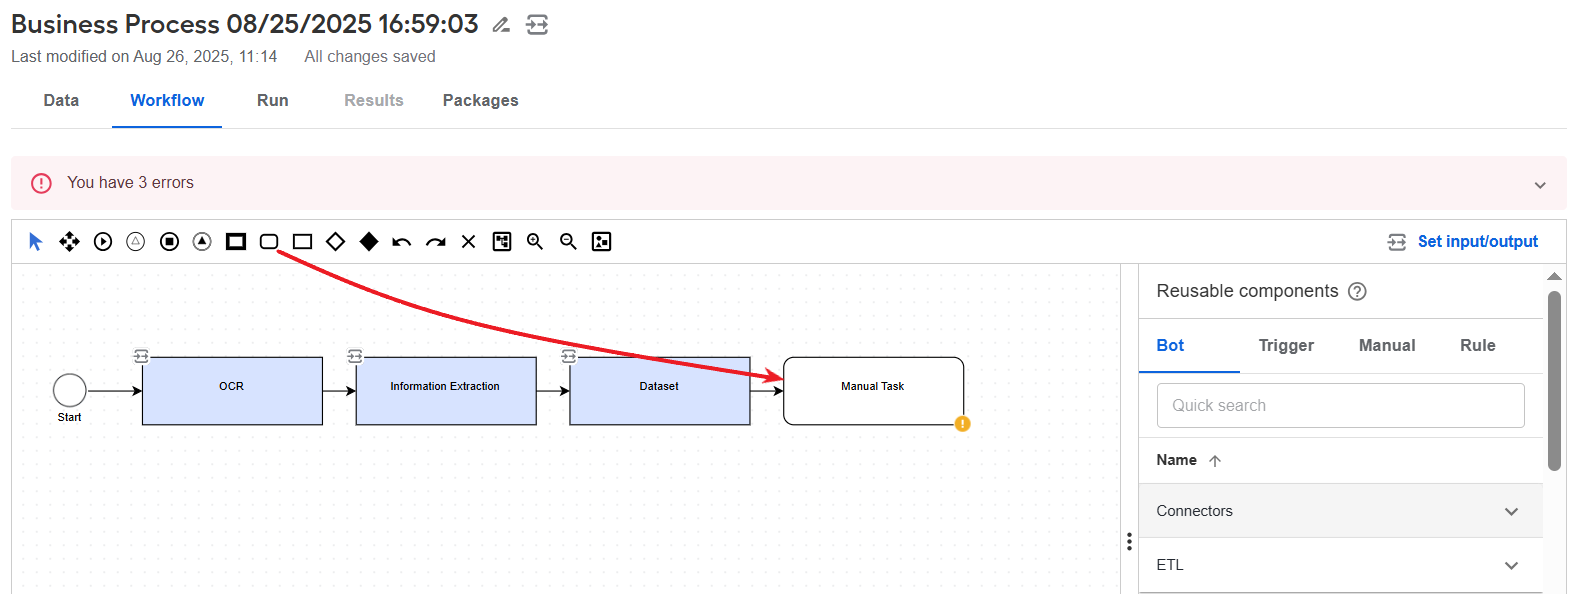
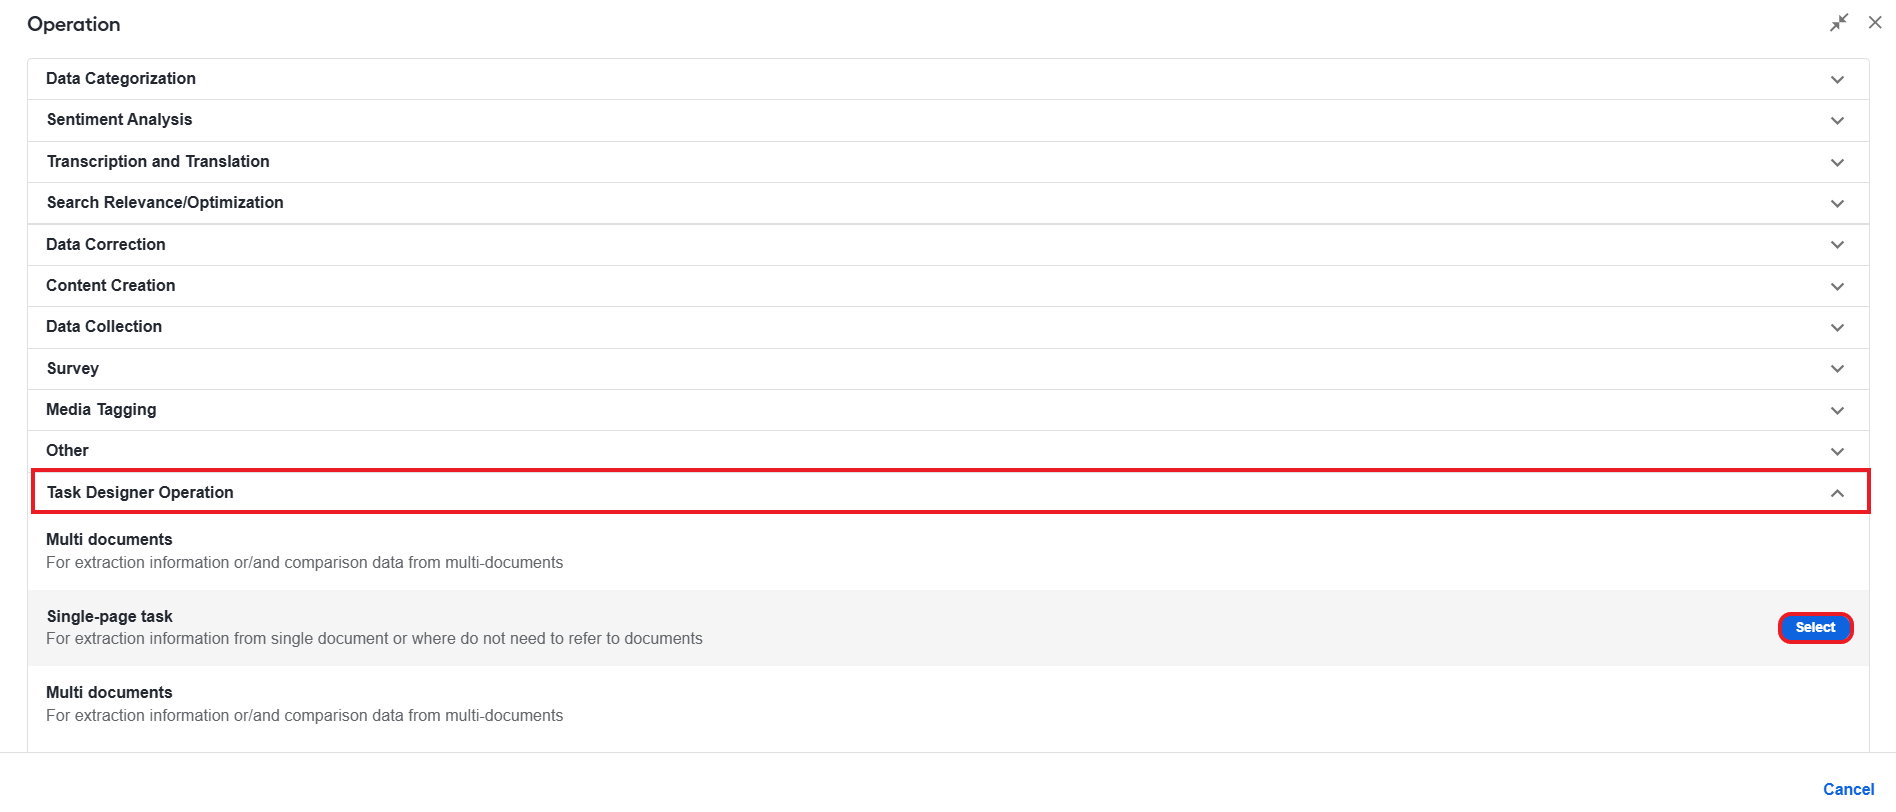
Double-click the added element. On the Operation tab, choose Task Designer Operation > Single-page task and click Select.
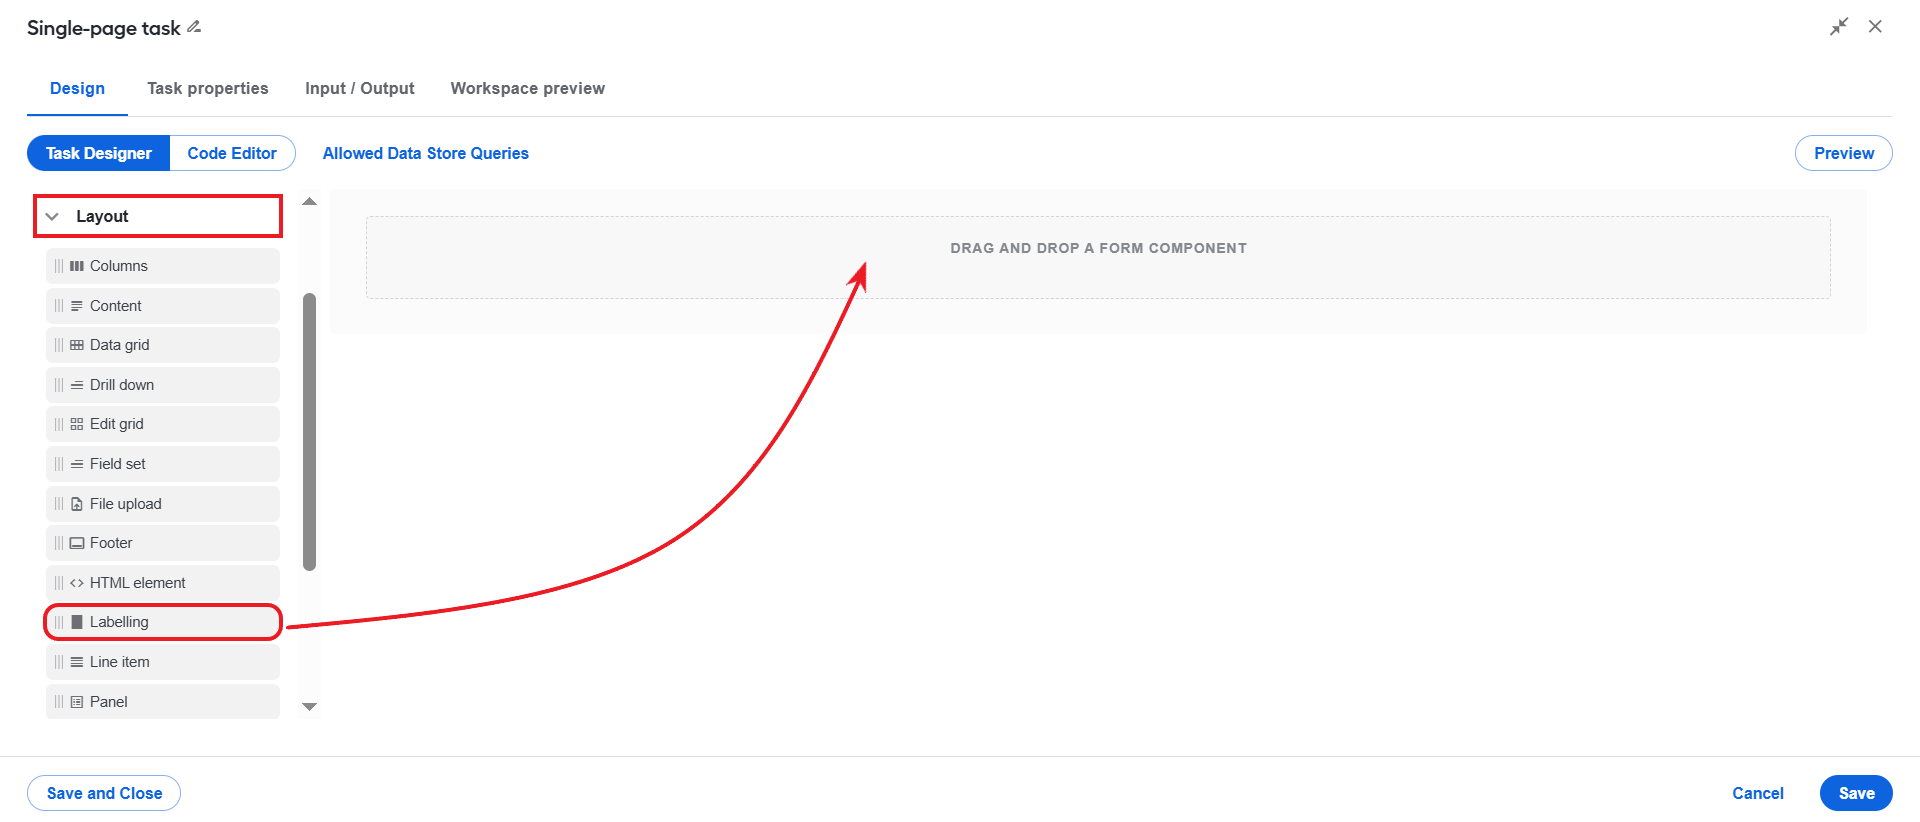
On the Design tab, in the Layout menu, find the Labelling component and drag it to the component area.
On the displayed configuration page, choose Generate from model and, in the Model field, specify the model from Step 5.
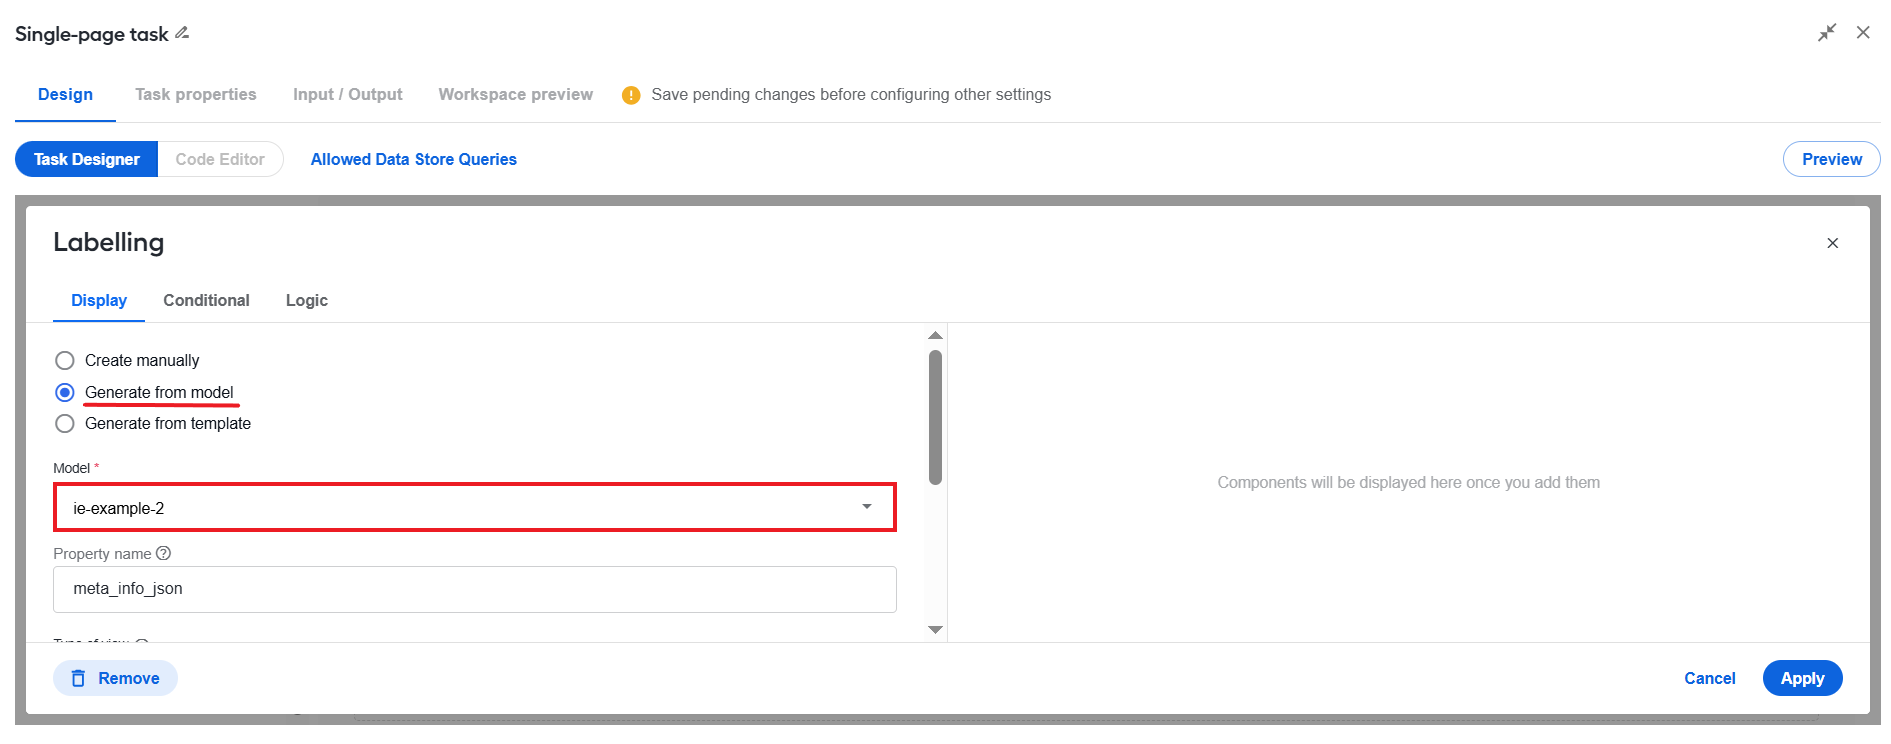
As you click Apply, a form layout is generated automatically from the model's training set.
noteIn case the model does not include a training set, the labels for the form layout are taken from the model's output.
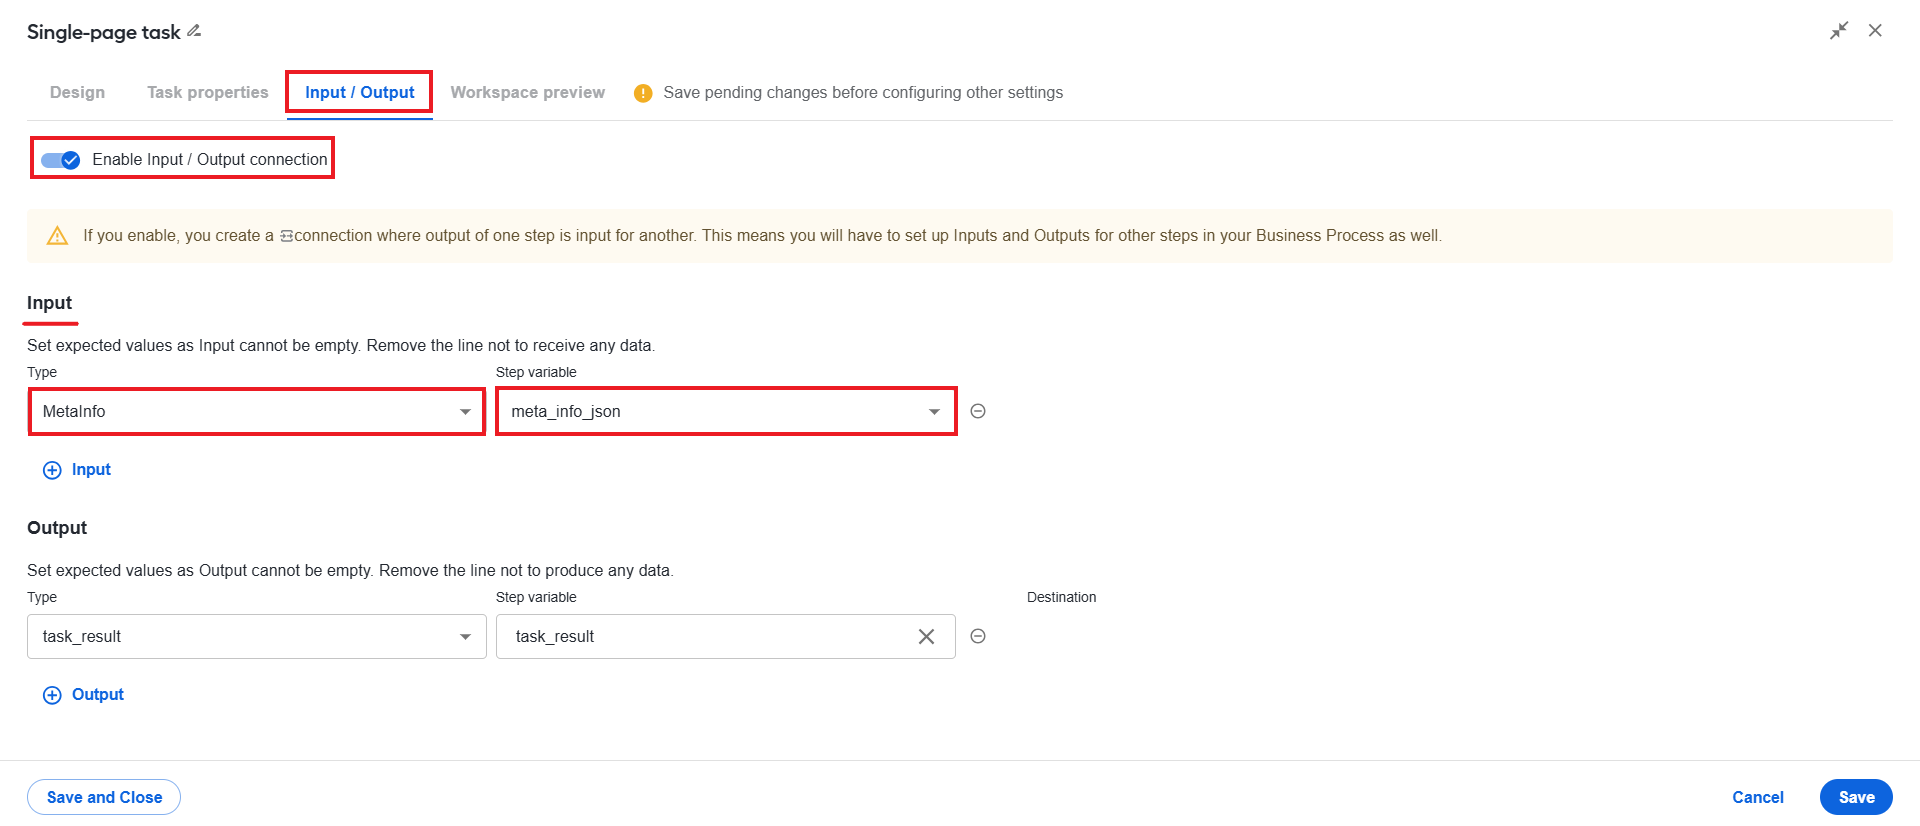
Navigate to the Input/ Output tab and switch on the Enable Input/ Output toggle. In the Input area, choose MetaInfo as the variable type and set Step variable to meta_info_json.
Optionally, you can add a Dataset step after a Manual Task to enrich the model's data with the human review output. You can leave the same Dataset ID. The only thing you need to change to make the step work is the input contract, setting its type to MetaInfo and task_results as the step variable.
Add an End element.
To address the issues related to Model steps you might come across when running a Business Process, read the following support guides:
Investigate Business Process performance degradation if you notice the BP has become slower.
Investigate non-operational Business Process if the BP will not work.
Investigate non-operational platform if the issues are associated with a malfunction of some platform component.