Integrate with CyberArk
The page covers details of WorkFusion integration with CyberArk products.
CyberArk Central Policy Manager
The integration allows CyberArk to communicate with the Work.AI platform to manage the privileged user credentials. With this plugin, the privileged user for WorkFusion will need to log in to the CyberArk Vault to gain access to the credentials to perform their configuration changes. CyberArk will also be able to monitor and report on that activity.
For details and integration support, refer to CyberArk CPM documentation.
CyberArk Privileged Session Manager
The integration serves as a jump server between the CyberArk Vault and Work.AI. When a privileged user logs in to the Vault, instead of receiving the credentials and then manually logging into the Work.AI platform, they will see a link that will connect them without ever seeing the credentials. CyberArk will also be able to record each mouse click and keystroke of the person using the credentials. This is an isolated session, so the user will not be able to use this connection to move laterally throughout the network and the SOC will be able to kill any session that looks suspicious.
For details and integration support, refer to CyberArk PSM documentation.
CyberArk Application Access Manager
The integration enables the storage of automated application passwords and RPA bot passwords in CyberArk AAM.
Prerequisites
CyberArk components installed:
- CyberArk Vault
- CyberArk PrivateArk
- CyberArk PAS (web API)
- CyberArk AIM (Central Credential Provider + Central Credential Provider Web Service)
CyberArk is integrated into the infrastructure:
- Credentials for the automated application are stored in CyberArk safe.
- Credentials for RPA bot users are stored in CyberArk safe.
For details, refer to CyberArk AAM documentation.
WorkFusion configuration:
- The Bot Master user is reserved for the startup of the bots and supports the standard Windows authentication mechanism.
- WorkFusion servers are authorized to access CyberArk AIM Web Service.
Automate application integrated with CyberArk
Use case: the application being automated is already integrated with CyberArk. In order to access it, RPA bot logic needs to retrieve the password from CyberArk.
To retrieve credentials in bot config, a call to CyberArk API needs to be performed as in the example below.
Expand to see sample bot config
<config xmlns="http://web-harvest.sourceforge.net/schema/1.0/config" scriptlang="groovy">

    <var-def name="responseJson">
        <json>
            <http-extended
                    url="https://cyberarkserver:port/AIMWebService/api/Accounts?AppID=WorkFusion&Object=WF-Bot1-Test&Safe=WorkFusion%20Bot"
                    method="GET">
            </http-extended>
        </json>
    </var-def>

    <script><![CDATA[
        // WARN: this line is printing CyberArk response to log. Use for initial testing only.
        // TODO: replace with actual logic parsing json response.
        log.warn("$responseJson");
    ]]></script>

    <export include-original-data="false">
    </export>
</config>
Store RPA infrastructure passwords in CyberArk
Use case: Windows passwords to RPA bot machines are to be stored in CyberArk.
Only bot agents' passwords can be stored in CyberArk. The Bot Master user needs to support the standard authentication mechanism.
Bot Master user is a "patient 0" which will invoke CyberArk API, retrieve credentials to individual RPA bots, and initiate the startup of the RPA bots.
In the default setup, there is one Bot Master on each RPA server.
Enable certificate-based authentication with shared user (mTLS)
Log in to an RPA machine as Bot Master and download the certificates provided by CyberArk AIMWebService. Follow the steps below to install the certificate to the RPA machine.
Open Run (Windows+R) and execute
mmc(Microsoft Management Console).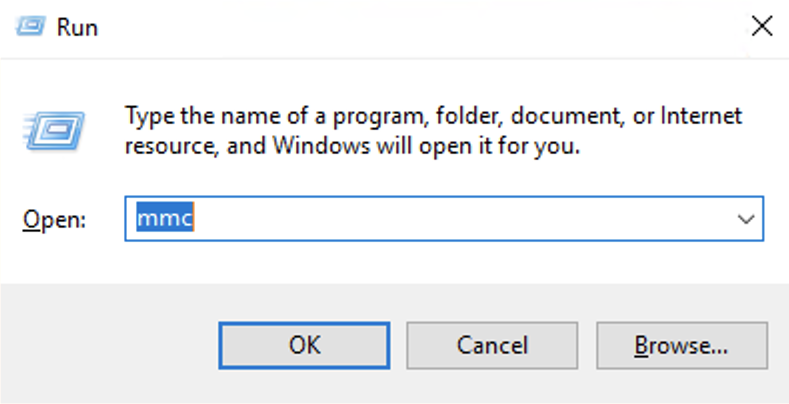
In the MMC application, click on File > Add/Remove Snap-in (Ctrl+M).
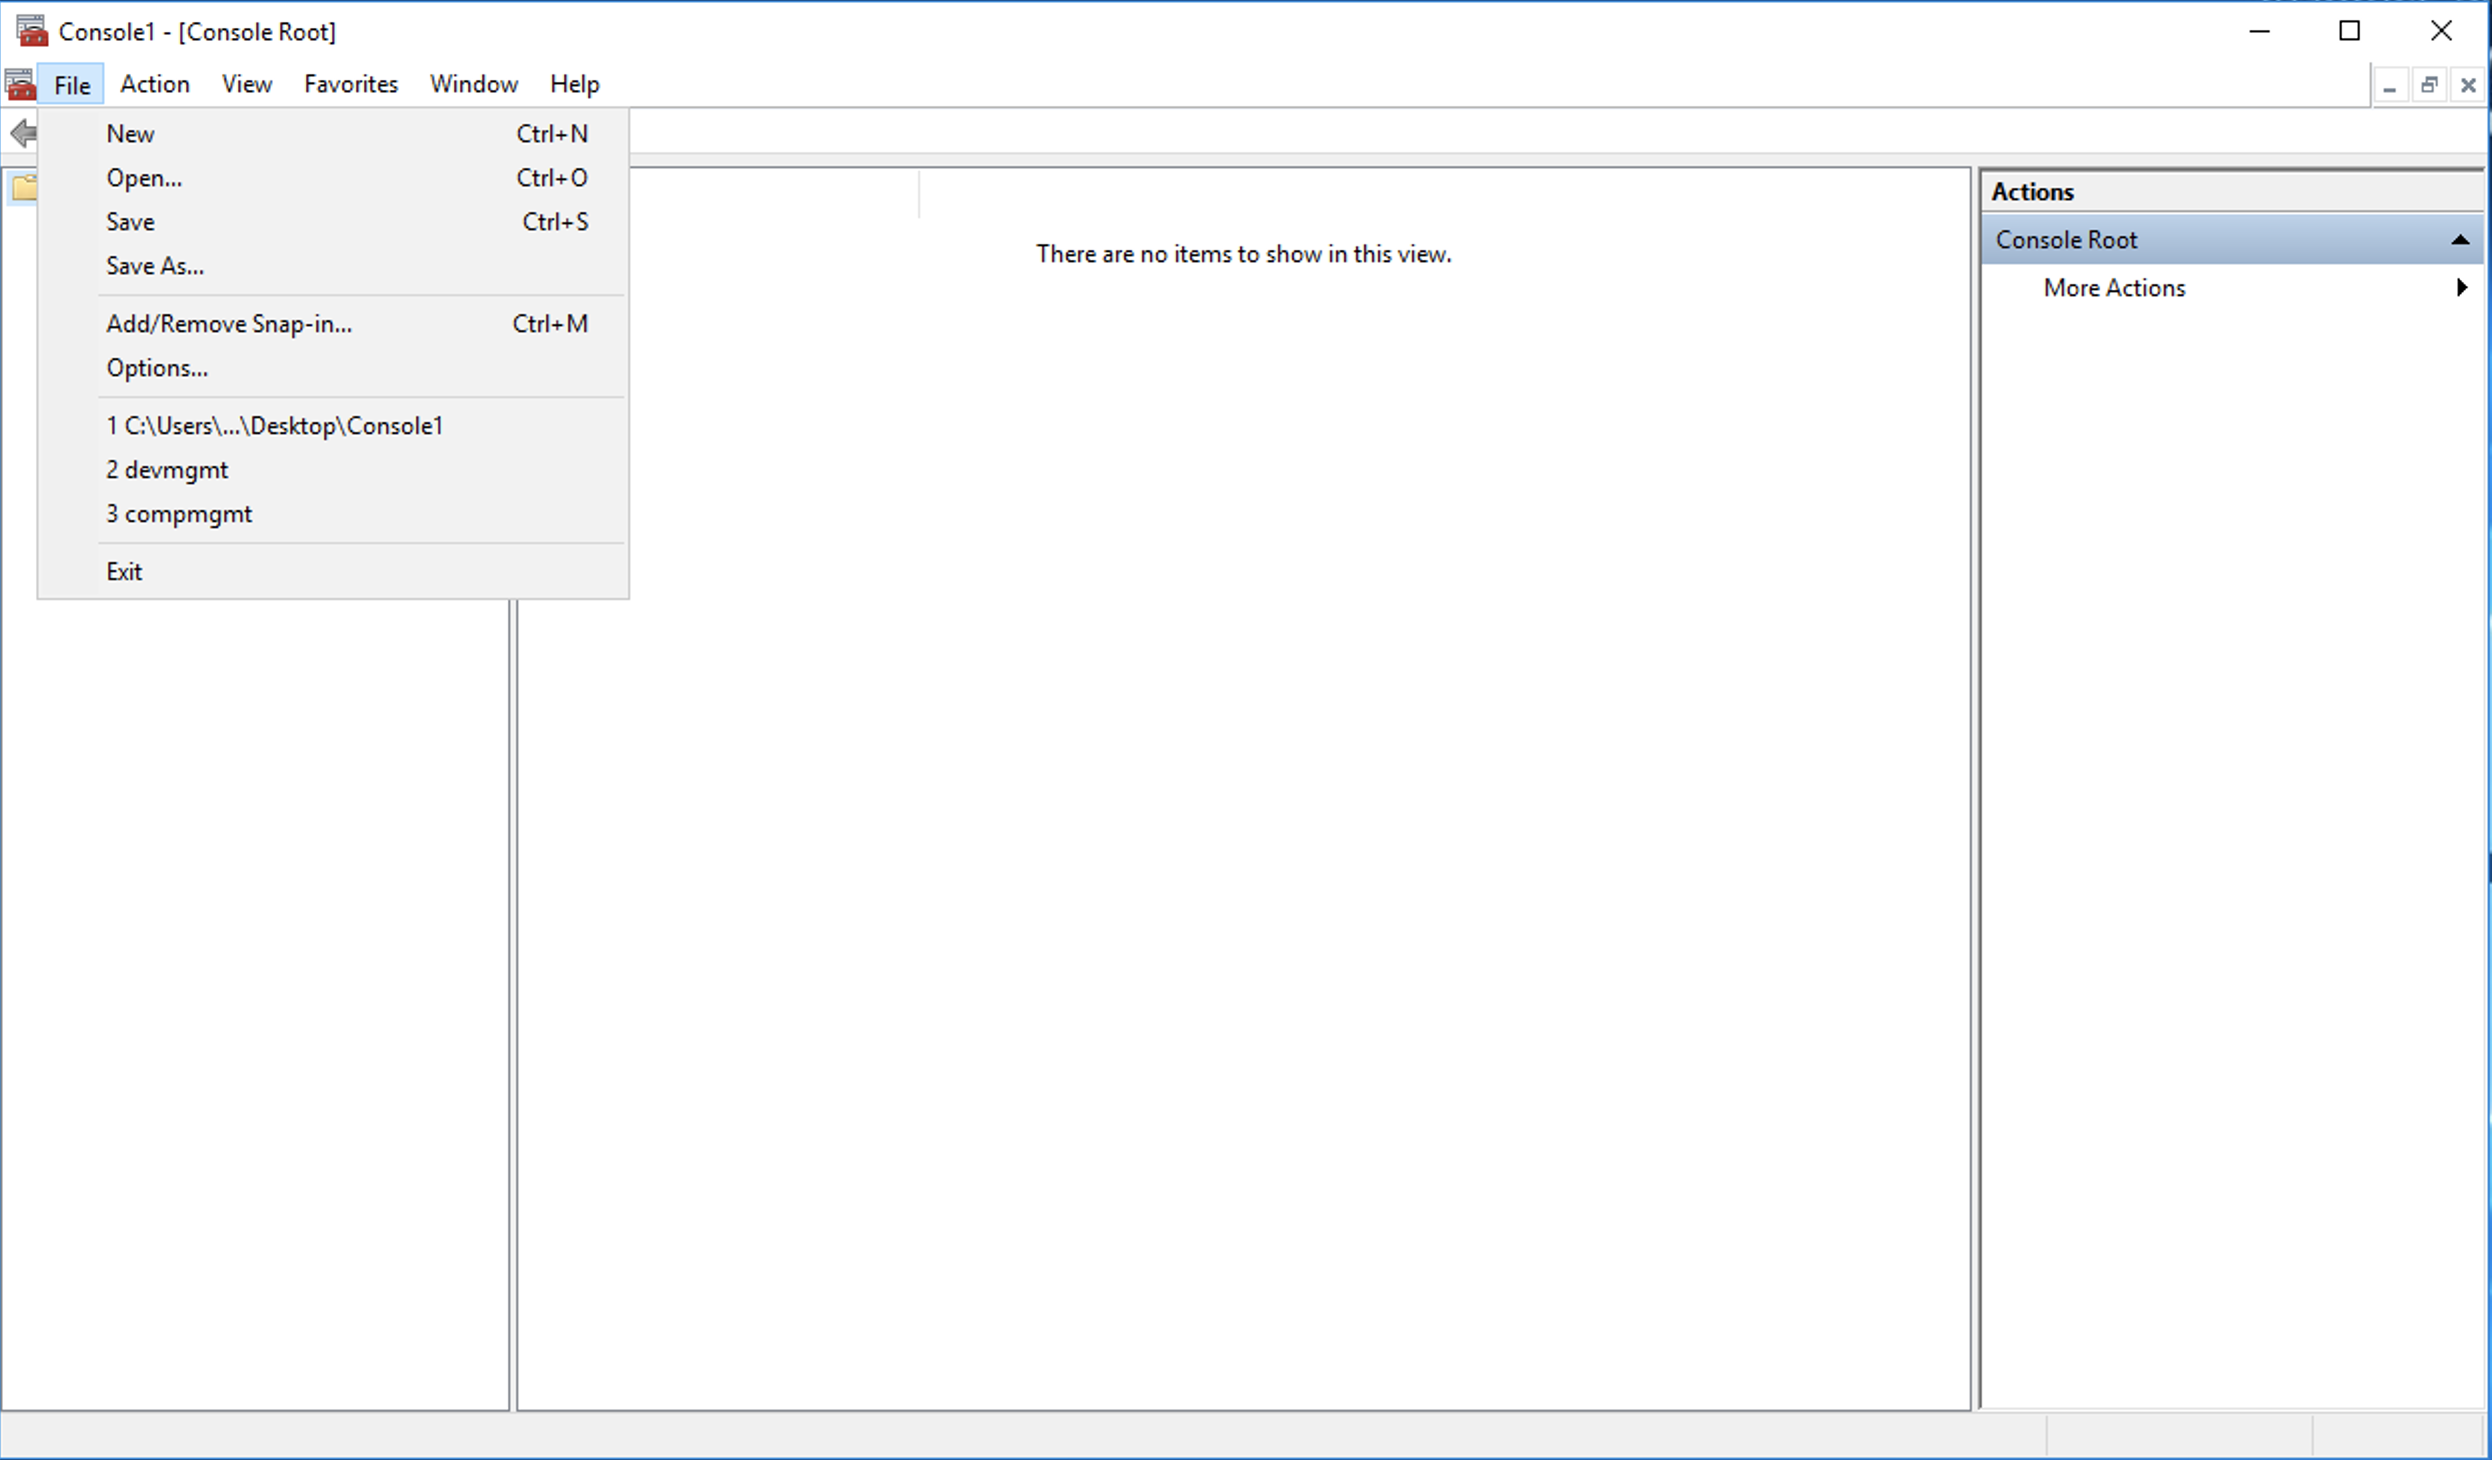
Select Certificate in the left column.
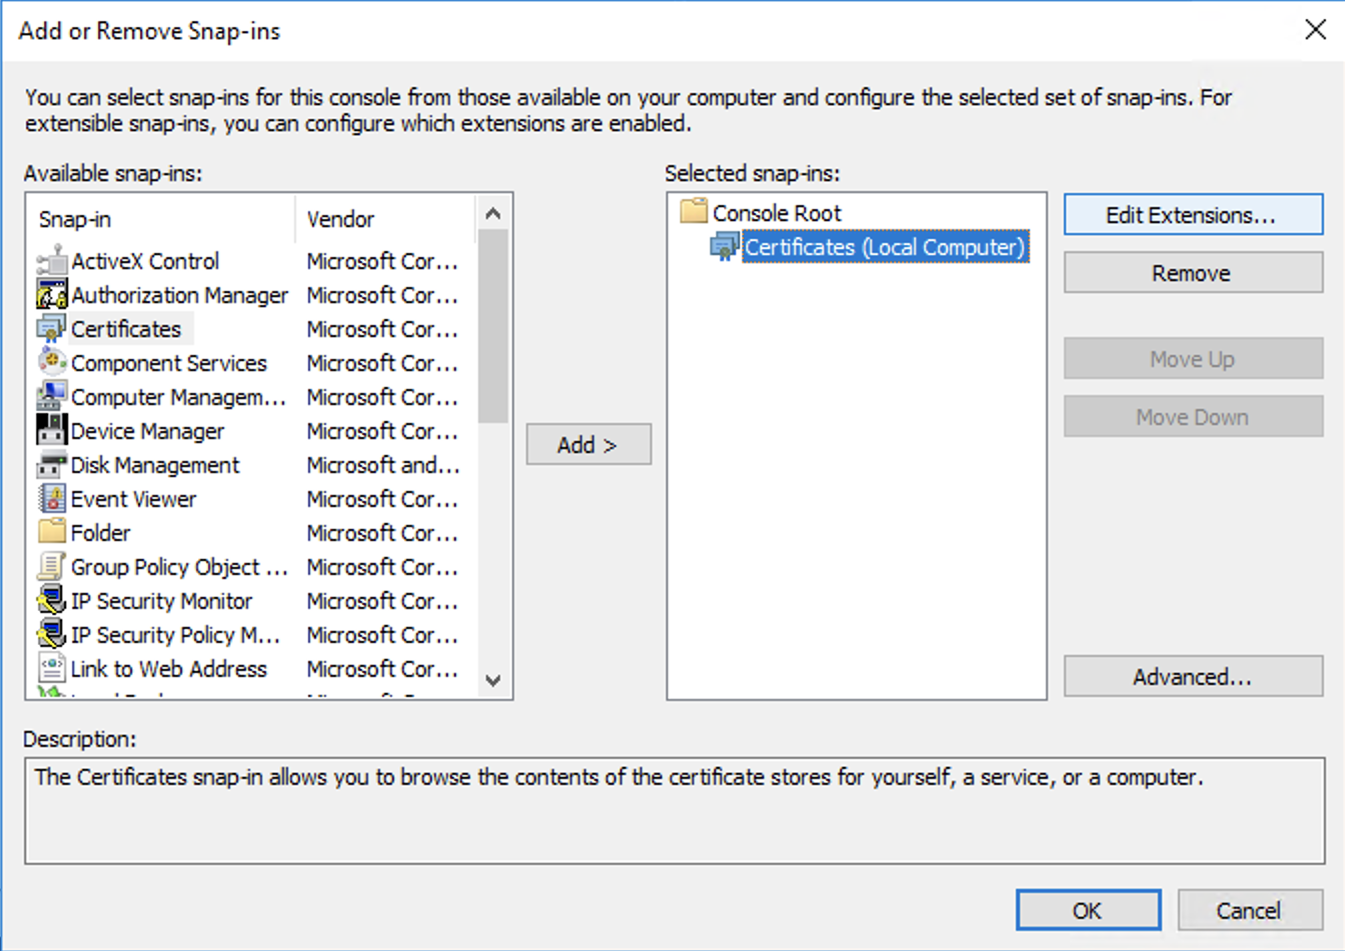
Select Computer account in the popup.
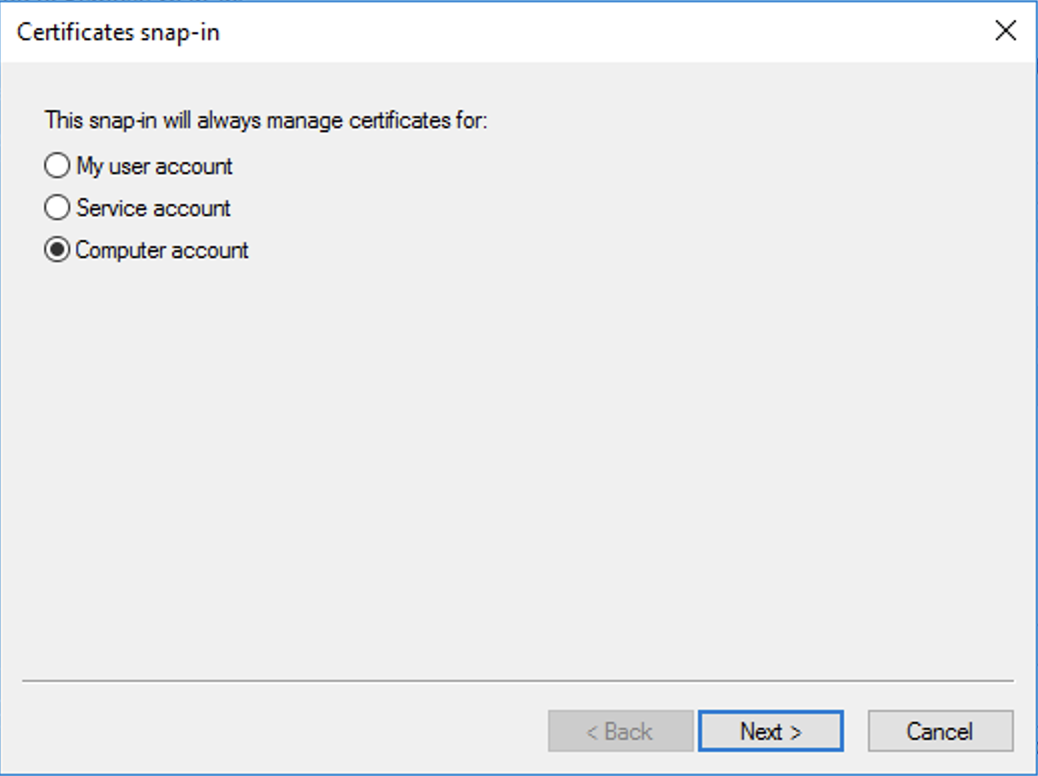
Click Next and then OK to create Certificates for your local computer.
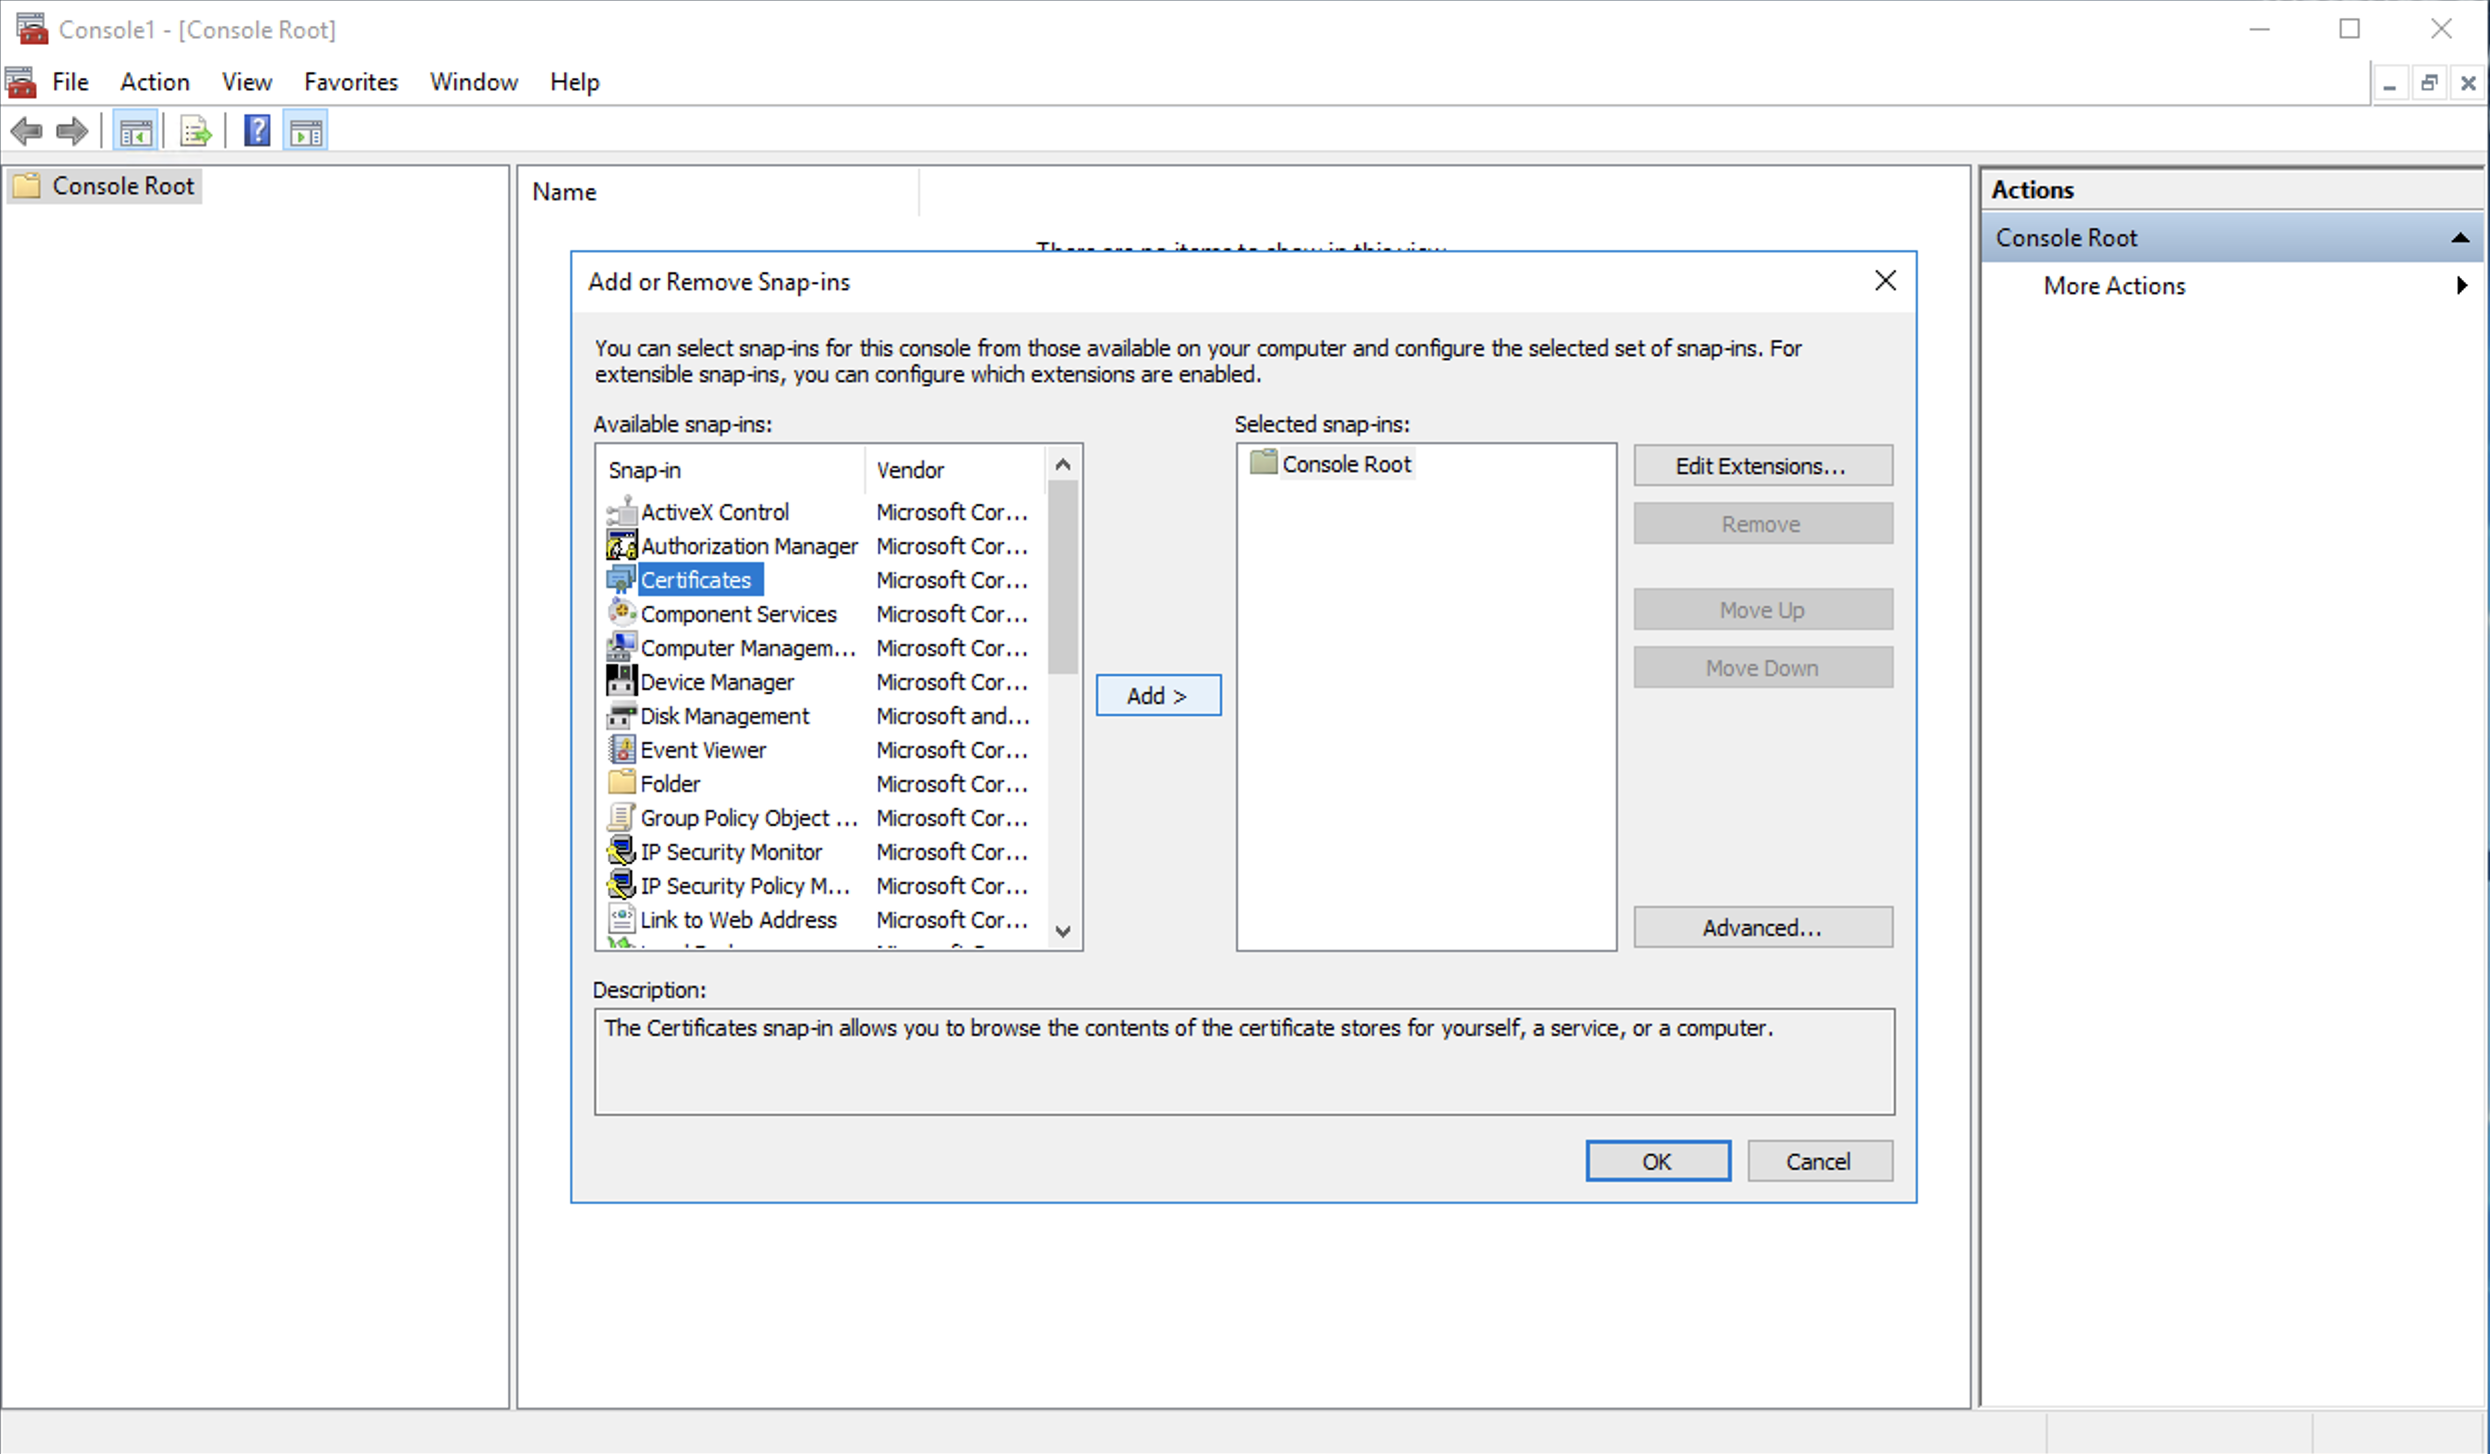
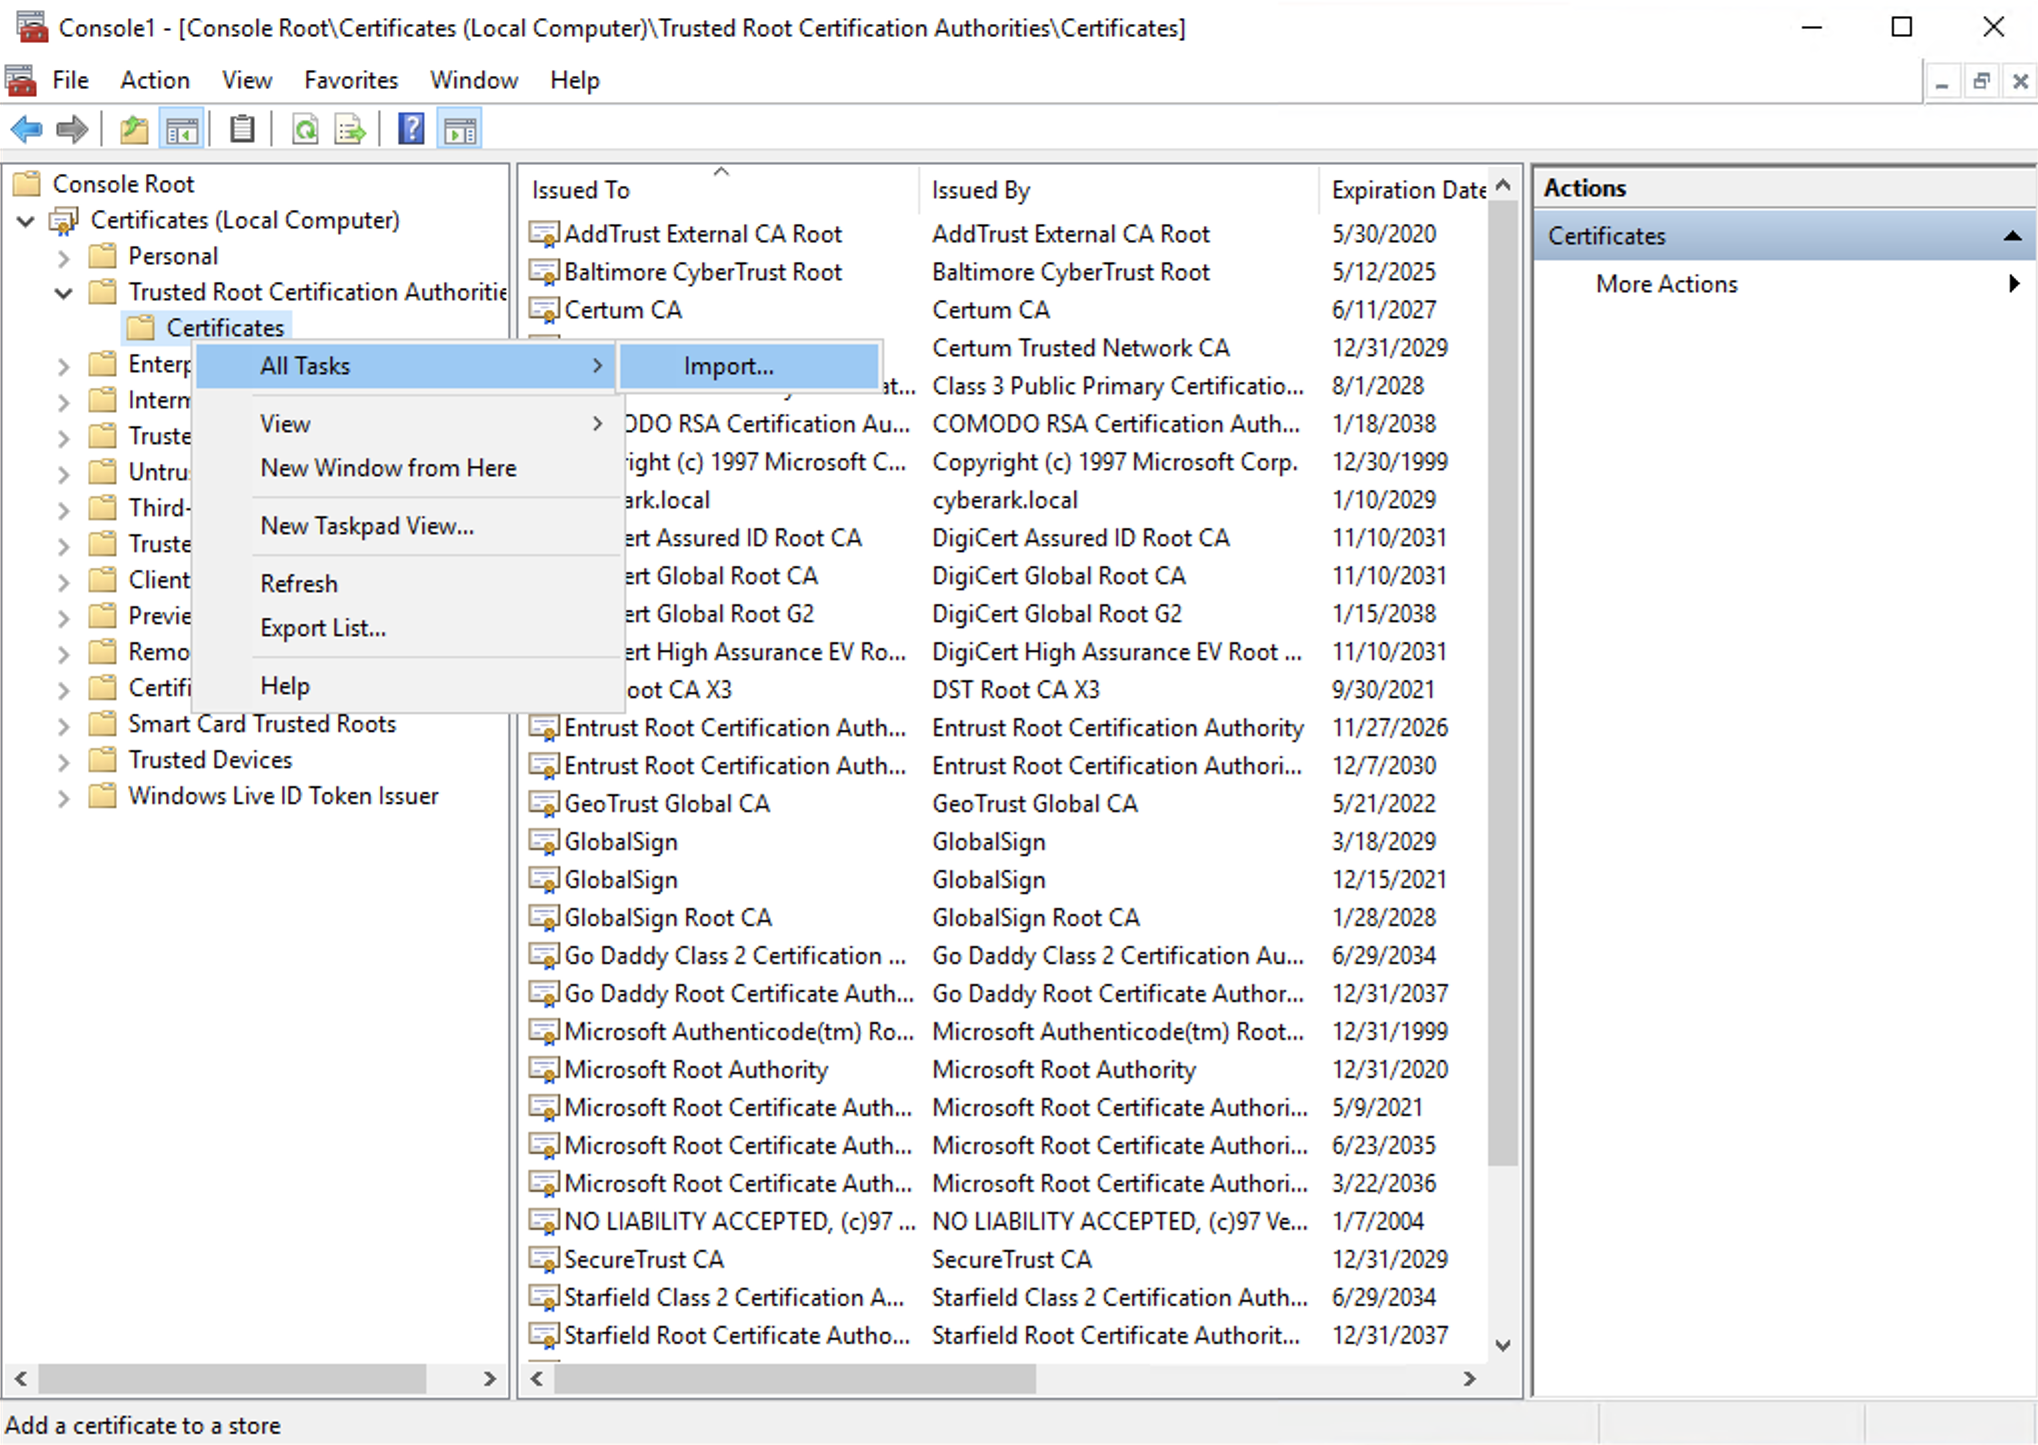
Expand Trusted Root Certification Authorities inside the Certificates folder and right-click on Certificates to import the root certificate provided.
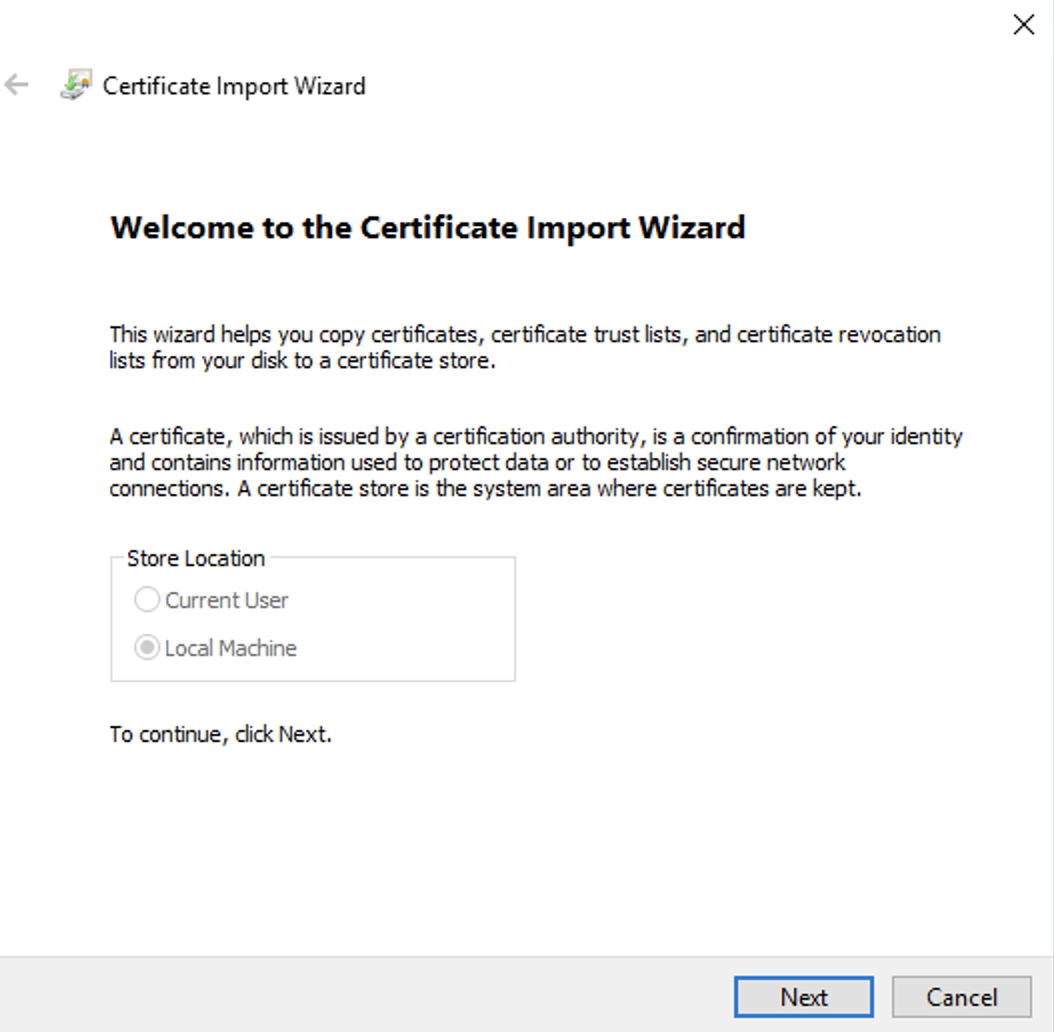
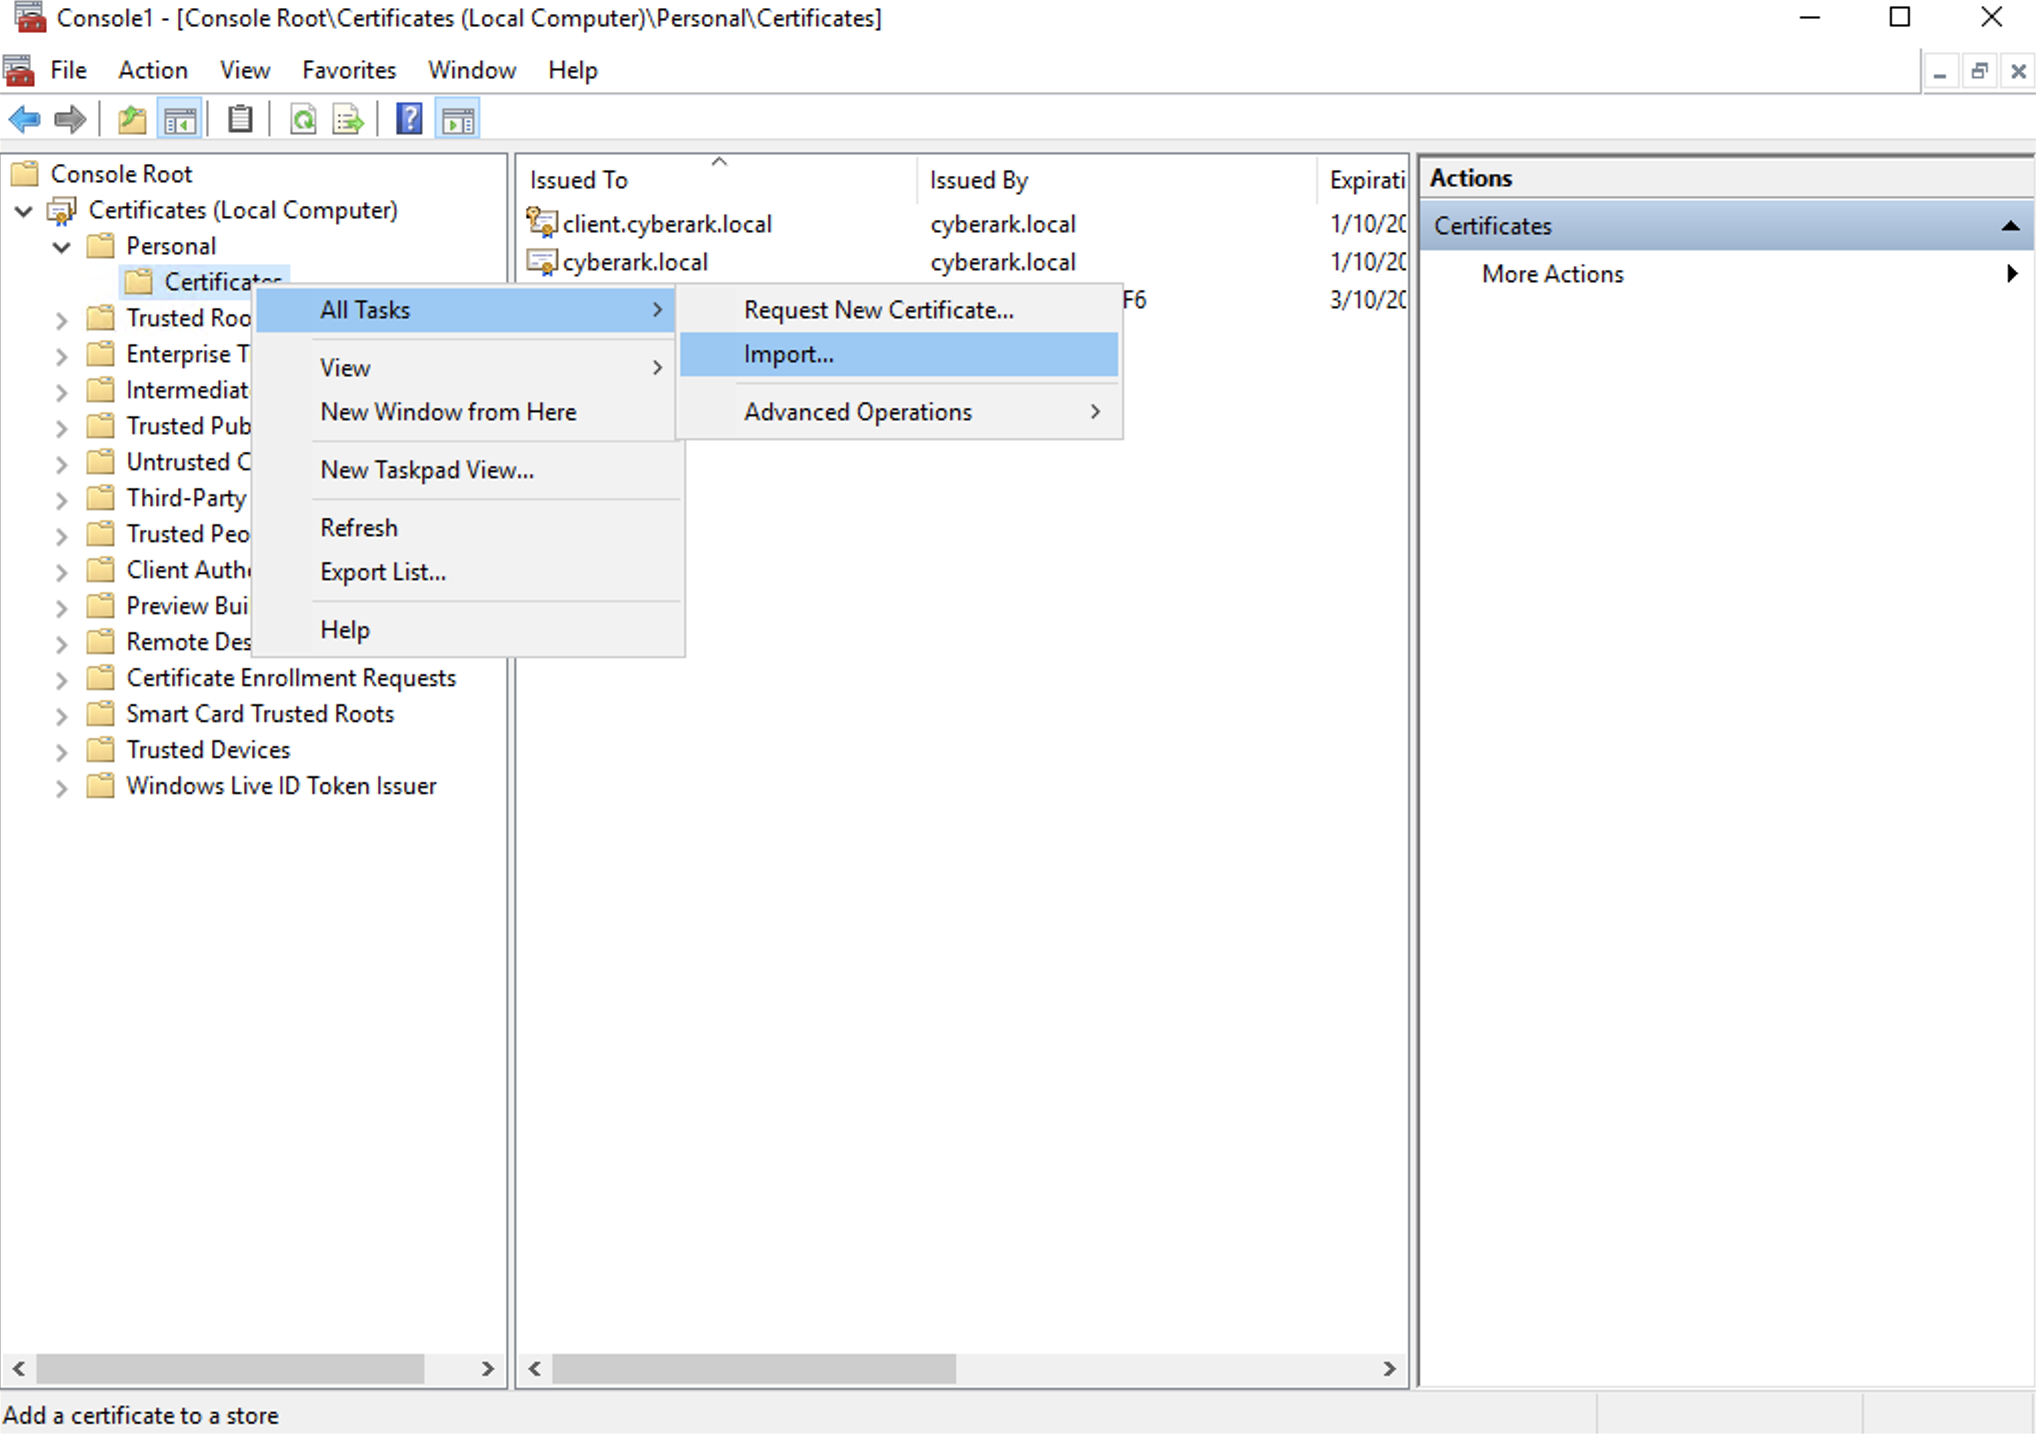
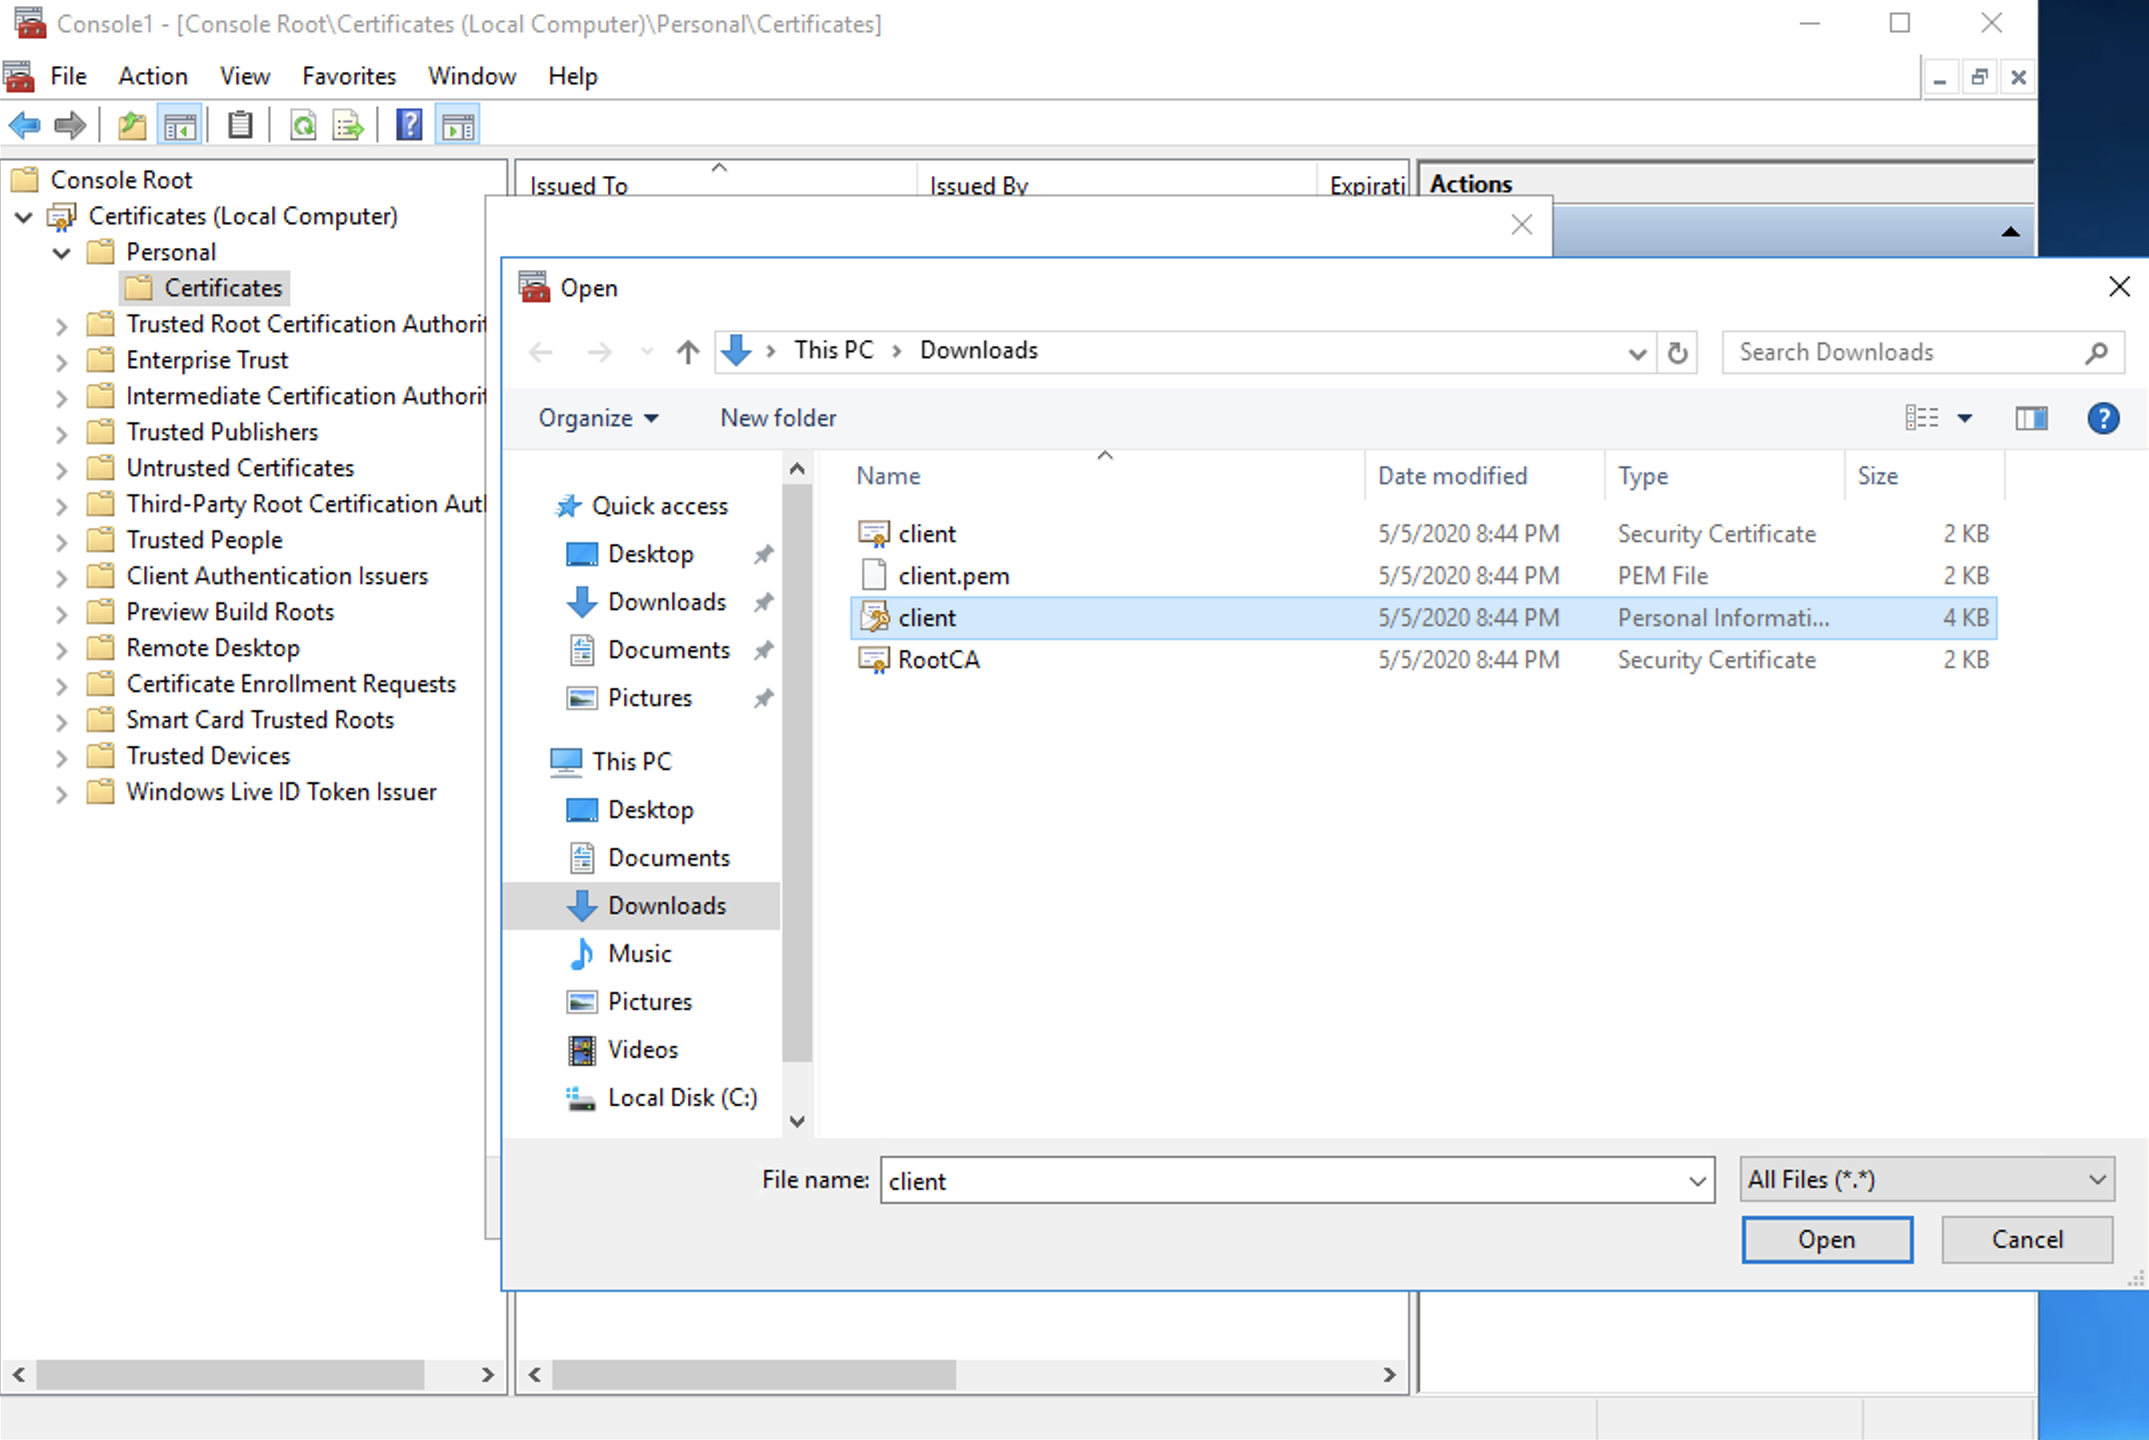
Expand Personal inside the Certificates folder and right-click on Certificates to import the PFK file.
Right-click on the imported certificate and select Open.
Navigate to the Details tab and note down the value for Thumbprint. This will be used while connecting to the CyberArk service from the PowerShell script you are going to create.
Retrieve credentials from CyberArk using PowerShell
Bot Master will retrieve credentials from CyberArk using PowerShell.
First, the script needs to be written and tested with pure PowerShell.
Example variables and parameters:
param([string] $baseURL, [string] $appId, [string] $safe, [string] $objectName, [string] $certificateThumbprint)

# Variables
$serverAddress = 'localhost'

# Param example
#$baseURL = 'https://cyberarkserver:port'
#$appId = 'WorkFusion'
#$safe = 'WorkFusionBot'
#$objectName = 'WF-Bot-Test'
#$certificateThumbprint = '023A534542CB2454'
Create a header object to set
Content-Type.$headers = New-Object "System.Collections.Generic.Dictionary[[String],[String]]"
$headers.Add('Content-Type','application/x-www-form-urlencoded')Set security settings for an HTTPS request.
[Net.ServicePointManager]::SecurityProtocol = "tls12, tls11, tls"Retrieve the added certificate using the passed certificate thumbprint.
$cert = Get-ChildItem -Path Cert:\CurrentUser\My\$certificateThumbprintMake a GET request to CyberArk.
$response = Invoke-WebRequest "$baseURL/AIMWebService/api/Accounts?AppID=$appId&Safe=$safe&Object=$objectName" -Method 'GET' -Headers $headers -Certificate $certConvert the response content to a JSON object.
$responseObj = $response.Content | ConvertFrom-JsonCache credentials in the Windows security storage for the server.
cmdkey /add:$serverAddress /user:$userName /pass:$passwordStart an RDP session.
mstsc /v:$serverAddress
Use the PowerShell script to start bot agent RDP session
To configure a bot agent to use credentials from CyberArk, do as follows.
Modify the following configuration in
{INSTALL_DIR}/bot-agent/conf/bot-agent-master.yml:- id: rdp0
expression: "cmd /c start /wait node0.RDP"
directory: "rdp"
enabled: "${environment.node0_enabled:true}"Place the PowerShell script created in the previous step to
{INSTALL_DIR}/bot-agent/bin. The modified configuration will look like below:- id: rdp0
expression: "cmd /c start /wait powershell .\\rdp_connection.ps1 -baseURL https://cyberarkserver:port -appId WorkFusion -safe WorkFusionBot -objectName workfusion-bot-1 -certificateThumbprint 023423AC43535BA23434"
tag: "rdp"
directory: "bin"
enabled: "${environment.node0_enabled:true}"
You can place the script wherever you wish inside `wfagent/bot-agent`. Make sure the directory is mentioned in the YML file.
- Perform these modification steps for each bot configuration with their corresponding CyberArk Object Name.