Set roles and permissions for Analytics
Managing Analytics-related roles and permissions can involve the following, depending on your needs:
Configuring or creating custom roles in Keycloack
Setting roles and permissions in Control Tower to access the Analytics capabilities available in the application
Setting roles and permissions in Workspace to access the Case Management dashboard
Configure Keycloak roles
The default user roles are pre-configured for you and inherited from the following clients in the WorkFusion's Keycloak-based user management system:
Administrator, Operator, and Developer roles in Control Tower from the wf-control-tower client
Administrator, Manager, and Worker in Workspace from the wf-workspace client
When a user logs in for the first time in an application, the Analytics component communicates with Keycloak. If the person is valid and matches Keycloak's access settings, he or she gets access to Analytics dashboards and related data, subject to available Analytics capabilities and permissions configured for their roles in Control Tower or Workspace.
To create a custom Keyclock role in addition to the existing default ones, follow the steps below:
Custom roles can be created by Keycloack admin users only and for on-premise installations only.
Log in to the WorkFusion's user management system (Keycloak). On the main menu, in the Configure group, click Clients.
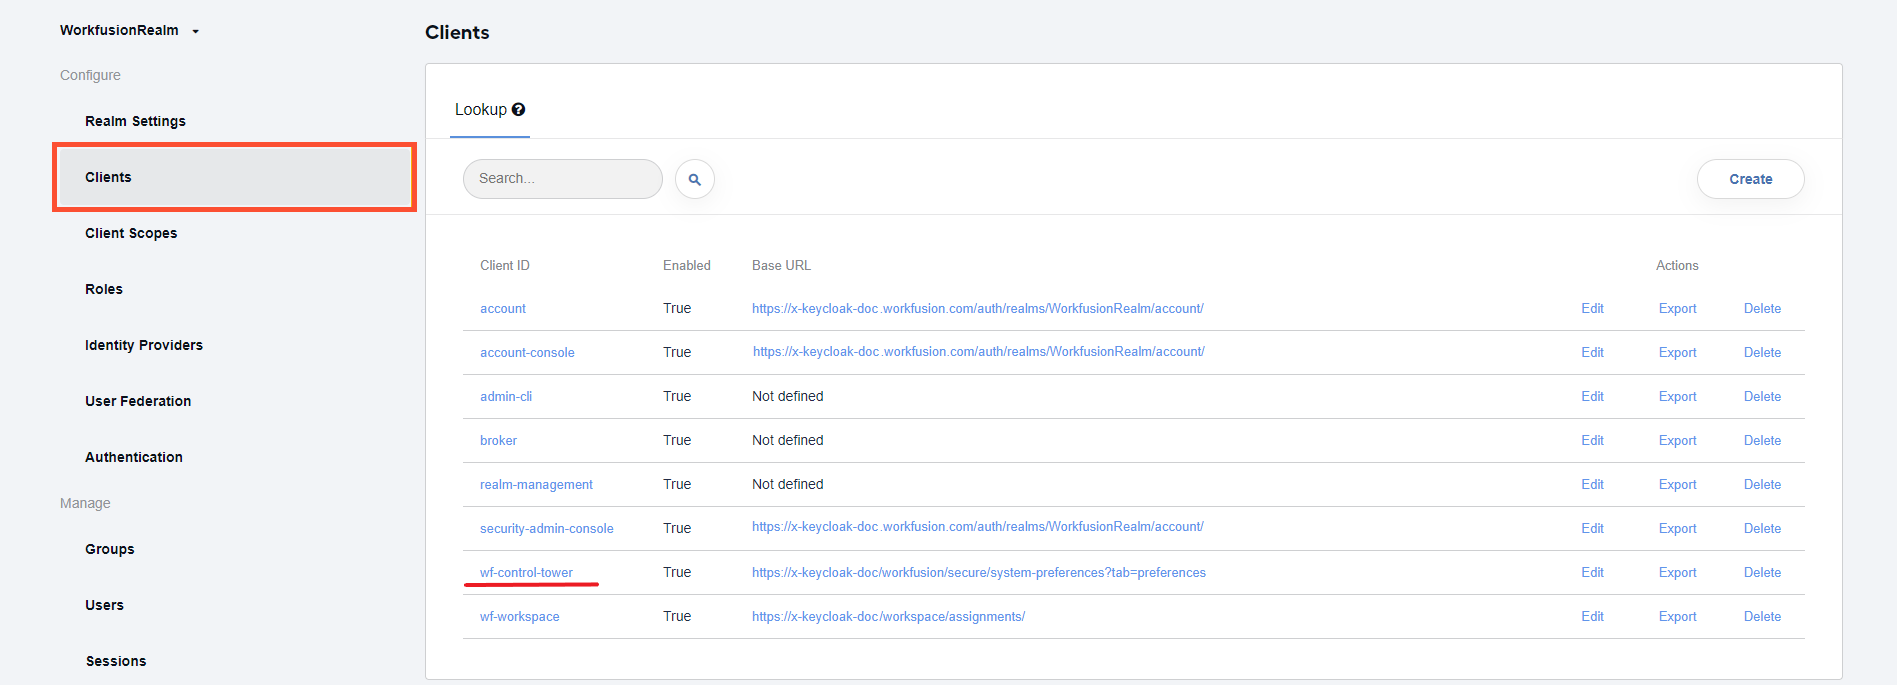
In the displayed list, click the wf-control-tower client. The client window appears.
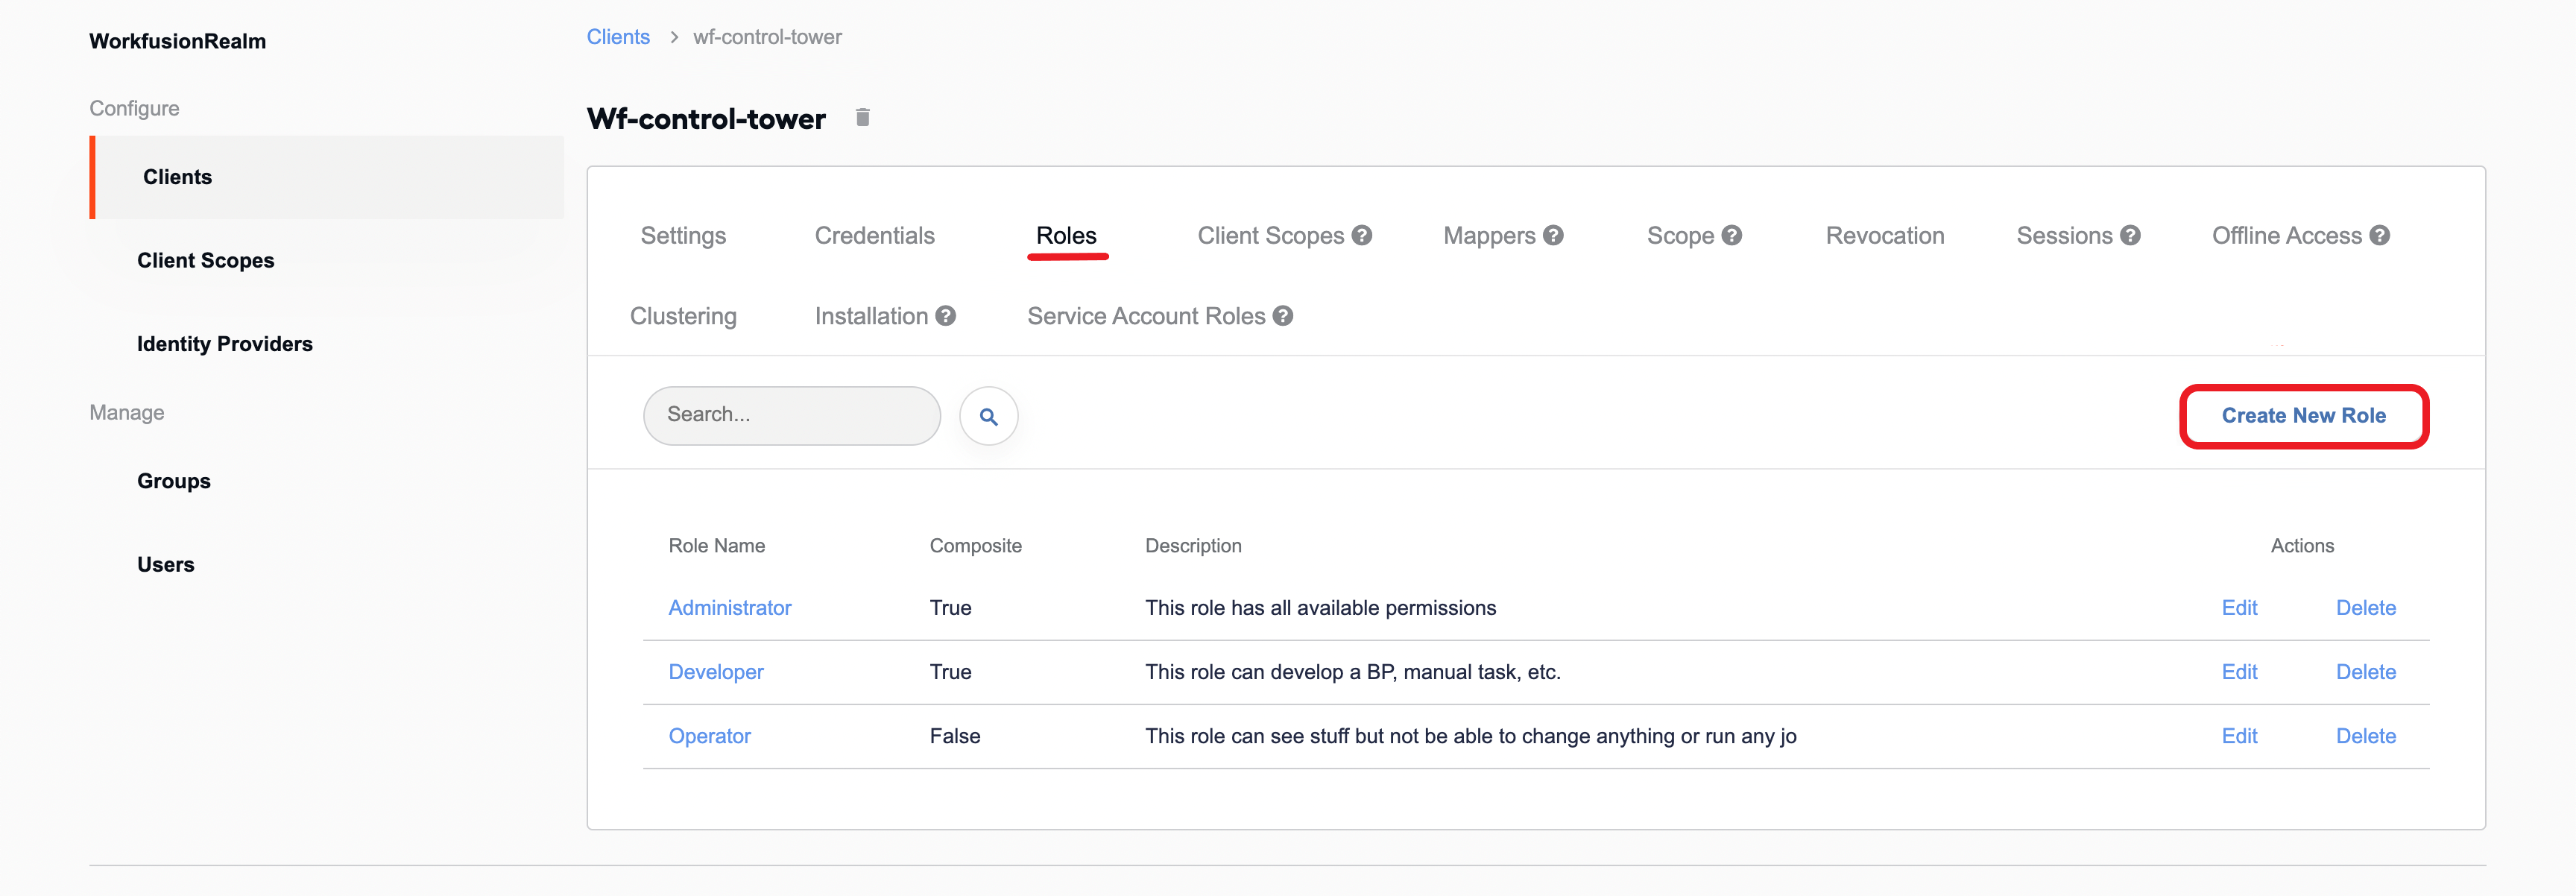
Go to the Roles tab, click Create New Role.
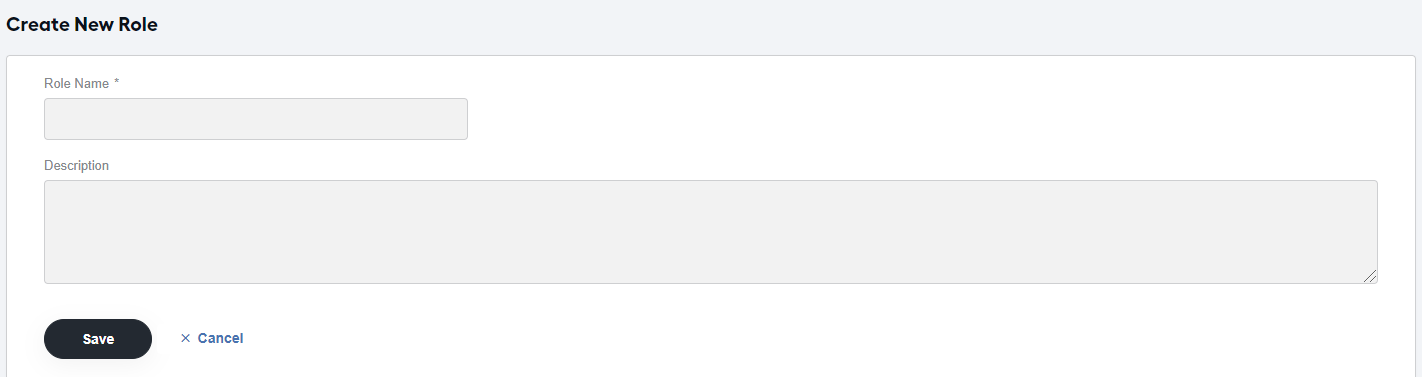
Fill in the fields and click Save.
To map users to the new custom role, follow the instruction.
Once a custom role is created in Keycloak, it appears in Control Tower on the Role Management page. Your next step is to assign the Analytics permissions to it and save the setup.
Change access permissions in Control Tower
To manage the access to Superset dashboards and related components, use standard Control Tower roles and permissions. To view or change the Superset-related permissions in Control Tower, navigate to System setting > Role management.
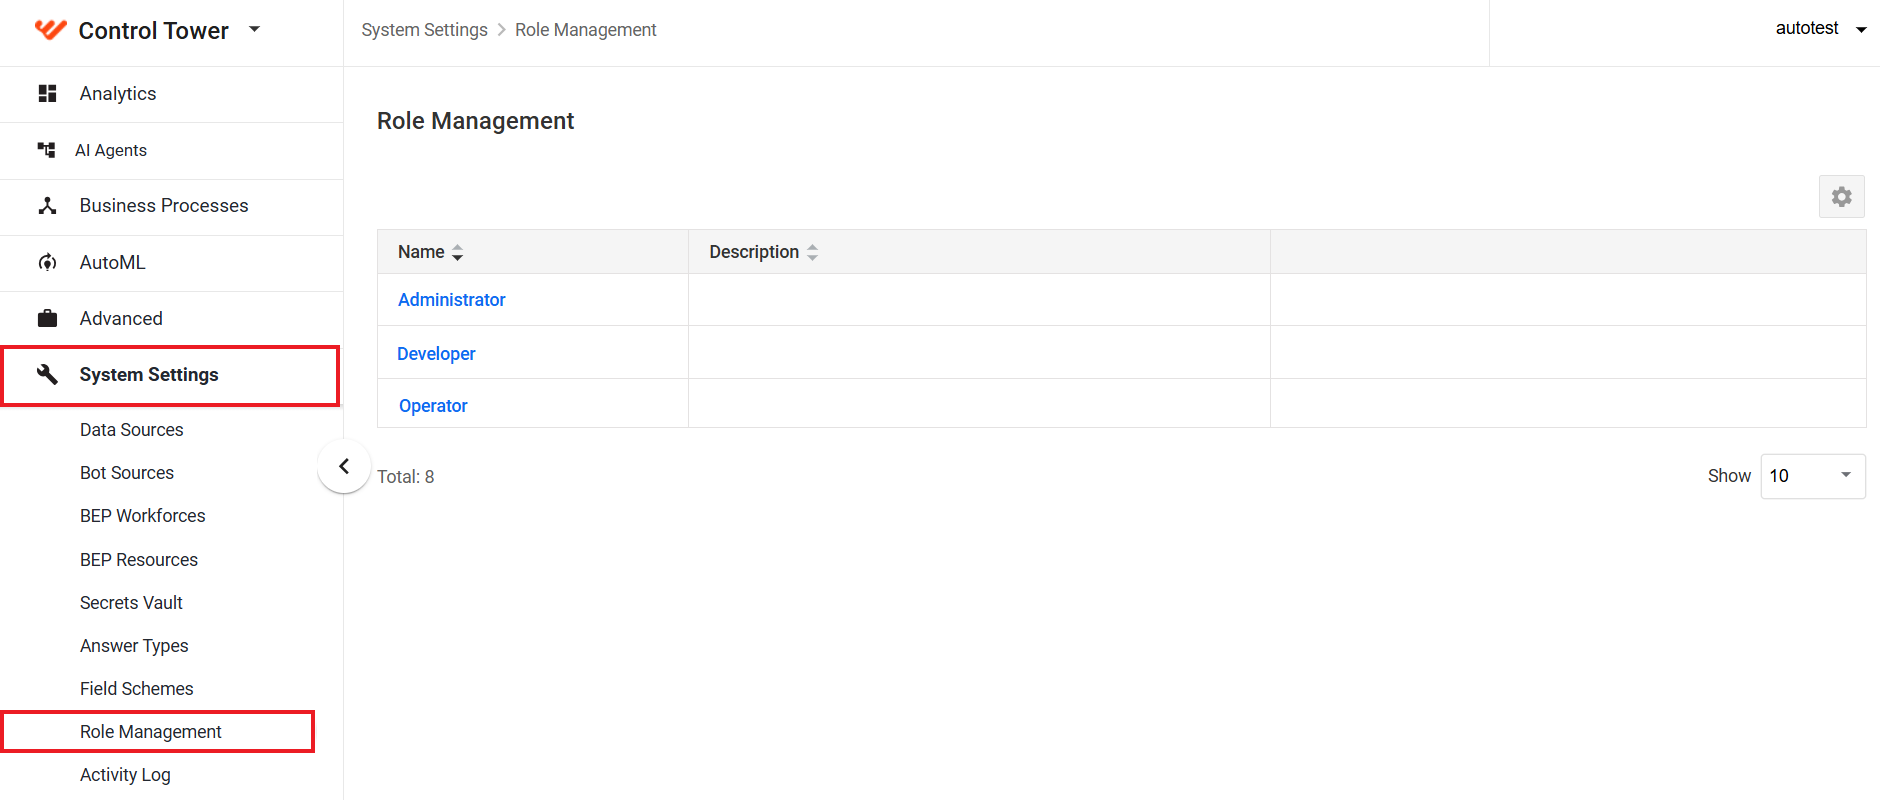
On the page, the following roles are available out of the box with the default scope of permissions as detailed below:
- Admin users have full access with the ability to modify permissions of other roles.
- Developer users can do almost everything, except importing dashboards and changing permissions.
- Operator users have read-only permissions by default. It means they can only view dashboards but cannot modify or create them or their components.
Control Tower features the following permissions you can set for each of the roles to allow or restrict access to Analytics:
Analytics Read-only enables you to view Analytics dashboards and related data, subject to any access-restricting filters. However, users with only this permission cannot create or modify dashboards and their components.
Edit Dashboards allows you to create and modify Analytics dashboards but not charts, datasets, or queries.
Edit Charts, Datasets & Queries allows you to create and modify components for Analytics dashboards, such as charts, datasets, and queries.
Import Dashboards allows you to import Analytics dashboards and their components.
Dashboards AI insights lets you use the built-in Artificial Intelligence (AI) capabilities to analyze the dashboard metrics and generate a report.
AI Chart Generator lets you use the built-in AI capabilities to create charts automatically based on your prompts.
Spark Pipelines lets you use the Spark-based Pipelines interface to build and execute custom data pipelines for advanced transaction analysis.
For default permission setups associated with default roles, see the table with default permissions.
To change access permissions for a particular role, follow the instructions in the Manage Control Tower roles and permissions guide.
Changing Analytics-related permissions is only available for Administrator role users.
Change access permissions in Workspace
In Workspace, you can access only the Case Management OOTB dashboard, provided you have one or all of the following permissions:
VIEW_USERS_ANALYTICS allows you to view the metrics not only for the Workspace tasks assigned to you but also for those assigned to all other users. By default, the permission is enabled for the Administrator and Manager users.
VIEW_MY_ANALYTICS lets you view only the metrics for the Workspace tasks assigned to you. By default, the permission is enabled for all user roles: Administrator, Manager, and Worker.
Only Administrator users can change the default permission setup. For more information, see the Manage Workspace roles and permissions.
Fine-grain Analytics access with filters
In Control Tower, you can create and apply filters to allow or restrict access to specific dashboards or analytics data for certain users or groups. With the filters, you can also flexibly change these access settings at runtime.
To access the filtering functionality, navigate to System Settings > Filters.
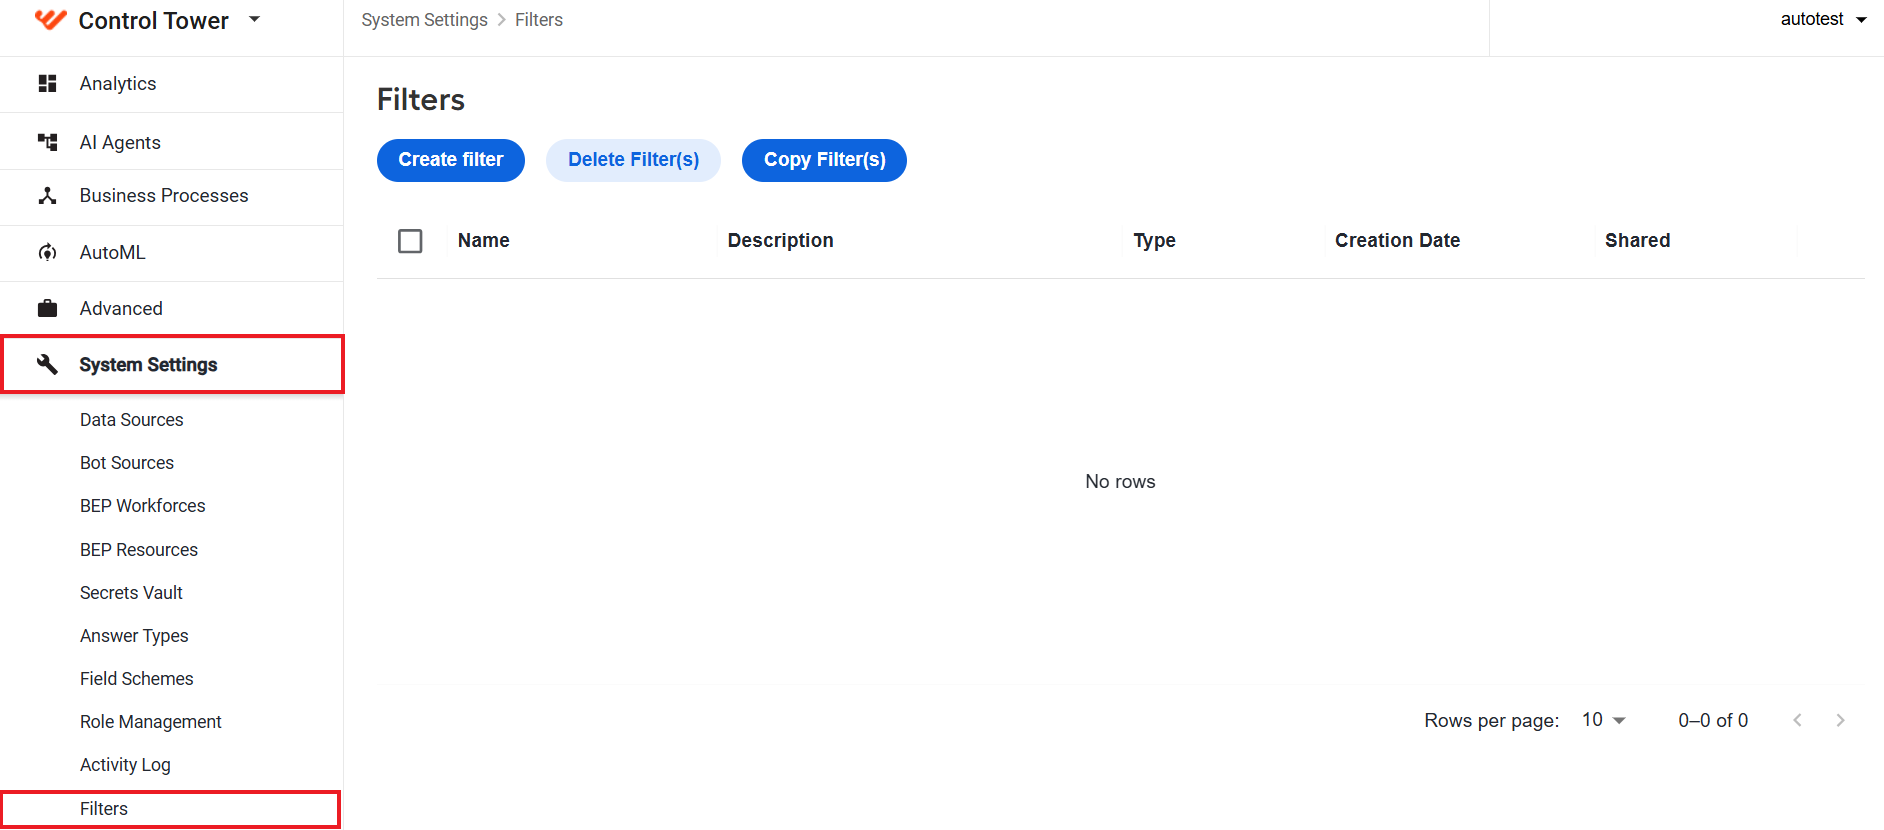
For instructions to create and assign a filter, refer to Set up filters for collaborative work.
The filtering functionality supports the following scenarios of how you can restrict or allow access to certain dashboards or analytics data:
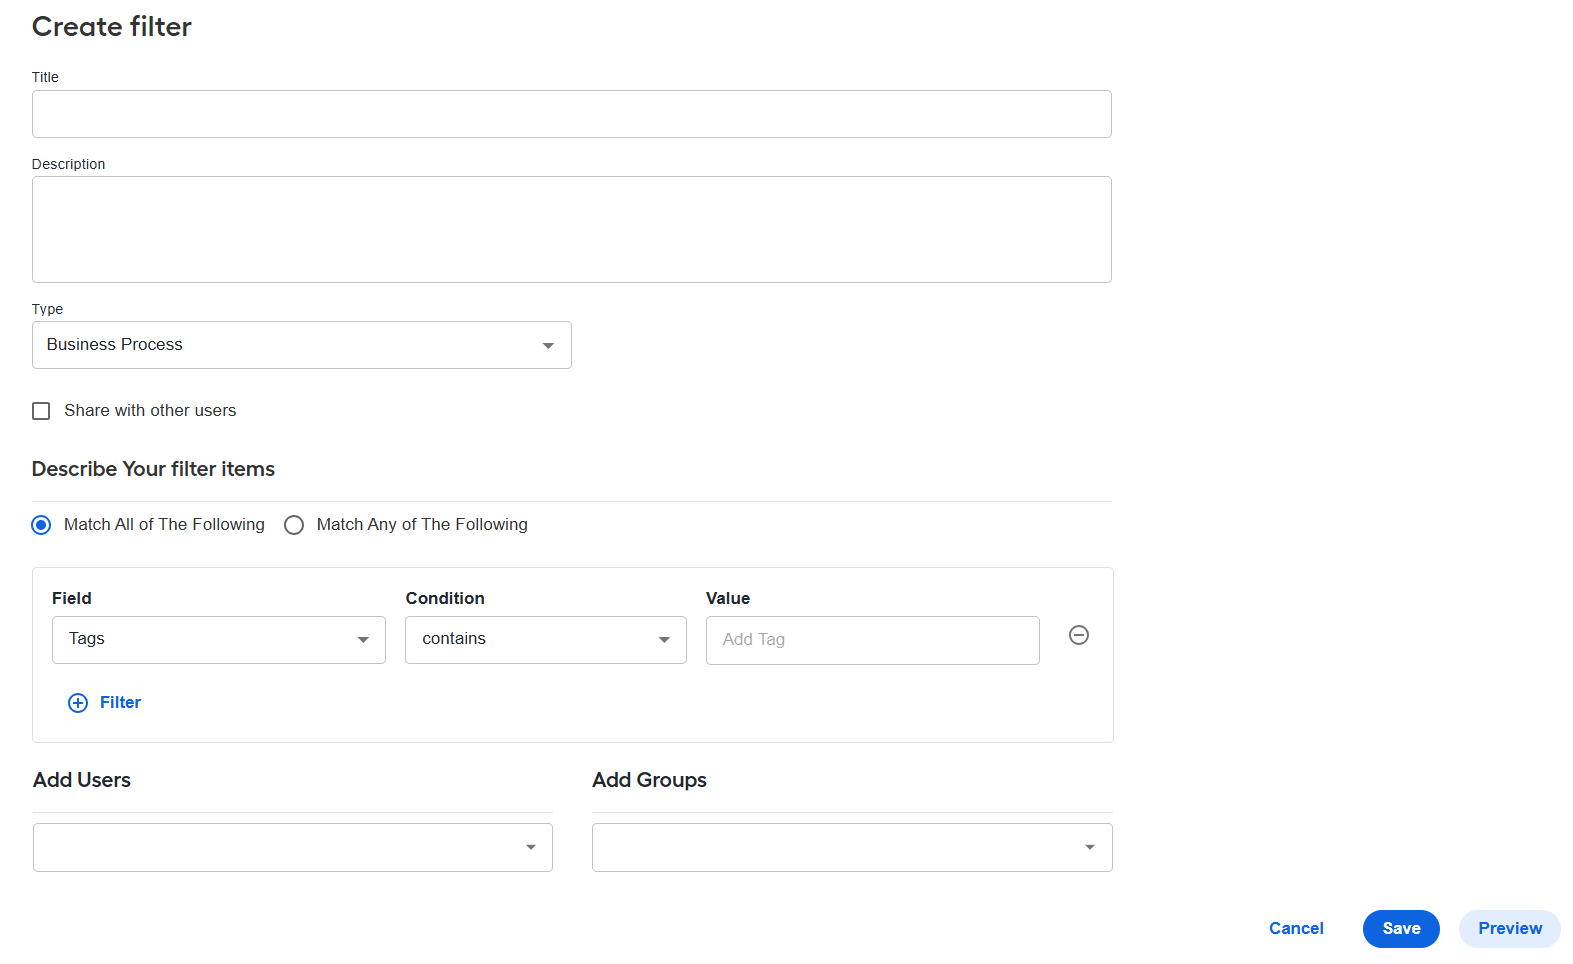
Restrict access to a particular Business Process to a specific user or group. As a result, the user or group will not see the data related to the Business Process in the dashboard.
To implement the scenario, create a filter by setting the Type field to Business Process and adding required conditions. For details, read Implement role-based filtering on Business Process data.
Restrict access to a specific dashboard or specific data for a particular user or group. As a result, the user or group will not have access to the dashboard or specific data within the dashboard.
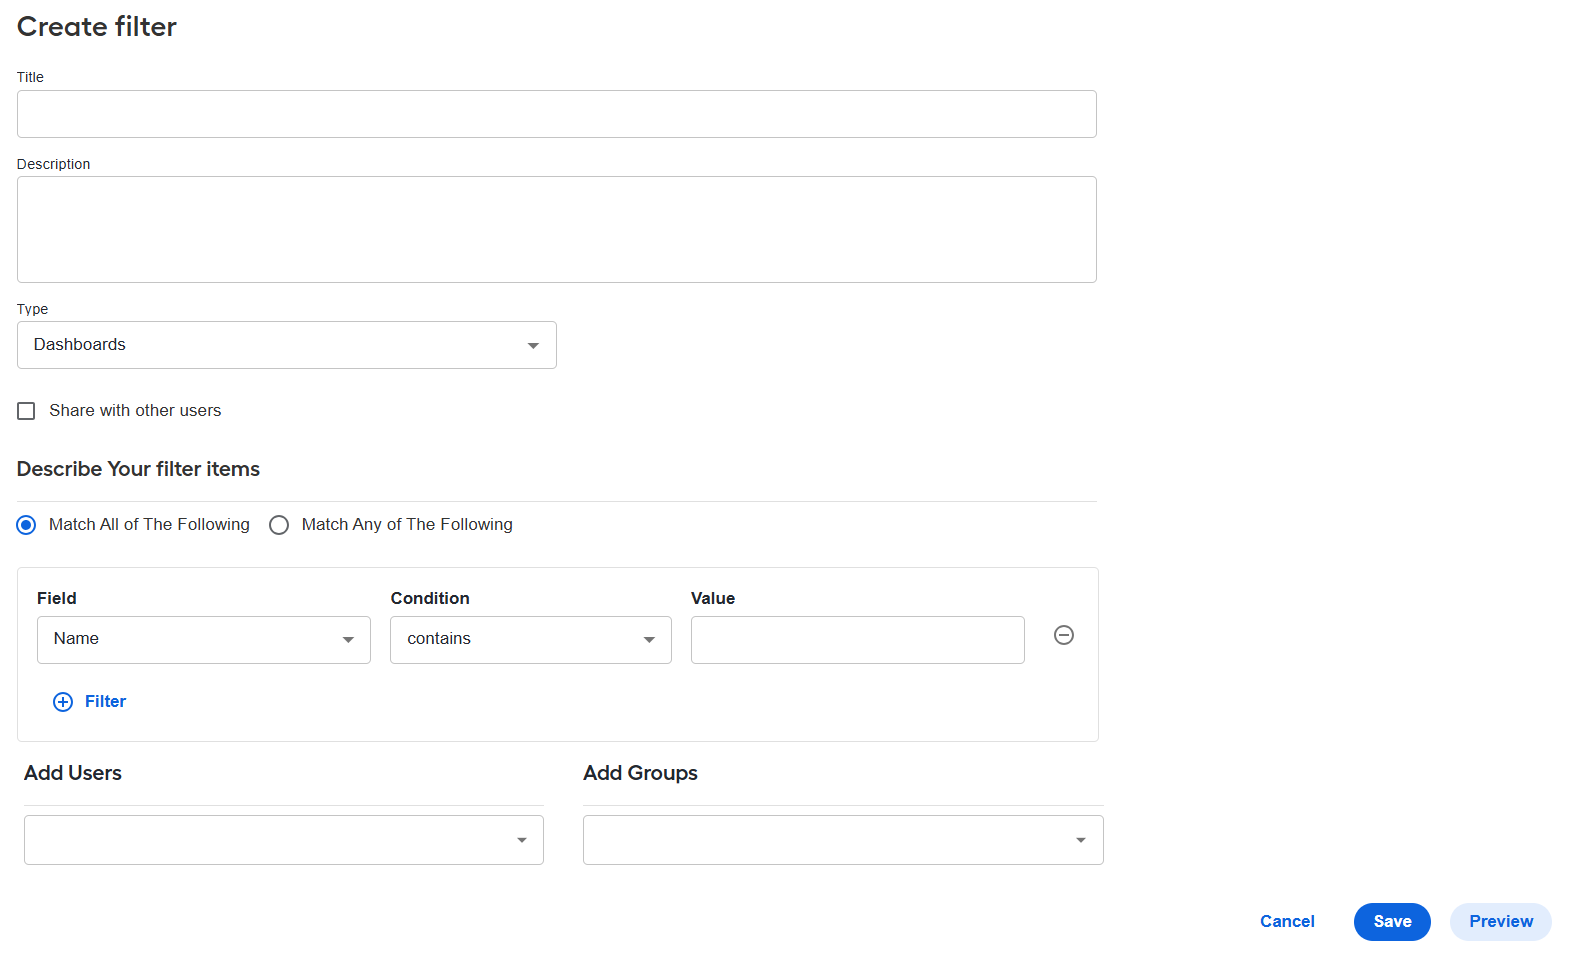
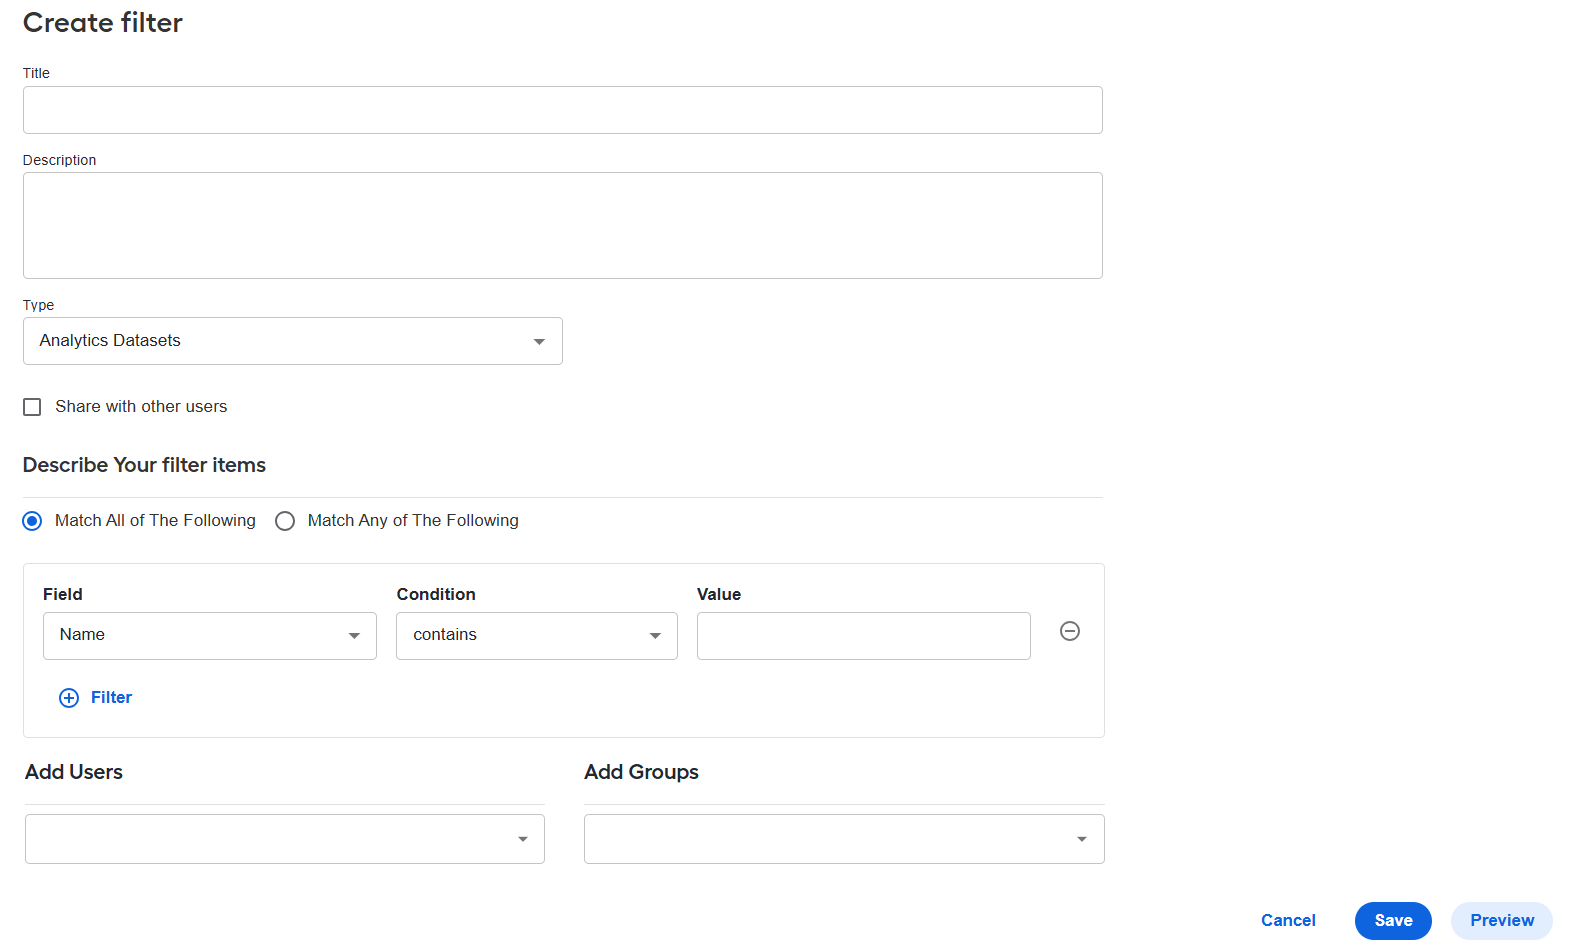
To implement the scenario, create a filter by setting the Type to one of the options below and adding required conditions.
Dashboards to restrict access to specific dashboards.
Analytics Datasets to restrict access to specific data across dashboards.
Restrict access to the Manual Task data in the Case Management dashboard for a particular user group based on a set of user-defined conditions. The filter is applied the same way to the Case Management dashboard in Control Tower and Workspace.
To implement the scenario, create a filter as described below:
In the Type field, select Analytics Role Level Security.
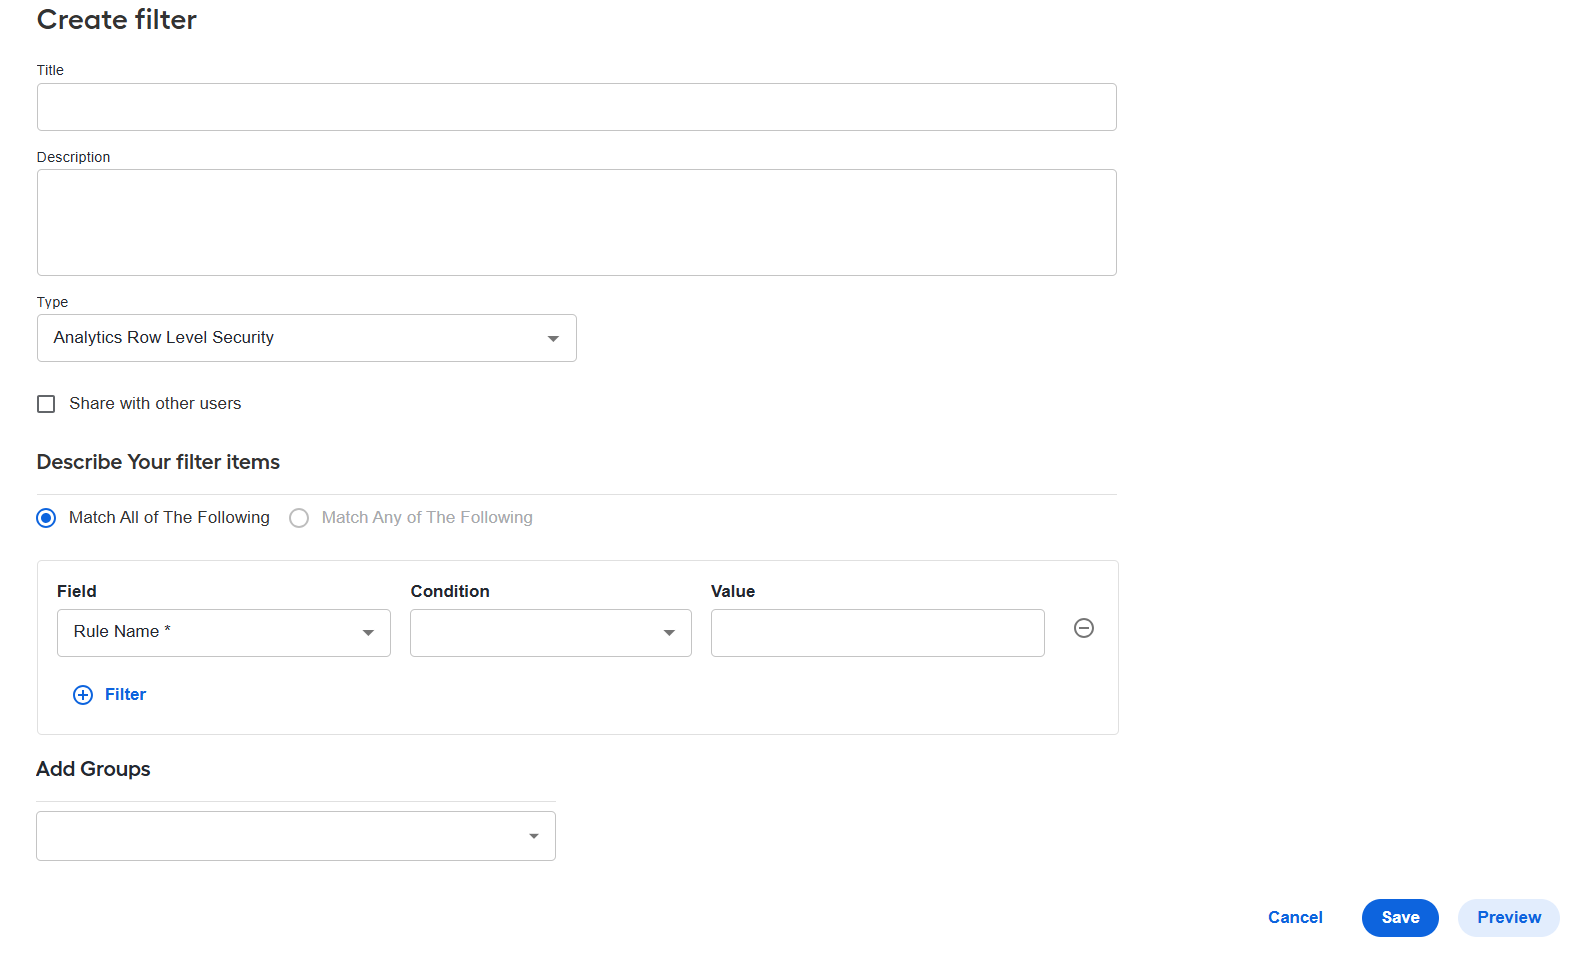
In Describe Your filter items, add the filtering conditions:
- Rule name (mandatory): the name of the rule created on the Work.AI Analytics side based on the filter.
- Datasets (mandatory): a specific dataset to which the filtering rule is to be applied.
- Clause (mandatory): a condition when the filter is to be applied to the specified dataset. For instance, if you set a condition like
last_assigned_user=autotest5, the filter is applied when thelast_assigned_usercolumn containsautotest5. - Group key (optional): additional identification.
In the Add Groups drop-down box, choose one or more user groups from Keycloak for which the created filter is to be applied and click Save.