Run investigation
Once Adverse Media Monitoring is installed and the configuration is complete, you can initiate investigations in one of the following ways:
- Start the Business Process from Control Tower
- Run it via the Ad hoc investigation search tool
- Call AMM REST API
- Ingest articles and entity details via a CSV file
- Start Business Process from Control Tower
- Run via Ad hoc investigation search tool
- Call AMM REST API
- Ingest via CSV file
You can initiate Adverse Media Monitoring in Control Tower by running the Core or Ad Hoc Investigation Business Processes (BP). The main difference is that the Ad hoc Investigation creates an ad-hoc search screen that enables analysts and business users without access to Control Tower to initiate investigations from Workspace, for instance, as part of a transaction monitoring fraud alert investigation.
To start the Core BP, do the following:
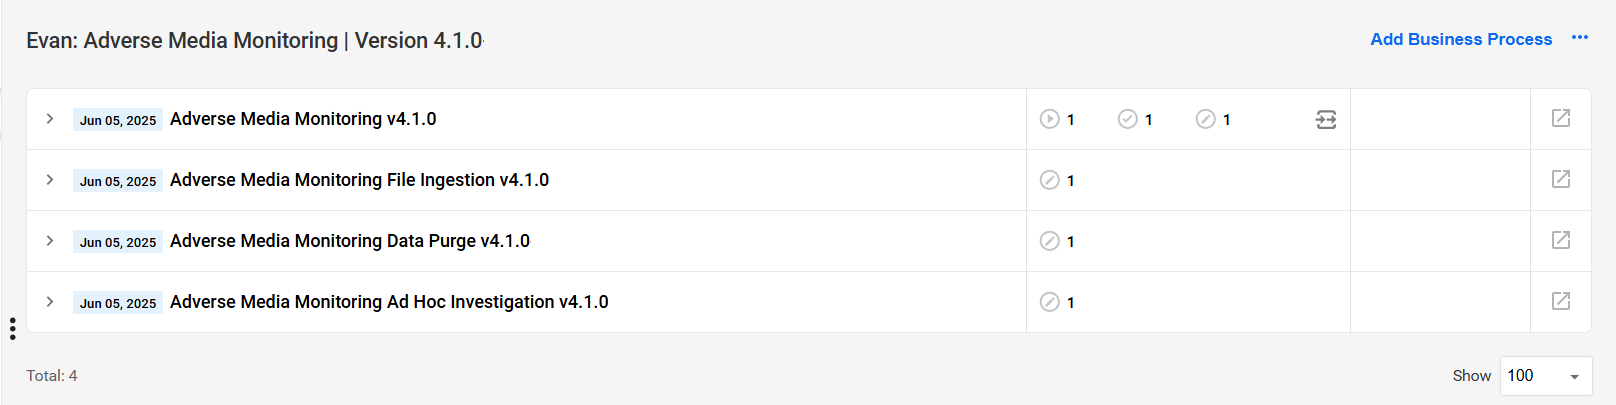
In the Control Tower menu, click Digital Workers > View All and find the Evan: Adverse Media Monitoring group.
In the group, find the variation you wish to use and click it.
Find the Adverse Media Monitoring BP and click it to open its process definition.
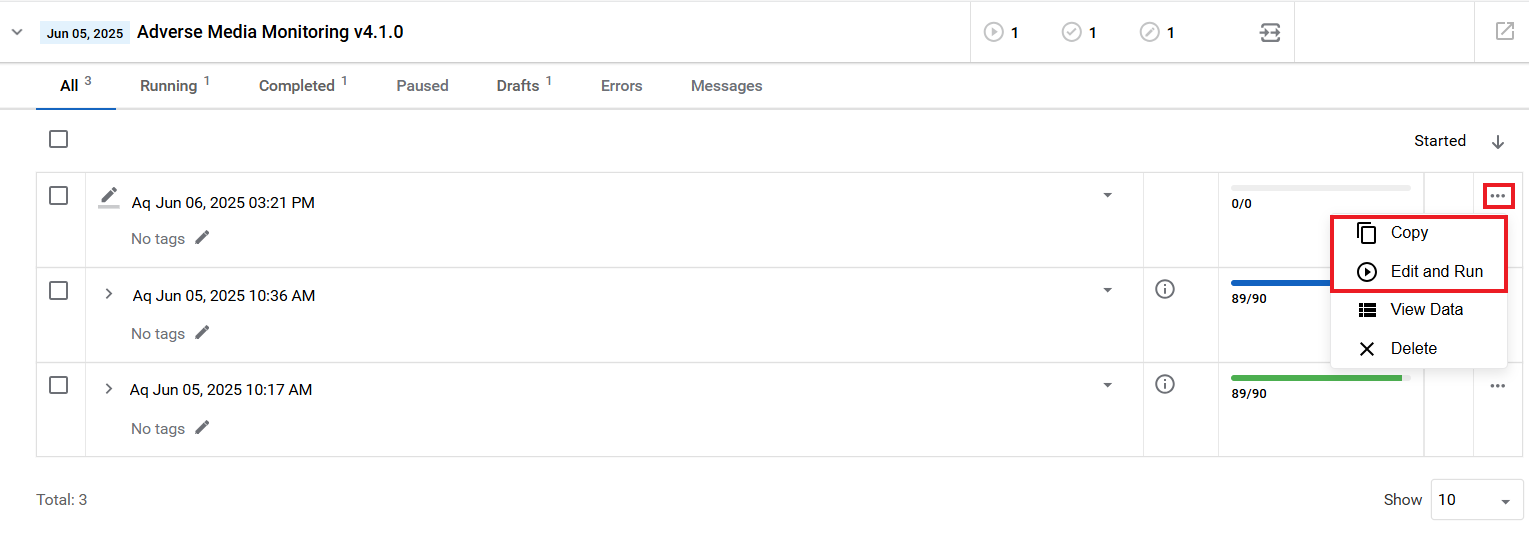
Next to the core BP instance, click the Actions menu button (...) and choose one of the following options:
If the instance is not running, click Edit and Run. The Edit Business Process window appears.
Click Copy to create another instance of the process. Thus, you can run a new instance without impacting an existing one.
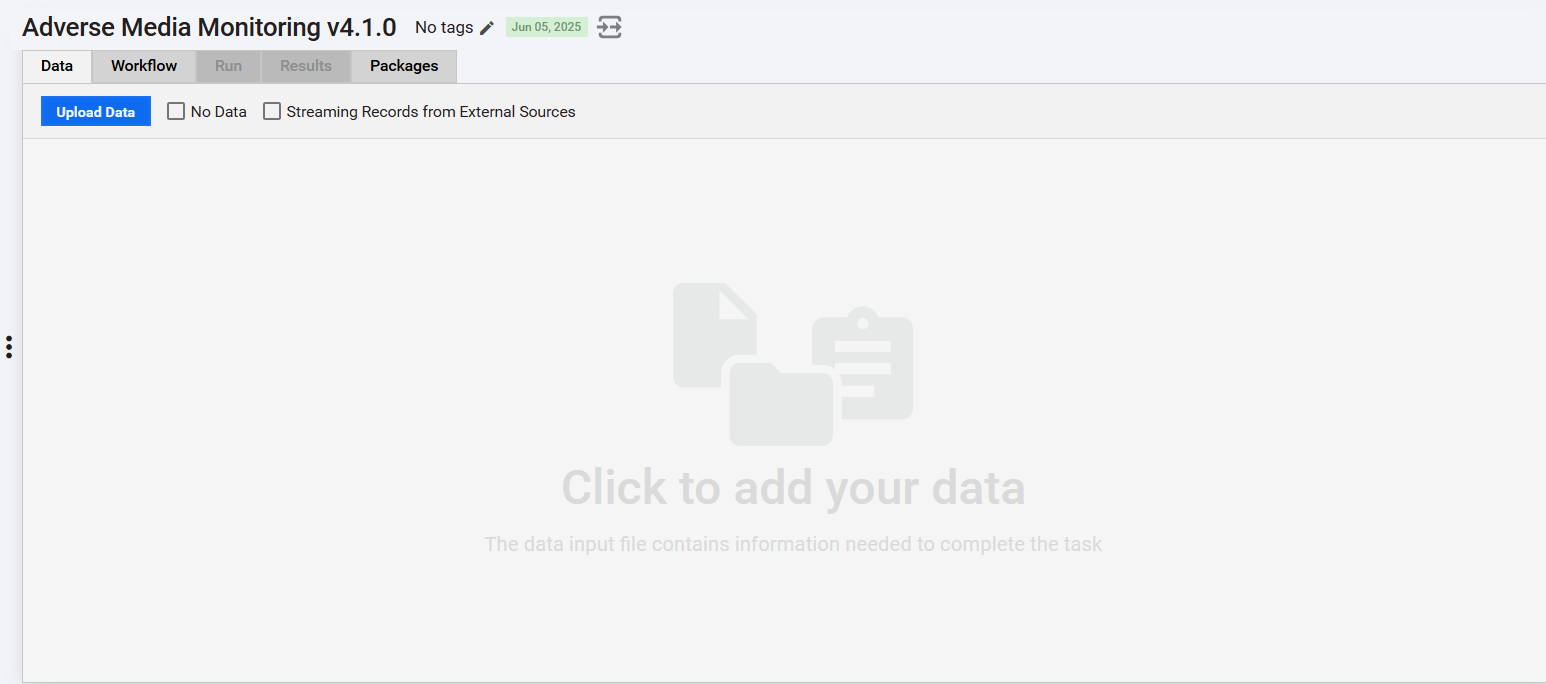
In the Business Process window, go to the Data tab and click Upload Data. The Upload Your Main Data window appears.
In the window, click Add, select a CSV input file, click Open, and then click Upload. The data is uploaded to the BP.
noteIf you are using the Human in the loop feature, you can pre-assign tasks to workers in your organization. To do this, enter the worker’s ID in the _sys_mt_hit_assignee column for the required entity rows of the input CSV file.
Currently, real-time validations are not supported. If a BP can't recognize a value in the sys_mt_hit_assignee column, the associated task is not assigned to any worker.
Go to the Run tab and click Run this process to start the BP.
If the Manual Task is enabled, the investigations appear in Workspace as they are completed. If it is disabled, the reports are generated and stored in the location specified during the AMM configuration.
Occasionally, no results are found for the search. If this occurs, a report for each entity is created. A separate email with a link to view and download the report is sent for each entity that does not have search results. A copy of this report is also stored in the location specified during the AMM configuration.
Once all the entities within the input file have been processed, the Business Process ends automatically.
The Ad hoc investigation is a Business Process that allows customers to trigger Adverse Media Monitoring from the Workspace user interface. It is available after installing and configuring Adverse Media Monitoring.
Start Ad hoc investigation
To start an Ad hoc investigation, do the following:
In the Control Tower menu, click Digital Workers > View All and find the Evan: Adverse Media Monitoring group.
In the group, find the variation you wish to use and click it.
The number of ad-hoc search tasks created in Workspace is configured in the Investigation step.
Click the Adverse Media Monitoring Ad hoc investigation group to expand it.
Next to a BP instance, click the Actions button (...) and select one of the following options:
- To run the Ad hoc investigation, click Edit and Run. The Edit Business Process window appears.
- To create another BP instance, click Copy. Thus, you can run a new instance without impacting an existing one.
In the Business Process window, go to the Run tab and click Run This Process to start the Business Process.
Run ad-hoc search
To run an investigation using the ad-hoc search screen, do as follows:
Log in to Workspace, find Submit Adverse Media Monitoring Investigation request vX.X, and open it:
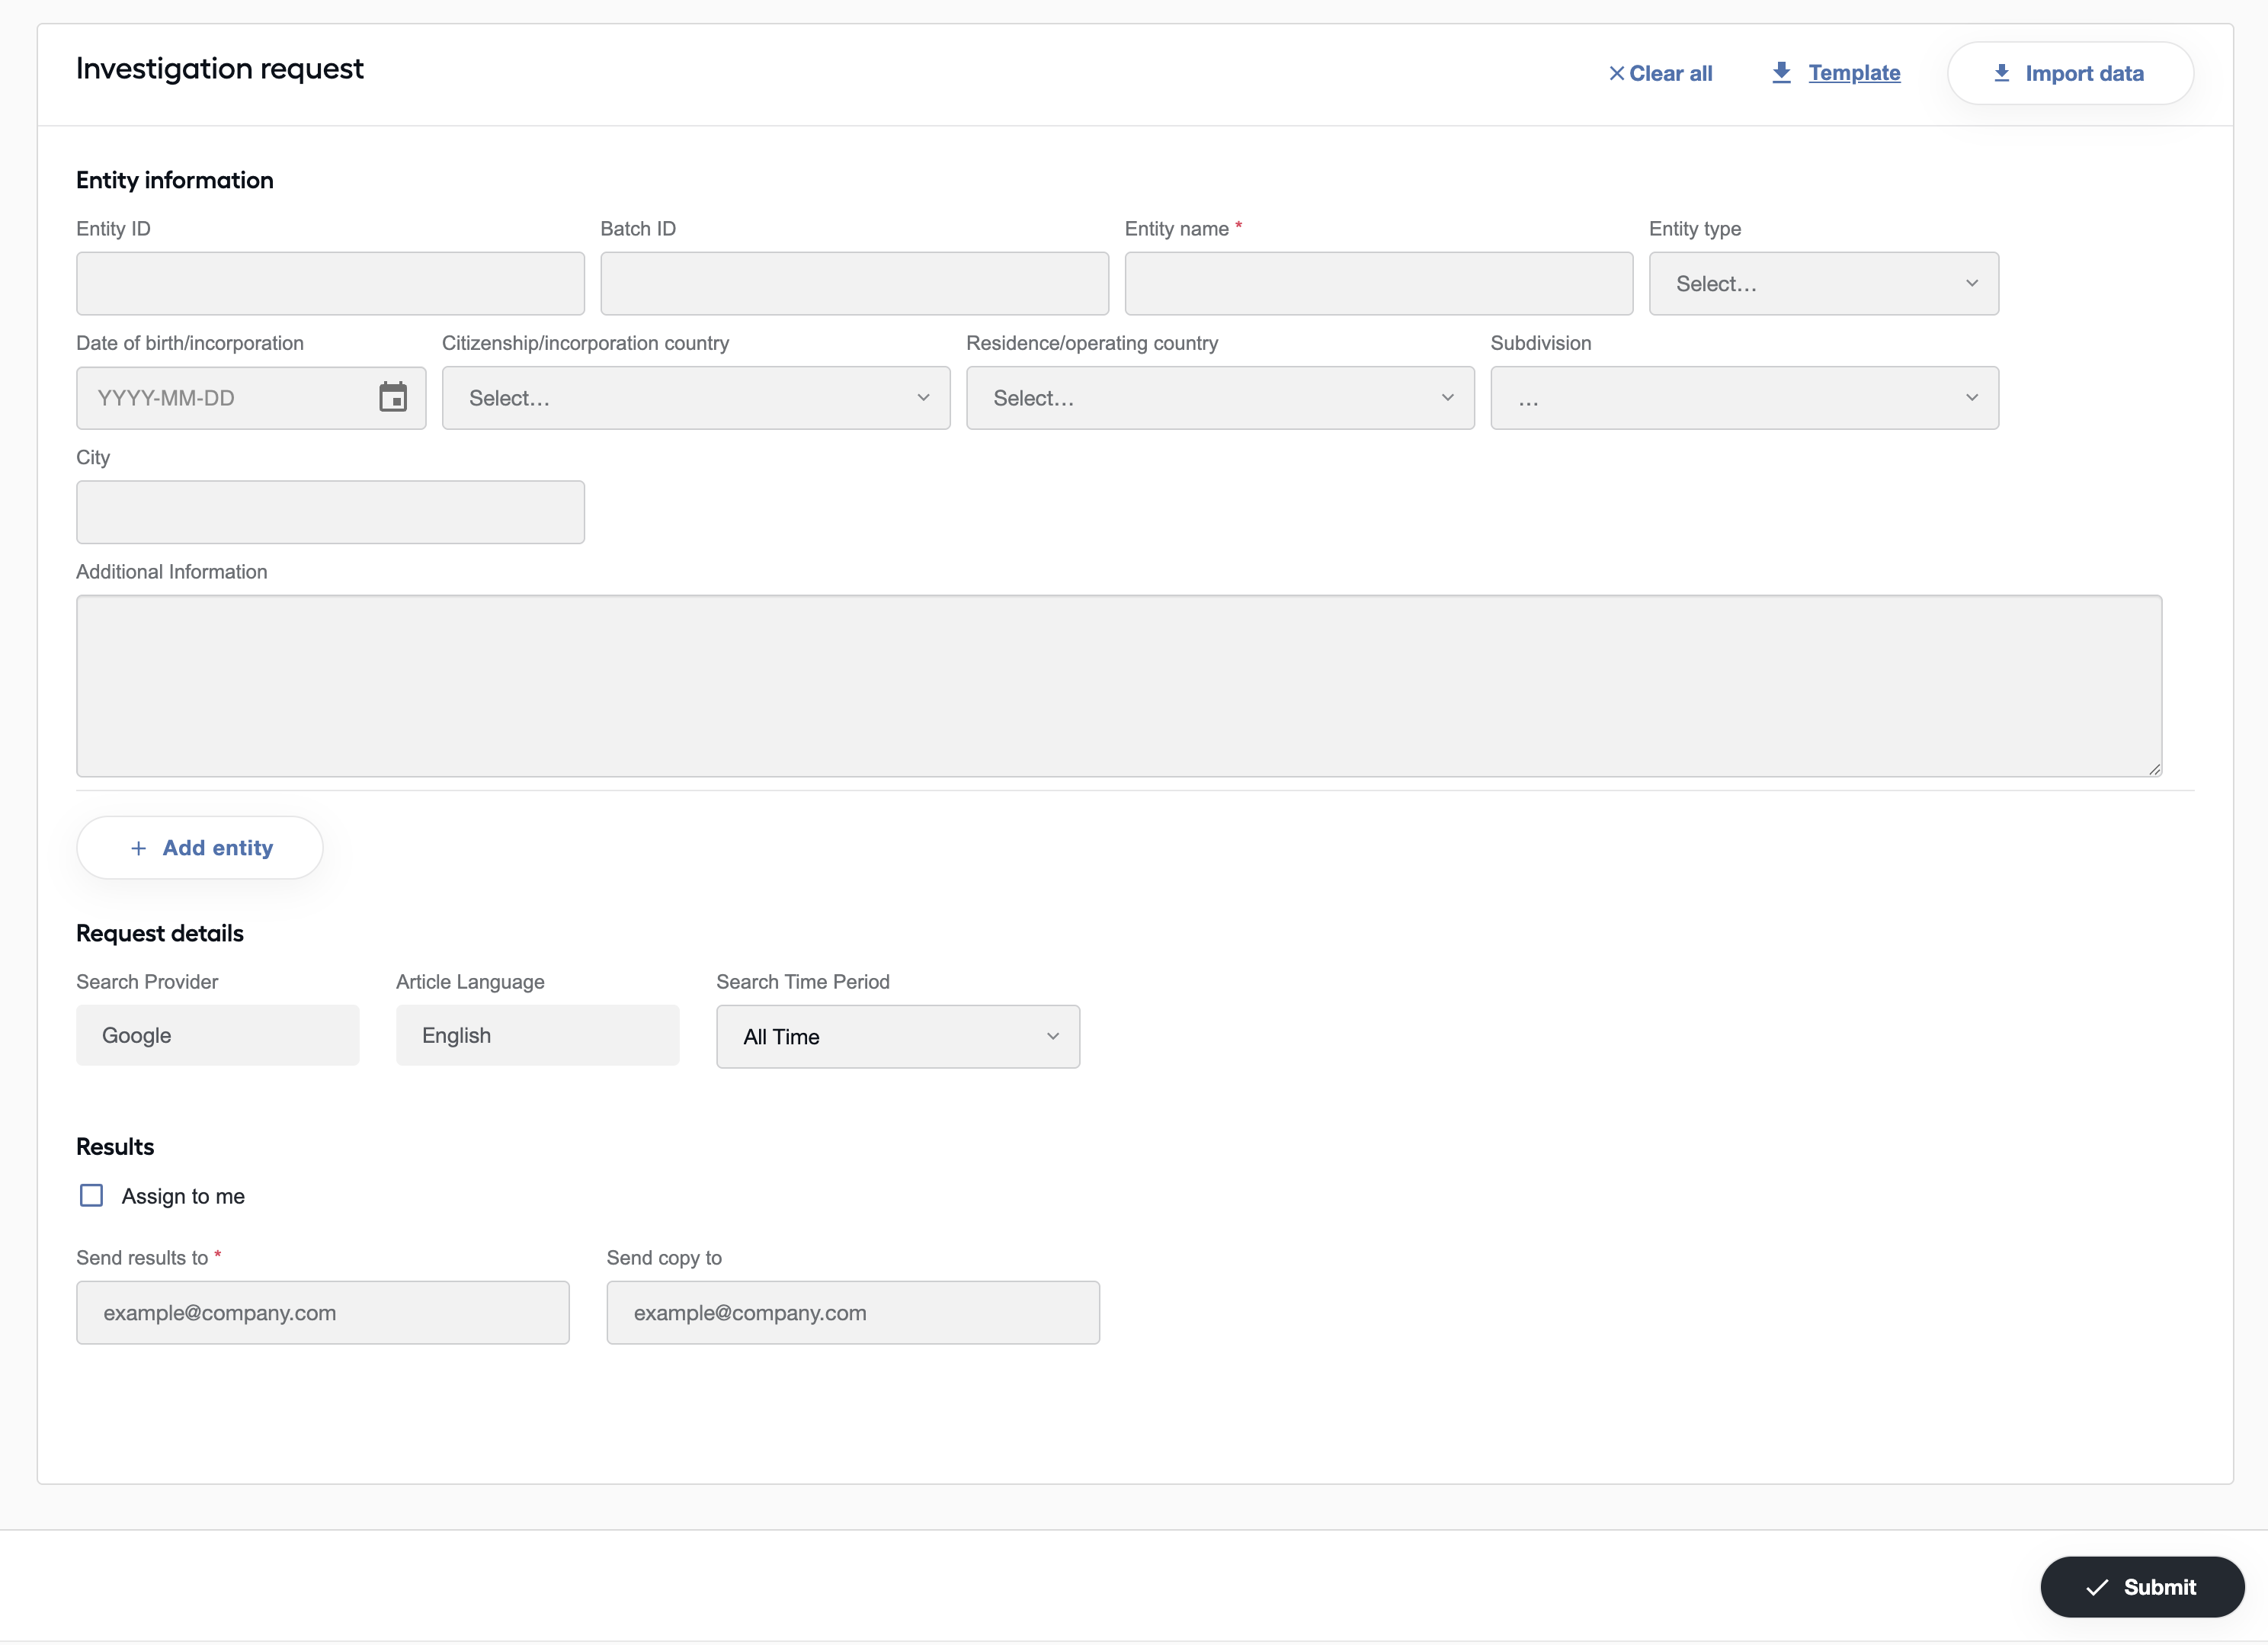
If you do not need all Entity information fields, you can configure only required fields during the user interface configuration in the Investigation step (Ad-hoc investigation settings > Fields to include in the ad-hoc investigation task). For details, see Install and configure | Investigation.
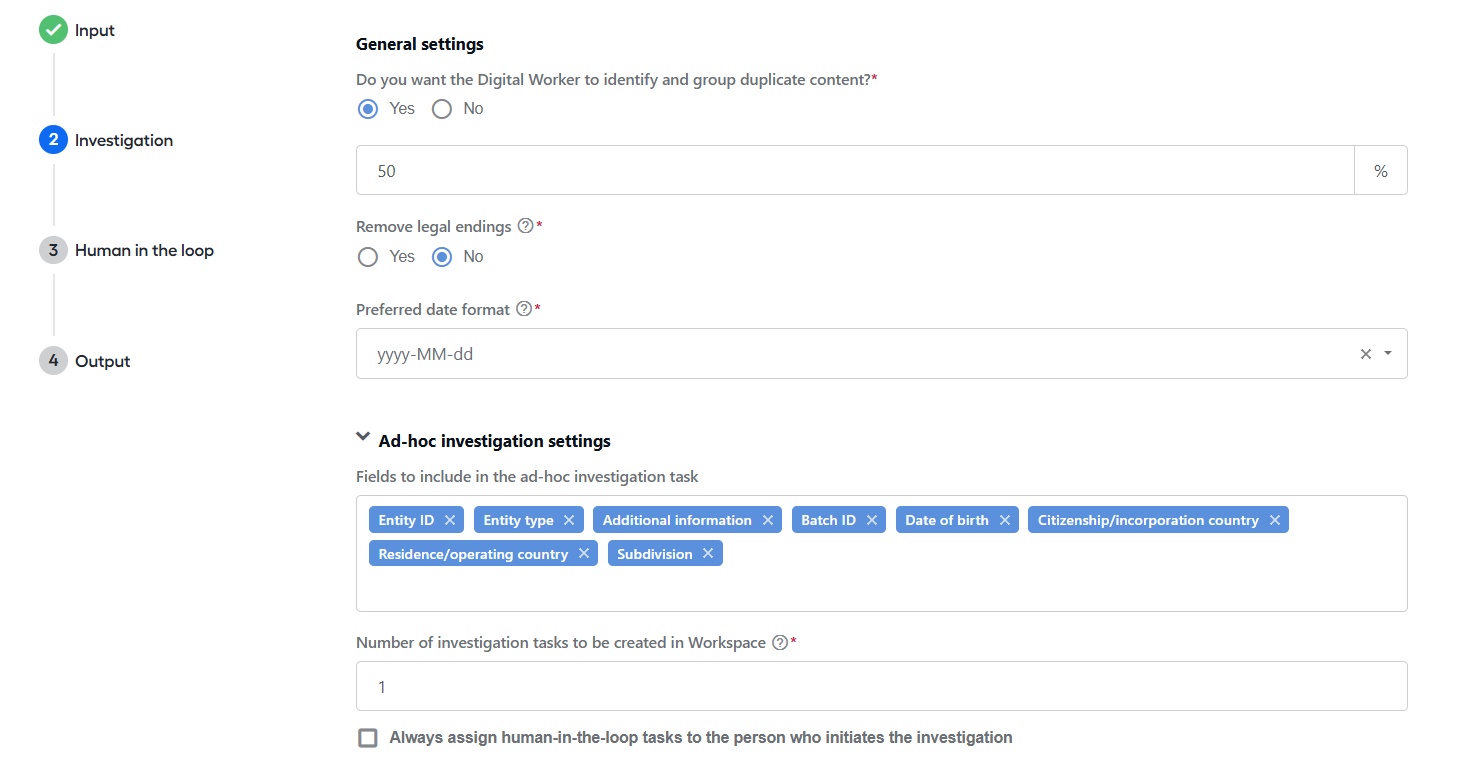
In the Entity information group, enter data for the entity you wish to screen. Pay attention to the following considerations:
Only Entity name is required to initiate a search. All other fields are optional but encouraged since more information on the entity enables the automation to eliminate more false positive results.
To allow re-applying decisions in future investigations for the same entity, provide a custom Entity ID. The same Entity ID must be used for all further investigations on the entity.
You can either upload data in a CSV file or enter the data manually.
Review the settings in the Requests details group. If necessary, in the Search Time Period box, select a different time for scanning.
Here, you can only change Search Time Period. Other fields are configured in Control Tower and listed on this screen for reference only.
Review the settings in the Results group:
- Select the Assign to me checkbox to get the investigation results sent to you automatically.
- Enter one or more email addresses where to send the results. In the Send copy to field, it is recommended to specify a group email so that other team members can refer to previous investigations and their results.
Click the Submit button.
Once the results are ready, an email notification is sent with a link to the assignments in Workspace and a final report.
If your organization does not use the Human in the loop feature, you only receive a final report. This is also indicated on the ad-hoc search screen.
In some cases, no results are found for the search. If this occurs, a report is created for each entity that does not have search results. A separate email with a link to view and download the report is sent for each such entity. A copy of this report is also stored in the S3 storage specified during the AMM configuration.
Adverse Media Monitoring can be invoked by calling the WorkFusion AMM REST API. You must first configure a variation as it requires a BP associated with it. For details, see the Configure REST API endpoints guide.
For more information on REST API, read Running AI Agents via REST API.
To run an investigation using an uploaded file, follow the steps below:
In the Control Tower menu, click Digital Workers > View all and find the Evan: Adverse Media Monitoring group.
Locate the Adverse Media Monitoring variation you wish to use and click it.
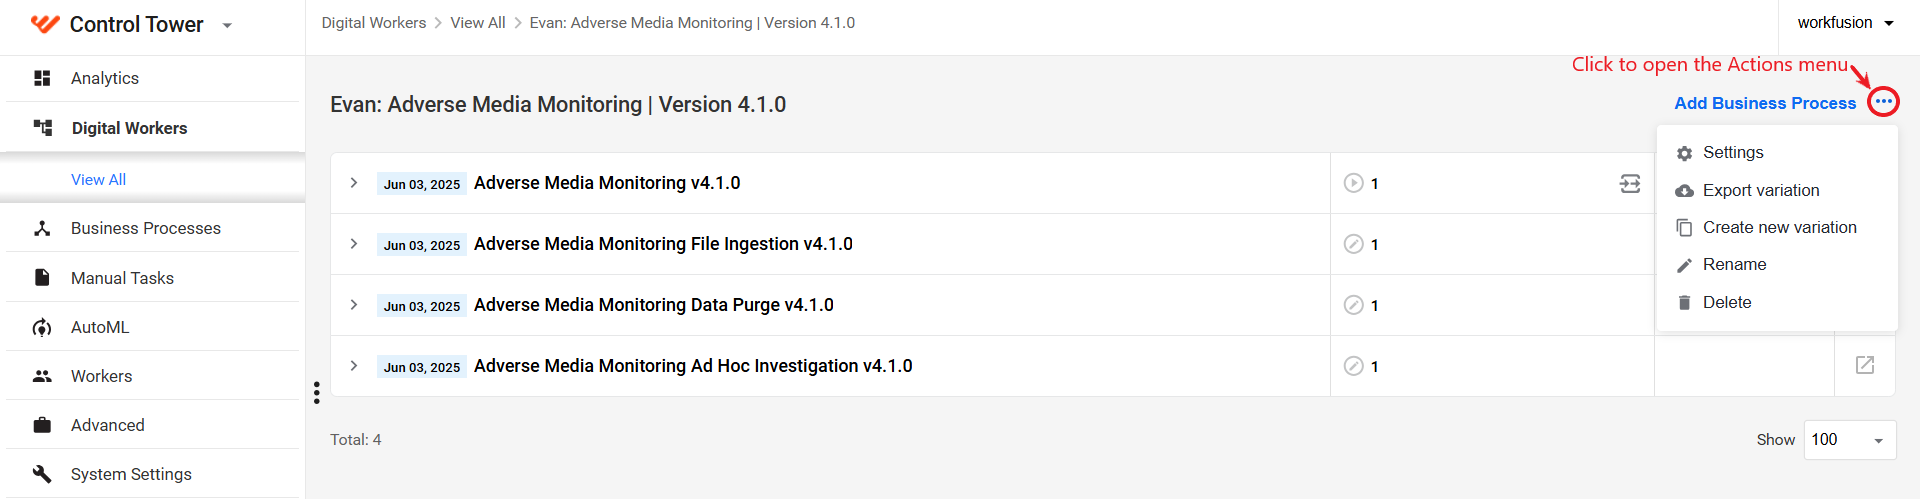
Open the Actions menu and select Settings to open the configuration screen for the variation.
On the Input step, in the Search provider dropdown box, make sure to select External Source.
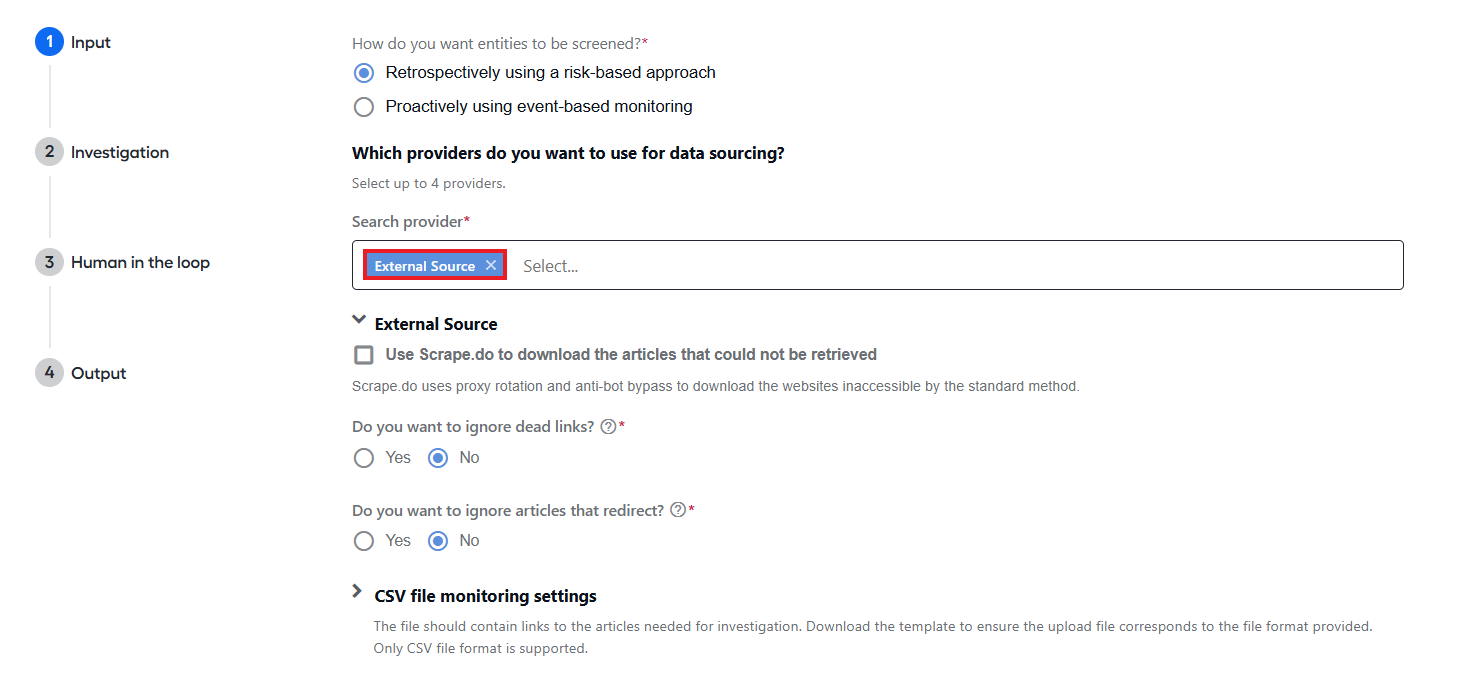
Configure other input settings as required for the provider. For detailed instructions, read Install and configure.
If you want to use metadata information to disposition articles first, go to the Investigation step and select Yes to answer the Do you want to use available meta data to adjudicate articles first? question.

Start the Ingestion BP:
In the Control Tower menu, click Digital Workers > View all and find the Evan: Adverse Media Monitoring group.
Locate the Adverse Media Monitoring variation you wish to use and click it.
In the group, click the Adverse Media Monitoring File Ingestion BP to expand the process definition.
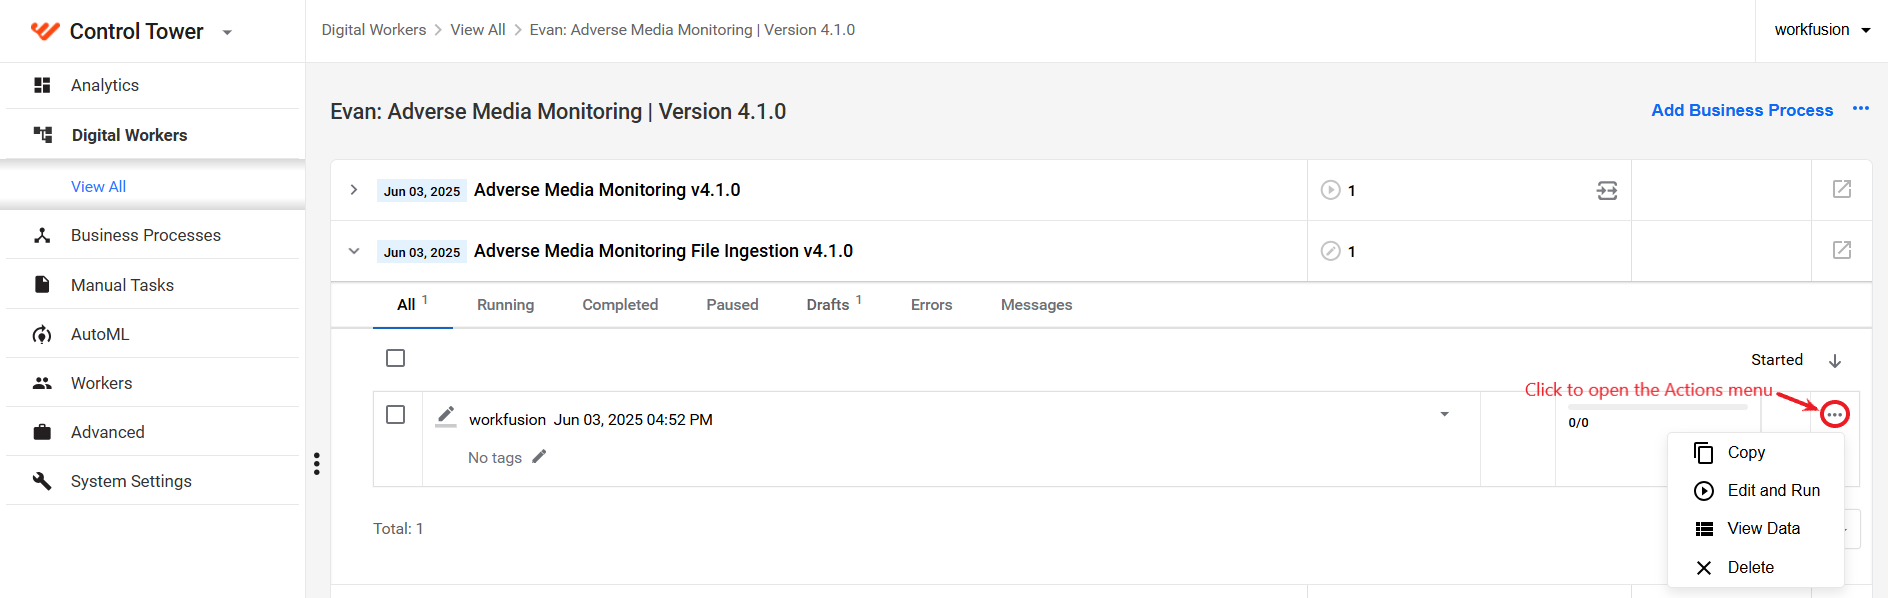
Choose a BP instance, open the Actions menu for it, and select Edit and Run.
If you configured AMM to use metadata information to disposition articles first, go to Workflow tab, click the Execute NSS step, and specify the Signal ID from the NSS Business Process. Click Save to save the changes.
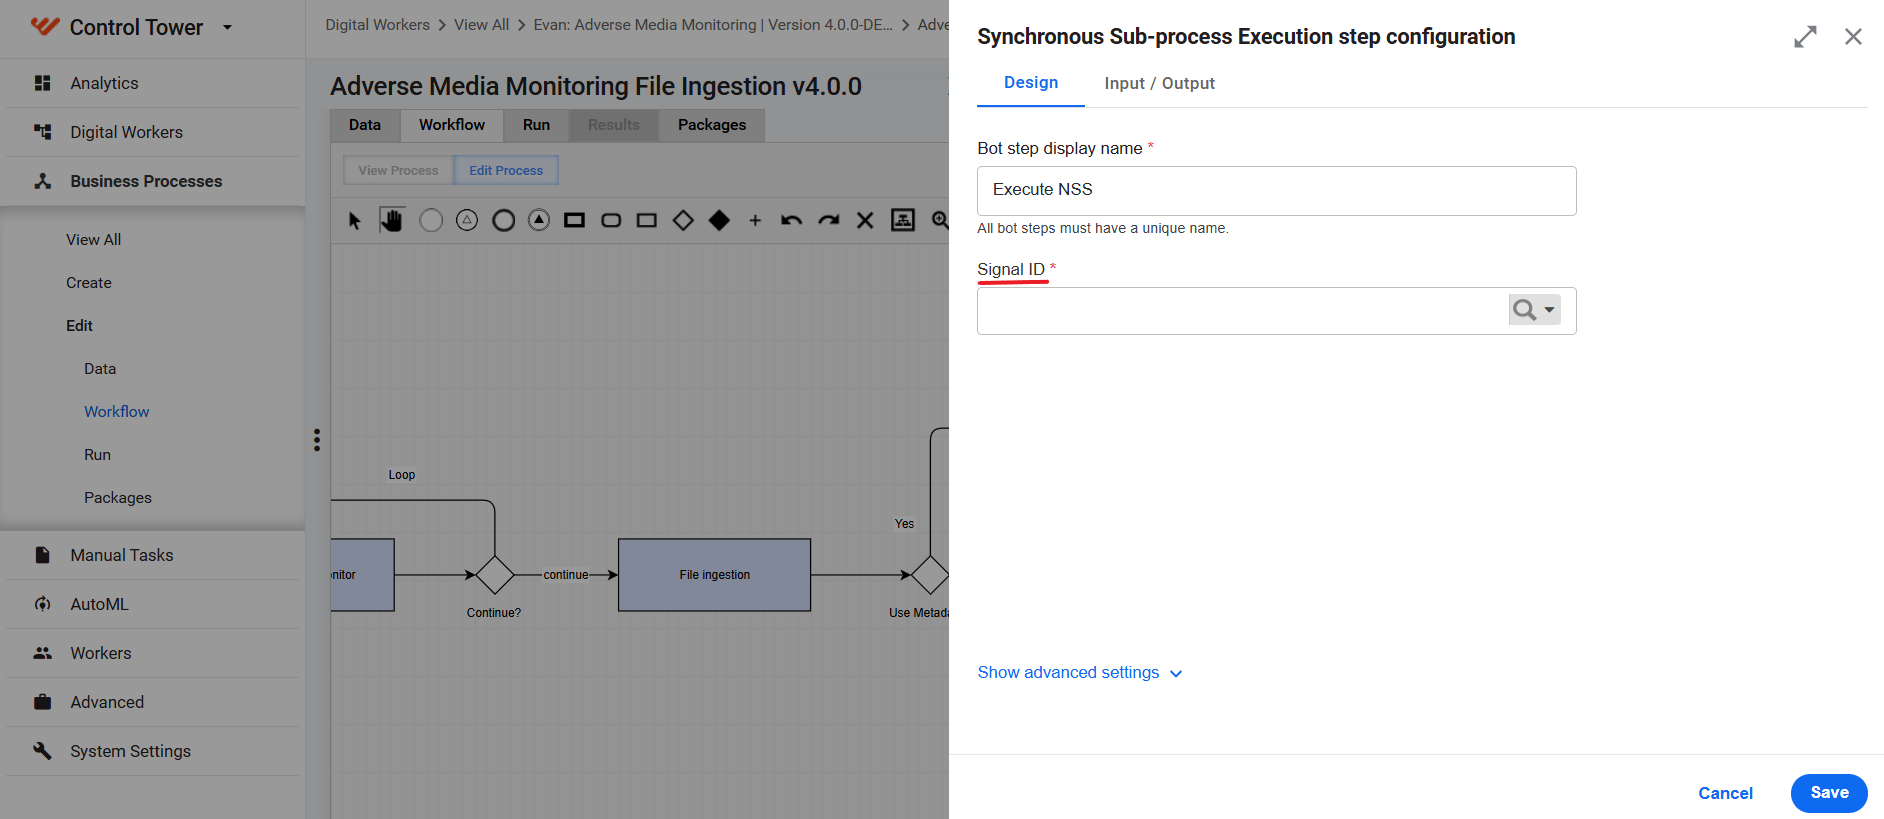
Go back to the Workflow Designer, navigate to the Run tab, and click Run This Process.
Upload a CSV file with input data:
Go to MinIO (example of sample MinIO URL: https://amm-release-minio-ui.cloud.workfusion.com/).
Log in with SSO.
Go to the bucket you specified when configuring the external source.
Go to the directory (or create one if it doesn’t exist) you specified when configuring the external source.
Click Upload > Upload File.

Select an input CSV file and upload it.
noteTo make sure your CSV file has the correct format, download the sample and check your file against it. Files that do not comply with the format requirements are not ingested.
After some time, the file is picked up by the AI Agent and moved to the processed folder.