Run investigation
Once the Adverse Media Monitoring skill is installed and the configuration is complete, you can initiate investigations in one of the following ways:
Call WorkFusion REST API
The WorkFusion API lets you launch, post data to, and automatically receive results from the WorkFusion platform. Using it, you can manage simple tasks and more complex Business Processes (BPs) representing a workflow of various manual and automated tasks. More information on how to connect to and use the WorkFusion REST API can be found here. Detailed information on the inputs and outputs from Adverse Media Monitoring can be found below.
The input data is a CSV file with data used by Adverse Media Monitoring.
This data can be delivered from file storage:
- MinIO S3 within the IA Cloud platform.
- Any storage outside the IA Cloud platform.
A client's server can also host the files. However, WorkFusion IA Cloud must access the files via traditionally accepted methods—S3 Object Storage, HTTP, FTP.
- IA Cloud MinIO S3
- S3 Object Storage
- HTTP
- FTP
The MinIO client for interacting with WorkFusion MinIO S3 can be written in Java, Go, Python, JS, .NET, and other languages.
WorkFusion MinIO is available at https://HOSTNAME-minio-lb1.workfusion.com/minio/. Remember to insert your URI instead of the placeholder.
The WorkFusion MinIO URL is outside the Intelligent Automation Cloud platform. Therefore, use the access key and secret key authentication:
Access key: HHVDVFJFT3GHHJKJ43FG
Secret Key: KNJkljJHGJHgjhJGHKjgy666RryfrftFk6589890
For more information on how to upload and download files, refer to the MinIO SDK guide.
You have to create a bucket in the following format in advance:
https://HOSTNAME-minio-lb1.workfusion.com/minio/media_check/input_data/.
Verify that the file transfer is working by checking the following MinIO SDK methods (JavaScript Client API Reference):
bucketExistschecks if a bucket exists:https://docs.min.io/docs/javascript-client-api-reference.html#bucketExists.putObjectuploads an object from a Stream or Buffer:https://docs.min.io/docs/javascript-client-api-reference.html#putObject.In case of a successful file transfer, the response contains the
etagandversionIdstrings of the uploaded object.
When using S3 Object Storage, WorkFusion IA Cloud can access stored files with the credentials provided by the user in the following format:
Access key: HHVDVFJFT3GHHJKJ43FG
Secret Key: KNJkljJHGJHgjhJGHKjgy666RryfrftFk6589890
In the case of HTTP links, WorkFusion IA Cloud can access stored files with the credentials provided by the user in the following format:
Username and password authentication:
headers: {
        username: USERNAME,
        password: PASSWORD
        }
Secret key in the HTTP headers:
headers: {
        secret-key: secretKey
        }
Secret key specified as a get-parameter in the link to the file:
https://client_domain.com/media_check_input_data/file1.xlsx?key=JKJH778sdfusdf678f678dfs78s^yjhhjwdkl754HMAC-based one-time password:
API_KEY = c3b290df-d560-493c-86ca-0ab552f24490a
SECRET = 06d9BLvnPwpj/DFKJ6iGb5oiFO7wZK+dl+C9aflIu/9DIXMXqEyR0Qi1y5BjFi8NcSJl4b62vpK9v3JB1223339g==

headers: {
        authorisation: Signature keyId="${API_KEY}",algorithm="hmac-sha256",headers="(request-target) host date",signature="${HMAC_GENERATED_SIGNATURE_VIA_SECRET}"
        }
When you use an FTP server for storing input files, WorkFusion IA Cloud downloads these files with the following credentials provided by the user:
Protocol: FTP / SFTP
Port: 21
host: ftp://client_domain.com
remote root: /www/media_check_input_data/
username: USERNAME
password: PASSWORD
At the end of execution, the BP saves the updated files to the MinIO S3 storage at https://HOSTNAME-minio-lb1.workfusion.com/minio/media_check/output_data/.
The BP generates a final report with temporary links to these files. You can retrieve the report via API. For details, read Check BP for results.
Start Business Process
Once logged in, call the WorkFusion REST API to start the Business Process while passing a link to the CSV file with associated entities for screening.
The command to start a Business Process takes the following form:
Method:
POSTURL:
https://HOSTNAME/workfusion/api/v2/workfusion/task/fileHeaders required:
JSESSIONID: from the Auth API response, see Form-based authentication.X-CSRF-TOKEN: from the Auth API response, see Form-based authentication.Content-Type: application/json; charset=utf-8
Body:
JSON object
{
    "campaignUuid" : "UUID of the Combined UC Campaign",
    "mainData" : ".csv file in the text representation."
}

// An example of building mainData string
var main_data_example = "wf_screening_input\n" + // name of the column
    "file_s3_path_1\n" +
    "file_s3_path_2";

var mainData = JSON.stringify(main_data_example ));
Response: UUID of the started Business Process
Below is a Postman example:
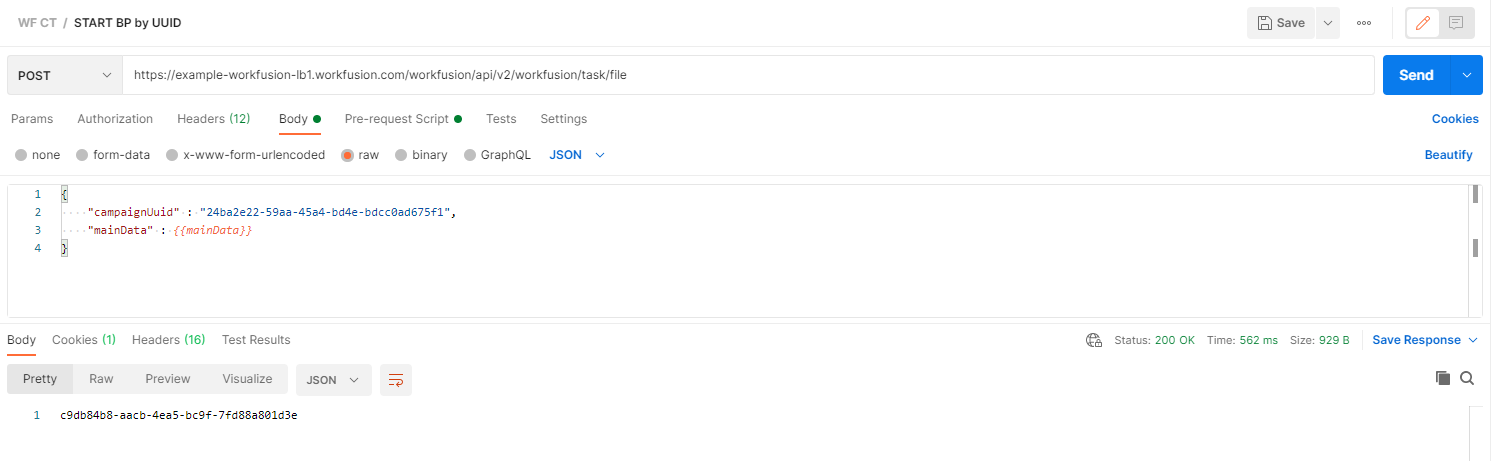
The return of a UUID indicates a successful start of the Business Process with the provided CSV file.
Start Business Process from Control Tower
You can initiate Adverse Media Monitoring in Control Tower by running the Core or Launcher Business Processes. The main difference between the core BP and the Launcher is that the Launcher creates an ad-hoc search screen that enables analysts and business users without access to Control Tower to initiate investigations from Workspace as part of a transaction monitoring fraud alert investigation.
To start the core Business Process, do the following:
In the Control Tower menu, in the Digital Workers section, click View All, and then click the Adverse Media Monitoring group to expand it.
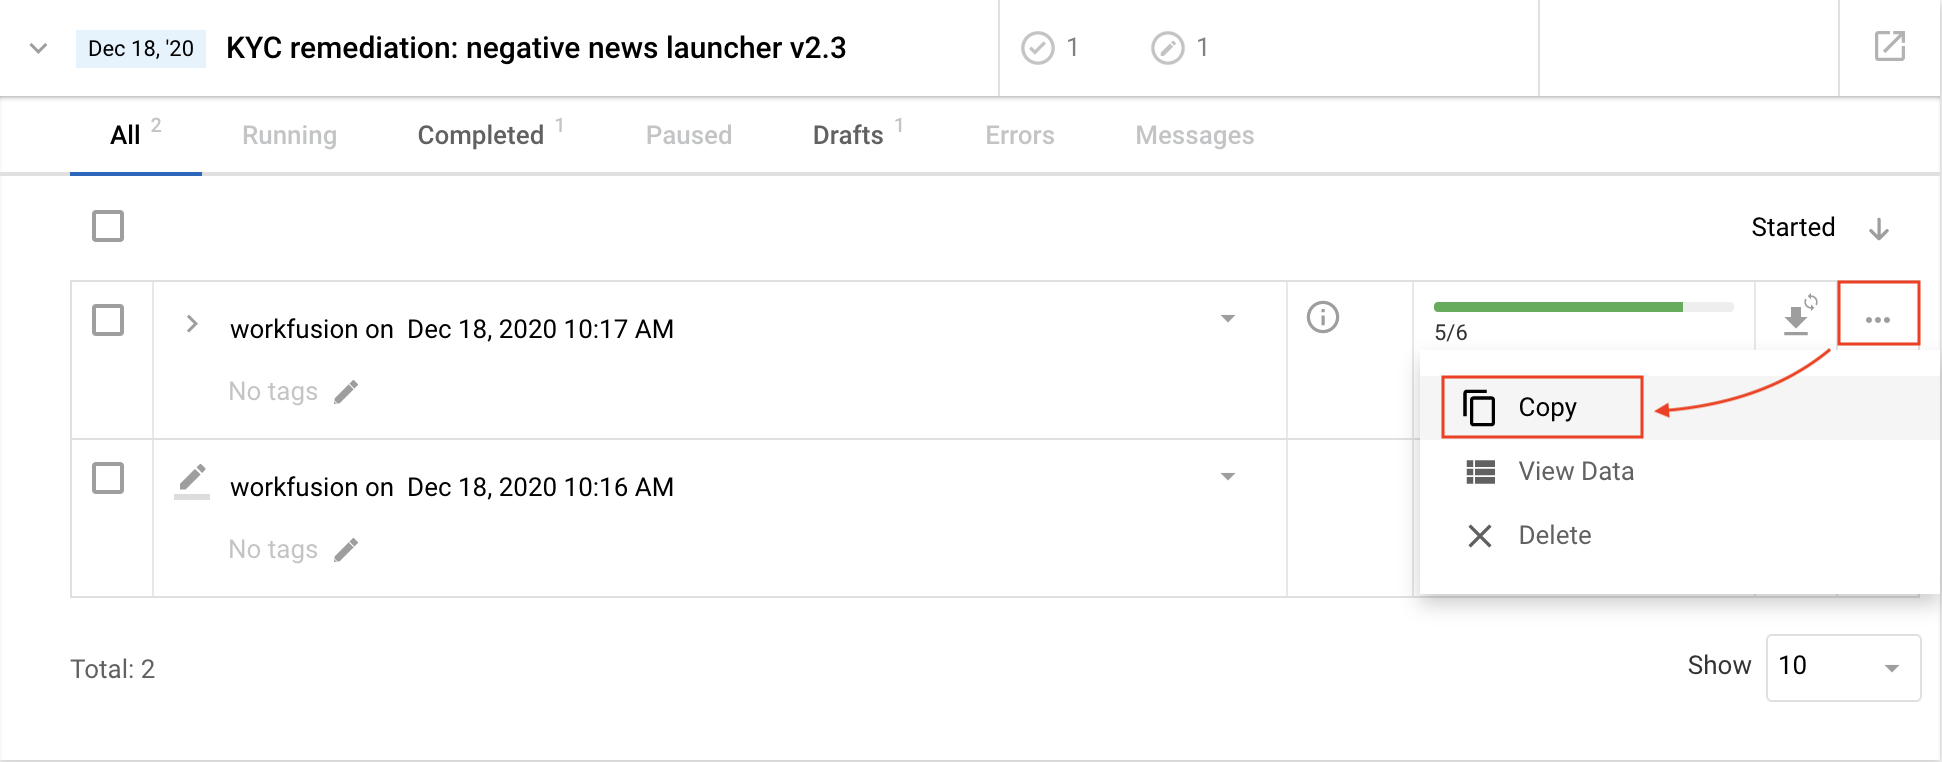
In the group, find the variation you wish to use and click Adverse Media Monitoring to expand the process definition. Click Copy to create a new instance of the process.
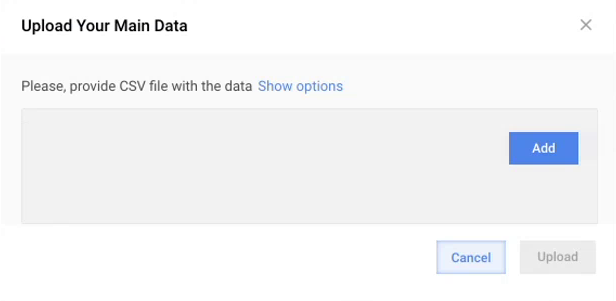
In the Business Process window, go to the Data tab and select Upload your data. The Upload your main data window appears.
In the window, click Add, select the CSV input file, click Open, and then click Upload. The data is uploaded to the Business Process.
Go to the Run tab and start the Business Process.
If the Manual Task is enabled, the investigations appear within Workspace as they are complete. If it is disabled, the reports are generated and stored within the location that was specified during the installation and configuration of AMM.
Occasionally no results can be found for the search. If this occurs, a report for each entity is created. A separate email with a link to view and download the report is sent for each entity that does not have search results. A copy of this report is also stored in the location specified during the installation and configuration of AMM.
Once all of the entities within the input file have been processed, the Business Process automatically ends.
Run ad-hoc search via Launcher
The Launcher is a business process that allows customers to trigger Adverse Media Monitoring from the Workspace user interface. It is available after installing and configuring Adverse Media Monitoring.
To start the Launcher and run an investigation using the ad-hoc search screen, do the following:
In the Control Tower menu, in the Digital Workers section, click View All, and then click the Adverse Media Monitoring group to expand.
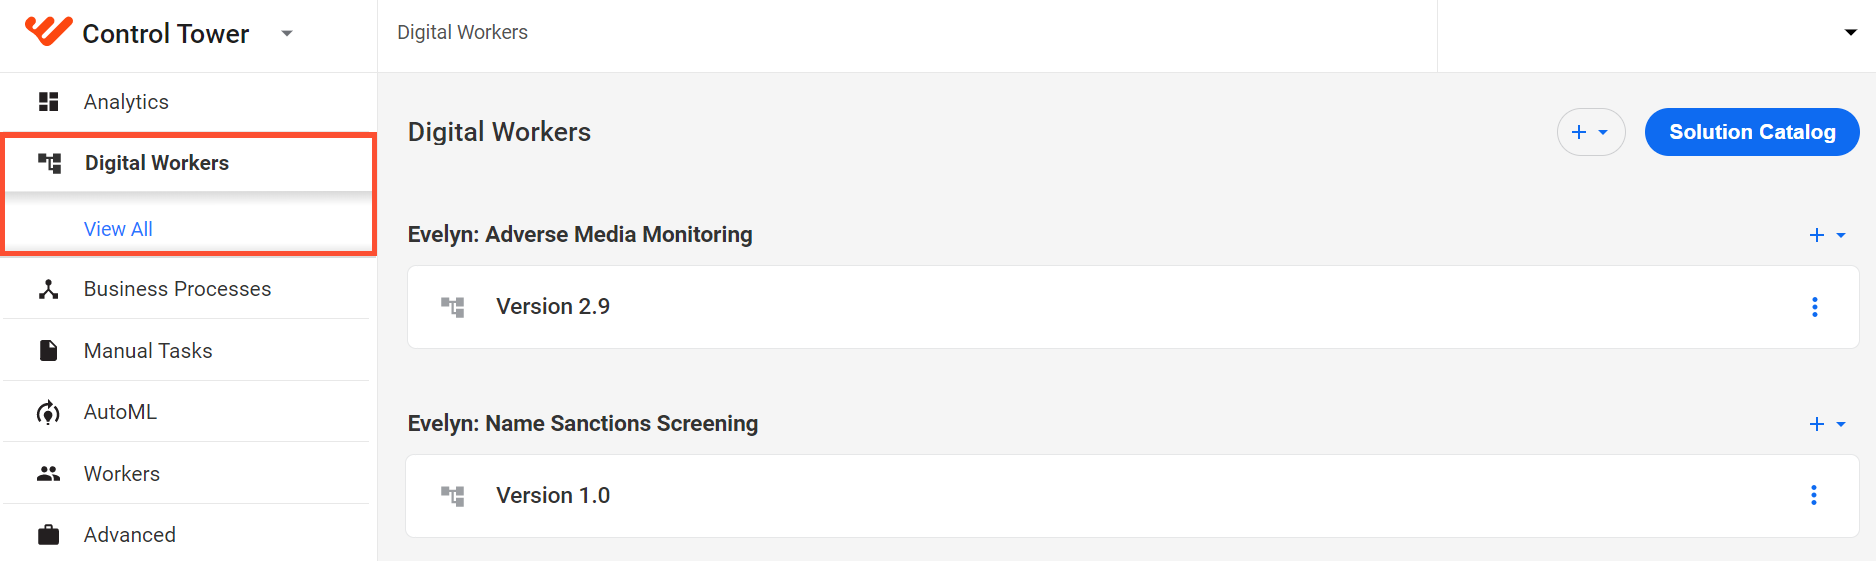
In the group, find the variation you wish to use and click Adverse Media Monitoring Launcher to expand the process definition. Click Copy to create a new instance of the process.
In the Business Process window, go to the Data tab and select No Data.
Go to the Run tab and start the Business Process.
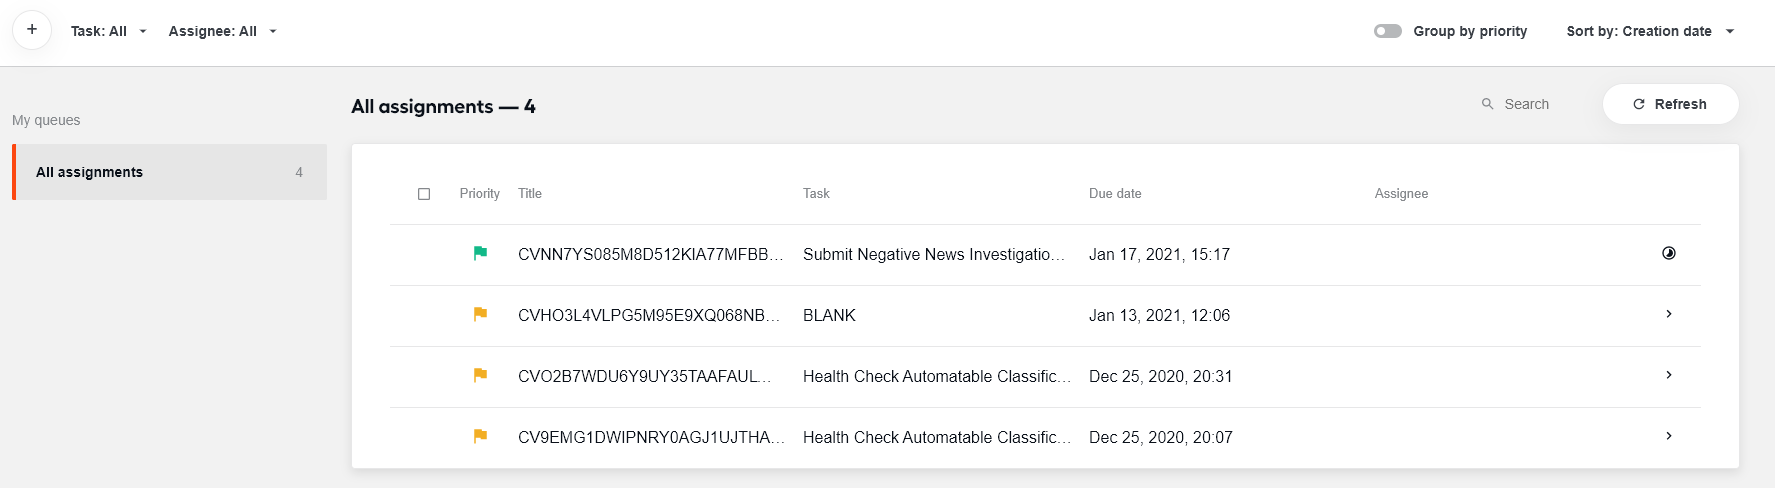
Go to Workspace, find Submit Adverse Media Monitoring Investigation request vX.X, and open it:
Enter the information for the entity you wish to screen.
Only Entity name is required to initiate a search. All other fields are optional but encouraged since more information on the entity enables the automation to eliminate more false-positive results.
Information can either be uploaded via a CSV file or entered manually.
Enter the email address to which you wish the results to be sent and select optional search parameters.
Note that some search parameters are available as read-only since these are configured in the control tower. They are listed on this screen for reference only.
Click the Submit button.
Once the results are ready, an email notification is sent with a link to the assignments within Workspace.
Occasionally no results can be found for the search. If this occurs, a report for each entity is created. A separate email with a link to view and download the report is sent for each entity that does not have search results. A copy of this report is also stored in the location specified during the installation and configuration of AMM.