Run screening and view reports
Start screening
To start Transaction Screening, do the following:
In the AI Agents list, click the installed AI Agent (variation).
On the AI Agent variation's details page, open the process definition and click a Business Process (BP) instance name.
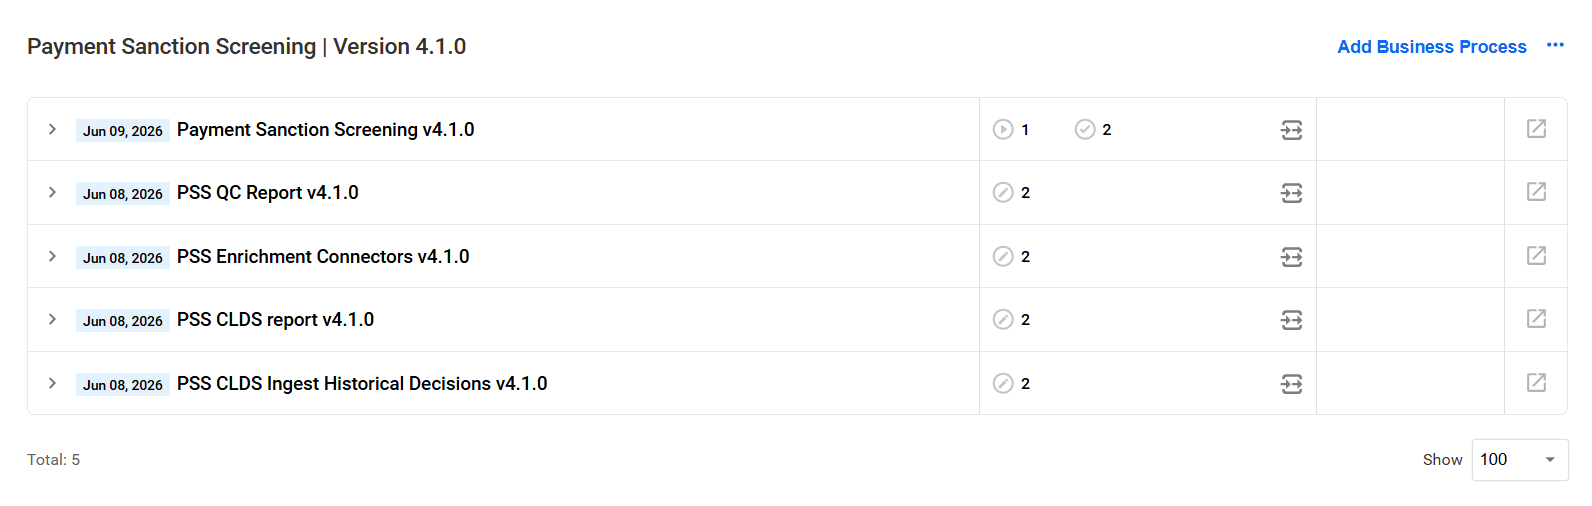
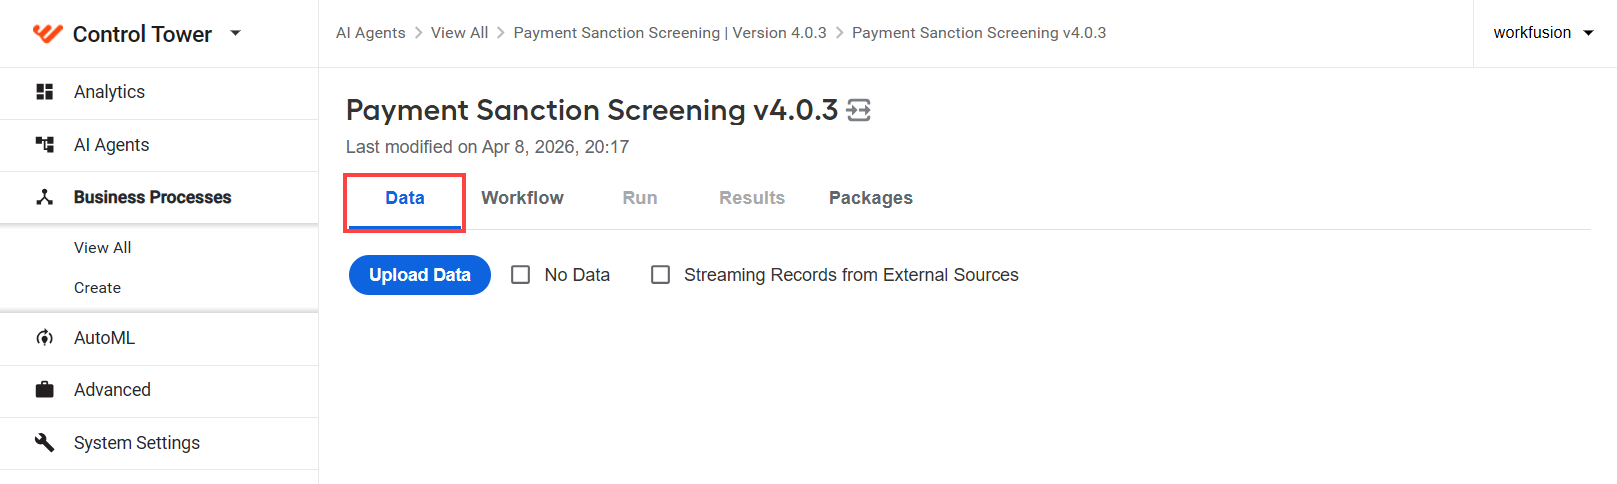
Click the name of the required BP, navigate to the Data tab, and add your input data in one of the ways:
- Upload a CSV file.
- Use the streaming API input option.
- Get data from a connector.
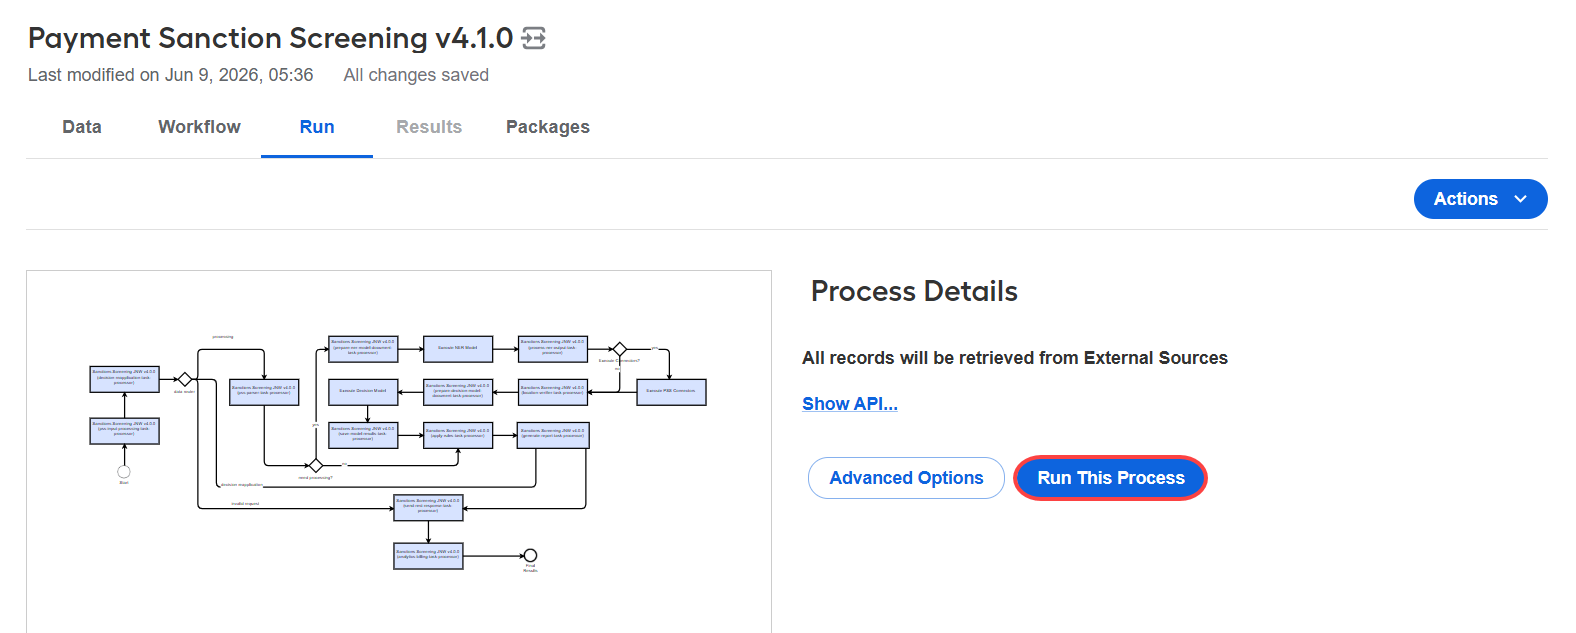
Go to the Run tab and click Run This Process.
The Business Process started successfully window appears.
Click View results to see the Results tab.
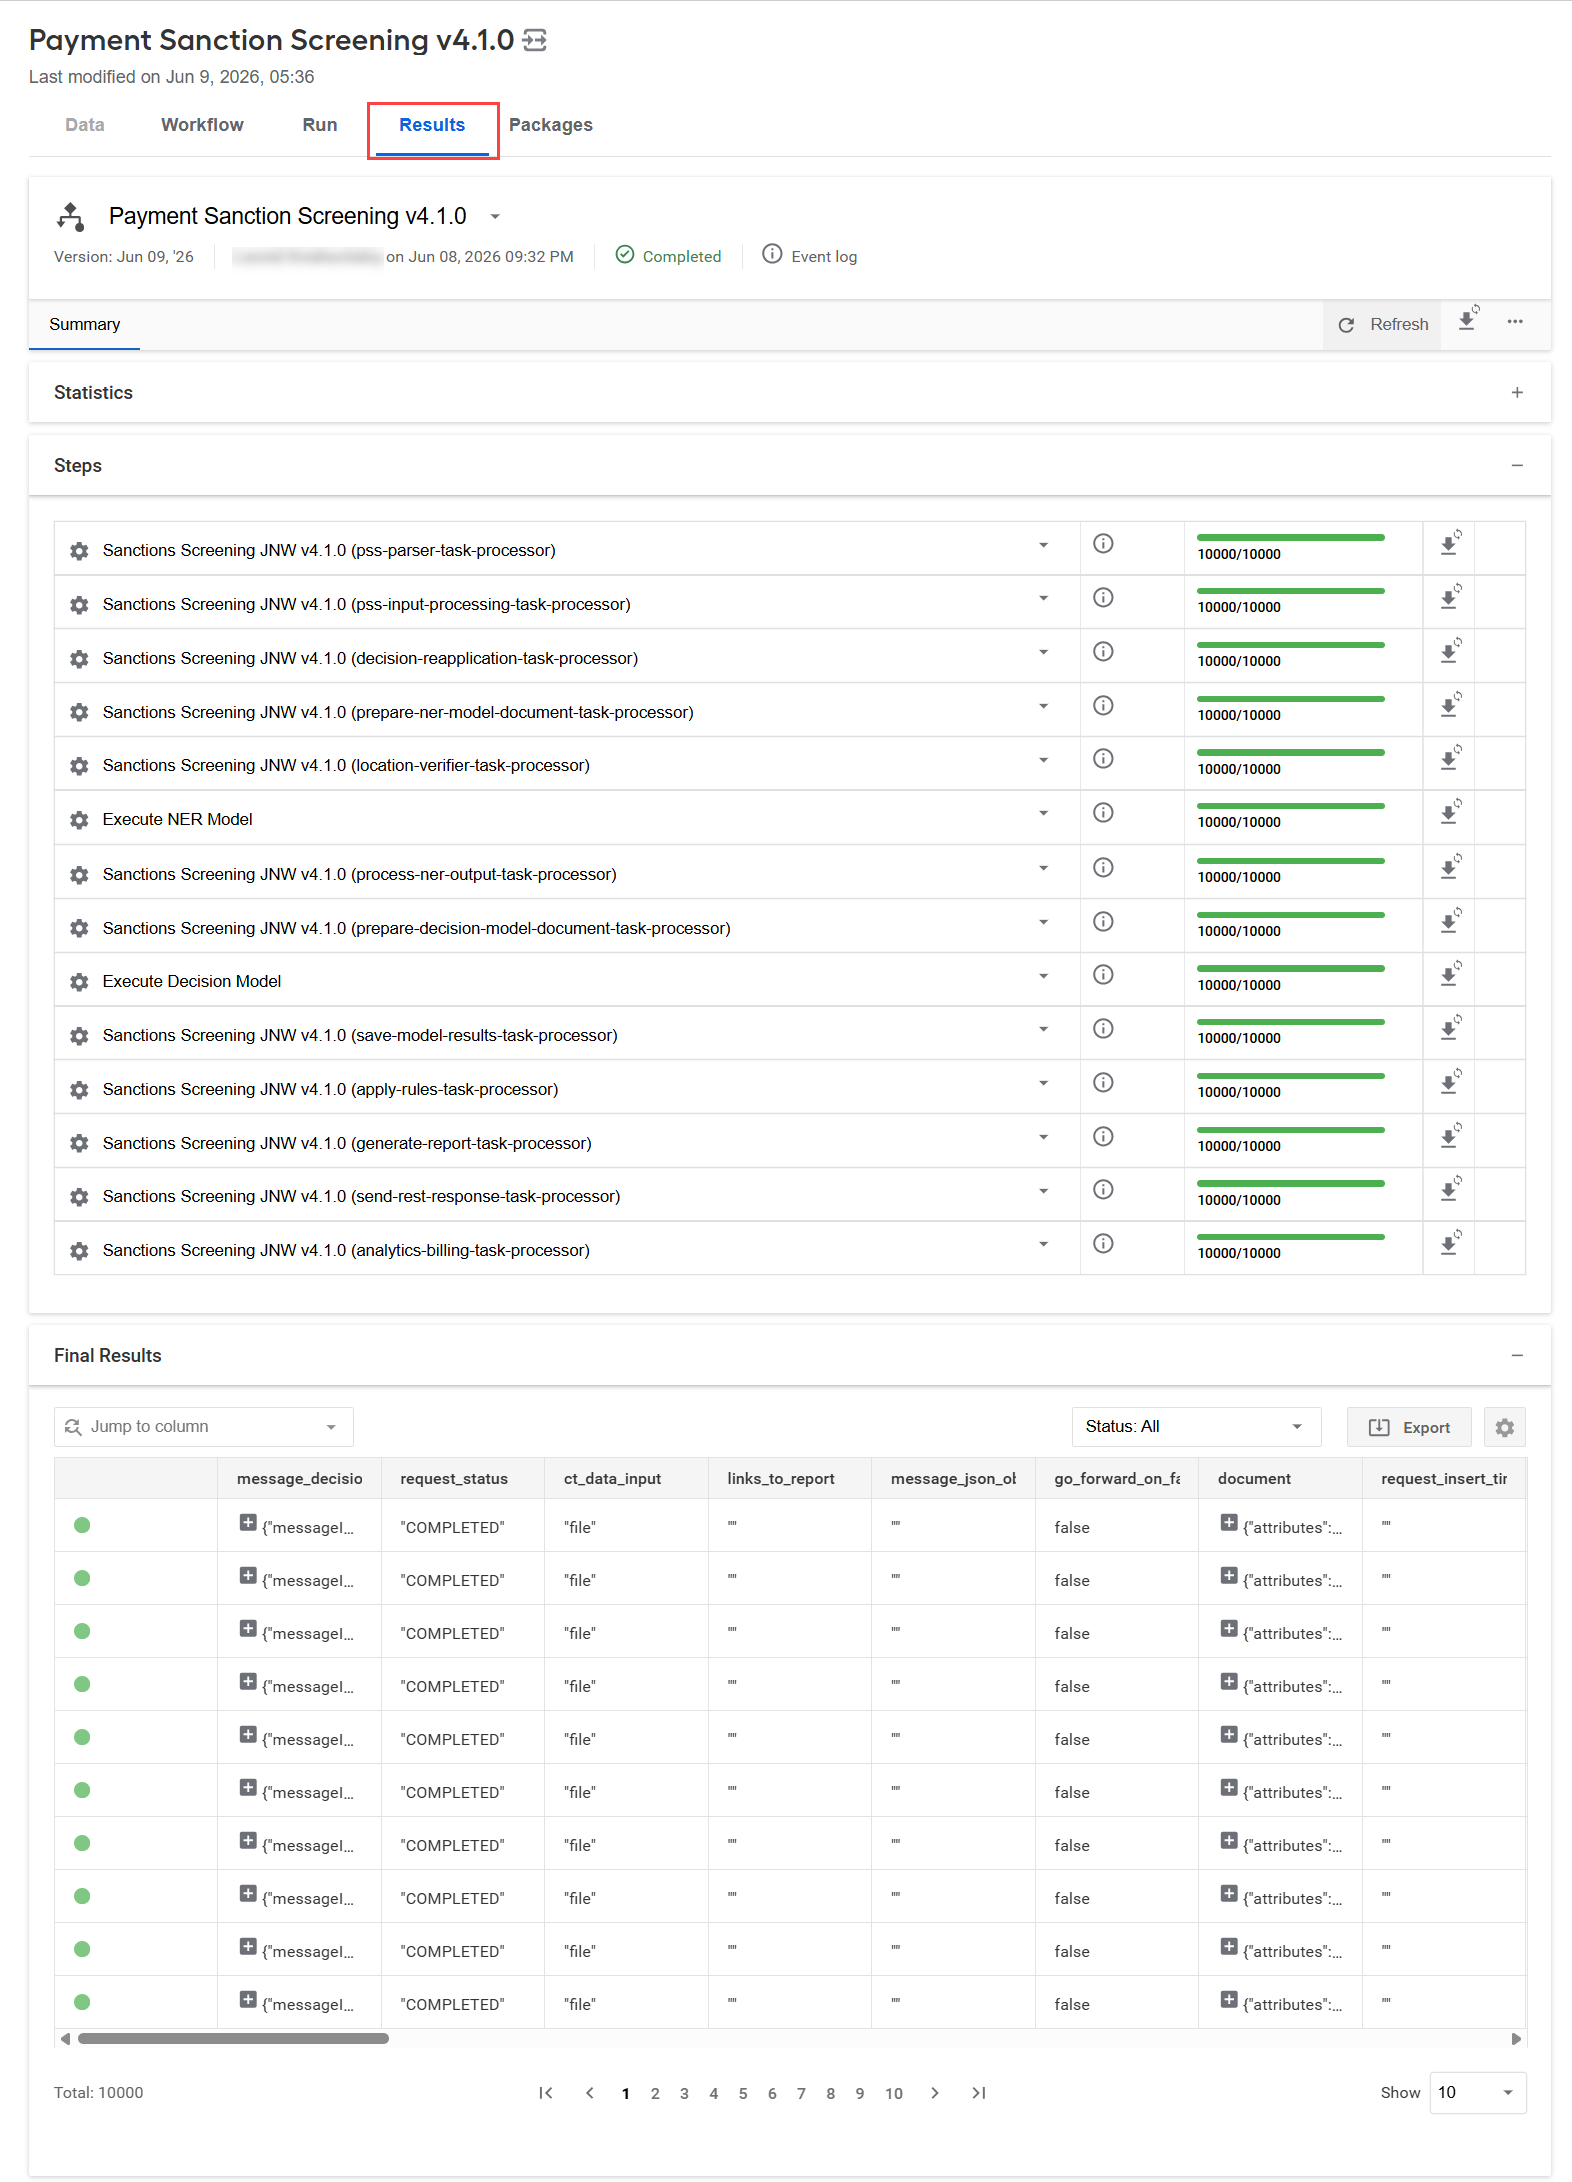
View results
HTML reports
If you configured HTML reports earlier, the reports are available in S3 at doc-upload/payment_sanctions_screening/reports/html. To review detailed screening results, complete the following steps:
In the Payment Sanction Screening BP, go to Results > Final results > Steps and select the Sanctions Screening JNW (generate-report-task-processor) step.
On the Data tab, in the links_to_report column, copy the report link and paste it in a browser window to view the report.
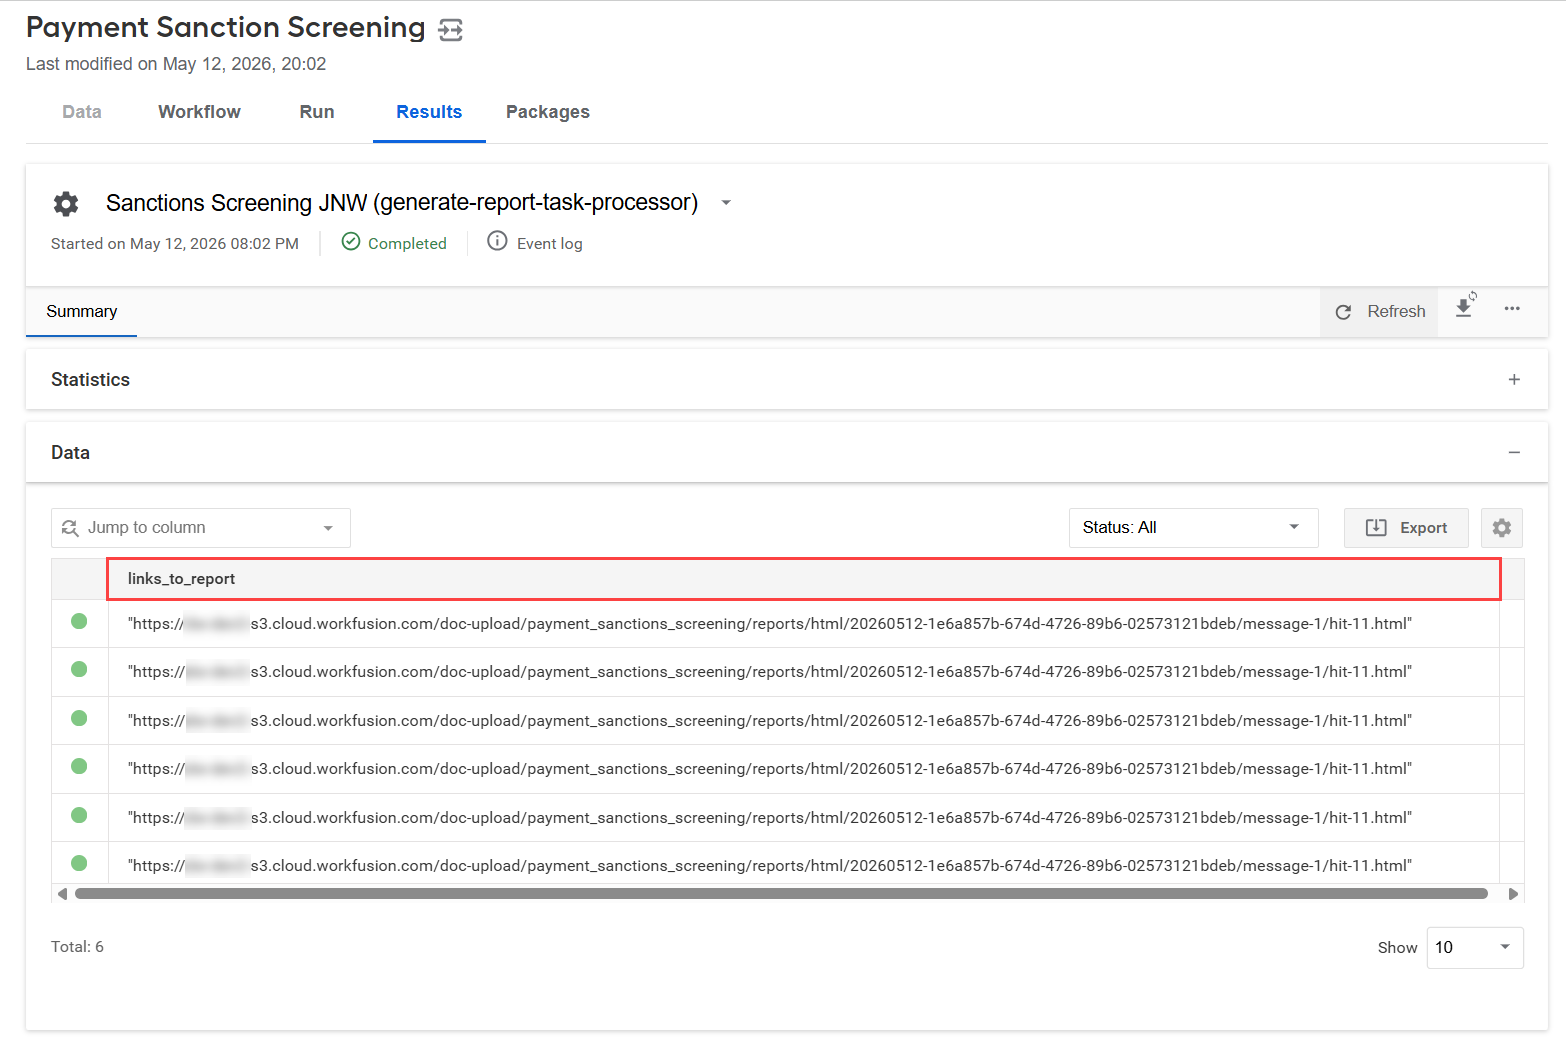
The Screening Review report opens in a separate window.
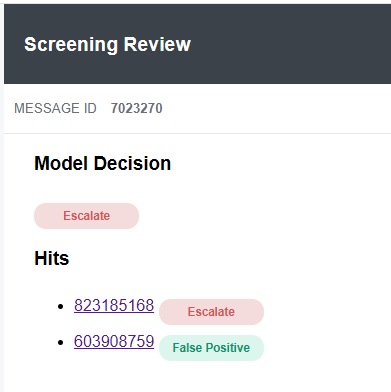
Click the hit ID to view the details.
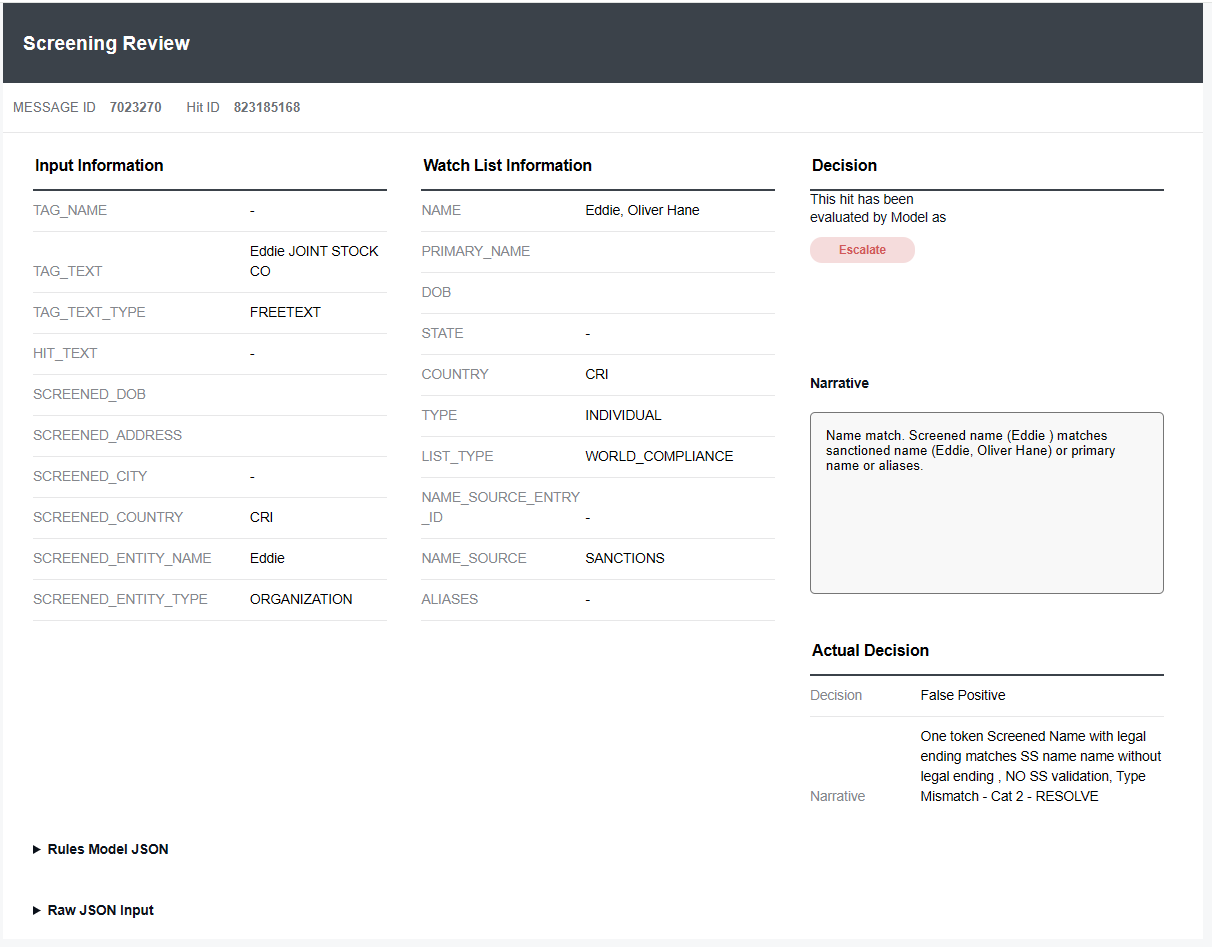
An HTML report contains the following data:
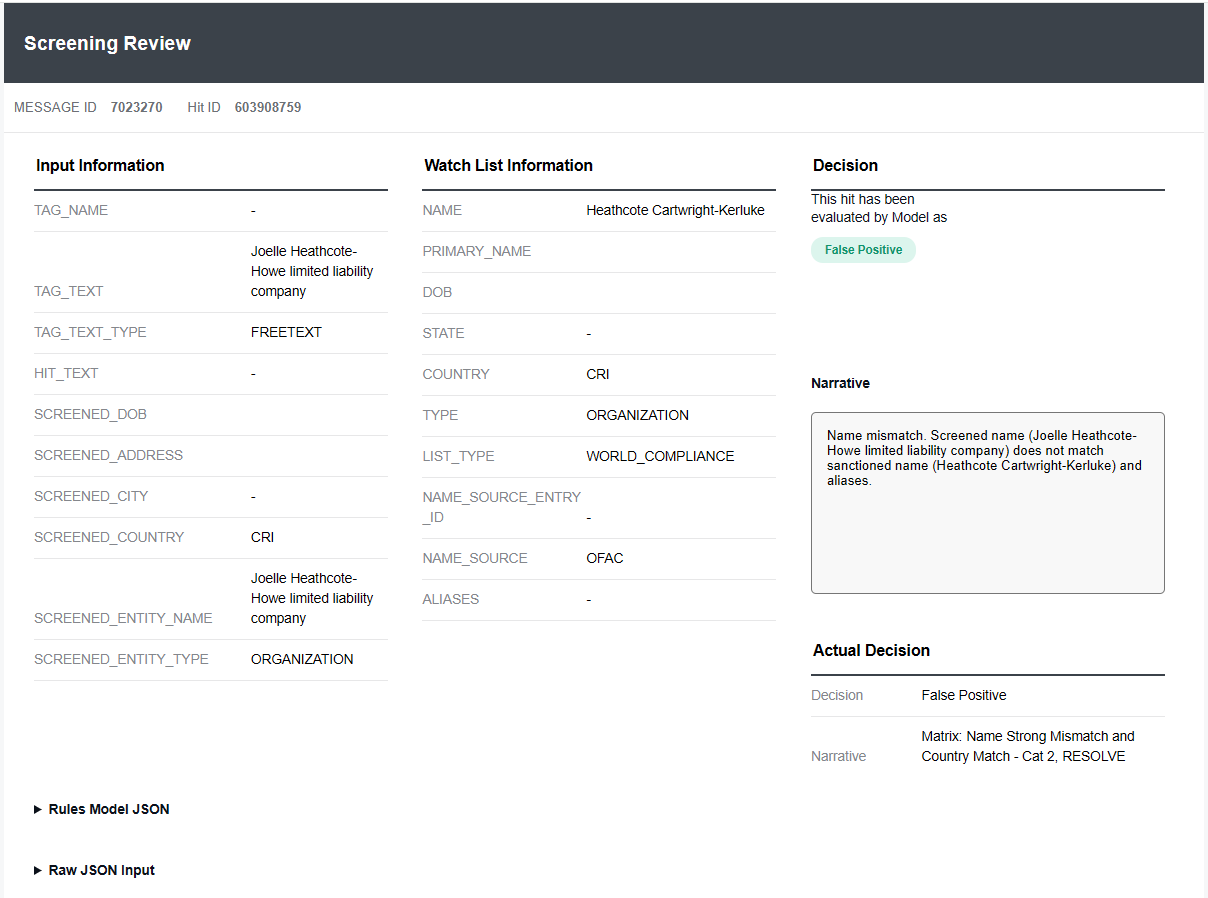
Input fields from the screened and santioned sides as Input Information and Watch List Information respectively
Final decision made by Tara as Decision and Narrative
Map snapshot of the verified screened location as SCREENED Location if Geocoder is turned on and the address is verified
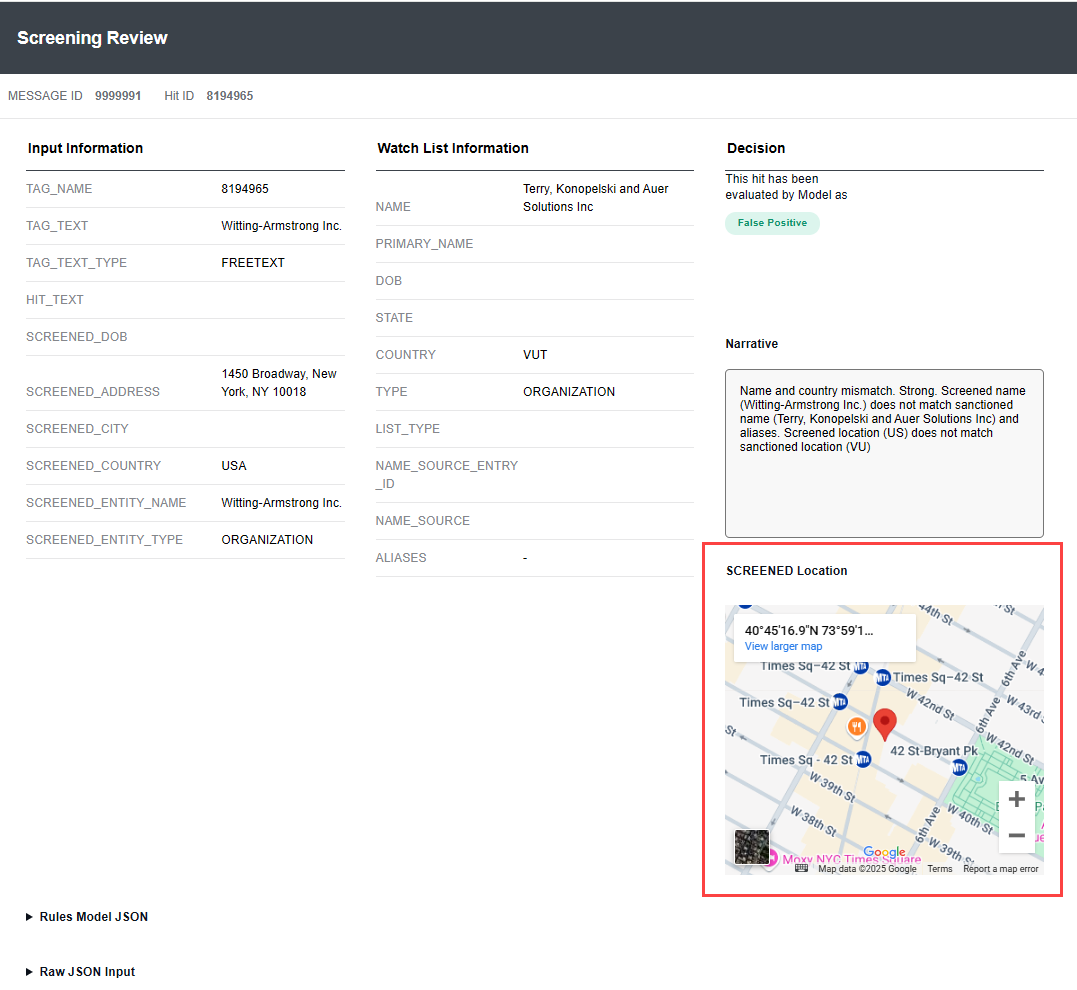
Gold value as Actual Decision (this value might be present when running a CSV input file)
Copy of the original JSON request as Raw JSON Input used for debugging and analysis
Copy of the rule JSON object that led to the decision as Rules Model JSON used for debugging and analysis
A sample decision response
{
    "decision": {
        "messageId": "7023270",
        "suggestedAction": "NO_DECISION",
        "comment": "PARTIALLY_RESOLVE: 1 hit(s) escalated by [name_match]; 1 hit(s) resolved by [name_mismatch_strong]; ",
        "hitDecisions": [
            {
                "reasons": [
                    {
                        "score": 1,
                        "code": "name_match",
                        "description": "Name match. Screened name (Eddie ) matches sanctioned name (Eddie, Oliver Hane) or primary name or aliases."
                    }
                ],
                "hitId": "823185168",
                "suggestedAction": "NO_DECISION",
                "comment": "Name match. Screened name (Eddie ) matches sanctioned name (Eddie, Oliver Hane) or primary name or aliases."
            },
            {
                "reasons": [
                    {
                        "score": 0.4401,
                        "code": "name_mismatch_strong",
                        "description": "Name mismatch. Screened name (Joelle Heathcote-Howe limited liability company) does not match sanctioned name (Heathcote Cartwright-Kerluke) and aliases."
                    }
                ],
                "hitId": "603908759",
                "suggestedAction": "RESOLVE",
                "comment": "Name mismatch. Screened name (Joelle Heathcote-Howe limited liability company) does not match sanctioned name (Heathcote Cartwright-Kerluke) and aliases."
            }
        ]
    },
    "requestId": "859e93c6-726c-4934-bde6-d8b5eb4d8421",
    "statusDetails": "",
    "html_report_link": "https://instance-s3.cloud.workfusion.com/doc-upload/tara-html-reports/e383607a-5447-481e-88b6-9e913bf3af91/message-7023270/message-hits.html",
    "status": "COMPLETED"
}
QC reports
In QC reports, report data is populated at the hit level for each incoming request within configured timeframe. The data used to generate reports is stored in the pss_request_processing_v4 Data Store.
You can run reports manually or schedule them. The recommended scheduling options are as follows:
- End of business day. Select the Today option to collect data for the current day.
- After midnight. Select the Last x days option and enter
1in the field to collect data for the previous day. For more details, see Install and configure | Output.
Generated CSV files are saved to S3 at doc-upload/payment_sanctions_screening/reports/qc. Before new reports are created, all previous reports are moved to the doc-upload/payment_sanctions_screening/reports/qc/reports_archive directory.
You can change the S3 directory location if you use a custom S3 bucket. The inner directory structure must remain the same.
The report template located at doc-upload/payment_sanctions_screening/reports/templates/qc_report_template.csv. When you create a custom report, place it in S3 at doc-upload/payment_sanctions_screening/reports/templates/qc_report_template_custom.csv.
The report can contain the following columns:
| Column | Description |
|---|---|
message_id | Alert ID; an alert may contain many hits. |
msg_type | Message type; may contain type and subtype or subtype only. |
content_format | Content format. |
hit_id | Unique hit ID within the alert. |
hit_tagcontent | Parsed or supplied value defined by tag_name in the payment message. |
hit_tagname | Name of the tag in the message that was identified as a hit during screening. |
hit_hittext | Part of the text that triggered a sanctioned match. |
hit_hittype | Type of the sanctioned hit. |
hit_screeneddata_type | Type of the screened entity that was identified as a hit. The value can be provided or predicted and is used in the final decision. |
hit_screeneddata_name | Name of the screened entity that was identified as a hit. The value can be provided or predicted and is used in the final decision. |
hit_screeneddata_address | Address of the screened entity that was identified as a hit. The value can be provided or predicted and is used in the final decision. |
hit_screeneddata_dob | Date of birth of the screened entity that was identified as a hit. The value can be provided or predicted and is used in the final decision. |
hit_screeneddata_country | Country of the screened entity that was identified as a hit. The value can be provided or predicted and is used in the final decision. |
hit_screeneddata_id | ID of the screened entity that was identified as a hit. The value can be provided or predicted and is used in the final decision. |
screen_data_source | Source of the screened data: screened, NER, or combined. |
hit_sanctiondata_name | Name of the sanctioned entity that matched. This can be the best matching alias or the primary name. |
hit_sanctiondata_primaryname | Primary name of the sanctioned entity that matched. |
hit_sanctiondata_type | Type of the sanctioned entity that matched. |
hit_sanctiondata_dob | Date of birth of the sanctioned entity that matched. |
hit_sanctiondata_country | Country of the sanctioned entity that matched. |
hit_sanctiondata_id | ID or code of the sanctioned entity that matched. |
hit_sanctiondata_sourceentryid | Source ID of the sanctioned entity that matched. |
alert_decision | Alert-level decision. |
hit_decision | Hit-level decision. |
hit_decision_code | Main reason for the disposition. |
hit_decision_comment | Detailed explanation of all reasons for the disposition. |
hit_name_matcher_score | Highest name matcher score between the screened name and all sanctioned names. |
hit_type_confidence_score | NER model confidence score for the predicted screened type. |
hit_ner_type_original | Original type predicted by the NER model. |
is_auto_qc | Defines if the hit or alert is marked for automatic quality control. |
tara_version | AI Agent version. |
ner_model_version | NER model version. |
decision_model_version | Decision model version. |
request_id | Unique request ID. The value can be used as a link to the processing table. |
last_timestamp | Timestamp when the request is completed; the alert-level timestamp. |
alert_execution_time | Total record execution time in seconds at the alert level. |
alert_completion_status | Processing status: COMPLETED, IN_PROGRESS, or FAILED. |
gold_decision | Expected decision if available. Used for analysis and training. |
gold_decision_comment | Expected decision comment if available. Used for analysis and training. |
CLDS reports
The data used to generate CLDS reports is located in the pss_request_processing_v4 Data Store. If a hit matches historical data, it includes a CLDS object with all necessary report information.
You can run reports manually or schedule them. The recommended scheduling options are as follows:
- End of business day. Select the Today option to collect data for the current day.
- After midnight. Select the Last x days option and enter
1in the field to collect data for the previous day. For more details, see Install and configure | Output.
Report templates are located at doc-upload/payment_sanctions_screening/reports/templates, for example:
- CLDS report template with standard columns:
doc-upload/payment_sanctions_screening/reports/templates/clds_report_template.csv - Custom CLDS report template:
doc-upload/payment_sanctions_screening/reports/templates/clds_report_template_custom.csv
Generated CSV files are saved in S3 at doc-upload/payment_sanctions_screening/reports/clds. Before new reports are created, all previous reports are moved to the doc-upload/payment_sanctions_screening/reports/clds/reports_archive directory.
Generated filenames follow the format: CLDS-Payment-Screening-{date}_{time}-{part}.csv For example, CLDS-Payment-Screening-20250113_225716-1.csv.
The report template is located in S3 at doc-upload/payment_sanctions_screening/reports/clds/clds_report_template.csv. This template cannot be customized and includes the following predefined columns:
| Column | Description |
|---|---|
hash_id | Calculated unique hit hash value. |
id | ID from a system generating an alert. |
message_id | Message ID of an incoming alert. |
reference_id | Content of the [REFERENCE] field of an incoming alert. |
message_type | Available in a subtype field of the message. Content of the [TYPE] field of an incoming alert. |
content | Content of an incoming message. |
hit_id | Unique hit ID within an alert. |
hit_tagcontent | Parsed or supplied value defined by the tag name in a payment message. |
hit_tagname | Name of the tag in a message that was a hit during screening. |
hit_hittext | Part of the text that triggered a sanctioned match. |
hit_hittype | Type of a sanctioned hit. |
hit_sanctiondata_name | Name of the matching sanctioned entity (best matching alias or primary name). |
hit_sanctiondata_primaryname | Primary name of the matching sanctioned entity. |
hit_sanctiondata_type | Type of the matching sanctioned entity. |
hit_sanctiondata_sourceentry_id | Source ID of the matching sanctioned entity. |
hit_sanctiondata_sourcekeywords | Keywords for sanctioned listing sources. |
payment_sender_bic | Available in the payment section of a message. Value of the [SENDER] field of an incoming FUF message. |
payment_receiver_bic | Available in the payment section of a message. Value of the [RECEIVER] field of an incoming FUF message. |
payment_direction | Incoming or outgoing. Available in the payment section of a message. |
hits_count | Number of hits in an alert. |
hash_counter | Number of times each hit hash occurred. |
hash_minimum_counter | Number of alerts required to clear for a hash ID before continuous learning begins auto-disposition. |
hash_enable_date | Date when each hit hash achieves the CLDS-enabled status. |
hash_status | Current enabled or disabled status of the hash. |
alert_released | Indicates whether all hits are resolved by continuous learning (Y). |
hit_decision | Indicates whether the final decision for the individual hit is RESOLVE or NO_DECISION. |
hit_decision_comment | Explanation of the hit decision if the historical data contains analyst comments. For RESOLVE decisions, the field contains the most recent analyst comment). |
alert_date_received | Date when a message was sent to Tara. |
A hash ID is calculated as the sum of hit-level fields and message-level fields used for decision reapplication and tag content. The hit-level hash comprises predefined hard-coded fields. You can configure message tags during reapplication data setup.
Analytics Data Stores
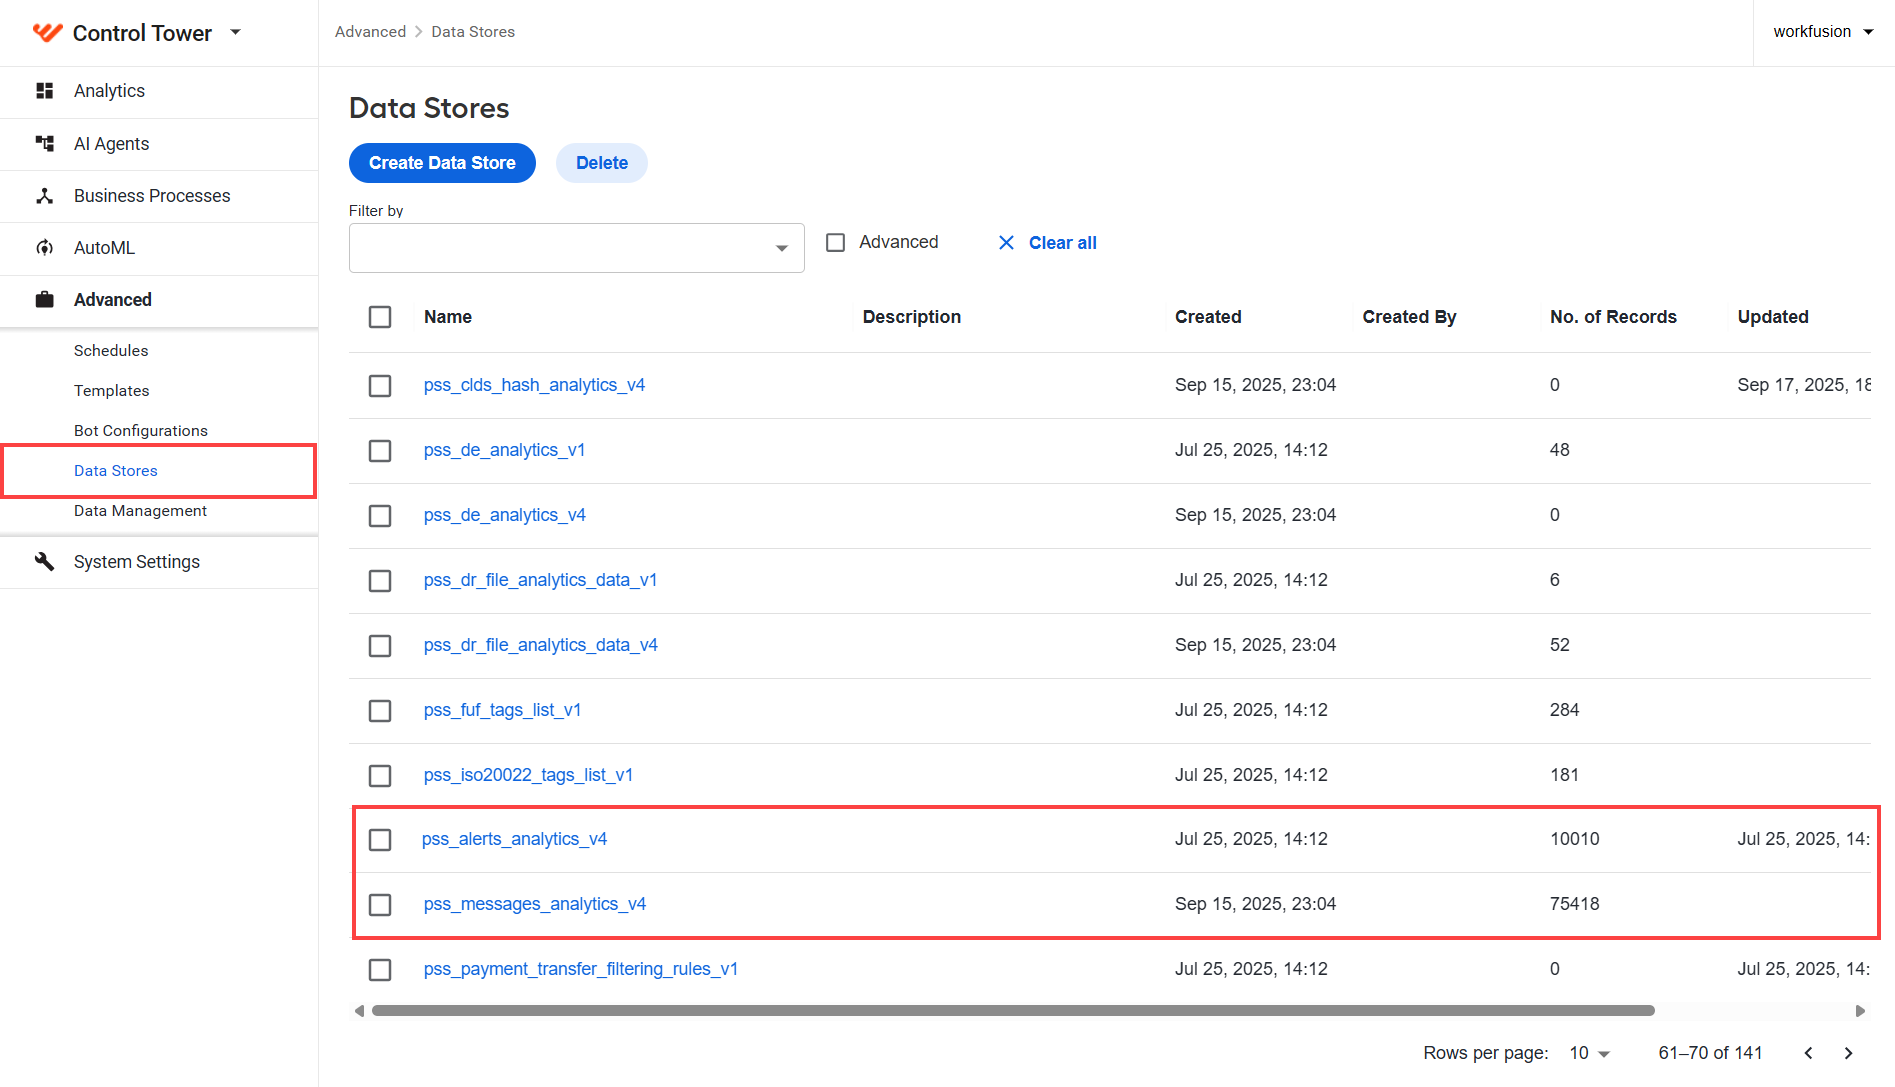
Execution results are also recorded in the message and hit analytics Data Stores. To view the Data Stores, go to Advanced > Data Stores and select:
- pss_messages_analytics_v4 to view message-level decisions
- pss_alerts_analytics_v4 to view hit-level decisions
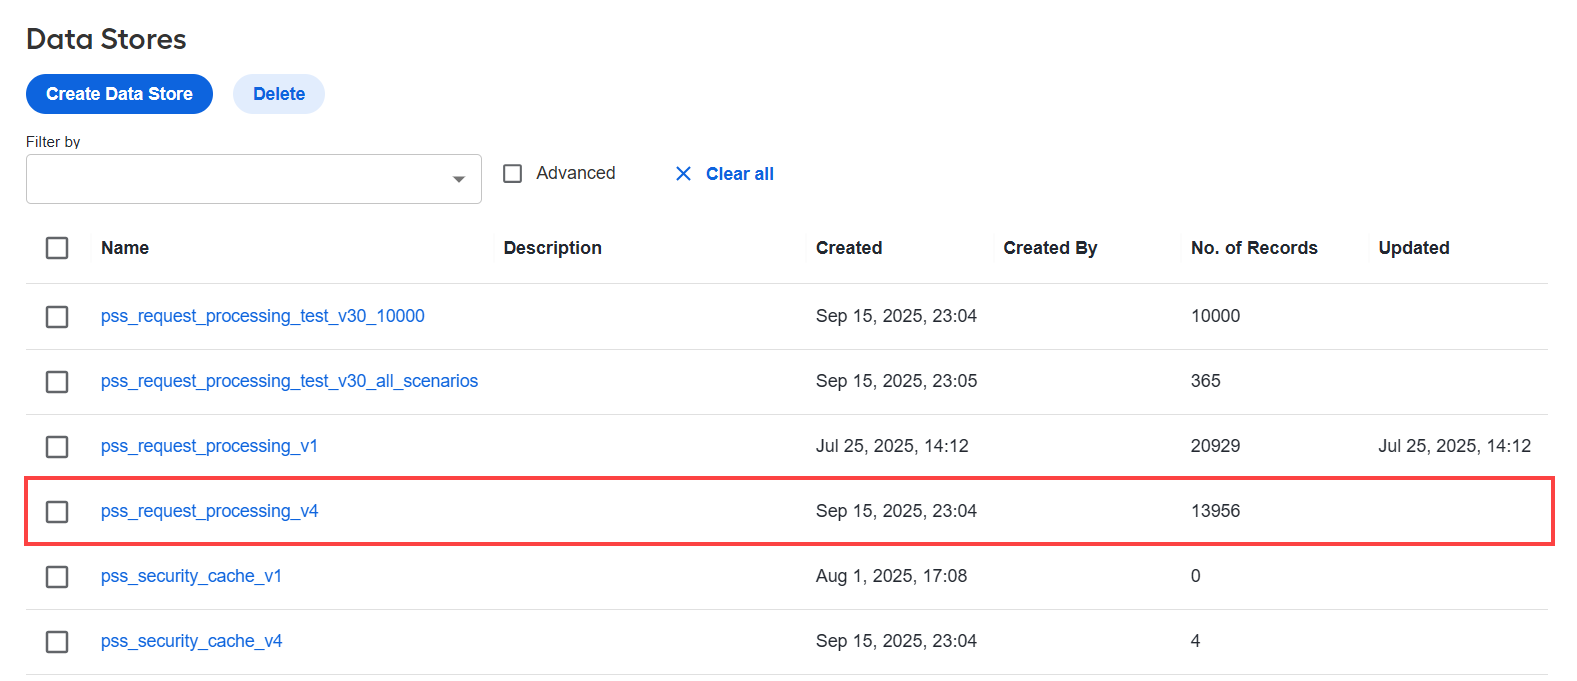
To analyze the results, you also need access to the original requests. All requests are saved in the request processing Data Store.
Go to Advanced > Data Stores and open the pss_request_processing_v4 Data Store.
Click Download, then select All Records > Comma Separated (.csv) to download all records as a CSV file.
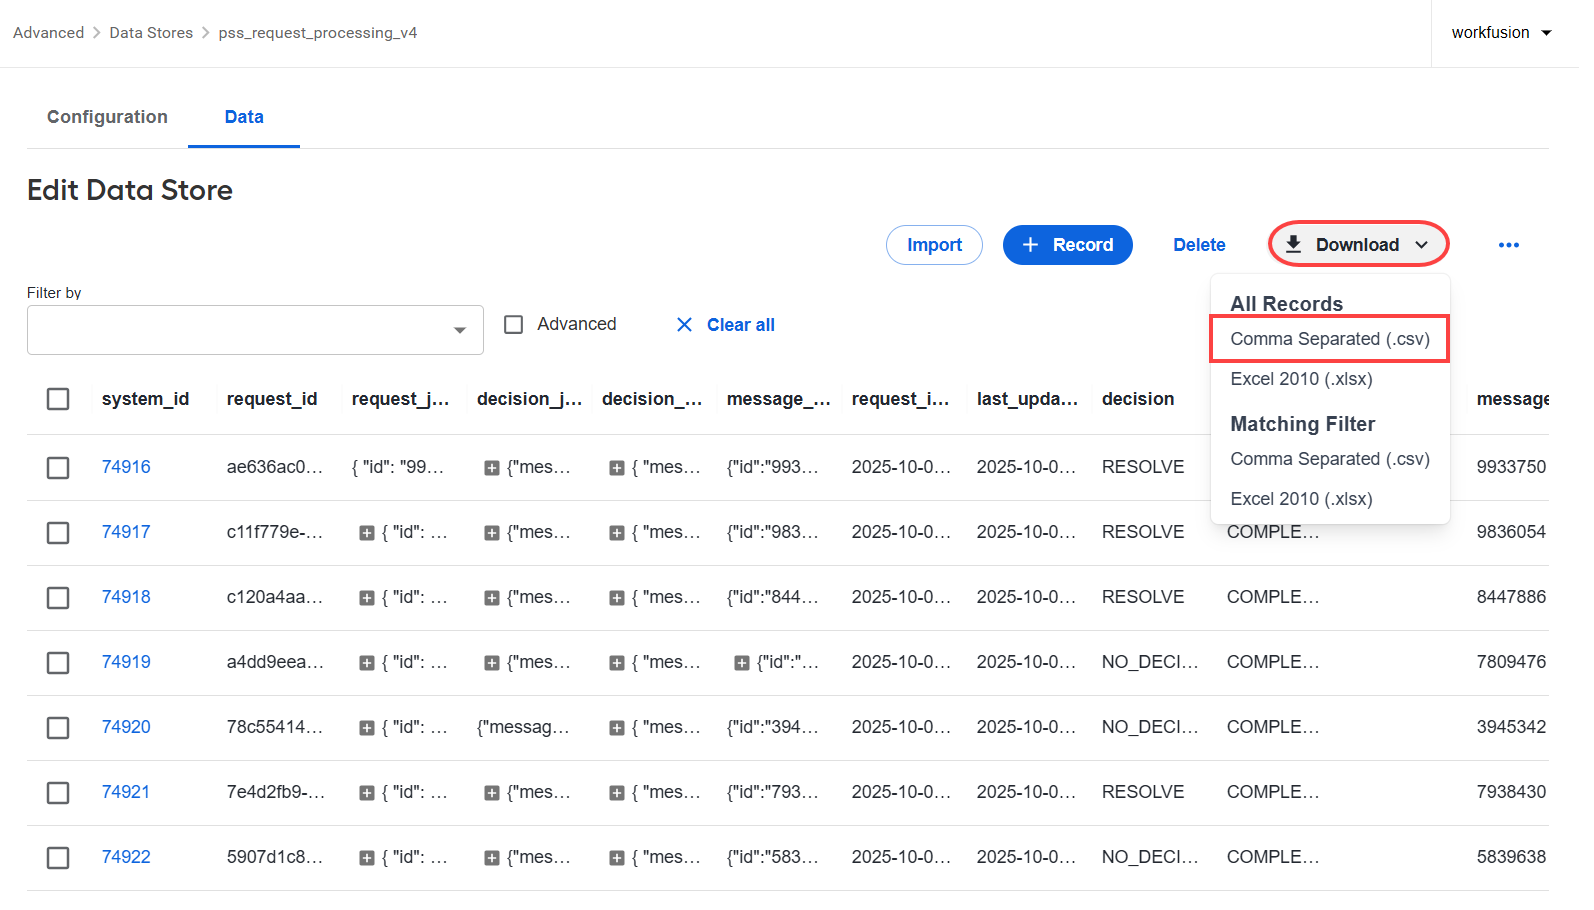
Once the file is downloaded, you can review the requests and responses to verify the decisions.
Event log
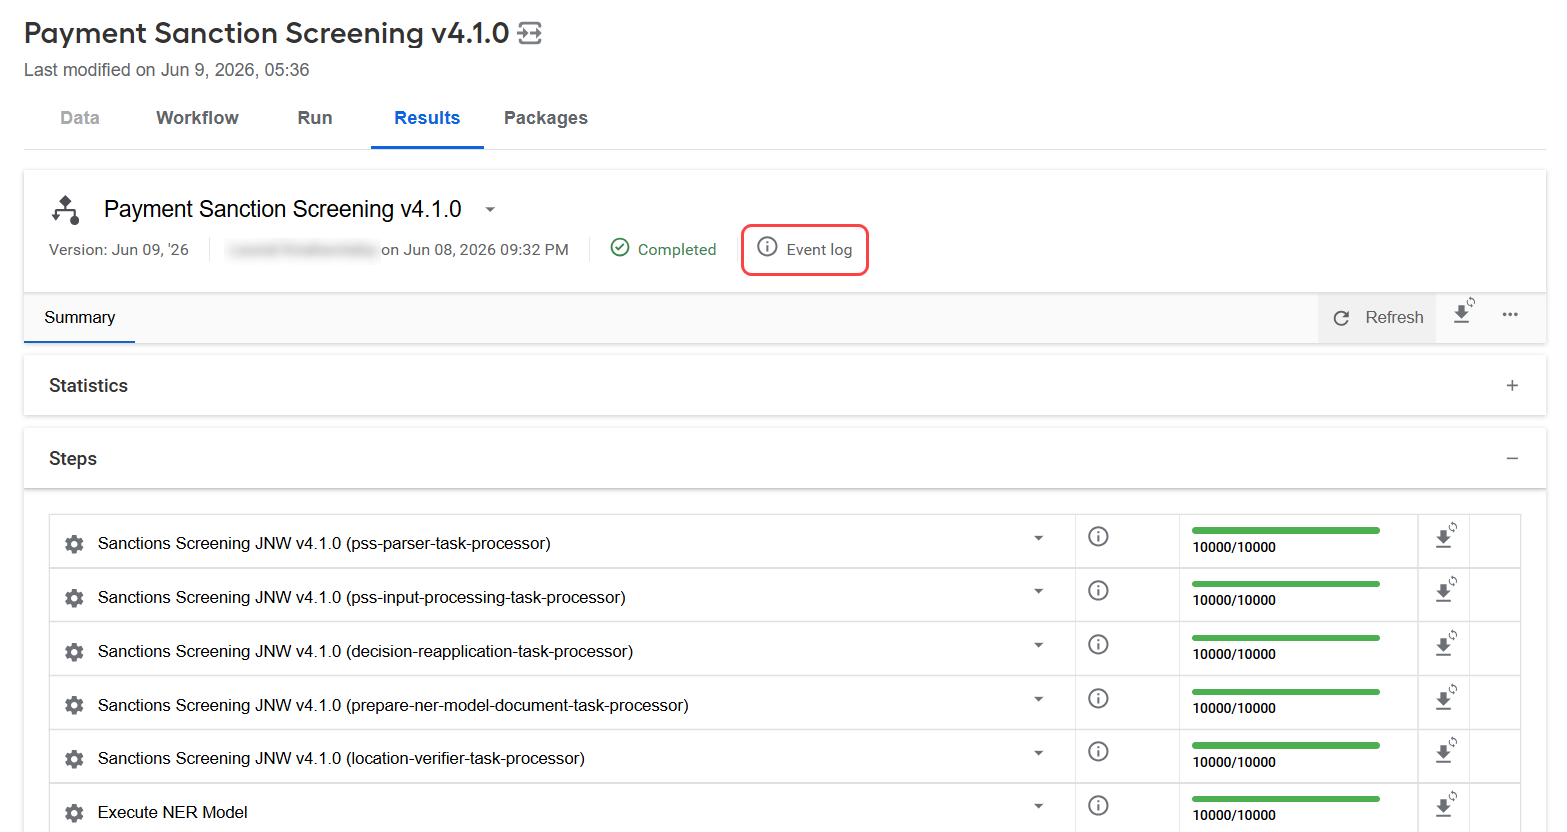
To view the event log, go to the Results tab. If any issues occur during BP execution, an exclamation mark appears.
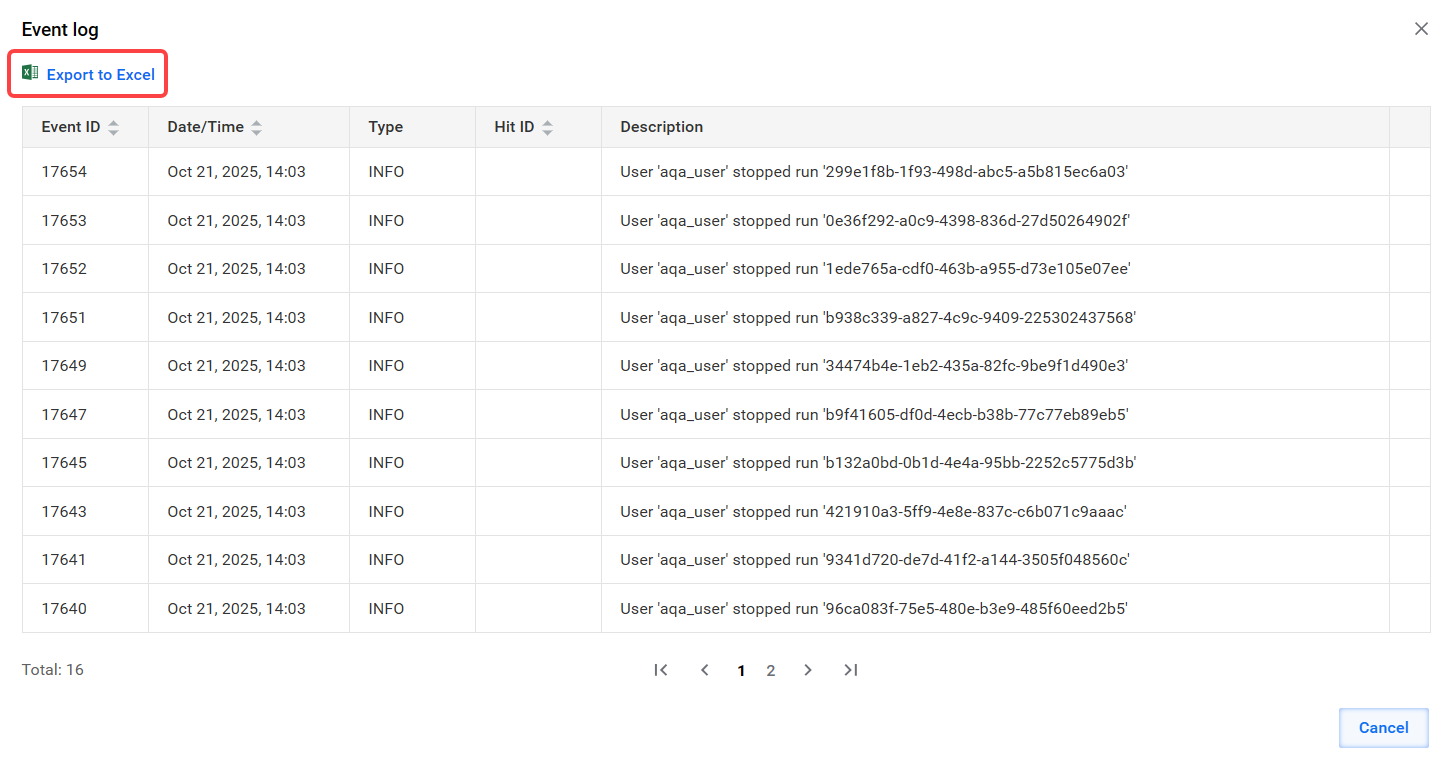
To view the errors, click Event log. The event log opens in a separate window.
To download the report, click Export to Excel.
For further analysis, also review the Tara: Payment sanction screening overview dashboard.