
Install RPA Windows server
Overview
RPA deployment diagram
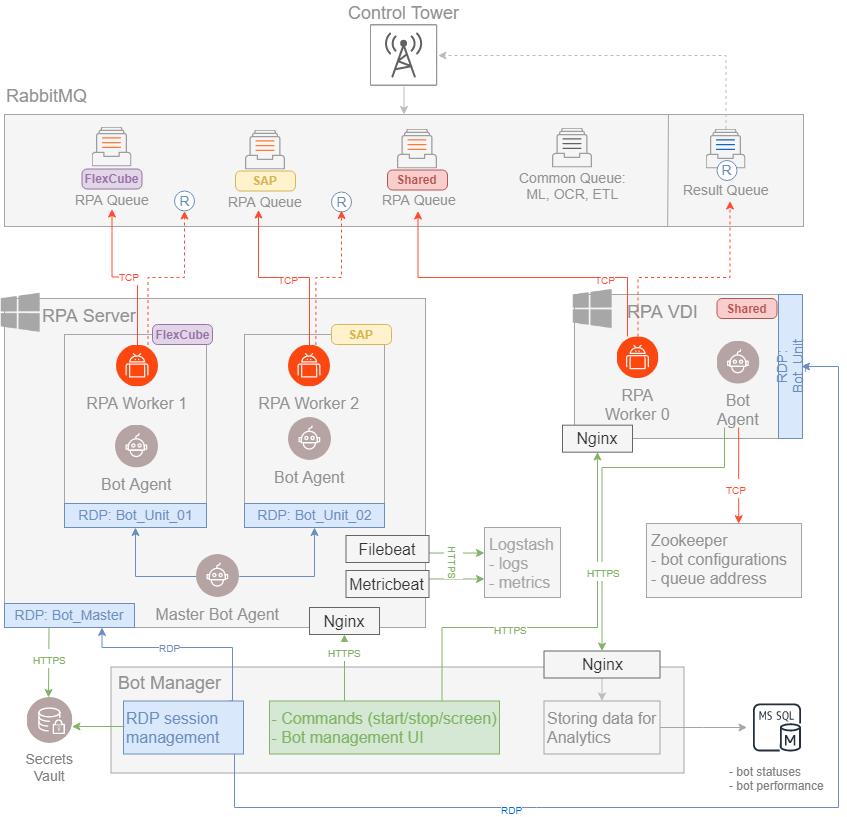
note
To learn more about deployment, see Deploy RPA. For the general deployment architecture, refer to Installation overview | Deployment diagram.
RPA folder structure
As soon as you have downloaded the installer file, extract all the files from RPAInstaller-{version}.zip to any folder on your PC.
The packages inside the folder are as follows:
- autoit: executes AutoIT scripts.
- bot-agent: contains Bot Agent together with its configuration and logs.
- filebeat: contains Filebeat configuration and logs.
- java: executes Java processes for 64-bit Windows.
- java_x86: executes Java processes for 32-bit Windows.
- libs: contains DLL files used for native work of the system.
- logs: contains logs of RPA Workers.
- metricbeat: contains Metricbeat together with its configuration and logs.
- nginx: contains Nginx configuration and logs.
- registry: contains registry files used while installation together with
machine_settingsanduser_settings. - rpa-grid: performs configuration.
- scripts: collects logs from the package, contains scripts for both logs and configuration.
- worker: contains executable code.
Prerequisites
- Internet Explorer 11
- The CA certificate is imported into Trusted Root Certificates Authorities of Local Machine's Certificate TrustStore. See here for more information.
- Before configuring users, make sure your Internet Explorer browser is turned off, and no Java processes are running.
- In case of the production installation, MS SQL, Integration, and Application servers are installed.
- RPA Windows users are created in advance and logged in at least once.
Install RPA Windows server
Install RPA package
important
Install RPA as the Administrator user on a Windows machine.
Download the installer file and extract all files from
RPAInstaller-{version}.zipto any folder on your PC.Launch
RPAInstaller.exeand follow the RPA setup wizard steps. Accept the License Agreement and proceed.Set the Destination Folder for the RPA server installation.
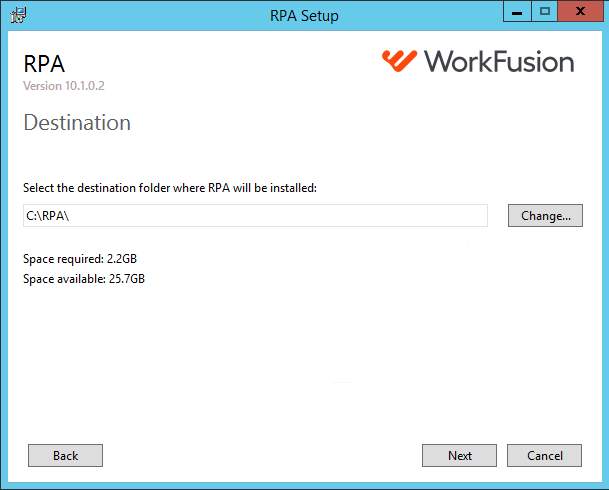
By default, the destination directory for the RPA installation is
C:/RPAthat will be further referred to asINSTALL_DIR.Choose the installation type:
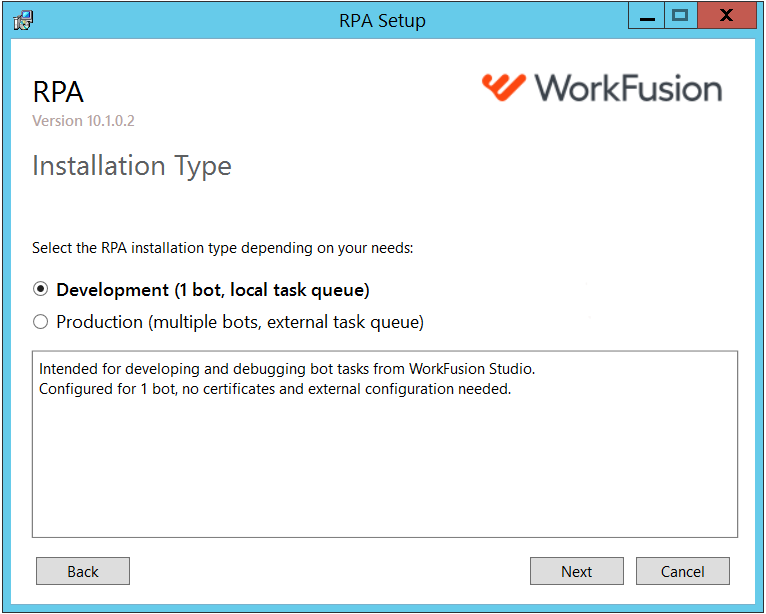
- Development is intended for developing and debugging Bot Tasks from WorkFusion Studio, configured for one bot, no need for certificates and external configuration
- Production is intended for executing Bot Tasks from an external task queue configured for multiple bots on one machine.
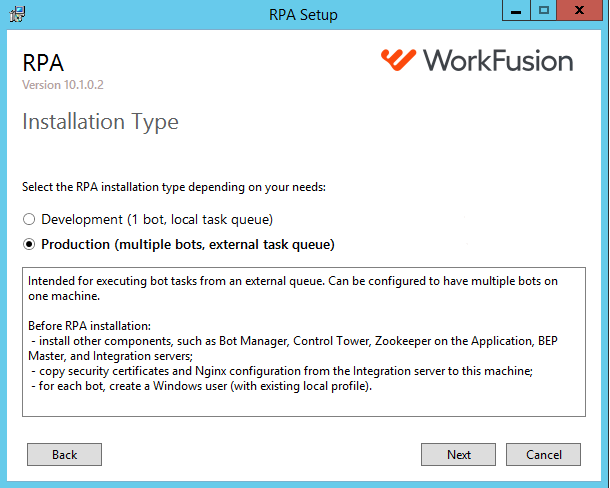
Install RPA development
On the Installation Type screen, select Development.
On the Bots Configuration screen, specify the user. Under the selected installation type, only one bot is configured.
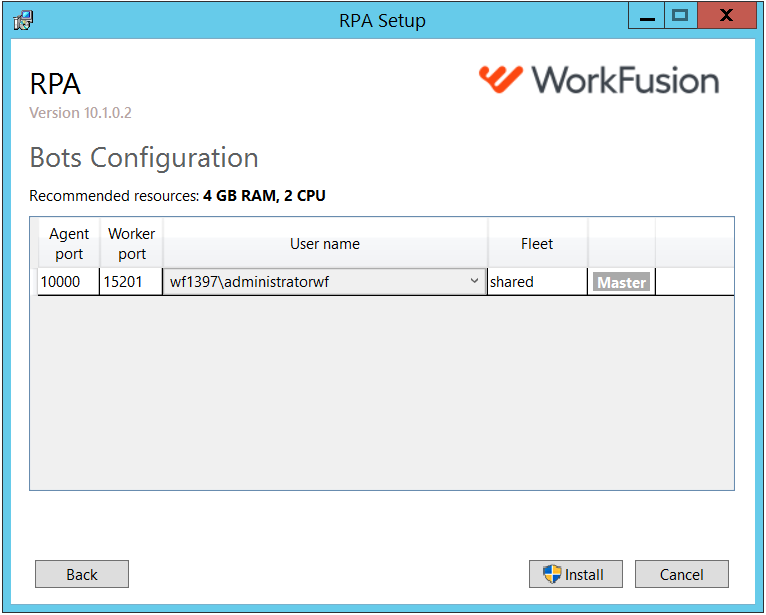
Click Install and allow the program to make changes to your device.
Wait for the installation process to complete.
Install RPA production
important
Before you start installing RPA Production, make sure to perform the following actions:
Install other components, such as Bot Manager, Control Tower, ZooKeeper, BEP Master, and so on. For more information, see High availability setup or Standard setup depending on your installation type.
Ensure that Control Tower and Bot Manager are up and running on the Application server.
wfmanager status workfusion
wfmanager status bot-manager
Ensure that ZooKeeper and Secrets Vault are up and running on the Integration server.
wfmanager status zookeeper
wfmanager status vault
Generate and copy security certificates (ca.crt, mtls-client.crt, mtls-client.key, rpa.crt, rpa.key, vault_workfusion.p12), as well as the Nginx configuration file (nginx.conf), from the Integration server to the machine, where you install RPA. Mind that certificates are generated and located at
PACKAGE_DIR/certificates. For more information on the generation of certificates, see Prepare RPA, OCRWIN and BI configurations.Before RPA Windows Server installation, RPA users must exist and have local profiles on RPA machine. In case you need to create users, see the instructions.
To install RPA Production:
On the Installation Type screen, select Production.
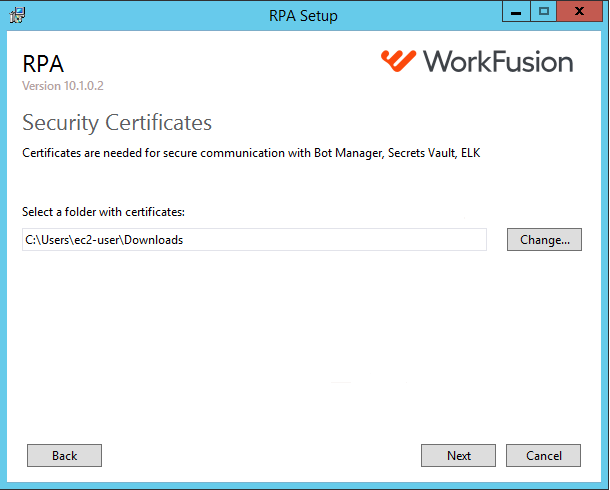
Specify the path to the folder with certificates.
Set up the network configuration:
- Specify the Nginx configuration file location.
For information on how to generate the RPA configuration files, see Prepare RPA, OCRWIN and BI configurations. Mind that the Nginx configuration file can be copied from the Integration server:
distr/win_confs/rpa_configs/host-rpa1.example.com/nginx/conf.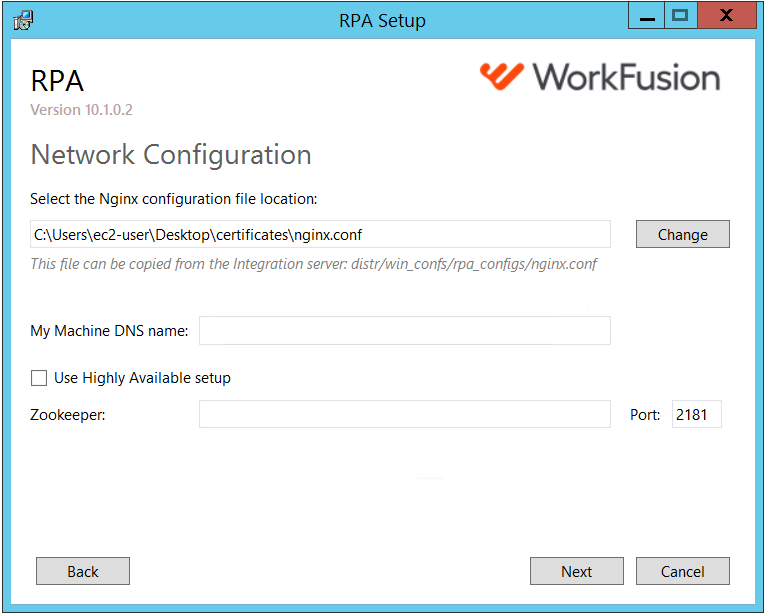
- Enter your machine DNS name.
- Specify the Integration server hostname for ZooKeeper. The default ZooKeeper port is 2181.
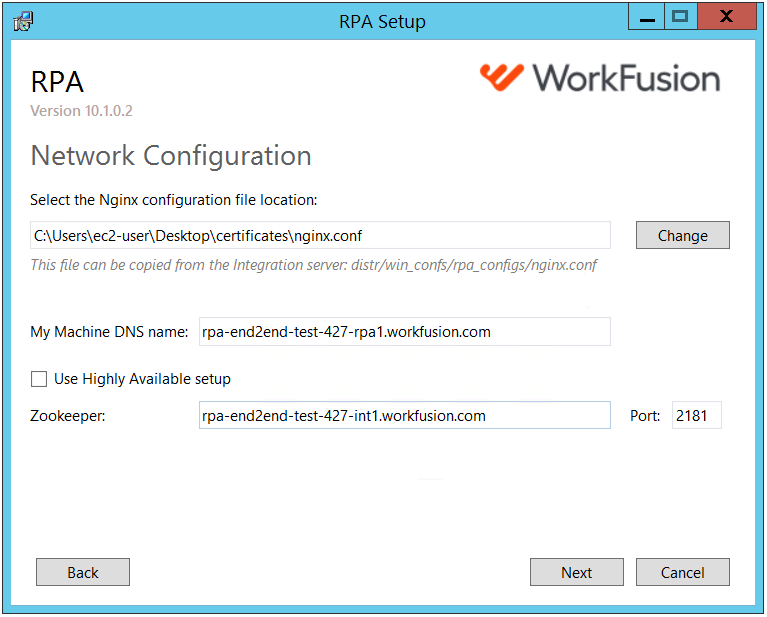
- In case of the high availability setup, select the Use Highly Available Setup checkbox and define hostnames for each ZooKeeper in the list.
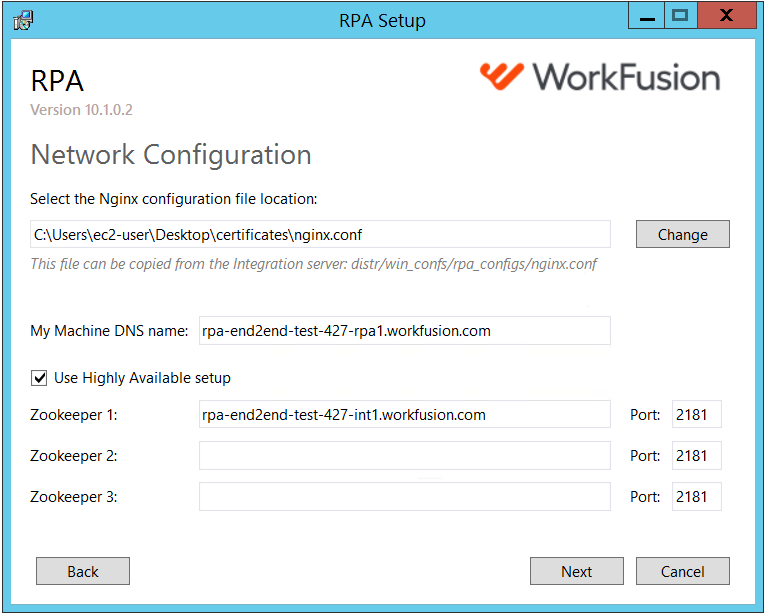
Configure RPA Units and assign fleets:
- To add an RPA Unit, click Add Bot, and select a user from the dropdown list.
- To delete an RPA Unit, click Close next to it.
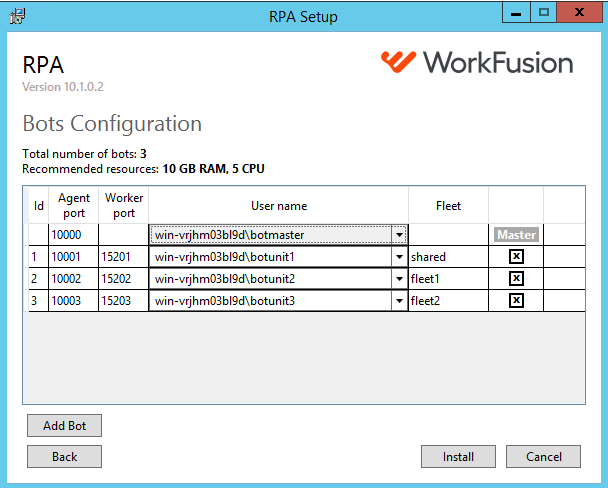
Click Install and allow the program to make changes to your device.
Wait for the installation process to complete.
Configure users
Register Bot Master and RPA Units in Secrets Vault in Control Tower. Add secret entries with Alias for Bot Master and Alias for Bot Unit. The Key field stands for username, while Value – for password.
- Bot Master User secret entry: Alias = rpa. + {RPA_HOSTNAME} + .rdp.master.credentials Key = Bot Master Username Value = Bot Master Password
- RPA Unit User secret entry: Alias = rpa. + {RPA_HOSTNAME} + .rdp.unitX.credentials Key = RPA Unit Username Value = RPA Unit Password
note
The system does not allow choosing an RPA Unit user in the RPA installer. As a temporary workaround, install RPA and choose a proper user in the Windows scheduler after the installation.
Grant the RPA folder permissions to all created users–Bot Master, RPA Unit X. The RPA folder is the folder where your RPA is installed.
Make sure that Bot Master is a member of the Administrator group. Follow the link to see more on configuring groups and permissions in Windows.
Verify Internet Explorer settings (optional)
Verification is required in case Internet Explorer is used. The settings are verified for each added user. For more details, go to Configure Internet Explorer for RPA.
Configure Firewall for Nginx
To provide access to Nginx, configure Windows Firewall to define a port for connection:
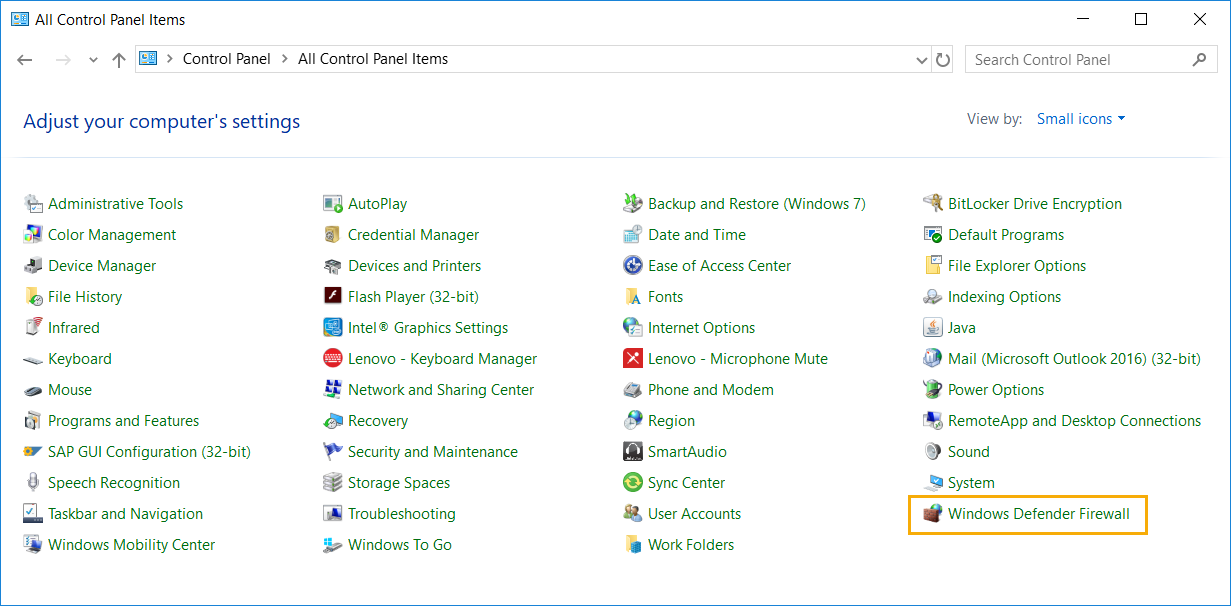
Go to Control Panel > Windows Defender Firewall.
Select Advanced settings > Inbound Rules and find Workfusion RPA Nginx SSL that allows secure inbound communication for applications to use the SSL connection.
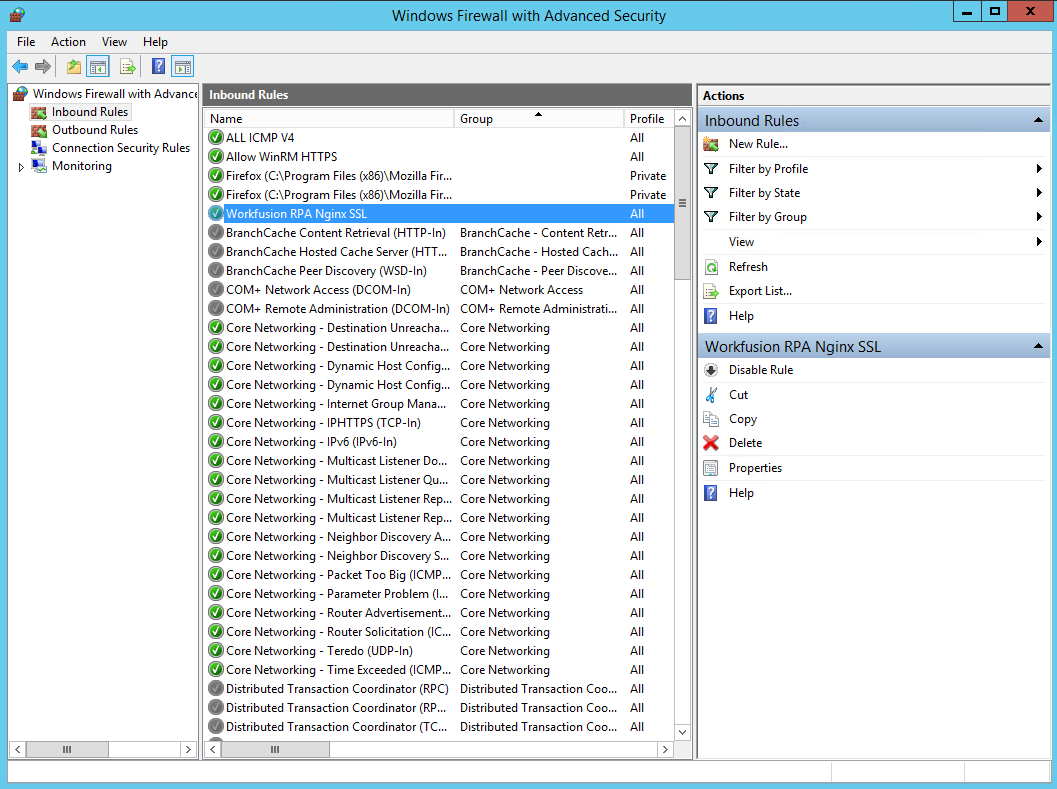
Click Properties and select Protocols and Ports. Define the local ports 8080 and 8443 to allow the connection.
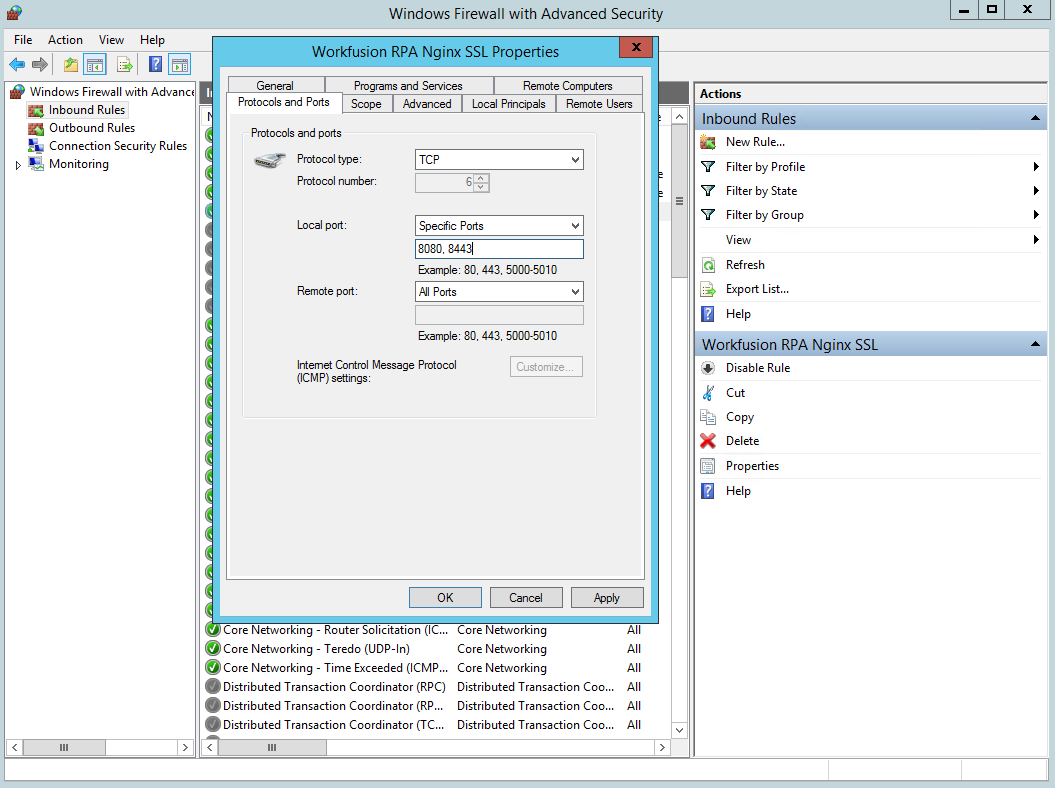
Click Apply and OK to save.
Configure RDP auto-reconnect (optional)
note
If you don't have a possibility to work with Windows Credential Manager, you cannot auto-reconnect, as Bot Agent Master cannot fill in credentials for auto-connect without typing them. As a result, when you start the RPA environment, you should connect to the Bot Agent Master session and fill in credentials manually to start each RPA Unit session. If you do not set the auto-reconnect option as false, your RPA Unit tries to make reconnect when it tries to make an RDP session and cannot fill in credentials again, thus you get an exception.
To set up auto-reconnect of RDP unit sessions:
Go to the Bot Manager UI.
To disable autoreconnect, click Settings.
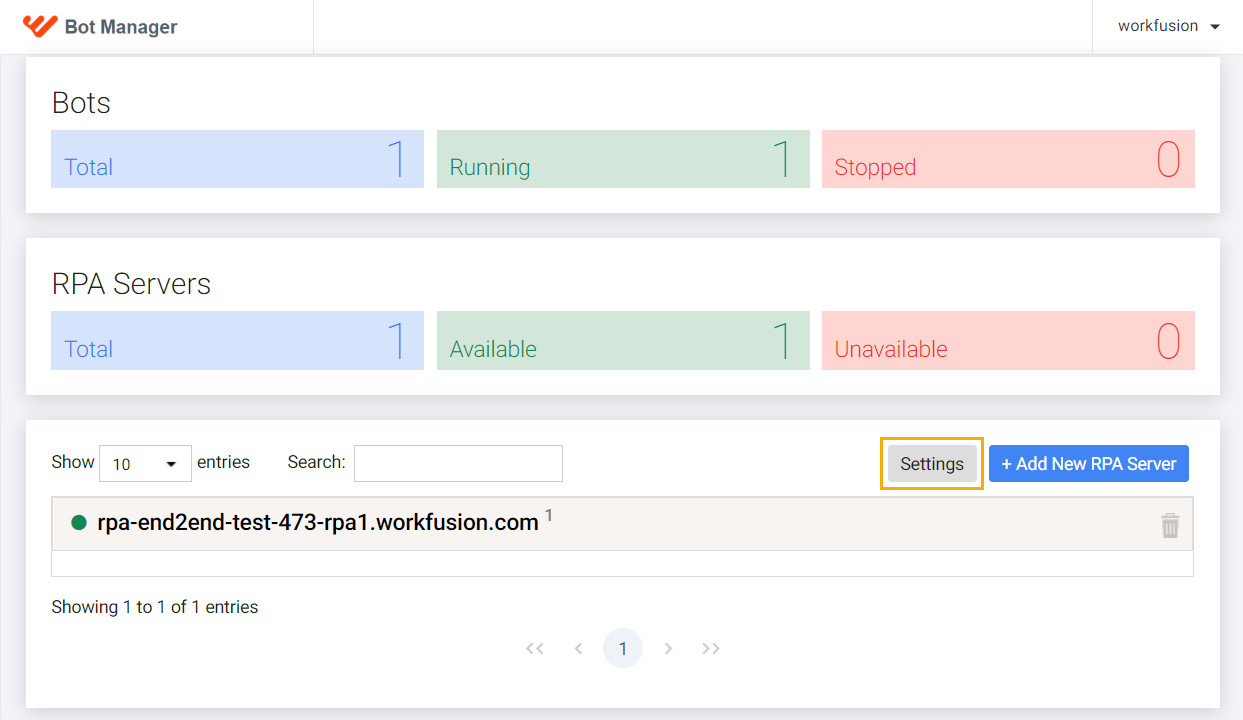
Select OFF for the Re-connect bots automatically option.
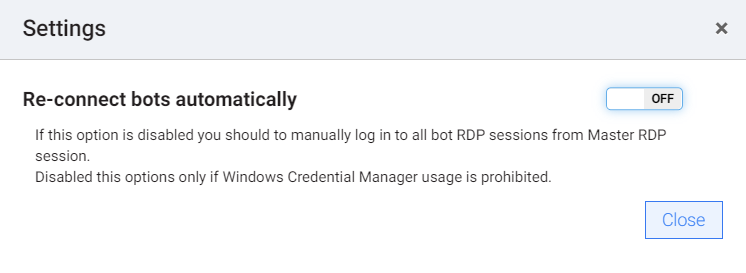
Connect to Bot Agent Master session, fill in unit credentials, and start unit sessions.

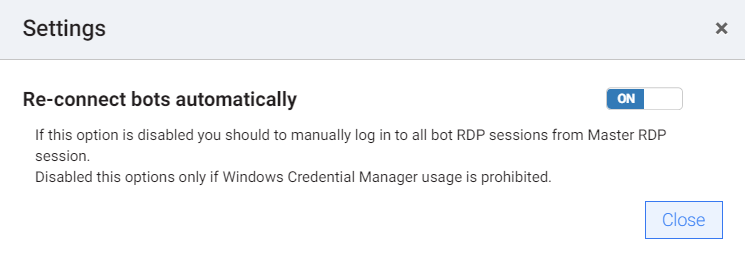
To enable the RDP auto-reconnect option, click Settings and select ON for the Re-connect bots automatically option.
Check RPA Installation
tip
It is recommended to reboot your machine after the installation process is finished and proceed to the check procedures.
There are several ways to check RPA Windows Server installation.
To check the RPA Worker, open the following link in your browser under any user on RPA machine: http://localhost:1520{unit_id}/health.
The response must be as follows:
 ```
 [
 {
     "status": "UP",
     "details": {
     "rabbit": {
         "status": "UP",
         "details": {
         "version": "3.7.14"
         }
     },
     "diskSpace": {
         "status": "UP",
         "details": {
         "total": 53317988352,
         "free": 25653489664,
         "threshold": 10485760
         }
     },
     "refreshScope": {
         "status": "UP"
     },
     "zookeeper": {
         "status": "UP",
         "details": {
         "connectionString": "hostname.workfusion.com:port",
         "state": "STARTED"
         }
     }
     }
 }
 ]
 ```
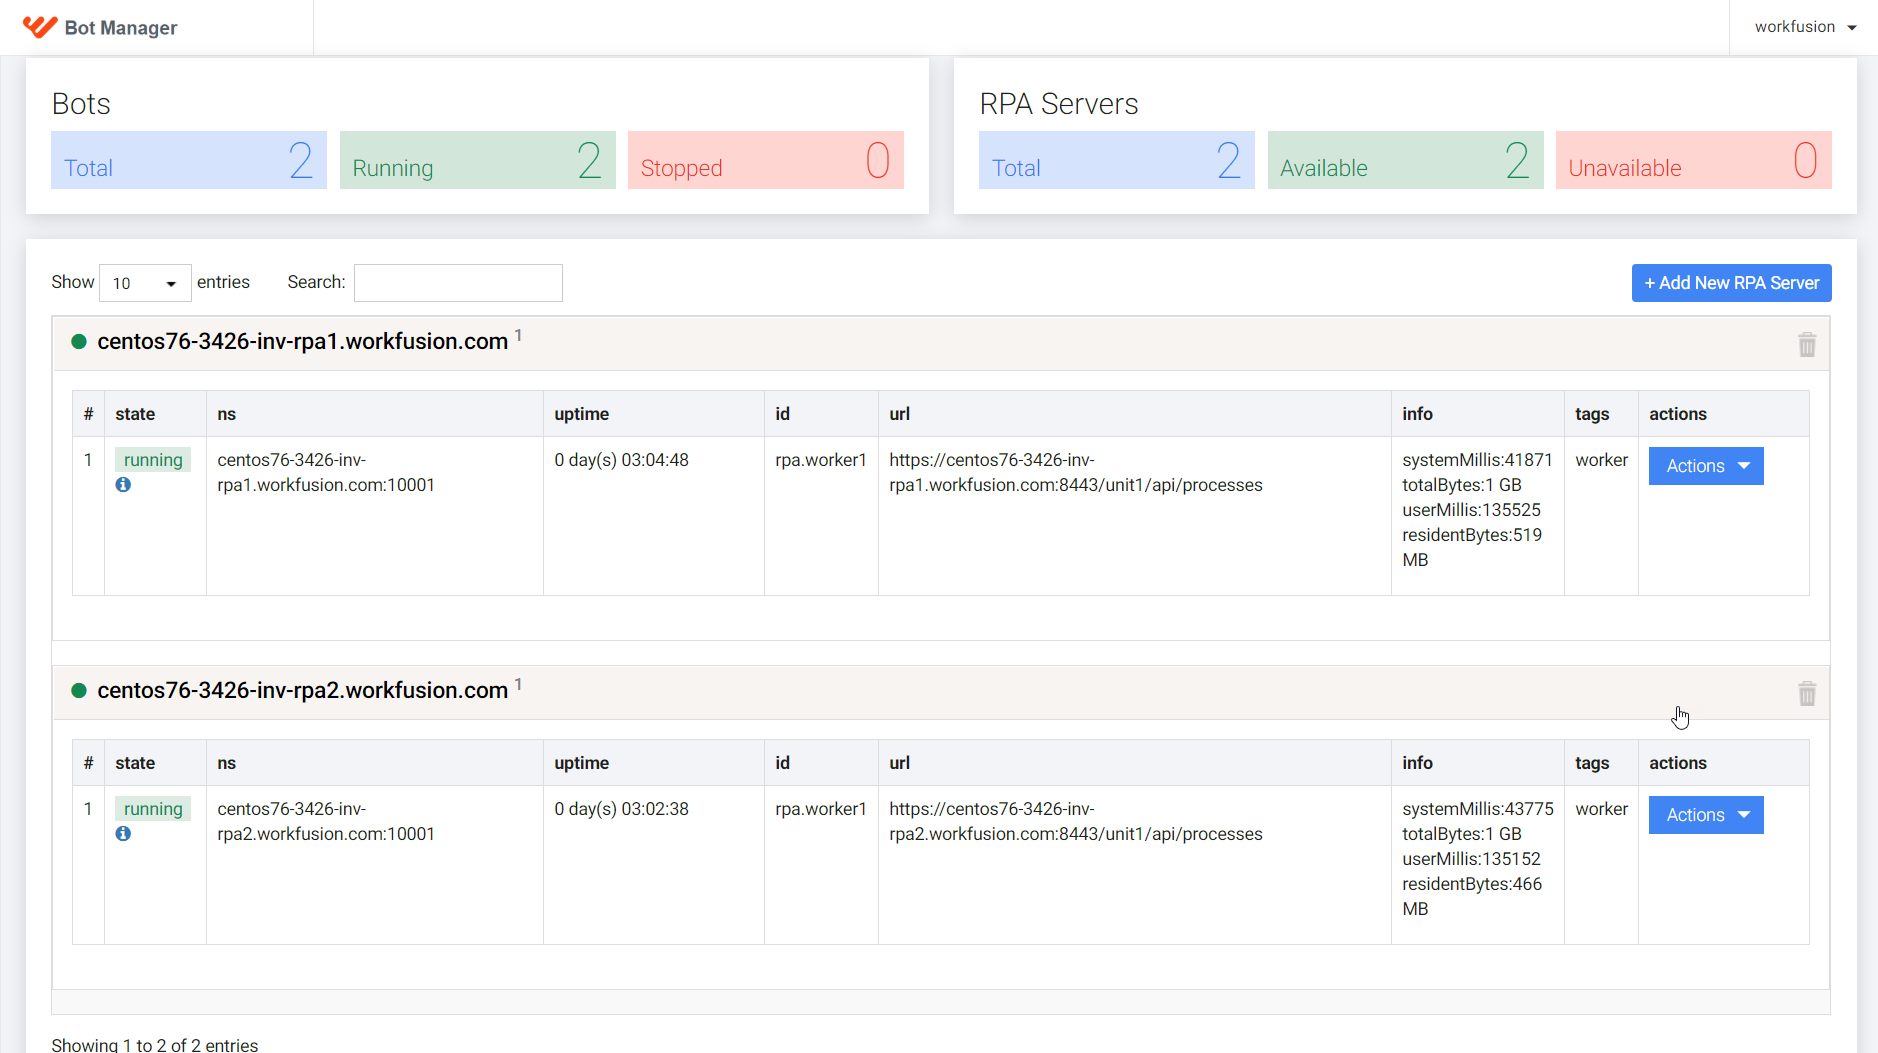
Open Bot Manager, and make sure your RPA Windows server hostname is available, and you can send commands to the RPA Worker.
Run any RPA task and view logs in Kibana.