Integrate SonarQube
Several developer tools produce HTML reports. In many cases, you may need to schedule them in TeamCity and see the results there. TeamCity already provides the functionality to handle this: you may publish build-generated HTML pages and set TeamCity to show them on additional tabs on the build overview page.
But sometimes reports can be already placed somewhere on the network, and publishing additional artifacts with every build may consume space (for example, if they contain a lot of pictures).
The following guide can help you integrate SonarQube reports into TeamCity.
Create SonarQube build tab
To integrate the SonarQube WEB UI as a separate report tab for each build:
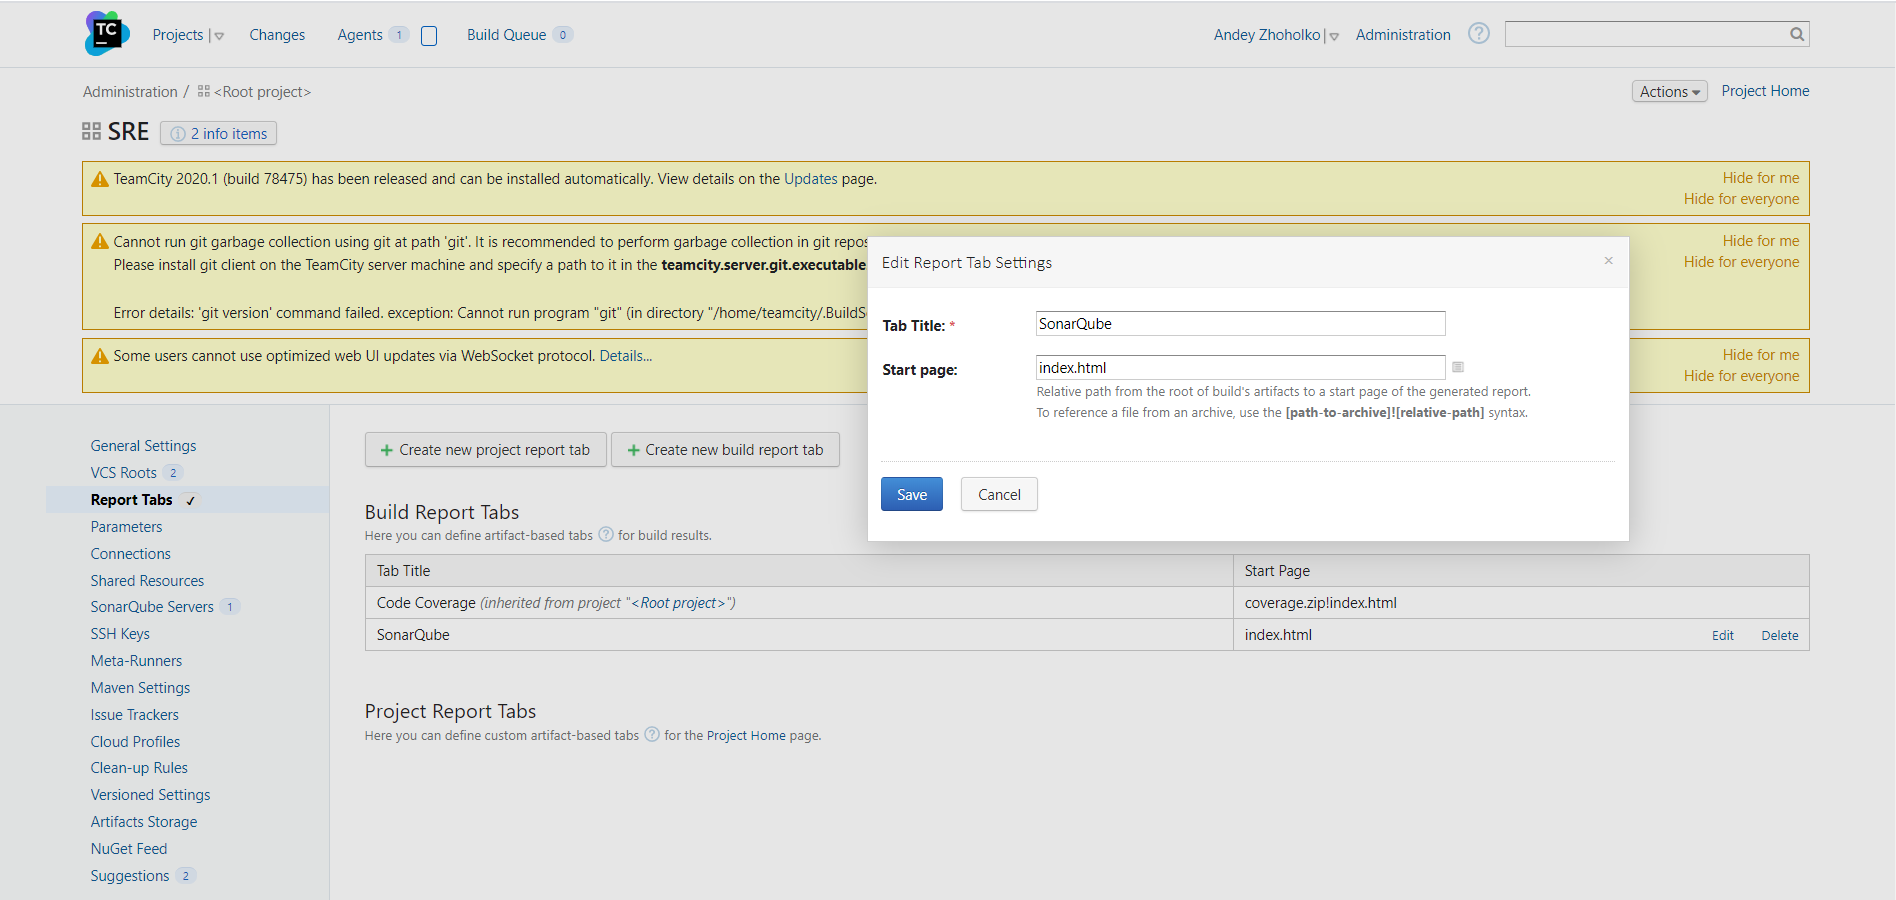
Go to your project settings → Report Tabs. Click Create new build report tab button and specify Tab Title and Start page.
Edit an existing or create a new build configuration. On the General Settings tab, add
%TargetFile%as the artifact path and skip the following VCS root setup.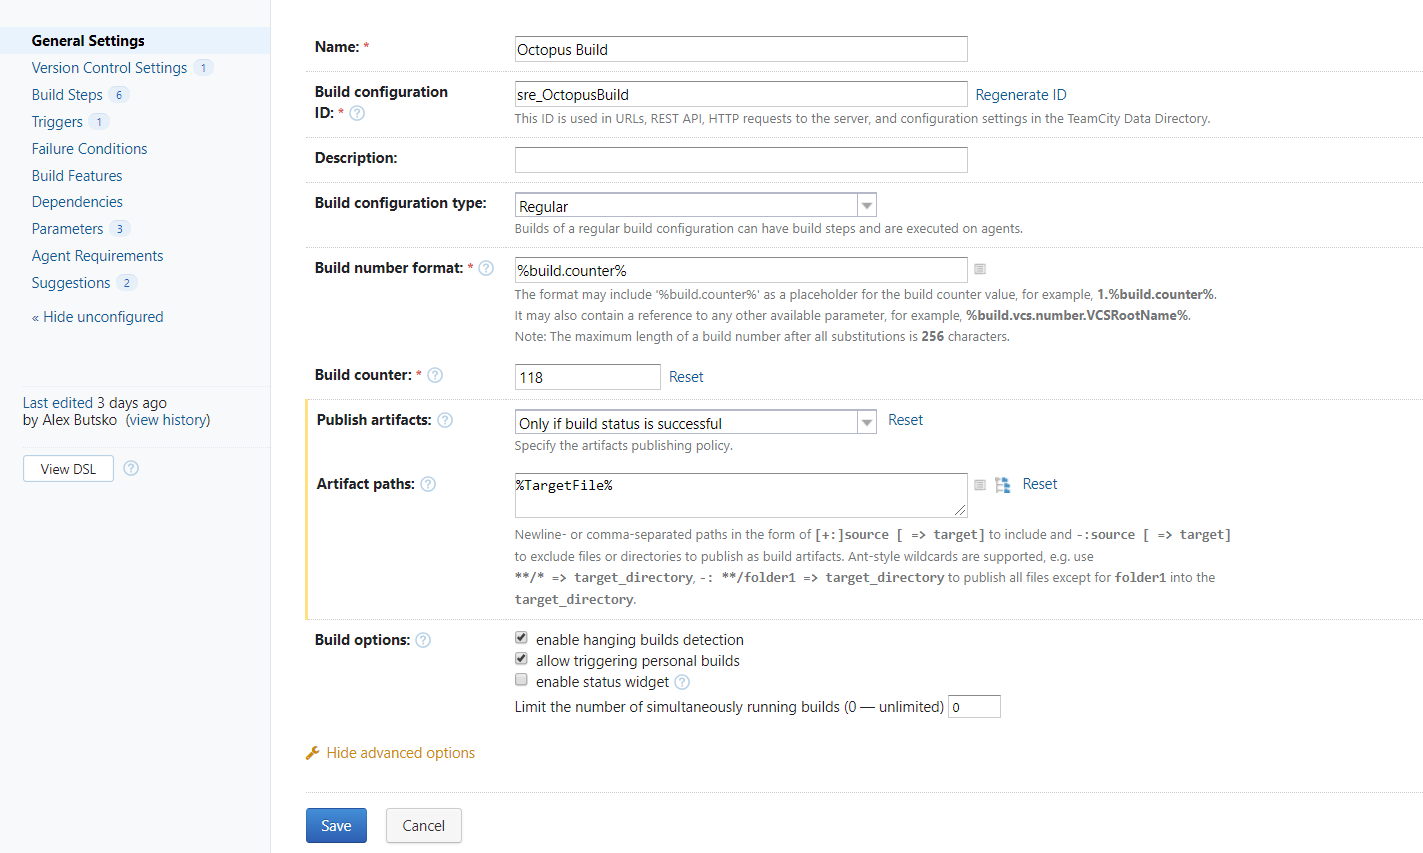
Go to Build Steps, click Add build step, and choose a command-line runner. Use the following bash snippet to redirect the TeamCity report
iframeto any page of your choice:echo '<script>location="%TargetUrl%"</script>' > %TargetFile%.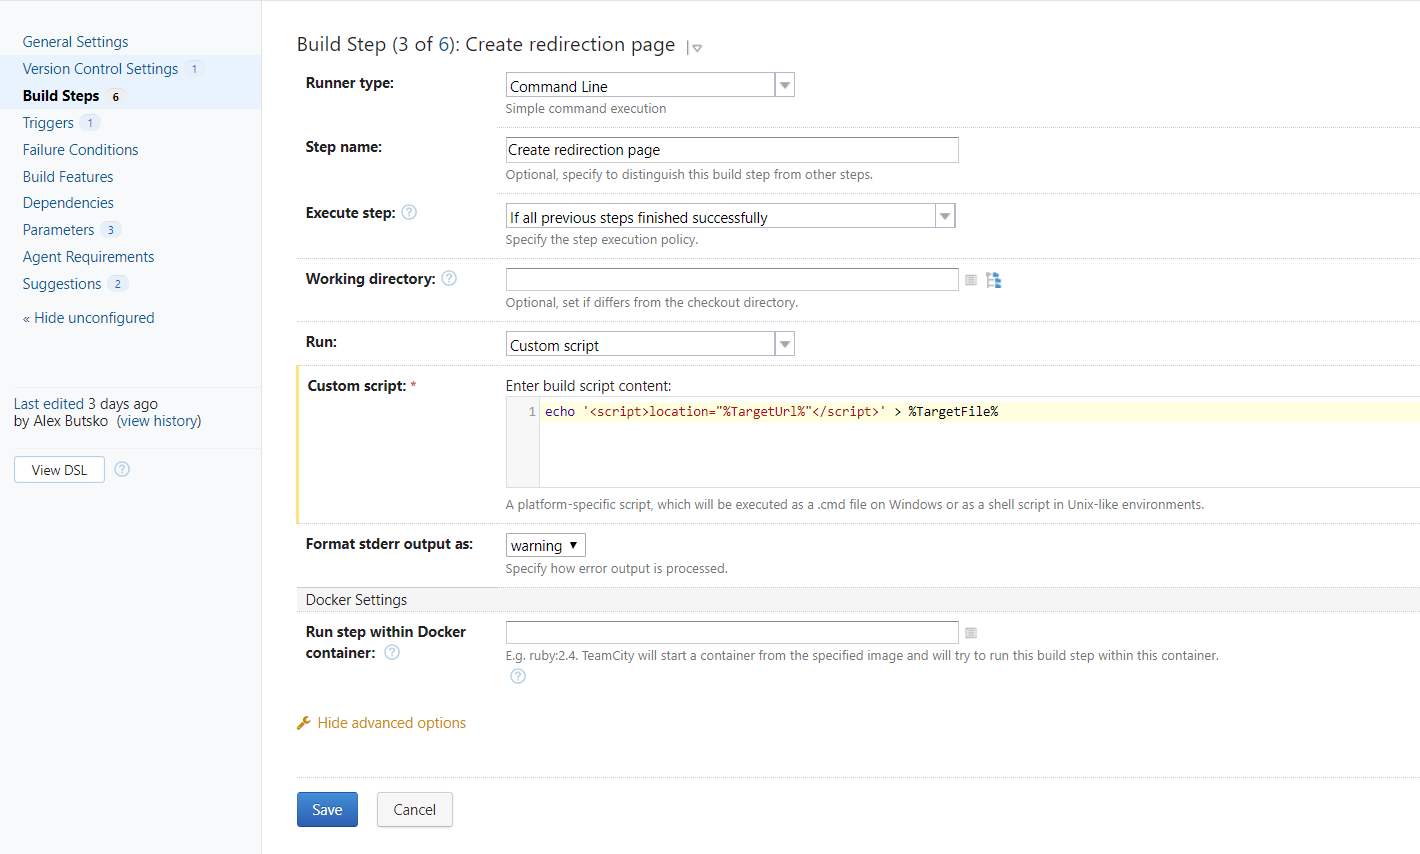
Place this action after the SonarQube step in your build steps.
Go to the Parameters tab and click Add new parameter.
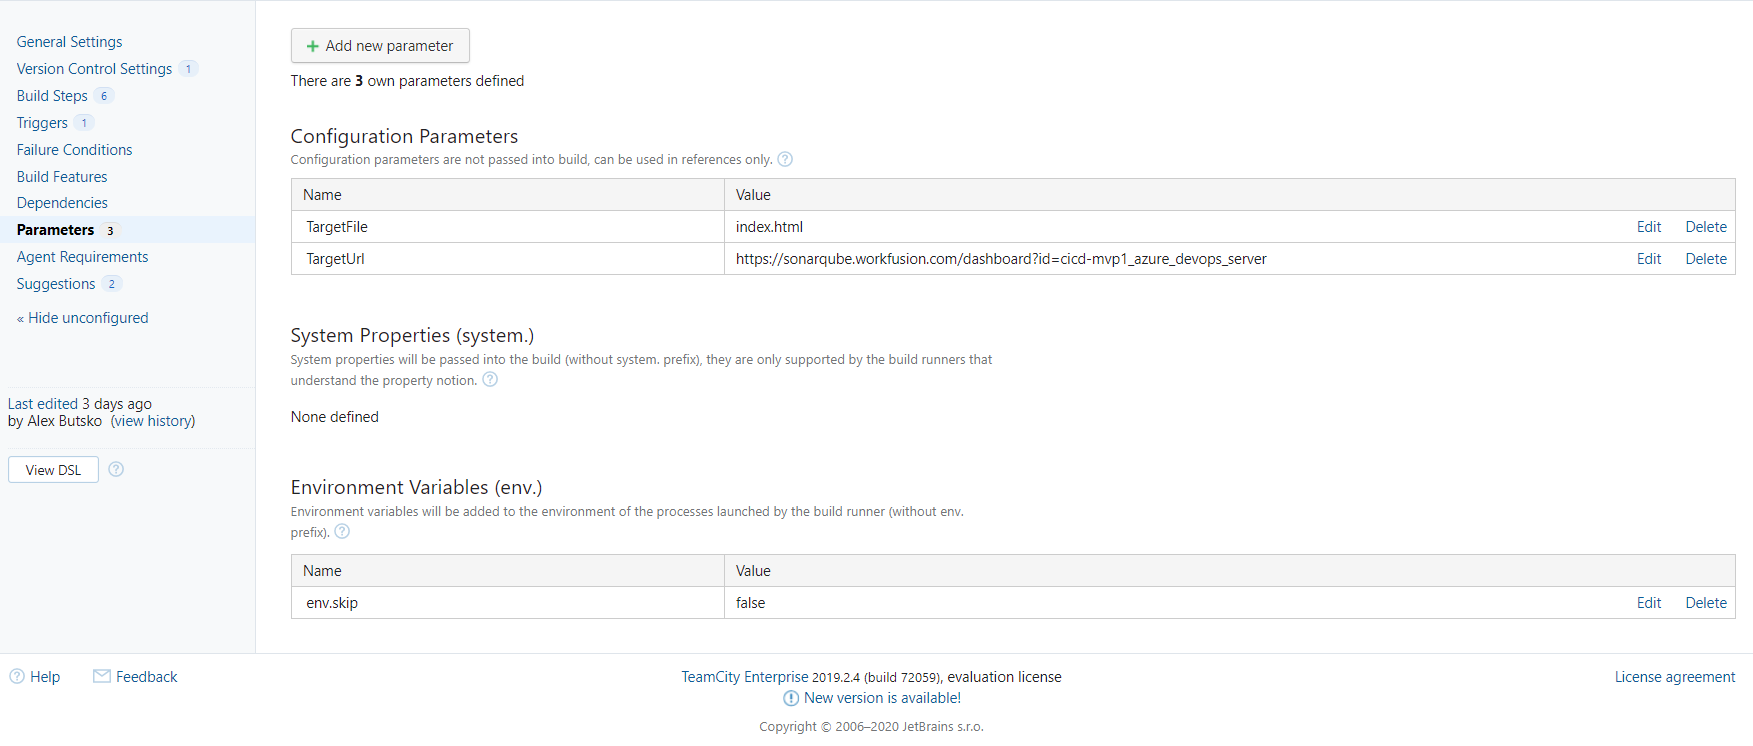
Add the TargetFile and TargetUrl parameters with the configuration shown below:
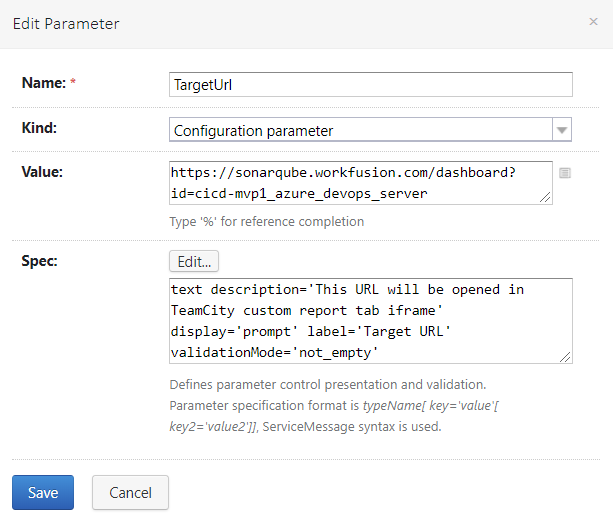
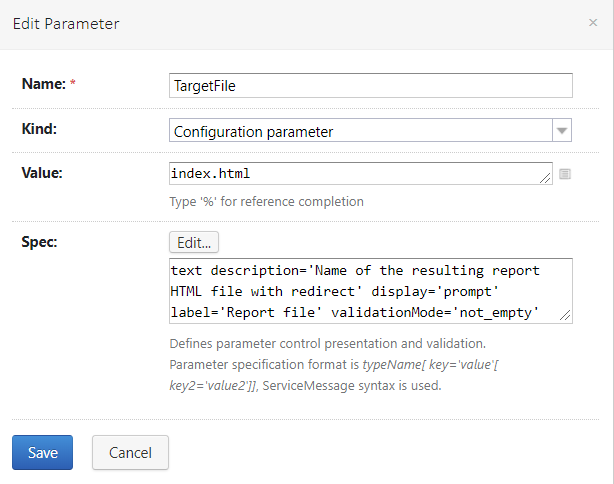
In the Value field for the TargetUrl parameter, specify the link to your project on the SonarQube server side.
To display the SonarQube WEB UI in TeamCity, reconfigure internal properties:
Go to Administration → Diagnostics → Internal properties. Click Edit internal properties and add the following line:
teamcity.web.header.Content-Security-Policy.protectedValue=frame-src 'self' https://sonarqube.example.com; frame-ancestors 'self' https://sonarqube.example.com; default-src 'self' 'unsafe-inline'; script-src 'self' 'unsafe-inline' 'unsafe-eval' https://teamcity.example.com; img-src 'self' data: blob: http://127.0.0.1:63330 http://127.0.0.1:63331 http://127.0.0.1:63332 http://127.0.0.1:63333 http://127.0.0.1:63334 http://127.0.0.1:63335 http://127.0.0.1:63336 http://127.0.0.1:63337 http://127.0.0.1:63338 http://127.0.0.1:63339; font-src 'self' data: https://teamcity.example.com https://fonts.gstatic.com;
Here,
- Replace
https://sonarqube.example.comwith the proper DNS name of your SonarQube server. - Replace
https://teamcity.example.comwith the proper DNS name of your TeamCity server.
Click Save.
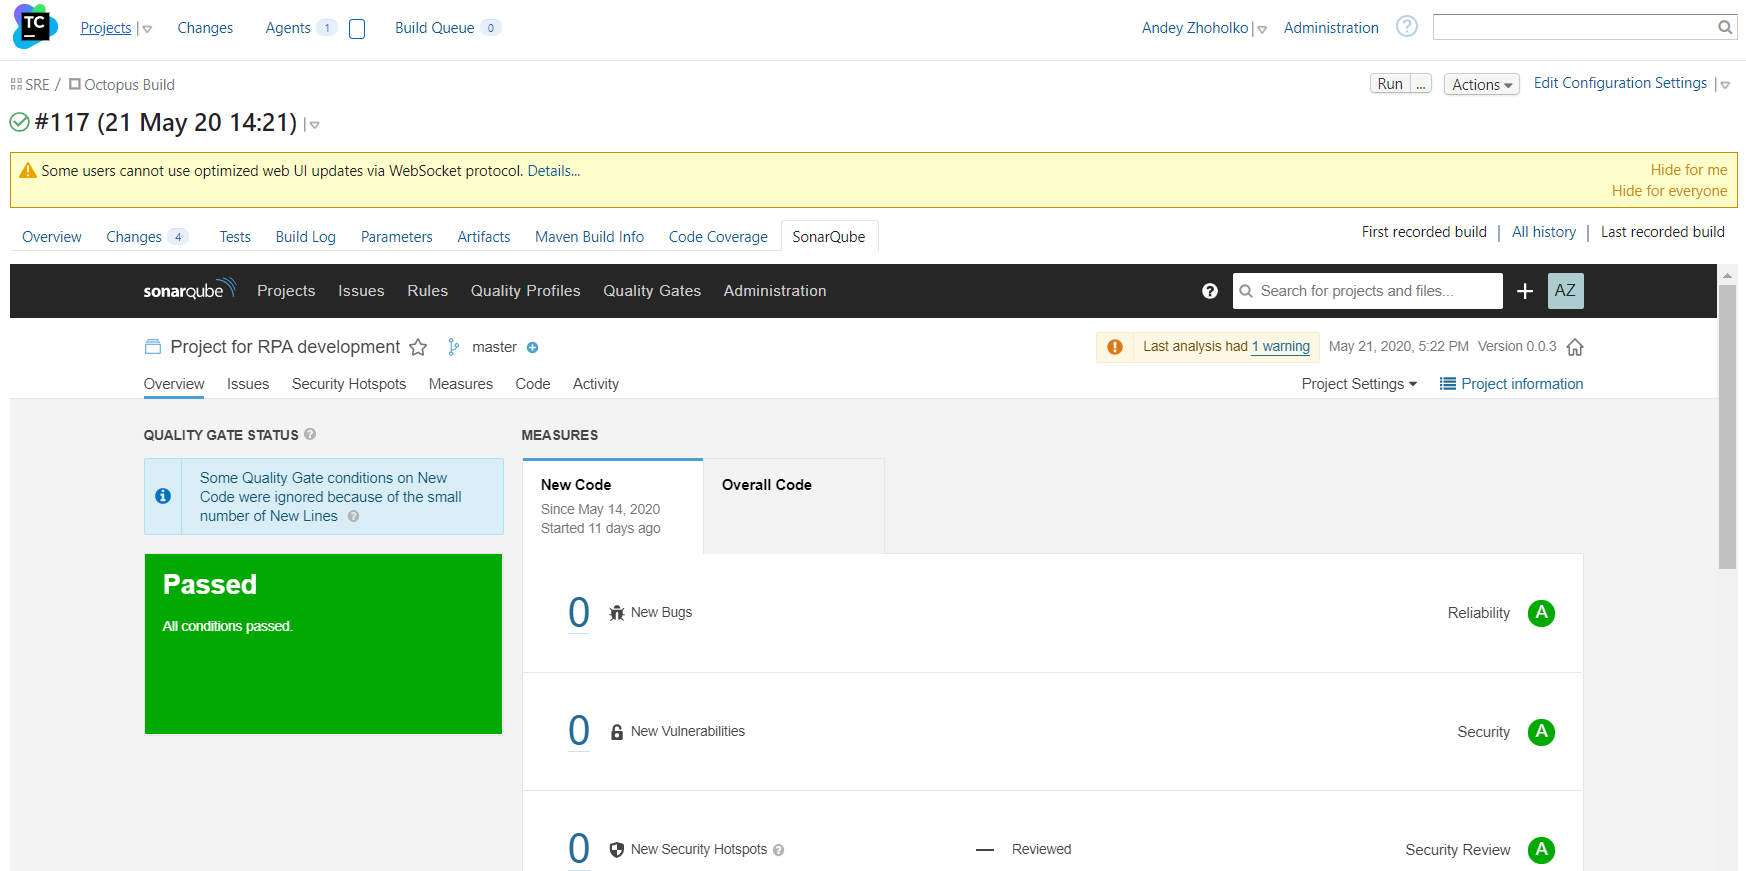
As a result, for each build, on the SonarQube tab, you can see the WEB UI for the SonarQube project: