Deploy ODF components to IA Cloud environment of other version
Although Intelligent Automation Cloud Enterprise and Intelligent Automation Cloud Developer have ODF components installed along with the environments, one may need to work with a different ODF version. Here are some scenarios of such cases.
Scenario 1
- A new ODF version compatible with the current platform version is released. This version is not automatically installed with the platform, and typically we do not release a new version of Intelligent Automation Cloud Enterprise or Intelligent Automation Cloud Developer just to update an ODF version.
Scenario 2
- Upgrade to a new minor or major platform version (for example, from 10.1.6 to 10.2.1 or from 9.2 to 10.2) and re-package a Use Case to address potential compatibility issues.
note
Within one major version, ODF and platform changes guarantee compatibility of all ODF-based code. For example, a Use Case that uses the ODF core library of the version compatible with IA Cloud Enterprise version 10.1.2 can also run on version 10.1.6 with no compatibility issues.
Deploy ODF components
Prerequisites
- Local Maven is already configured to be able to work with https://repository.workfusion.com/ according to this guide.
- You are logged in https://repository.workfusion.com/ using credentials from the guide above.
- If you want to deploy ODF components to remote Environment, you should know the credentials of a Control Tower user which has Import/Export and Advanced Package Import permissions.
Define ODF version to install
ODF related components come with a pre-packaged bundle known as ODF installation bundle or ODF install package. There are two ways to obtain an installation bundle:
- (Preferable): Open ODF releases. Find the required ODF version inside the table and download the ODF installation bundle you need.
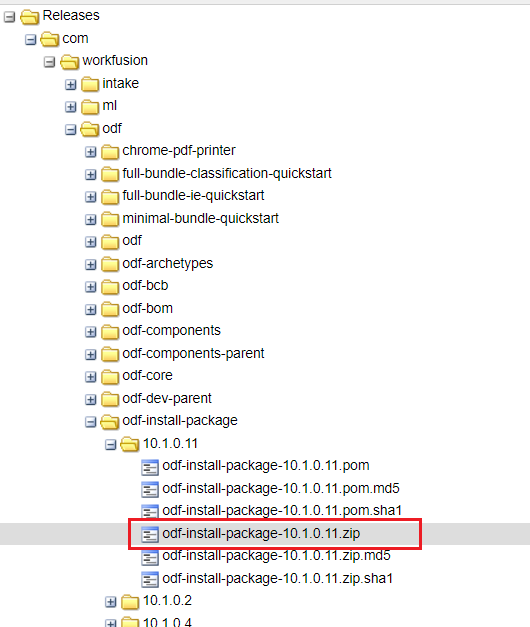
- (Additional): Go to https://repository.workfusion.com/ directly and download the
.zipfile from the Releases repository.
Configure Control Tower credentials in Maven
Configure Maven's settings.xml file (located in the C:/User/[USER_HOME]/.m2 folder). Make sure that following XML block is present or add it if necessary:
<settings>
    ...
    <servers>
        ...
        <server>
            <id>control-tower-odf-import</id>
            <username>user</username>
            <password>VeryStrongPassword</password>
        </server>
        ...
    </servers>
    ...
</settings>
If you want to deploy to multiple environments, you need to update credentials every time you are deploying to a different environment. Local Control Tower credentials can be copied from the same file.
Prepare local pom.xml
To deploy an ODF installation bundle to Control Tower, use bundle-maven-plugin, and therefore the pom.xml file is required. Download it from the sample below to a folder of your choice.
note
Here is pom.xml for 10.1.x versions.
<?xml version="1.0" encoding="UTF-8"?>
<project xmlns="http://maven.apache.org/POM/4.0.0"
         xmlns:xsi="http://www.w3.org/2001/XMLSchema-instance"
         xsi:schemaLocation="http://maven.apache.org/POM/4.0.0 http://maven.apache.org/xsd/maven-4.0.0.xsd">
    <modelVersion>4.0.0</modelVersion>

    <groupId>com.workfusion.odf</groupId>
    <artifactId>odf-package-install</artifactId>
    <version>1.0.0.0</version>
    <packaging>pom</packaging>

    <properties>
        <workfusion.environment.url>http://localhost:15280/</workfusion.environment.url>
        <bundle.to.import.path>C:\Users\Some_User\Downloads\odf-install-package-10.1.0.7.zip</bundle.to.import.path>
    </properties>

    <repositories>
        <repository>
            <id>wf-dependencies</id>
            <name>WorkFusion Nexus Repository - dependencies</name>
            <url>https://repository.workfusion.com/content/groups/dependencies/</url>
            <releases>
                <enabled>true</enabled>
                <updatePolicy>daily</updatePolicy>
            </releases>
            <snapshots>
                <enabled>true</enabled>
                <updatePolicy>always</updatePolicy>
            </snapshots>
        </repository>
    </repositories>

    <pluginRepositories>
        <pluginRepository>
            <id>wf-dependencies</id>
            <url>https://repository.workfusion.com/content/groups/dependencies/</url>
        </pluginRepository>
    </pluginRepositories>

    <build>
        <plugins>
            <plugin>
                <groupId>com.workfusion.odf</groupId>
                <artifactId>bundle-maven-plugin</artifactId>
                <version>10.1.0.4</version>
                <configuration>
                    <server>
                        <id>control-tower-odf-import</id>
                        <url>${workfusion.environment.url}</url>
                    </server>
                    <bundle>${bundle.to.import.path}</bundle>
                </configuration>
            </plugin>
        </plugins>
    </build>

</project>
Here, you can find two properties that require your attention. Make sure these properties are filled with suitable values:
workfusion.environment.url- the target Control Tower instance to deploy an ODF installation bundlebundle.to.import.path- the path to an ODF installation bundle that is going to be deployed
Also, ensure that settings.xml is updated with the valid Control Tower credentials as described in this guide.
Deploy ODF installation bundle
If everything is set up correctly, run the following command from the folder in which pom.xml is stored.
mvn bundle:import
Also, you can specify Control Tower and a bundle path from the command line if needed.
mvn bundle:import -Dworkfusion.environment.url=http://localhost:15280 -Dbundle.to.import.path=C:\Users\Some_User\Downloads\odf-install-package-10.1.0.7.zip
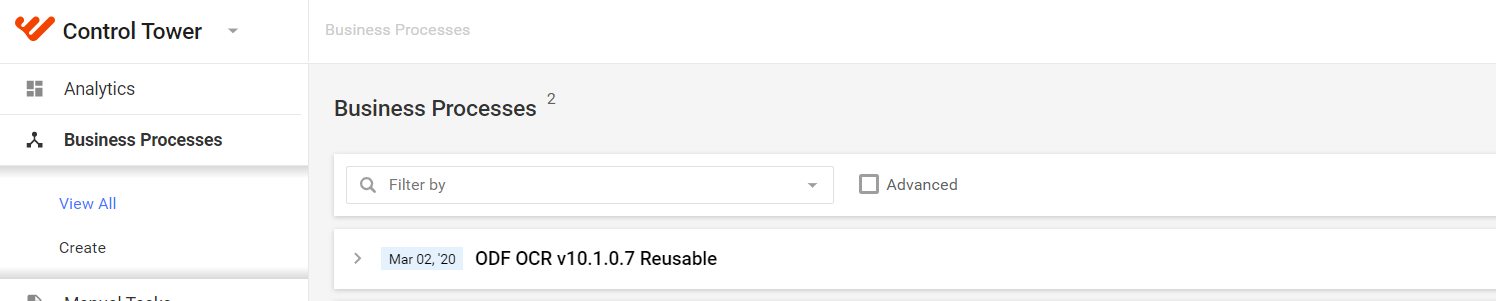
After the process is finished with the BUILD SUCCESS message, you can open Control Tower and observe that an ODF business process is created and all the related ODF components are available.