Launch sensitivity analysis and get model explanations via CT UI
This guide describes how to run a model with pre-configured sensitivity analysis and get model explanations via the Control Tower (CT) user interface.
The general flow is as follows:
Configure sensitivity analysis inside your model.
Upload the model and artifact to CT.
Prepare a custom Cognitive Bot Workflow.
Launch the model with configured sensitivity analysis and explanations.
Get the results for the model's sensitivity analysis and explanations.
Avoid using the sensitivity and explainability functionality in production. Feature importance explanations are delivered for each document individually. So, it increases the processing time by 50% or higher. Besides, it works only during execution.
The sensitivity analysis takes about 30 trainings per model, depending on the model configuration. Besides, it works only during training.
Configure sensitivity analysis
By default, OOTB models have their sensitivity analysis pre-configured. However, if you want to customize the analysis or implement it for a custom model, follow the Configure sensitivity analysis guide.
The step is optional—only if you need feature importance explanations. Skip the step if you already have a configured model or you don't want to run the sensitivity analysis.
Upload model or artifact to CT
To upload the model to CT, pack it into an Asset Bundle and proceed as described in Manage models | Import.
Prepare custom Cognitive Bot Workflow
When you create an Automation Manual Task, it generates automatically a Business Process (BP) with default steps. Should you change any of the default steps, the changes are extended to any other BPs created from an Automation Manual Task.
To prevent overriding the settings in all such tasks, create a Cognitive Bot Workflow with an independent copy of the Work router and Execute AutoML Model: Bridge steps.
To accomplish this, follow the instruction below:
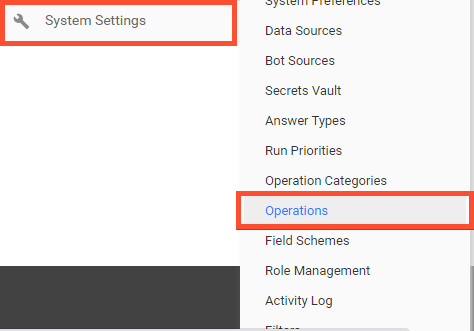
Go to System settings > Operations.
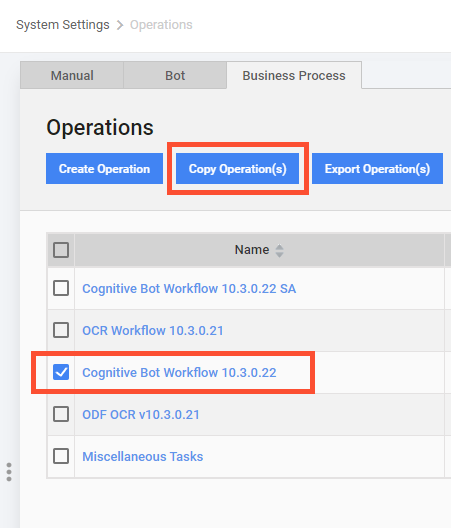
Make a copy of the default Cognitive Bot Workflow for automation.
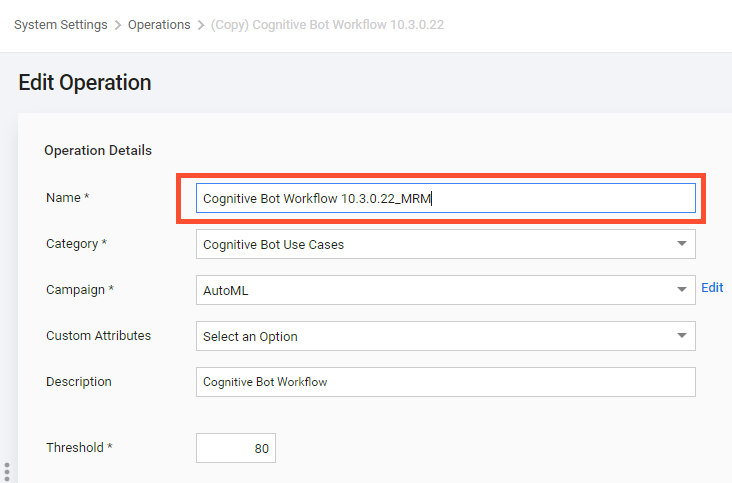
Set a new name for the copied Cognitive Bot Workflow.
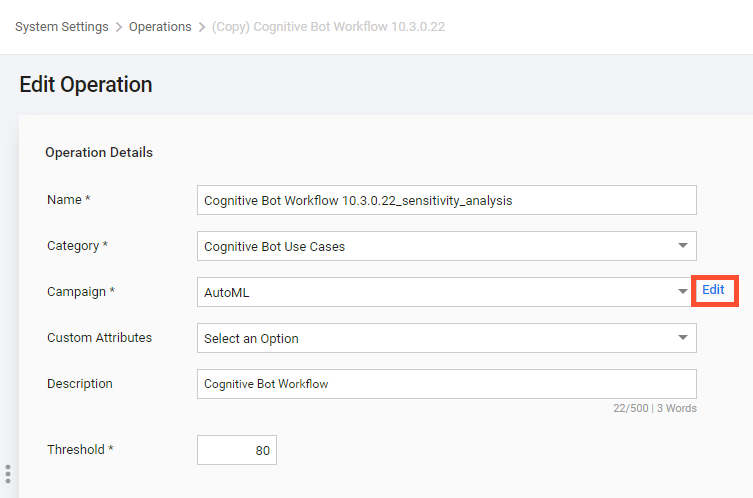
Click Edit next to Campaign to proceed to BP editing.
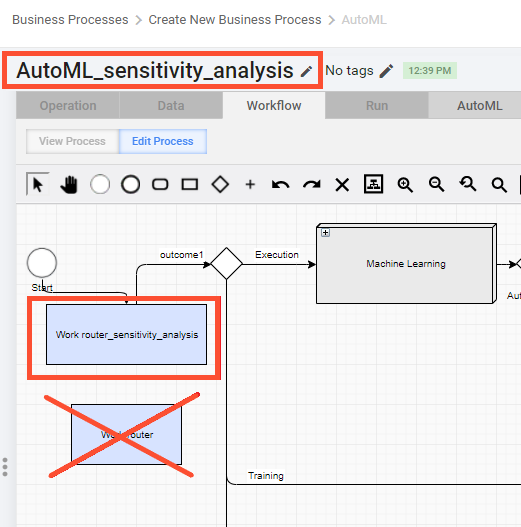
Change the BP name and replace the Work router step with a copy.
Configure the sensitivity analysis settings.
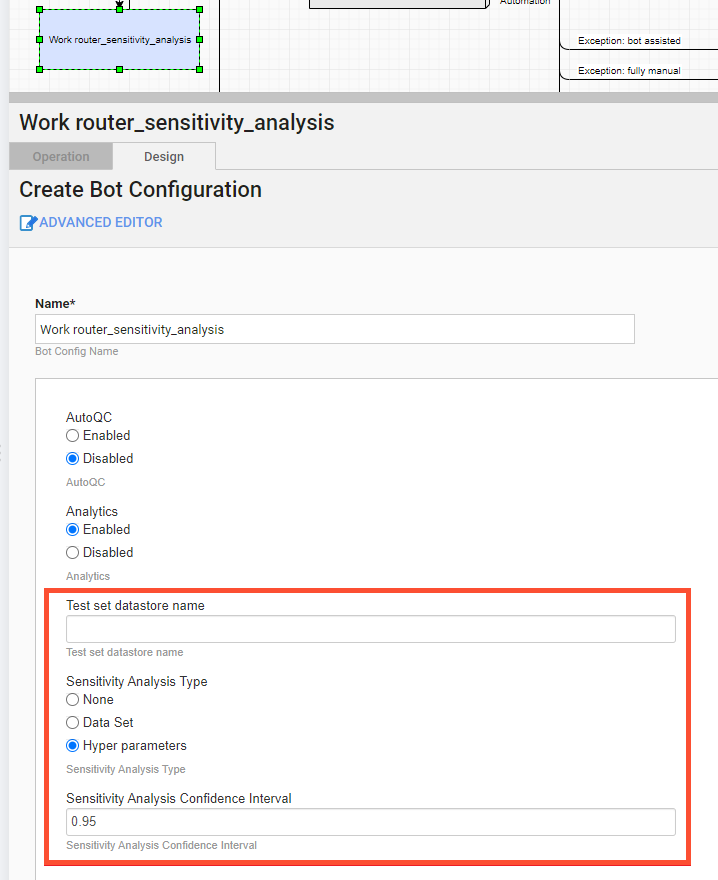
For a better understanding of the configuration parameters, refer to Configure sensitivity analysis.
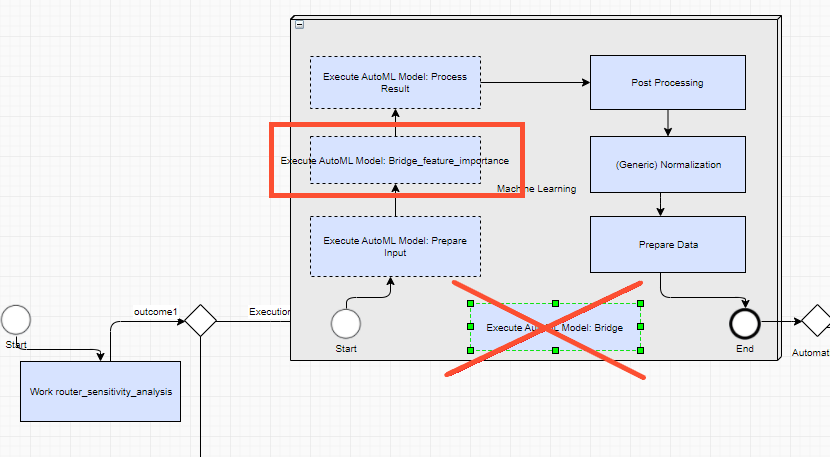
Inside the Machine Learning sub-BP, replace the Execute AutoML Model: Bridge step.
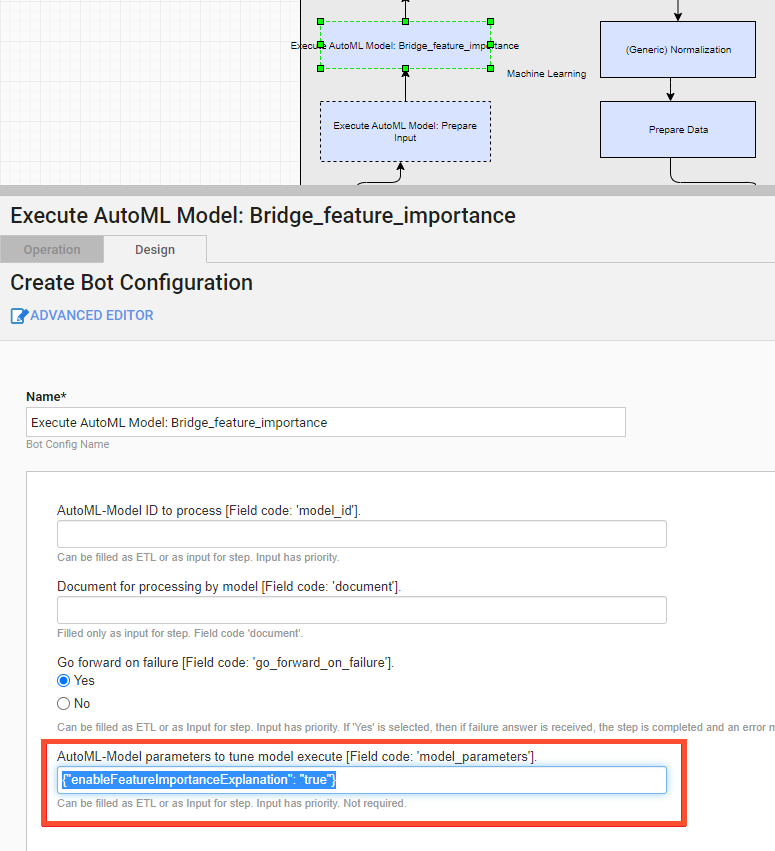
Set the parameter to enable feature explanations.
Save the BP.
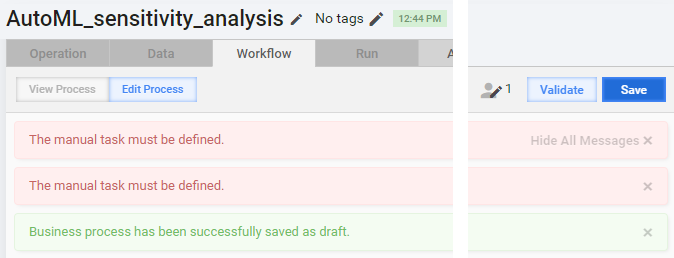
In case you get such error messages as in the figure below when you start saving the BP, ignore them. It is typical behavior.
After you are done with the steps above, you can see the resulting BP name in your Cognitive Bot Workflow configuration.
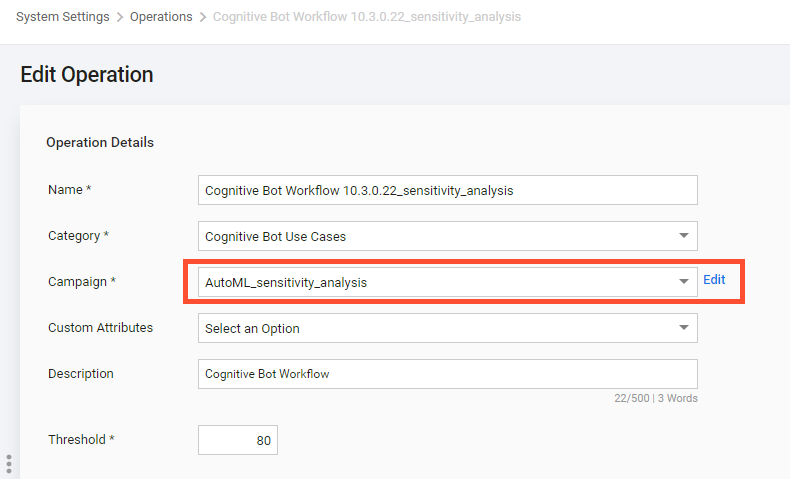
If the BP name is not displayed in your Cognitive Bot Workflow configuration, try reopening it.
Launch model
To create a Business Process for training or execution on CT, follow the Create Automation Manual Task guide.
Note that the sensitivity analysis works for training only, whereas feature importance explanation—for execution only.
Get results
Check sensitivity analysis results
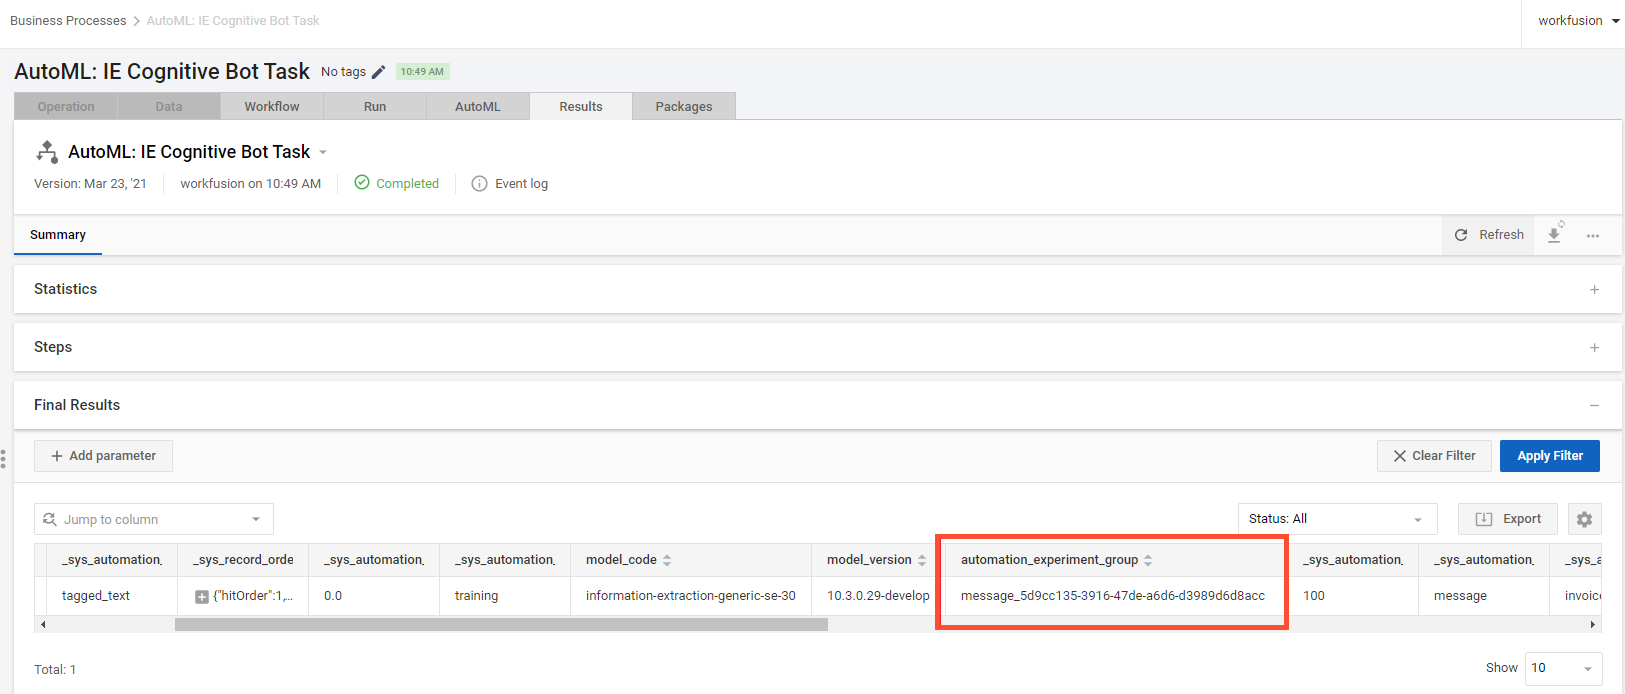
After the model training is finished, you can find the sensitivity analysis result in the model output on S3. For model ids, view the automation_experiment_group column in the BP results as shown below.
For better understanding of the output, read Configure sensitivity analysis | Run and check results.
Check feature importance explanation results
To view feature importance explanations after the model execution is finished, go to the Results tab of the BP and view the model_results column.
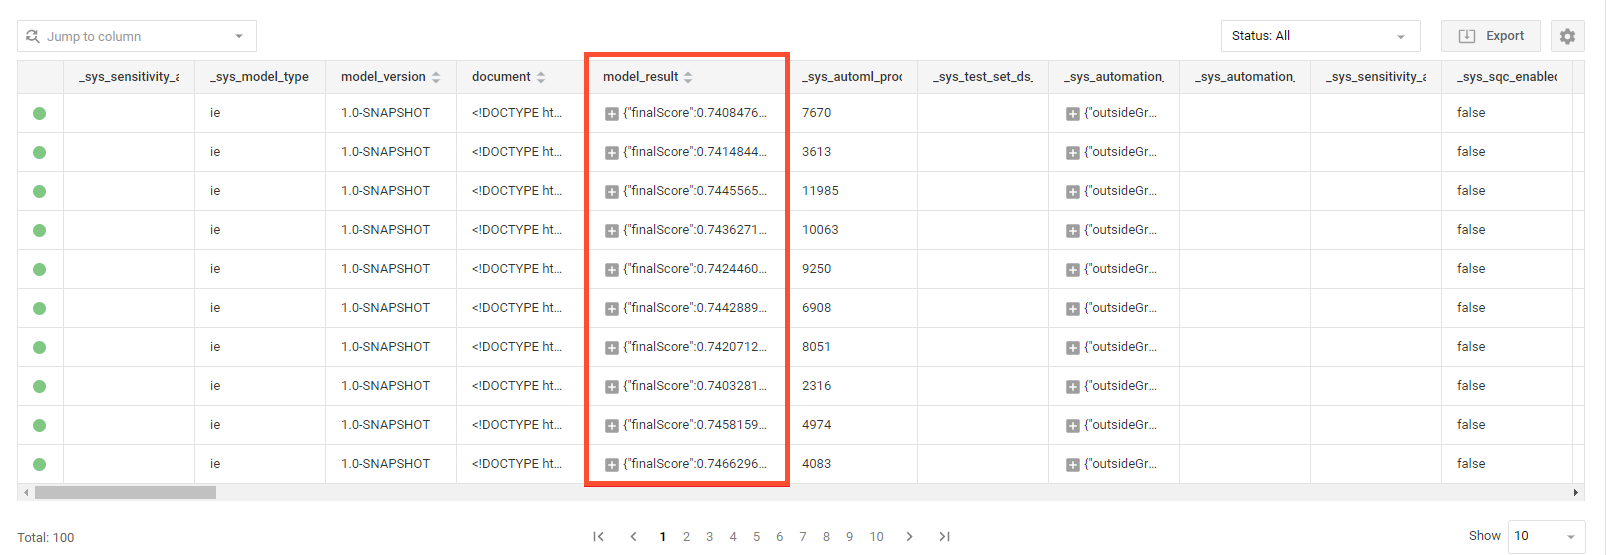
The available explanations are based on Liblinear and LIME.
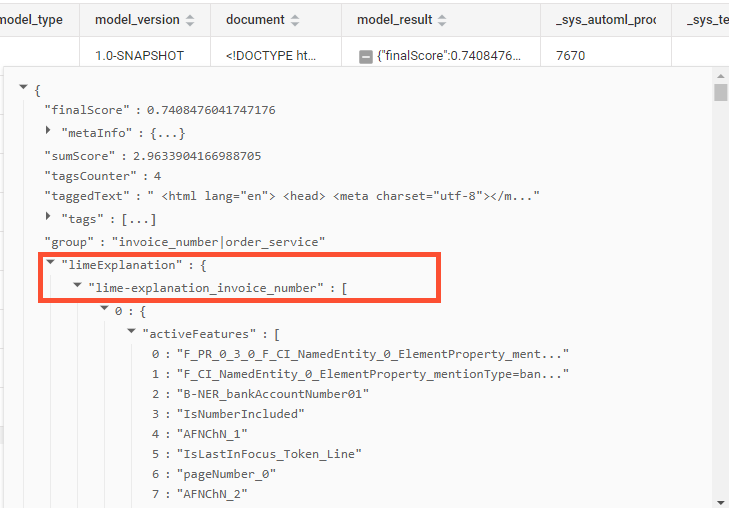
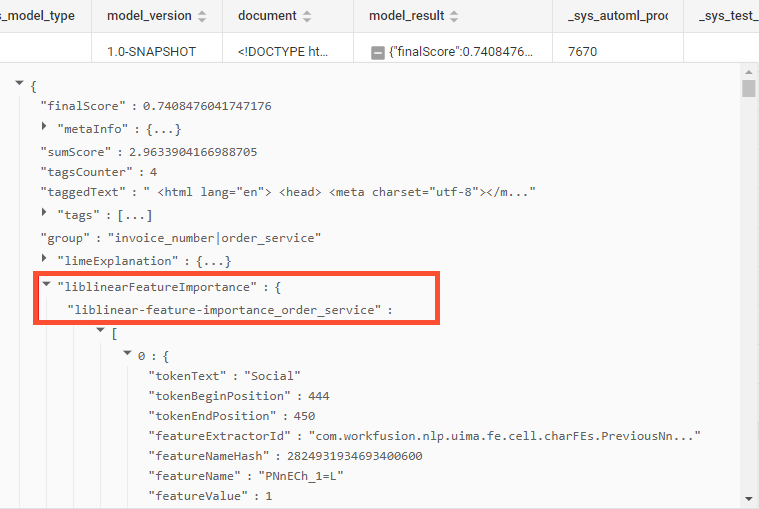
For details, refer to Get model explanations | Results for execution.
Explore local vs cluster execution
For a cluster execution, the logic of the sensitivity analysis and model explanations is the same as for a local run. In a BP, you adjust the training and execution parameters sent to the same parameters of a runner on a cluster.
The main difference is between local and cluster feature importance explanations:
For local feature importance explanations, all results are written to a directory.
For a cluster execution, all results are written to document attributes. Therefore, it is impossible to view the output on the CT side.