Deploy custom Tableau-based dashboards
This instruction explains how to publish custom legacy Tableau-based dashboards to WorkFusion Analytics Server (Tableau Server starting from version 2018.3.2).
Observe naming convention
To make dashboards available in Control Tower, name them according to the pattern: en_Category+Names_WorkbookName_custom.
For instance, a custom dashboard name can look like this:

In the example above:
en_ is the language prefix to support a specific dashboard localization.
Five localizations are available with the following prefixes:
en_: English
es_: Spanish
ja_: Japanese
de_: German
fr_: French
_custom is the postfix for adding custom dashboards to Control Tower.
WorkbookName is the unique name of your file.
If a category name consists of several words, put a plus (+) sign between them.
To designate another nesting level, put a preceding underscore sign, such as between Know+Your+Customer and Client+Outreach in the example above.
The dashboard name in Control Tower depends on the dashboard name in the Workbook file. In the example above, it is Overview.

Deploy dashboard from WorkFusion Analytics Desktop
The approach is recommended when you want to publish a workbook file to the WorkFusion Analytics Server for the first time. If you already have workbook files on the Server, you can run the publish script directly from it using a remote connection.
To deploy a custom dashboard from WorkFusion Analytics Desktop, follow the instruction below:
Connect to the Analytics server, open the main menu, select Server > Sign In, and specify the server name.
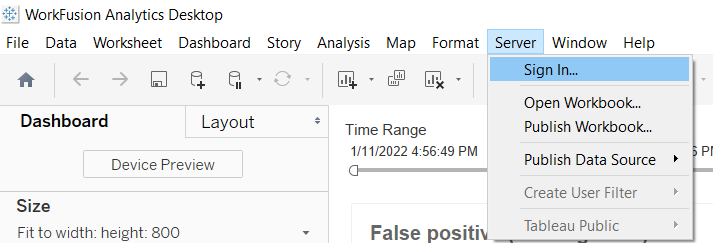
To start the deployment, navigate to Server > Publish Workbook. In the drop-down menu, select your site.

Specify the dashboard name according to the naming convention. The project name must be the same as that of your instance plus a postfix defining the workbook file language. For example, if the instance is account-workfusion-lb1.workfusion.com and its language is English, the project name must be account-workfusion-lb1_en.
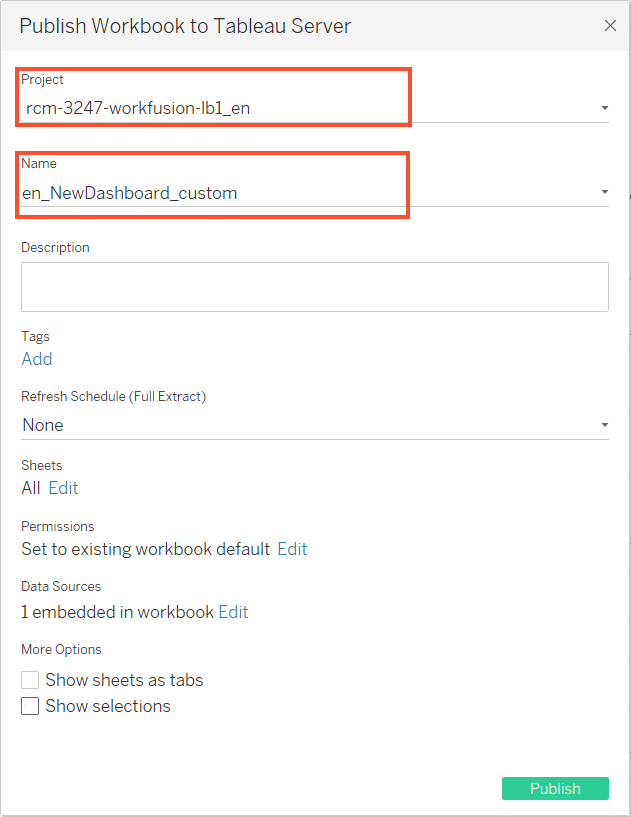
If there is only one custom dashboard, go to the More Options section and clear the Show sheets as tabs checkbox. If you keep the selection, several custom dashboards are displayed on separate iframes (embedded frames).
In the Refresh Schedule section, select a scheduler if needed.
In the Data Sources section, confirm using an embedded password to let users see the dashboard without entering the WorkFusion Analytics Server password.
An embedded password is when the credentials you use to connect to data are saved with the connection and used by everyone who accesses the data source or workbook you publish.
Click Publish. A confirmation dialog with a preview appears.
Check availability in Control Tower
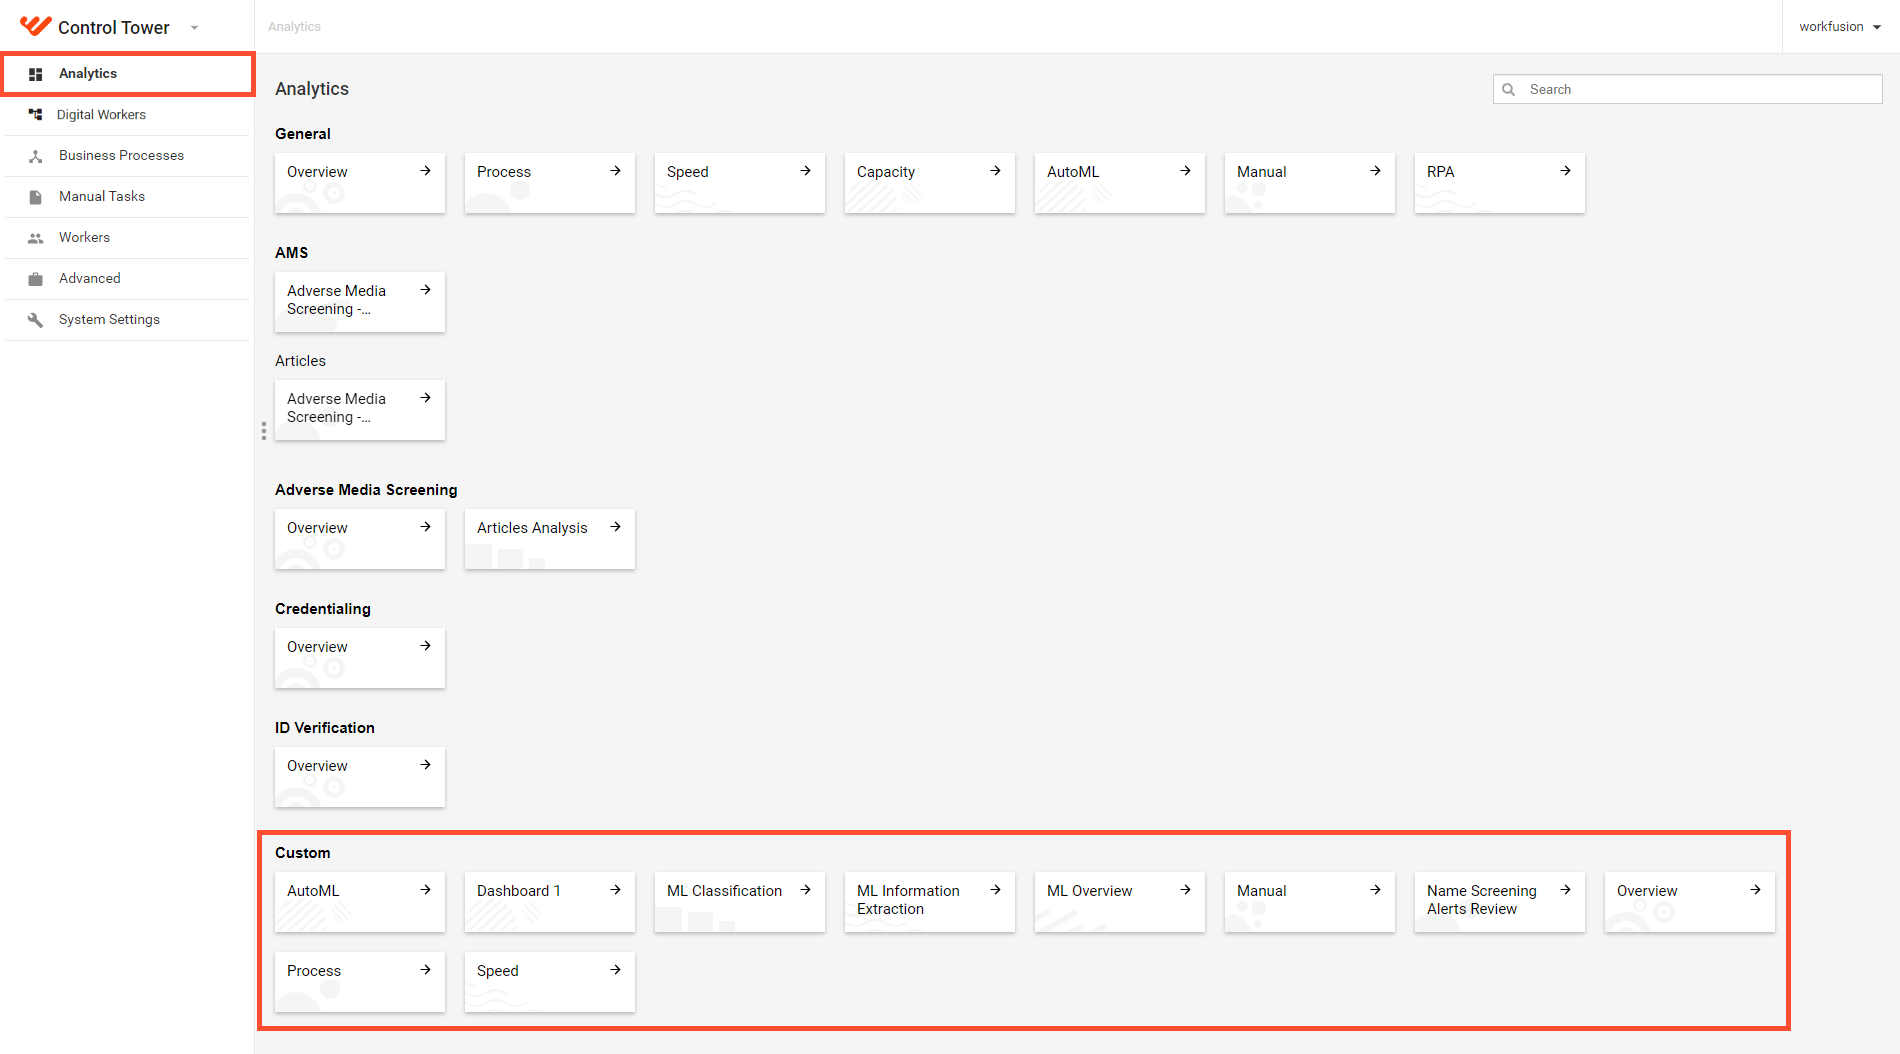
To check the publishing results, go to Control Tower. On the CT main menu, select Analytics > Custom and make sure your custom dashboards are available there.
Manage deployed dashboards
To manage deployed dashboards, sign in to the web Admin module of the WorkFusion Analytics Server with the same credentials as for WorkFusion Analytics Desktop.
Here, you can download, update, delete workbooks and change related permissions.
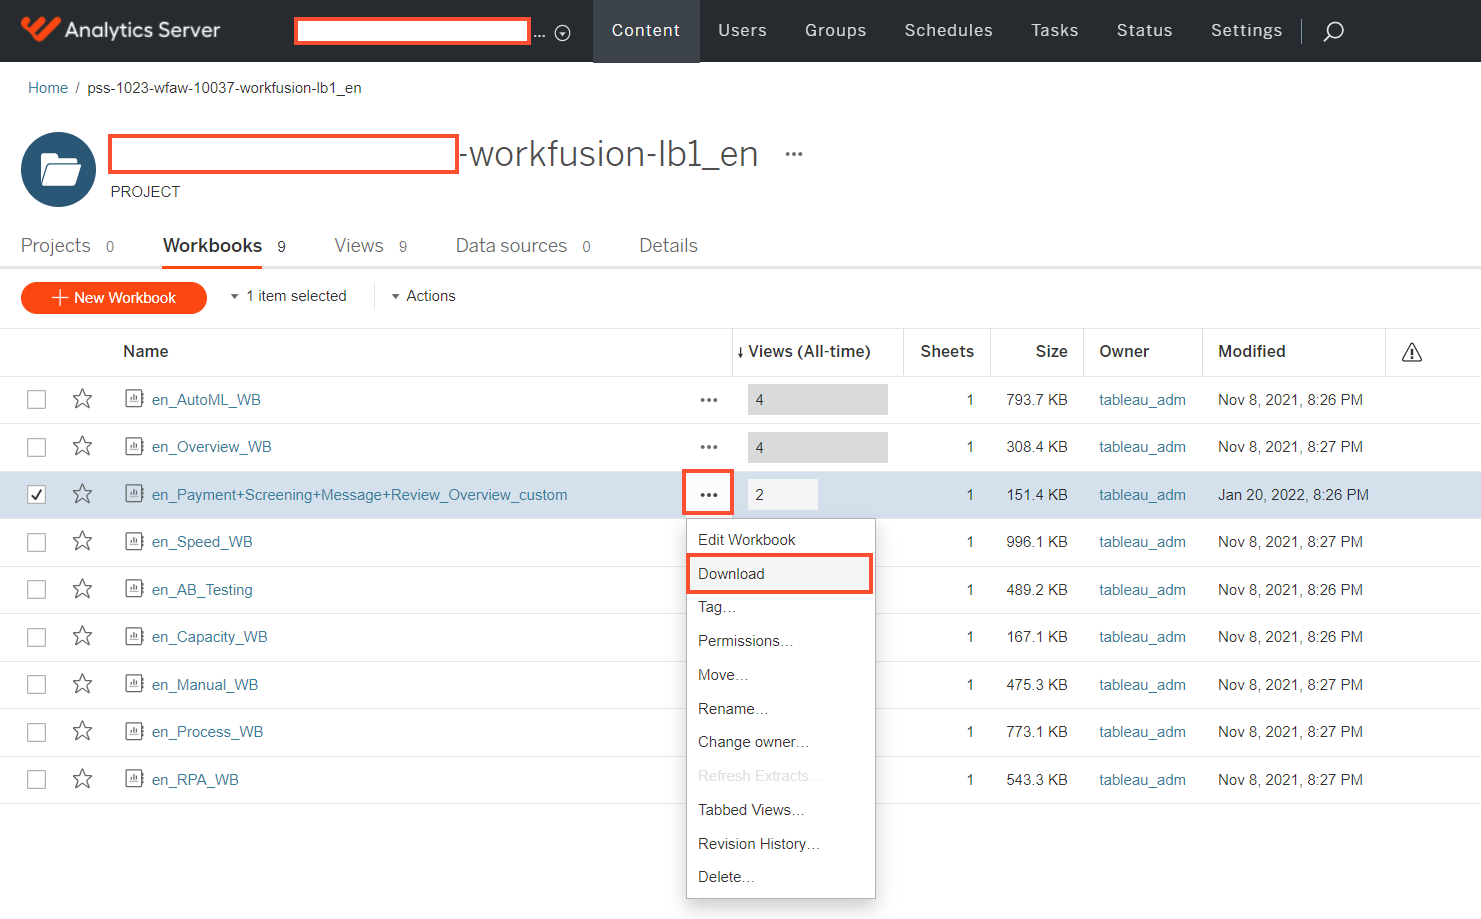
Download files
To download the workbook and connection files from WorkFusion Analytics Server, act as shown in the figure below:
Deploy existing dashboard from WorkFusion Analytics Server
Once you finish testing custom dashboards, you can publish them to UAT and Production without a desktop application:
Log in to WorkFusion Analytics Server via Remove Desktop Connection.
Put your workbook files to the following folders:
C:\workfusion\tdeploy_home\deploy\to_deploy\site_name\dashboardC:\workfusion\tdeploy_home\deploy\to_deploy\site_name\datasource
The
site_namevalue must be identical to the name of the Control Tower instance. For example, if the Control Tower instance is account-workfusion-lb1.workfusion.com, thesite_namemust beaccount-workfusion-lb1.
To publish the copied files to the exact
site_name, runpublish.cmdon WorkFusion Analytics Server as Administrator.c:
cd install_folder\tdeploy_home\deploy
publish.cmd site_name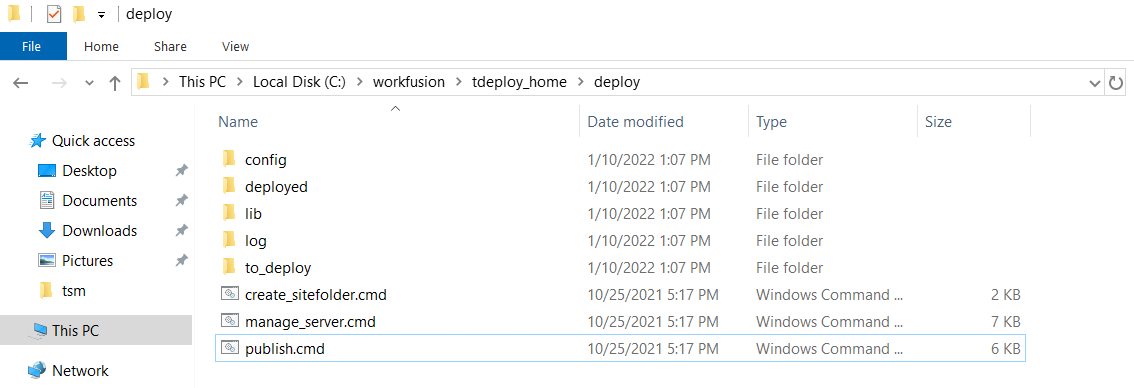
Make sure to specify the exact folder where Analytics Server is installed. The default location is
C:\workfusion, but it can be located on another path.
The above deployment script moves published files to the following folders respectively:
\deploy\deployed\site_name\dashboard\deploy\deployed\site_name\datasource
For every site, a log file is created in \deploy\log.