Create custom AI Agent
The quick-start guide describes how to use the existing Work.AI no-code functionality to create a custom AI Agent containing a simple one-step Business Process (BP).
The guide is only applicable starting from Work.AI v10.2.9.
Start from base bundle
A base AI Agent bundle is pre-installed in your environment.
In a v10.2.9 environment, log into Control Tower and go to the Digital Workers page.

In a v10.3 environment, log into Control Tower and go to the AI Agents page.

To start building a custom AI Agent, create a variation of the pre-installed base bundle.
Do not delete or alter the pre-installed base bundle! Otherwise, your custom AI Agents, imported or created as variations from the base bundle, will not work.
Create variation
To create a variation of the base AI Agent bundle, follow the instructions below, depending on the Work.AI version you are using.
- v10.2.9
- v10.3
On the Digital Workers page, click the name of the installed base AI Agent bundle. Typically, its name is NoCode Worker.

On the AI Agent details page, open the Actions menu and choose Create new variation.

A new variation is created and added to the list of the base bundle variations on the Digital Workers page, while you are redirected to the details page of the new variation.

On the details page of the new variation, click the Actions menu and select Rename.
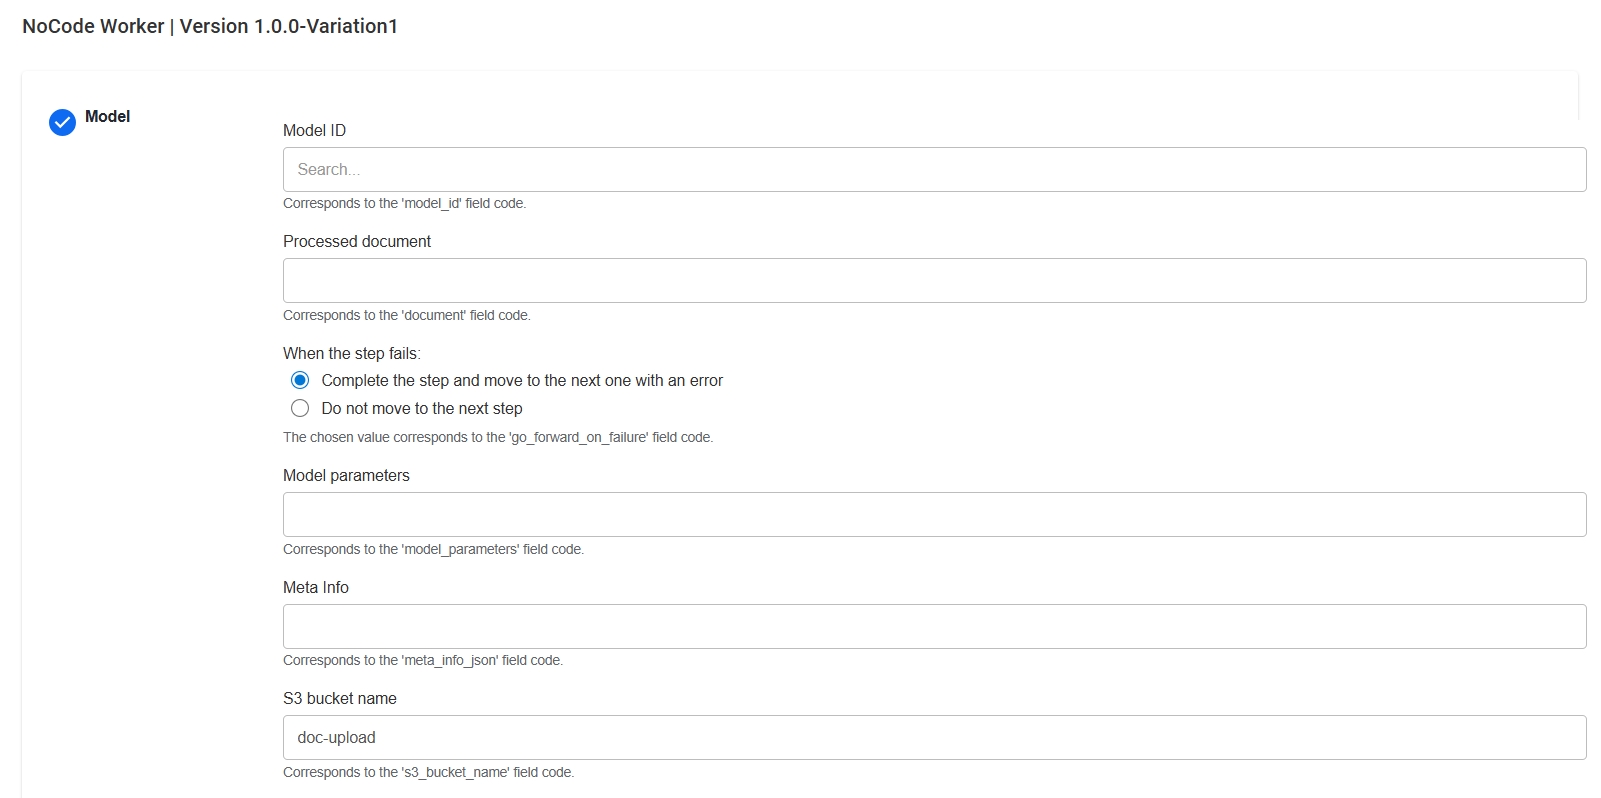
In the Rename dialog, type in a new variation name and click Submit. The display name of the variation changes accordingly.
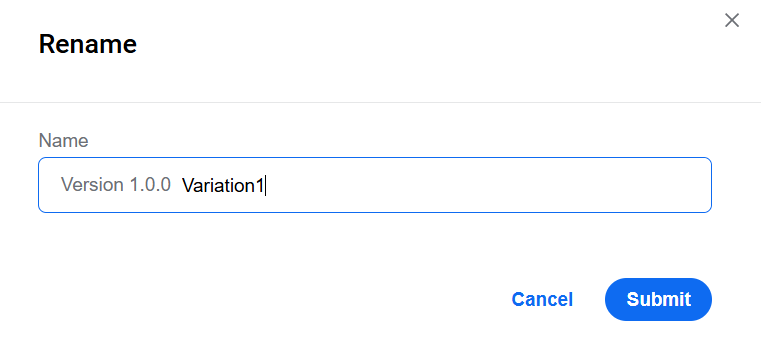
On the AI Agents page, click the name of the installed base AI Agent bundle. Typically, its name is NoCode Worker.

On the AI Agent details page, open the Actions menu and choose Create new variation.

A new variation is created and added to the list of the base bundle variations on the AI Agents page, while you are redirected to the details page of the new variation.
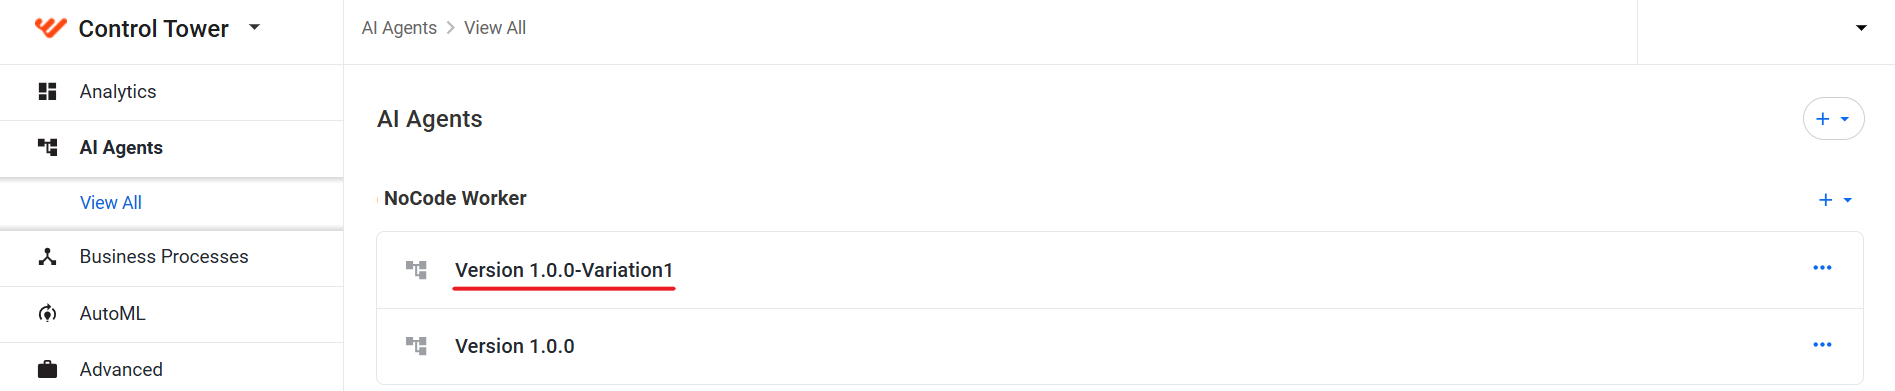
On the variation's details page, click the AI Agent version menu and select Rename.

In the Rename dialog, type in a new variation name and click Submit. The display name of the variation changes accordingly.
Add Business Process
Just as the base bundle, the created variation of the custom AI Agent contains no configuration and no Business Process. You need to set up those as required for your purposes.
In the example below, a simple one-step BP is created for working on information extraction tasks. Follow the instructions, depending on the Work.AI version you are using.
- v10.2.9
- v10.3
On the details page of the new variation, click Add Business Process.
 tip
tipTo open the details page from the Digital Workers list, click the name of the new variation.
On the Operation tab, choose Other > Miscellaneous Tasks and click Select This Operation.
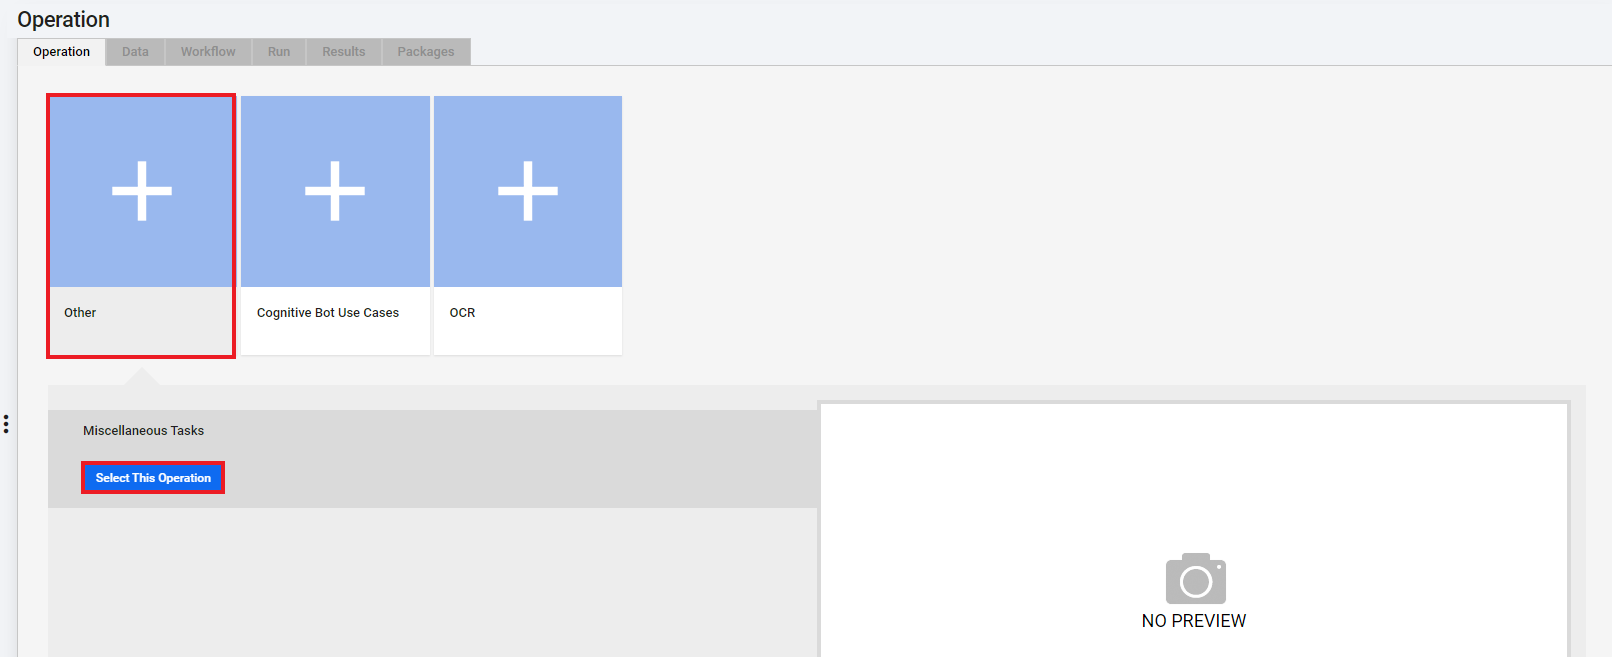
Navigate to the Workflow tab and add a custom name to the Business Process. To do that, click the pencil icon and type in a unique name that can help you to easily identify the BP among others.
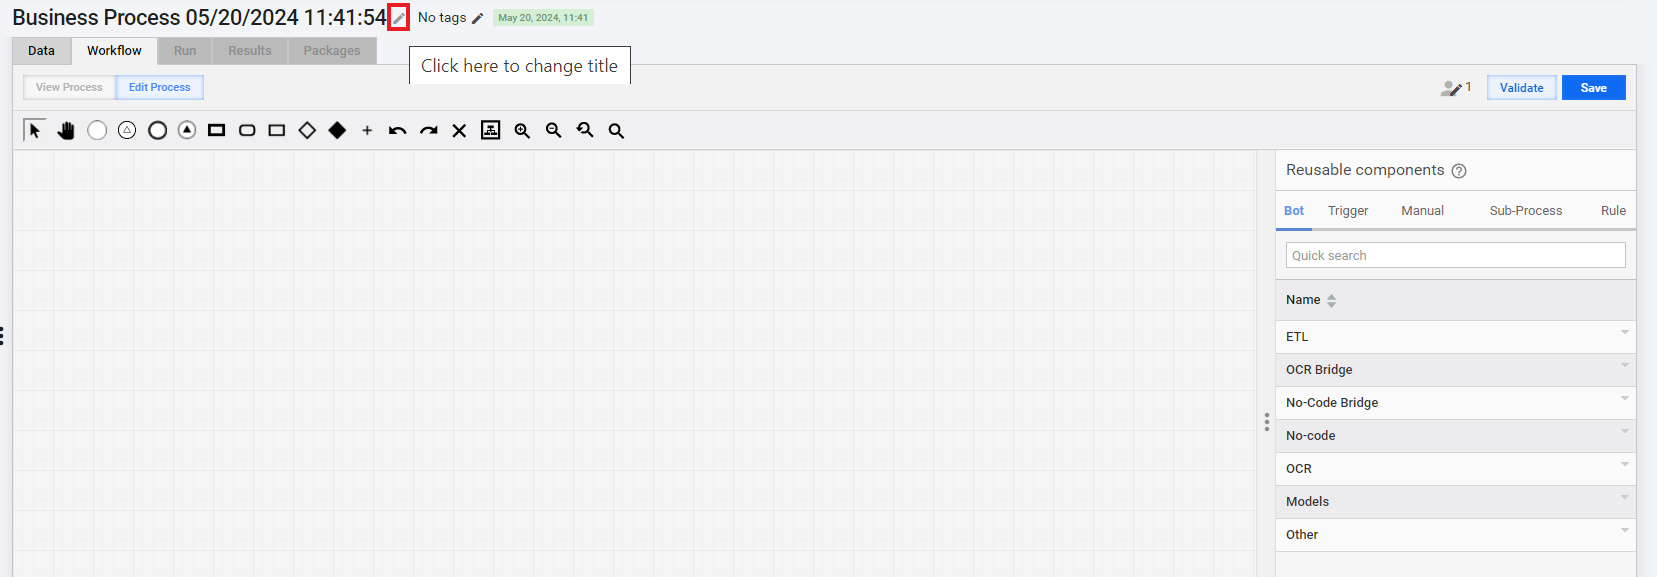
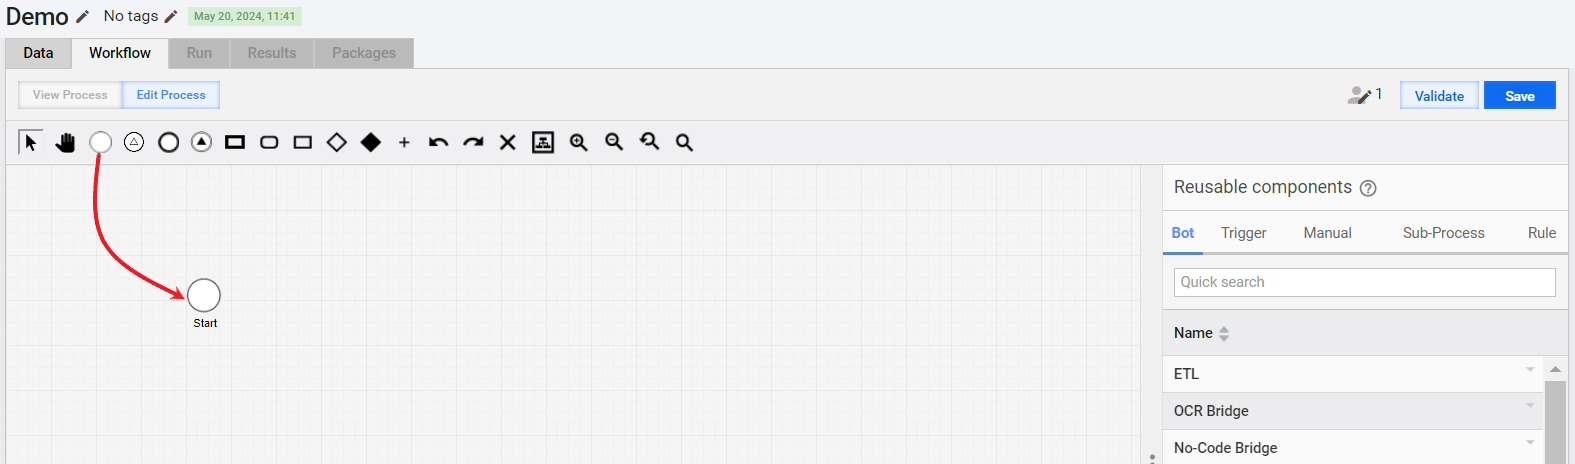
On the Workflow Designer canvas, start building the automation flow:
Drag the Start element from the toolbar to the canvas.
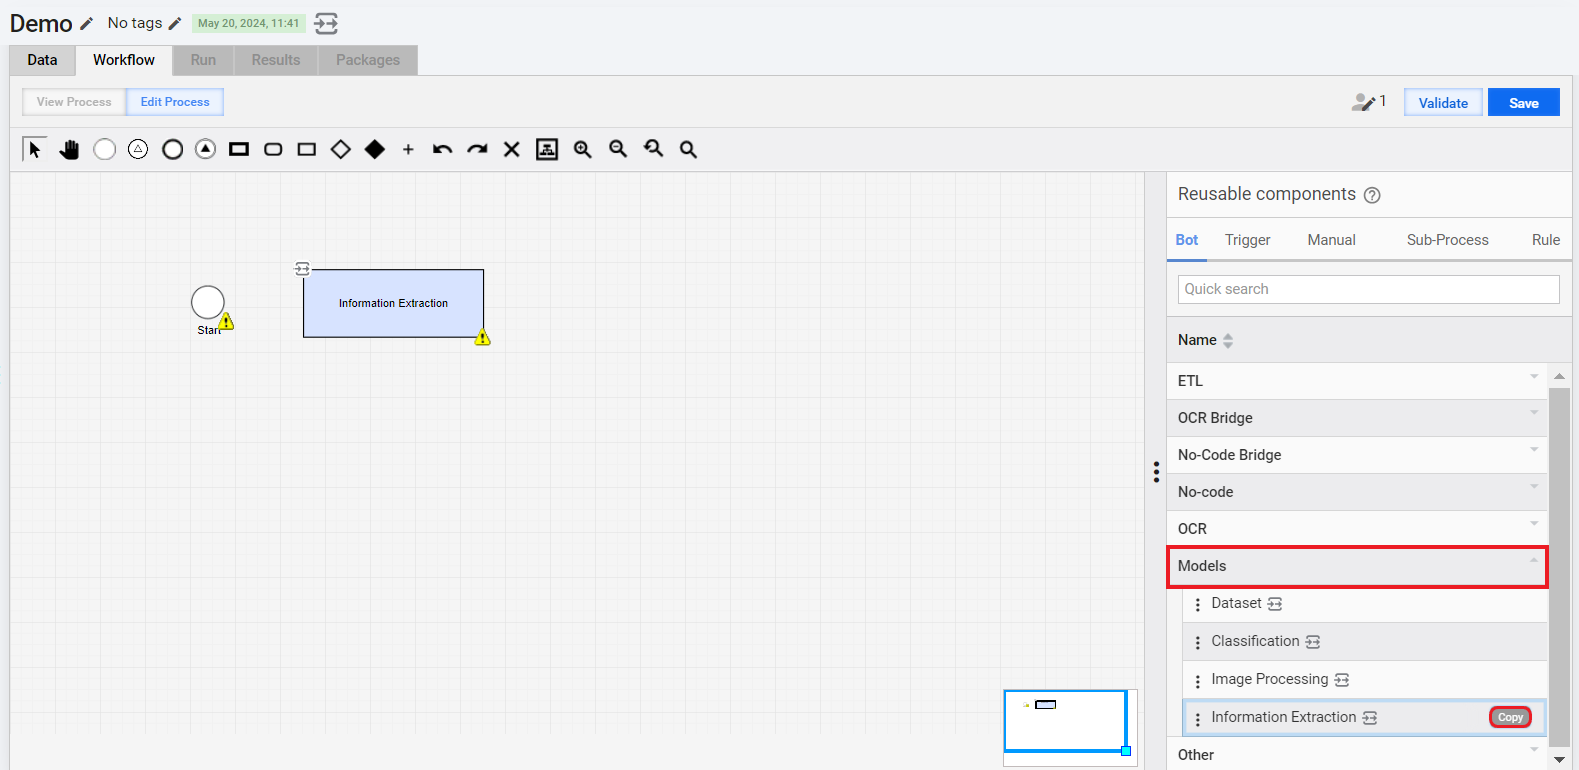
On the Bot tab of the Reusable components panel, expand the Models category, hold the pointer over Information Extraction, and click Copy.
 note
noteMaking a copy is essential to create an independent Model step. If you simply drag a step from the Reusable components panel, any changes to its configuration will also affect other Business Processes where the step might be or is included.
Change the step name and click Save. The Information extraction step appears on the canvas.

Drag the End element from the toolbar to the canvas.
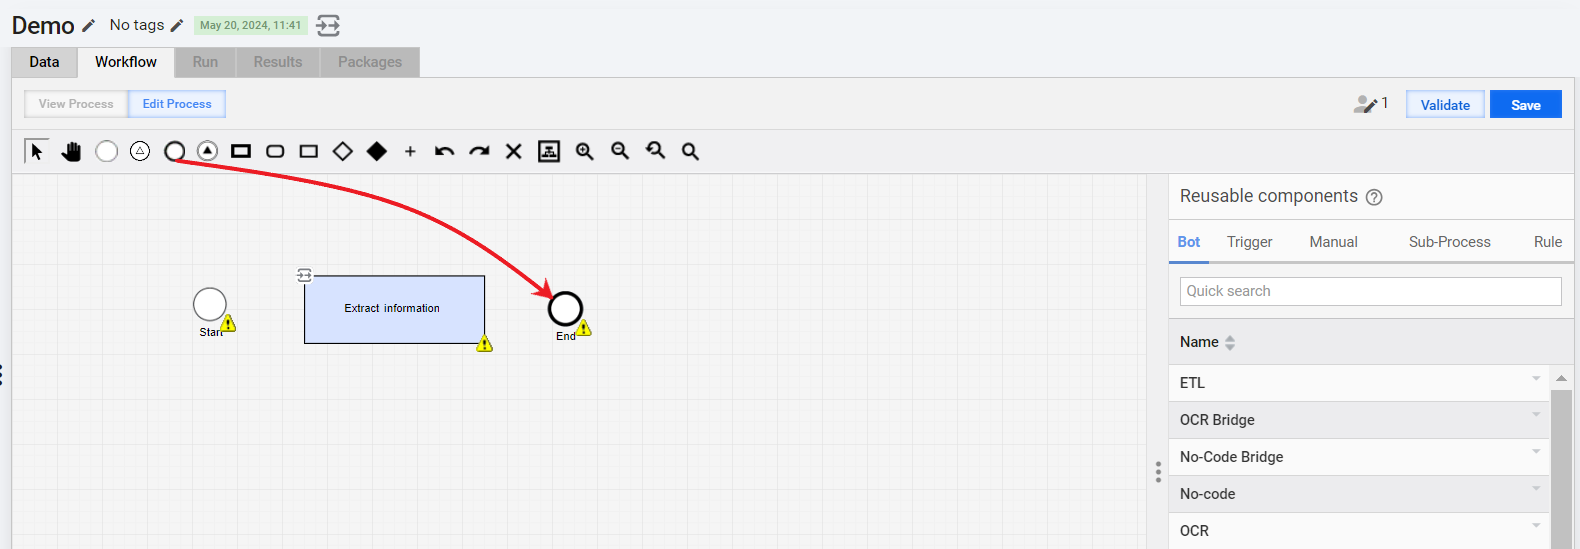
Create connections between the BP elements. To do this, move the pointer over the left side of an element and drag the blue arrow towards the next step.
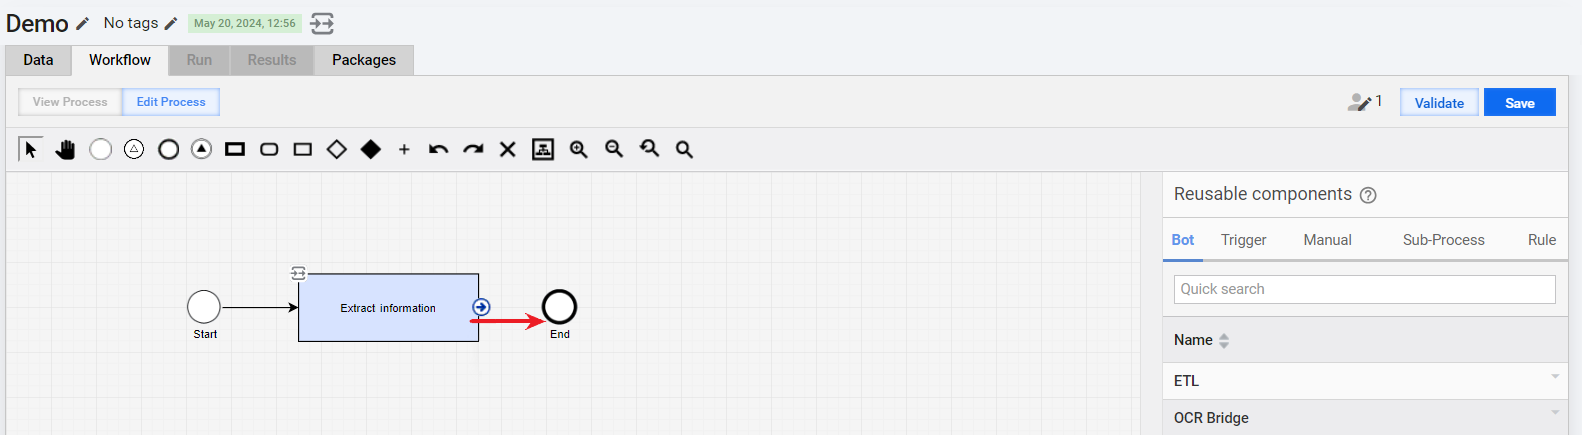
Configure the model (Extract information) step:
Double-click the step in the flow to open the configuration window.
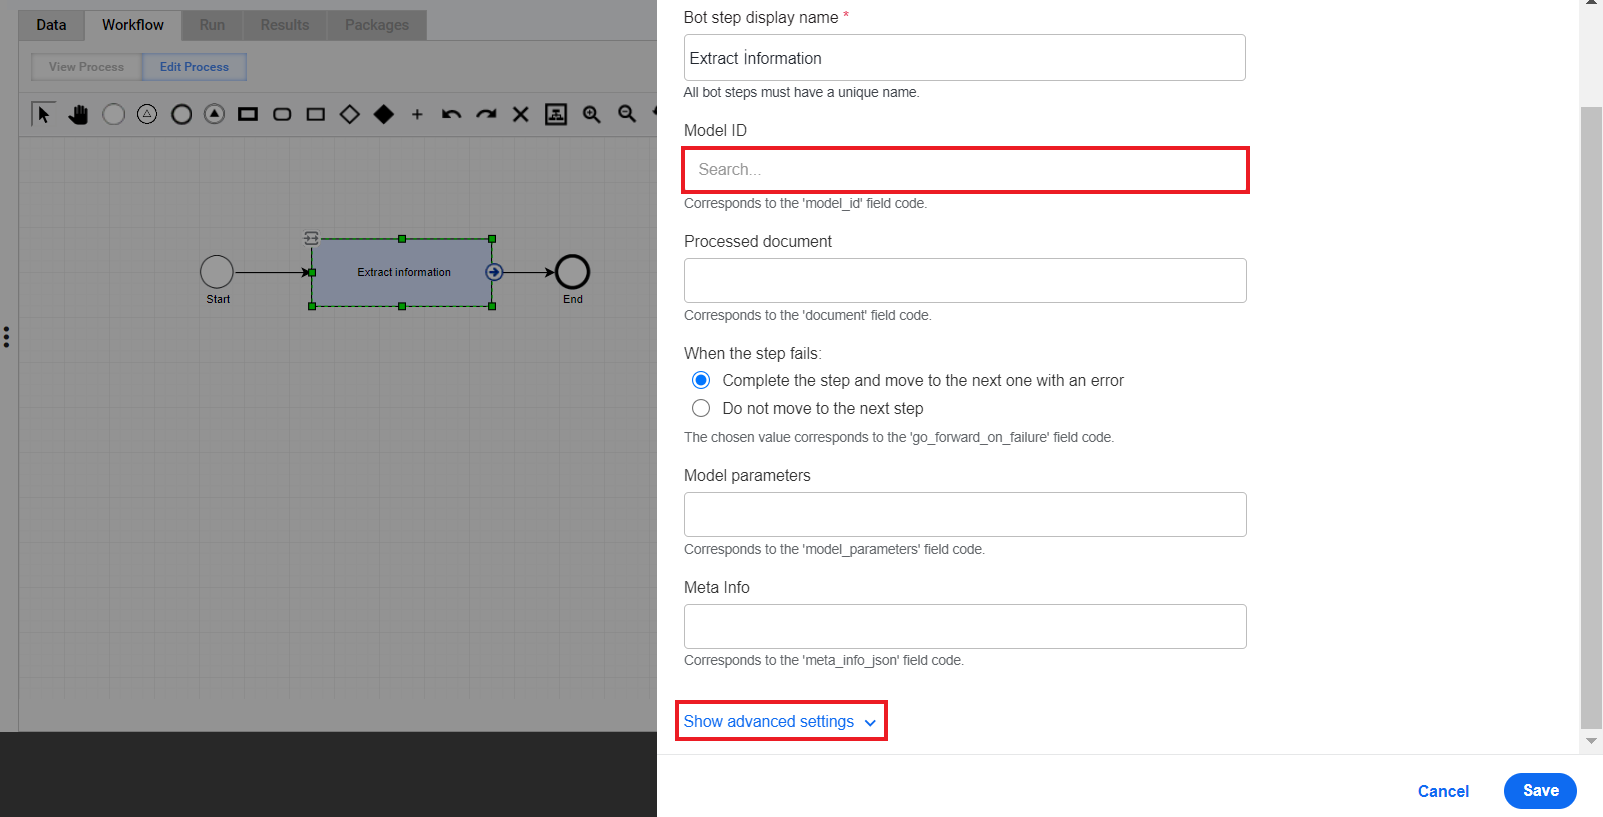
In the Model ID field, choose a model and leave the rest of the settings as they are.
Click Show advanced settings.
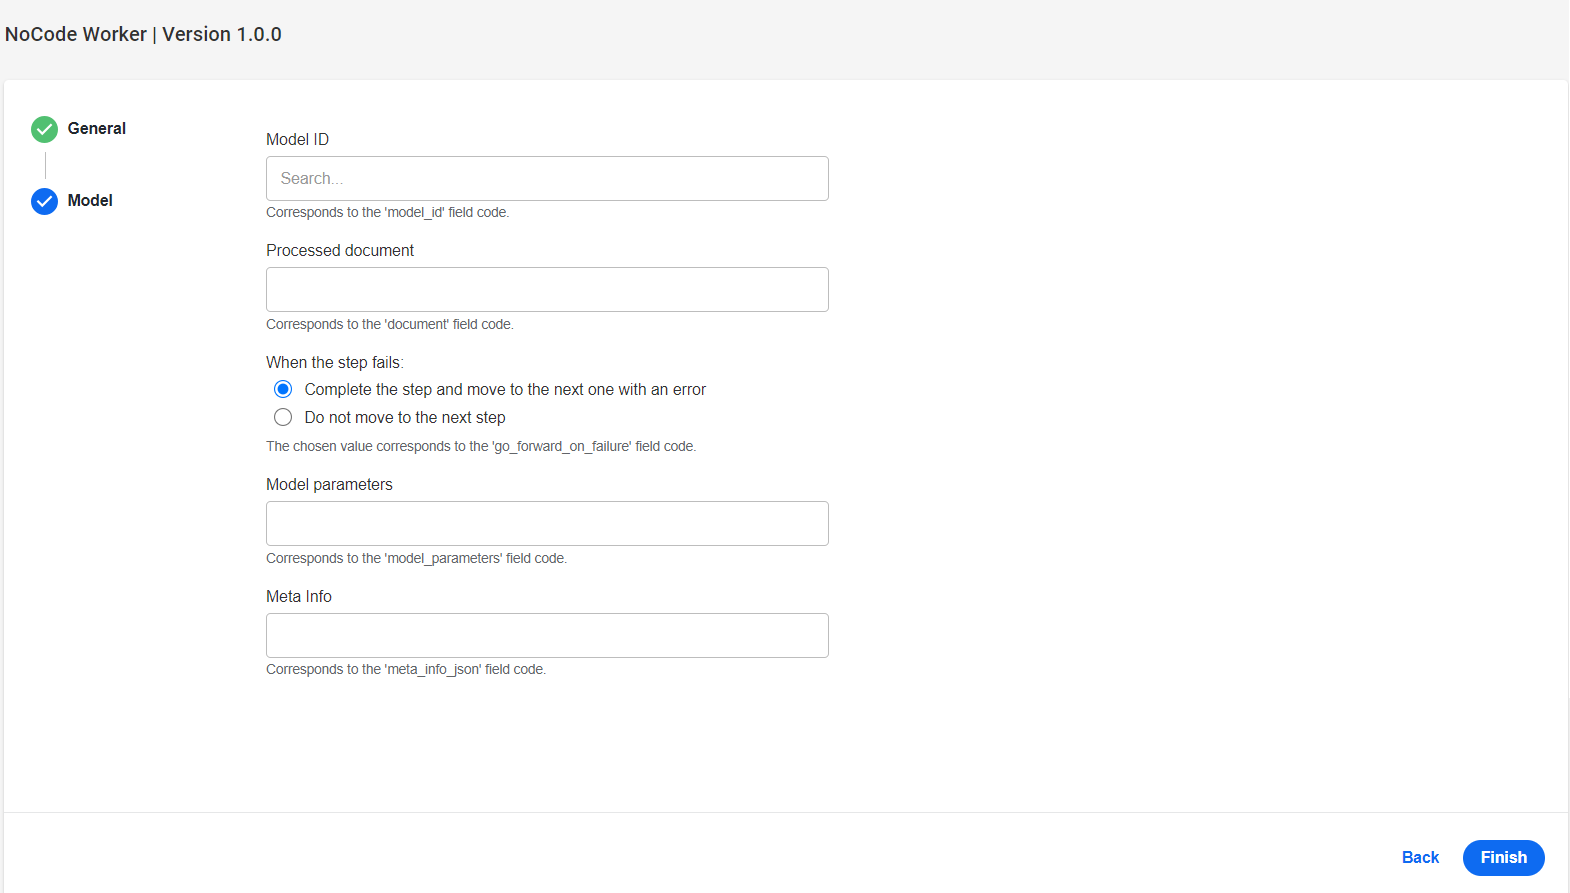
In the advanced settings, set the Show on Digital Worker configuration screen to True and type in a display name. Thus, you include the bot step configuration screen as a step to the AI Agent configuration stepper. The name of the step will be the one you specified in the Display name field.
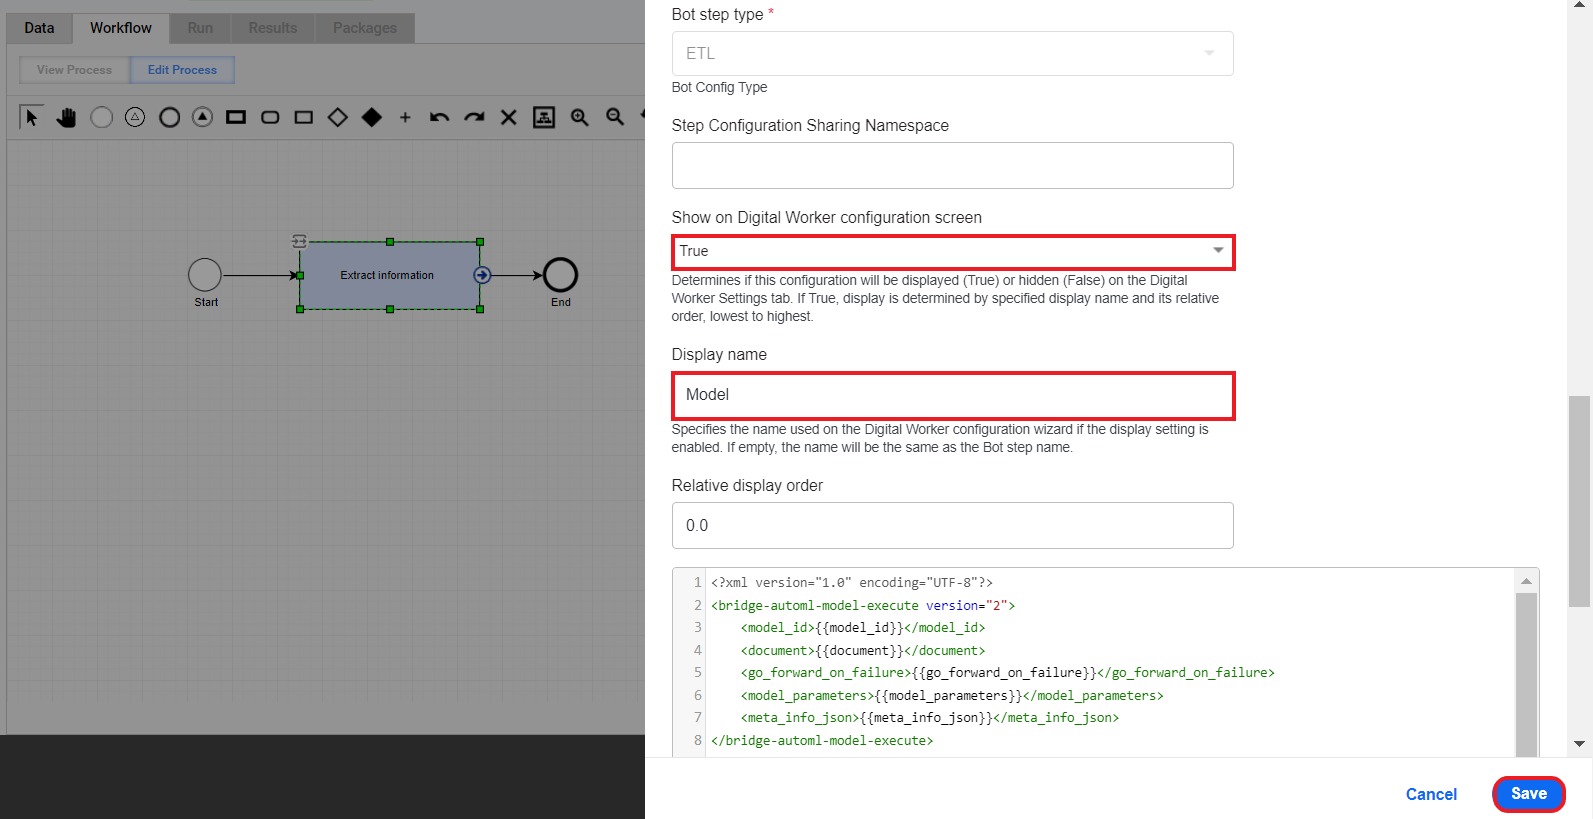
On the Input / Output tab, leave the settings as they are.
Click the Save button to save the configuration.
Click Save to save the BP.
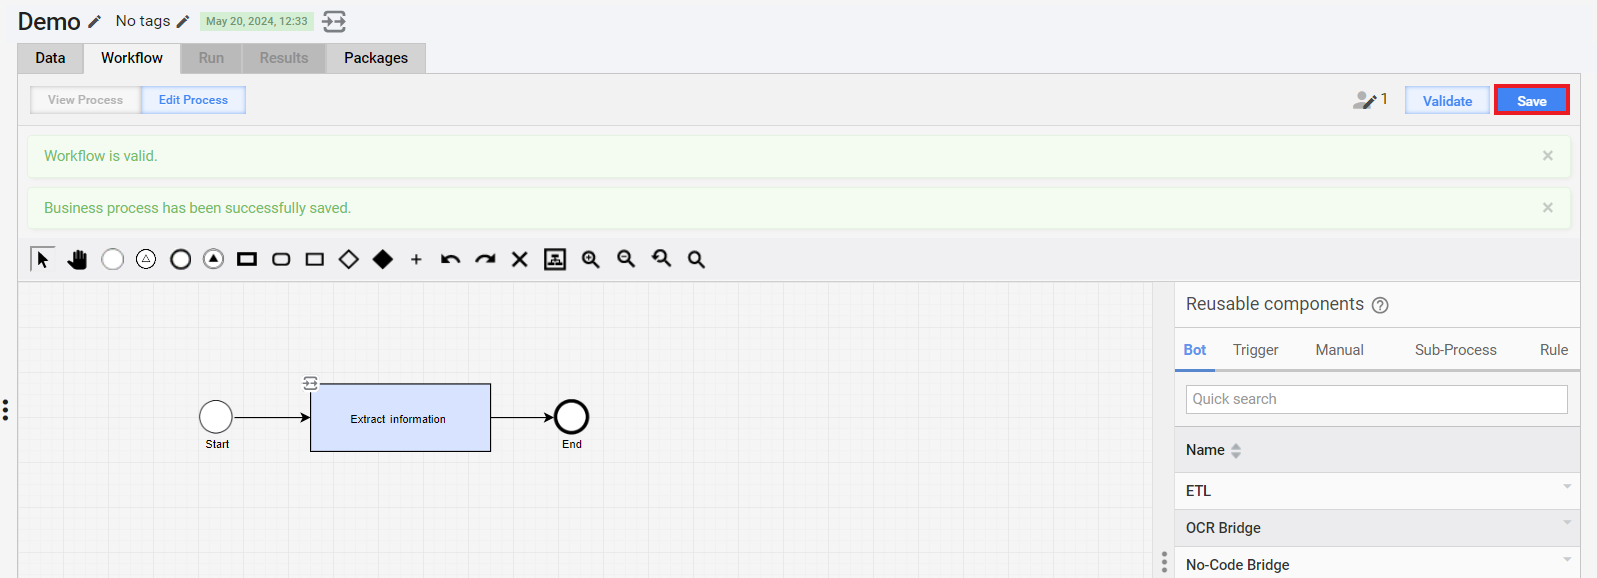
The Business Process appears on the variation's details page.

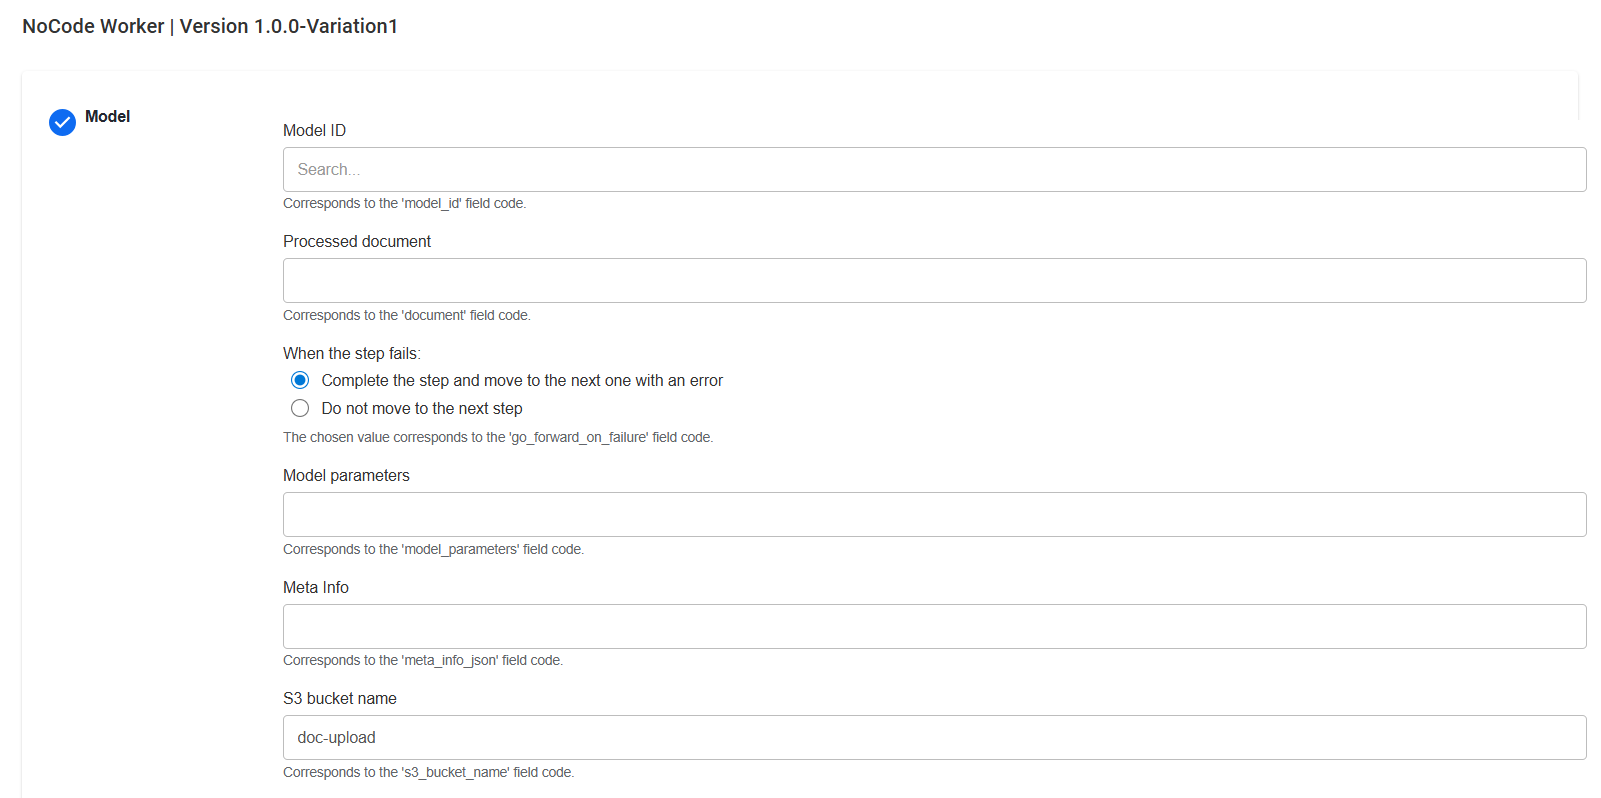
To see and change the AI Agent configuration, click the Configuration button.
On the details page of the new variation, click Add Business Process.
 tip
tipTo open the variation's details page from the Digital Workers list, click the name of the newly created variation.
In the newly created BP, navigate to the Workflow tab and add a custom name to the Business Process. To do that, click the pencil icon and type in a unique name that can help you to easily identify the BP among others.
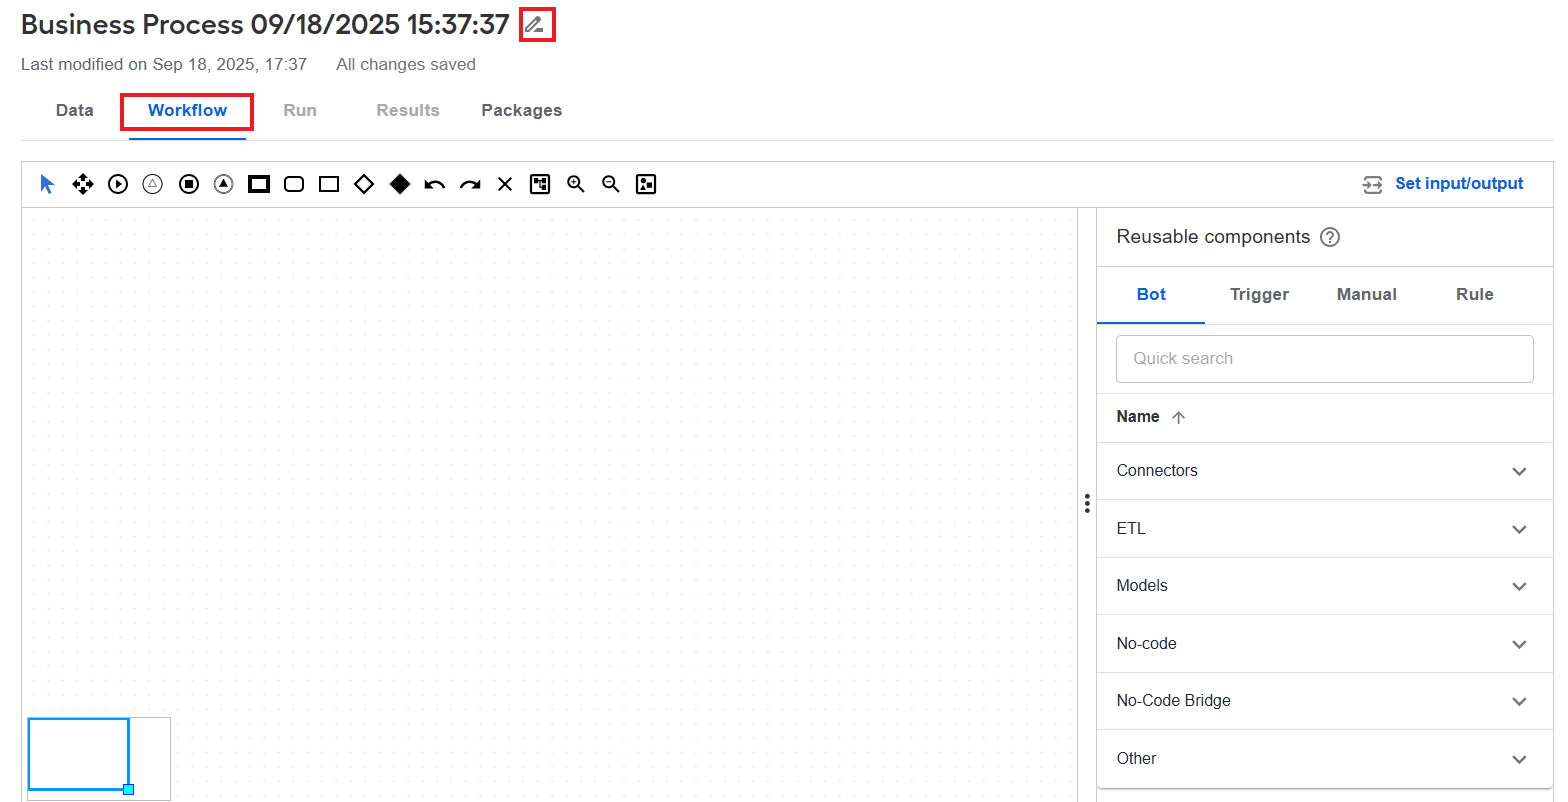
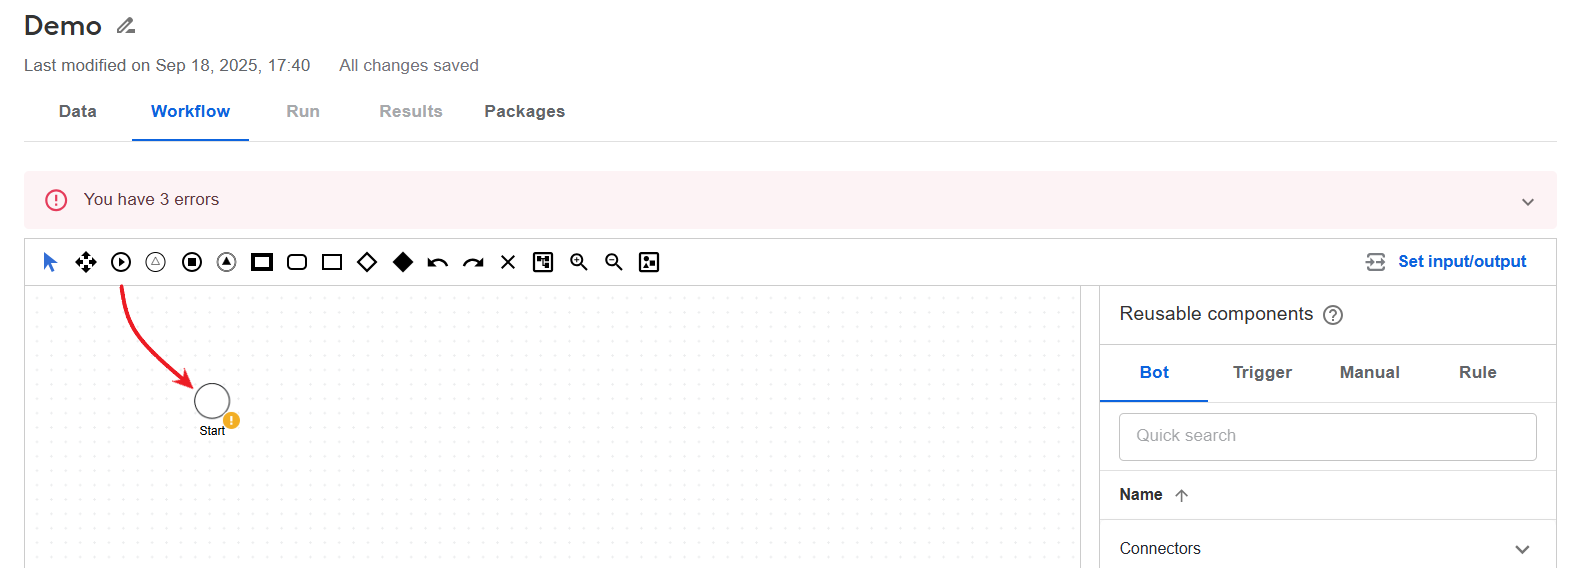
On the Workflow Designer canvas, start building the automation flow:
Drag the Start element from the toolbar to the canvas.
On the Bot tab of the Reusable components panel, expand the Models category, move the pointer over Information Extraction, and click Copy.
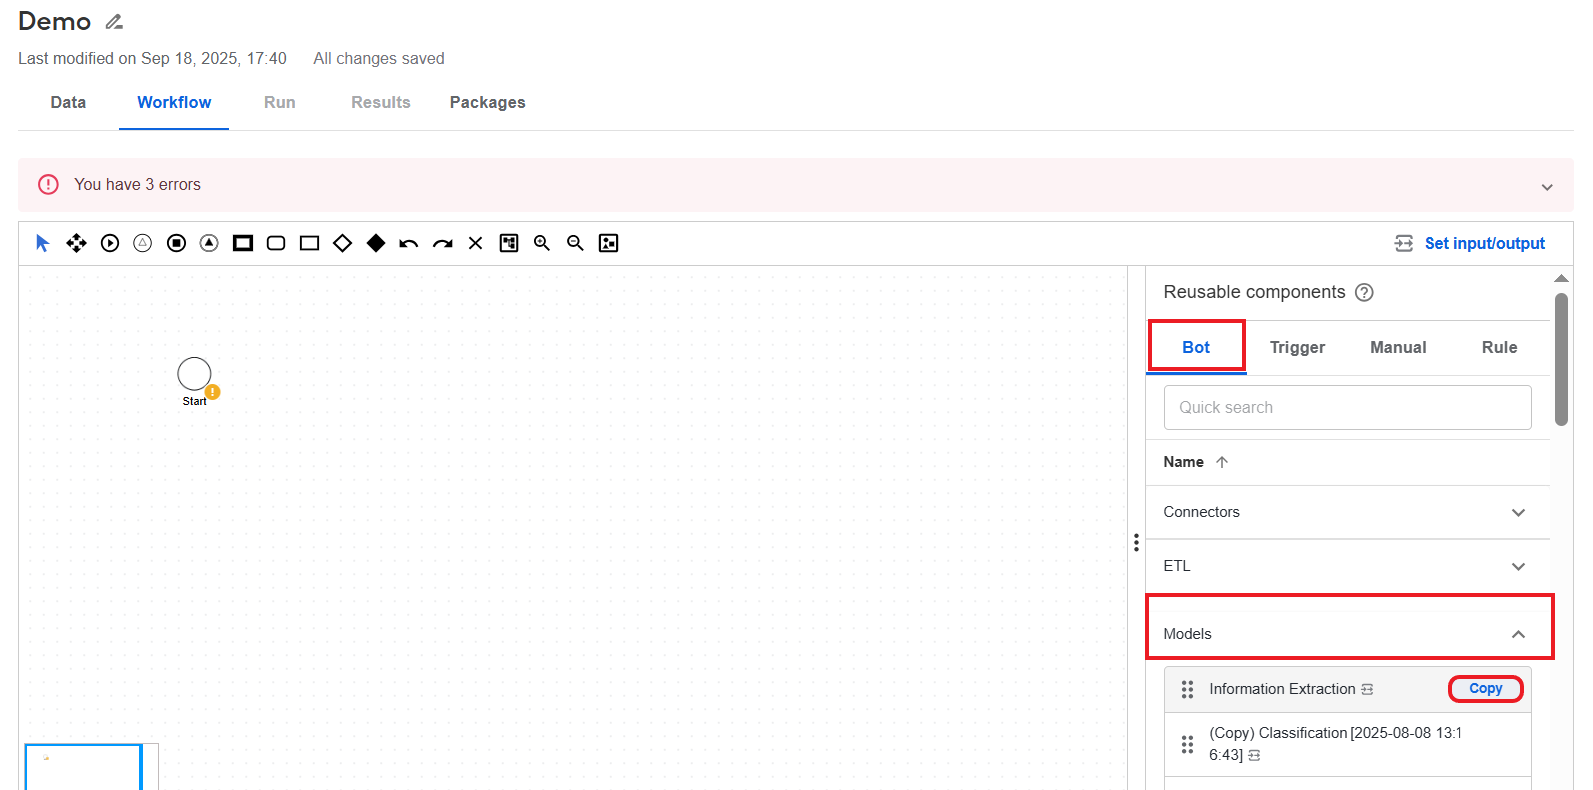 note
noteMaking a copy is essential to create an independent Model step. If you simply drag a step from the Reusable components panel, any changes to its configuration will also affect other Business Processes where the step might be or is included.
Change the step name and click Save. The Information extraction step appears on the canvas.

Drag the End element from the toolbar to the canvas.
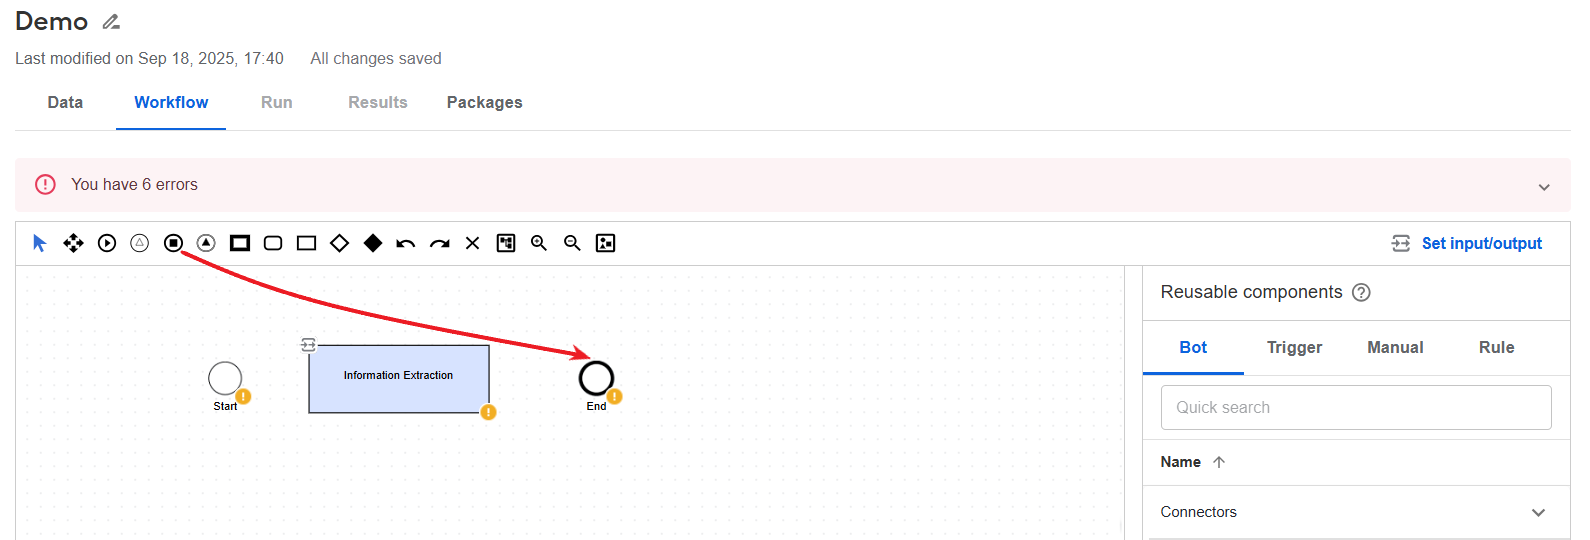
Create connections between the BP elements. To do this, move the pointer over the left side of an element and drag the blue arrow towards the next step.
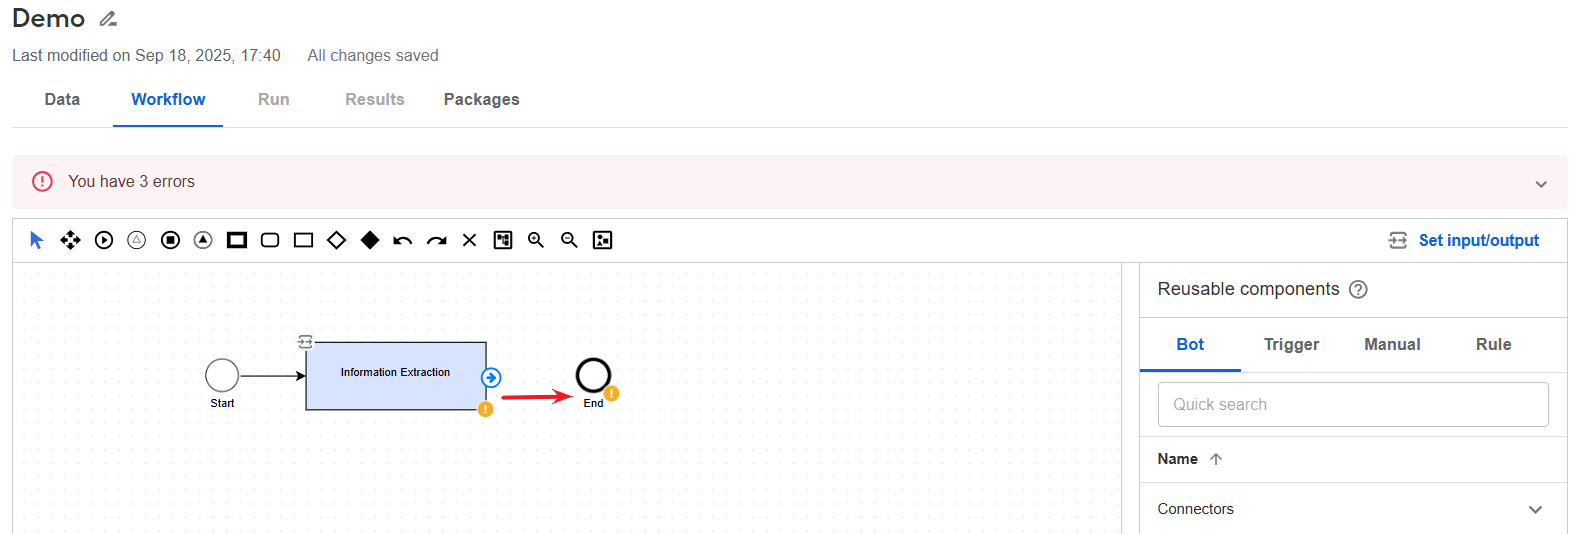
Configure the model (Extract information) step:
Double-click the step in the flow to open the configuration window.
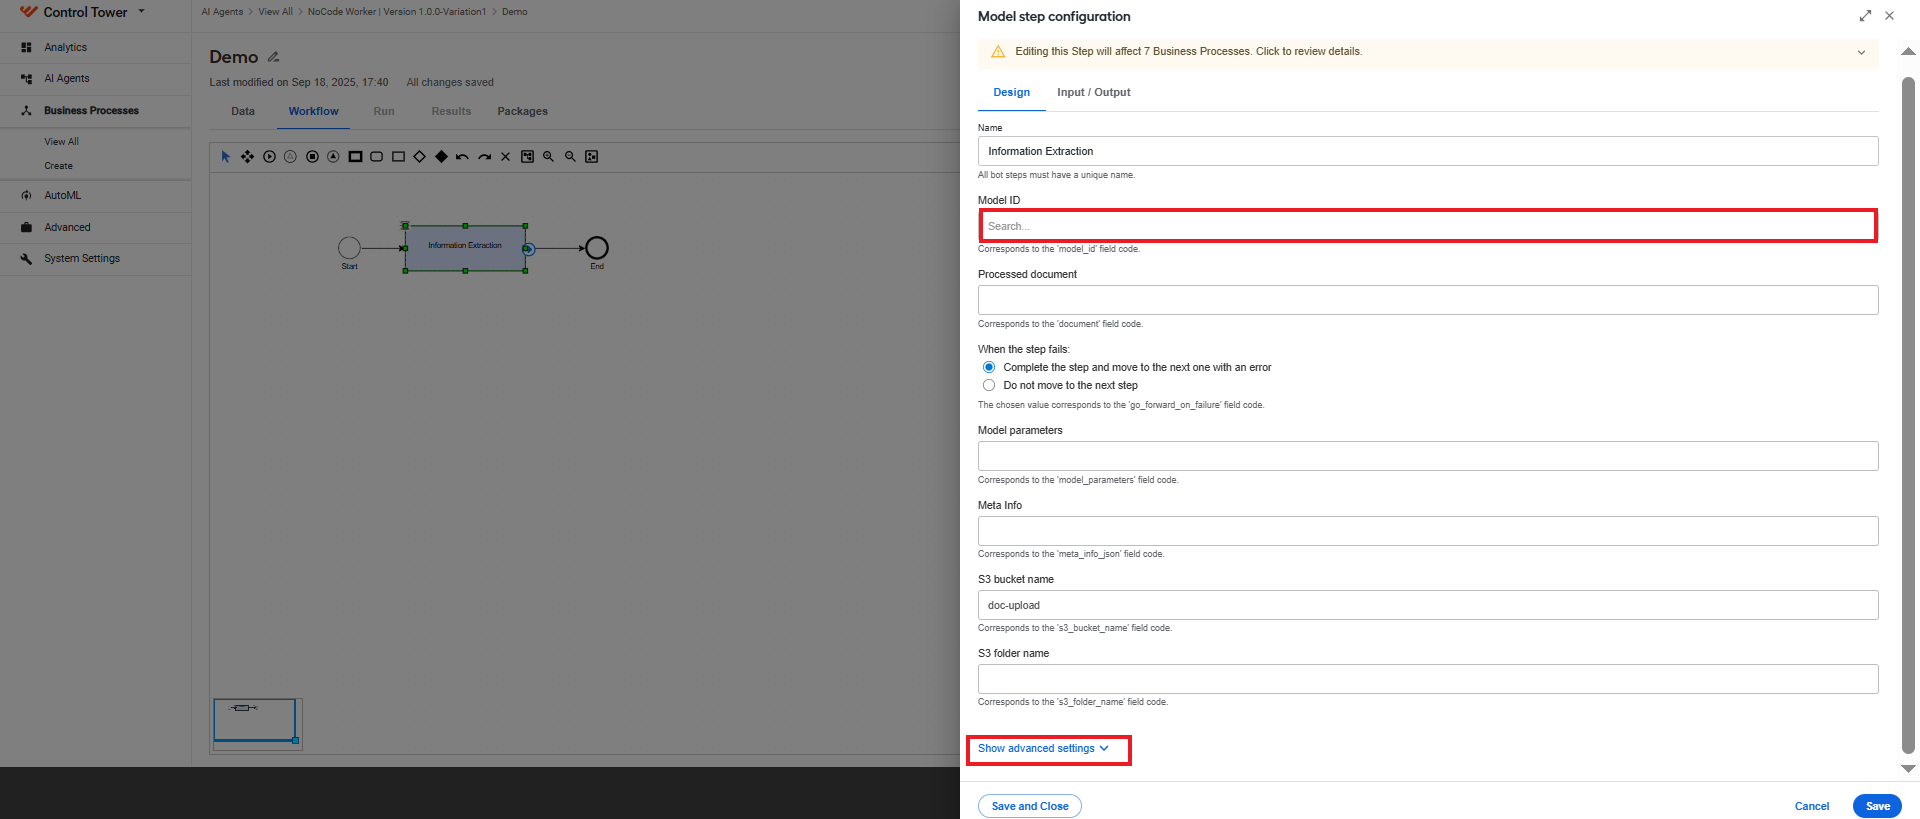
In the Model ID field, choose a model and leave the rest of the settings as they are.
Click Show advanced settings.
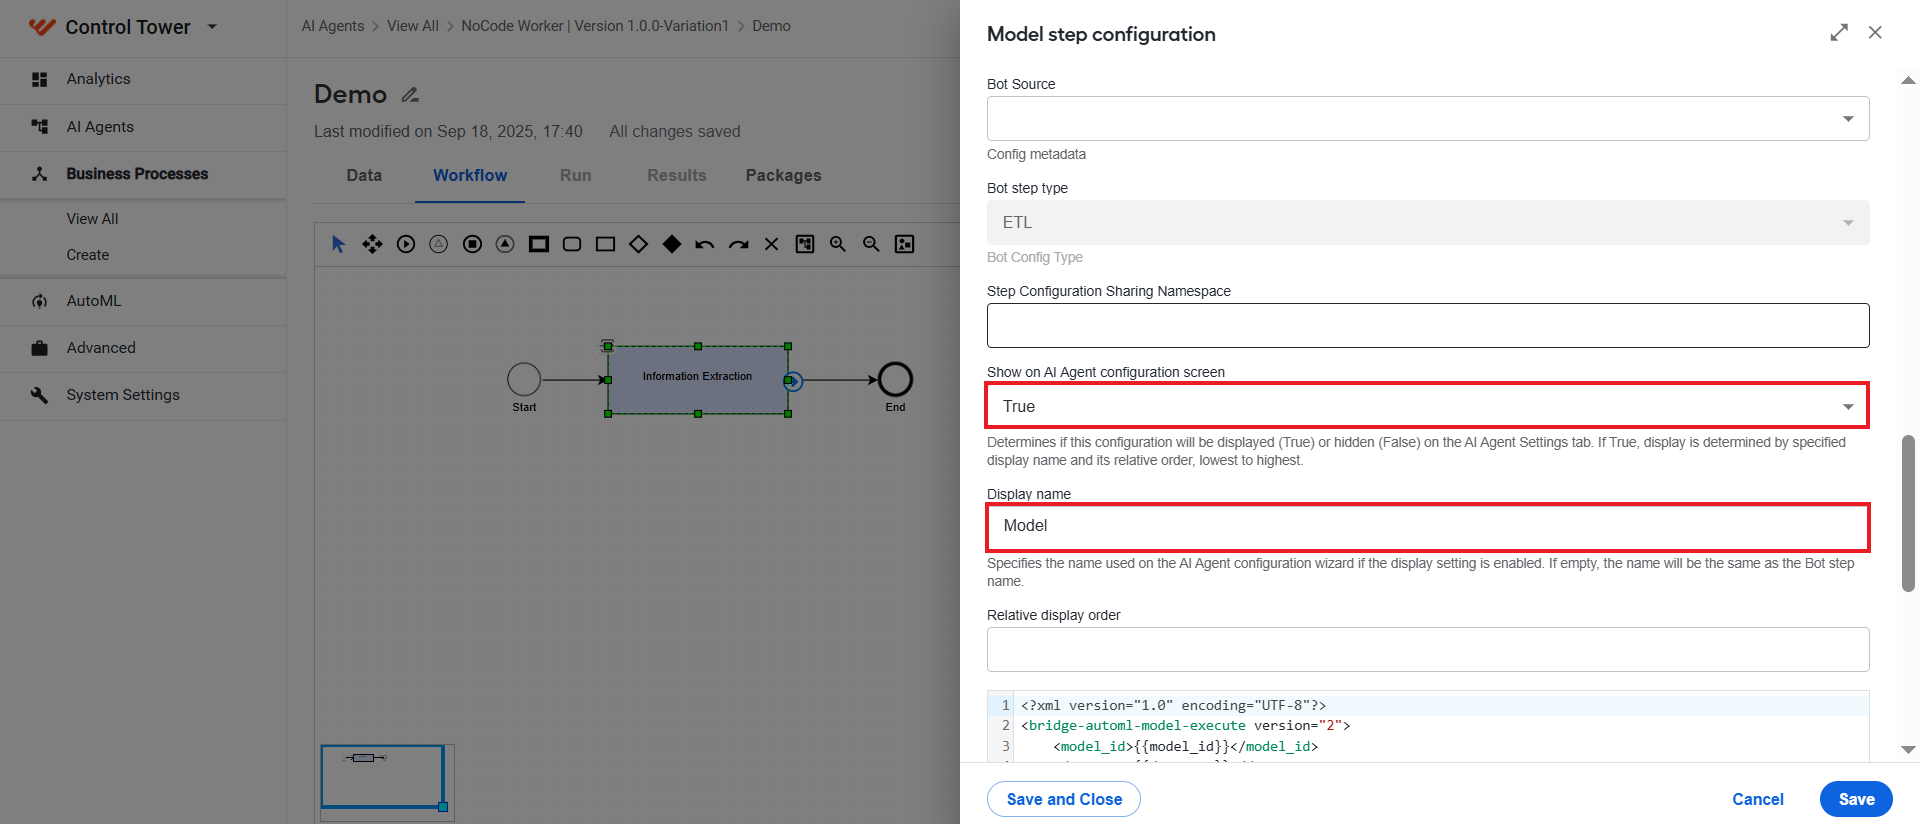
In the advanced settings, set the Show on AI Agent configuration screen to True and type in a display name. Thus, you include the bot step configuration screen as a step to the AI Agent configuration stepper. The name of the step will be the one you specified in the Display name field.
On the Input / Output tab, leave the settings as they are.
Click the Save and Close button to save the step configuration.
Go back to the AI Agent variation's details page. You should be able to see the created Business Process there.
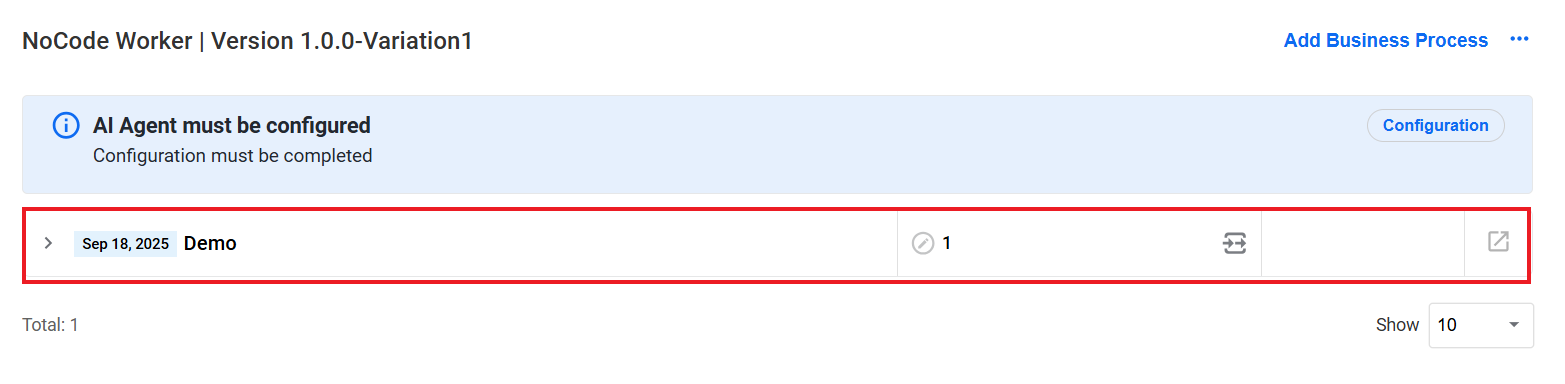
To see and change the AI Agent configuration, click the Configuration button.
Import custom AI Agent variations
To avoid overwriting existing variations of the base AI Agent bundle or the base bundle itself, make the following changes before importing a new variation as a bundle to the same environment:
Open the zip folder with the bundle files and find the
meta-info.jsonfile.In the
meta-info.jsonfile, change the value for one or both of the following parameters:NAMEUSE-CASE-VERSION
Once the changes are made follow the instructions below to import it, depending on the Work.AI version you are using.
- v10.2.9
- v10.3
Sign in to Control Tower and navigate to the Digital Workers page.
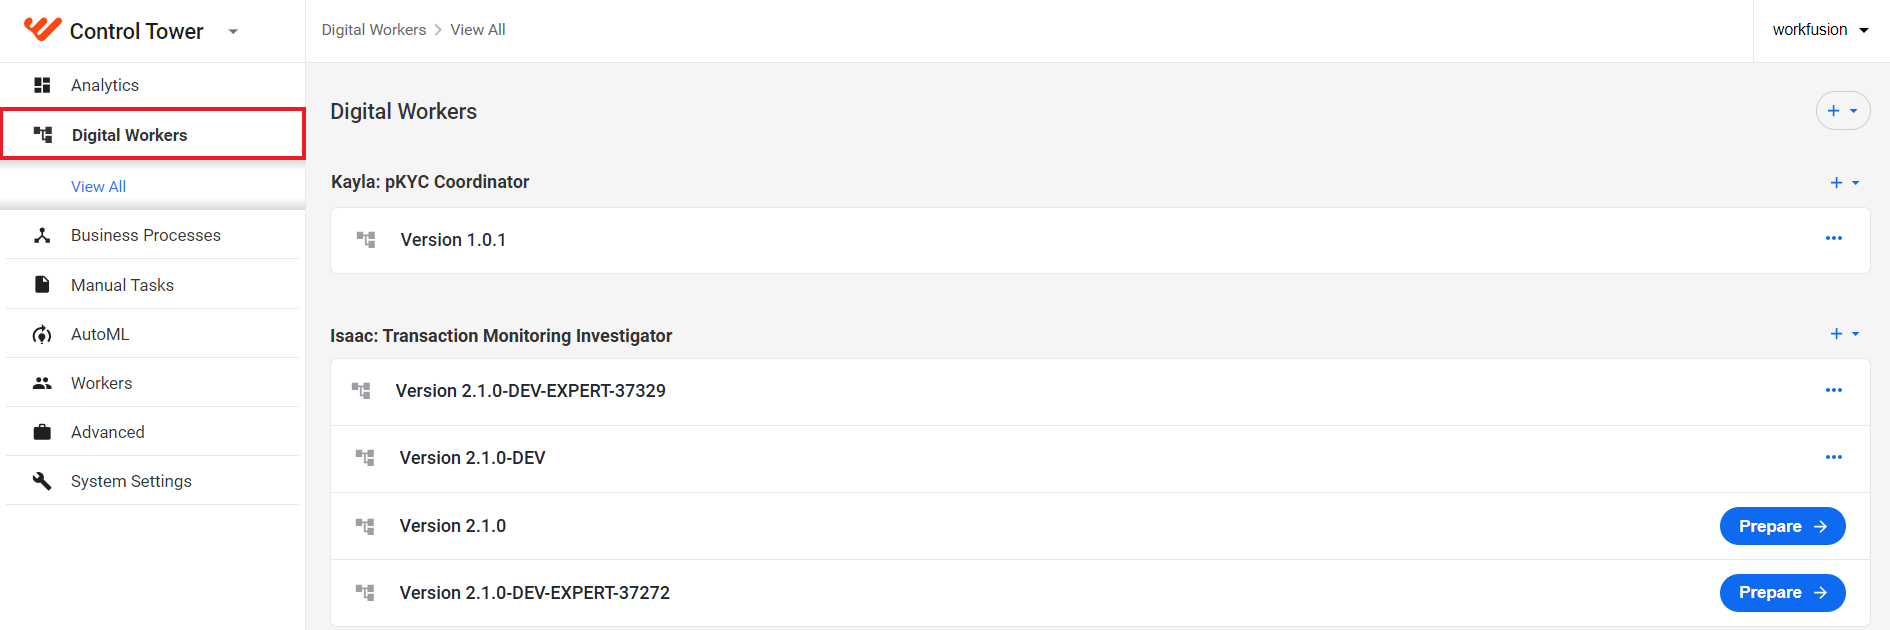
On the Digital Workers page, click the + button at the top of the page and select Upload new.

In the Add new Digital Worker dialog, click Add and select the bundle you want to upload.

Once the bundle upload is completed, the AI Agent variation appears on the Digital Workers list. The name and version of the uploaded AI Agent are identical to the value specified for the NAME and USE_CASE_VERSION parameters in the meta-info.json file of the uploaded AI Agent bundle.
custom-upload.png
Sign in to Control Tower and navigate to the AI Agents page.
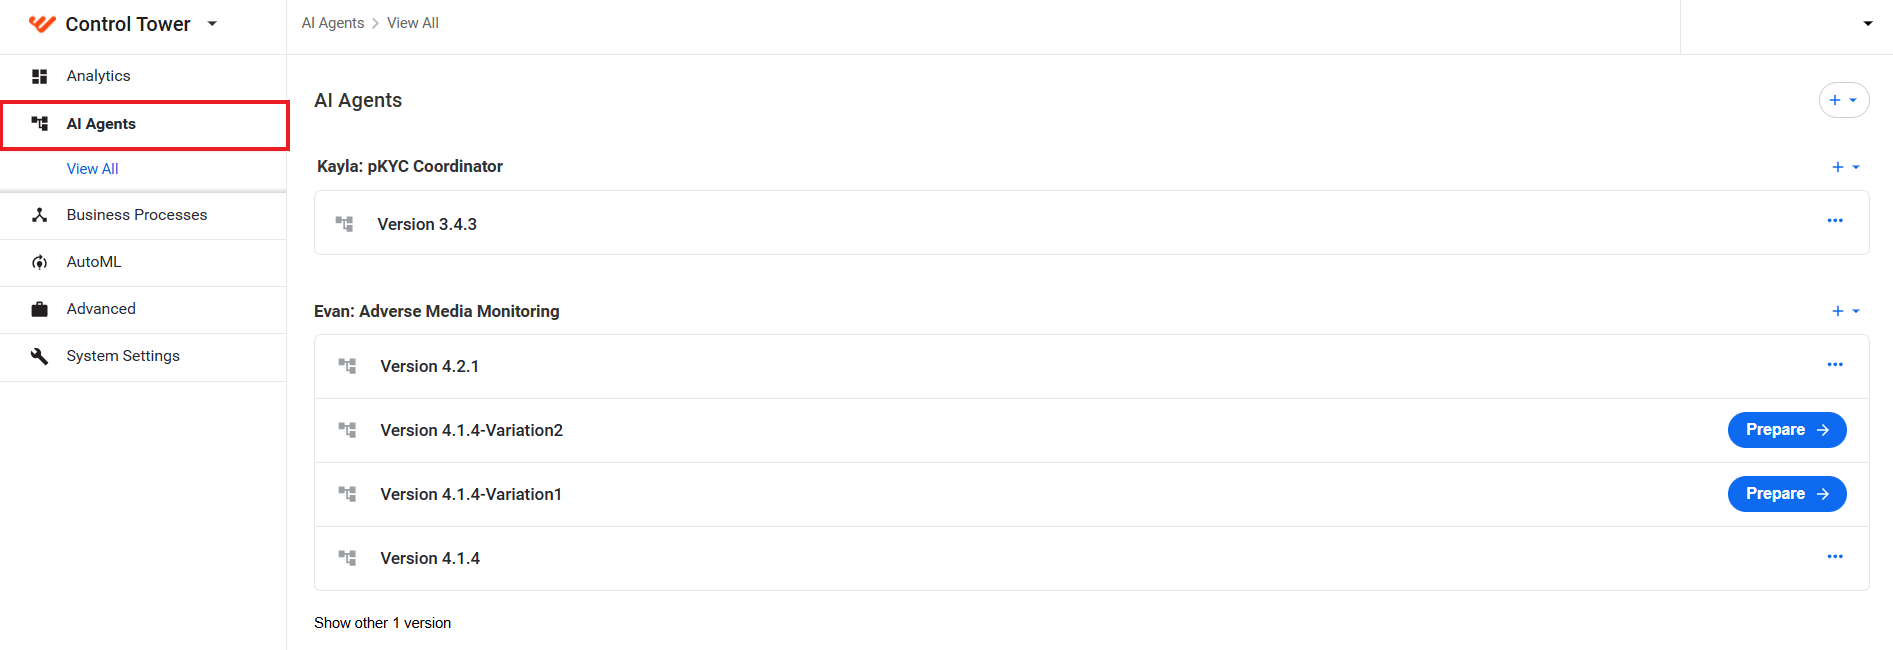
On the AI Agents page, click the + button at the top of the page and select Upload new.

In the Add new Digital Worker dialog, click Add and select the bundle you want to upload.

Once the bundle upload is completed, the AI Agent variation appears on the AI Agents list. The name and version of the uploaded AI Agent are identical to the value specified for the NAME and USE_CASE_VERSION parameters in the meta-info.json file of the uploaded AI Agent bundle.