Configure preferences
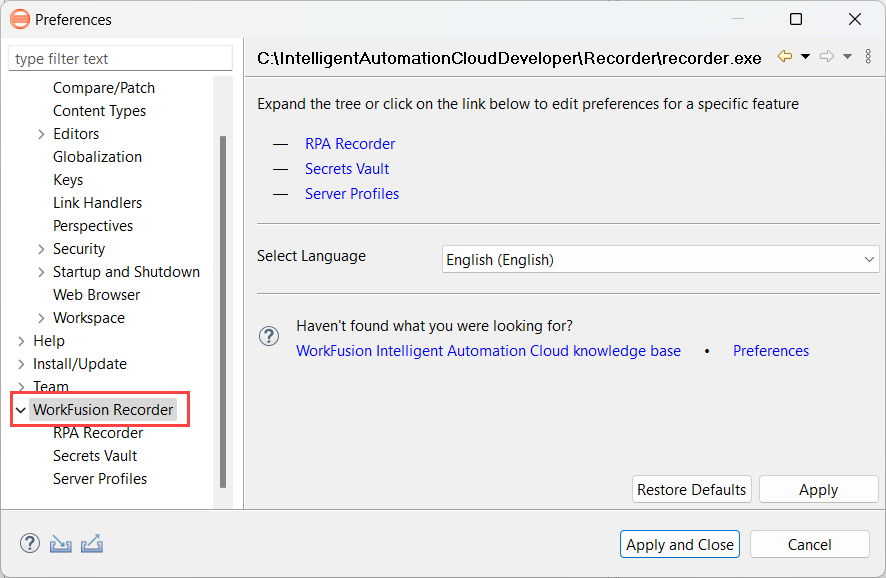
There are some global parameters for Recorder to define component settings, their general behavior, and so on. The most widely used setup refers to the Recorder settings. Go to Window > Preferences > WorkFusion Recorder.
Language settings
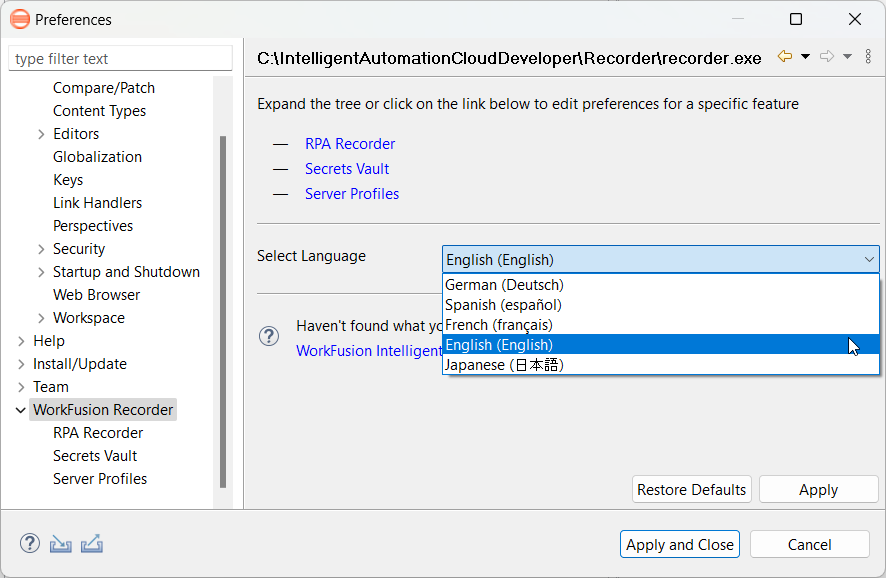
You can change the display language to your preferred language at any time. The list of languages includes:
- English (default)
- German
- Spanish
- French
- Japanese
To set up your language preferences, do as follows:
Go to Window > Preferences > WorkFusion Recorder.
Select the language you need in the Select Language dropdown.
To save, click Apply and Close.
The settings apply after restart. Click OK to confirm the changes.

Tab names are translated only when you select a tab and make it active. That is an Eclipse-related issue. To learn more, see here.
RPA Recorder
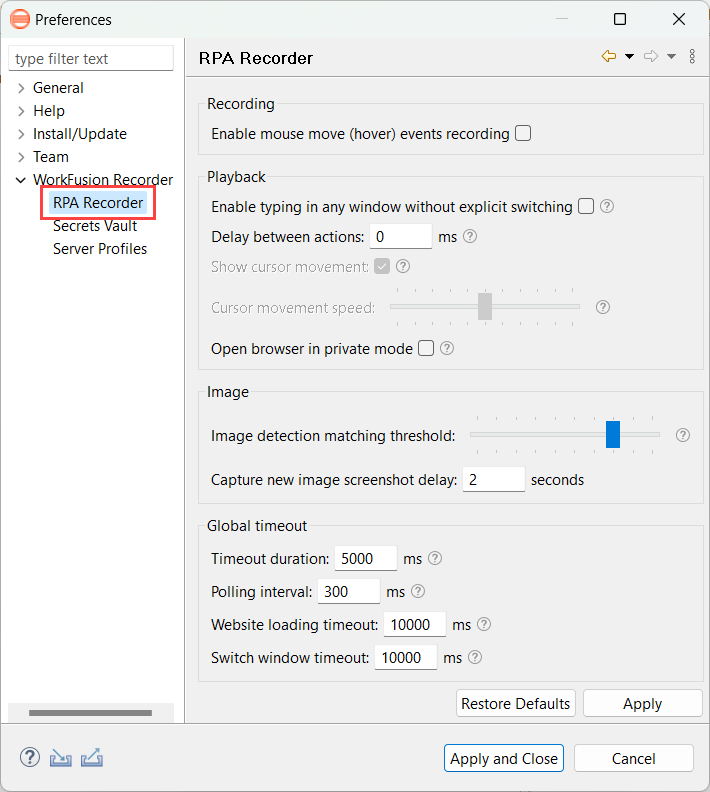
To open Recorder preferences, go to Window > Preferences > WorkFusion Recorder > RPA Recorder.
- Recording:
- Enable mouse move (hover) events recording. Enable or disable capturing of mouse actions while a recording is made.
- Playback:
- Enable typing in any window without explicit switching. Enable for old scripts with typing on the screen to work smoothly. The parameter is applied on playback or while exporting to a Bot Task, a Groovy script, or Control Tower. By default, the option is disabled. Mind that enabling it makes your automation less stable if some popup windows appear.
- Delay between actions. Wait for the specified time before performing the next action in the script.
- Open browser in private mode. When selected, browser tabs are opened in the private mode.
- Image:
- Image detection matching threshold. When looking for an image on the screen, choose how similar it needs to be to the recorded one.
- Capture new image screenshot delay. Specify a default delay for the Capture new image function.
- Global timeout settings:
- Timeout duration. If an action fails, specify how long to wait for it to complete before stopping the script.
- Polling interval. If an action fails, specify how often to retry it. The action retries until the timeout expires.
- Website loading timeout. Define the default maximum time to wait for a website to load. This setting can be configured for each Open Website action separately.
- Switch window timeout. Specify the maximum time to switch to a window. The default value is 6,000 ms.
Secure Storage
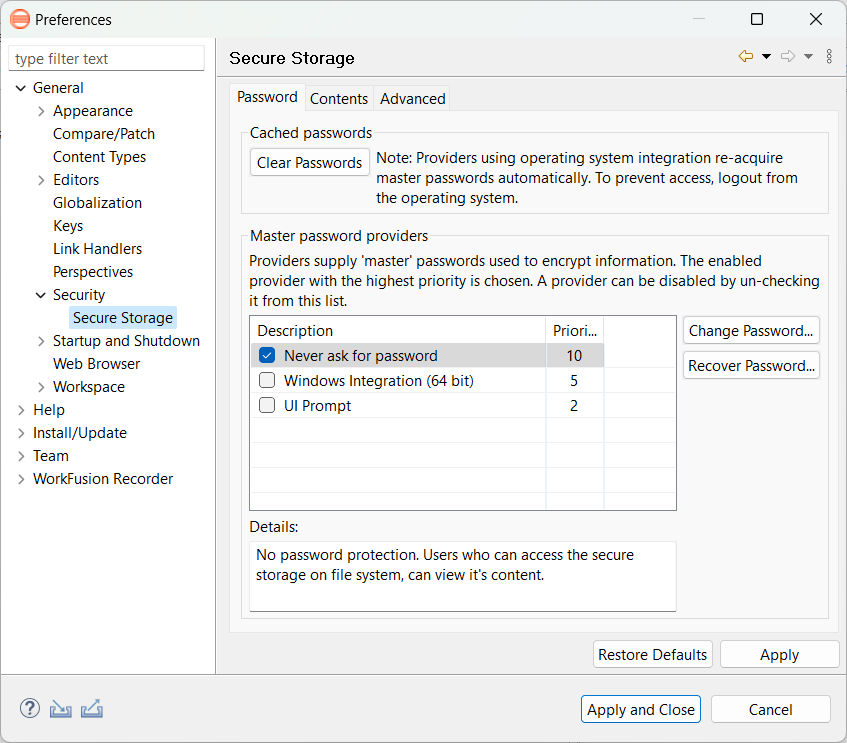
To set up the storage of encrypted information, go to Preferences > General > Security > Secure Storage. Typically, you have no reason to alter these preferences. The options are used primarily for troubleshooting and setup of multiple providers.
Password providers
The Password tab contains the functionality related to the master password lifecycle and password providers.
The Clear Passwords button clears cached master passwords from memory that is similar to logging out of Secure Storage. Mind that some password providers obtain credentials from the OS automatically. To prevent them from doing so, log out from the OS account.
The Master password providers section contains a list of currently available password providers. By default, the enabled provider with the highest priority is used to encrypt data added to Secure Storage. The priority range is from 0 to 10, with 10 being the highest. A password provider can be disabled if it malfunctions or if you prefer a lower-priority password provider.
The data can only be decrypted by the same provider that encrypted it. This means that changes to the list of password providers affect only new entries. A password provider for the existing entries can only be overwritten by the application storing the data.
By default, all password providers are enabled.
The available options for password providers are as follows:
- Never ask for password: a security option allowing a custom provider to use a hardcoded master password for Secure Storage. It silently authenticates storage on each Recorder launch, so you are not asked to enter your password to work with all stored records.
The recommended configuration is checking Never ask for password only and unchecking all the rest.
Windows Integration (64 bit): a native OS password storage that is standard for every user's OS way for Secure Storage. It is not recommended because of known issues on older Eclipse and OS versions.
UI Prompt: an option that asks for a password on each Recorder launch. When a higher level of security is required, you can configure to ask for the Secure Storage master password on each launch. To switch off, go to the Password tab and uncheck UI Prompt.
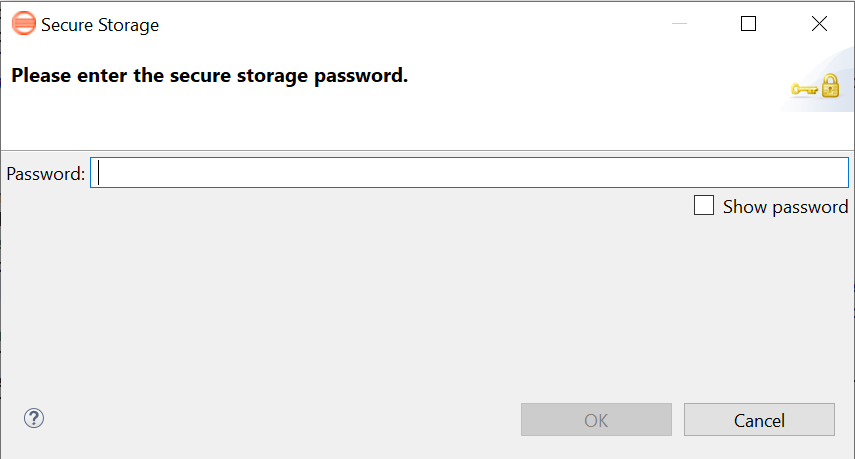
Each password provider used at least once has an associated master password. Click the Change Password... button to modify the master password of the selected password provider.
The Recover Password... button opens the password recovery dialog. Use this option if you forgot the master password and configured password recovery questions. The button is disabled if the password recovery setup was canceled while creating the master password.
You should enter answers for password recovery questions exactly as they were specified during the password recovery setup. Answers are case-sensitive and white spaces are significant.
Contents
The Contents tab displays the contents of the default Secure Storage.
Secure Storage is organized as a tree where nodes represent the context of the information, and values are associated with each node. Selecting a node in the tree displays a table of values associated with that node. Values stored in a non-encrypted form are displayed; the encrypted values are shown as "*********".
At the bottom of the tab, you can see the actual file location used to persist the Secure Storage data.
To save changes for the Secure Storage contents, click Save.
To delete stored data to recover from an error or to reflect a change in the setup, click Delete. This deletes all Secure Storage contents. In some cases, other parts of the application may depend on the contents that you deleted. To avoid unexpected errors, restart the application after you deleted Secure Storage.
Advanced options
The Advanced tab of the Preferences page offers some extra tweaks to your Secure Storage.
You can modify the encryption algorithm used by Secure Storage. The drop-down list displays the discovered algorithms provided by the Java virtual machine that are compatible with Secure Storage.
Changes in the encryption algorithm are only applied to the data stored after the change. If you have already created Secure Storage, delete and re-create it to use the newly selected encryption algorithm.
The list of available algorithms can be different for different Java virtual machines. You can extend it by providing custom algorithms with the help of the Java security provider mechanism.
Troubleshooting
Lost password
When Secure Storage is used for the first time, it generates a master password used to encrypt data. This master password is required to retrieve data from Secure Storage.
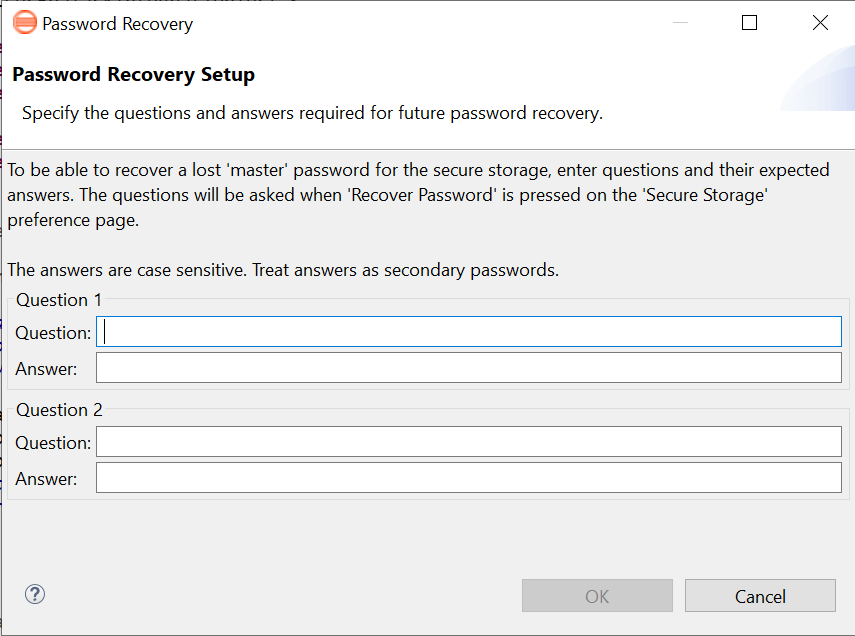
If the master password becomes unavailable, Secure Storage provides optional support for password recovery. If the master password is lost or forgotten, you can recover it by providing exactly the same answers to the recovery questions. This can help prevent data loss if you forget or lose your master password.
Pick password recovery questions that are easy for you to answer but hard for other people to guess. For example, consider asking about a memorable date, a place you liked when you were a child, or your favorite quote. The strength of Secure Storage is determined by its weakest link. Don't use answers that are short or easy to guess.
If you specified password recovery questions and answers, go to Preferences > General > Security > Secure Storage to recover your master password. After the master password is recovered, it is strongly recommended to change the master password. To do this, go to General > Security > Secure Storage and click the Change Password... button.
The recovered password is not displayed but stored in the memory cache until the application is closed.
Invalid password
If you have a problem with Secure Storage that you cannot find a workaround for, you can delete it:
Close the Incorrect password or data is corrupted window by clicking OK. It might require several clicks on the message window.
Close the application.
Go to
C:/Users/your_usernameand remove the.eclipsefolder.In the same folder, remove the
profiles.propertiesfile.Re-run the application and enter a new password and hints if needed.
If you delete all settings, re-point into your workspace upon the next launch, re-create your Server Profile if you used one, re-create Secure Storage records, and so on.
Secrets Vault
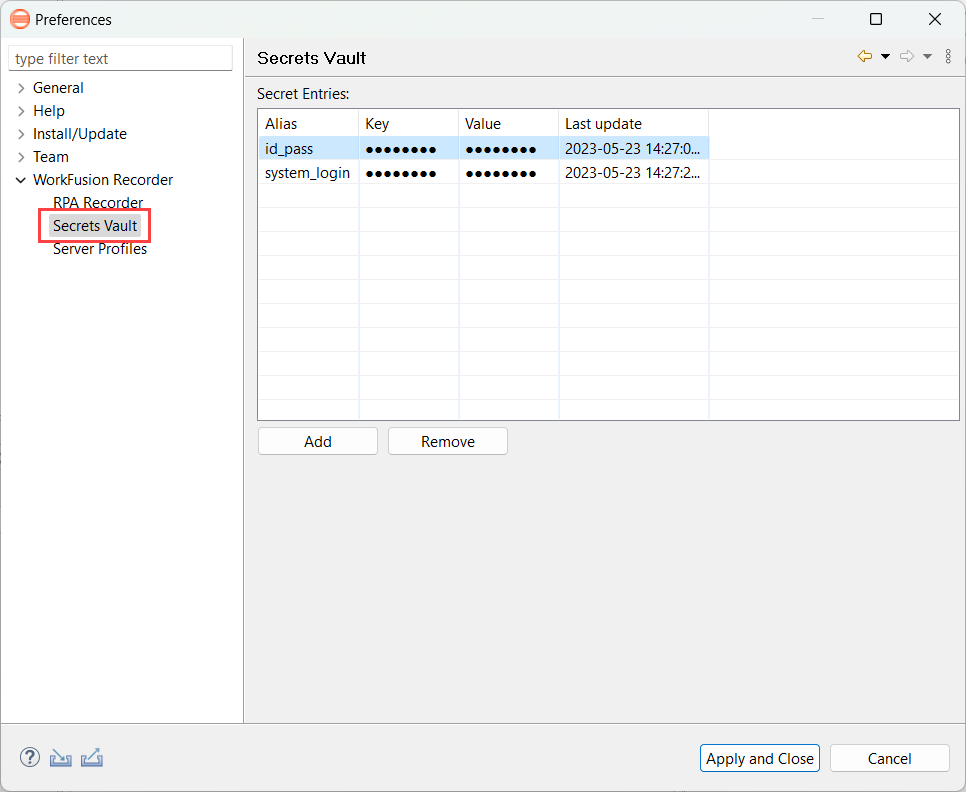
To use Secrets Vault, go to Window > Preferences > WorkFusion Recorder > Secrets Vault.
The recommendations specifically related to security in Recorder are as follows:
Do not hardcode sensitive data in Recorder variables. All sensitive data should be stored in secret entries in Secrets Vault.
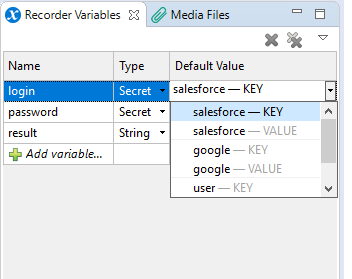
Mind that some character combinations are not allowed in Secrets Vault, so do not use them when creating new secret entries.
Always clear the clipboard using the Clear Clipboard action and set blank values in variables using the Constant Value action at the end of your script if you store sensitive data in variables. In this case, you cannot see values in execution result logs, and it keeps your data secret from other people who use this PC.
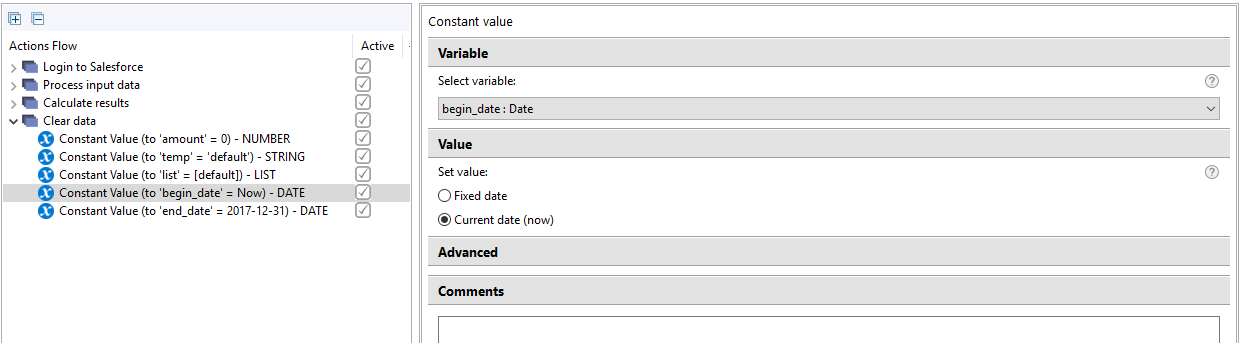
If you need to use basic authentication to access any web source, store the whole URL as a secret entry. Another option is to dynamically create the required URL using credentials stored in Secrets Vault at runtime.
See also Codeless scripting best practice.
Add secret entry
To add an entry to the Secrets Vault, do as follows.
Press Add.
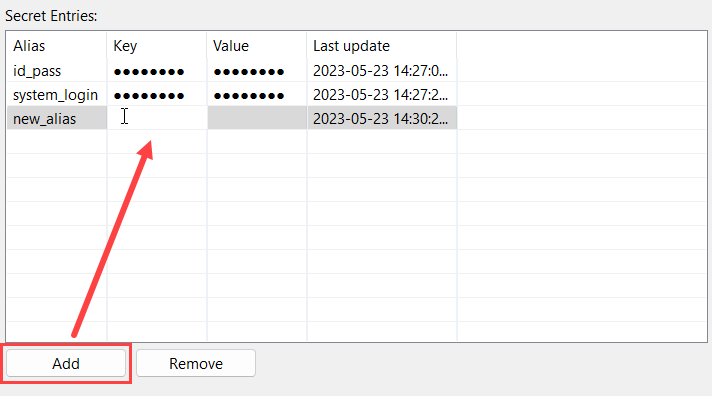
Insert Alias, Key, and Value. The changes are saved automatically.
- Alias serves to distinguish secret entries and must be unique to be used in recordings.
- Key and Value are designed to save the login and password information, respectively.
To have only one secure data record, save it in either the Key or Value field of your choice and leave the other field empty.
The data in the Key and Value fields is encrypted. Thus, you cannot view it when opening Secrets Vault or editing the entry.
Edit secret entry
To edit an entry, click the field you want to edit and insert the new data. The changes are saved automatically.

Delete secret entry
To delete an existing entry, select it in the list of secret entries and click Remove.

The changes made to secret entries are not automatically reflected for Recorder variables. You have to update these values manually.
Server Profiles
The Server Profiles tab contains the settings required for the correct work of all server components.
If you work with different environments (development, production) and need to publish your scripts to different Control Towers, use several Server Profiles and switch between them when required.
To open Server Profiles, go to Window > Preferences > WorkFusion Recorder > Server Profiles.
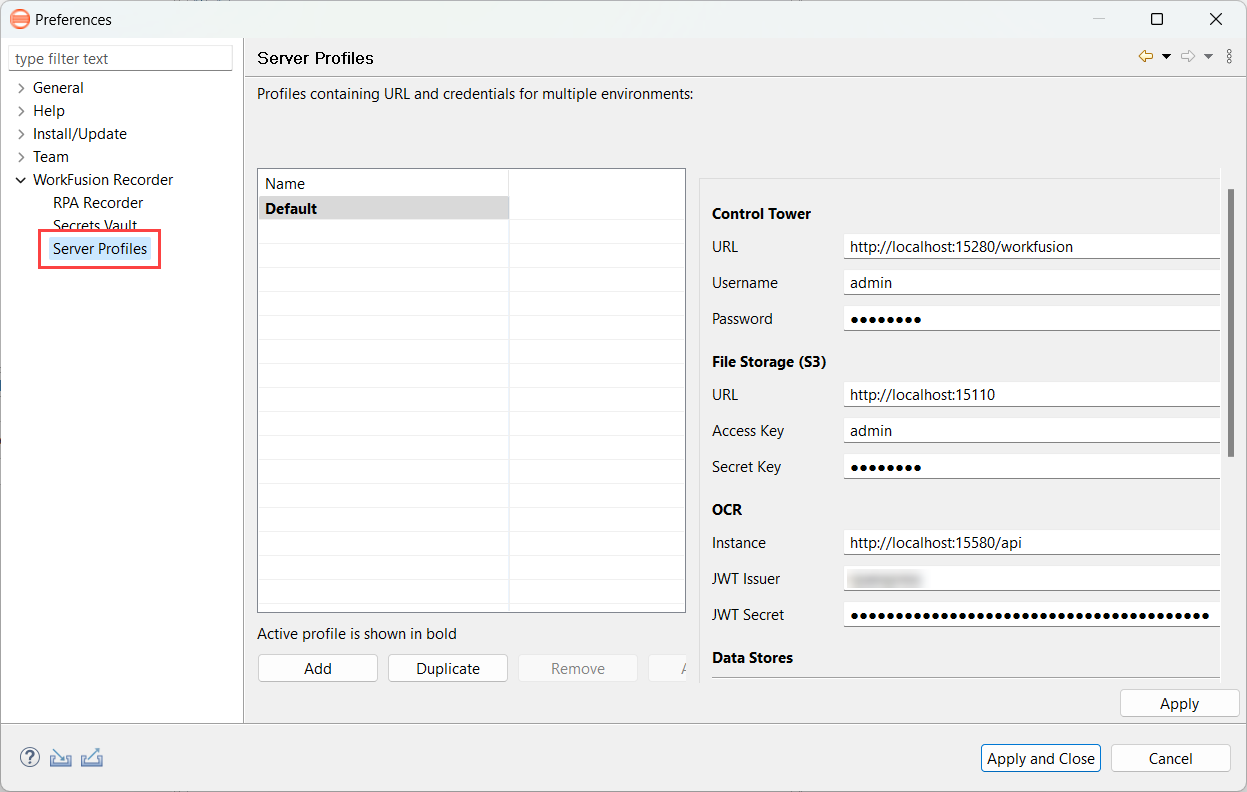
For each server profile, you can specify the following preferences:
- Control Tower:
- URL: URL to Control Tower using the server hostname or IP address
- Username: username to access Control Tower defined during the installation in the Administrator account
- Password: password to access Control Tower defined during the installation in the Administrator account
- File Storage (S3):
- URL: URL to S3 File Storage defined during the installation using the server hostname or IP address
- Access Key: username to access File Storage defined during the installation in the Administrator account
- Secret Key: password to access File Storage defined during the installation in the Administrator account
- OCR:
- Instance: URL to OCR defined during the installation using the server hostname or IP address
- JWT Issuer: username to use OCR created during the installation
- JWT Secret: password to use OCR created during the installation
- Data Stores > Database:
- Schema URL: URL to PostgreSQL scheme
- Username: PostgreSQL username
- Password: PostgreSQL password
- Data Stores > Service:
- Service URL: URL to the Control Tower application
- Username: username to access Control Tower
- Password: password to access Control Tower
- Data Stores > AutoML SDK:
- Archetype Catalog > Local
- URL/Path: URL or path to a local catalog file or the directory containing the catalog file
- Archetype Catalog > Remote:
- URL/Path: URL or path to a remote catalog file or the directory containing the catalog file
- Username
- Password
- Archetype Catalog > Local
Add profile
You can have several server profiles configured for working with different servers.
To create a new profile, do as follows:
On the Server Profiles tab, click Add.
In the window that follows, enter a server name and click OK. Mind that the profile name can contain only letters, digits, and underscores.
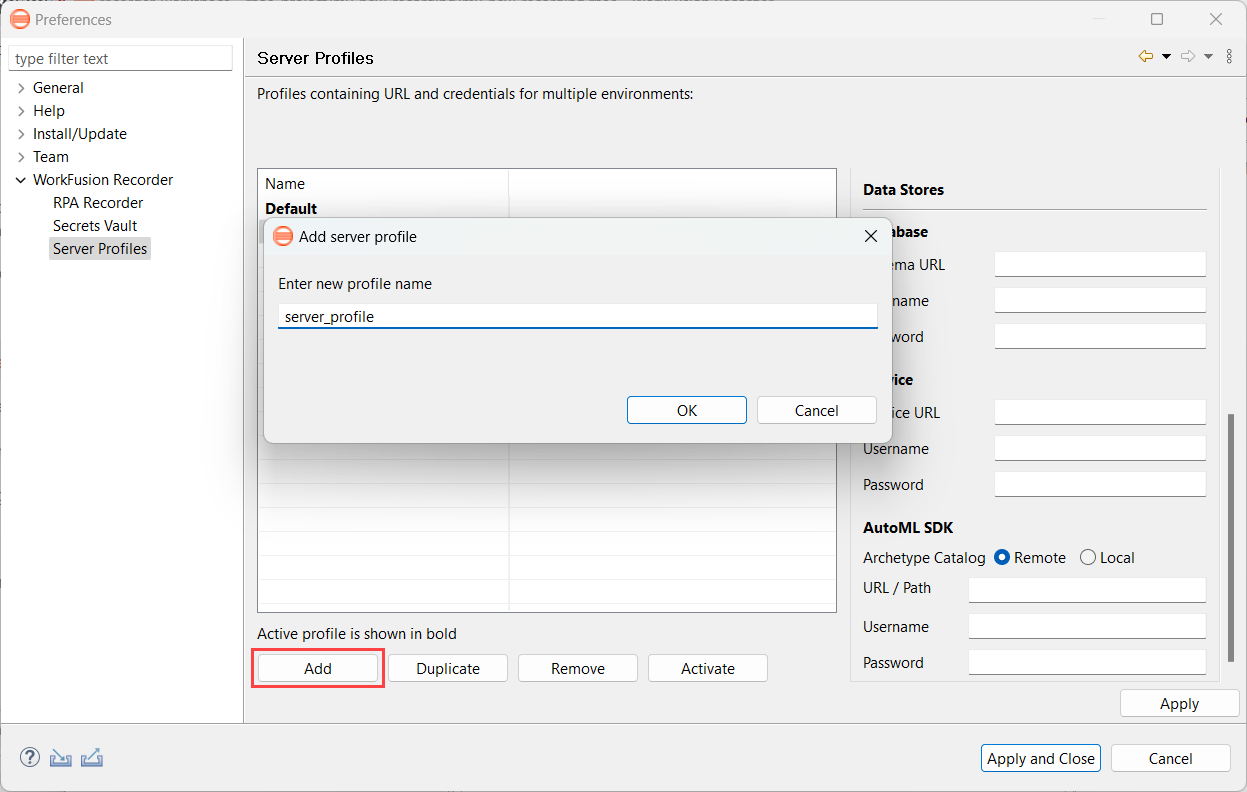
Enter the required parameters and click Apply or Apply and Close to save the settings.
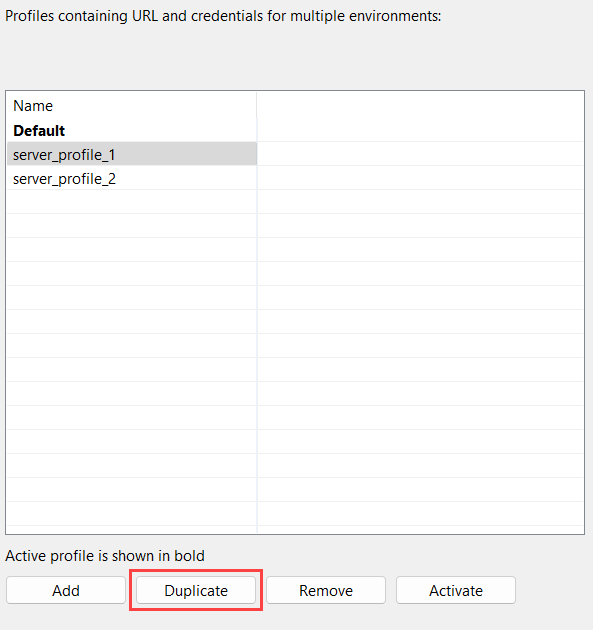
You can also duplicate the profile you have already created:
Click the Duplicate button.
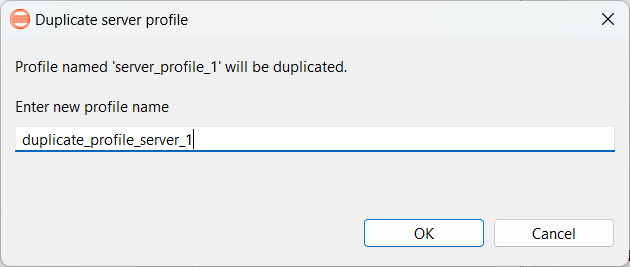
In the window that follows, enter a new profile name and click OK.
Edit profile
To edit server profile settings, select a server profile in the list of Server Profiles, enter the needed changes, and click Apply or Apply and Close.
On saving the changes, close Recorder and open it again to check whether everything is in place.
Activate profile
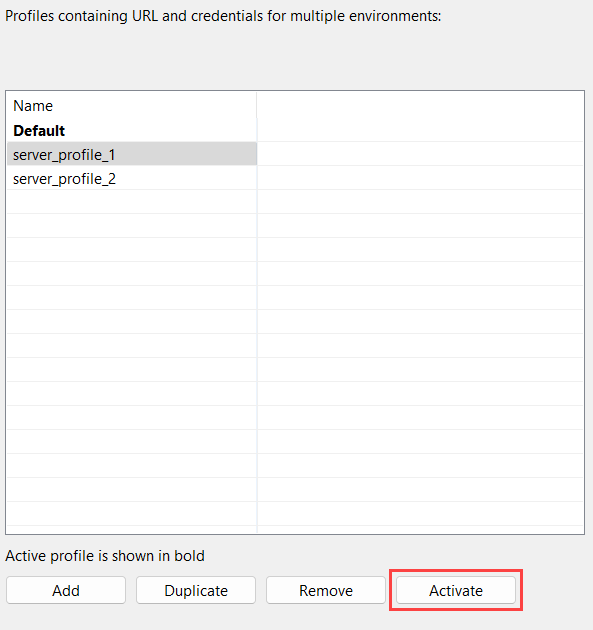
To make a server profile active, select it in the list of Server Profiles and click Activate.
Remove profile
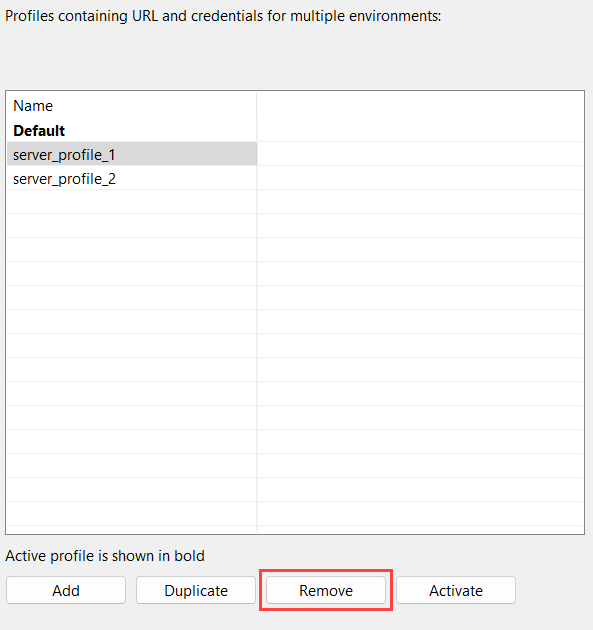
To delete a server profile that is no longer in use, select it in the list of Server Profiles and click Remove. The server profile is removed from the list.