Build Business Process from Bot Task
The guide illustrates the implementation of a schemaless Business Process (BP) for website rating from a Bot Task using the Work.AI Developer and Control Tower capabilities.
The video recording below gives a comprehensive overview of the BP creation steps. However, mind that the application screens in the video might differ, depending on the Work.AI version you are using:
Here are the materials you can use to implement the BP rating BP:
- The rating_website_validation recording you can open Recorder and publish to Control Tower
- The rating_website_scraping recording you can open in Recorder and publish to Control Tower
- The bp-rating package that can be imported into Control Tower as a ready BP
- The input data file
Below, you can find the detailed guide on how to publish your recordings to Control Tower and create a BP step by step.
Publish recording to Control Tower
To publish a recording to Control Tower, do as follows:
On the menu, click the Publish to Control Tower button.

Enter the BP name.
Click Finish. If the recording has been published successfully, the following dialogue window appears.
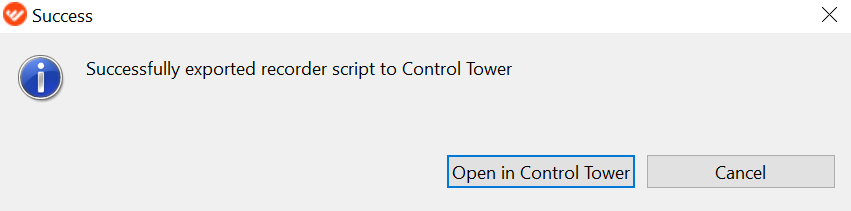
To open the BP draft in Control Tower for editing, click Open in Control Tower.
Each recording is published both as a ready one-step BP you can run in Control Tower and as a BP step (or a Bot Task) you can use in other BPs.
To update a published recording, publish it again using the Publish to Control Tower button. You will be prompted with the following message:
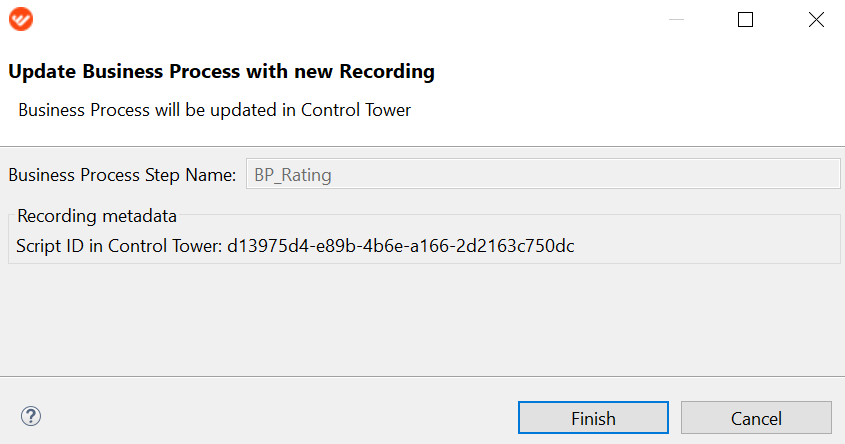
Click Finish to update both the BP and the Bot Task in Control Tower. It will also update all BPs that include this Bot Task.
To publish a recording as a different BP, use the As new business process option.

Publishing the recording as a new BP removes the connection between the recording and the previously published BP and creates a connection to the new BP. If the recording is published again, only the new BP is updated.
Publish Bot Task to Control Tower
To publish a Bot Task to Control Tower in Eclipse, follow the scenario below:
Open the Configs folder of your project.
Right-click the Bot Task you need to publish.
Select Publish Bot Task.
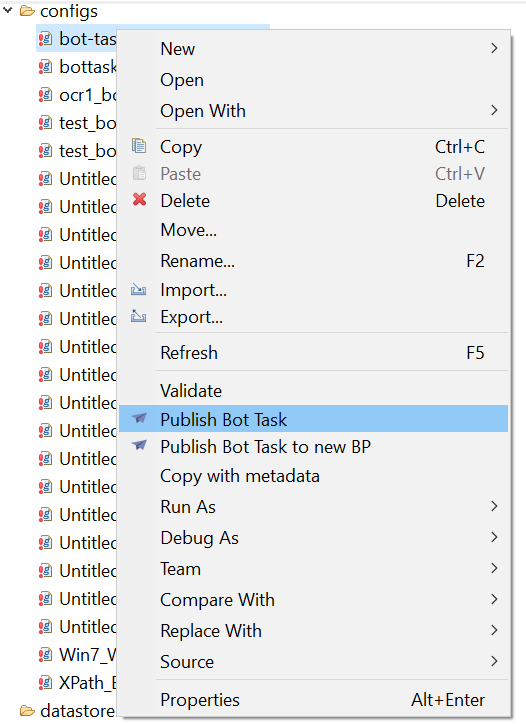
Enter Instance URL (the URL of the Control Tower) and the BP name.
Click Finish.
To update the already published Bot Task, publish it again.
To publish without updating the previously published Bot Task, select the Publish Bot Task to new BP option.
Design Business Process
Besides running the one-step BPs published from Eclipse, Control Tower allows you to create complex BPs with multiple steps (Bot and Manual Tasks) and various workflows.
To create a BP in Control Tower, do as follows:
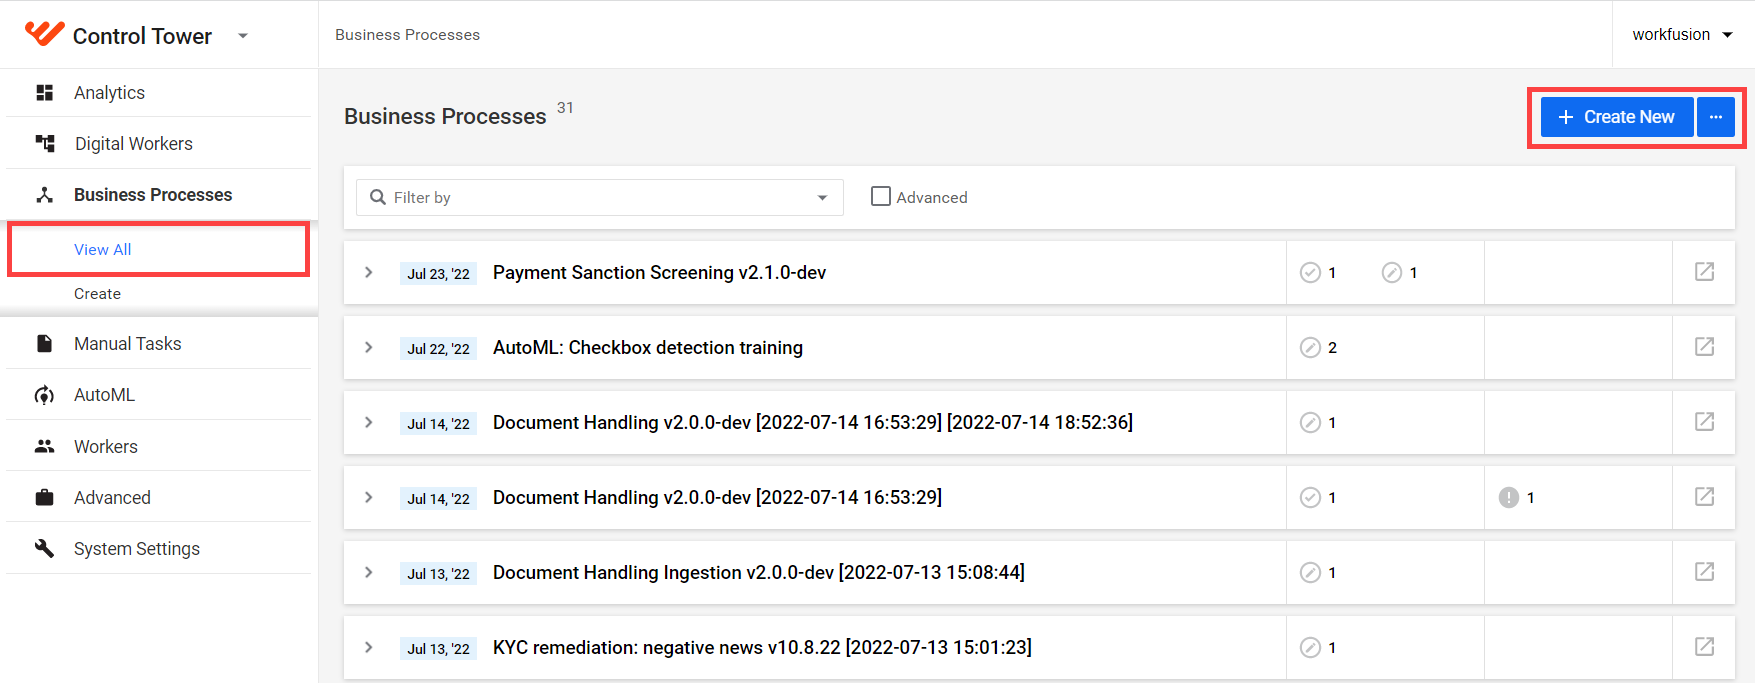
Go to Business Processes > Create.
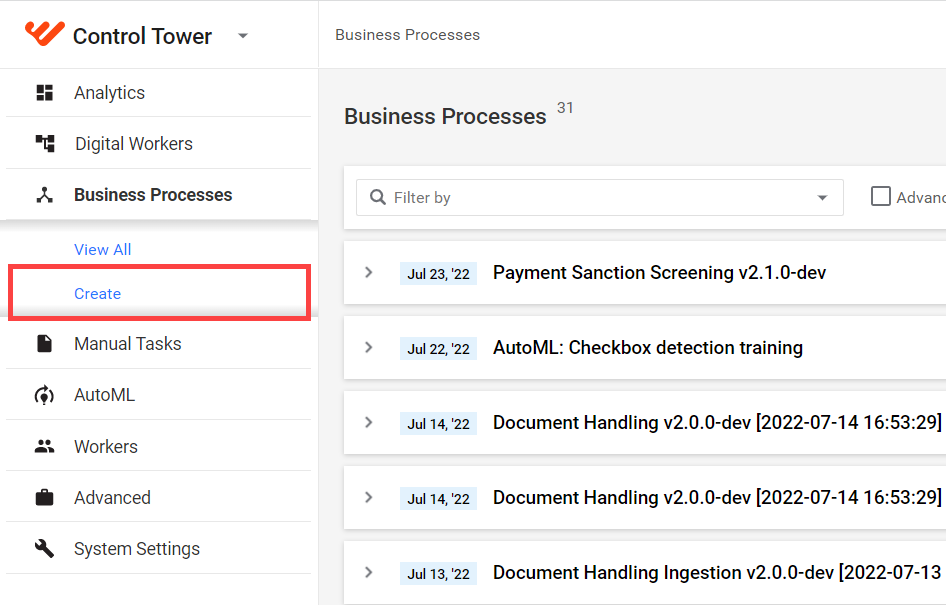
You can also click the Create New button on the Business Processes page.
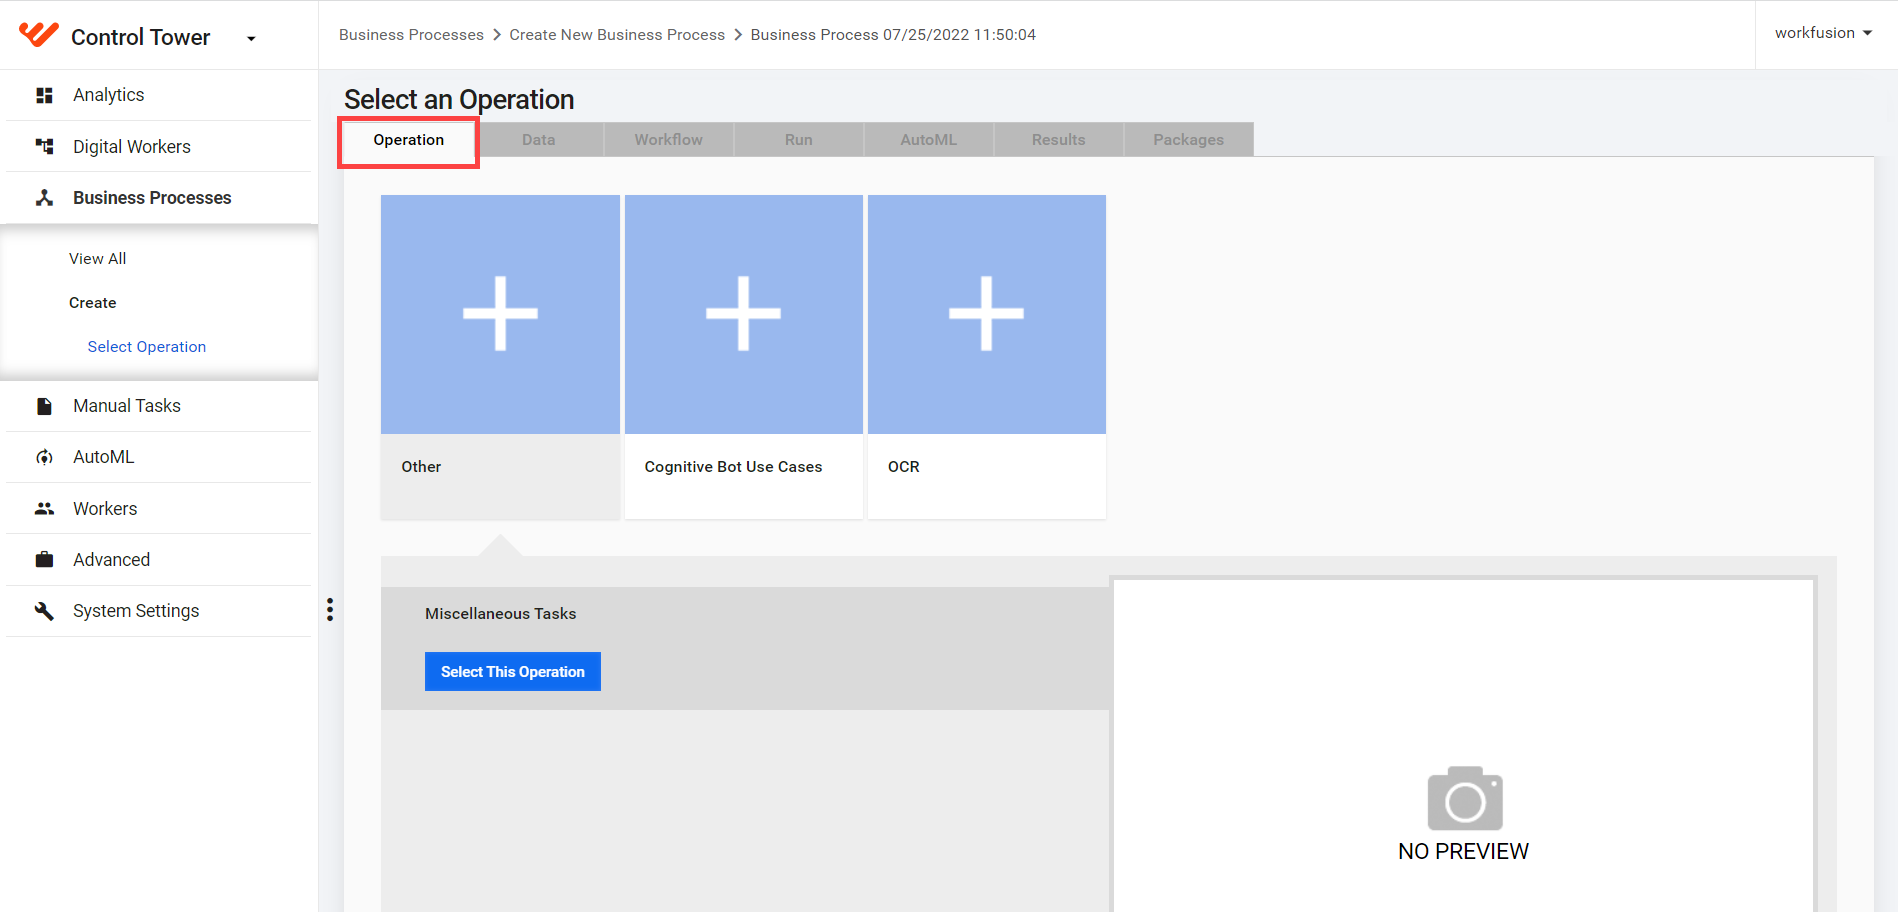
Go to Other > Miscellaneous Tasks > Select This Operation.
The Workflow tab opens for you to define the BP workflow.
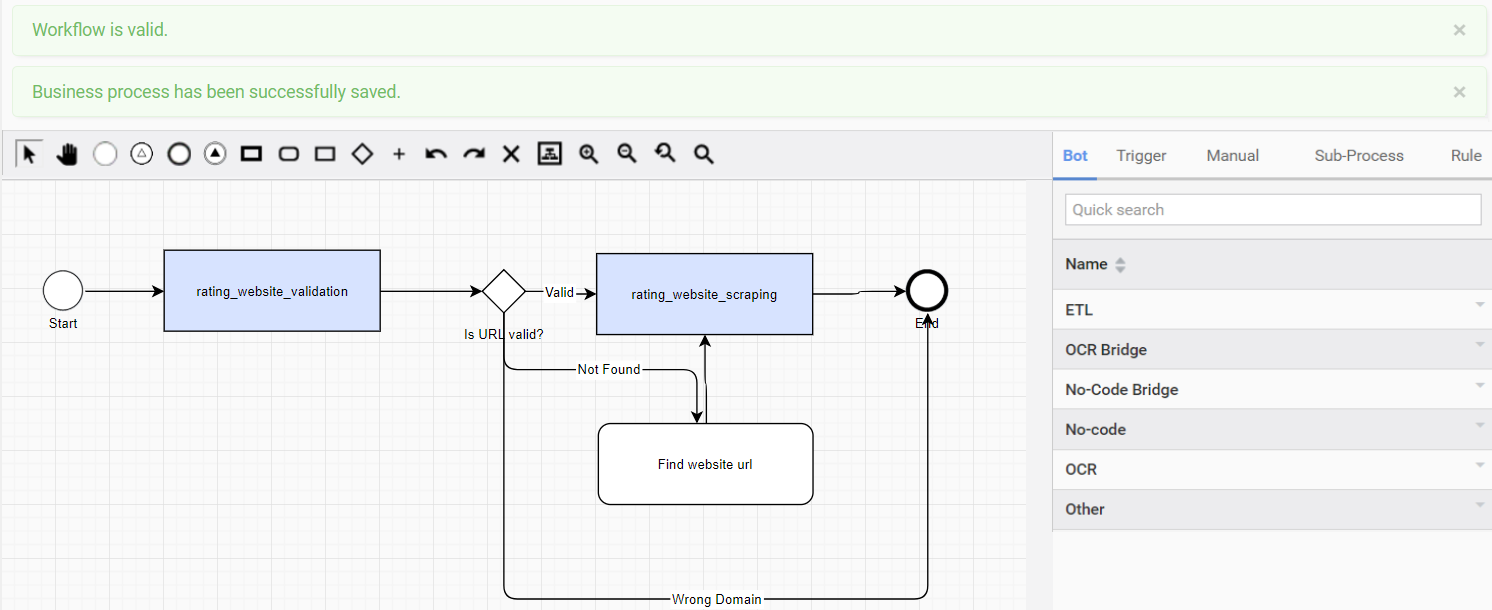
The provided example is based on the BP rating BP that collects information about a number of companies online. The BP consists of two Bot Tasks and a Manual Task. These are as follows:
- The rating_website_validation Bot Task that checks if the provided web-page URL is valid.
- The rating_website_scraping Bot Task that extracts information from the web-page.
- A Manual Task in which a human is able to review the URL that was marked as wrong and provide the correct URL for the second Bot Task.
In the Manual Task, you see which webpages return the Not found status (saved in the is_valid variable) in Bot Task 1, find the correct URL manually, and pass it to Bot Task 2.
You can find the video demonstrating how to create a BP in Control Tower, and download used recordings and input data at the end of this guide.
Create workflow
On the Workflow tab, perform the following steps:
Enter the BP title and tags if required.
Add the BP elements to the canvas.
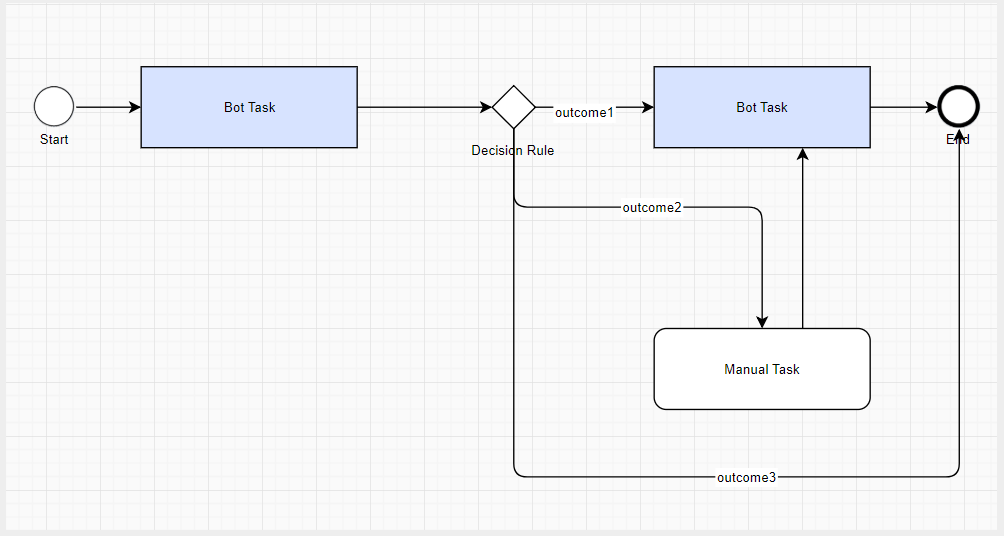
You can add the elements to the canvas in the following ways:
- Adding them from the toolbar or via the context menu opened by right-clicking the canvas. In this case, an empty element is created that needs to be defined. To define the element, drag the required Bot Task, Manual Task, or rule to the respective element icon from the side panel.
- Dragging them from the side panel (only Bot Tasks, Manual Tasks, rules). In this case, the already existing element is added to the workflow and doesn’t need to be defined.
To edit a step in the workflow, double-click its element in the canvas.
3. Create connections between the elements by dragging the arrow icon from one element to the other. If the line is green, the connection is allowed. If the line is red, the connection is not allowed (an error message is displayed in this case).
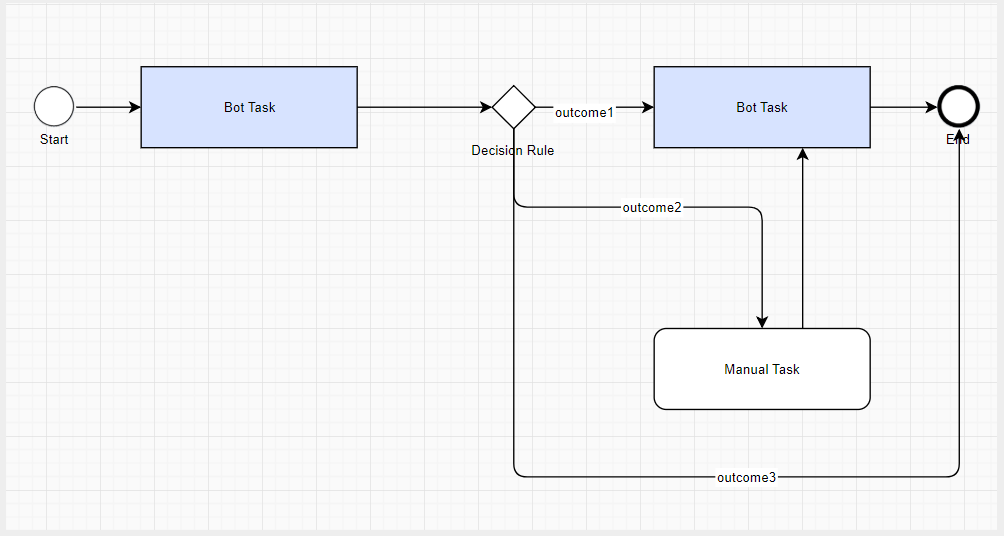
Rules for creating connections:
- The Start element must have 1 outgoing connection.
- The End element must have at least 1 incoming connection.
- All tasks and rules must have at least 1 incoming and 1 outgoing connection.
4. Make sure all BP steps use valid data from the previous tasks:
- Column headers from Input Data
- Answer codes from Manual Tasks
- Variable values from the published recordings
5. Validate and save your BP by clicking the corresponding buttons. In case you have any error messages, click them one by one, and appropriate steps or connections are highlighted in red.
Add decision rule
Using decision rules, you can define several flows for a BP, depending on certain conditions.
To add rules to a BP, use the following methods:
- Add a new rule from the toolbar or using the context menu.
- Add an existing rule from the sidebar.
To define a new rule or edit an existing one, double-click the element's icon. Perform the following actions in the Rule Editor:
Enter the rule name.
Click Add Outcome. Outcomes define different BP workflows based on certain conditions.
Click Add Condition to add one or more condition to the outcome. If the Outcome has no conditions, it means for all other records.
Click Save.
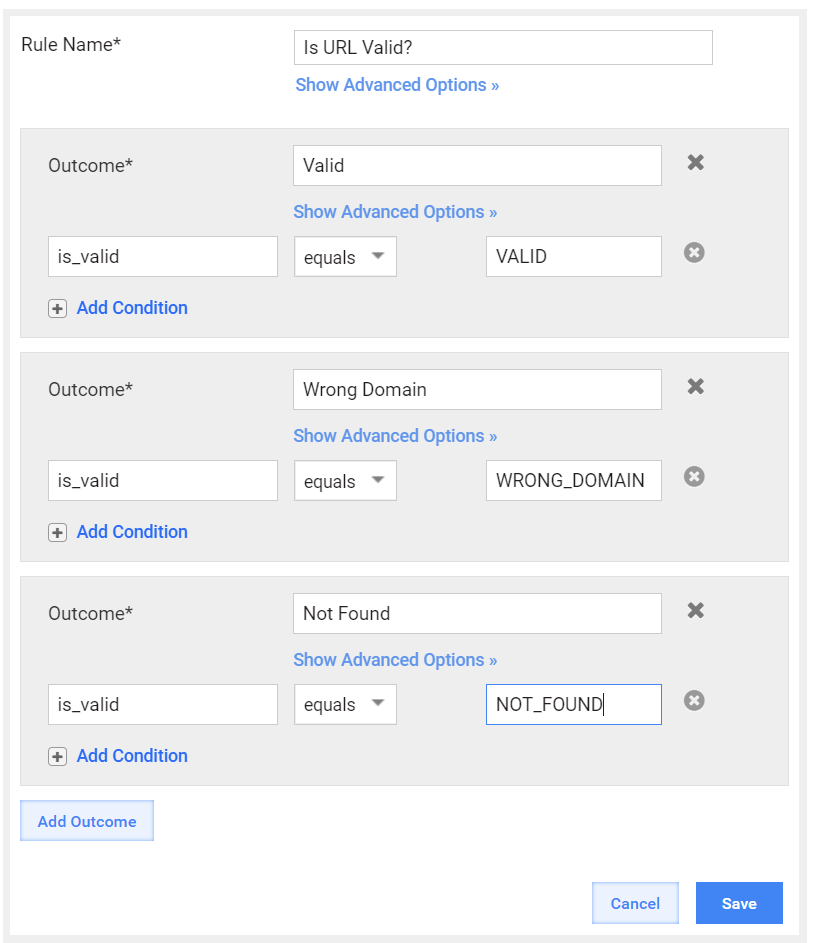
The logic of rule elements is as follows:
- OR between Outcomes
- AND between Conditions
Each Condition contains three fields:
- Variable (Answer code from a Manual Task, column header from input data, variable from a Bot Task)
- Logical Operator (for instance, equals, less than)
- Value or regular expression, if required.
Outcomes are connected to respective elements in the BP.
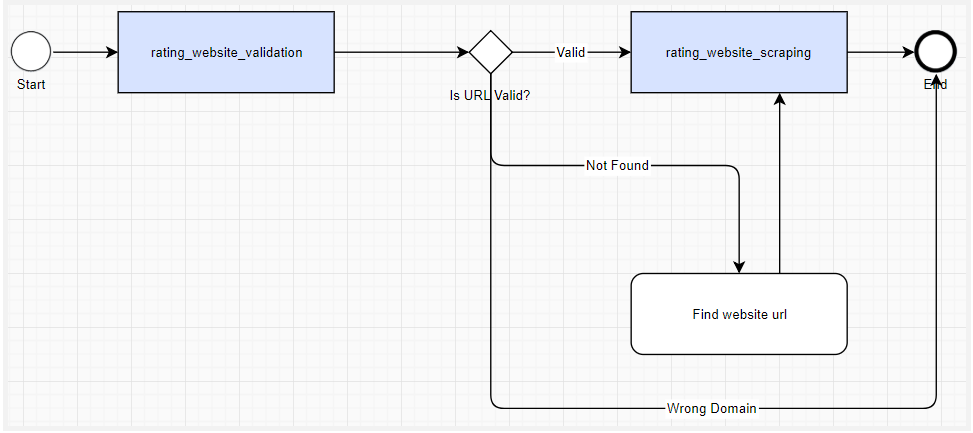
Validate the BP to check that the workflow is valid.
Add input data
Using input data in a BP is optional.
If you need to use input data, do as follows:
Open the Data tab of the BP.
Uncheck the No Data box and click Upload Data.

Click Add, select the data file, and click Upload.
Click Clear to remove the selected file and select another one.
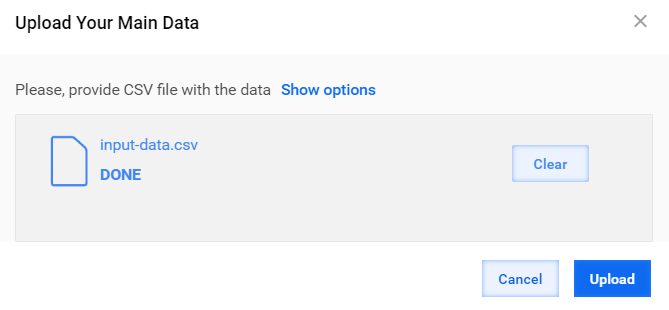
The input data file has to be a CSV file. The column headers in the file should be the same as the variables used in the BP.
The default data file settings are as follows:
- The file separator is a comma.
- The file encoding is UTF-8.
You can change the settings by clicking the Show options link.
Input data file
Input data can contain values for different types of variables.
Follow these rules to create a valid input data file.
- The List variables values should have the following format:
["1", "2", "3"]. - The Table variables values should have the following format:
[["1", "2", "3"], ["a", "b", "c"]], where["1", "2", "3"]and["a", "b", "c"]are table rows. - The Boolean variables values are to be started with an apostrophe:
'true,'false.
To download a sample data file, click the link.
Upon uploading, the contents of the input file is displayed along with the file's existing columns headers.
You can remove the uploaded data by clicking the Remove Data button.
In case the headers do not correspond to the variables used in the BP, the following notification appears:

Click Map columns to see the error and remap the columns. Click Next to proceed to the Workflow tab.
Add Manual Task to BP
To create a Manual Task in a BP, double-click the Manual Task element in the workflow.
You can also create a standalone Manual Task not connected to any BP by clicking Create Manual Task in the Manual Tasks list or by selecting Manual Tasks > Create.
To add an existing Manual Task to a BP workflow later, drag it from the side panel.
To design a Manual Task, follow the steps:
Double-click the Manual Task step, select an Operation, and click Select Operation.
tipFor designing Task Designer Operation tasks, follow the guide.
If you create the Manual Task from scratch, you can upload input data in an appropriate format on the Data tab. If the Manual Task receives data from previous BP steps, no input data is required. Click Next.
Add Title and Instructions if required and click Save.
Reopen the editor by double-clicking the Manual Task icon.
In the side panel, select data elements required for a manual worker to complete the task. Data elements are received from the input data file and from previous BP steps.
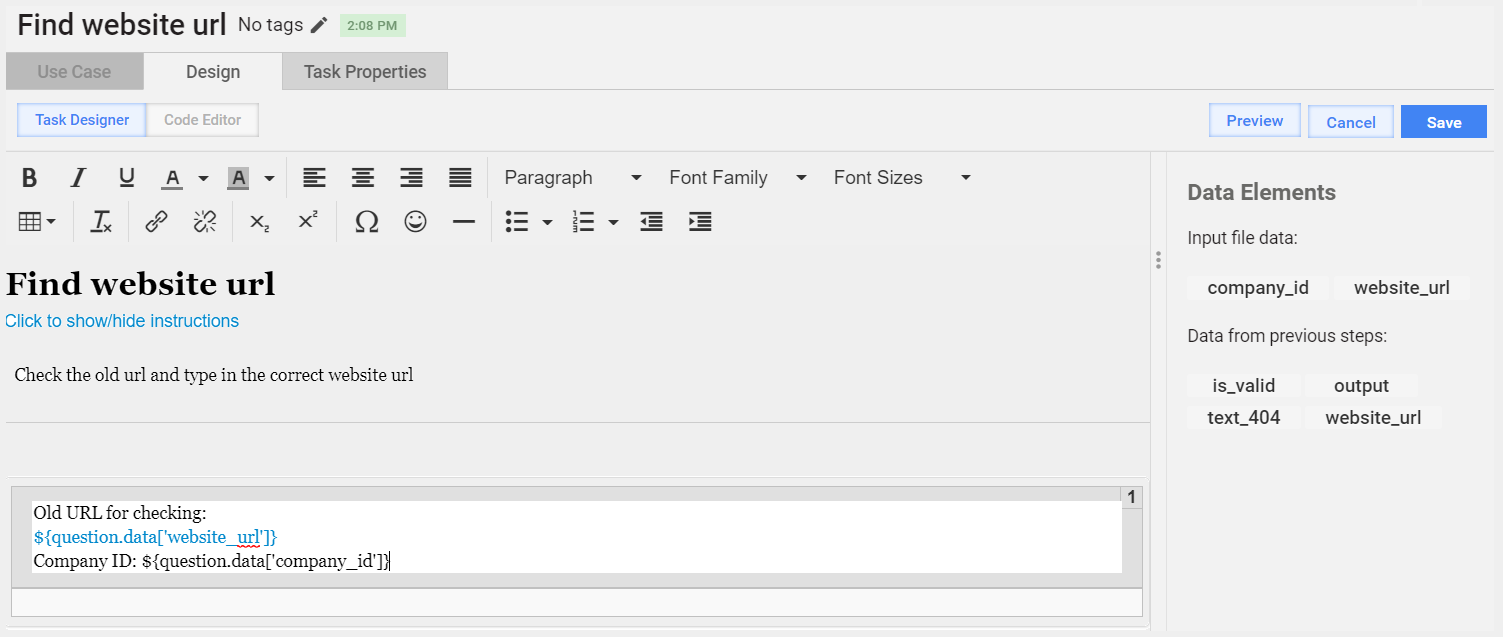
Add an Answer—the data to be provided by the manual worker to the next step in the BP or as its final result.
- Fill in Unique Code—the variable to where the result of the Manual Task is saved.
- Enter the answer title in the Answer field. This is the title the worker sees on opening the task.
- Select Answer Type.
- Add Description (optional).
- Check whether the answer is required.
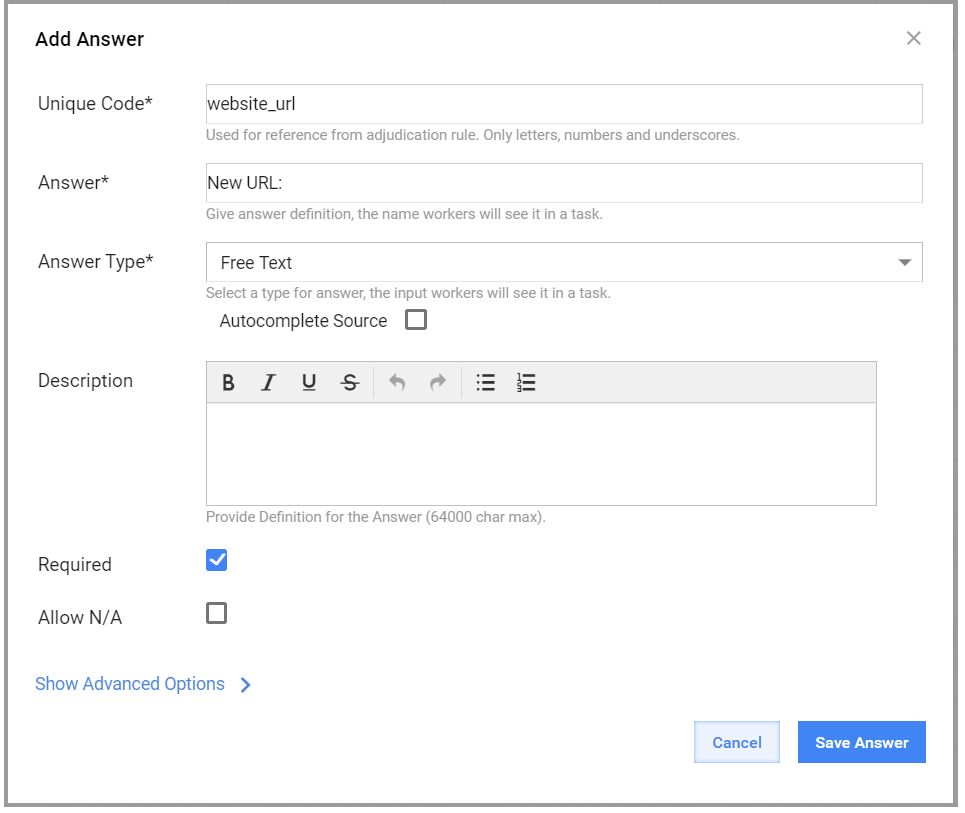
Click Save Answer. You can add several answers to one Manual Task.
Click Validate and Save to complete the BP.
When you have trouble creating a BP, read the Impossible to create Business Process guide.
When you have issues with Recorder, read Troubleshoot Eclipse and Recorder.