Configure no-code Decision rules step
A Decision rules step allows you to configure decision rules and routing outcomes in a no-code manner.
The step produces decisions triggered by the rule logic and a special rule definition that routes records to an outcome via the _sys_rule_outcome output variable. This routing variable contains IDs of the outcomes to which the current record must be sent for further processing. The rule that processes the routing using only _sys_rule_outcome finds outcomes and transfers records.
Rules are mapped to decisions and outcomes as 1:n. For example, one rule is mapped to one outcome, but different rules can be matched to the same decision.
The step mechanism supports a possibility for multiple values in _sys_rule_outcome, but the features like splitting and joining rules or splitting data is not supported in Work.AI v10.2.9+. For the split and join functionality, see Use Split-Join rule.
When a BP is executed, the rule logic is executed, and the _sys_rule_outcome routing variable is generated. Along with the variable, the Decision rules step can generate other variables. They might be used by the downstream step, in which case they will not be used by the routing rule.
During the transition flow, Control Tower checks the type of the routing rule. In the case of the variable-based routing, Control Tower routes records based on the values of the _sys_rule_outcome variable.
- If a rule with the variable-based route does not receive the
_sys_rule_outcomevariable, an exception is thrown. - If
_sys_rule_outcomehas outcomes that do not match the existing ones, an exception is thrown. - If
_sys_rule_outcomeis present but empty, the records end the same way as for the original rule when no condition matches.
- For sample use cases, see Rule Builder REST API.
- For the API documentation, refer to GenAI rules REST API.
Add Decision rules step to Business Process
To build a BP with a Decision rules step, follow the steps:
Create a BP as described in the guide.
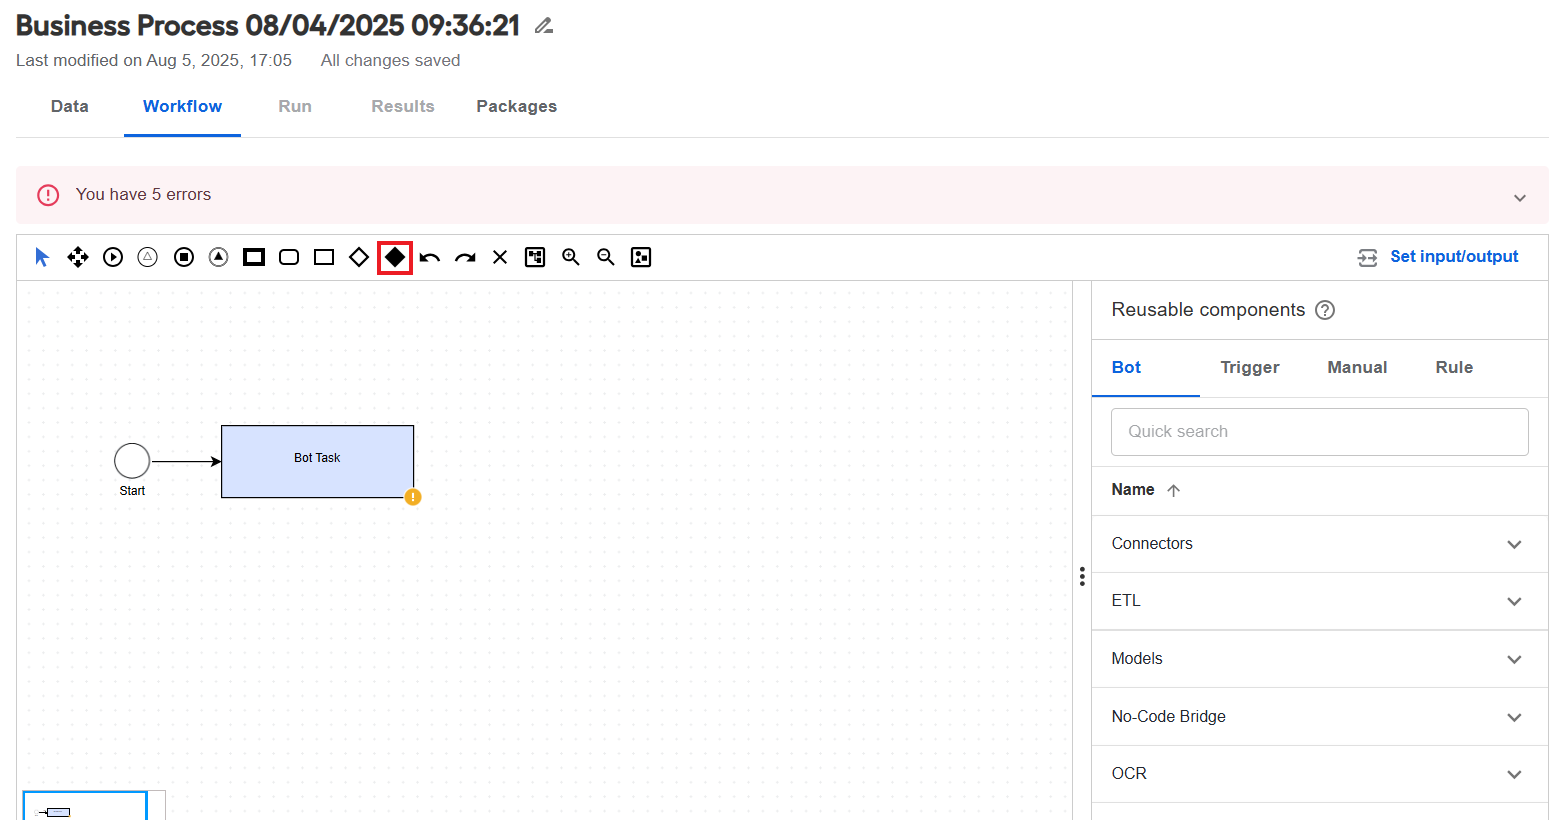
Navigate to the Workflow tab and drag the black diamond operator, a Decision rules step, from the toolbar to the canvas.
 note
noteA composite rule added via a white diamond operator does not contain any business logic but is used to route the output to the rest of the BP elements based on the decision.
Connect the Decision rules step with the previous step to get input data.
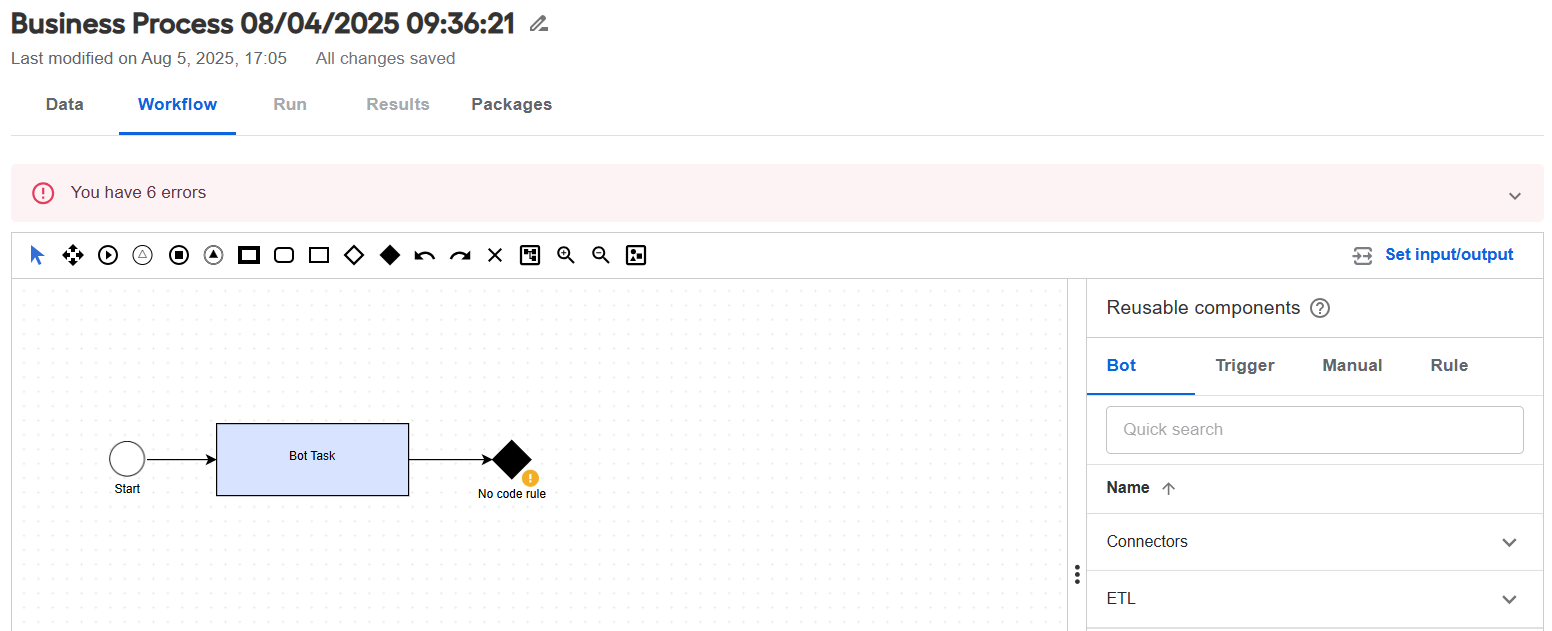
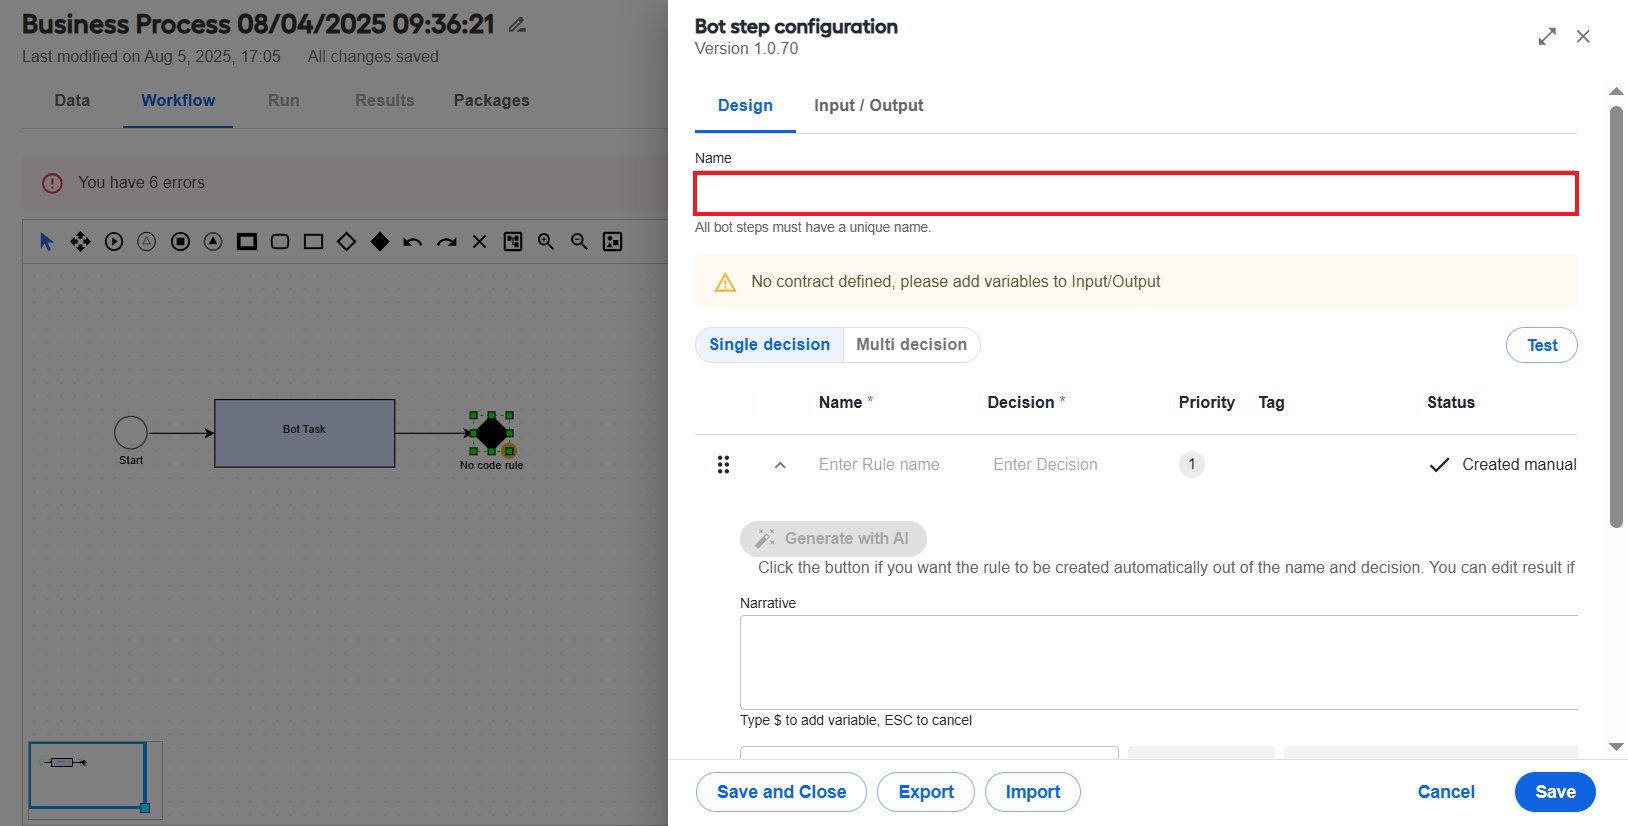
Double-click the step. On the Design tab, enter the step name in the Name field and click Save to save the changes.
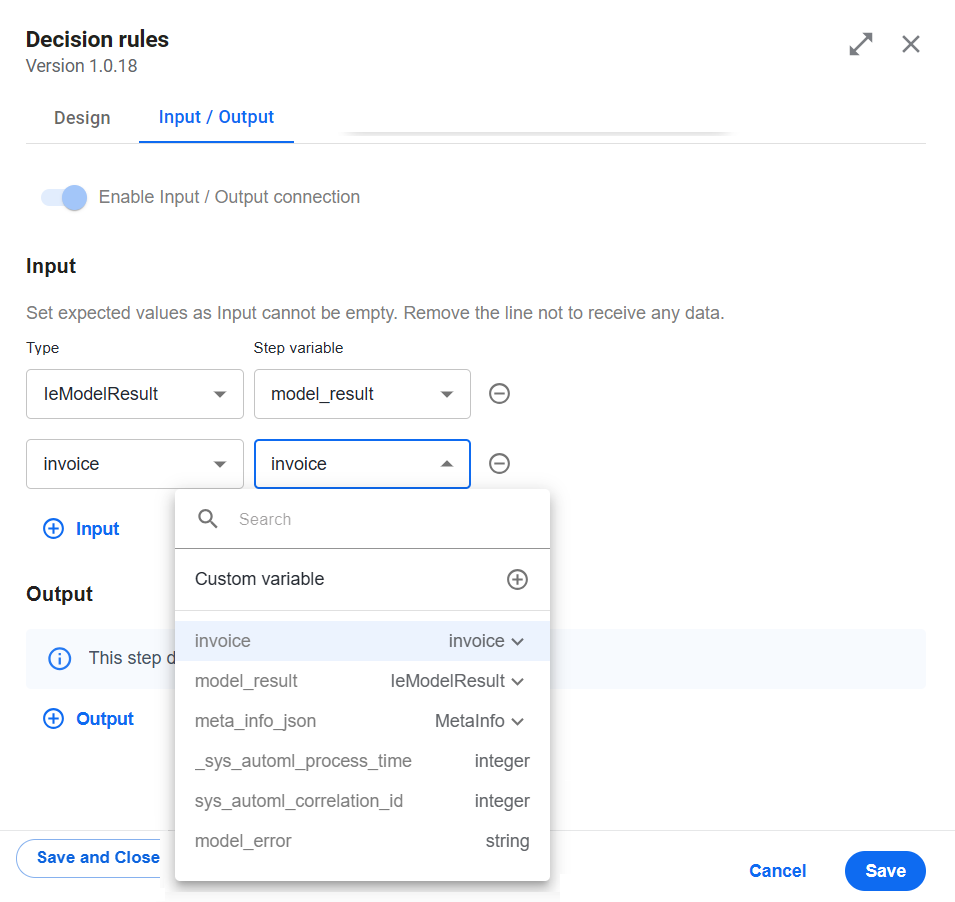
Navigate to the Input / Output tab, switch the Enable Input / Output connection toggle, set the input and output contracts, and click Save. Only the fields defined in the rule step contract appear in the rule builder on the Design tab.
Click Save and Close. Once you save the rule configuration, outcomes are generated automatically. Connect them to other steps on the canvas.
Add rule
To add a rule for a Decision rules step, you must first set input and output contracts.
For convenience, you can switch to the fullscreen mode by clicking the Open in fullscreen button  next to the Close icon.
To add a rule, complete the following steps on the Design tab of the step configuration window:
Click the Rule button.
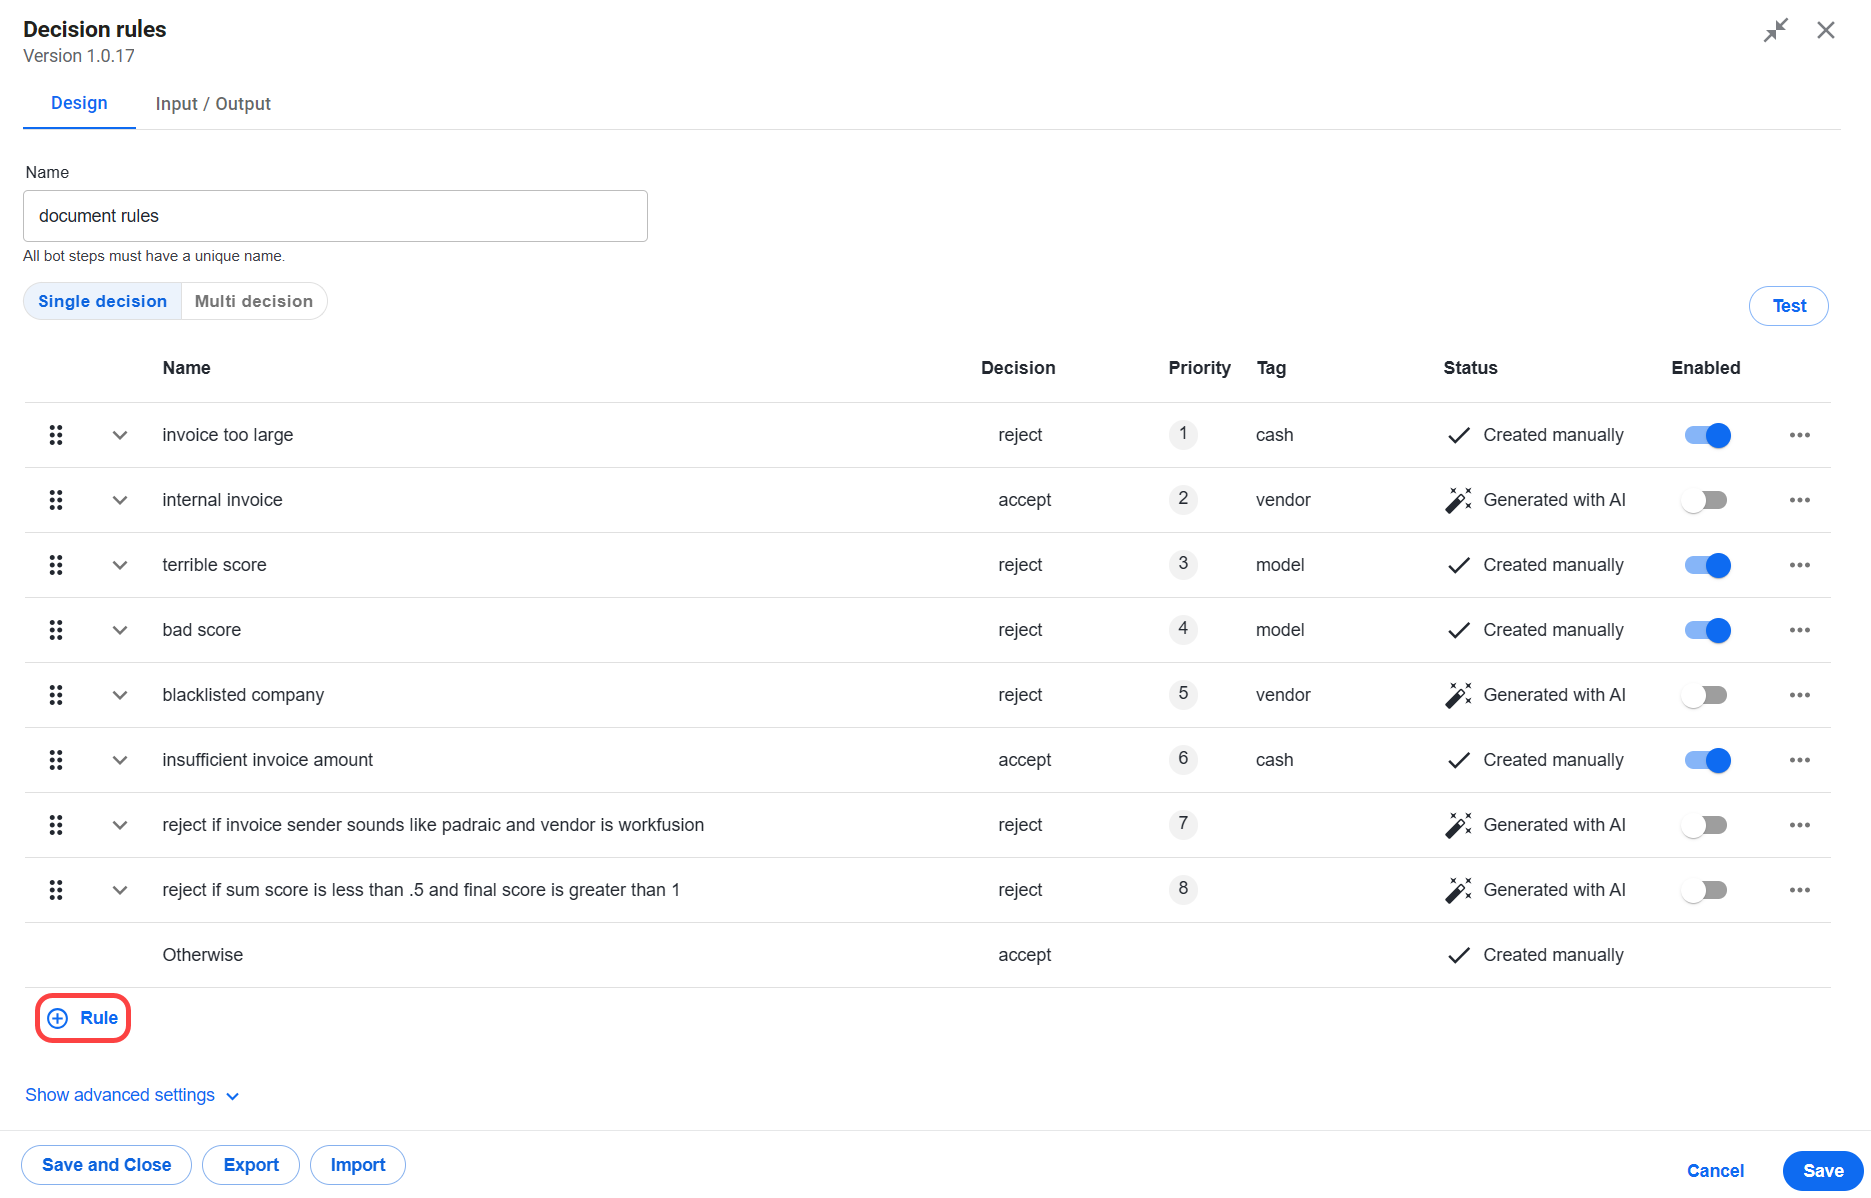
In the Name field, enter a name for the rule.
In the Decision field, enter new routes so that they appear in the workflow. The dropdown also shows existing routes for easy selection.
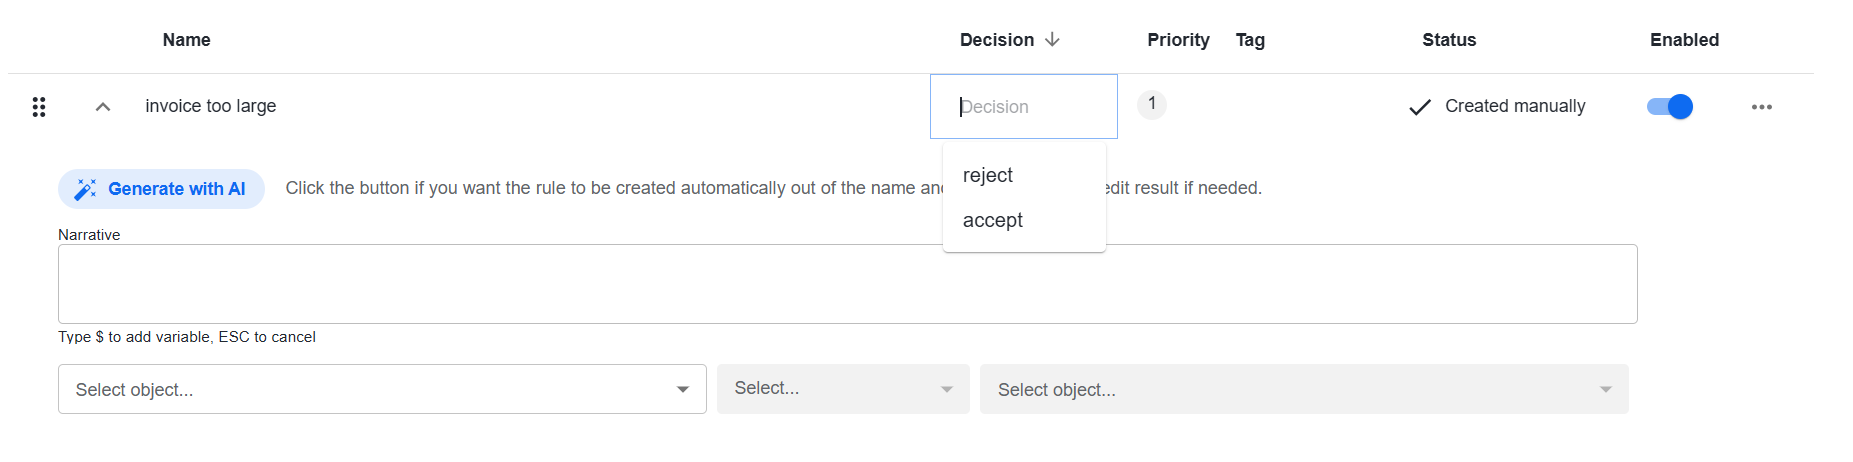
In the Tag field, enter the rule tag.
Make sure the rule is enabled: the Enabled toggle is on.
To disable a rule, switch the Enabled toggle off. The disabled rule appears as grayed out in the list of rules.
Create a rule in one of the following ways:
Manually. For a manually created rule, the Status column displays Created manually.
In the Narrative area, enter further information about the decision. Type
$to add a variable and select it from the list of schema variables available in the step. To cancel the selection, click the ESC button.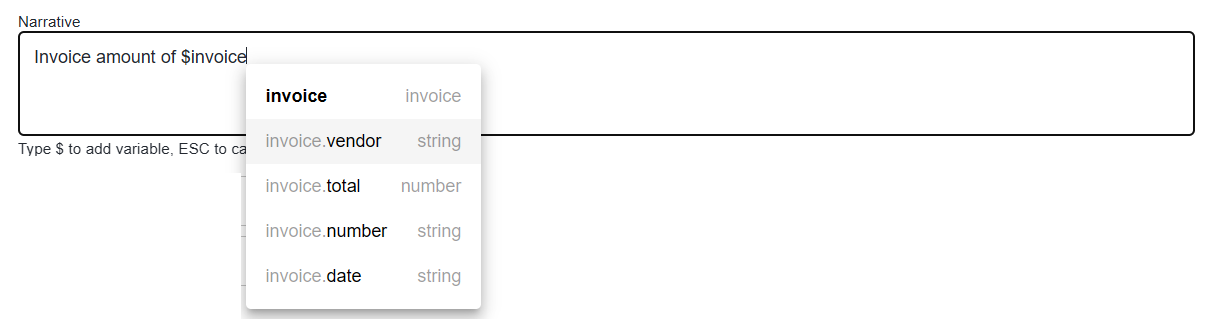

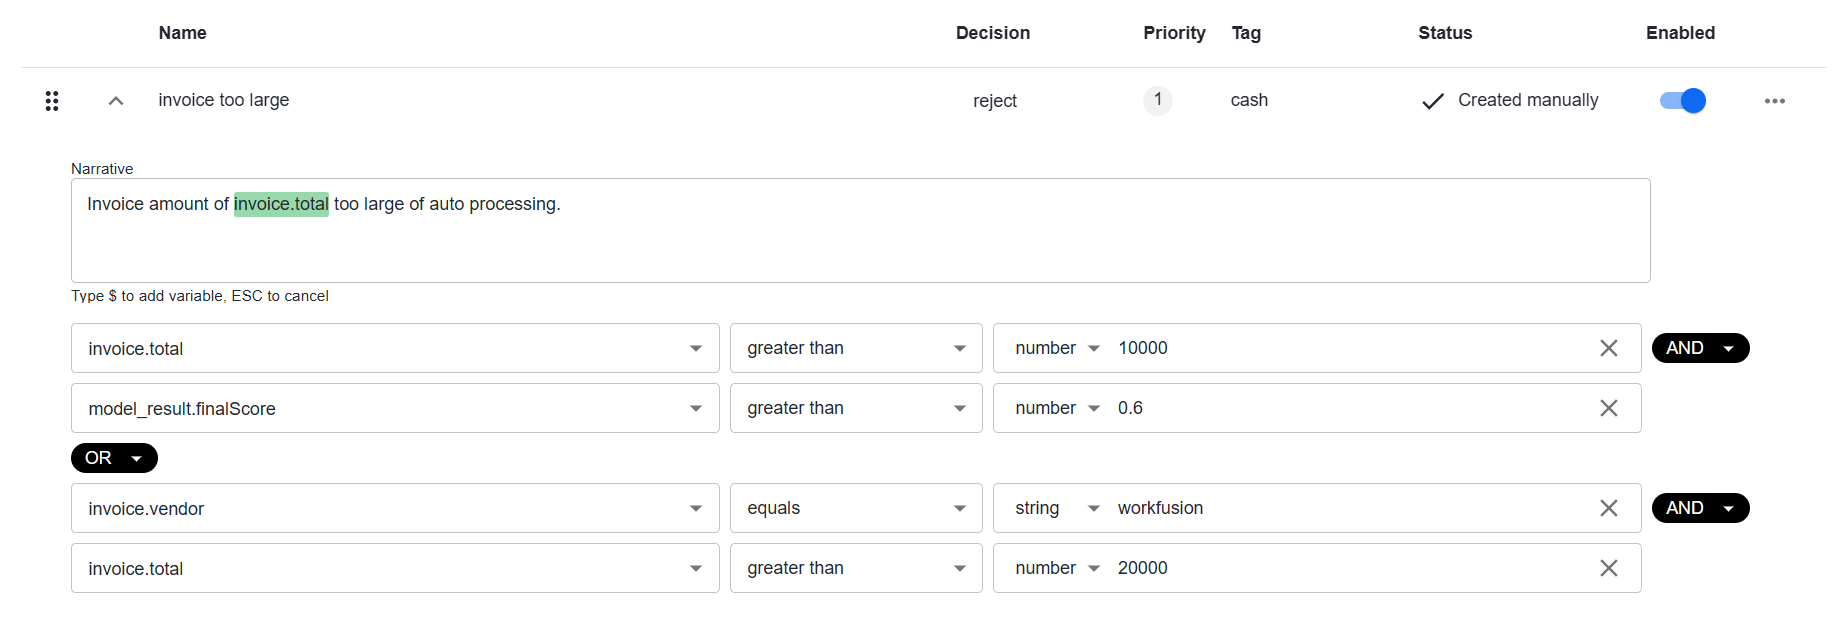
Set up a condition by defining primary and secondary variables and selecting an operator.
Automatically. To create the rule automatically out of the name and decision, click the Generate with AI button. Alternatively, click the Options menu and select Generate with AI.
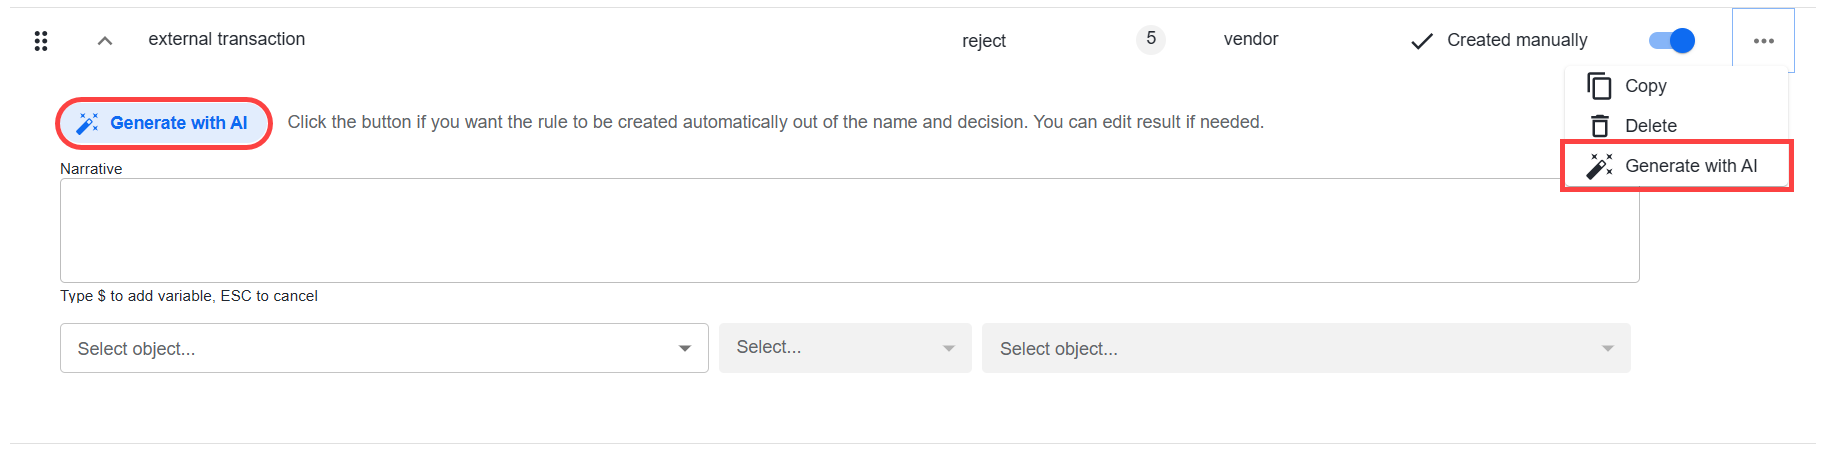
While the rule is being generated, Generating is displayed in the Status column. You can go to another screen and then return to view the results.

Once the rule is generated, Generated with AI is displayed in the Status column. The status is disabled. Switch on the Enabled toggle to use the rule in the step.
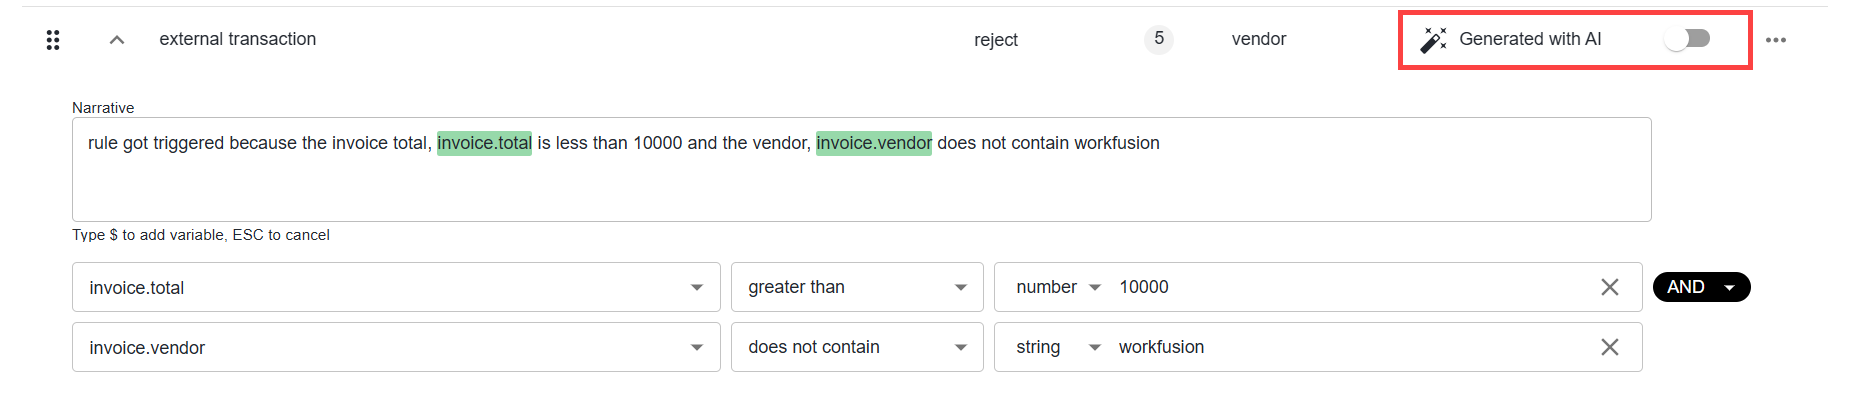
If a wrong rule is generated, for example, a non-existing operator is used, the invalid part is highlighted in red, and the rule is highlighted in red in the list of the rules.
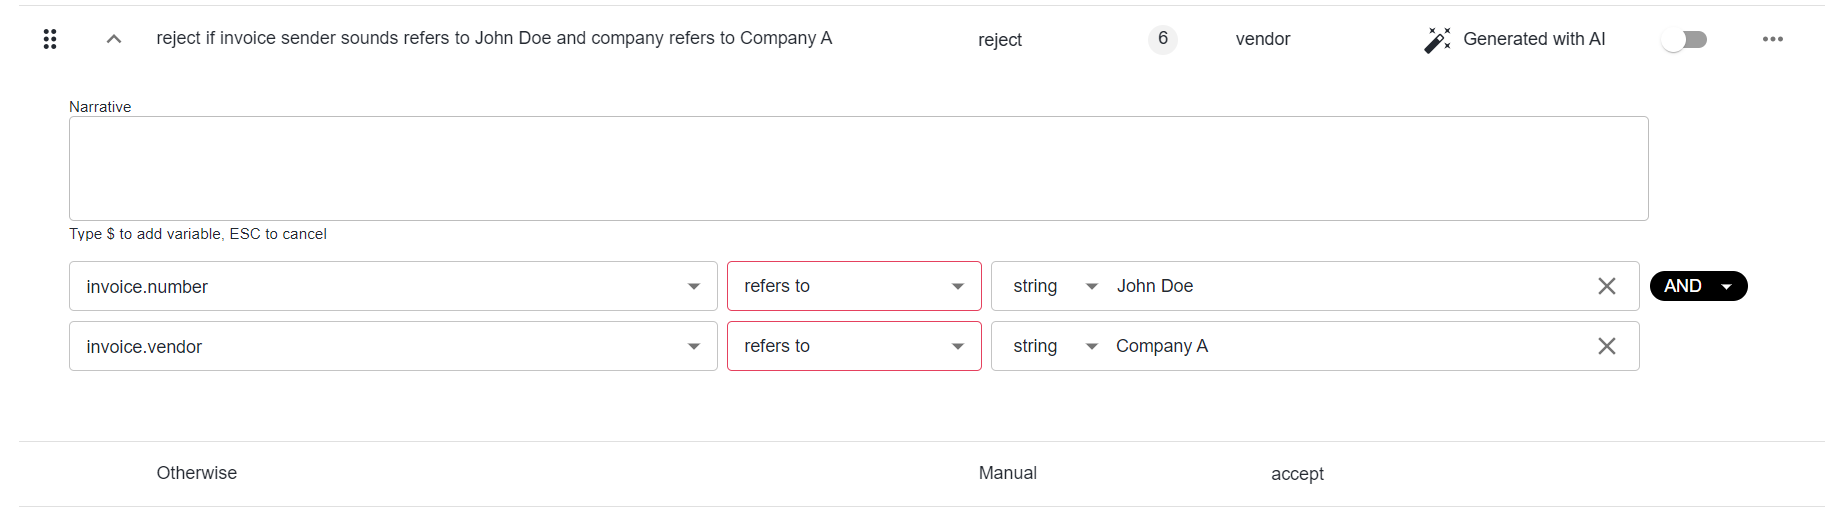
Edit the rule and save your changes. In the Status column, Generated with AI changes to Created manually.
Click Save and Close to finish the configuration.
If needed, you can create a copy of any rule for further editing. Click the Options menu for the rule and select Copy. Then, click Save to save the changes.

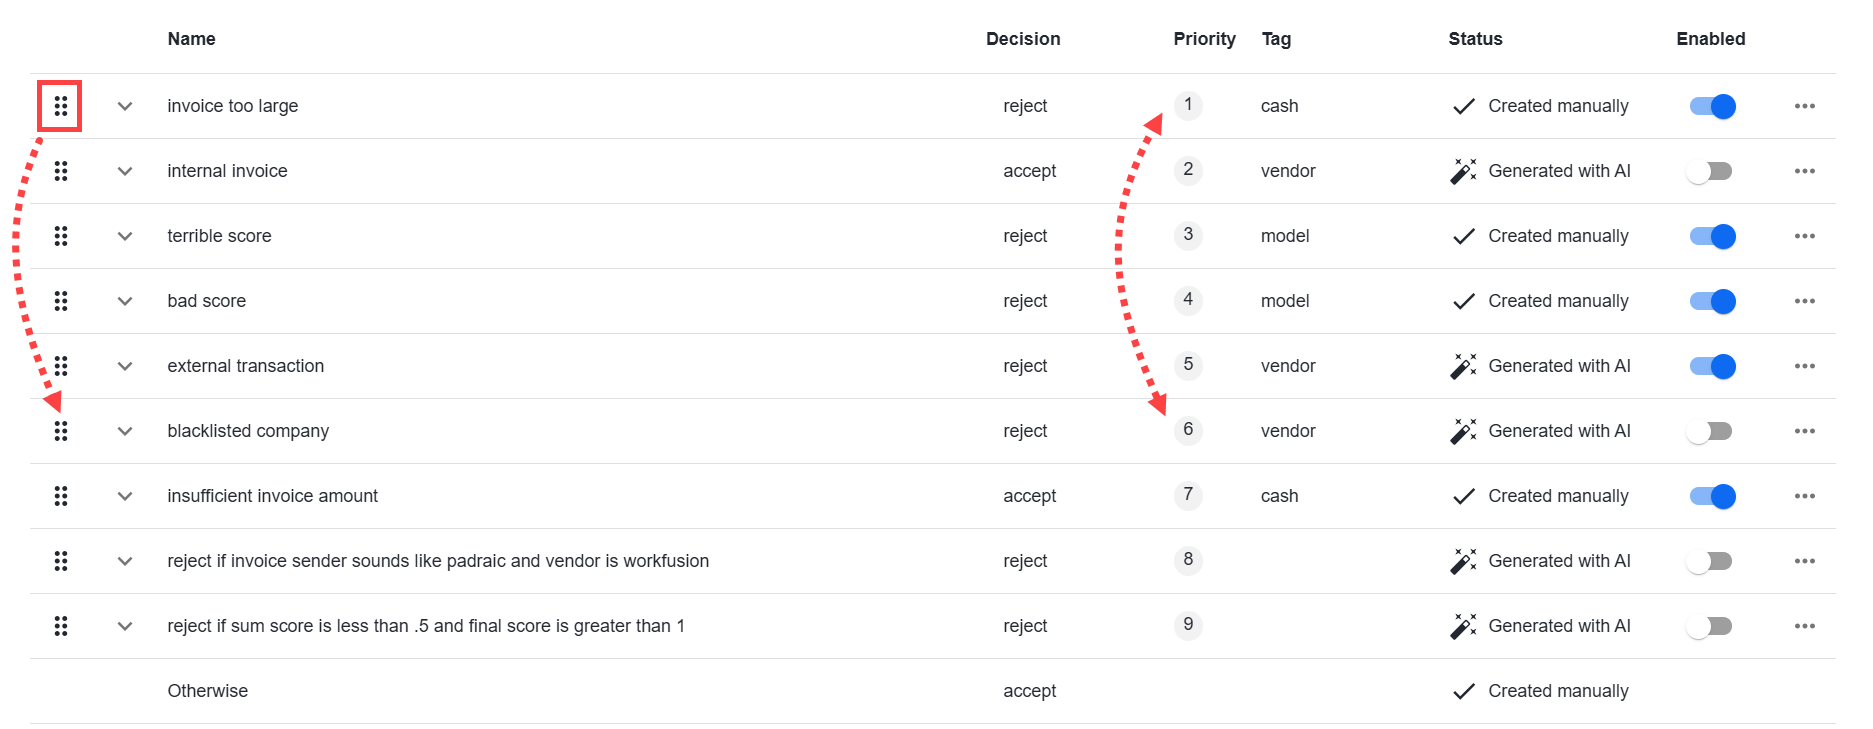
Rules have priorities. To arrange rules in a preferred order, drag them by the grey icon on the left. The priority values in the Priority column change accordingly.
To reuse existing rules from another Business Process instead of creating new ones, see Import and export rules.
Set up condition
A condition comprises the following parts:
- Primary variable
- Operator
- Secondary variable

You can combine conditions into rule sets:
Insert the logical AND operator. In this case, all the conditions must be met for a rule to be satisfied.
Add the logical OR operator. In this case, should any of the conditions be met, the rule is considered to be satisfied.
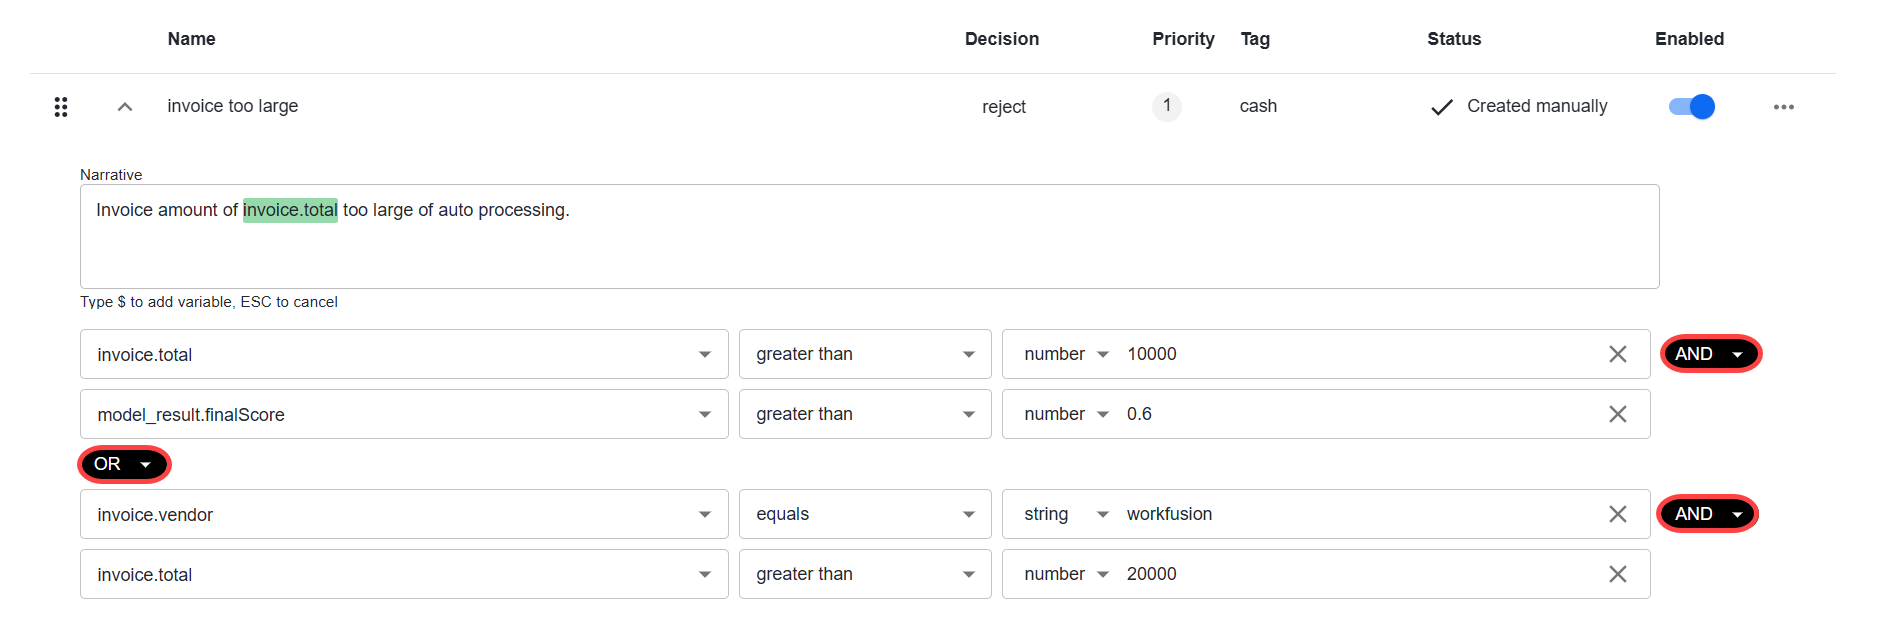
Define variables
When setting up a condition, you work with two types of variables: primary and secondary.
A primary variable is any data element from a session, such as:
A custom value, for example, a string or a list of varying sizes
An expression
A schema-selected item
A secondary variable can be one of the following:
A custom value, for example, a string or a list of varying sizes
A schema-selected item
An expression
A literal value
To define variables, you can specify a custom value, add an expression, or choose an item from the BP schema.
Add custom value
To add a custom value, follow the steps:
In the Variable dropdown, expand Custom and select Value.
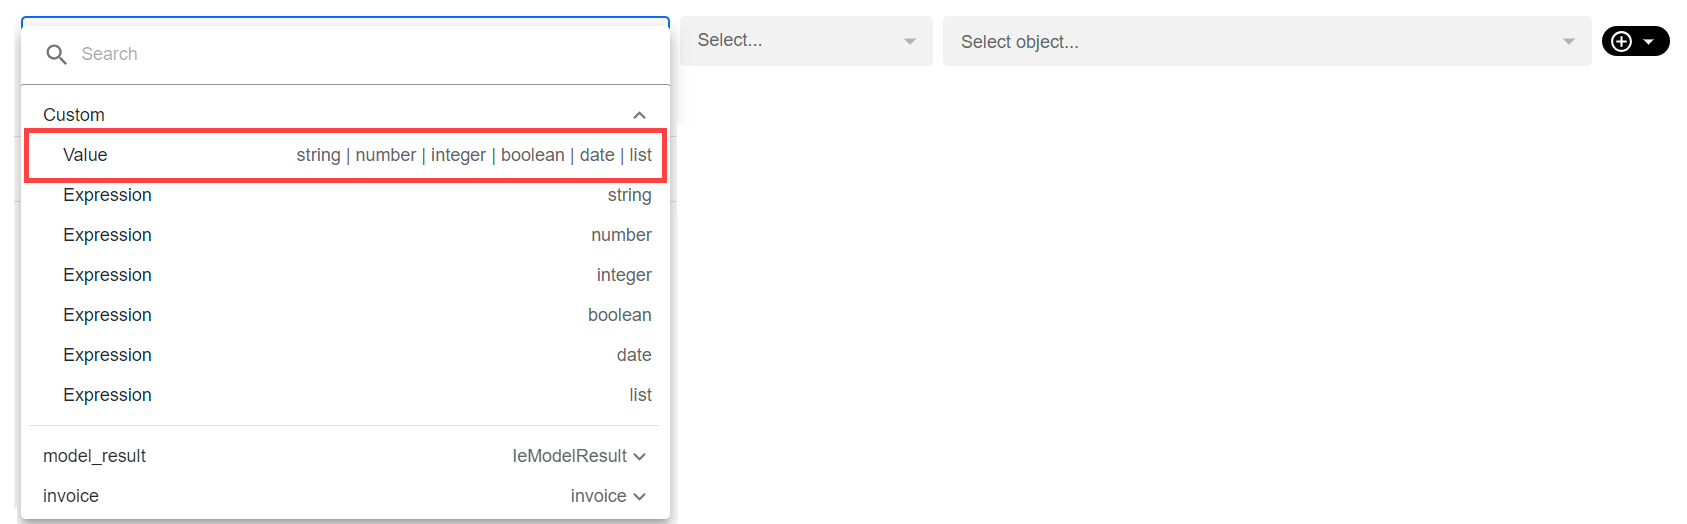
Select a type. Available types include string, number, integer, boolean, date, and list.

Specify your custom value.
Add expression
To add an expression, complete the following steps:
In the Variable dropdown, expand Custom and select Expression of a specified type. Available types include string, number, integer, boolean, date, and list.
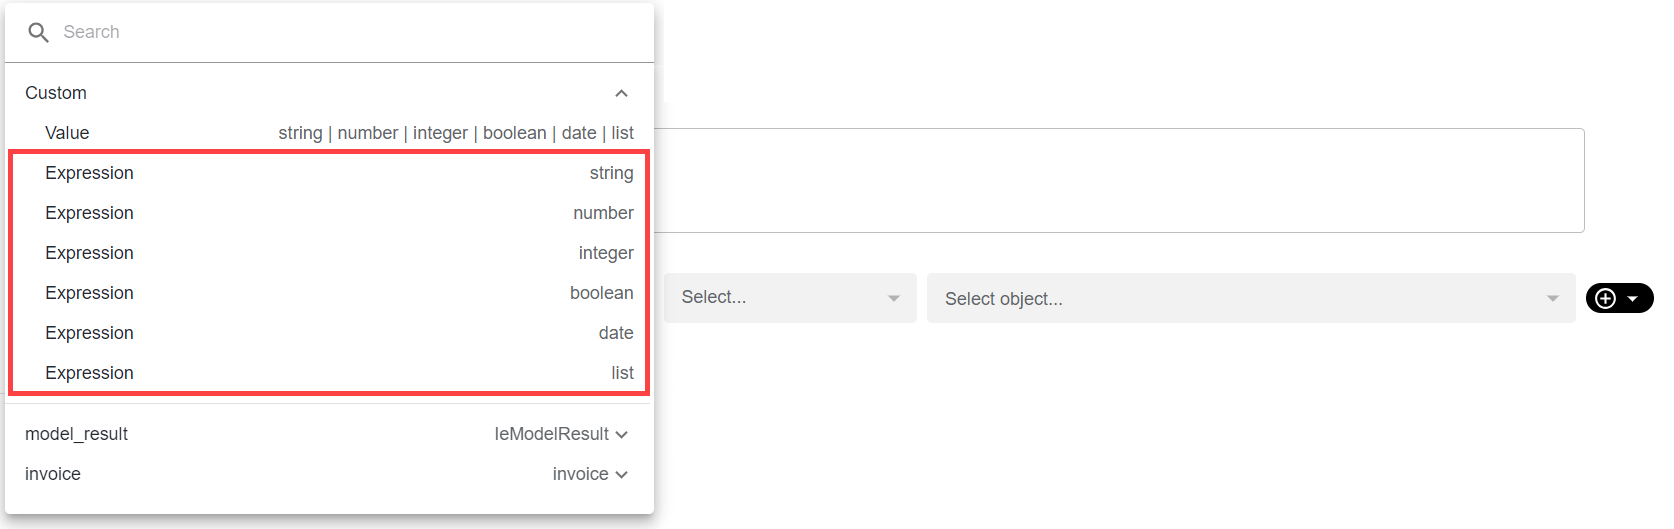
- To add a variable, type
$and select a variable from the available schema variables.
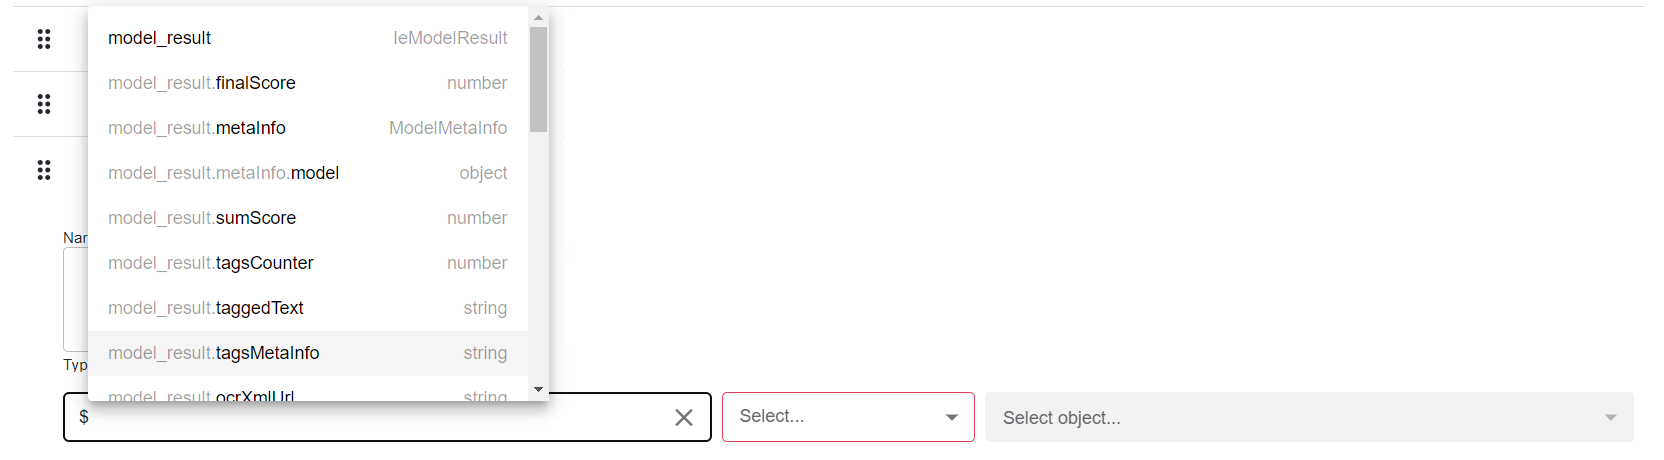
- To add an expression, type
@and choose an existing expression or write your own using the JEXL syntax.
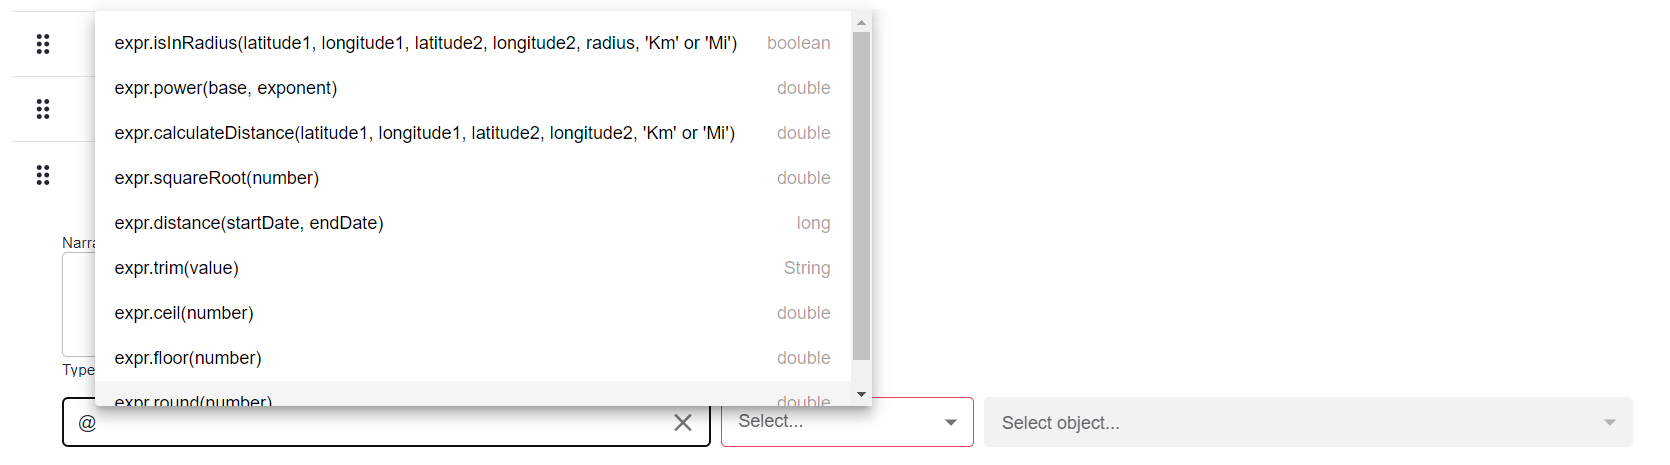
- To add a variable, type
To cancel the selection, press ESC.
Add schema object variable
To add an item from the BP schema, in the Variable dropdown, move the pointer to the needed variable in the list and click Select or expand the selected option for more available variables.

For more details, refer to the Configure input and output contracts in Business Process | View step contracts topic.
Select operator
An operator compares two variables based on which a decision is made. Select the operator in the Operator drop-down list.
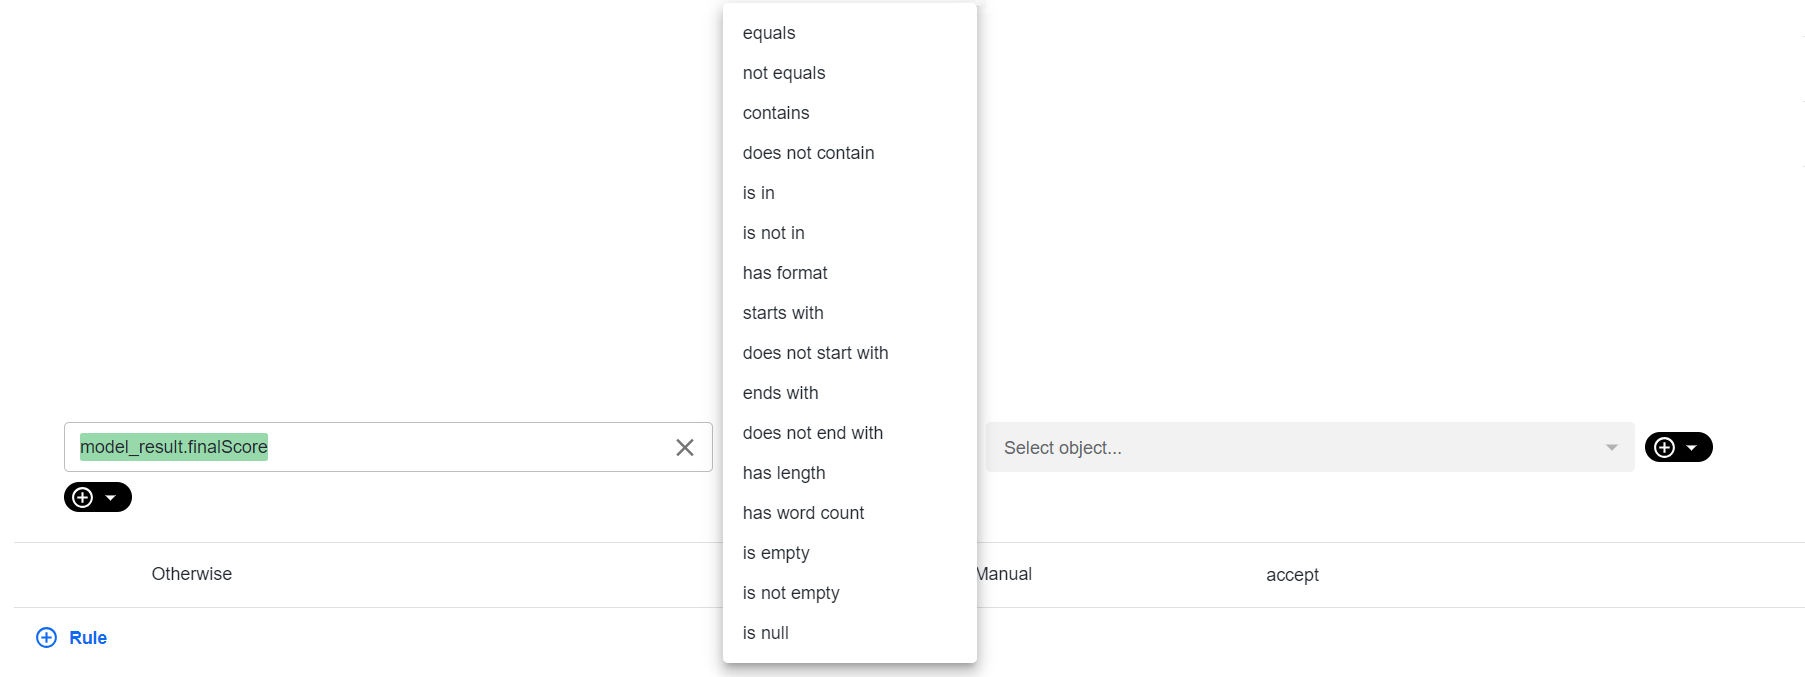
For supported operators and examples, see Learn about supported rule and transformation operators.
Write expressions
Java Expression Language (JEXL) is a flexible expression language that supports various operators and functions for data manipulation and allows embedding expressions directly in Java code.
Expressions enable dynamic handling of data such as strings, numbers, and dates. The standard function-like syntax for writing expressions is as follows:
expr.functionName(parameter1, parameter2, ...)
Where:
expr: a required prefix for all expressionsfunctionName: the operation being performedparameters: required inputs separated by commas
When writing expressions, follow the syntax rules:
- Strings must be enclosed in single quotes, for example,
'some text'. - Numbers are written without quotes, for example,
123. - Boolean values do not require quotes, for example,
true.
For example, expr.substringIndex('Alice Wonderland', ' ', 1) returns 'Alice' or extracts a substring before the first space.
Expressions can be nested to perform complex operations. For example, expr.upper(expr.substringIndex('Alice Wonderland', ' ', 1)) returns 'ALICE' by extracting the substring before the first space and converting it to uppercase. For more advanced usage, refer to the JEXL official documentation.
Expressions support two types of operators:
Built-in native operators provided by JEXL.
Custom operators implemented in
ExpressionsUtillocated in the com.workfusion.rules.util package. To use a custom operator, apply theexpr.prefix, for example,expr.customMethodName(method parameters).
You can combine custom methods with native ones.
Manage decision routing
Available since Work.AI v10.2.9.2.
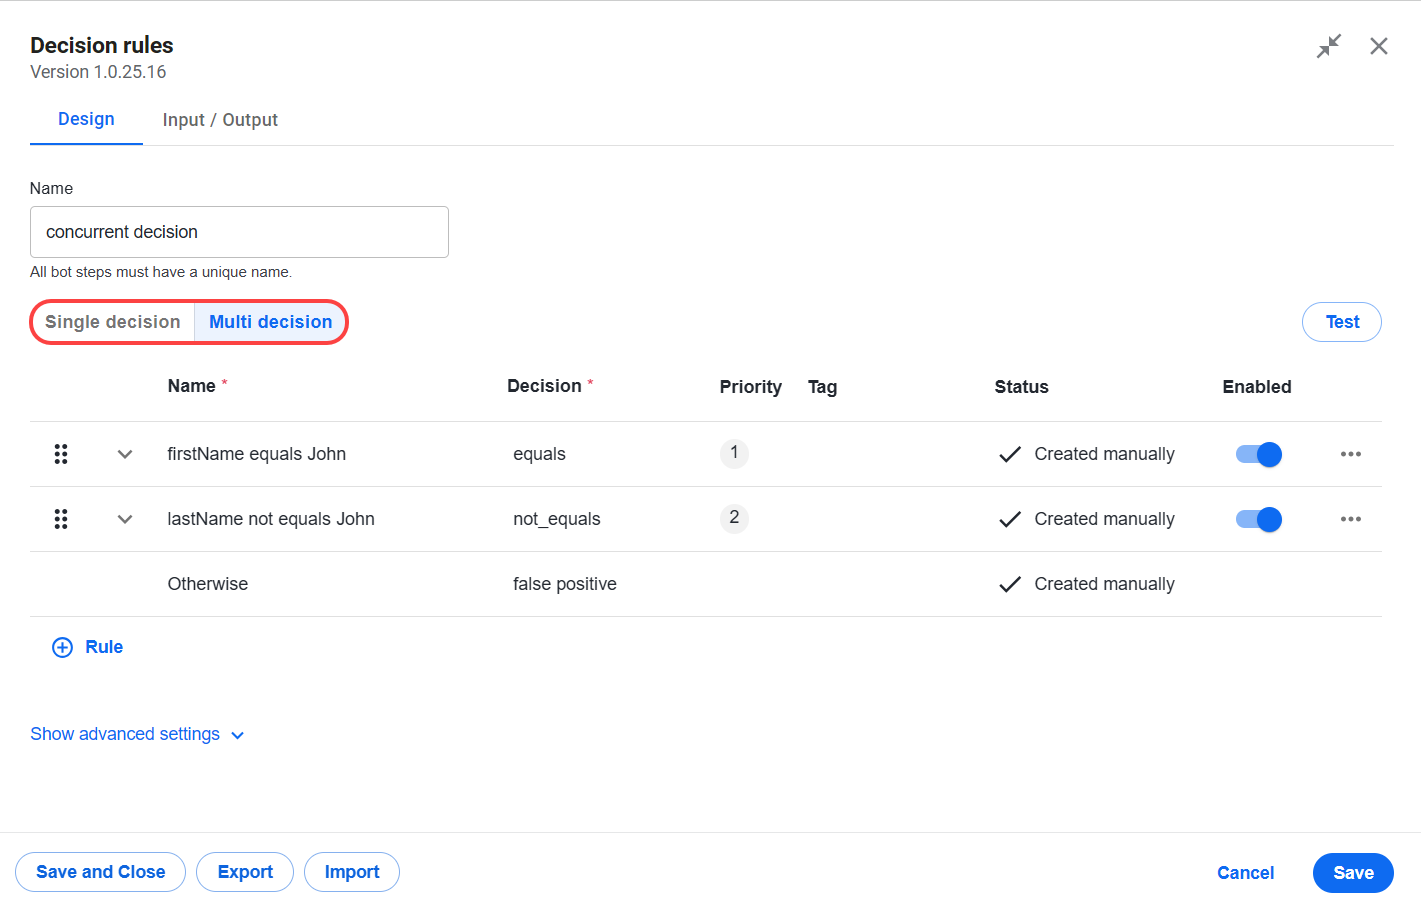
When configuring the Decision rules step, you can specify how the system handles decision routing based on fired rules:
Select Multi decision to enable the concurrent execution of multiple decision routes. In this case, all fired decisions are returned as an array in the order of priority. For example, if a step comprises four rules (A, B, C, D) that fired with the descending priority, resulting in four routes (A1, B1, C1, and D1), the
sys_rule_outcomeparameter contains the[0:A1,1:B1,2:C1,3:D1]array routed accordingly.Select Single decision (selected by default) to return only the highest priority decision among all fired rules. Thus, in the example above, only A1 is returned.
Group rules
You can filter, group, and sort rules, depending on your needs.
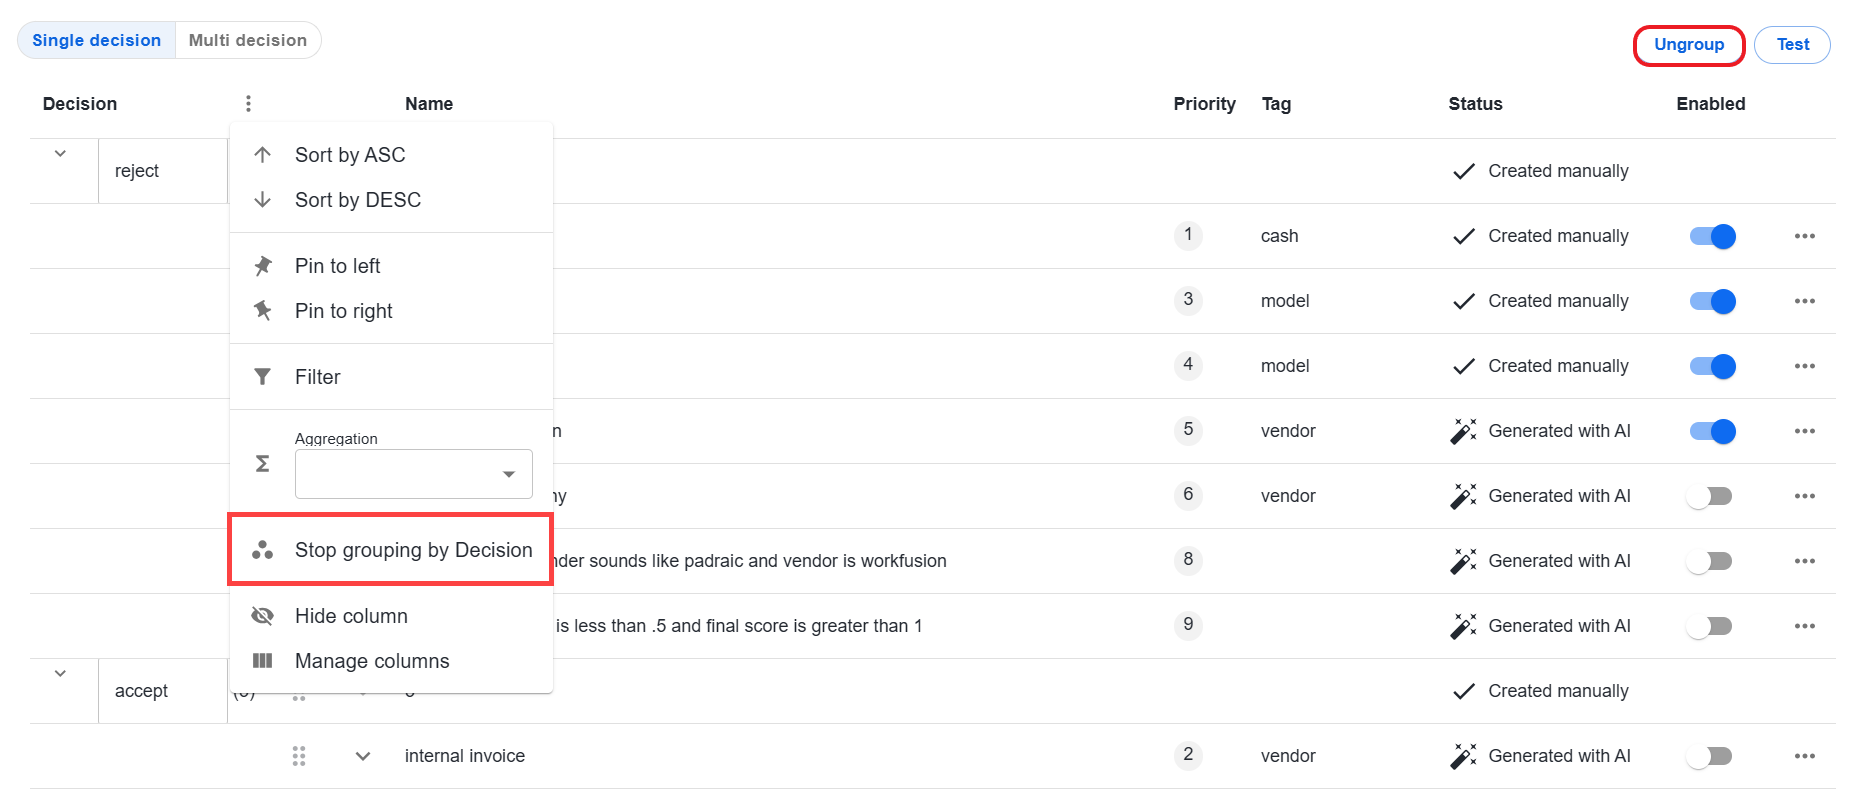
To sort rules in the ascending or descending order, click the column name. The arrow next to the column name defines the sorting order.
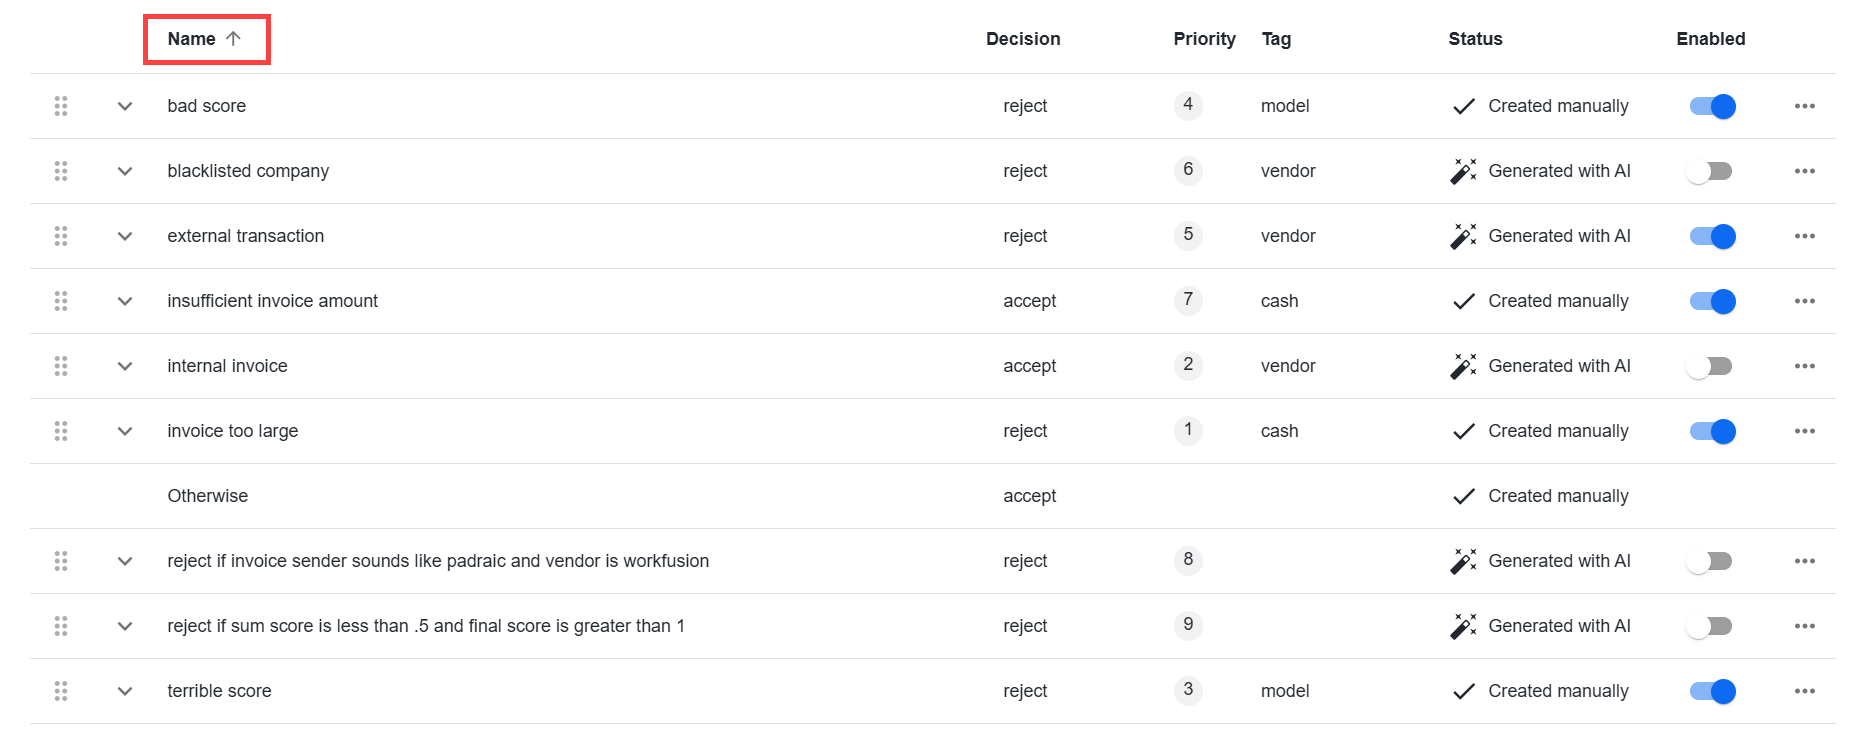
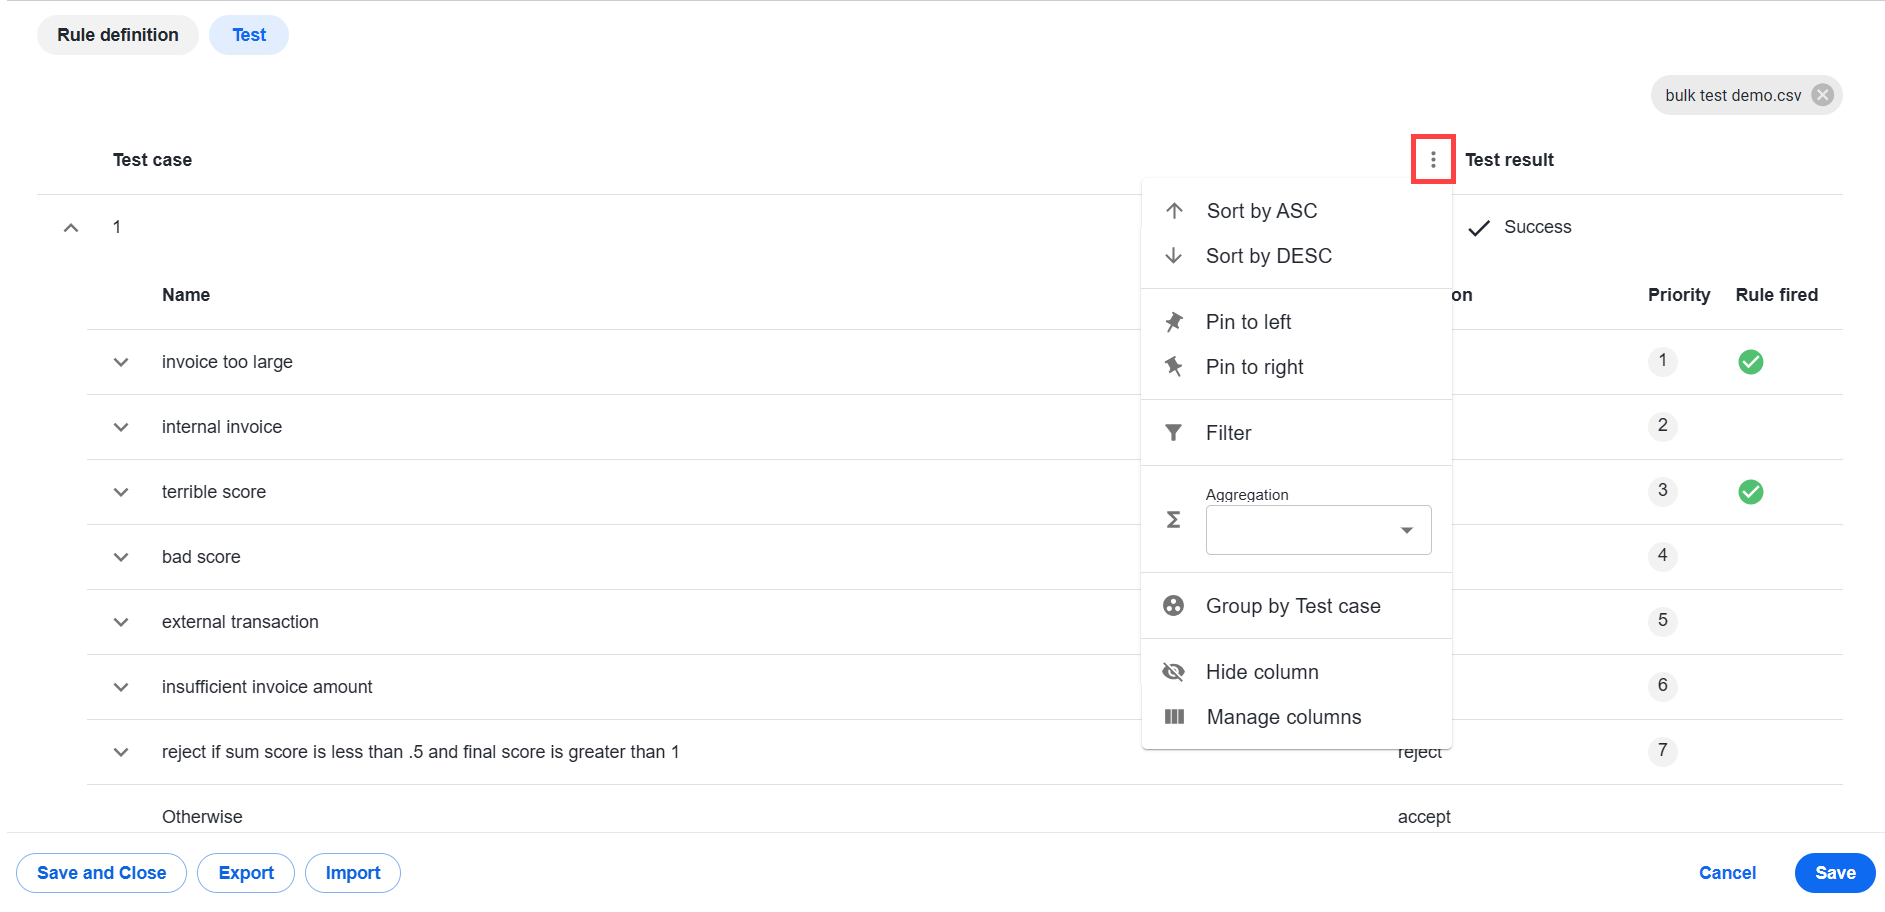
To view other sorting options, move the pointer over the column name and click the Options menu.
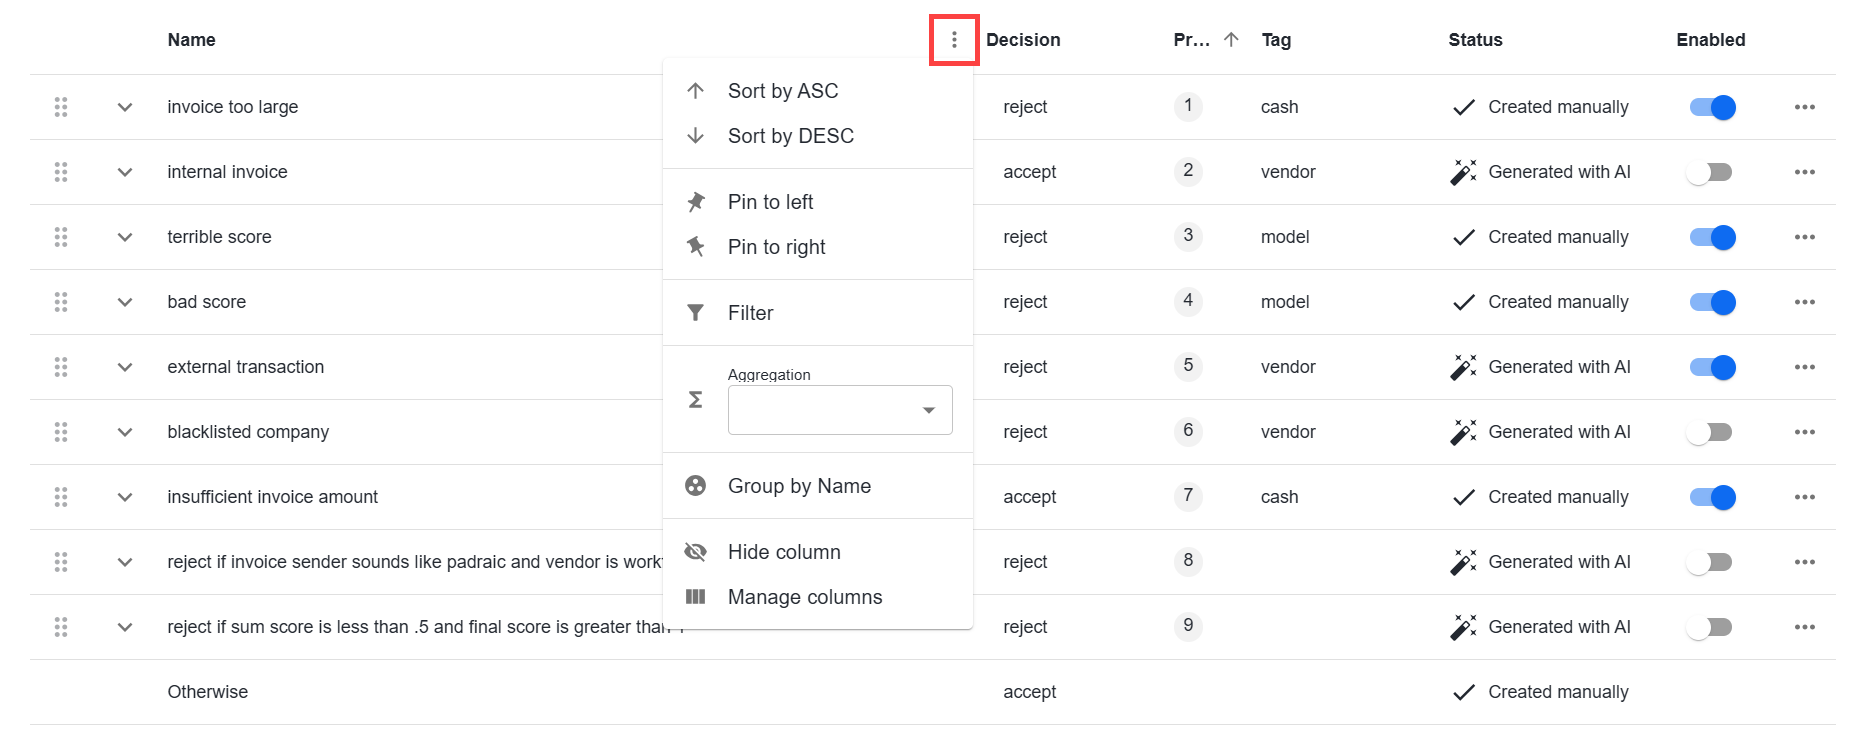
The available options are as follows:
Sort by ASC. Sort rules in the ascending order; you can perform the same action by clicking the column name.
Sort by DESC. Sort rules in the descending order; you can perform the same action by clicking the column name.
Pin to left. Pin the selected column to the left. To return to the default view, click the Options menu and select Unpin.
Pin to right. Pin the selected column to the right. To return to the default view, click the Options menu and select Unpin.
Filter. Filter rules by specific values.
In the Column drop-down list, the column name you initiated the filter from is displayed. If needed, you can select another column.
In the Operator drop-down list, specify the operator.
In the Value field, enter the value to filter the rules.
The rules are filtered accordingly. To add more filters, click Add filter. Select between the AND or OR operators and fill in the fields.

To remove a selected filter, click Close next to it. To remove all filters, click the Remove all button.
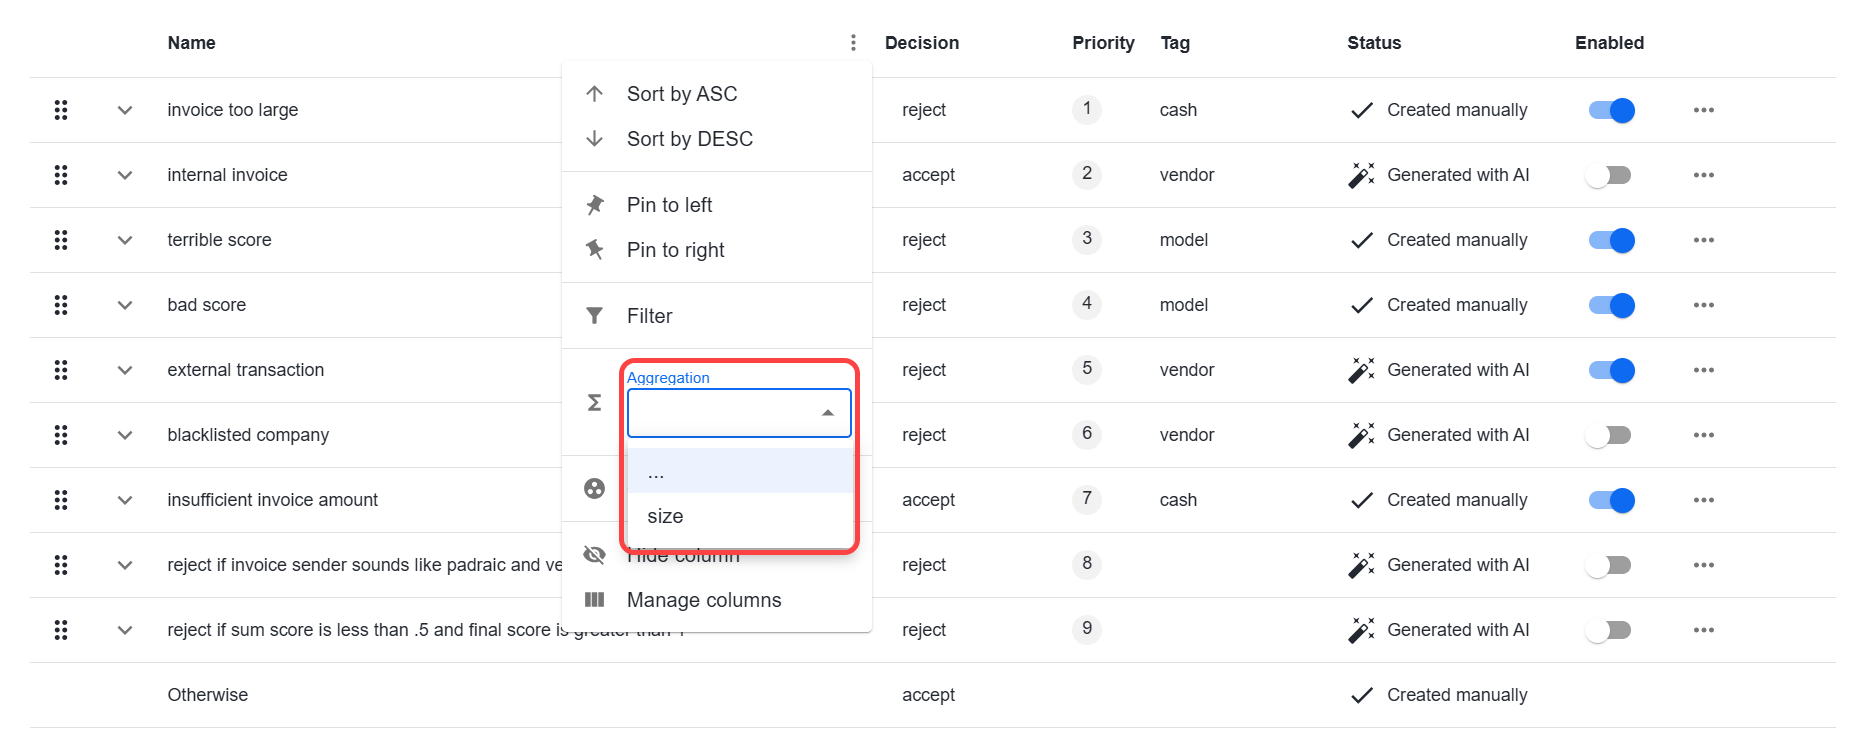
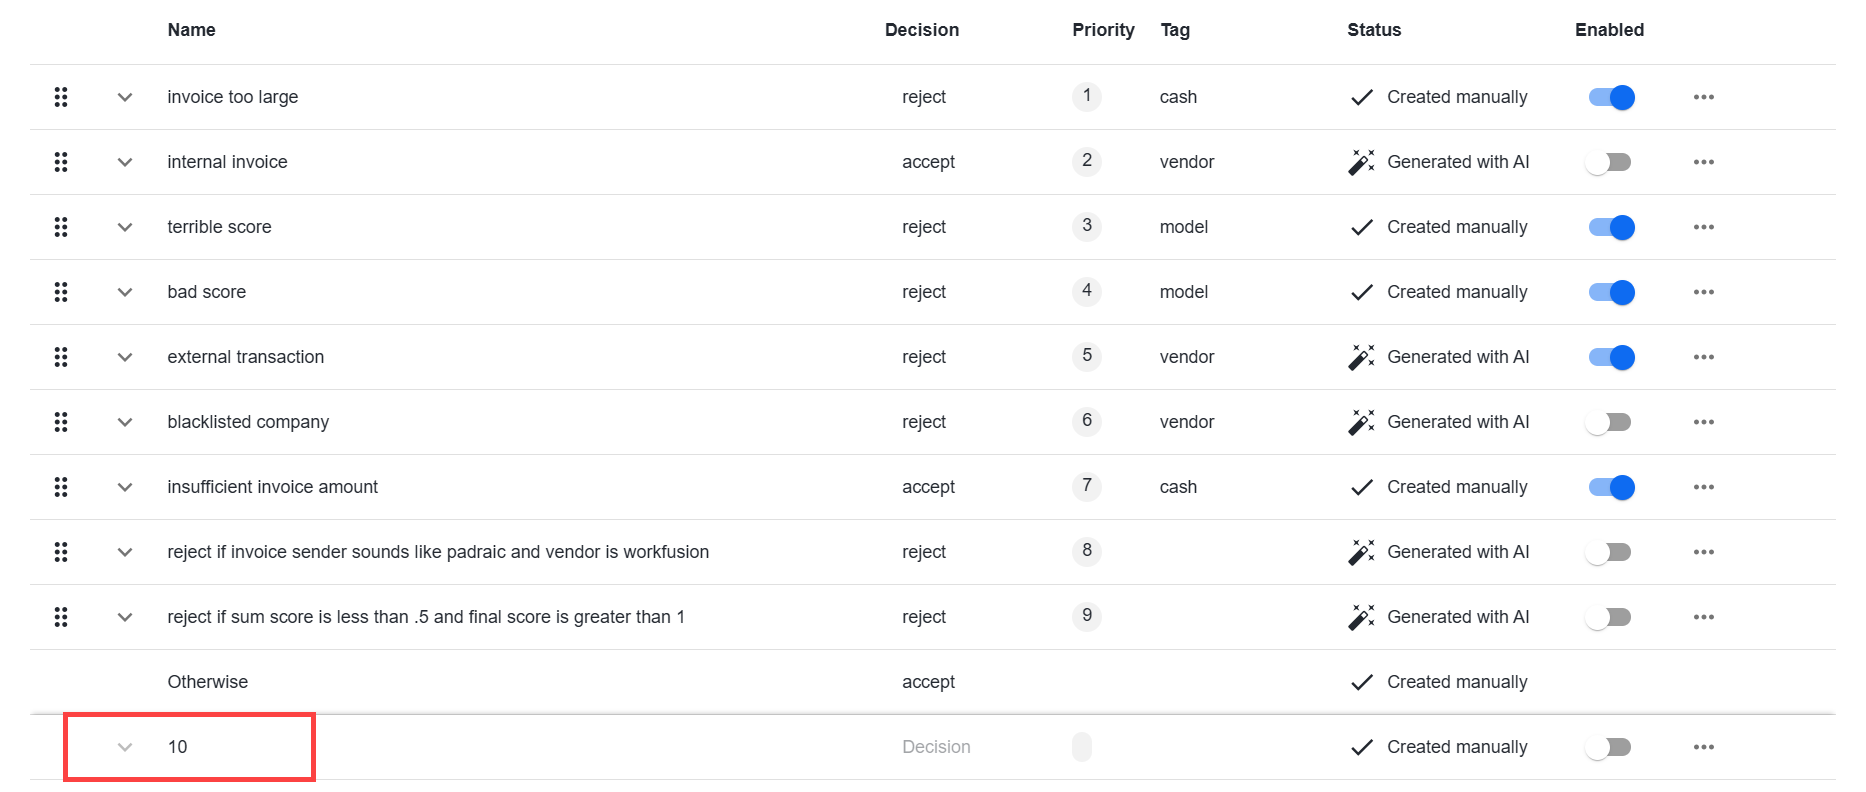
Aggregation. Select size to create the sum total at the bottom of the screen. The option is useful when filtering large volumes of rules.
Group by. Group rules by any column, such as Group by Name or Group by Decision.
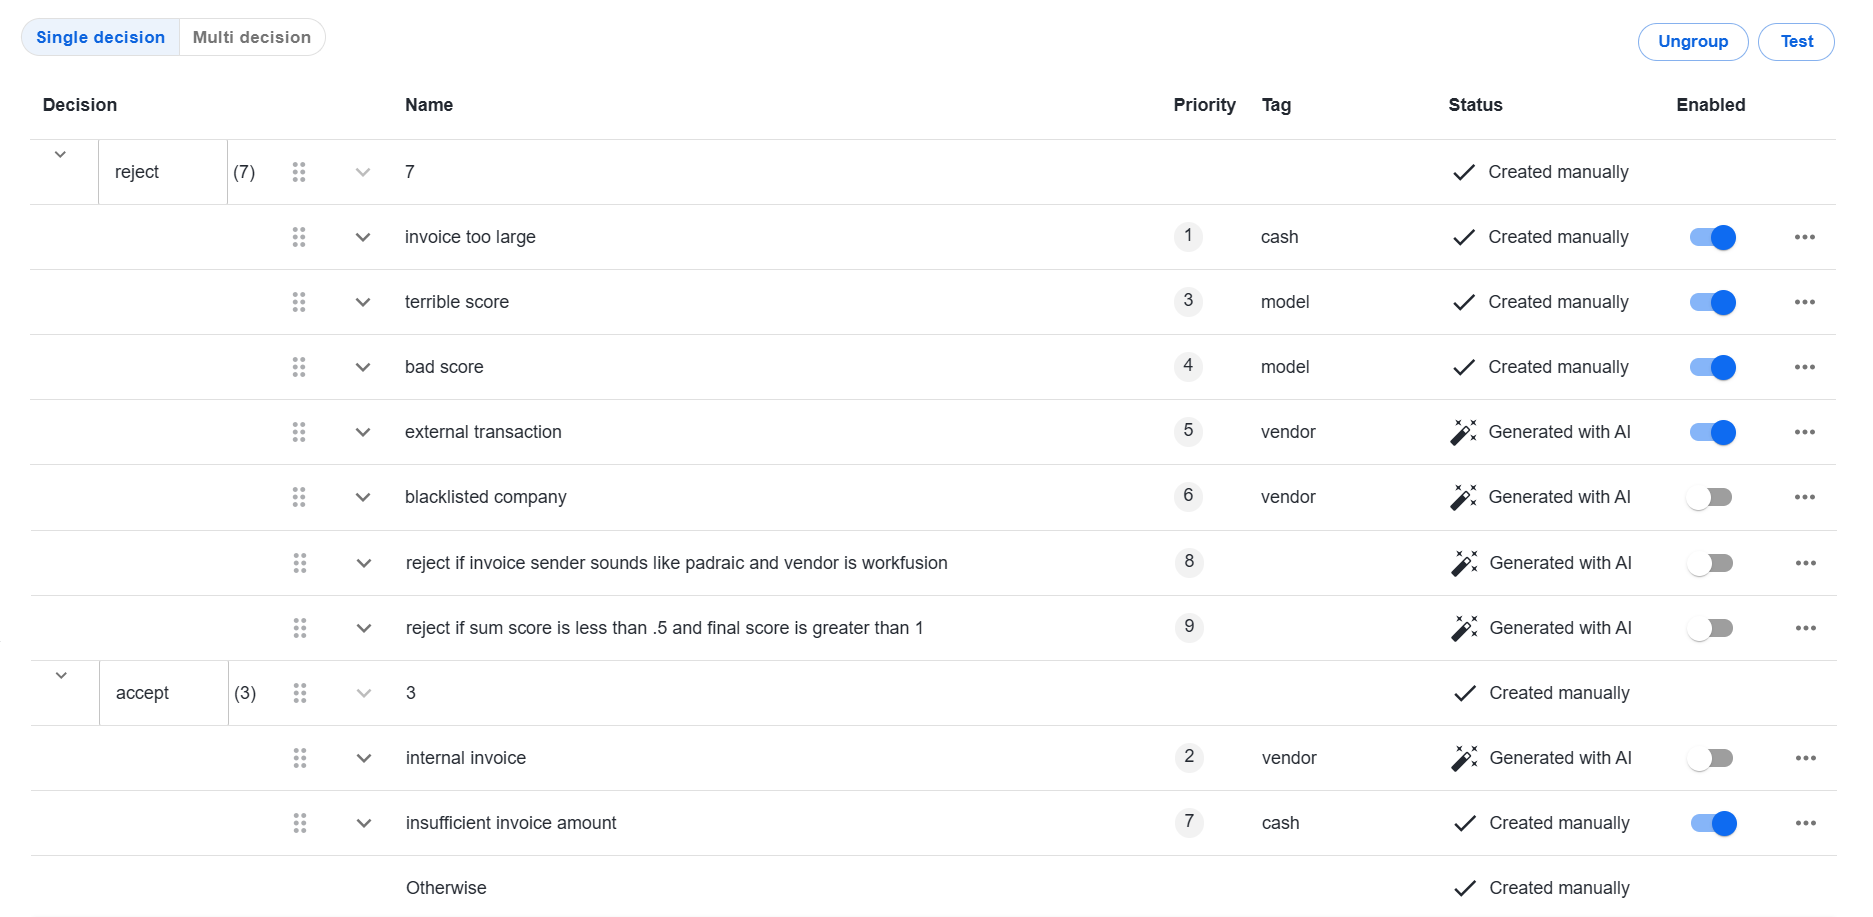
To return to the default view, use one of the following ways:
Click Ungroup.
Move the pointer over the grouped column, click the Options menu, and select Stop grouping by....
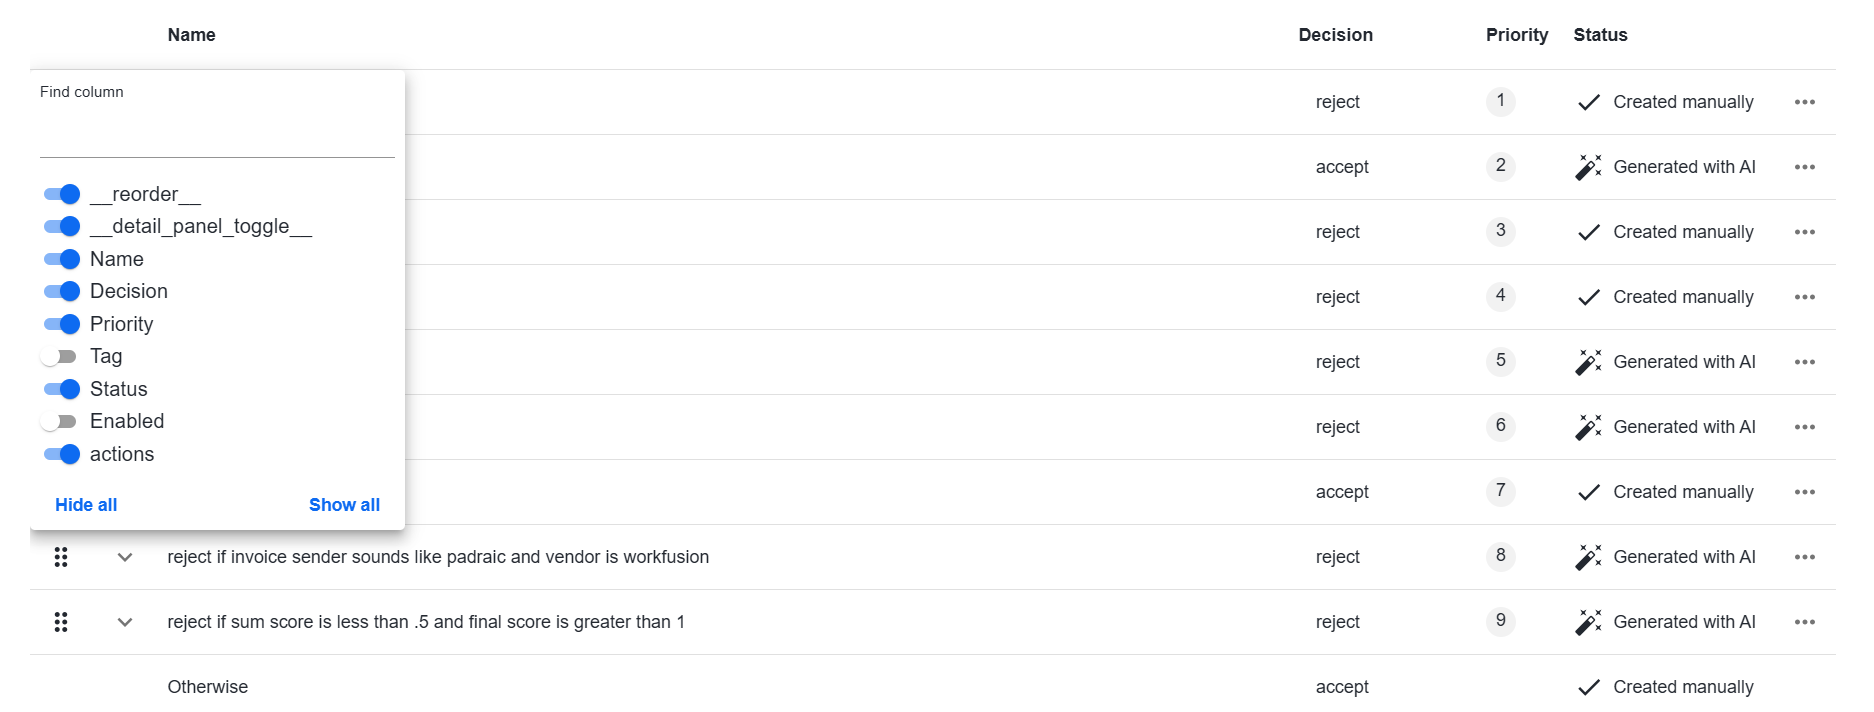
Hide column. Hide the selected column. To display it again, click the Options menu, select Manage columns, and switch on the toggle next to the hidden column.
Manage columns. Hide or show selected columns. To hide or show all columns, select Hide all or Show all, respectively.
Import and export rules
You can reuse rules across different no-code rule steps or Business Processes by downloading the rules and importing them where needed.
To export rules, complete the following steps:
Open the Decision rules step that contains the rules you want to reuse.
Click Export.
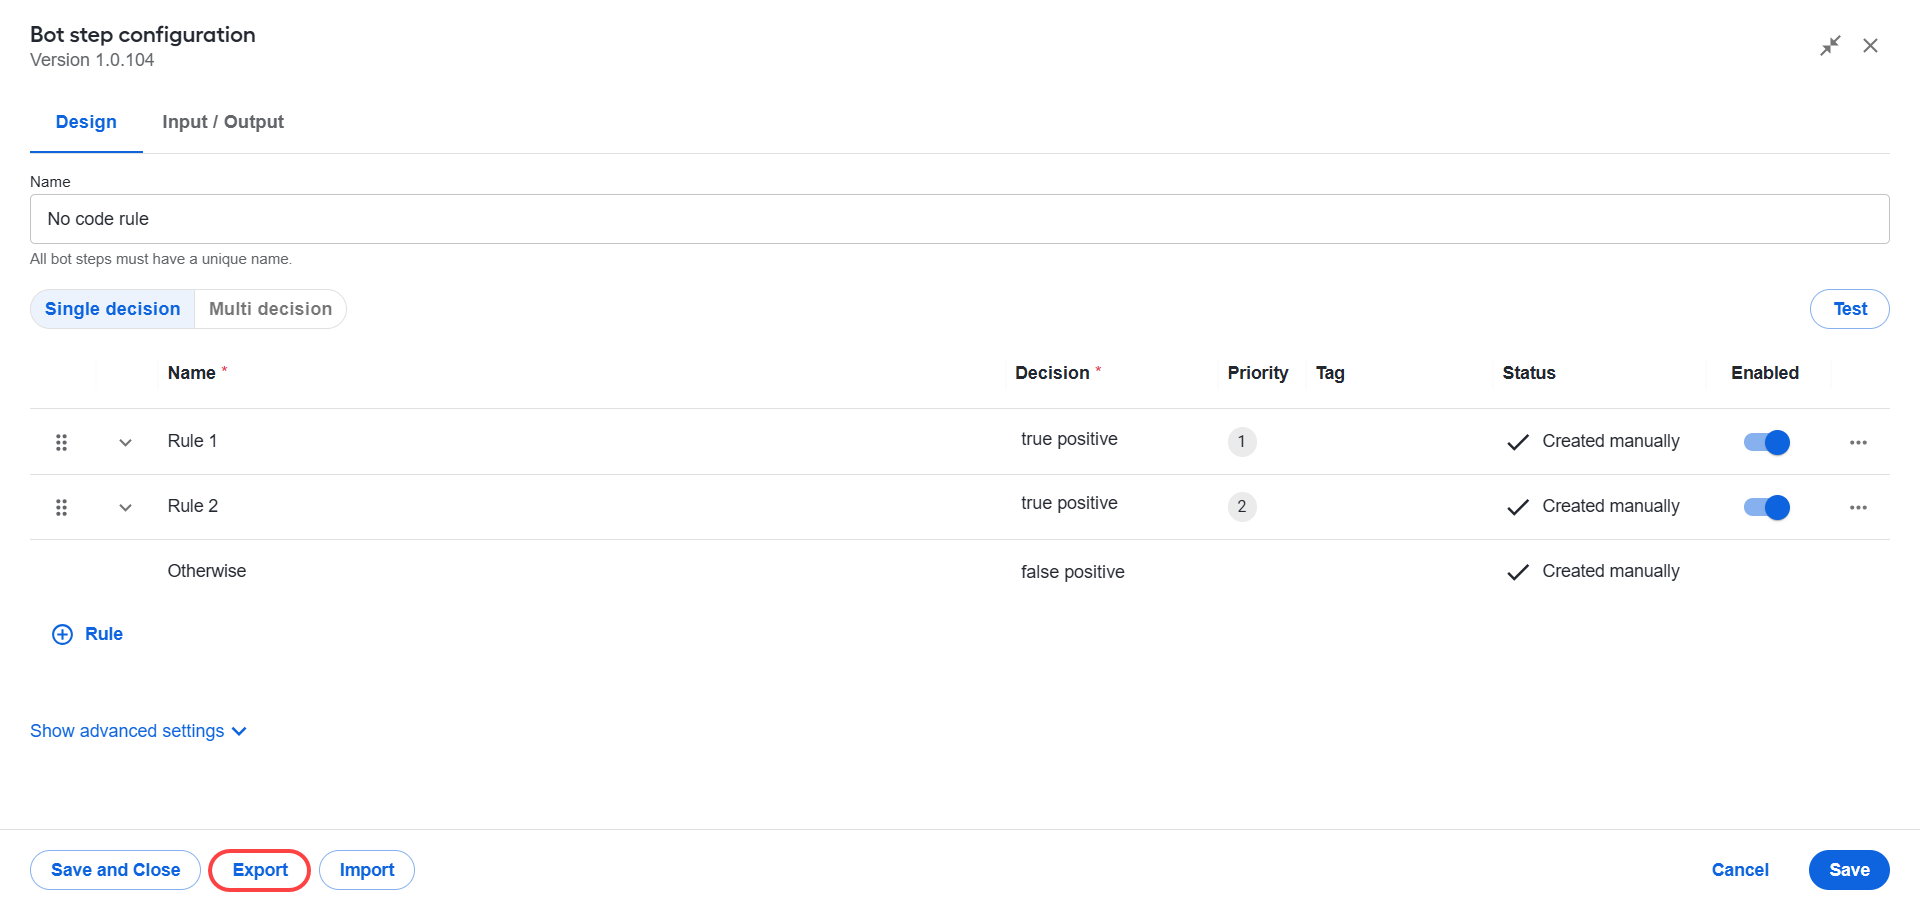
A JSON file containing your rules is downloaded to your machine.
To import the downloaded rules, do as follows:
Open the target no-code rule step.
Click Import.
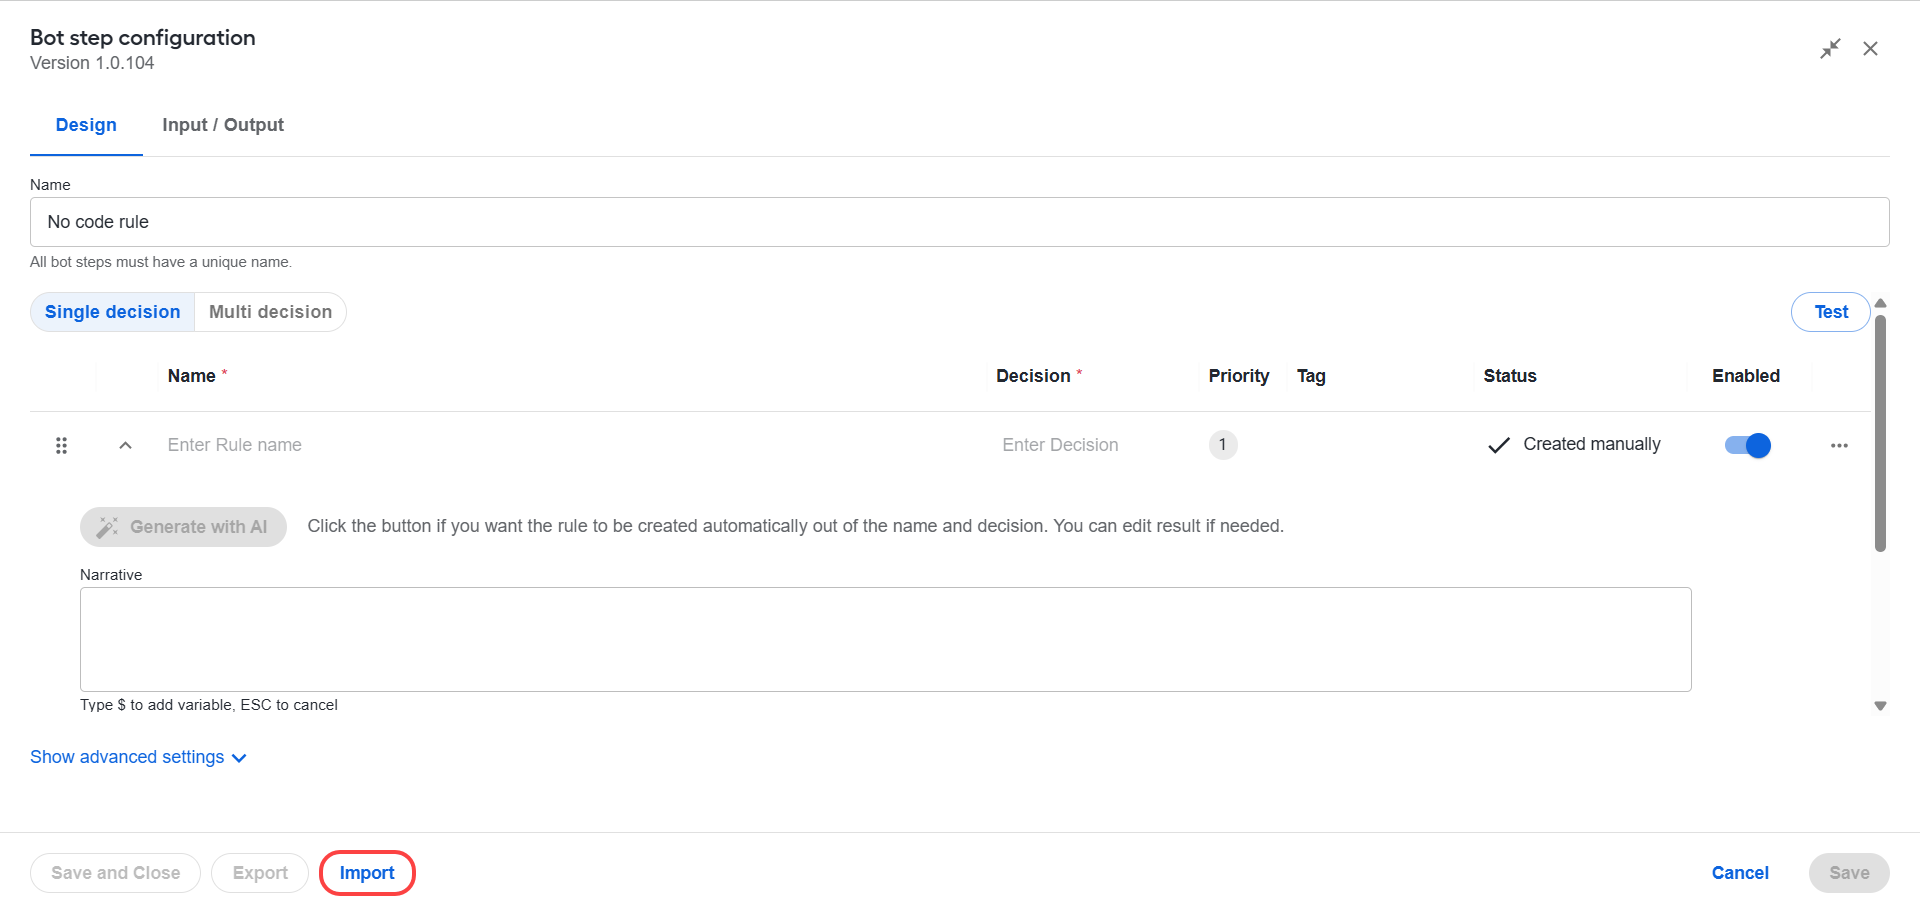
In the Import rules window, drag and drop the previously downloaded file or click to browse and select it. Only JSON files are supported.
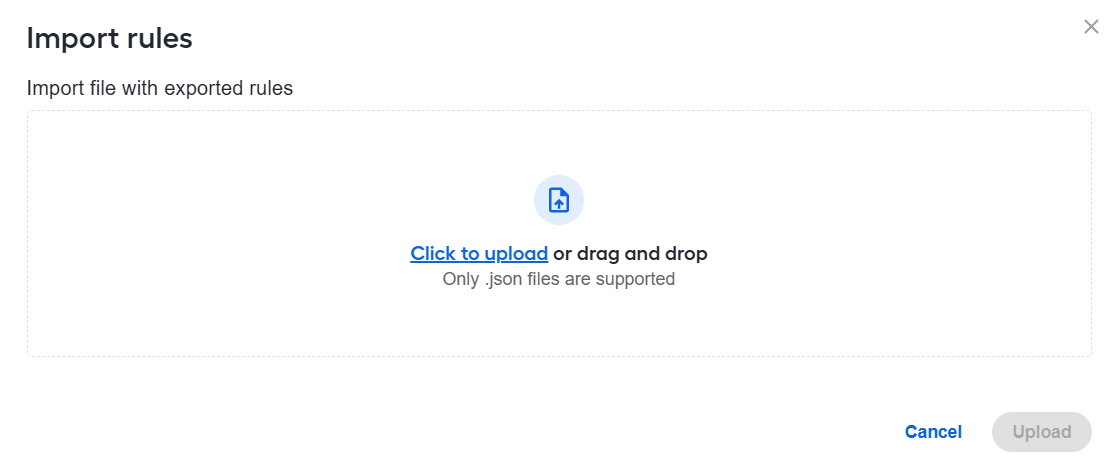
Click Upload.
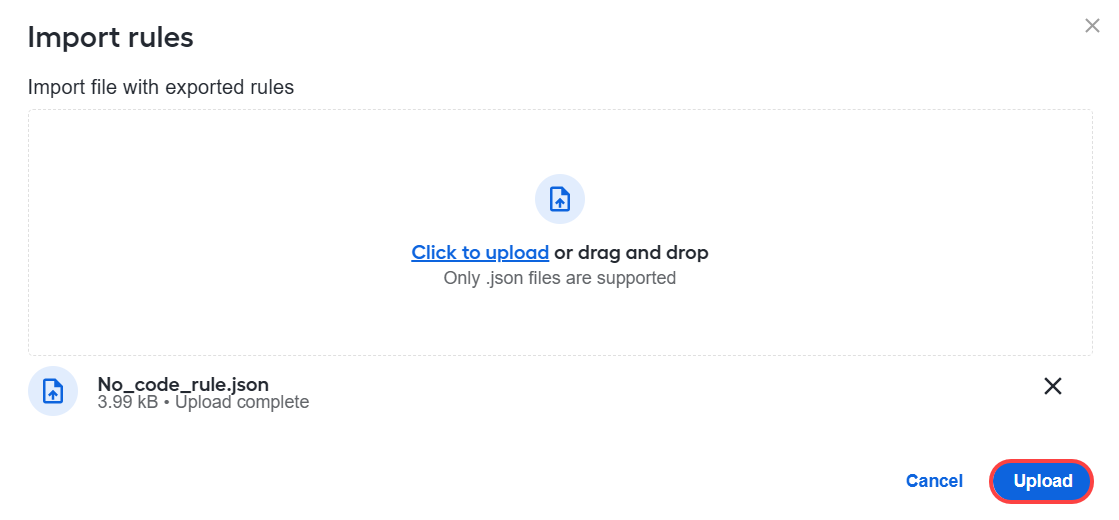
After you upload a file, it is validated to ensure the rules can be safely applied:
If the rules are compatible with the current Business Process, they are applied automatically.
If the rules are not compatible, a warning message is displayed. Update the contract on the Input / Output tab to match the required schema, then import the file again.
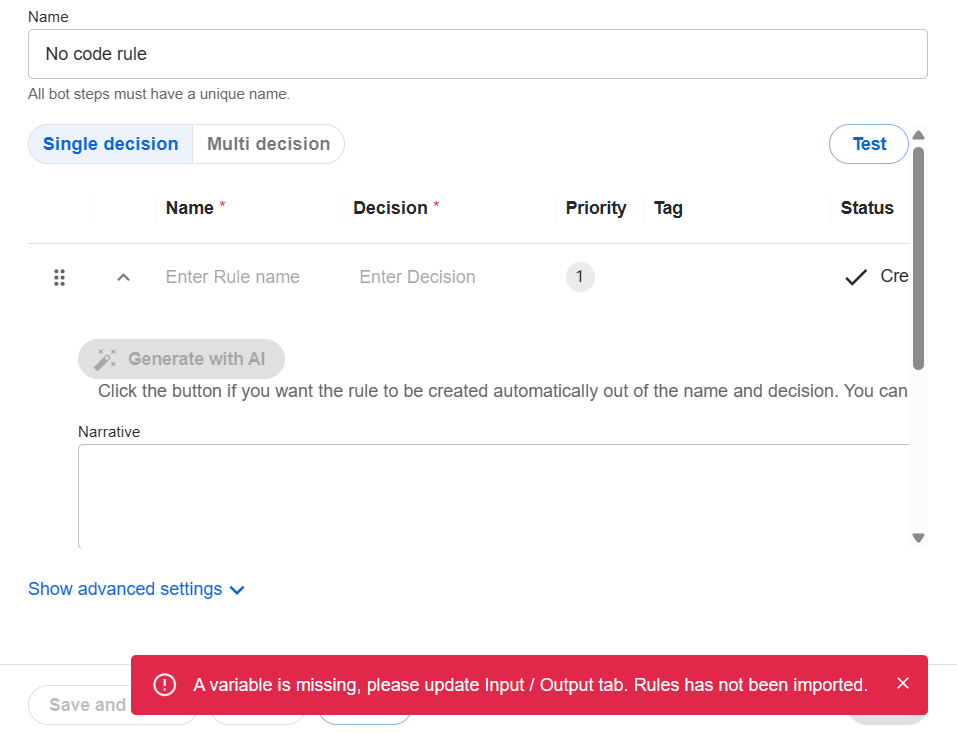
If the file is not valid JSON or is corrupted, an error message is displayed and the import is rejected.
Test rules
To test the design logic you create while adding or modifying rules, click the Test button. To test the Decision rules step in isolation from the BP, complete the following steps:
Click the Test button.
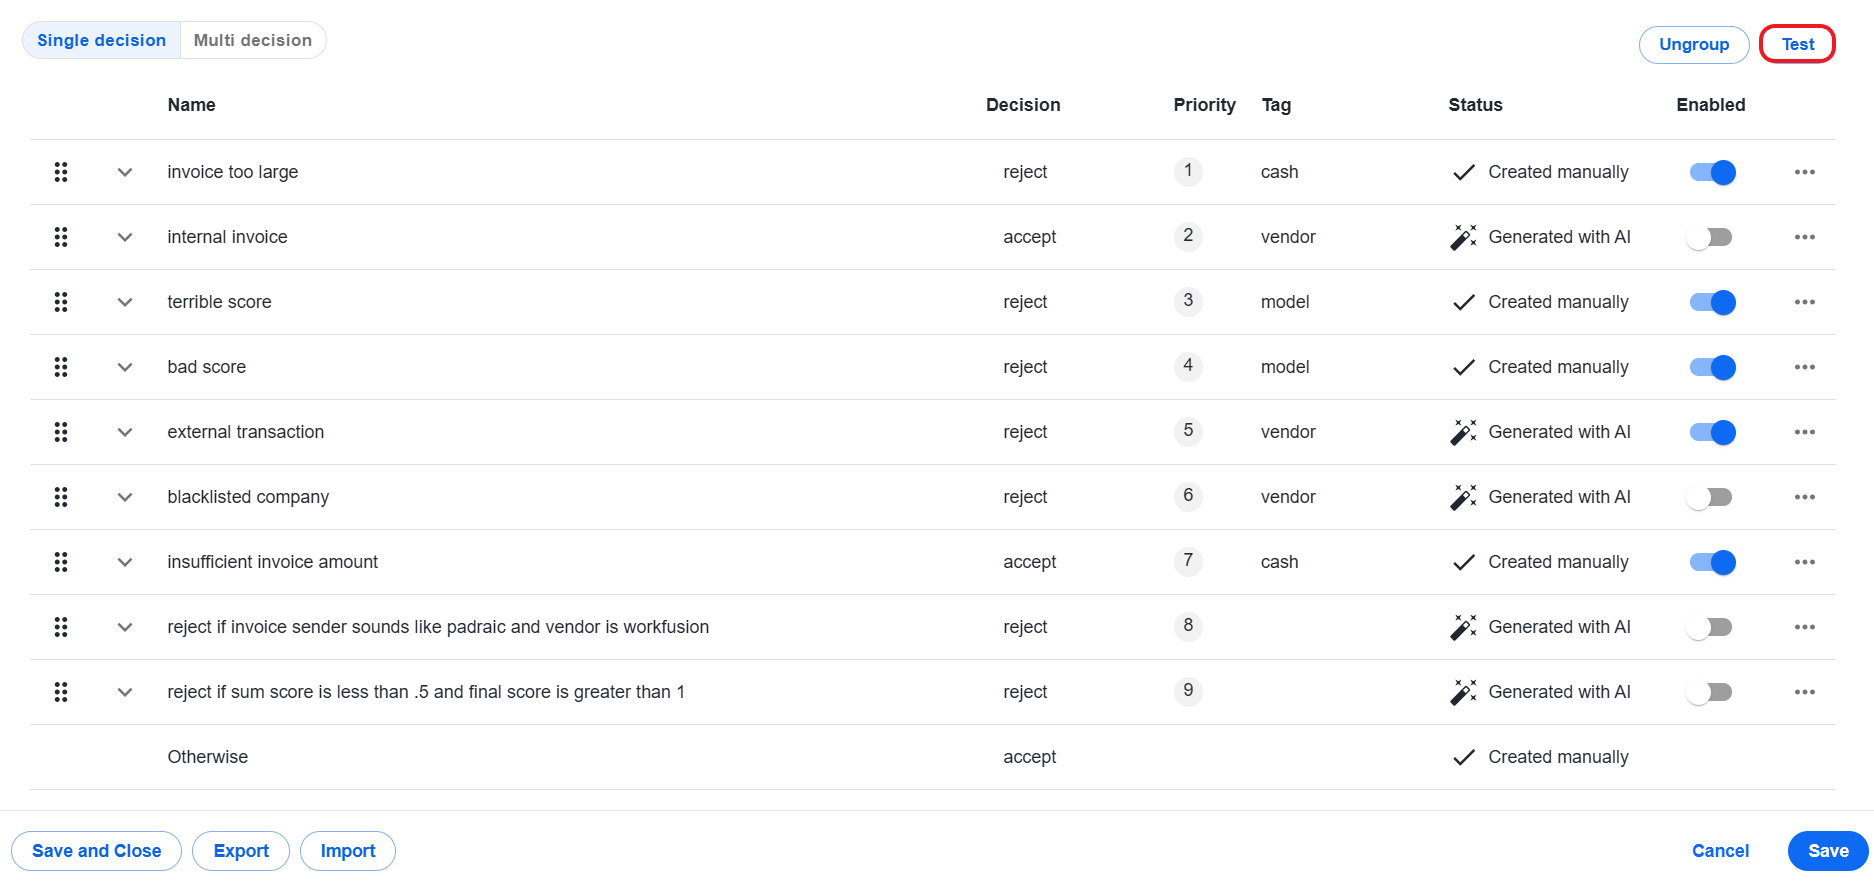
Upload a CSV file with test data. Create it yourself or download the data file from the Results tab of your BP if you have previously run the BP. To make sure you prepared the test data correctly, download the template by clicking Template and compare it against your data.
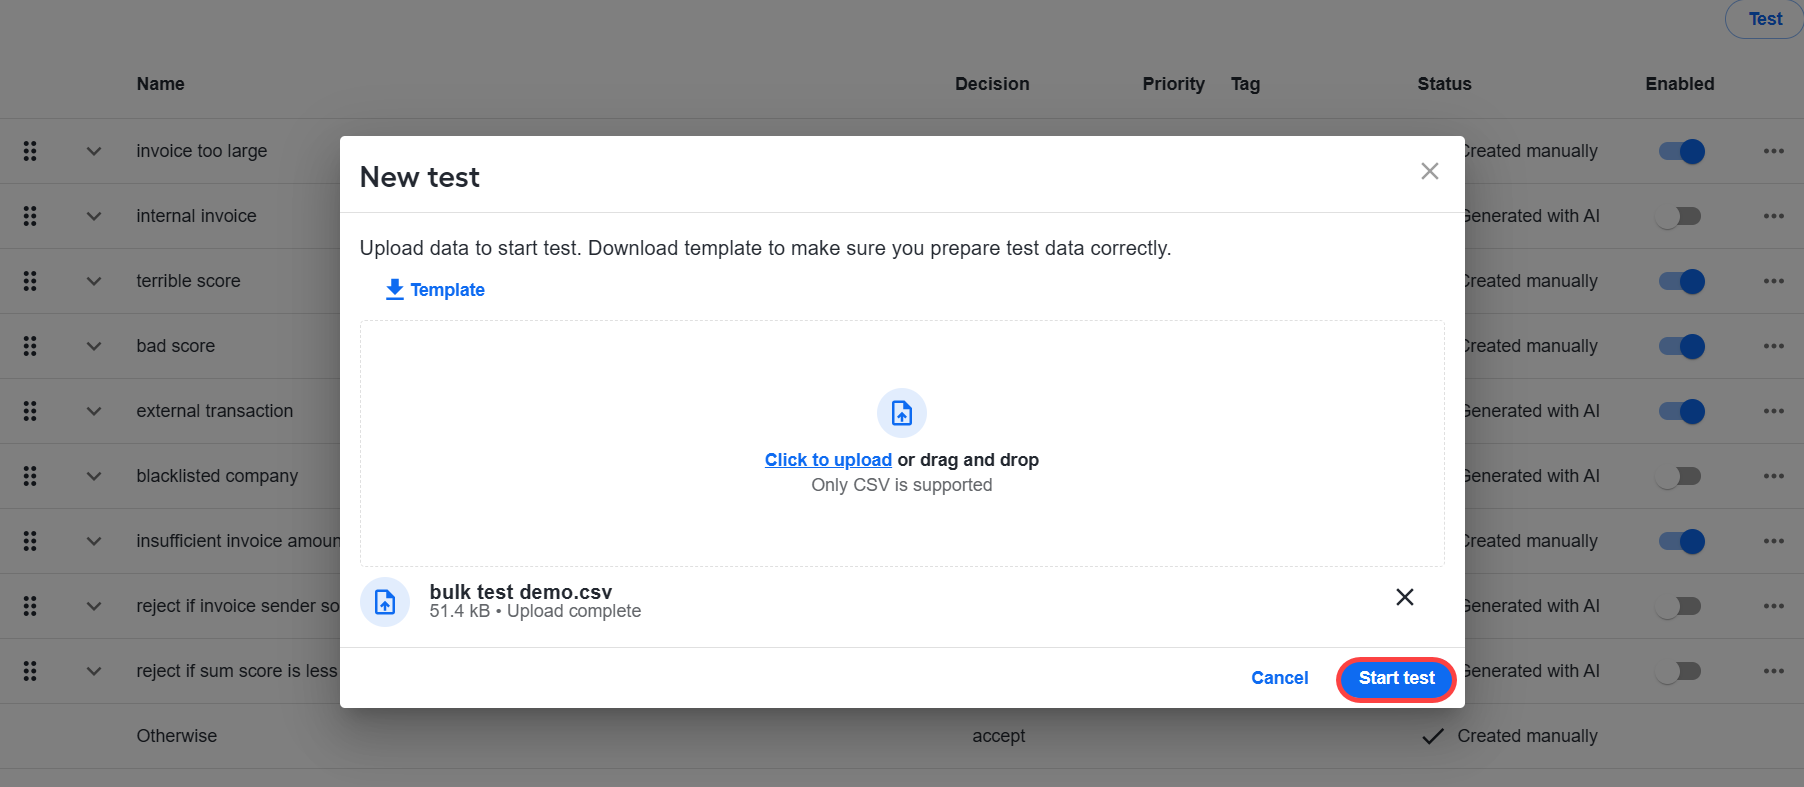
Once the test data is uploaded, click Start test. Tests run asynchronously, so you can return and view results for larger files.
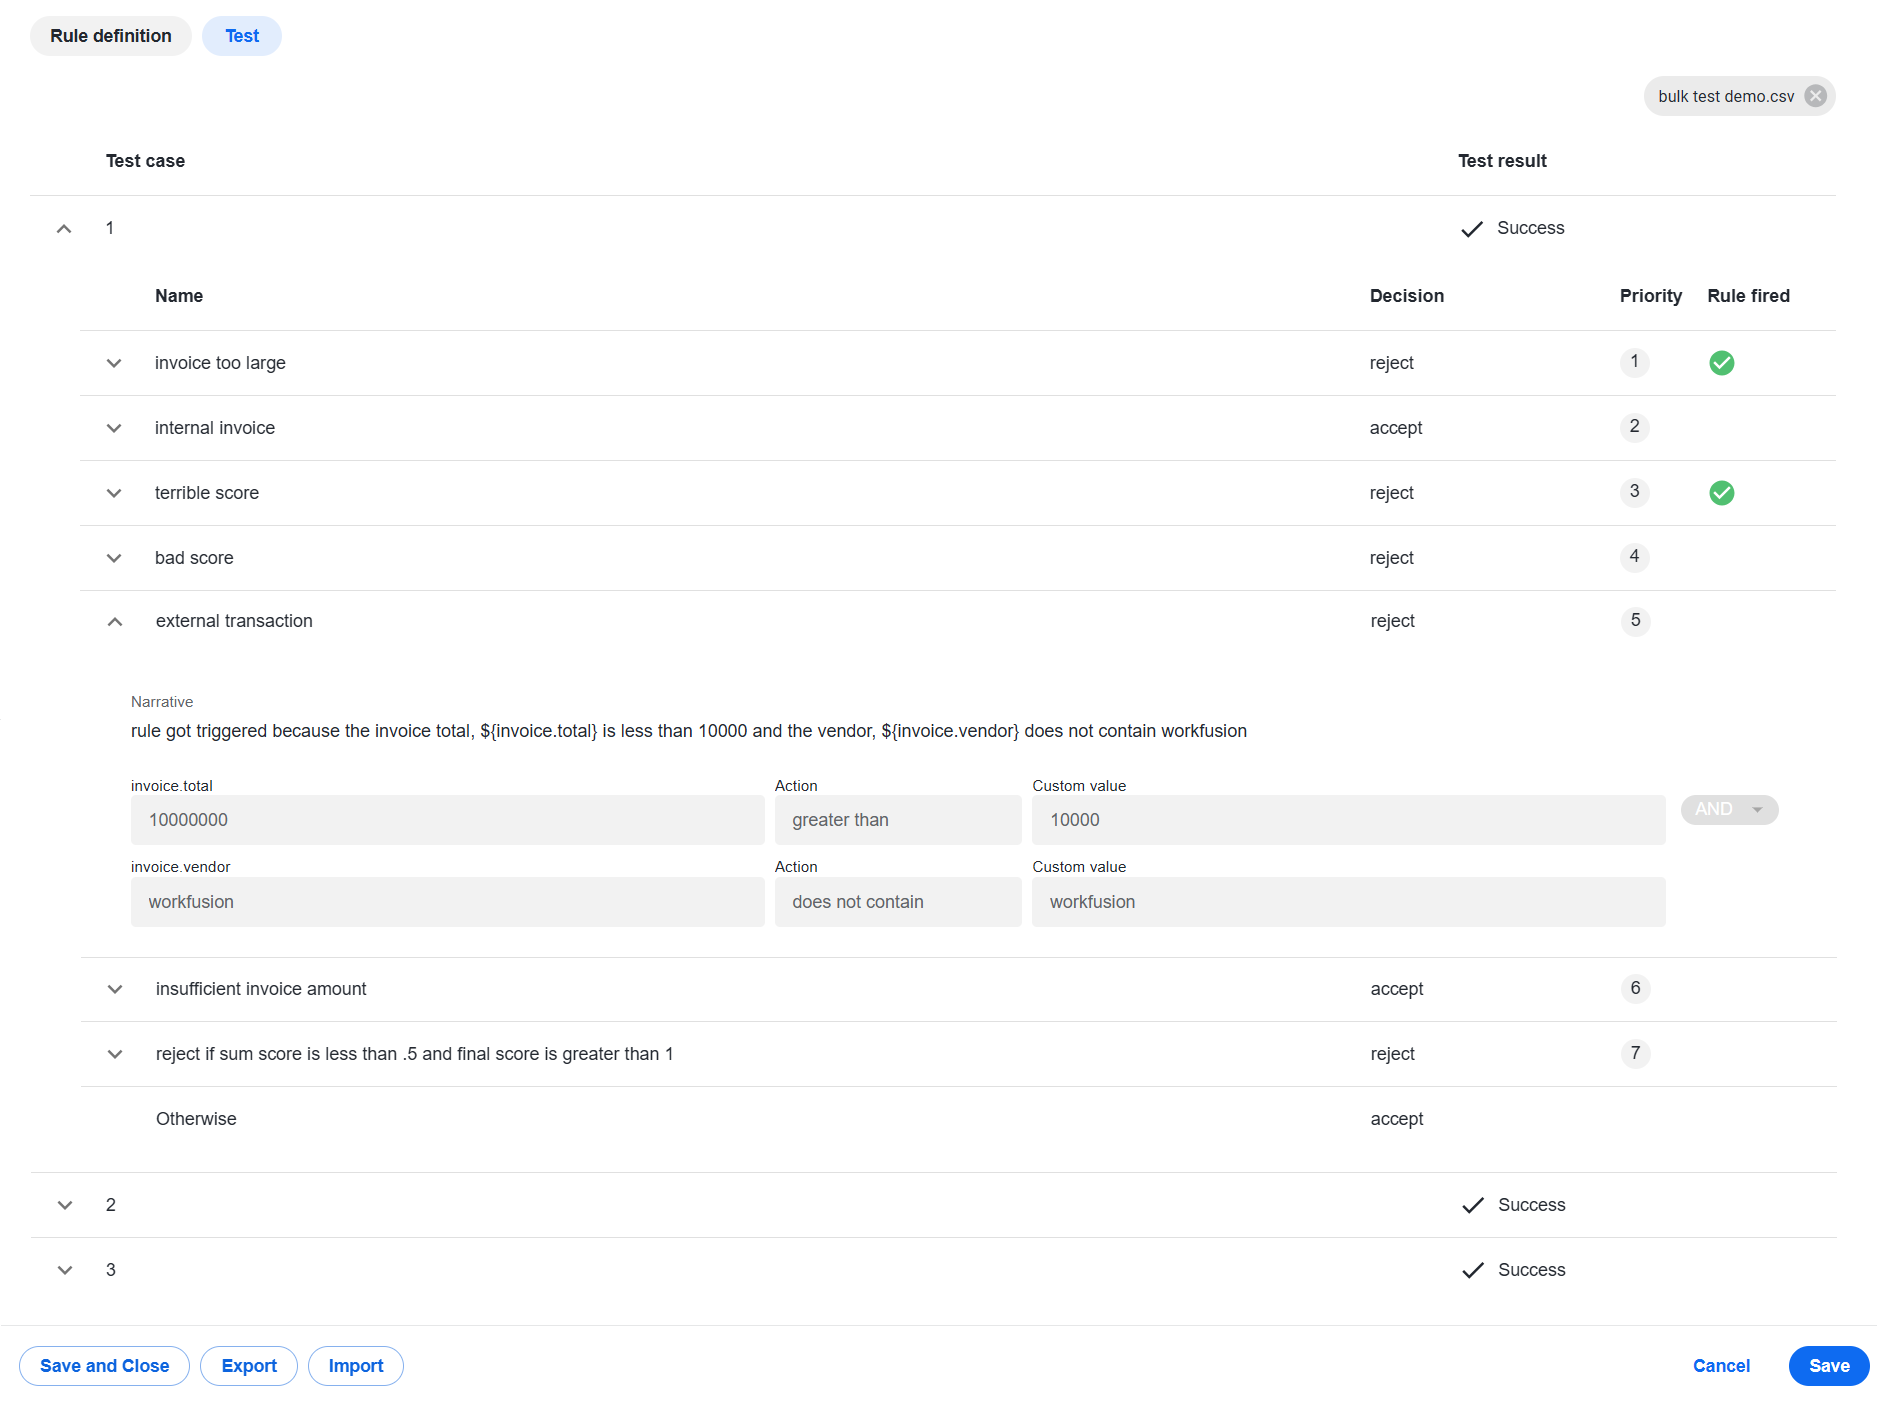
After tests are completed, expand a test case to see the results.
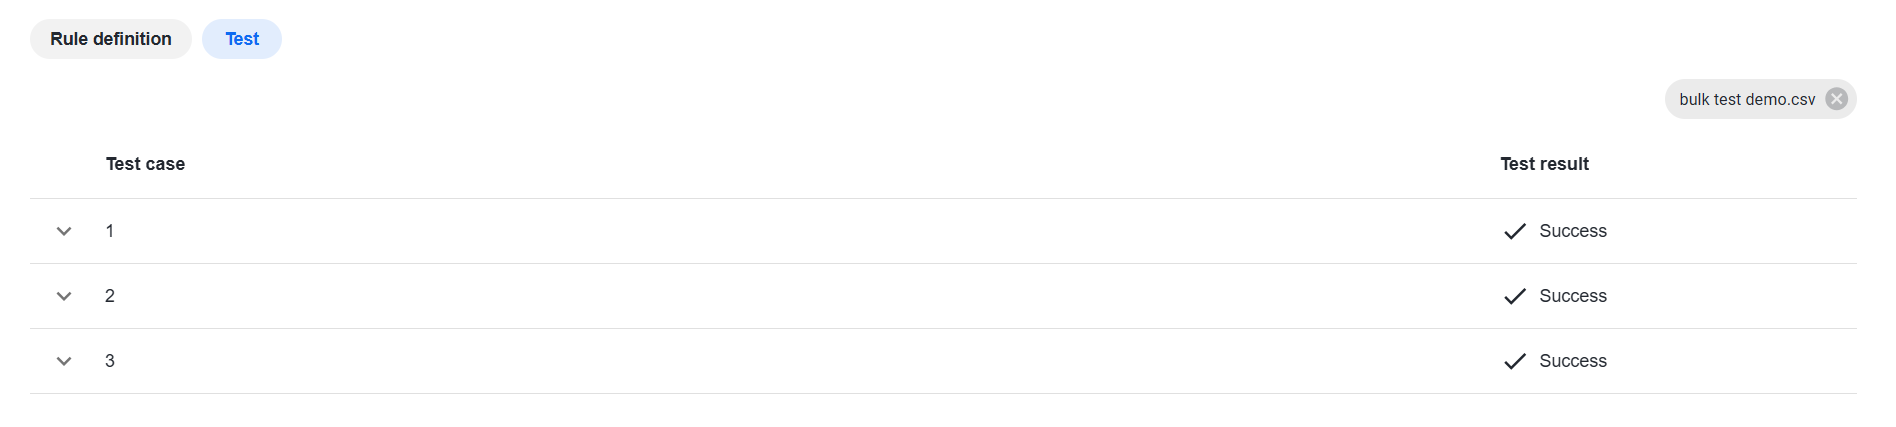
A green tick is displayed if the rule fired, and a red icon if not. To view the value of any rule, expand it.
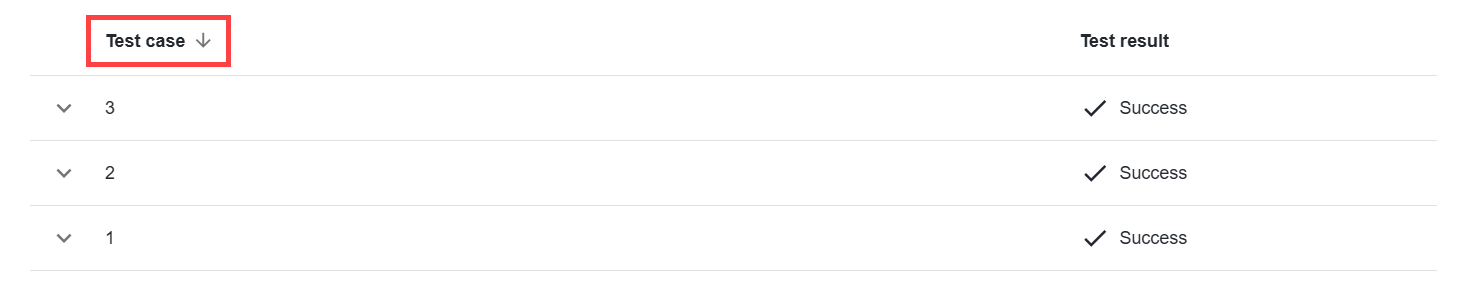
To sort test cases in the ascending or descending order, click the column name. The arrow next to the column name defines the sorting order.
To view other sorting options, move the pointer over the column name and click the Options menu. For instructions on using sorting options, refer to the Group rules section.
To test your rules on another file, remove the data file by clicking the Close option and repeat the above steps.
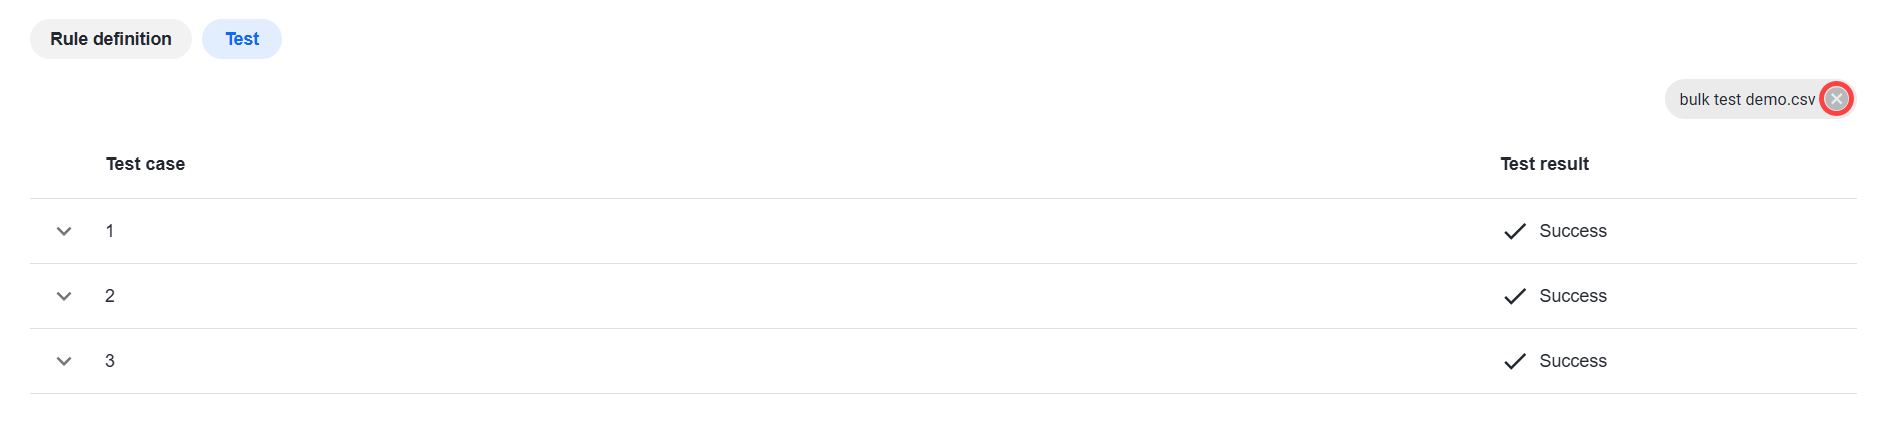
To return to the list of rules, click Rule definition.
Delete rule
To delete a rule, do as follows:
Click the Options menu next to the rule you want to delete and select Delete.
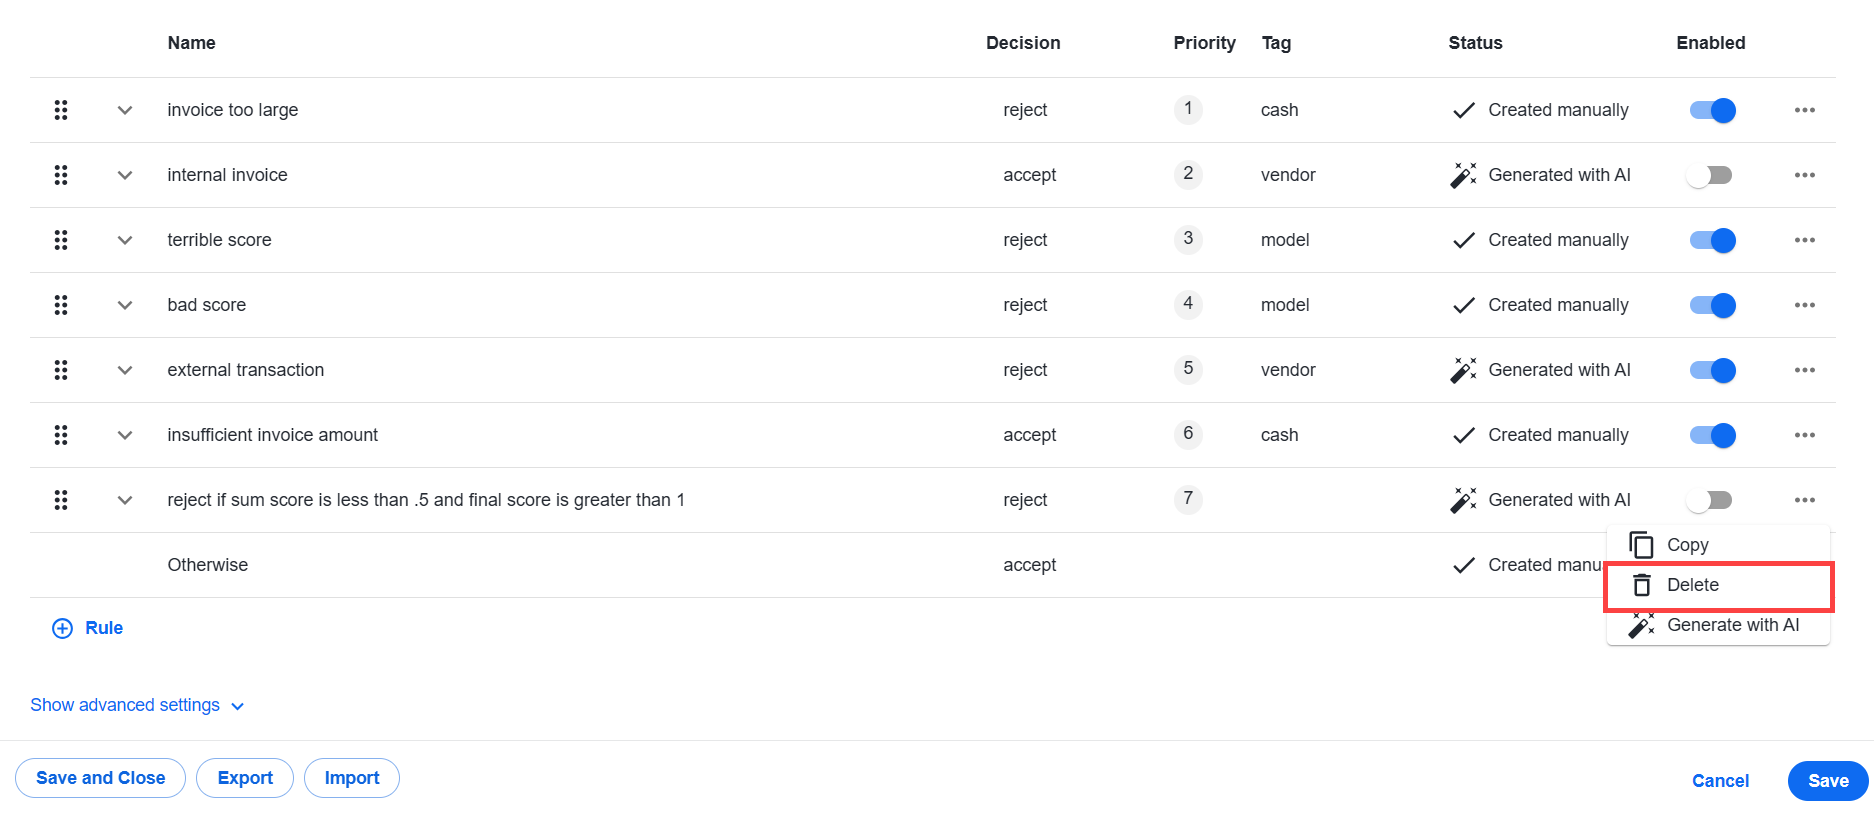
Click Save to save the changes.