Build Business Process flow in Workflow designer
Designing a Business Process (BP) means creating and configuring a sequence of code-based or no-code steps, such as Manual or Bot Tasks, nested processes, or rules, as required to accomplish a business goal.
A Business Process flow can have one of the following designs:
Schema-based, where each step or the entire process have contracts defining variables expected as input and those produced as output on the step or BP level.
Schemaless, the legacy type, requiring no contracts. You can convert a schemaless design into a schema-based one by setting contracts.
To start designing a Business Process, open a BP instance and navigate to the Workflow tab.
When you design a BP, it's recommended to use only tested tasks and processes. Make sure that all tasks within the BP have valid input and generate valid output.
Explore Workflow designer interface
The Workflow tab features the following design tools and elements:
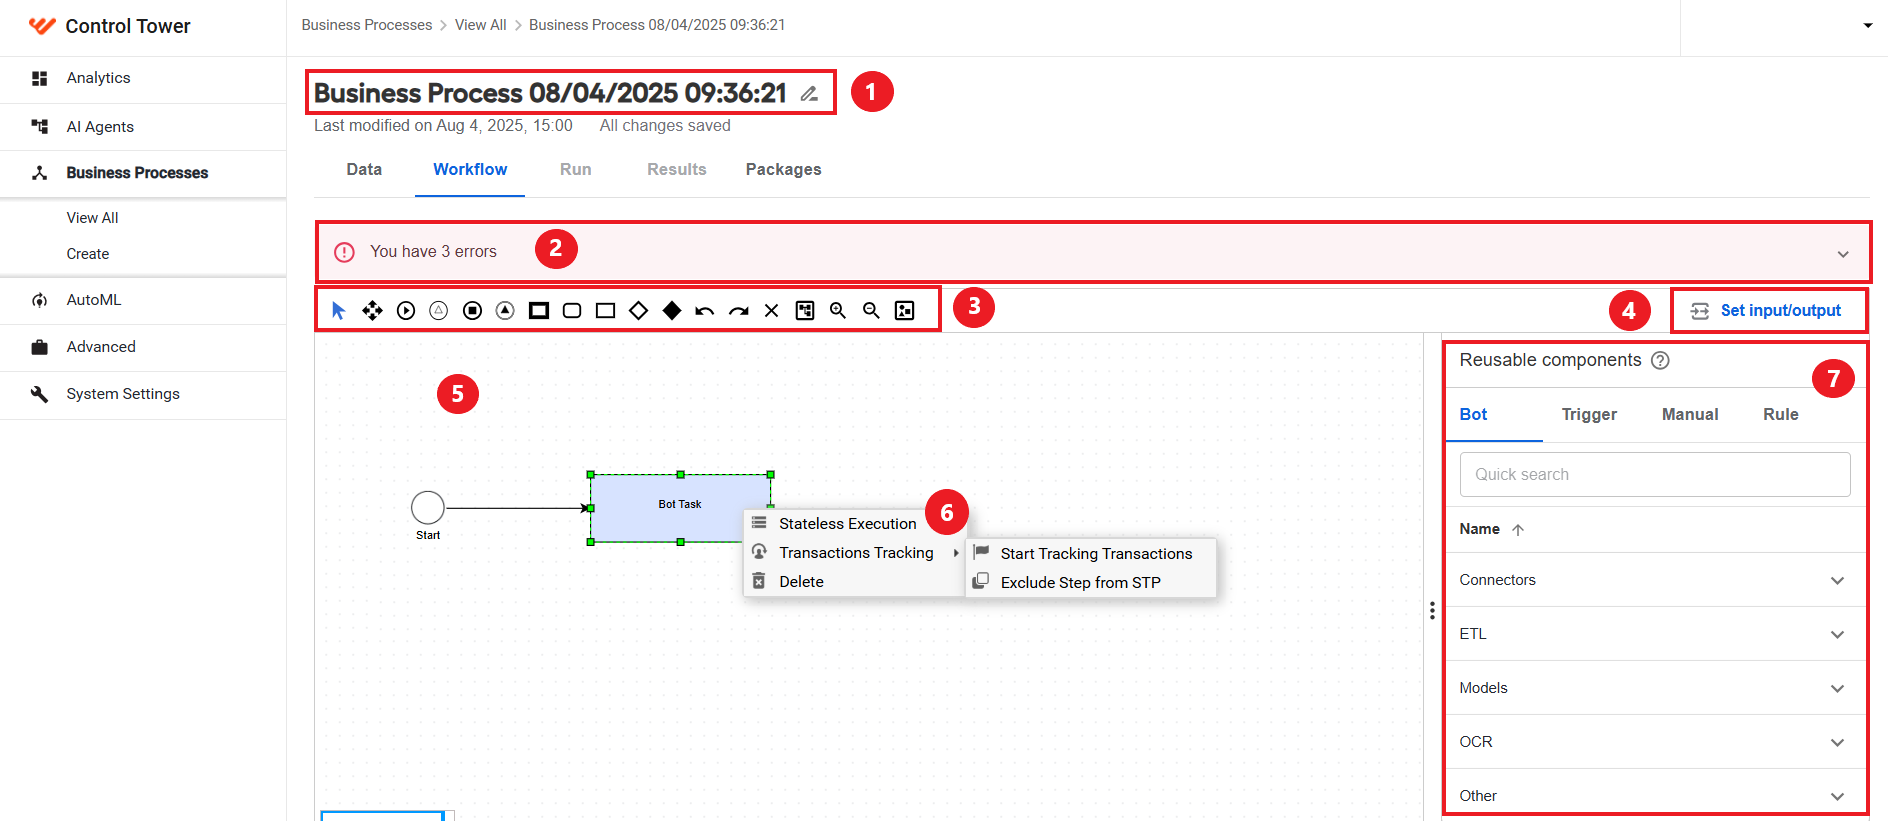
The digits in the figure above correspond to the following descriptions:
Title panel: you can edit the BP name and add tags for better accessibility. The date and time values change automatically, depending on when you create or update the BP.
Error panel: the panel shows Business Process design errors; to see exact error details, expand the panel.
Toolbar: you can add elements to the canvas and manage viewing options. Active elements are highlighted in blue.
Tool Purpose 
Select the workflow elements. 
Shift the canvas by clicking an empty space and dragging. 
Add elements to start or end the BP or include a Manual Task, Bot Task, trigger, decision rules, nested synchronous or asynchronous BP. You can add the elements by dragging them to the canvas or by selecting an appropriate icon in Toolbar and clicking an empty space in the canvas. 
Undo or redo a preceding action. 
Delete an element by selecting it and clicking the icon or pressing the Delete key. 
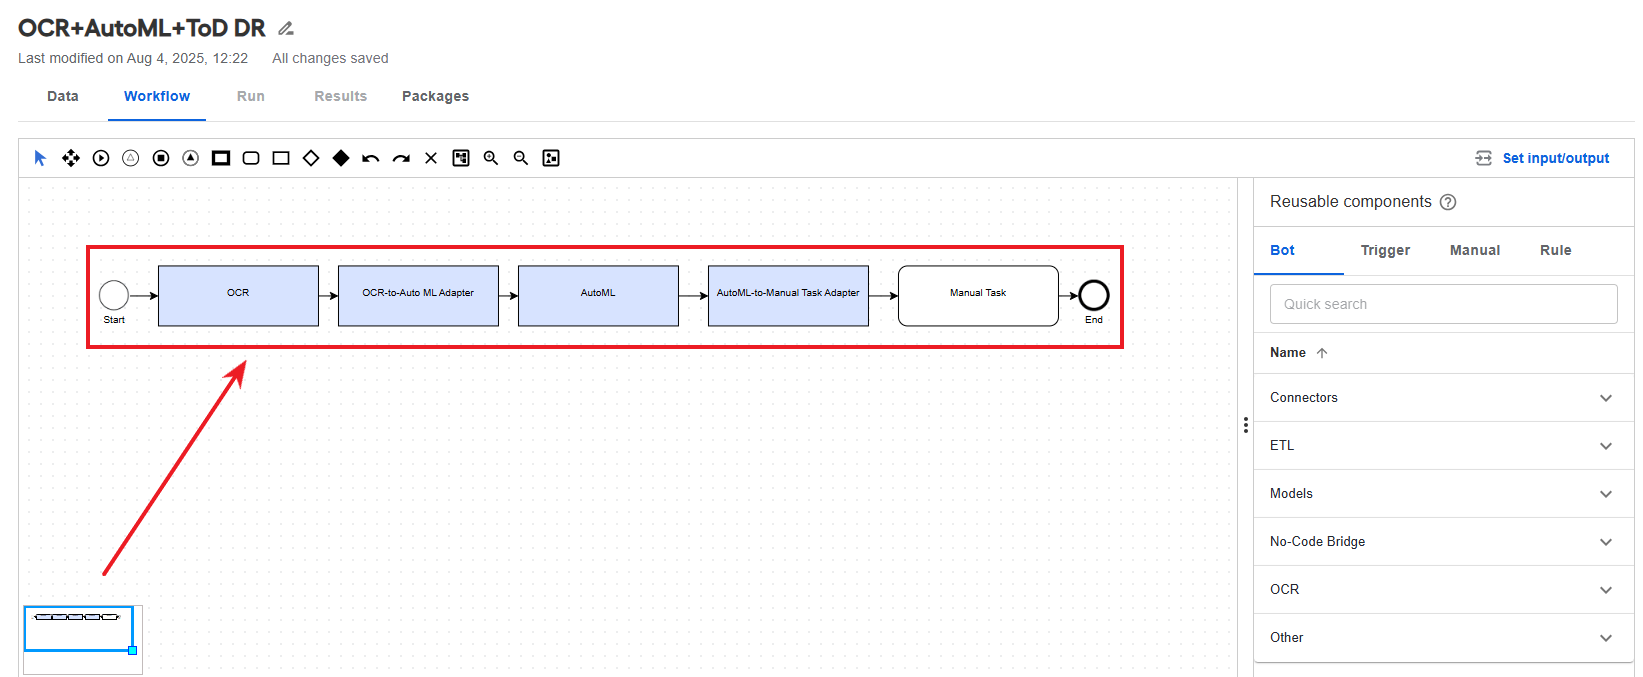
View BP workflows comfortably in detail. Click a corresponding icon to fit the workflow to the size of the canvas, zoom in on or out of it, return to the actual size, and so on. tipTo navigate across the BP flow, no matter how big and complicated it is, move the blue frame on the scheme miniature in the bottom right corner of the canvas.
Set input/output: click the button to configure the input and output contracts on the BP level.
Canvas: the checkered background is intended for placing the BP elements and connections between them.
Element context menu: to open the menu, right-click a workflow element. Currently, it includes the following options:
- Stateless execution
- Transaction tracking
- Deletion of the element
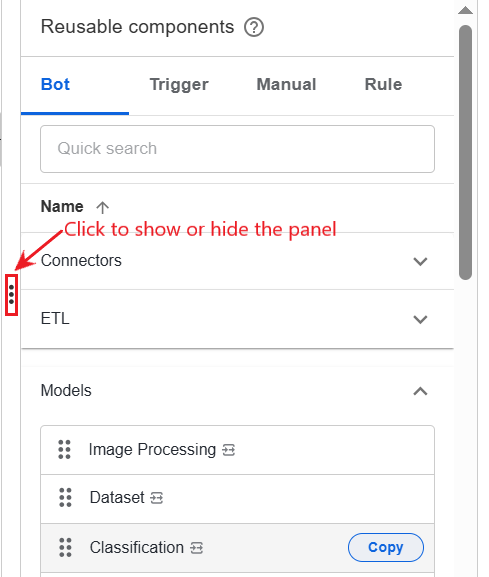
Reusable components side panel: contains all existing triggers, connectors, and rules, as well as Manual Tasks, and bot steps. To hide the panel, click the button on the left panel border.
To leverage the elements in your BP, drag them to the canvas. If you drag a component from the panel to the canvas, editing the step configuration will affect other Business Processes where it is used.
If you don't want edits to the step to affect other Business Processes, hover over a reusable component in the panel and click the displayed Copy button.
Build schema-based process flow
In a schema-based Business Process, each step or the entire flow has contracts defining variables expected as input and those produced as output on the step or BP level. As a result, a schema-based BP boasts the following additional features:
Input and output validation
Per step data mapping
Support of complex no-code steps, such as Transformation, Decision, Trigger, Connector, and so on
Below is a general sequence for designing a schema-based BP flow:
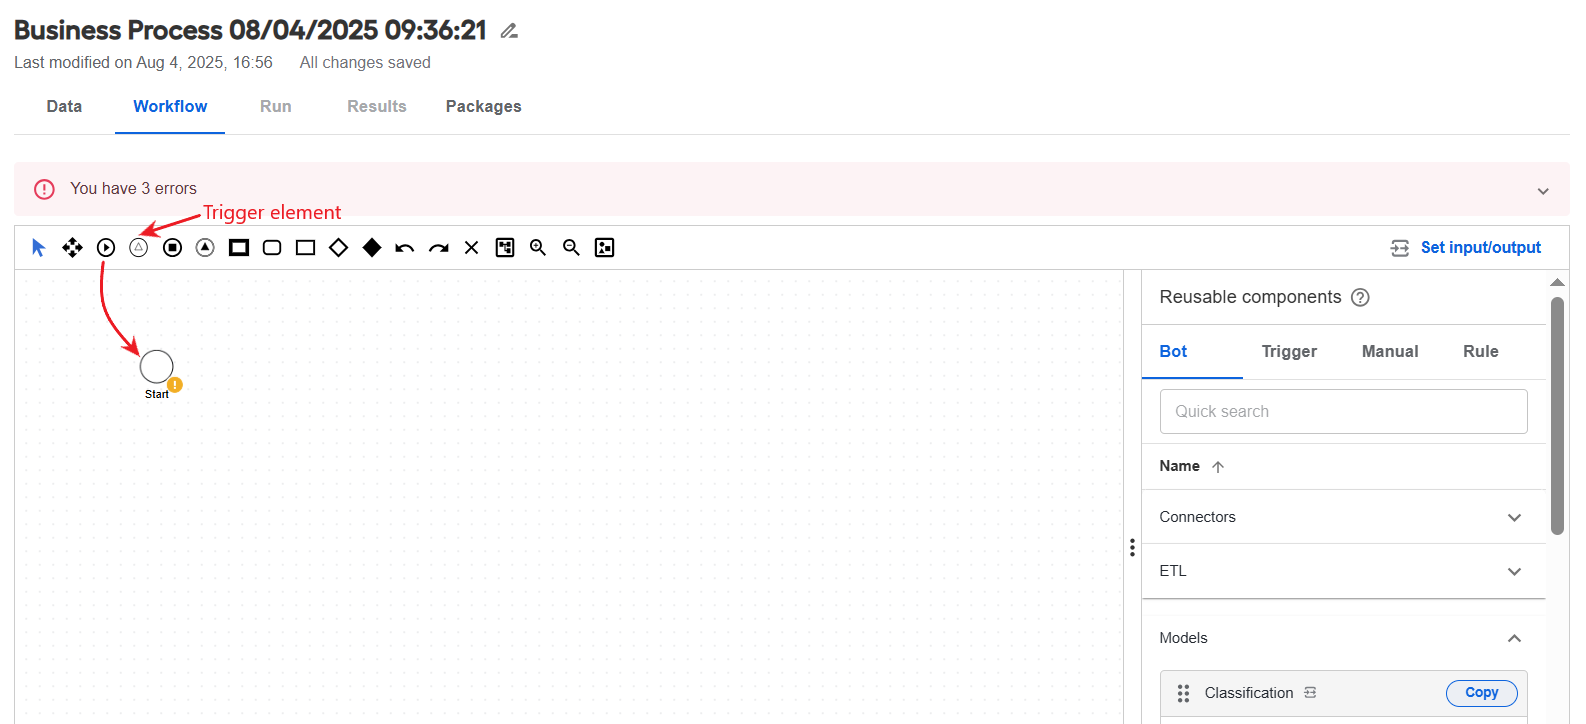
On the Workflow tab, drag the Start element from the toolbar to the canvas. Alternatively, you can set up a Trigger element to start a Business Process based on an external event. For details, see the guide.
Add other steps to the canvas one by one using one of the following methods and connect the steps with each other.
Method 1: drag them from the toolbar. In this case, an empty element is created that needs to be configured.
Method 2: drag them from the Reusable components side panel. In this case, the already existing element is added to the workflow, and you you don't need to configure it additionally, except when you want to modify the settings. Any changes you make to the component configuration are propagated to the other BPs where it is used.
Method 2: hover over an element in the Reusable components side panel and click Copy. In this case, a copy of the already existing element is added to the workflow, and you can change its configuration as required. The changes you make to the configuration of the copied component are not propagated to any other BPs where it is used.
Set up configurations for each of the steps:
Configure the input and output contracts. For detailed instructions, see the guide.
Set the parameters on the Design tab.
warningInstead of configuring contracts step by step, you can set them on the Business Process level. For details, see the guide.
For detailed configuration instructions on each of the steps, see the following guides:
Build the decision logic by adding Decision rules steps. To set up technical operations, such as splitting, joining, or throttling data, you can use the legacy composite rules.
Add the End element and switch to the Run tab to set run options and start the resulting BP.
Validation is done at runtime, and any changes to the Business Process are saved automatically. If needed, read error messages and warnings and edit the BP elements.
See also the Create no-code schema-based Business Process tutorial.
Build schemaless process flow
Below is a general sequence for designing a schemaless BP flow:
Drag the Start and End elements from the toolbar to the canvas.
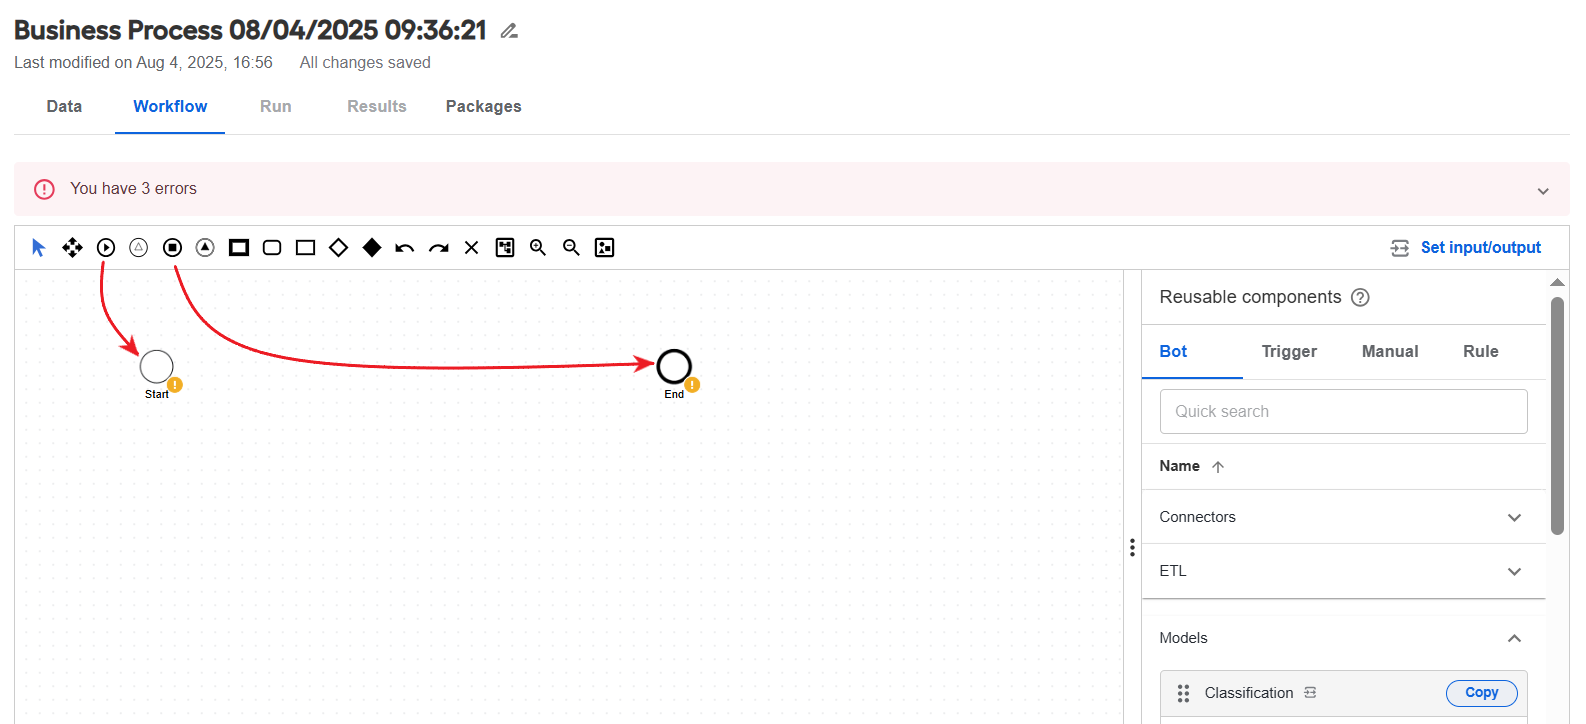
Add and configure flow steps using one of the following methods and connect them with each other:
Method 1: drag them from the toolbar. In this case, an empty element is created that needs to be configured.
Method 2: drag them from the Reusable components side panel. In this case, the already existing element is added to the workflow, and you you don't need to configure it additionally, except when you want to modify the settings. Any changes you make to the component configuration are propagated to the other BPs where it is used.
Method 2: hover over an element in the Reusable components side panel and click Copy. In this case, a copy of the already existing element is added to the workflow, and you can change its configuration as required. The changes you make to the configuration of the copied component are not propagated to any other BPs where it is used.
For detailed configuration instructions, see the following guides:
If needed, add composite rules to set up splitting, joining, or throttling data.
Validation is done at runtime, and any changes to the Business Process are saved automatically. If needed, read error messages and warnings and edit the BP elements.
After the design and configurations are ready, switch to the Run tab to set run options and start the resulting BP.
See also the Create schemaless Business Process in 20 minutes tutorial.
If Workflow Designer opens slow, try the workaround described in the support guide.