
WorkFusion Studio overview
note
WorkFusion Studio is an Eclipse-based IDE intended to develop bot task examples.
Java 8 is required for Studio to work correctly.
tip
Useful materials:
Create new project
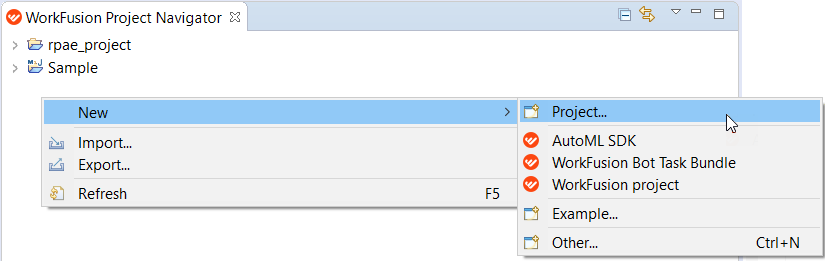
- Within WorkFusion Project Navigator, right-click and select New > Project.
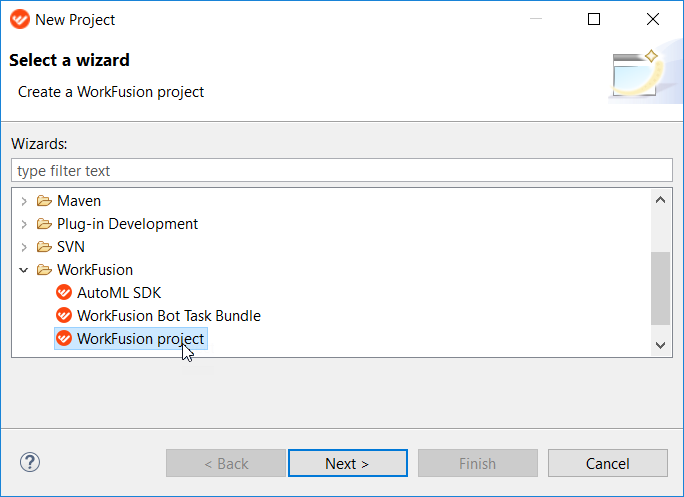
- In the window that opens, select WorkFusion Studio project and click Next.
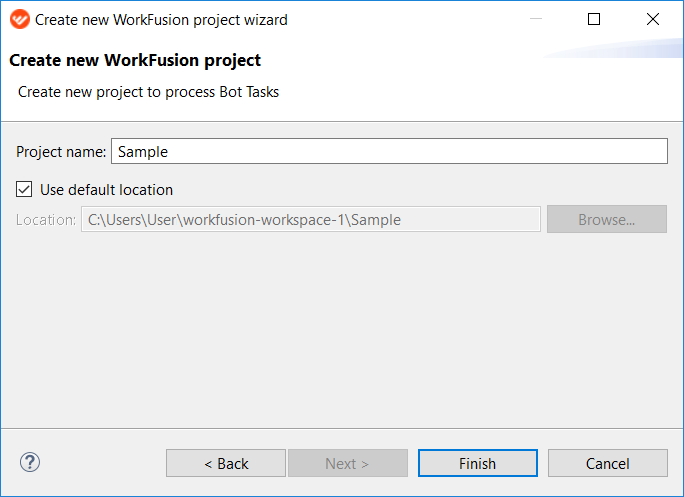
- Enter the project name and click Finish.
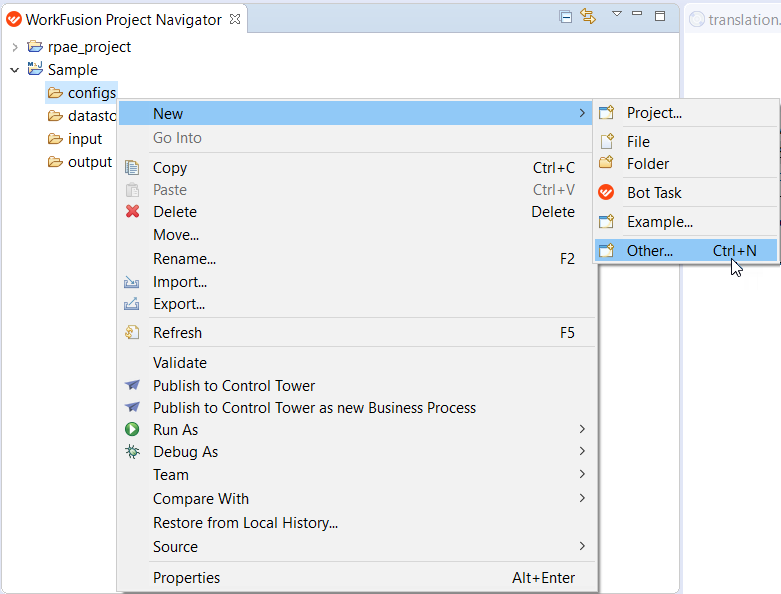
- A new folder with a predefined structure is created in Project Navigator. To create a bot task config, right-click Configs and select New > Other.
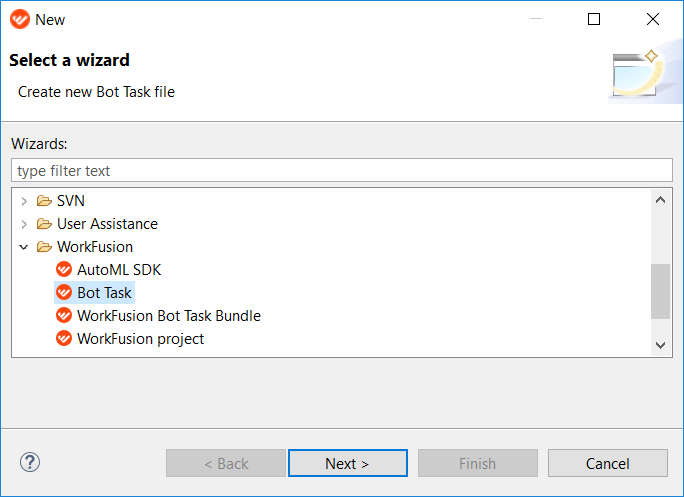
- Select Bot Task and click Next.
- Specify the bot task name and click Finish.
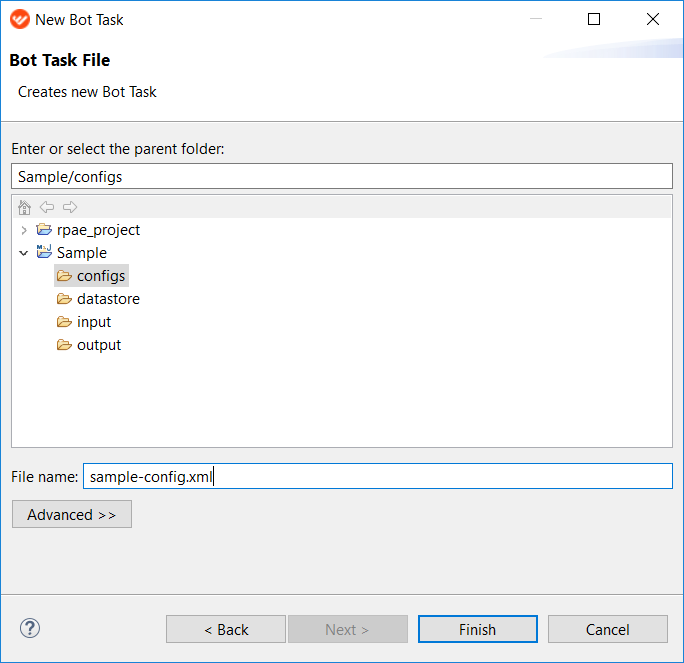
A newly created bot task configuration has a predefined structure and the<config>and<export>plugins.
Create Bot Config Bundle project – WorkFusion repository
To use this feature, you need to install and setup Java SE Development Kit in Eclipse.
The Repository feature allows developers to package RPA tasks in WorkFusion Studio and publish them to a repository in the Intelligent Automation Cloud instance for inclusion in business processes. These artifacts contain everything needed to run an RPA task, including Java and Groovy classes, input data and data stores, and any required settings.
For this purpose, WorkFusion Studio provides a new project type – WorkFusion Bot Task Bundle (or Bot Config Bundle / BCB).
The bot task bundle project offers two starter templates:
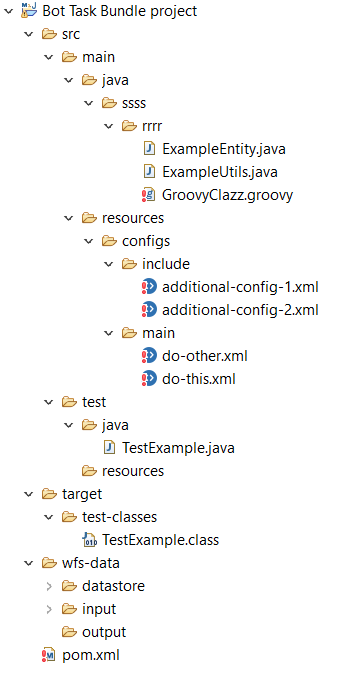
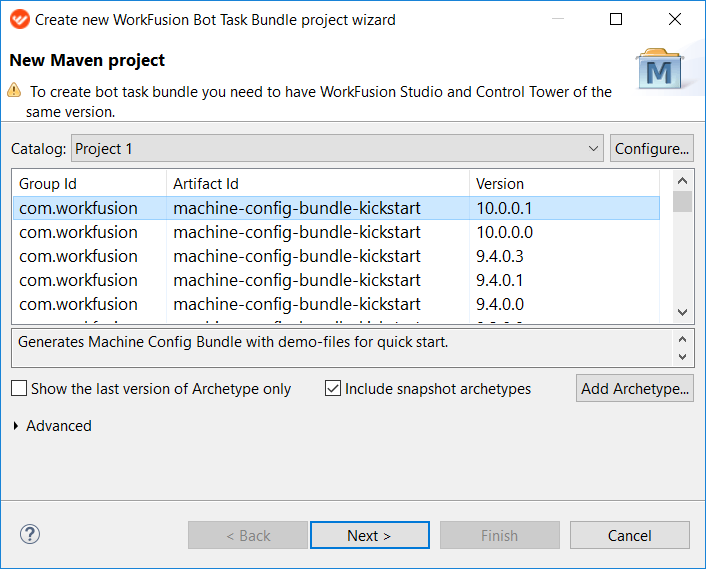
- "kickstart" – contains a set of demo files and working config examples, and perfectly fits for understanding and testing the whole Artifactory workflow
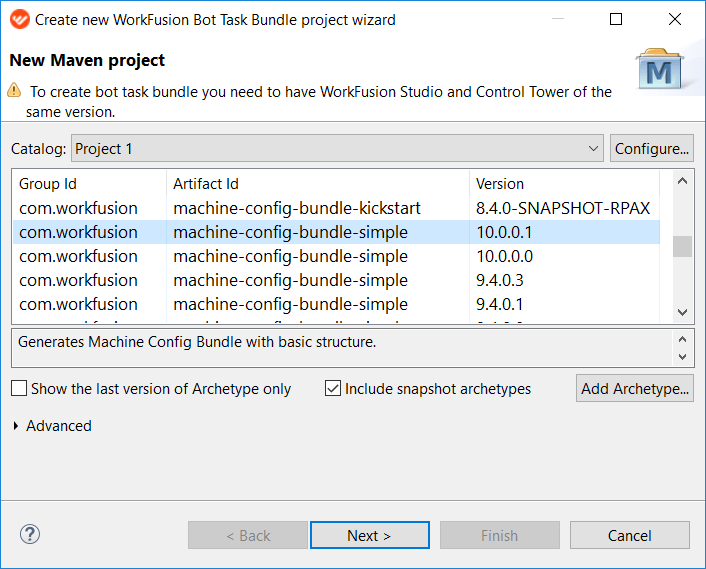
- "simple" – contains only required folders and files without working samples
| Project types | Bot task bundle "kickstart" structure |
|---|---|
 |  |
To create a bot task bundle, do as follows.
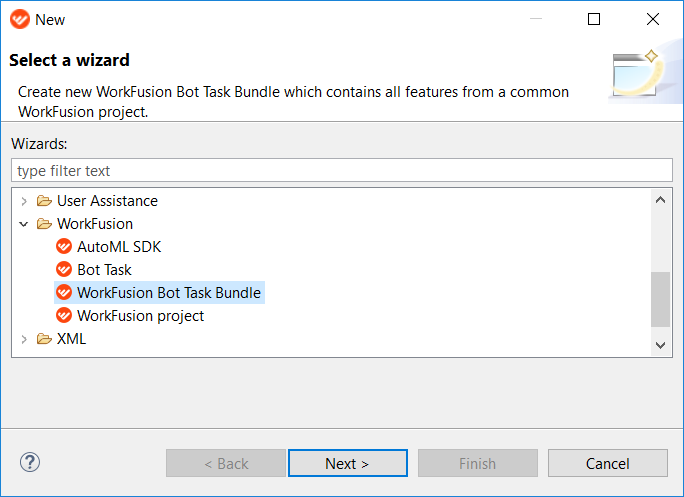
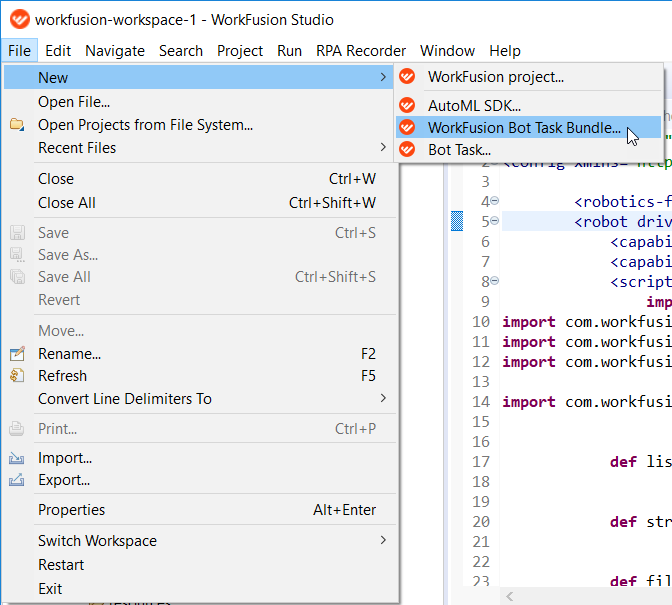
- Go to File > New > WorkFusion Bot Task Bundle.
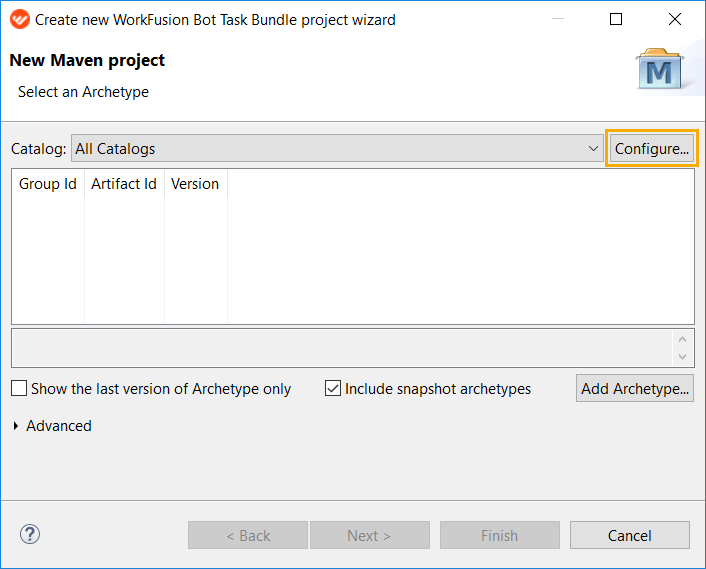
- In the Create new WorkFusion Bot Task Bundle project wizard, click Configure next to Catalog.
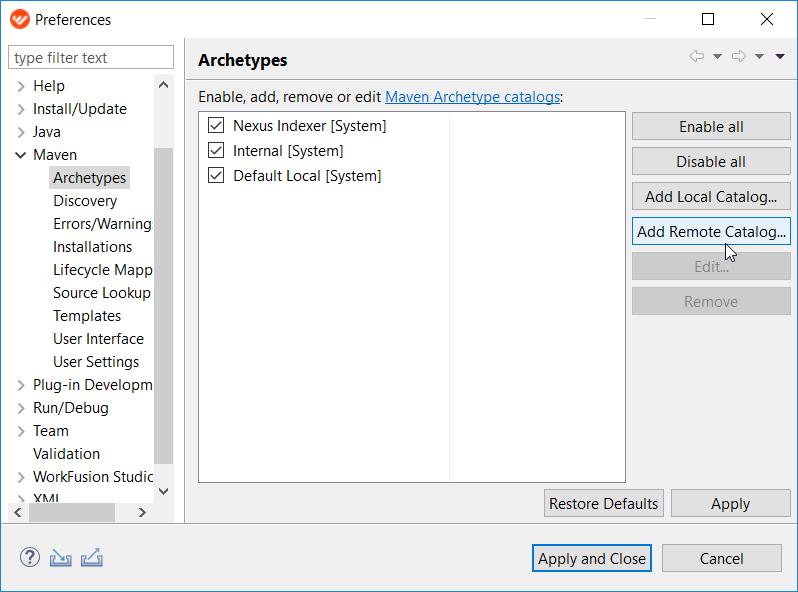
- In Preferences > Maven > Archetypes, click Add Remote Catalog.
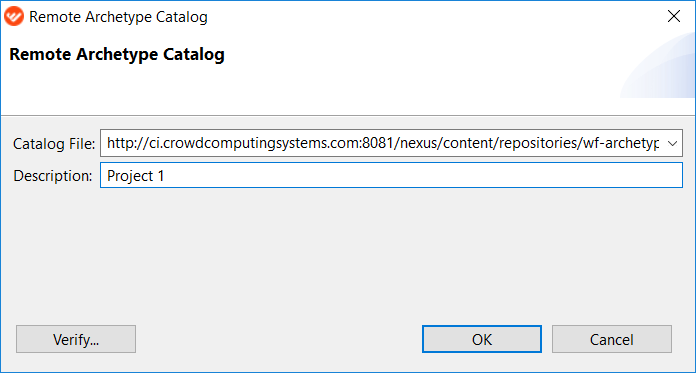
- Specify the link to your catalog file and its description. Click OK.
- Select the project type and click Next.
- "kickstart" – generates a bot task bundle with demo-files for quick start
- "simple" – generates a bot task bundle with basic structure
- "kickstart" – generates a bot task bundle with demo-files for quick start
- Specify the project parameters (Group Id, Artifact Id, Version, Package) and click Finish.
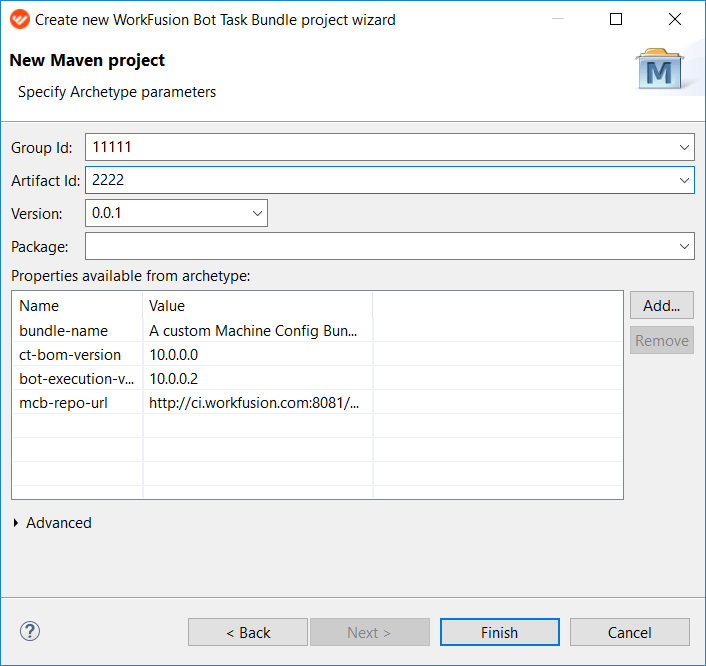
In a bot task bundle, you can create your custom Java and Groovy classes and import them into bot configs.
When Bot configuration has been tested, you need to run the project as a Maven build and set the clean deploy command as a target. Maven creates a Bot Config Bundle (BCB), that is a jar-file that contains main and included bot configs together with Java and Groovy, – and uploads this bundle to the Nexus repository.
Afterwards, all configs from the uploaded BCB are scanned and uploaded by WorkFusion Studio for you to add them to business processes.
Write code configs
To write config code, you should switch to the Code perspective.
- Go to Window > Perspective > Open perspective > Other.
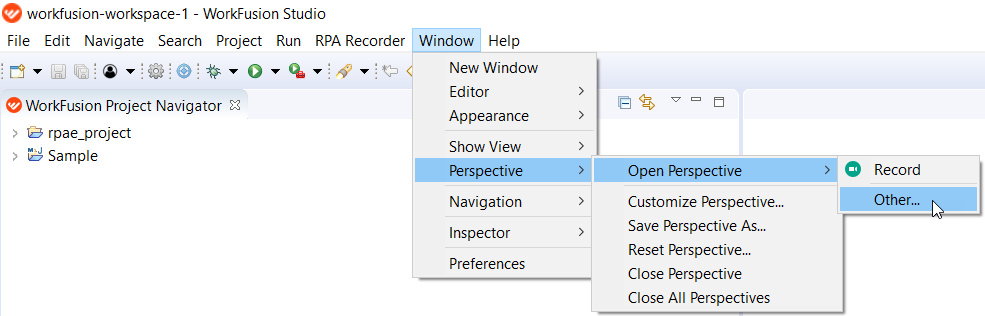
- In the window that follows, select Code and click Open.
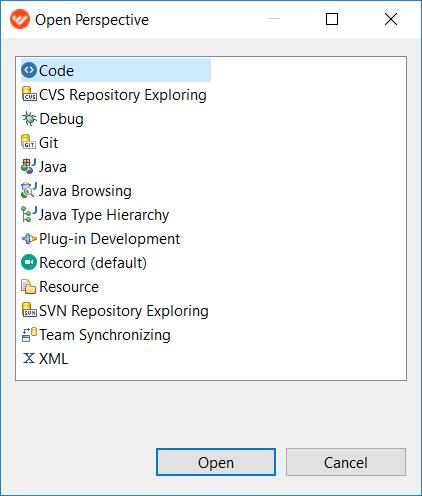
To switch to the Code perspective, you can also use the Quick Access option or click the Code perspective button next to it.
- Open a config file and start coding. The
<config>tag must have the xmlns="http://web-harvest.sourceforge.net/schema/1.0/config" attribute. - Save your script before running or debugging.
Debug
- Set brake point(s) by double-clicking near line number.
- Click the Debug icon.
- Select one of recent Debug Configurations.
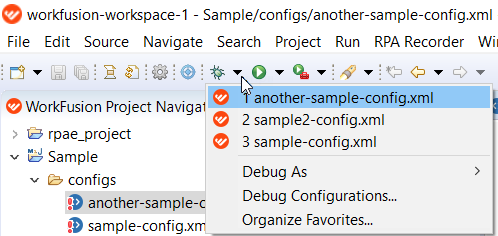
Or click Debug Configurations and create a new one.
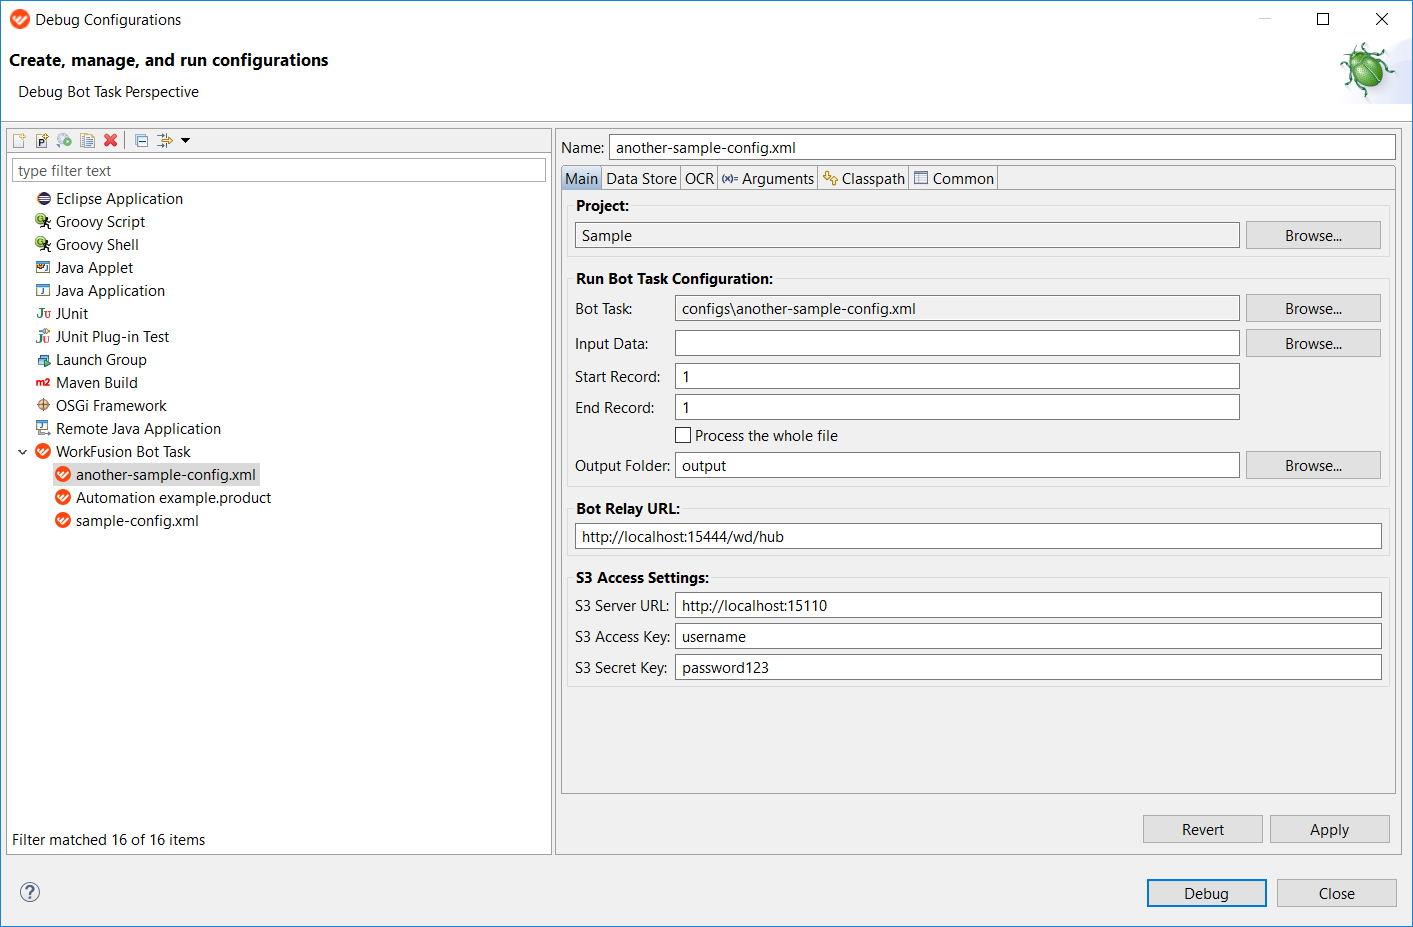
Run configurations
- To run a configuration, select it in Project Navigator and click Run. You can use the Run As option, depending on the configuration type.
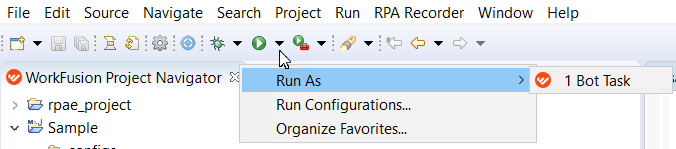
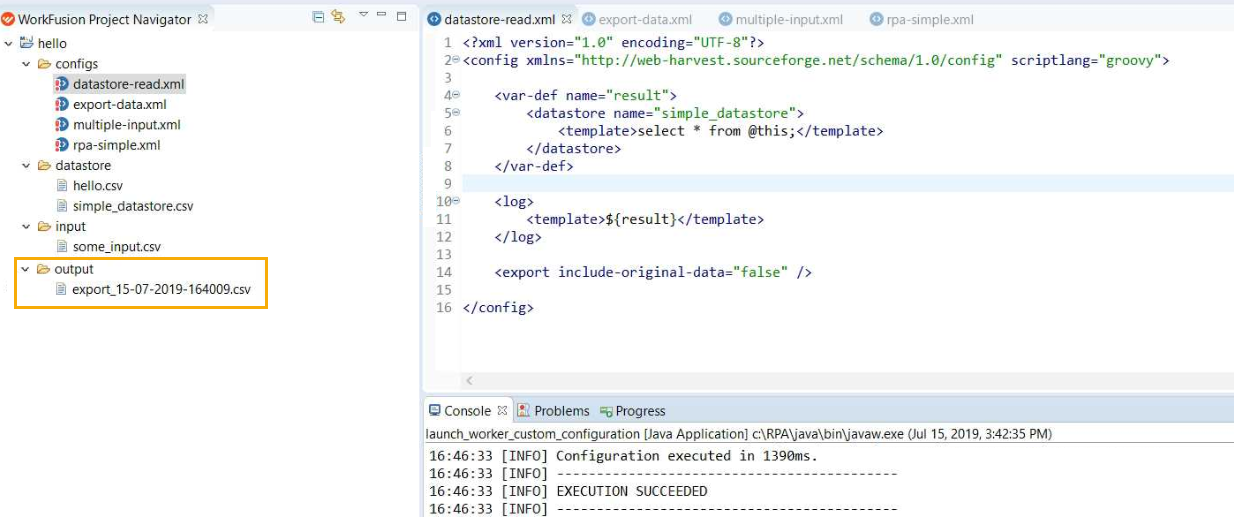
- As soon as the execution finishes, see the output folder and Console to view results.
Input and output data
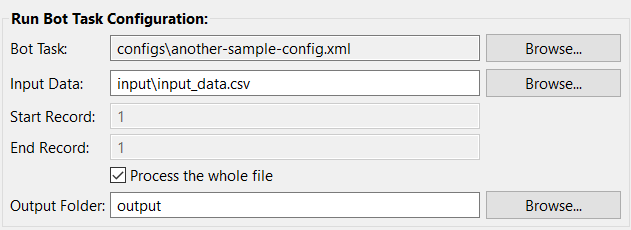
Put a .csv file with the input data into the /input project folder and select it in the Script Input Data field.
note
If the input file contains multiple records, the config will be executed:
- for a defined range of records (the Start and End Record fields), or
- for each record (check the Process the whole file option)
 By default, script results are recorded to the /output project folder. Each config execution creates a new .csv file
 export\_\<timestamp\>.
You can choose a custom project folder to store the configuration output data.
Set up RPA environment
- Install RPA package as described in the RPA Environment Setup guide.
- Start your Bot(s) to register to Bot Relay.
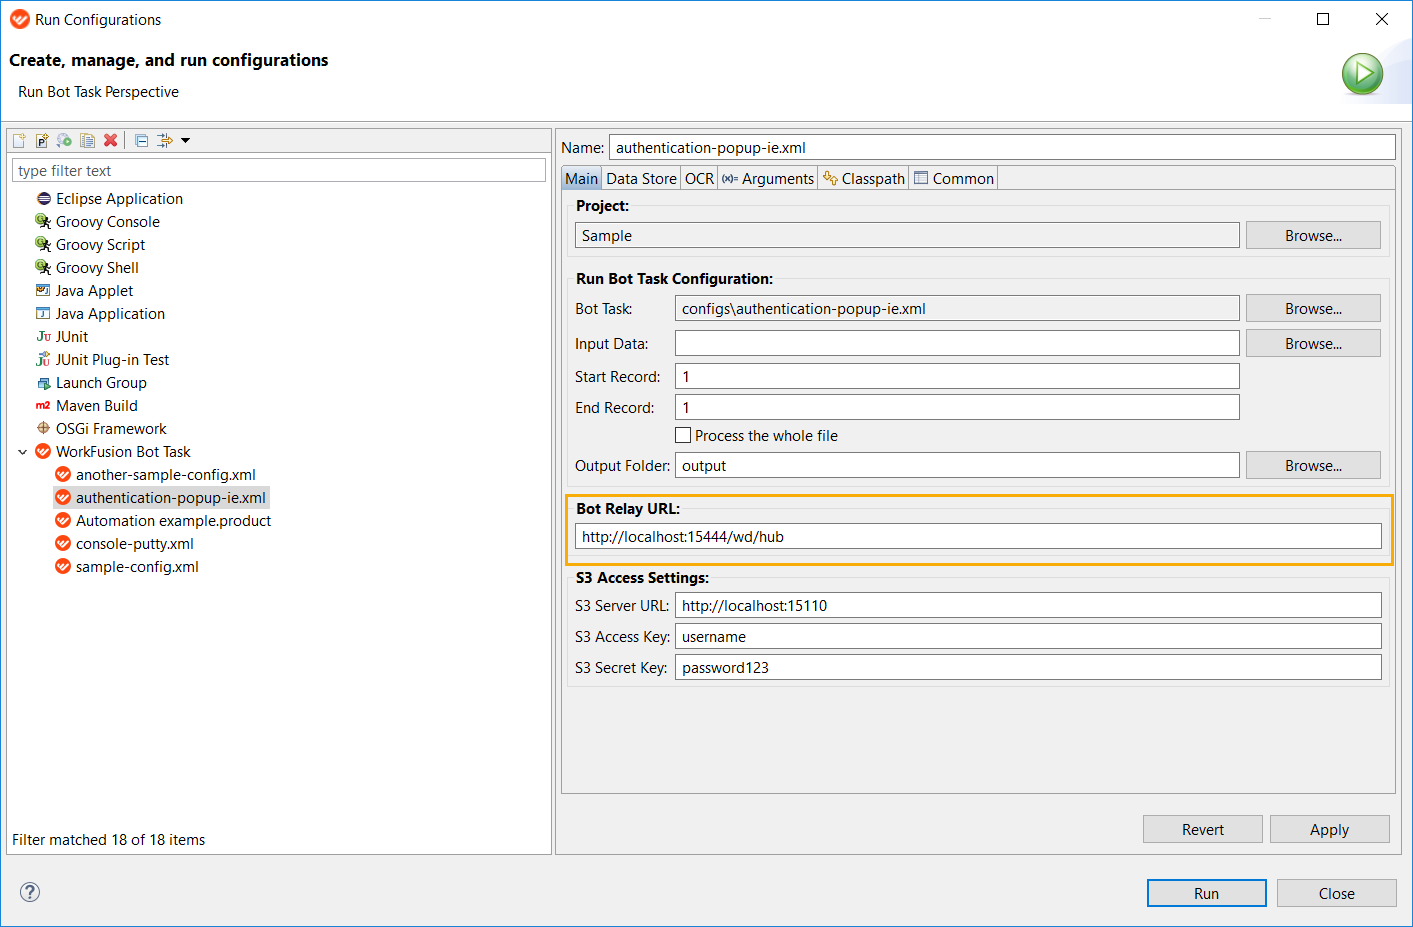
- Go to Run > Run Configurations screen, check the Bot Relay URL option is as follows: http://localhost:15444/wd/hub and run your RPA script.
S3 access
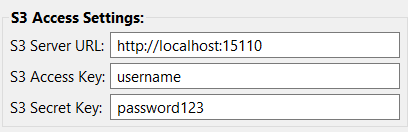
After you enter your S3 keys, you can use S3 Plugins (without hard-coding access and secret key attributes, which is a bad practice and is deprecated). View S3 access settings on the Run Configurations screen.
OCR
In Bot Tasks you can use the OCR plugin to process documents or images.
OCR Sample Code
<var-def name="ocr"> <ocr export-format="txt"> <ocr-image> <var name="document"/> </ocr-image> </ocr> </var-def>
To enable processing with OCR, define the needed settings.
- Go to Run > Run Configurations > OCR.
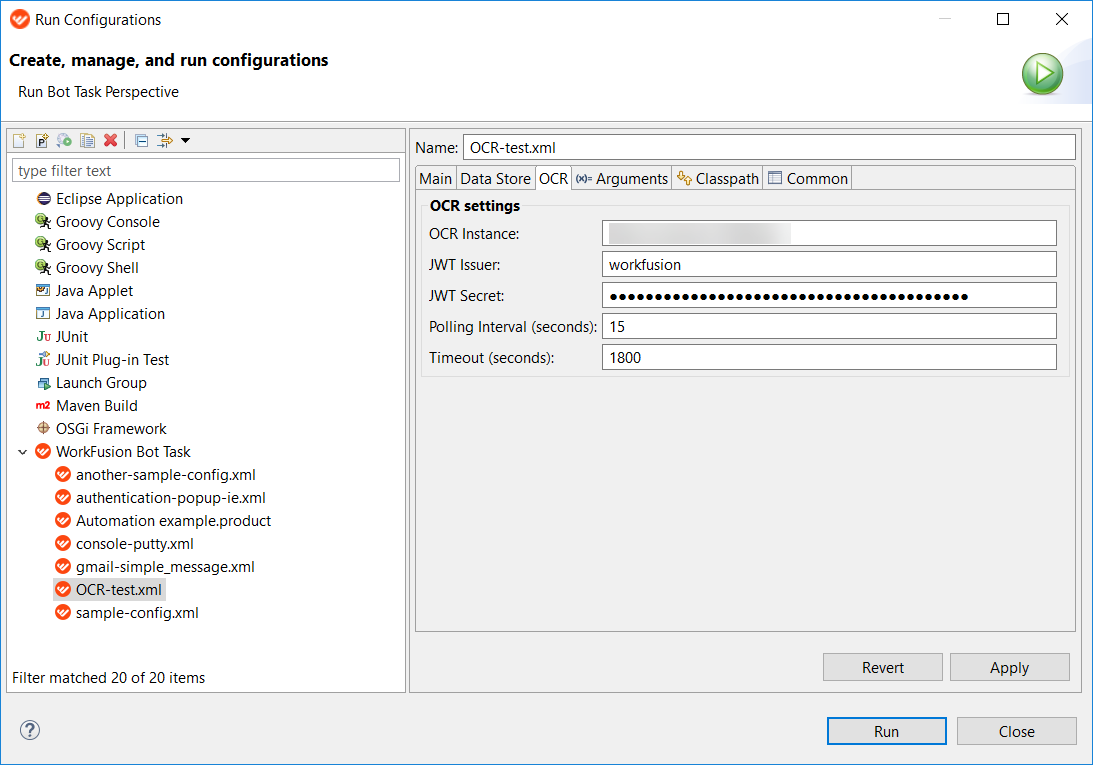
- Define the following parameters required to process your documents or images with OCR:
OCR Instance – target location with the OCR service installed and running to enable documents/images recognition
JWT Issuer – username to authenticate to the OCR service
JWT Secret – key to authenticate to the OCR service
Polling interval (seconds) – time period defining how often to retry the OCR service if it fails
Timeout (seconds) – time period defining how long to wait for the OCR service to complete before stopping the execution process.
Secrets Vault
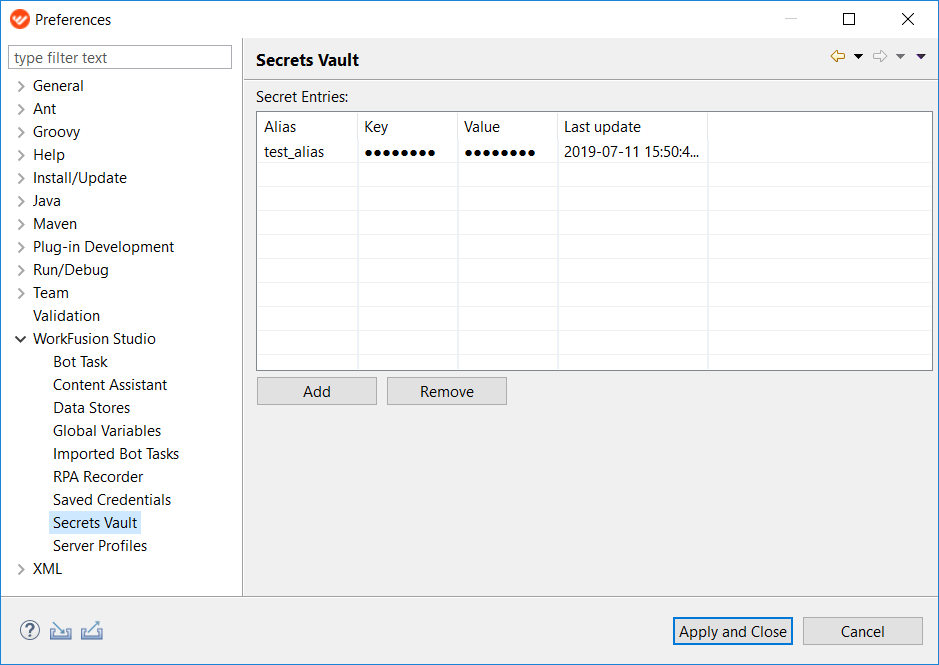
Using Secrets Vault functionality, you can create secret entries locally to store sensitive data and use it in your bot configs.
To manage Secrets Vault, go to Window > Preferences > WorkFusion Studio > Secrets Vault.
When a secret entry is added, it becomes accessible in bot configs by a unique Alias. For more details, see <secrets-vault> plugins.
Global variables
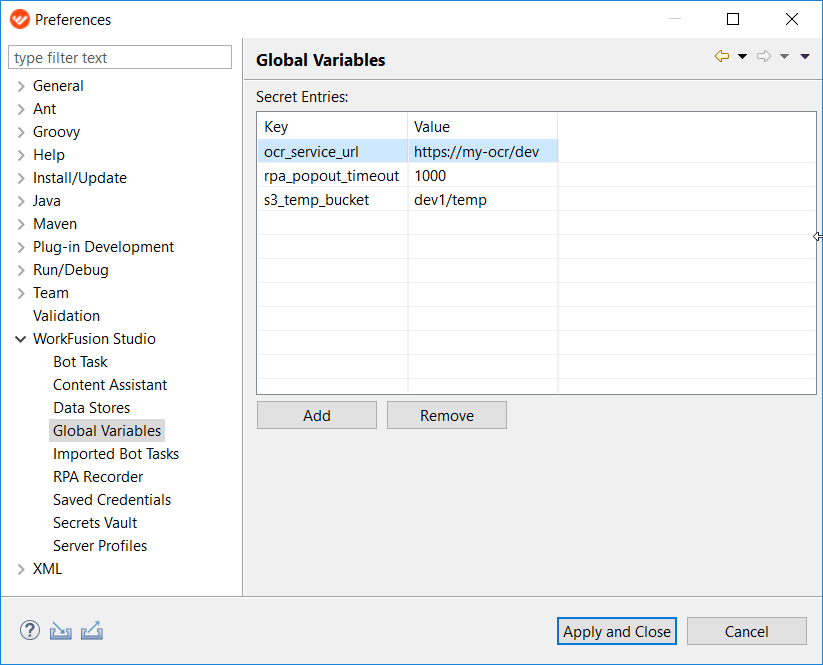
If your config uses global variables to store common values used in different processes and dependent on the Intelligent Automation Cloud environment, you need to use the <var-global> plugin.
WorkFusion Studio supports the <global-var> plugin and inserts values of variables defined in Window > Preferences > WorkFusion Studio > Global Variables.
Import and export bot tasks
Instead of copying and pasting bot config code between Studio and Control Tower, you can use more simple and reliable feature – Import-Export.
- If the bot configuration you are using has included configs, these configs will be transferred together with the main bot config between Studio and Control Tower.
- The Input data step is downloaded when importing a bot config from Control Tower to Studio.
Import bot from Control Tower to WorkFusion Studio
(Optional) Run the following REG file to skip the copy-paste step by registering the wfstudio protocol.
REG file content
[HKEY_CLASSES_ROOT\wfstudio] @="URL:WorkFusion Studio Protocol"
"URL Protocol"=""

[HKEY_CLASSES_ROOT\wfstudio\DefaultIcon] @="eclipse.exe,1"

[HKEY_CLASSES_ROOT\wfstudio\shell]

[HKEY_CLASSES_ROOT\wfstudio\shell\open]

[HKEY_CLASSES_ROOT\wfstudio\shell\open\command]
@="\"PATH_TO_STUDIO_INSTALLATION\\eclipse.exe\" \"%1\""
Replace
PATH_TO_STUDIO_INSTALLATIONwith your path to WorkFusion Studio. Mind to use double back-slashes, for example:@="\"D:\\Work\\WorkFusion\\SPA Studio 10.0.1\\spa-studio.exe\" \"%1\""In Control Tower, open any business process in Workflow > Edit Process.
Right-click a bot step you want to open in WorkFusion Studio.
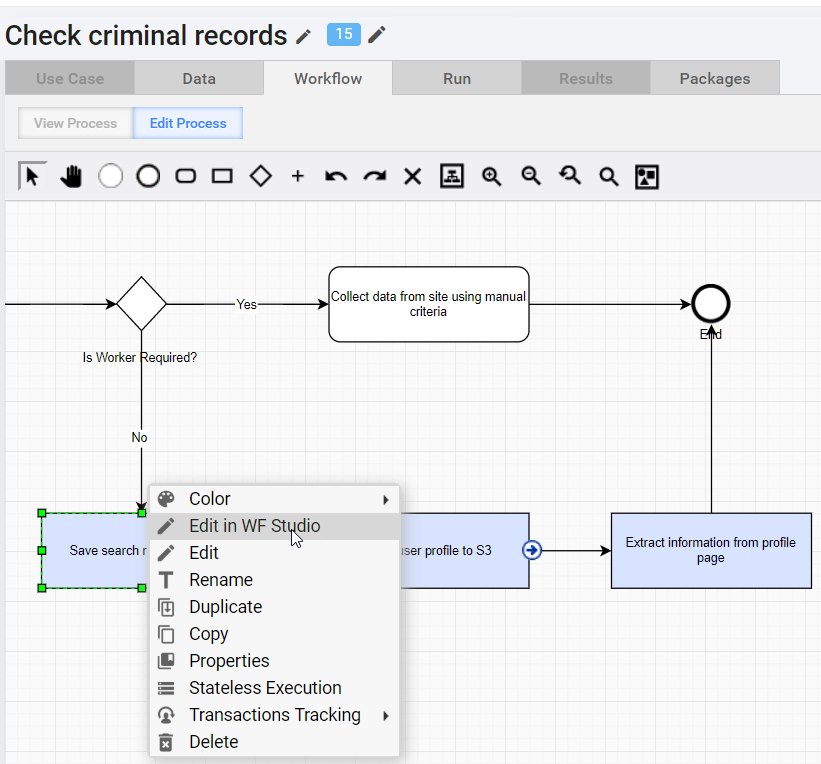
Select the Edit in WF Studio option. The following popup appears.
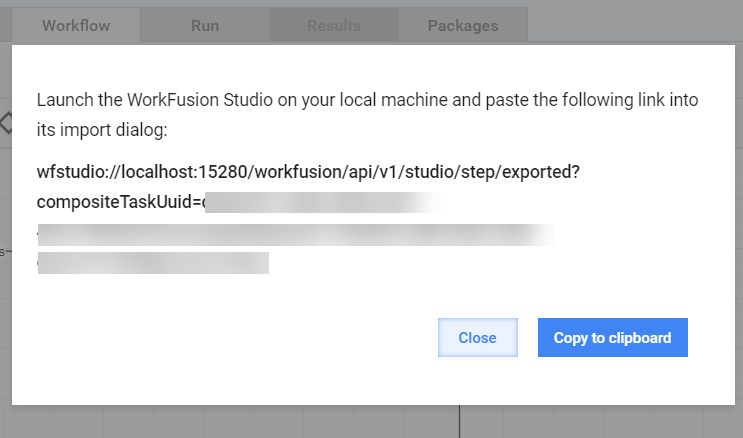
Click Copy to clipboard.
Open WorkFusion Studio > File > Import. This step is not required if you have already registered the wfstudio protocol (step 1).
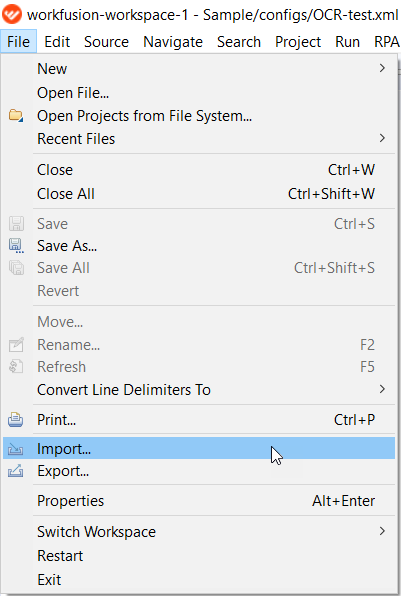
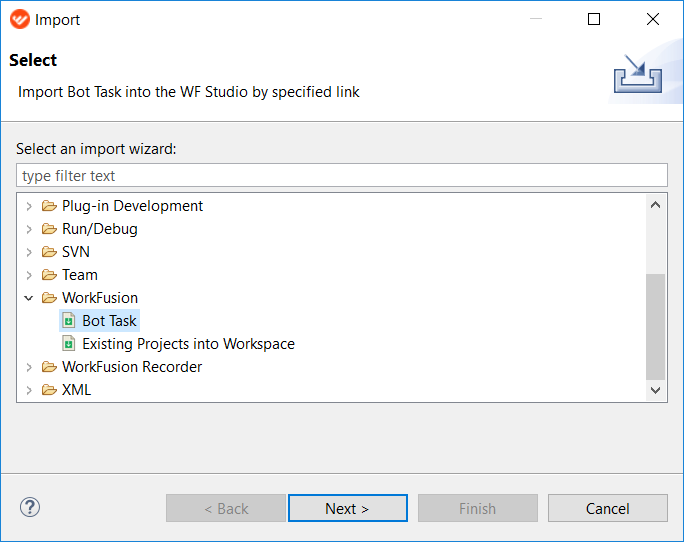
Select WorkFusion > Bot Task.
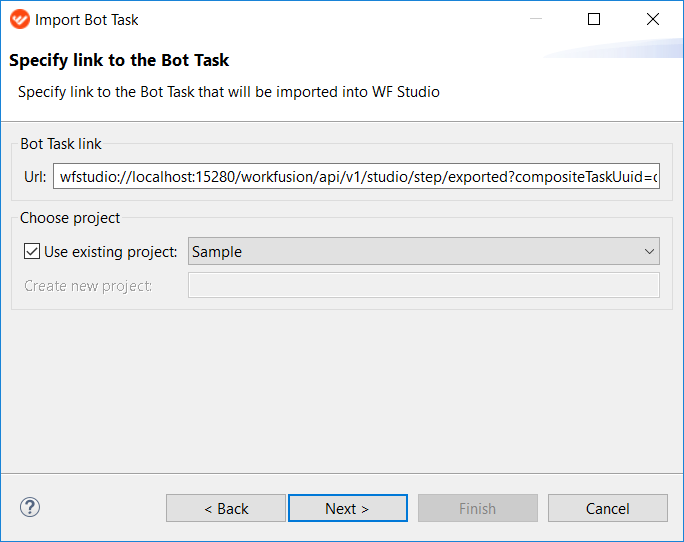
Paste the Bot task URL copied on the step 5 and choose an existing Project if needed.
Specify your user credentials for the Control Tower you imported the current bot task from. You can save these credentials not to enter them for each import procedure.
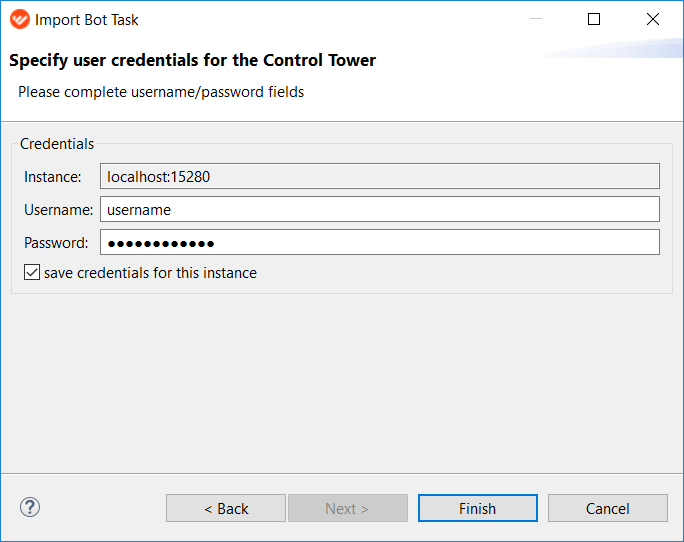
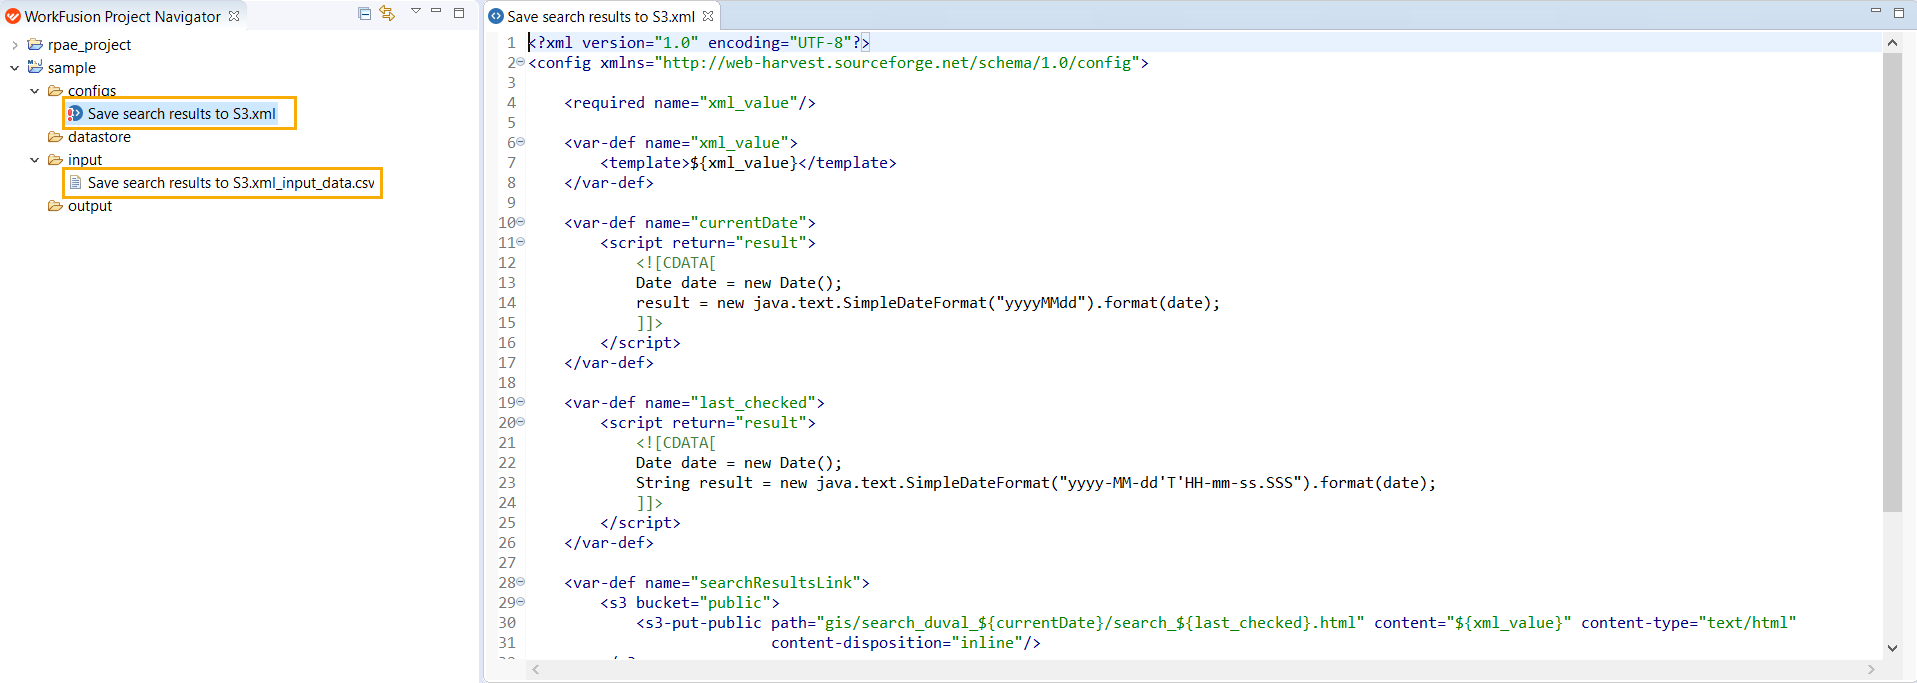
There can be issues in case you provided wrong credentials or Control Tower outage.As a result, your bot task is displayed in Project Navigator together with the input data (and included configs if they exist).
Publish bot task from Studio to Control Tower
When the bot config is tested and runs smoothly, you can publish it to Control Tower.
- Right-click the bot config file in Project Navigator or in the code editor itself.
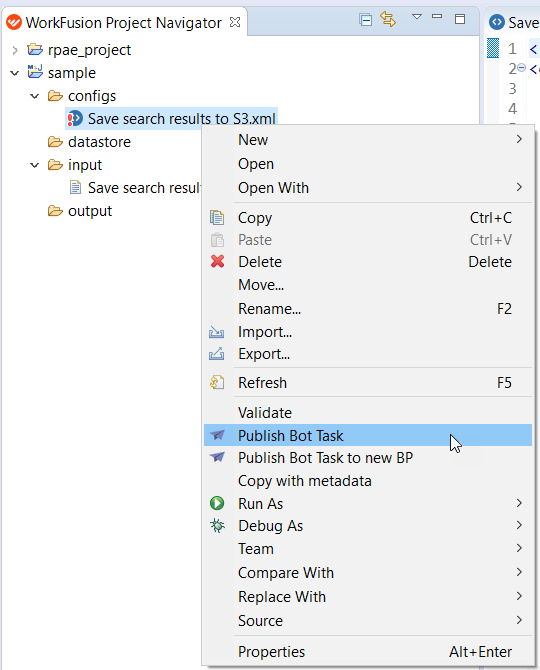
- Select one of the following options:
- Publish Bot Task – use to overwrite the step in the existing business process
- Publish Bot Task to new BP – use to create a new business process with one bot step
- Enter Control Tower Instance.
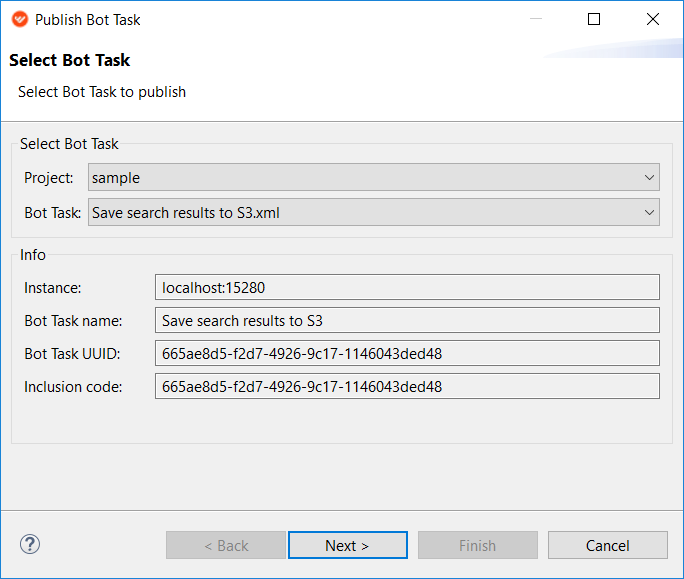
In case you selected Publish Bot Task to new BP, specify Process name for a new business process.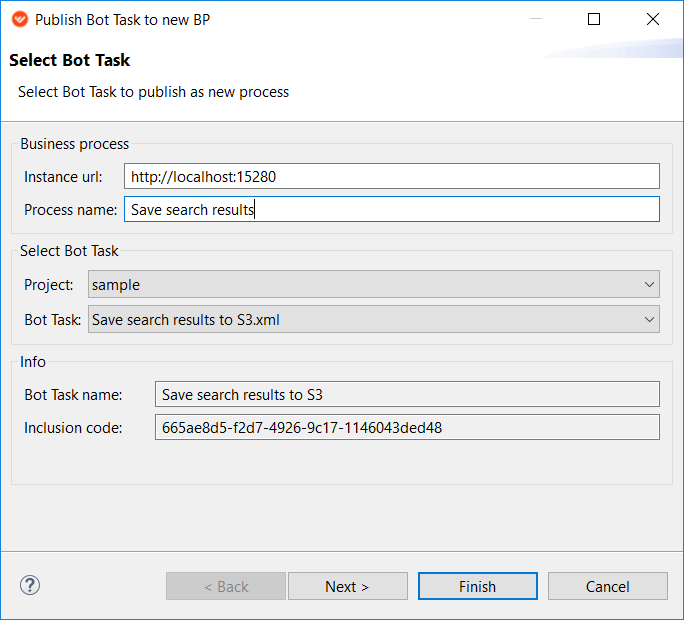
- Specify the credentials for the Control Tower you are publishing the current bot task to. You can save these credentials not to enter them for each publish procedure by checking save credentials for this instance.
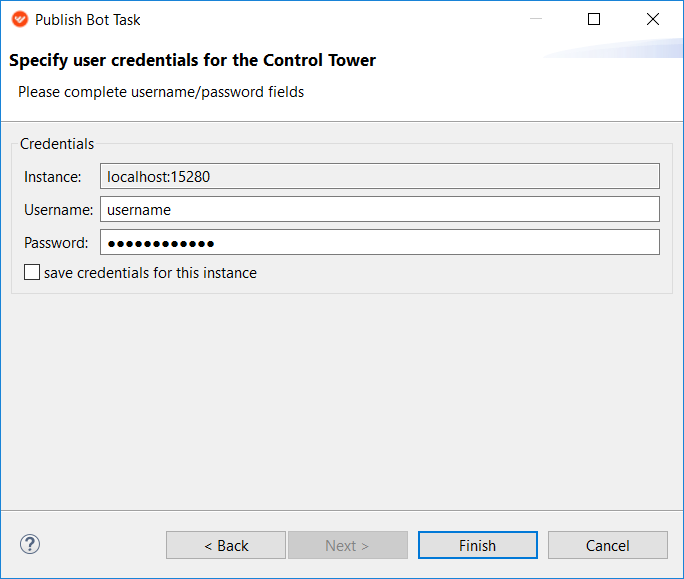
As a result, a success message is displayed.
warning
There can be issues in case you provided wrong credentials or Control Tower outage.
If you have selected the new process creation option (step 2, option b), this new process is opened in your default browser.
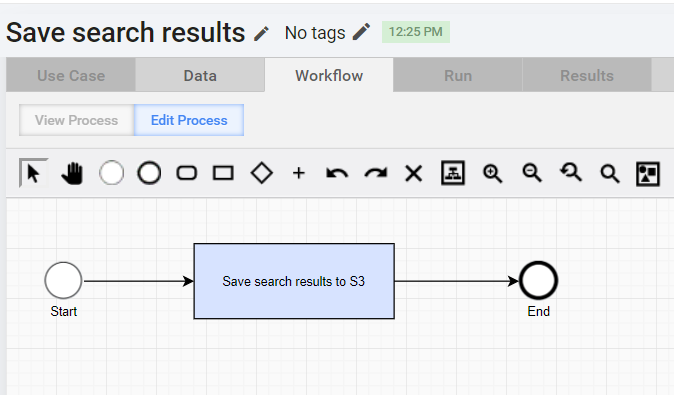
Set up import & export
Upon import or export of a bot task from/to Control Tower, the configuration file in WorkFusion Studio is linked to the bot task on the instance where Control Tower is running.
note
If you rename the configuration file, the link is broken, so you should repeat the Import/Export procedure.
To view the links of the files to bot tasks in Control Tower, do as follows.
- Go to Window > Preferences > WorkFusion Studio > Imported Bot Tasks.
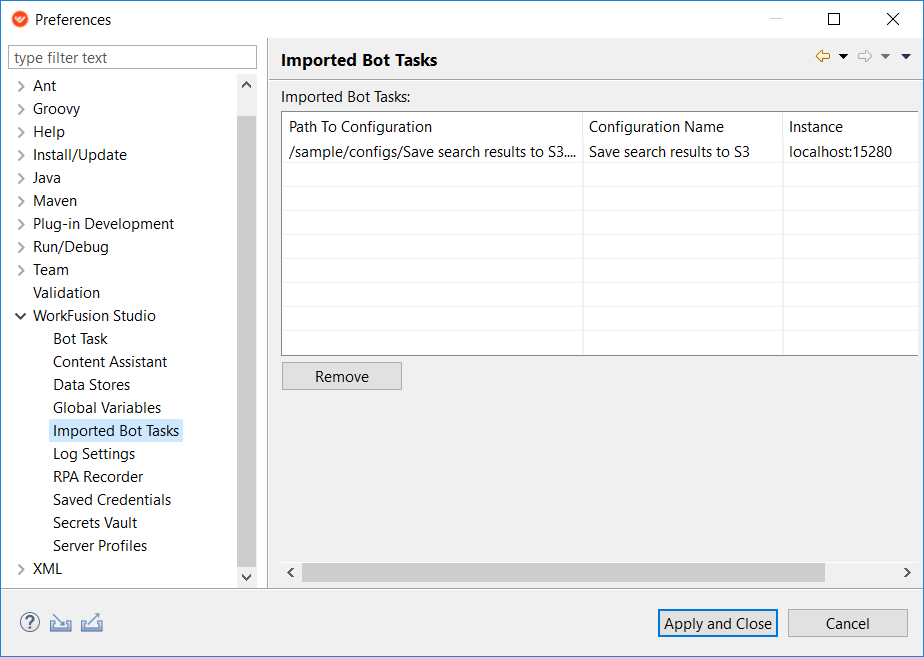
Here, there is the list of all your configurations linked to bot tasks in Control Tower. - Select a bot task and click Remove to break the link between the configuration and the bot task in Control Tower.
If you have selected the save user credentials for this instance option during Import/Export, your credentials are saved in Studio. To view the saved credentials to all instances, proceed as follows.
- Go to Window > Preferences > WorkFusion Studio > Saved Credentials.
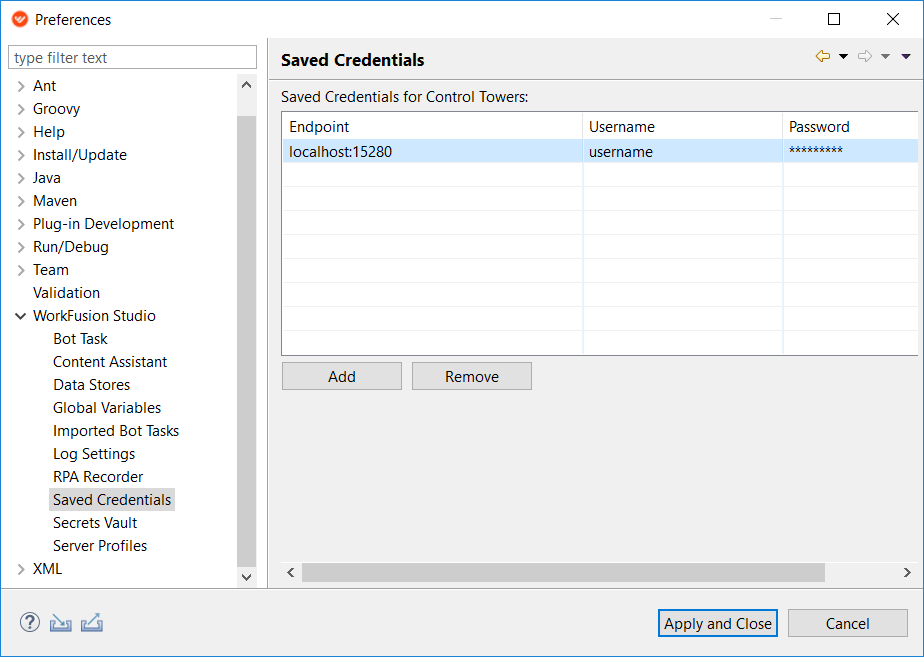
- You can add, remove, or edit the credentials.
- Add – click Add, select the new row appeared in the list, click each item in the row to enter the required data, and press Enter
- Edit – select a row with the credentials you are going to edit, click the item containing the information to be modified, enter the required data, and click Enter
- Remove – select a row with the credentials you are going to remove and click Remove
Modify log level
You can customize the WorkFusion Studio logger which records events produced by Studio during execution of bot tasks. For example, you can change the level of a message to make it less or more critical, or add a new trigger (appender) for a log message.
- Go to Window > Preferences > WorkFusion Studio > Log Settings.
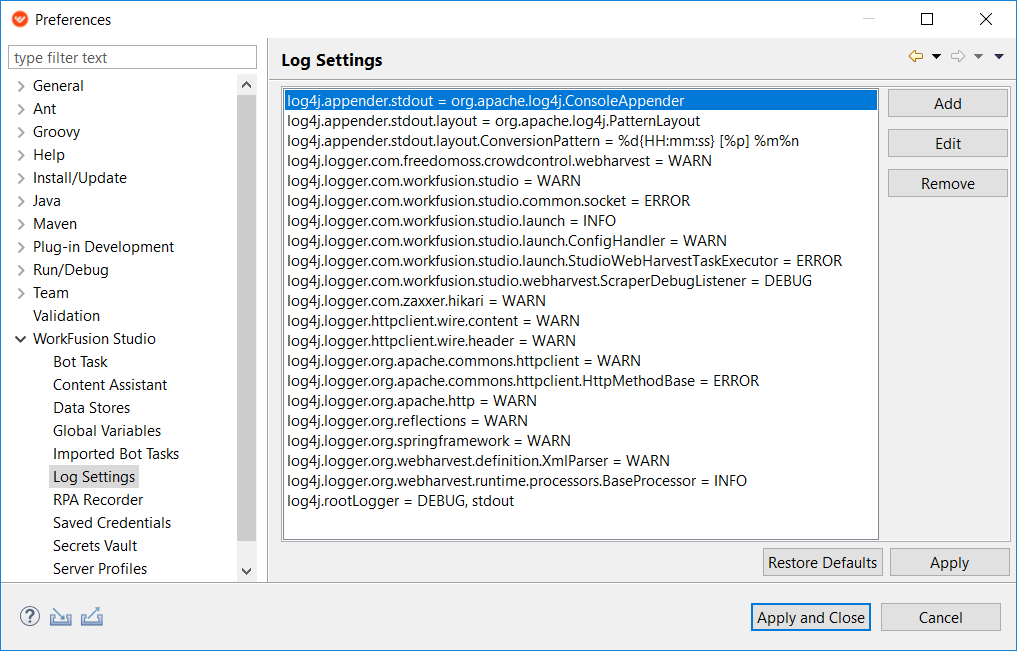
- You can add, remove, or edit appenders for log messages.
- Add – click Add to set up a new appender.
- Edit – select an appender you are going to edit, click Edit, modify the appender in the dialog appeared, and click Enter.
- Remove – select an appender you are going to delete and click Remove.
tip
For more information on how to configure the log level in WorkFusion Studio, refer to the following web resources: